|
|
Post by doublechevron on Oct 19, 2015 19:19:06 GMT 10
they reckon the protek industrial paints are really good for this type of thing (and reasonably priced). There is a flex additive you can add to activated paints if required. You know, the roof and bonnets of cars move around way more than caravan panels do, so I wouldn't be the slightest bit concerned about using any of these paints on a caravan  seeya, Shane L. |
|
|
|
Post by doublechevron on Oct 19, 2015 13:30:47 GMT 10
You can save a lot of coin by using enamel. You painter friend would no doubt prefer to use the products he is used to spraying ( I don't blame him ). The white enamel from supercheap is a bargain and applies quite well..... YOU CANNOT OVERPAINT ENAMEL WITH ANY SORT OF ACRYLIC PAINT THOUGH!!!!! (yeah I've learnt that one the hard way all to often). So you would need to choose the strip colour from supercheap in the same enamel too  I've painted quite a few cars with acrylic laquer, the amount of paint you use is incredible (most of it blows away and lands as overspray). seeya, Shane L. |
|
|
|
Post by doublechevron on Oct 19, 2015 13:26:43 GMT 10
He seems to be doing the rounds trying to sell it, he posted it on our (CC) FB page which is a no-no so I directed him here by he has left very little info. No Dramas, a lot of poeple don't know how to use a lot other than facebook. Especially if they are trying to post these adverts from a smart phone. If he reads this, you can copy the photo addresses above and use them outside of facebook (they are on photobucket). seeya, Shane L. |
|
|
|
Post by doublechevron on Oct 19, 2015 13:19:12 GMT 10
|
|
|
|
Post by doublechevron on Oct 19, 2015 13:15:21 GMT 10
Hi Ashley, where about is the van located ? and can it be towed or does it need to be moved by tilt tray/ car trailer ? that's hilarious ... i was just about to post his caravan here as it popped up on facebook. |
|
|
|
Post by doublechevron on Oct 18, 2015 22:30:54 GMT 10
For me ... It's not far at all. 3 young kids and working full time makes any sort of travel "not easy" .....
seeya
Shane L.
|
|
|
|
Post by doublechevron on Oct 18, 2015 17:51:21 GMT 10
That looks absolutely spectacular. Congratulations on an amazing job  |
|
|
|
Post by doublechevron on Oct 18, 2015 8:52:56 GMT 10
Those crappy 240v joiners are a very reliable way of joining brake wires together. They are a good tight connection and great when you need to remove the brakes for service. It'll be all full of copper rot though. I bet if I pull them off i'll find the wiring there extensively rotten and black  They aren't water proof! seeya, Shane L. |
|
|
|
Post by doublechevron on Oct 17, 2015 17:23:33 GMT 10
I finally got around to fitting the brake controller to the car, so hooked up the caravan wiring .... and got "N-C" on the controller unit .... hmmmm.... not connected. 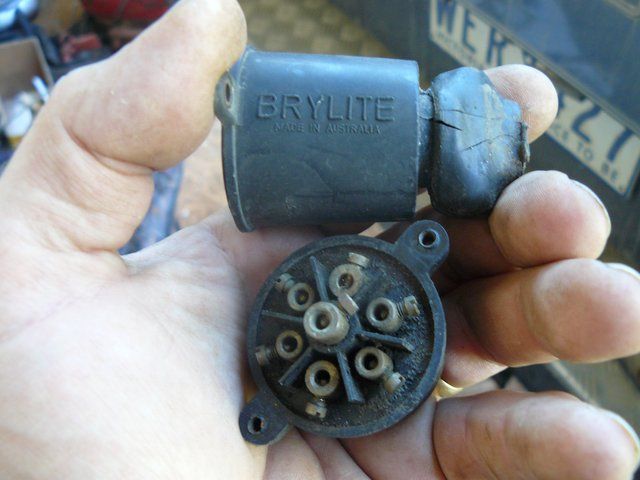 One of the wires in the coupling was broken .... check this out ... Made in Australia. You'll never see that on anything again. It still looks usable too (other than tarnishing to the brass connectors). 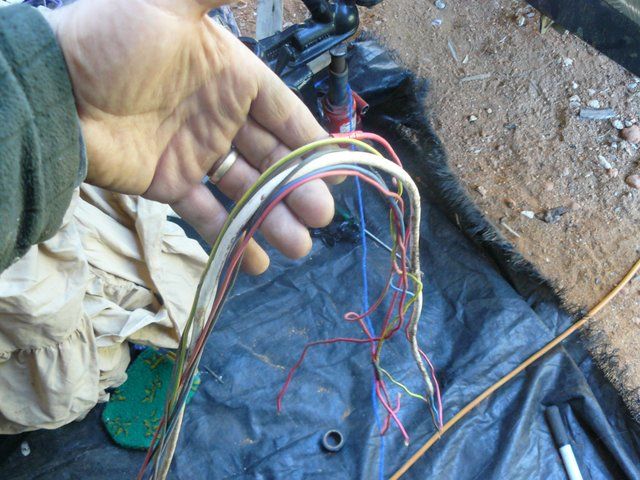 I've been caught out in the past with dodgy wiring, so I simply removed the plug, tape a draw cable to the wiring and pulled it back through the 'A' frame. Yep, crimp on connectors and and that looks like 240volt twin core 10amp light cable ?? and a 240volt earth wire ( yellow with a green strip). It had continuity to earth, so I hooked it up as the earth and found all sorts of weird crap when I tried to sort the wiring. I couldn't find which was the earth wire  So I hooked a jump lead over to the car to earth it to the car .... figuring throwing 12volts to the wires would find all the lights by illuminating them. Anyway, first, WTF is that 240volt twin core household cable. I crawled under and follwed it back ....  Bloody hell... it's heading to the brakes..... between the front suspension units.... crappy screw on connectors...  This is really shithouse... Amazingly the factory did this. Look at that 240volt wiring looping over to the brakes. 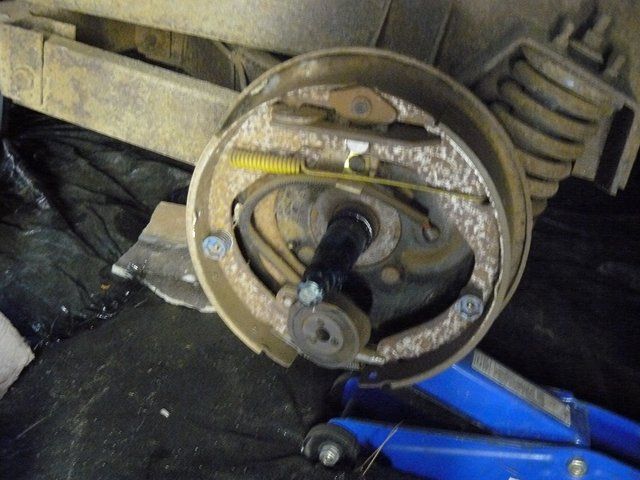  Maybe it earths through the brakes? So I pulled a brake drum..... Wow, the safety check the caravan place did ........... They fitted new bearings, greased correctly, new split pin and what looks like new nuts. the brake pads look new .... but that's not the 240volt wiring in there.... 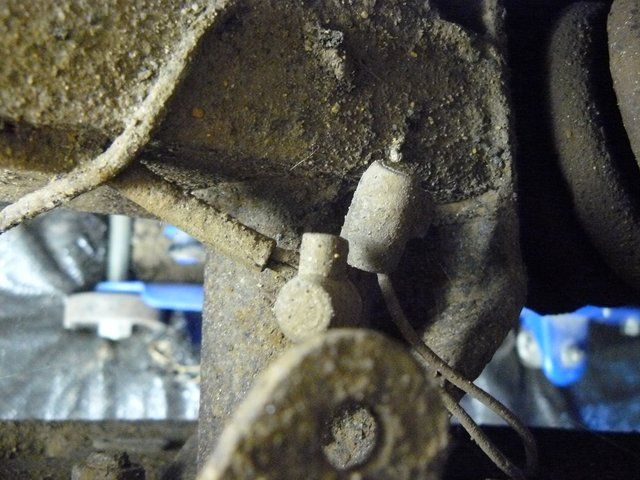 Bloody hell.... more crappy 240volt screw on wire joiners .... urgghhh.... Ok, the wiring looks quite sound so I'll snip out all the crappy wiring joiners and solder all the joins and cover with heat shrink. The wiring I finally have figured out ...... The factory hasn't earth the caravan     All of the lighting relies on any earth connection that may happen through the hitch assembly. All of the lighting relies on any earth connection that may happen through the hitch assembly.
So I need to earth the van and I reckon I can just fix up what's there. I dont' need to worry about wheel bearings etc either  seeya Shane L. |
|
|
|
Post by doublechevron on Oct 17, 2015 17:00:57 GMT 10
|
|
|
|
Post by doublechevron on Oct 16, 2015 9:12:20 GMT 10
Looks like fun .... How many runs did you get in there  .... You'll be amazed at the spots you missed taping when you unmask it too  If your going to leave it more than a day before top coating, I'd suggest removing the making tape and re-doing it. It really sucks trying to remove masking tape that has baked on  seeya, Shane L. |
|
|
|
Post by doublechevron on Oct 15, 2015 12:42:52 GMT 10
That's looking really good. It's amazing the way we all think we'll just fix the damage in a couple of days .......... Then end up posting photos of 'vans with the cladding removed and lots of frame replacement.
Did you mamage to source matching ply ?
seeya,
Shane L.
|
|
|
|
Post by doublechevron on Oct 12, 2015 9:42:20 GMT 10
I wonder if that ones a home made caravan  It looks unique. the vintage caravan forum could have poeple that will identify it! seeya Shane L |
|
|
|
Post by doublechevron on Oct 12, 2015 9:10:58 GMT 10
Wow, how many hours a day are you guys travelling for  Just put some freezer packs in the freezer overnight and leave the fridge off for the couple of hours you travel  I've had 3way fridges in the past... 12volts isn't much better than switching them off while you travel  seeya, Shane L. |
|
|
|
Post by doublechevron on Oct 11, 2015 21:24:52 GMT 10
Well, all J Moulds have been removed, the old concrete scraped off and resealed and refitted. My god, what a mongrel of a job !! Lol. Also have resealed the cross seams on the roof. Gonna have to do something about re sealing the roof hatch ( doesn't appear to be leaking) but the old concrete has been thickly applied and has started to lift on the edges. ( more fun times ahead it seems) It's way worse if someone has "resealed" it by pushing silicon under the edges. The hard old mastic is very easy to remove compared to the god awful silicon .... It takes forever to clean off the silicon from the visible areas it's been smeared all over  |
|
|
|
Post by doublechevron on Oct 11, 2015 21:16:34 GMT 10
Hi Kyfarm. Out of curiosity, what sealant have you used ?? Sikaflex 291 Marine, It was recommended as it seals well but can be removed easily in the case of a window not sealing (unlike silicone), is highly flexible. I think it comes in various colours - I bought white. Have you tried to remove one of those windows. I'd strongly recommend against that ... aus.sika.com/dms/getredirect.get/au01.webdms.sika.com/115It sounds strongly adhesive to me :eek: Mastic!! that's the stuff. you might have to re-do it in 10years time. but the windows will fall out and it's only $5.00 a tube  |
|
|
|
Post by doublechevron on Oct 11, 2015 17:51:45 GMT 10
Shane thanks for the reply. i had the hatches out twice and the second time i used that much ski flex it wasn't funny. i coud see where the water was coming in but could not work out how it came in there. when i fitted alloy sheeting over the holes no leaks. i just gave up as i never liked them anyway. i have just removed them from a mates Roma van his never stopped leaking. he called them his waterfalls. i fitted smaller fiamma hatches and never a hint of water since. Did you remove the plastic corner pieces and seal them? Then way it's designed is any water that gets past the flap hinges drains to the corners, the plastic corners drain to the bottom. Unless you pull the plastic corners off and seal behind them it'll always leak (weep at a minimum IMO ). I'm pretty sure the 4 seasons hatches in this caravan will be 100% leak proof for the life of the caravan now I've sealed them. You also need to seal up all the pop rivets, water can run through the pop rivet itself. If you fitted hatches onto a bed of sikaflex and squeezed it through.... You would NEVER have removed those hatches. that stuff holds windscreen into cars as a structural member in the event of an accident. Once you have glued something to a caravan with it if prep'd right ................ it's there forever  seeya, Shane L. |
|
|
|
Post by doublechevron on Oct 10, 2015 21:43:24 GMT 10
I don't think these ones will leak. Did you use sealer and "squeeze" it out to fill all the voids like I did  Smearing silicon over the shop with your finger won't seal anything sadly  Yeah the coloured cladding seems to be particularly good quality with a VERY thick coating of colour on it  These days it would be 1micron thick and wipe off if you sneezed near it! seeya, Shane L. |
|
|
|
Post by doublechevron on Oct 10, 2015 21:40:15 GMT 10
Shane Hi. The only problem I can see is that unless you have the generator running while driving from one campsite to the next one your 2way fridge wont be working. To do this you will have to have the generator running on your rear bumper. Ted I'd only run the generator when needed at times that wouldn't p!$$ people off  .... even though it would be the quietest one I could find. The fridge will run on gas .......... seeya, Shane L. |
|
|
|
Post by doublechevron on Oct 10, 2015 9:50:00 GMT 10
Don't laugh ... I was thinking "I bet it still bloody leaks from somewhere" ........ It seems like a lot of sealer, remember that's all the sidelights, two 4 seasons hatches, 5 vent hatches, 9 windows, 1 window cover and a door frame. It's 22 1/2 foot longs, so there will also be 90foot of tru-mold corner pieces there too :eek:  I played around a bit last night with a cheap clay bar ...... and tried some micro-fine cutters on the stripe down the back of the caravan ... expecting to wipe the colour straight off the caravan. 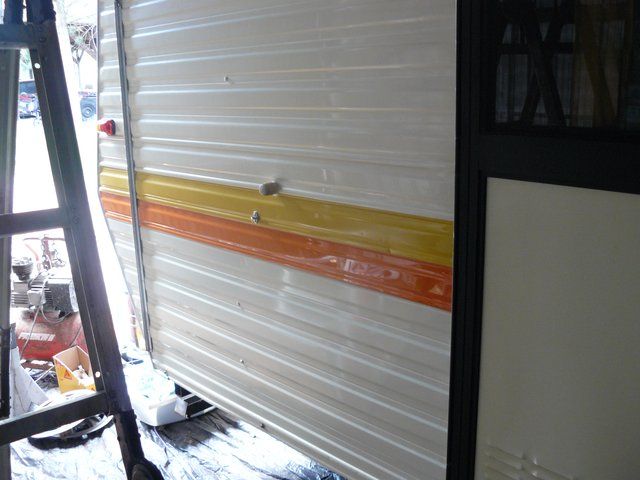 Lots of hard work 'cos you could risk using a rotary buffer with all of those edges. 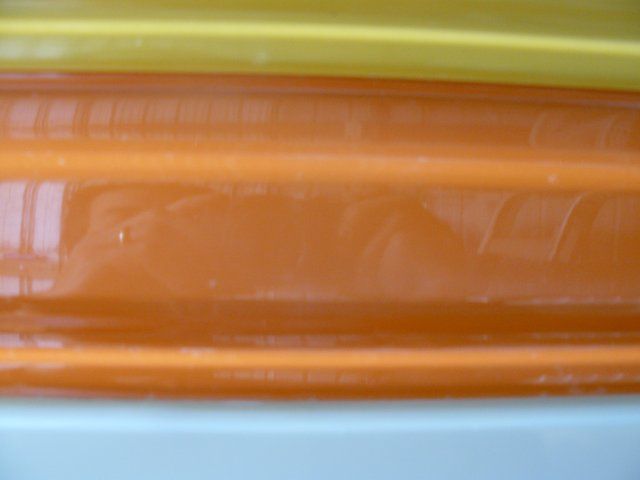 That ugly burnt orange comes up like new, with no signs of breaking through. I wonder if I can be bother putting all that effort into all the stripes on the caravan. It'll certainly brighten it up a lot. seeya, Shane L. |
|
|
|
Post by doublechevron on Oct 9, 2015 8:56:12 GMT 10
Yep, that's right - it runs at 240 the whole time.  You need a good (read expensive) inverter to do this properly - and safely though. The Selectronic unit I have is rated for 600w continuous, but up to 1200w for 5 minutes, and can peak at nearly 2000w. Kettles and toasters are out, but I use the stove to boil water and the grill to make toast, so it's really only running the lights, and the microwave occasionally - but I think I'm going to pull that out to save space and weight anyway. I'll pop up one day and say hi - I've been meaning to so I can drool over your Citroens....  I looked at them on ebay a few months back. By the time I purchased a big battery or two, wired it all in, fitted a quality inverter. I figured I could buy one of these: sydneytools.com.au/gensafe-ns105345-2kva-4-stroke-petrol-powered-inverter-silent-generatorand just use a 2nd battery in the car to run the 12volt lighting and tv of a night. there only 52dB running light loads. You could pack a big chunky battery charger to re-charge your car batteries when you use it during the day. It could also run a small split system if I fitted one (you'd just have to make sure it's an inverter with soft start, which most are these days). I'm trying to figure out the cheapest most usable way of doing this stuff (as opposed to the best way). If we purchased a quality generator we could sell it when we get back from the trip away. (it's not like we can go away for more than a week at a time for the next decade or two after the 3month trip either way). Young kids generally cause that  .... and working full time. seeya, Shane L. |
|
|
|
Post by doublechevron on Oct 9, 2015 8:40:56 GMT 10
I'll scan it as soon as I can get upto my parents to collect the magazine  |
|
|
|
Post by doublechevron on Oct 8, 2015 13:33:16 GMT 10
I know you don't want to do an inverter, but I thought I'd add in a bit on how I did mine in case someone looks this up in the future. My van was never wired for 12 volts - the fittings are all the dual socket fittings of the day, but none have ever been wired, and this was confirmed when I replaced some of the paneling - no wires have ever been run for any DC apart from the exterior lighting - tail lights and clearance lights. So, I run everything at 240 volts - through an inverter when away camping, and I have a changeover switch in the switchboard to flick between the inverter supply and the mains when I'm plugged in at home. The inverter is a top quality Australian built unit - a 600 watt Selectronic unit that goes to sleep when the load drops to below 4 watts, so it doesn't waste energy doing nothing like cheaper units. All globes now have warm white Phillips 5 watt LED globes installed so the current draw is very low, even with all the lights running. I have 2 x 100AH Full River deep cycle batteries in the van - soon to be 1 as I have too much capacity as it is. These are charged by the car when driving and kept topped up by a gloat charger at home while on the mains. I haven't even needed my solar panel with this setup - even when parked up in one spot for 4 nights in a row. This setup also allows me to run a small 240 volt TV, but cheap 12 volt ones are just as easy to get now. I can also just take my standard phone chargers with me to keep the phone charged. All the comforts of home.  Oh, a quick note on safety - what I have described with the inverter running through a change over switch can be potentially dangerous if not done properly and the system is not correctly understood. Not all inverters are suitable for this kind of setup. I'm a Sparky by trade and I specialise in generator and other isolated supplies so if you don't understand how this needs to be done safely and legally, then please don't attempt it - get an Electrician who understands this (not all will) to sort it.  Oh I get it, you left the caravan 240volts .. but run an inverter to step up to 240volts A/C. I could do this I guess ( I hope it has overload cutout incase you plug the kettle in by accident  ). I'll think about it for a while. I'm not too fussed about power .... I understand just enough .... to make a mess of things  (Is there anything worse than somoene that knows just enough to bugger everything up  ). I did a double diploma quite a few years ago now in electrical systems/electronics. It's all fun right ? I didn't read anything you wrote properly, I thought you were saying you converted to 12volts and was using a step down inverter ( from 240V AC -> 12V DC) to run all the 12volt stuff inside when plugged into 240  seeya, Shane L. |
|
|
|
Post by doublechevron on Oct 8, 2015 13:03:07 GMT 10
WOW I think my rusty old Jobbies were simple compared to yours!!!!! Very good sealing as usual!!! There quite simple.... It just confused matters as the sucker was assembled incorrectly. The flaps that open had been assembled into the hinge gutters below the slot they should have hinged into. I couldn't see a caravan repairer ever doing any of this. It's too time consuming .... so far to expensive to even consider doing. I was looking at the new caravans today when I grabbed a new water tank filler from the local caravan place. Wow .. talk about silicon. EVERYTHING on the modern 'van was assembled with silicon.... Lots and lots and lots of silicon. All the windows were glued in with silicon, the tru-molds were glued on with it ... every vent, flap, accessory was glued on with silicon. The suckers would be impossible to repair in the future as you would destroy it trying to get anything apart. I couldn't see the windows coming out of it without destroying the walls. On the bright side, it sure did appear to be nicely sealed up. 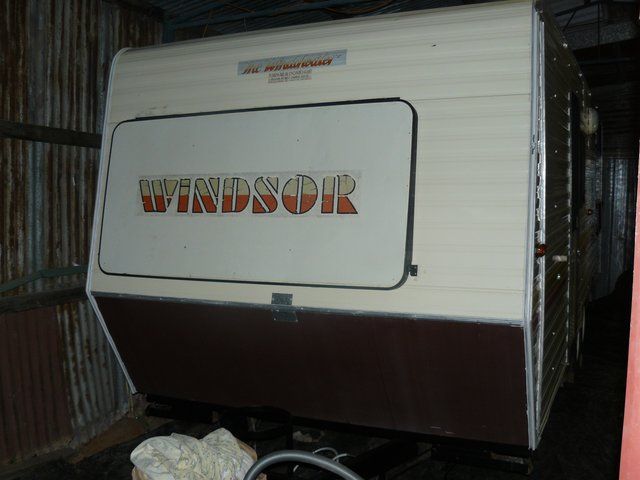 Fronts all back together. All the windows are in, tru-molds are done.  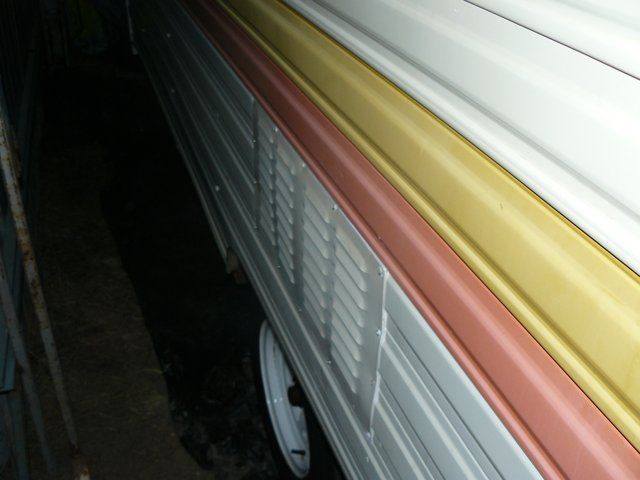 fridge vents are done.... ![]()  roof and gutter silicon "squeezed out" just like the other side. The aeriel plug is sealed, but not attached. I'll finalise what is done with it when I get decide how to setup the aerial. I'll probably use a screw on fitting on the caravan wall (the domestic fitting there is rusted, leaky no good junk). 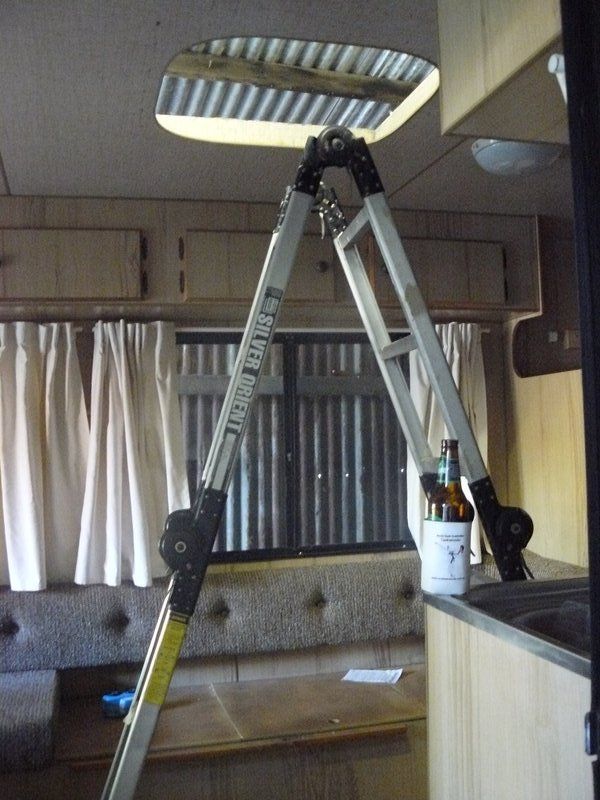 cleaning 4 seasons hatch was made easy ...... just by moving the ladder into the caravan. 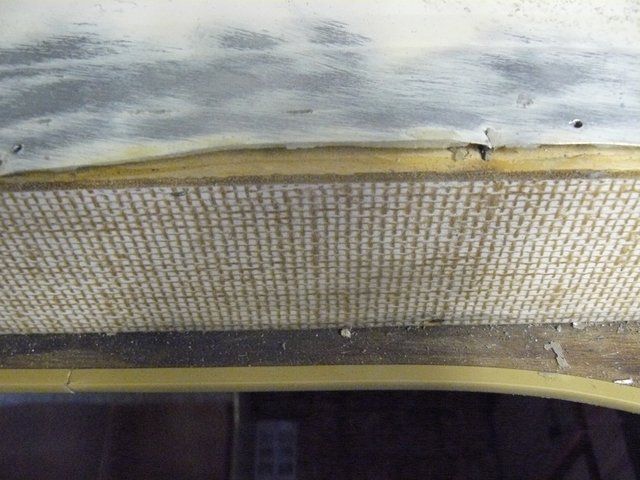 the area just beneath the hatches that have slight water staining .... are just decorative strips of ply. The frame behind them is like new.  Up here isn't visible, so I can give it a good clean and key is nicely with a wire brush. 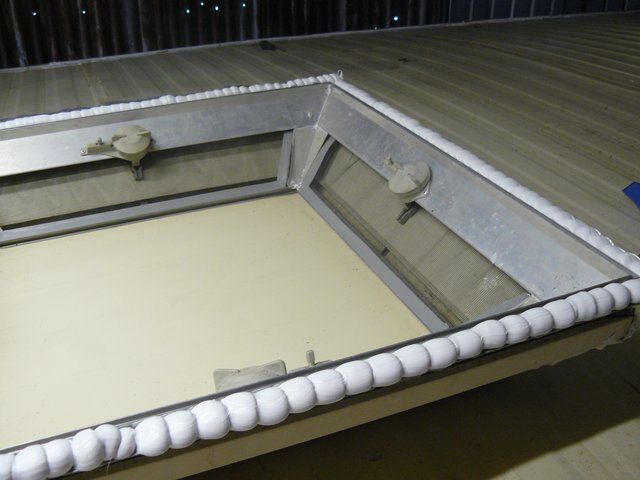 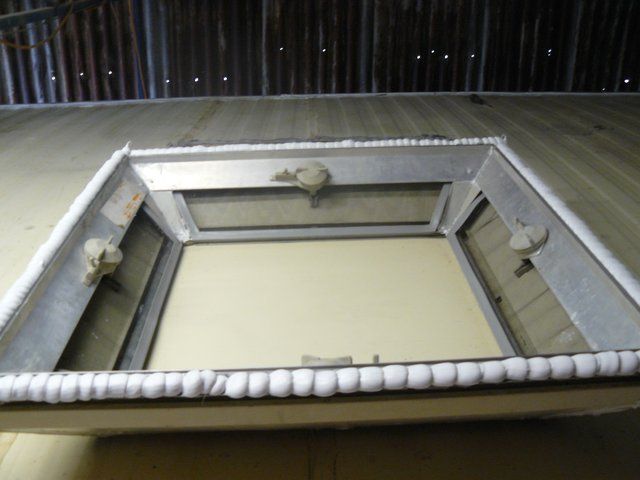 I hope I don't need to move either of these in the future. They will come back out, but it'll be a big job, 'cos I decided in the end, silicon was the go. using mastic and foam I didn't reckon was going to suffice long term up here in the direct sun. 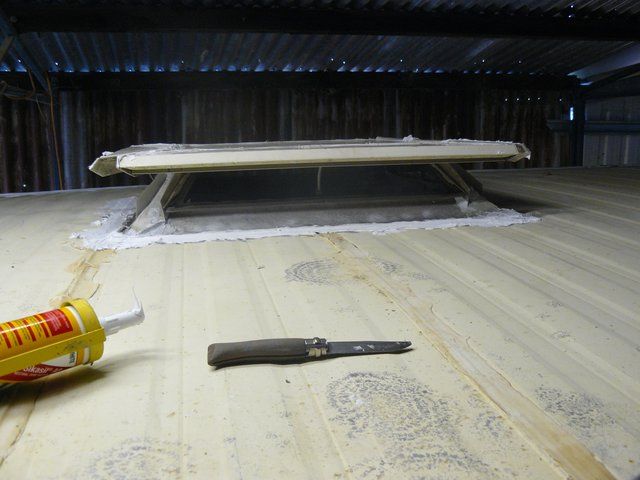 Once again, a quick wipe over with the finger to level the sealer ..... 'Cos this is invisible... and if I did this right it should have squeezed through to inside the caravan ............ where it's very visible to the wife.... so needs to look acceptable! 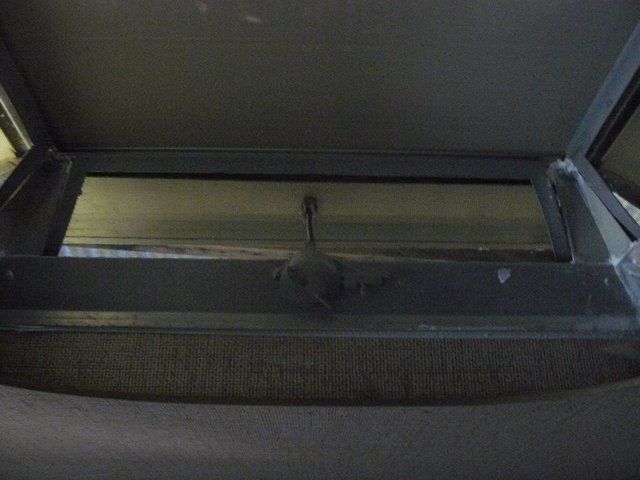 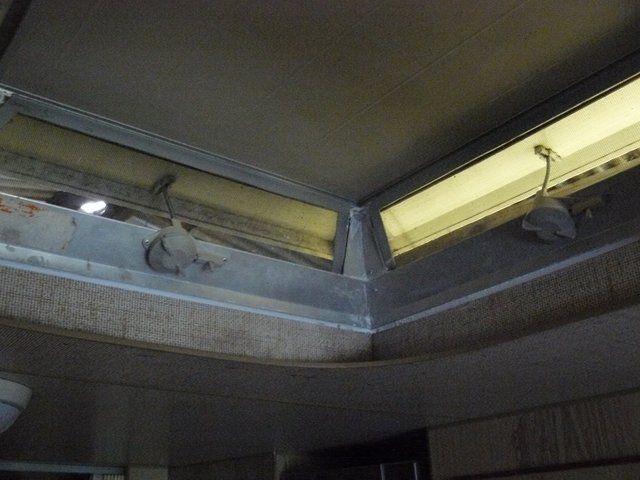 Lovely, it's squeezed right through.... lots of cleanup. Yes I'd taped this up to make cleanup easier prior to fitting the hatch. I'm pretty sure none of the stuff like the 4seasons hatches that I've resealed will ever leak again.... Unless they are broken I have no doubt they will now be leak free for the life of the caravan. Just better ensure we keep this caravan for enough decades to make all this work worthwhile  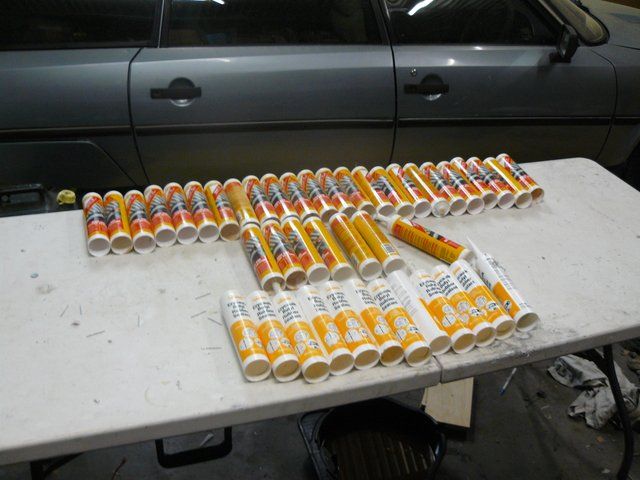 I've been busily cleaning up around the caravan.... That's 31 tubes of silicon and 13 tubes of mastic so far (no including the tubes I chucked into the bin as I went... I did buy 15tubes of mastic and it's all used ). I'll move the caravan out of the shed and give it a really good clean to wash off dirt and old sealer sanded/thrown everywhere and see what it looks like now I can safely get it wet  I'll clean all the old crap off with a clay bar ( there not aggresive like cuttters and polish so won't cut through the paint). I might even treat it to a coat of a sealer if it's finish is ok. Something like NuFinish. As it should last for years if kept in a shed out of the sun and weather. seeya Shane L. |
|
|
|
Post by doublechevron on Oct 8, 2015 9:48:31 GMT 10
A mob in Ferntree gully, Vic sell a thing call a squeeze box ladder, very similar to the one above.   I have one and I just love it.... TXP International
Video..Excellent... exactly what you need to pull the annex through the rail  |
|