|
|
Post by snoops on Jan 27, 2019 17:42:54 GMT 10
Aaaand, epic fail... Wired up the lights and plugged them in to test them - flashed momentarily then went out. Blew a fuse in the car - which I can’t find to replace - stupid handbook tells me where the fuse panels are, but neither show the fuse I’m looking for. Must only be small but I do have nearly 100 watts of clearance lights all in so I guess that’s the reason - these 5 lights doubled the load. Will replace all with LED next time I’m here and take the Hilux into Toyota for them to fix it (Work Car - I don’t touch anything on it even though I’m sure I could sort it)
|
|
|
|
Post by richo66 on Jan 27, 2019 20:08:11 GMT 10
lights look great, just make sure that you hook them up in parallel and not in series or you will certainly get a huge draw I've been down that road and it's a headache. tried to shortcut by wiring side clearance lights and ended up with almost 5x the load the fuse sounded like a cap gun😂
|
|
|
|
Post by snoops on Jan 27, 2019 20:30:38 GMT 10
Thanks. All good with the wiring - I’m a Sparky. Should have known a modern vehicle would have a pissy little fuse suppling the tail lights.
|
|
|
|
Post by 78466noM on Feb 14, 2019 7:16:47 GMT 10
if it is like the ranger may be computer has shut circuit down .  |
|
|
|
Post by Rattles on Feb 14, 2019 15:44:05 GMT 10
|
|
|
|
Post by Mustang on Feb 14, 2019 18:52:39 GMT 10
I changed all external lights on the Walden to LED & separated front & back to separate fuses, only 10amp, no problems so far.
|
|
|
|
Post by snoops on Feb 23, 2019 17:03:39 GMT 10
Back down with the van this weekend. I’ll be towing it from the Outlaws to a new place for a couple of weeks - a mates place just near Avalon Airport. I’m working at the Airshow at the moment and next week will be 12 hour days on site, so I don’t want to add another 2 1/2 hours in travel each day to that for the next 12 days. Really wanted to get the back painted as this will be difficult when I get it home, so bought everything I needed to do this. No power? No problems... 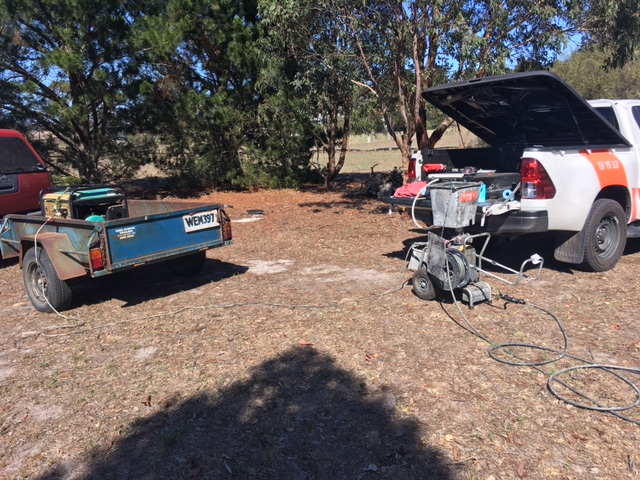 Untitled Untitled by Gavin Gregory, on Flickr All masked up ready to spray. 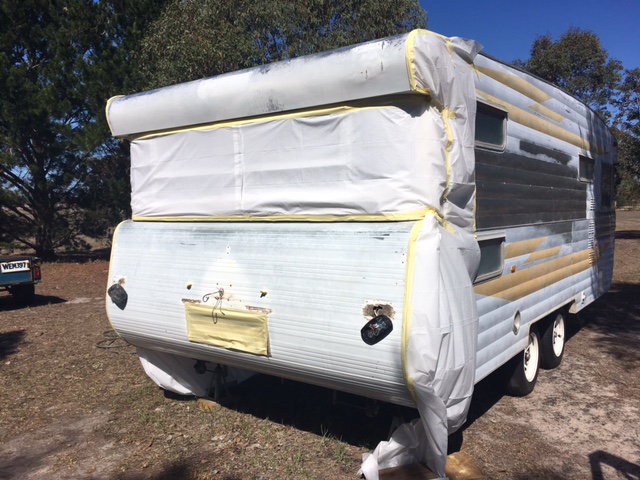 Untitled Untitled by Gavin Gregory, on Flickr And finished. Not perfect, but looks pretty good. Will look better when the rest of the van is done.  Untitled Untitled by Gavin Gregory, on Flickr 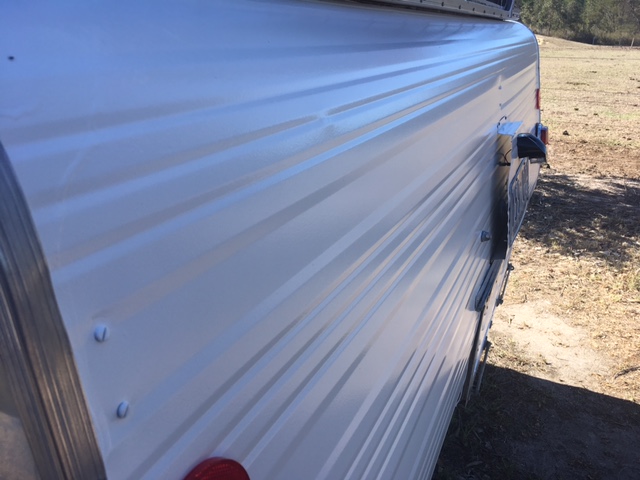 Untitled Untitled by Gavin Gregory, on Flickr 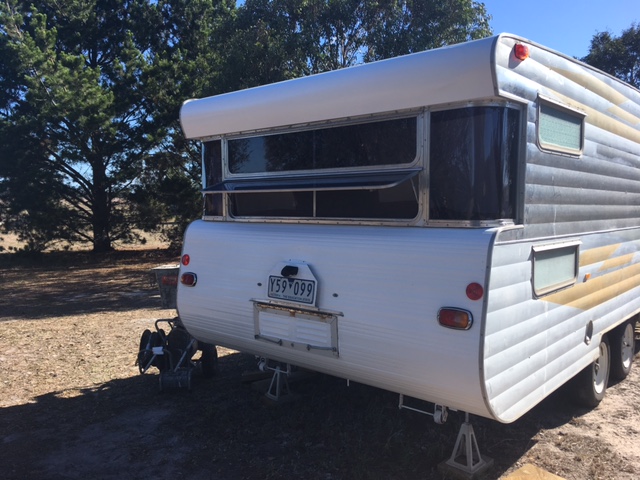 Untitled Untitled by Gavin Gregory, on Flickr |
|
|
|
Post by snoops on Feb 23, 2019 17:06:11 GMT 10
Need to order a sticker for it now, RV Stickers do the correct one for this van. Also need a chrome towel rail for the back. Does anyone know where I can get chrome plated brass fittings and stainless rod from? The stuff at Bunnings isn’t weatherproof at all - been down that road once already with the Franklin. TIA.
|
|
|
|
Post by Mustang on Feb 23, 2019 17:27:57 GMT 10
Need to order a sticker for it now, RV Stickers do the correct one for this van. Also need a chrome towel rail for the back. Does anyone know where I can get chrome plated brass fittings and stainless rod from? The stuff at Bunnings isn’t weatherproof at all - been down that road once already with the Franklin. TIA. I didn't like the B**nings fittings, but used them until I found better, problem is I never found better. I have kept the polish on & the still look OK. RV stickers have been good, you need a quiet day. Cheers |
|
|
|
Post by snoops on Mar 8, 2019 16:51:59 GMT 10
So the stickers I ordered turned up, so I stuck them on tonight. Finally found a name for the van - 'Molly' - not sure if I've picked that up subconsciously here or somewhere else so if I have copied you, apologies but it fits well. Also put a sticker down on the RHS as I'm always getting asked at Servo's, etc 'What is is?' RV Stickers supplied the Duralvan Sticker - I measured of the front where I can see a shadow of the old one so it's pretty close to being in the correct spot. Just need to put a towel rail on the back and figure out how to make that rear door look better, but I'm pretty happy with the result. 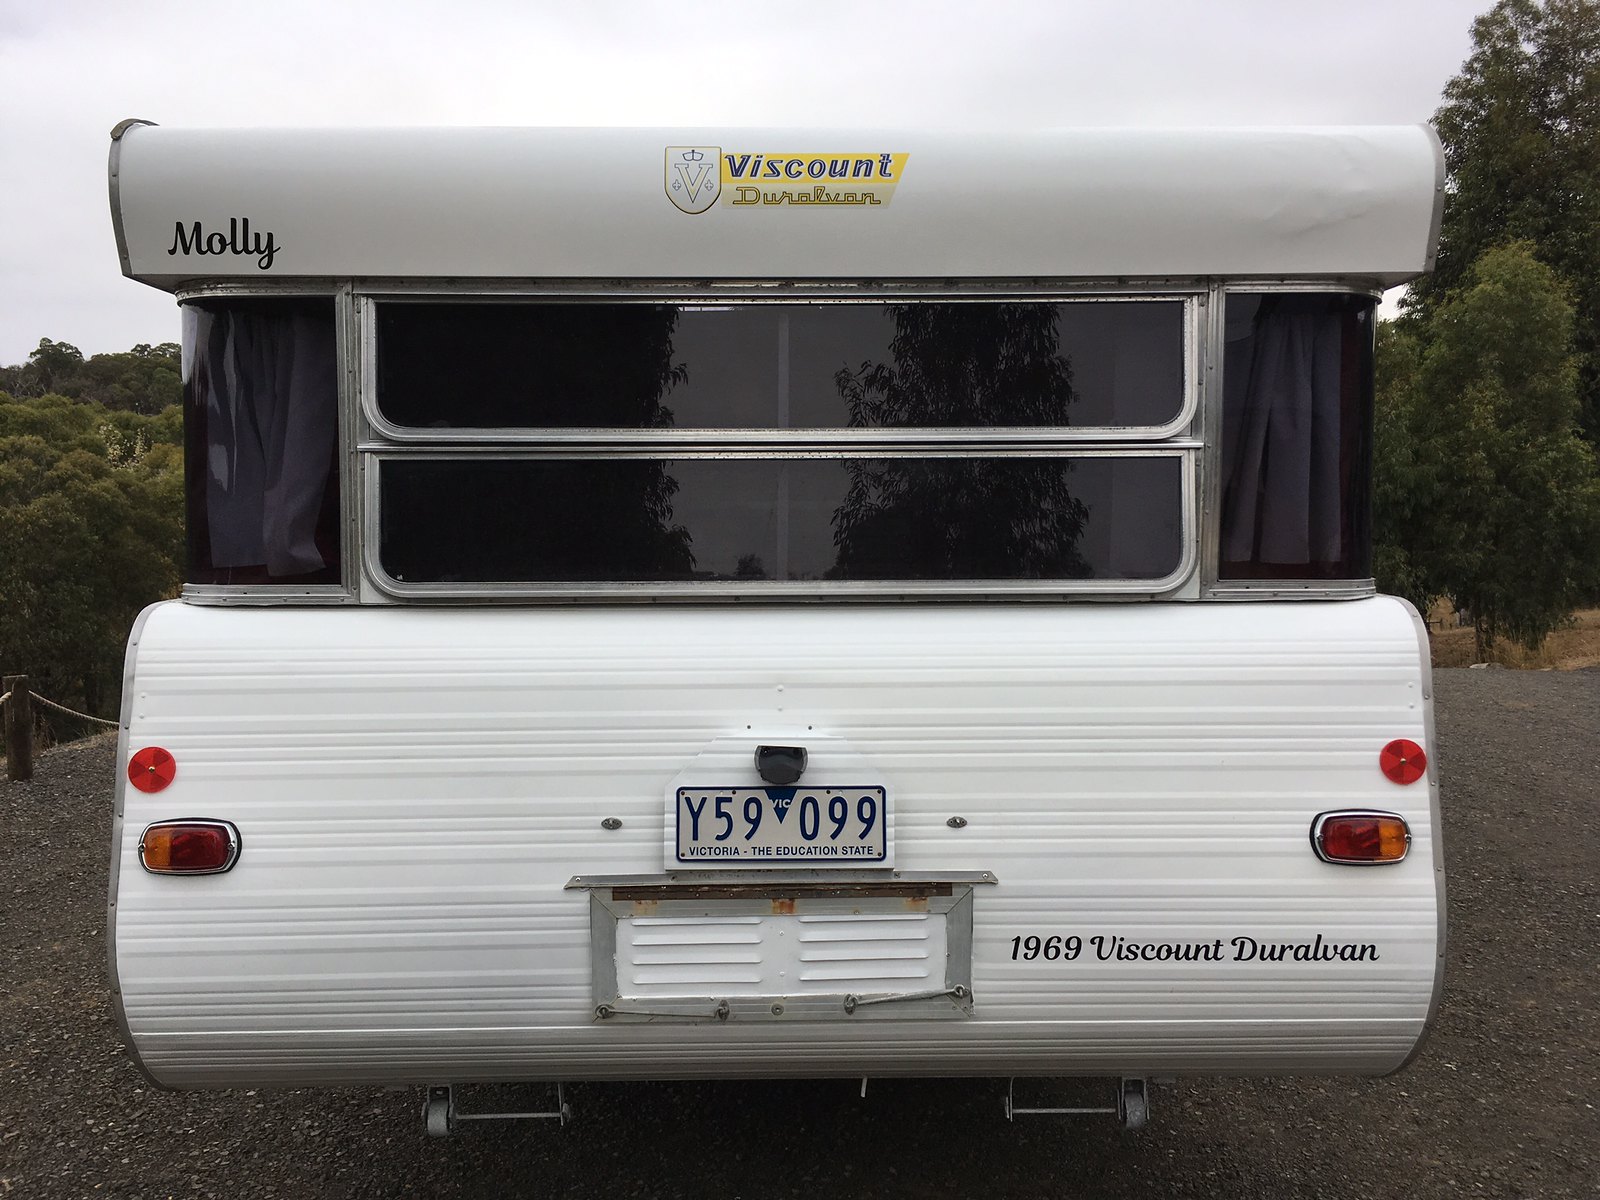 IMG_0358 IMG_0358 by Gavin Gregory, on Flickr |
|
|
|
Post by Mustang on Mar 9, 2019 7:30:14 GMT 10
Nothing like a fresh sticker!!!
The door looks like a bit of a feature, could you produce one smaller & do you need it to open?
If you painted it the same colour as the rear it should tend to disappear.
|
|
|
|
Post by Husky on Mar 20, 2019 14:34:29 GMT 10
Holy Crap batman those back windows look fantastic. nice job mate almost making me rethink pulling them out of mine.... nahhh
|
|
|
|
Post by tasmillard on Apr 29, 2019 6:54:57 GMT 10
This is great how it turned out mate, looking mighty nice. But be careful with tinted windows, mate of mine got his windows tinted before a family trip to Cairns. 9 months later baby no. 3 arrives on scene lol
|
|
|
|
Post by snoops on Apr 29, 2019 20:07:14 GMT 10
Lol, a bit past all of that I think. Youngest is 21, and I’m not starting again!
|
|
|
|
Post by snoops on Jun 17, 2019 19:00:31 GMT 10
Spent another weekend in the van - it’s at the in-laws place at the moment as that’s where I use it most, but it will come home in a few weeks to prep for a weekend away with some friends in August. Will get a few more things done and post a bit more then. Bathroom is next on the cards. 👍
|
|
|
|
Post by snoops on Sept 11, 2019 21:20:45 GMT 10
Ok, it’s been a while but I’m finally doing something on Molly - a large (and expensive) power upgrade. I am ditching the 4 x 100Ah Deep cycles (overkill anyway - I only needed 2) - with a 100Ah Lithium battery. Took a while to find the right one as there’s a lot of smoke and mirrors out there, but tomorrow I’ll have a new AMPS Lithium battery. The guy that sells these knows his stuff and I’ve got other stuff from him over the years and trust his judgement. He designs and builds the best dual battery systems gong - all in house right here in Aus and is a very clever guy - nice to chat to as well and he’s always got time to chat despite how busy he is. This is not a paid promotion, just my own personal experience as an Electrician who understands this tech. This is the unit - www.traxide.com.au/lithium-batteries.htmlGive Tim a call and say Gavin (Homestar from AULRO) sent you. 👍 Also bought a new MPPT controller and meter - both Victron. Overkilled it with a 50amp unit but with the 500 watts of fixed panels and the 150 watt portable panel, the 30 amp unit was borderline. Will be installing these in the next few days - my back pocket is aching but I’ll achieve a weight saving of 115Kg doing this which will allow me to install a second water tank for the shower and still have some up my sleeve. The Full rivers will now form part of a small home setup which I’ll convert all my lighting over to in the coming months. New goodies.  4EF004C8-DA91-45B2-BD71-BD03115AACDA 4EF004C8-DA91-45B2-BD71-BD03115AACDA by Gavin Gregory, on Flickr |
|
|
|
Post by 78466noM on Sept 12, 2019 9:03:27 GMT 10
Great idea for the full river battery's when I get the house sold and the one up north west nsw brought is I have to put in a flat for the daughter it will also run lights and power etc from a stand alone solar and agm battery's gas stove and mains for the fridge also gas heater. She will soon learn to save electricity when she tries to put too much on at once and it trips the circuit . The one 200w solar panel and one 130amph battery has had a work out in van and have never had battery below 11v but I will have to get a decent 240v inverter for flat and do some research. About 25 years ago looking into solar for a property we were told the best was to convert 24v to 240v I will have to see if that is still the best.
|
|
|
|
Post by snoops on Sept 12, 2019 17:18:42 GMT 10
|
|
|
|
Post by snoops on Sept 14, 2019 15:39:02 GMT 10
Hot on the heals of the power upgrade I got motivated to start on the en-suite - the only interior room left that needed finishing. The toilet has been in and working for some time but the shower never got finished. So I stripped everything out today, re lined it with a combination of marine ply and a waterproof board - pictures to come later on. Ordered a fold down sink and some other bits from Caravans Plus to finish it off.
Tomorrow I’ll be laying the shower base - which is a custom job that I haven’t figured out yet - that will happen when I put it in. Will be some heavy marine ply base on appropriate angles to get it to drain properly.
Will take some pics tomorrow of all the progress.
As usual, I do things at the last minute - I’m heading out for 2 consecutive weekends in it so want the shower done by then hopefully. Doubt I’ll have the new water tank in by then but I may just chuck it in the Ute and refill the existing one as needed. 😇
Grey water tank is also on the cards, but again, not in the next week.
|
|
|
|
Post by snoops on Sept 15, 2019 17:29:24 GMT 10
Some more done today, but it’s again too dark to take pics when I thought about it. Pulled the interior wall out of the en-suite as I decided to make the shower a little larger - there’s plenty of room so I’ve added 200mm to it. Made up the shower base - out of 12mm marine ply and made it in 3 sections so it angles towards where the drain is going. Only a bit but hopefully enough. That should all be dry overnight so next time will be waterproofing that and fixing the side walls in for good. I don’t think I’d trust it to be waterproof if using it every day, but for the few showers a year I’ll use it, I don’t think anything will rot away too quickly. 😊👍
Also laid down some vinyl tiles down where the toilet is, finished the panelling in that area and put the toilet back in once and for all - that came up really well, just need to paint the walls but that won’t happen this week. Big push to try and get the shower working by next weekend (doubt it, but I live in hope) 😇
|
|
|
|
Post by snoops on Sept 17, 2019 20:44:54 GMT 10
A couple of pics of the shower cubicle. Floor is down, sealed and covered. These are only stick on tiles so not expecting them to last forever but with the limited usage it will get, I think it should last a while. There are 2 short walls door not there, still to be built. You can see I’ve started trimming the sides in 20mm aluminium angle. This will be all sealed and the final wall panels inside the bits that go up to the walls so all water ends up where it’s supposed to. Not finished by a long way, but getting there. Plenty of room too which I’m pleased with.  8052F311-F8F8-4A00-995B-AD74C06E0955 8052F311-F8F8-4A00-995B-AD74C06E0955 by Gavin Gregory, on Flickr The curve of the wheel arch is a bit of a challenge, and the bit in the corner will be covered with an angled panel so ignore that bit. 😊 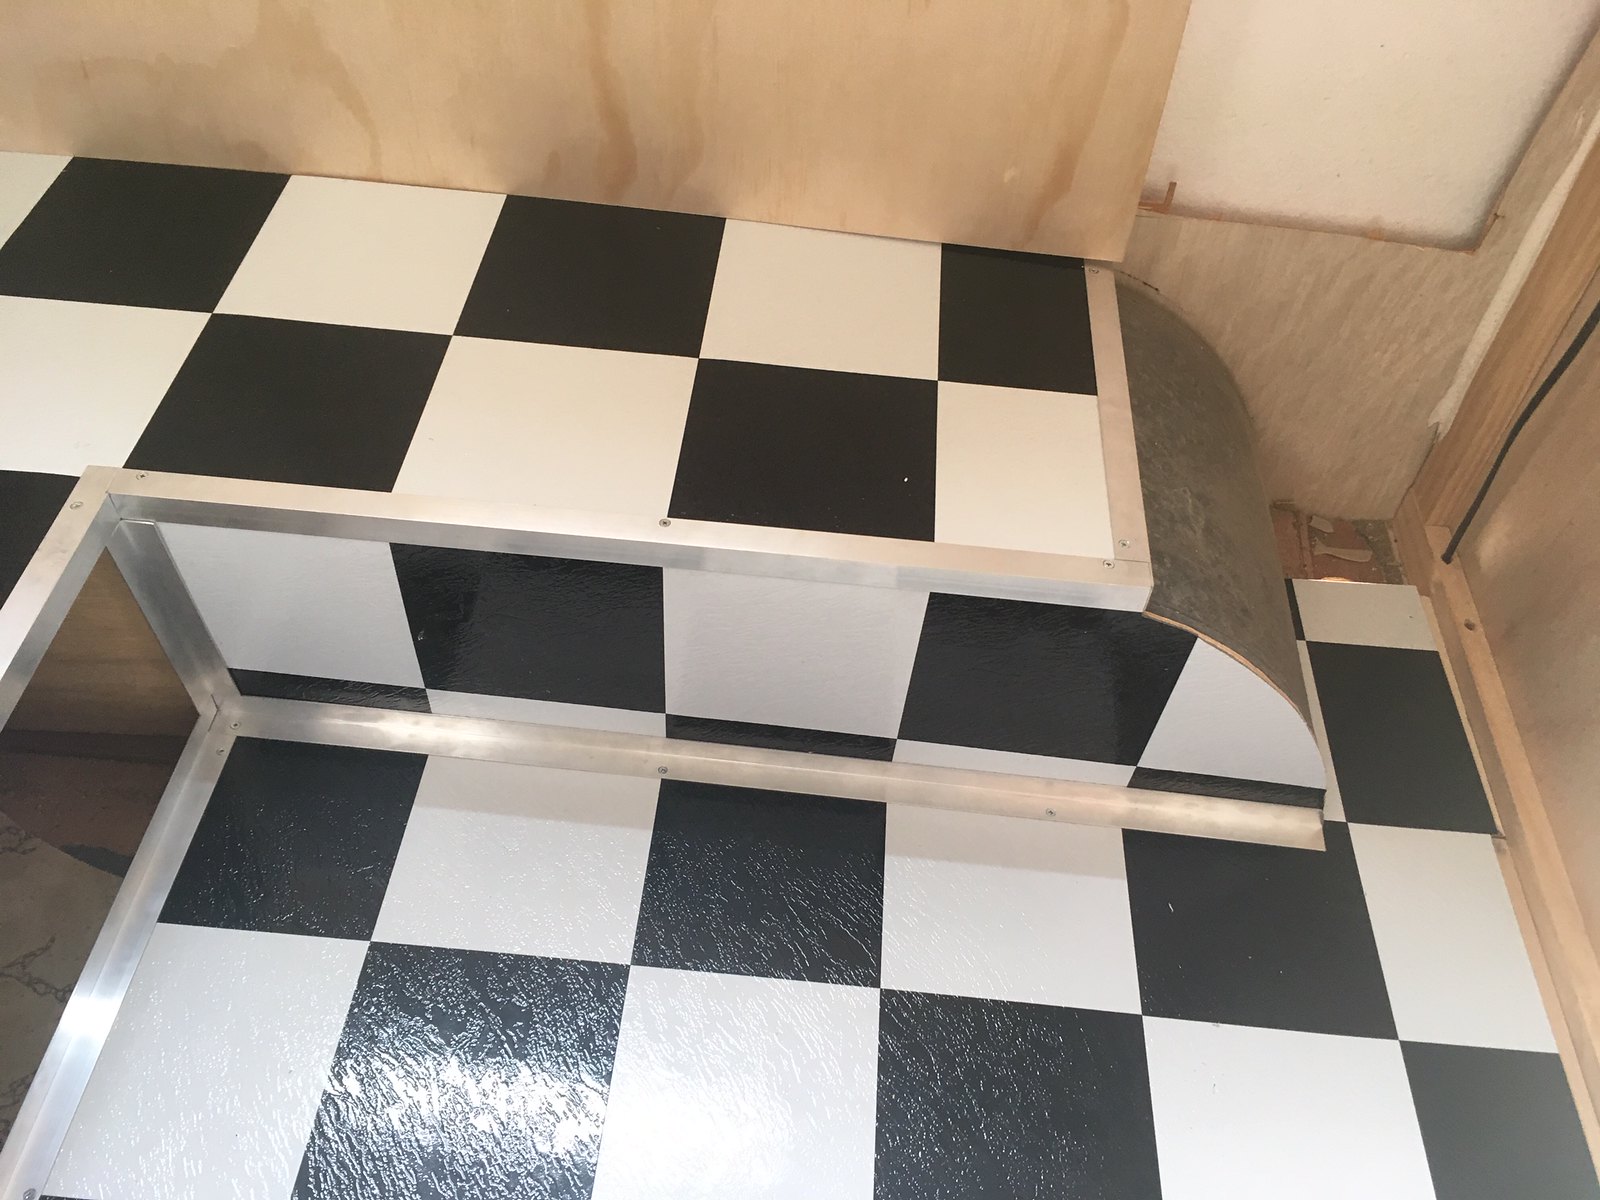 19F1CEA6-34C5-4F01-9169-E3F0CC1BB1C2 19F1CEA6-34C5-4F01-9169-E3F0CC1BB1C2 by Gavin Gregory, on Flickr |
|
|
|
Post by snoops on Sept 21, 2019 17:33:18 GMT 10
So back down the farm this weekend with Molly. There’s a VicRoads weighbridge on the way that’s always open for the public so I slipped in and weighed up everything. The Hilux was loaded with welder, E size gas bottle, 80 litre water tank which was full and a heap of tools. Van had 60 litre tank full, and everything apart from food in it, so pretty much fully loaded. Figures as follows:-
With van attached.
Hilux with me in it (GVM 3,000Kg GCM 5,650Kg)
Front axle - 1,280Kg
Rear axle - 1,480Kg
Van
Front axle - 700Kg
Rear axle - 700Kg
After that I dropped the van off and got the following. (Van GTM 1,760Kg)
Van total - 1,540Kg
Jockey wheel - 140Kg
So, I was surprised with the hitch weight - yes, not exactly the same as what’s on the jockey wheel but close. It’s always seemed a bit light even though it’s at 10% so I might move some stuff up the front lockers to see how that changes things.
Happy the vehicle is well under even with the back loaded up. The GCM is way under and I have a heap up my sleeve on the van. Still got to complete the bathroom and the waterproof panelling will add 30 odd Kg. After that I’m going to upgrade the water tank to a 100 plus litre unit and use the 80 litre spare tank I have as a grey water tank. Both tanks will never be full together so only a few Kg there. Should end up with something that is still under legal weight and well set up. Also very easy to tow rather than these mega tonne monsters on the road these days. 👍
|
|
|
|
Post by snoops on Sept 22, 2019 17:45:33 GMT 10
So another day, another step closer to completion of the ensuite. Got the plumbing installed and connected, trimmed some more of the shower recess and sealed the trims - the waterproof panel will now drop straight over that edge and no water will be able to get under the bottom. Installed the drain and tested everything. Very happy - the drain is in exactly the right spot and the shower if controlled properly (ie not turning on the taps full boar) will provide a nice constant flow at the right temperature at just under 5 litres per minute, so by turning off the taps between getting clean, it should be easy to have a good shower with 10 litres of water max, half that for a quick wash.
As my water tank is so small, this is the next upgrade - I’ll buy a 100 plus litre tank this week and bung that in next weekend when I’m back at the van for 5 nights over the AFL grand final weekend.
Have well and truly got my mojo back on this project so I’ll push through and get the inside pretty much complete soon. 👍
|
|
|
|
Post by Mustang on Sept 23, 2019 13:00:52 GMT 10
Nothing like a break, I had two months off in summer due to the heat, but came back stronger than ever.
|
|
|
|
Post by Husky on Sept 26, 2019 23:07:03 GMT 10
its good to have a break i agree. after nearly 9 months of not working on Charlie i was jumping out of my skin to get back on it. mix that with all the new knowledge i have and i'm hoping for big things when complete.
cant wait to see a coat of paint on yours though Snoops. Any idea when that's going to happen?
|
|