|
|
Post by tasmillard on Apr 13, 2018 14:28:58 GMT 10
Snoops, great to hear progress and you enjoying the van. On the awning/annex topic, over Easter we had some high winds and unfortunately the canvas got torn where the door opens (dont have a door roller so need to get one). Anyway, we also contemplated getting those modern pull out ones but we decided that it would look terrible especially with a curved roof line. So I agree with the above comments, so in my case I will be repairing it or spending money on another similar one at this stage. Anyway, your van, your decision  |
|
|
|
Post by planner on Apr 17, 2018 11:47:06 GMT 10
Diesel goes jelly like when it gets down below zero and we often camp in much colder conditions that that - had a friend with a diesel heater that stopped working on a -7 degree night a couple of years back - we were in the back of the 101 under canvas that night - brrrr. Wait until winter, then go for a drive with a jerry can. Alpine areas sell "alpine" or "winter" diesel that doesn't freeze as easily, I'm told it has wax removed from it. Not sure where is closest for you, maybe Healesville, Warburton area. I know Merton & Myrtleford sell it during winter. |
|
|
|
Post by Husky on Apr 17, 2018 19:26:30 GMT 10
when we go to the snow races we add a antifreeze diesel additive when filling up. this way when we are off to the races in the morning our cars start easily. dunno if that would work in the heater or not?
|
|
|
|
Post by snoops on Apr 18, 2018 7:55:33 GMT 10
First cold morning since the heater install so I went out early and gave it a blast. Temp gauge in the van was showing 3 degrees. In half an hour at 75% it was at 15 degrees and quite comfy in there in a tee shirt. Turned it down to low and it keeps the temp stable no issues. Actual unit stays cool to the touch so that's good too. - BUT, it isn't all beer and skittles. I am still not happy with the drone it makes when turned down low - it is quite noticable in the van and moreso outside. Being a very still morning, it is able to be heard from quite a distance outside, so still have to think about that. The fuel pump clicking is also annoying, but I think I can isolate this better from the chassis where it is attached so hooefully I can solve that one easily.
Overall for the price I'm happy, if I'd spend $1,200+ on a name brand that did this I would be less so but for the price, very good.
|
|
|
|
Post by snoops on Apr 27, 2018 17:10:42 GMT 10
|
|
|
|
Post by snoops on Apr 27, 2018 17:16:10 GMT 10
Being off season now, not many others around (which is nice) - only around a dozen to 15 vans in the whole park. Along with my Viscount, there are 2 other classics here though - a York and Travel Home. No one home at either but hope to catch up with the owners while I'm here. 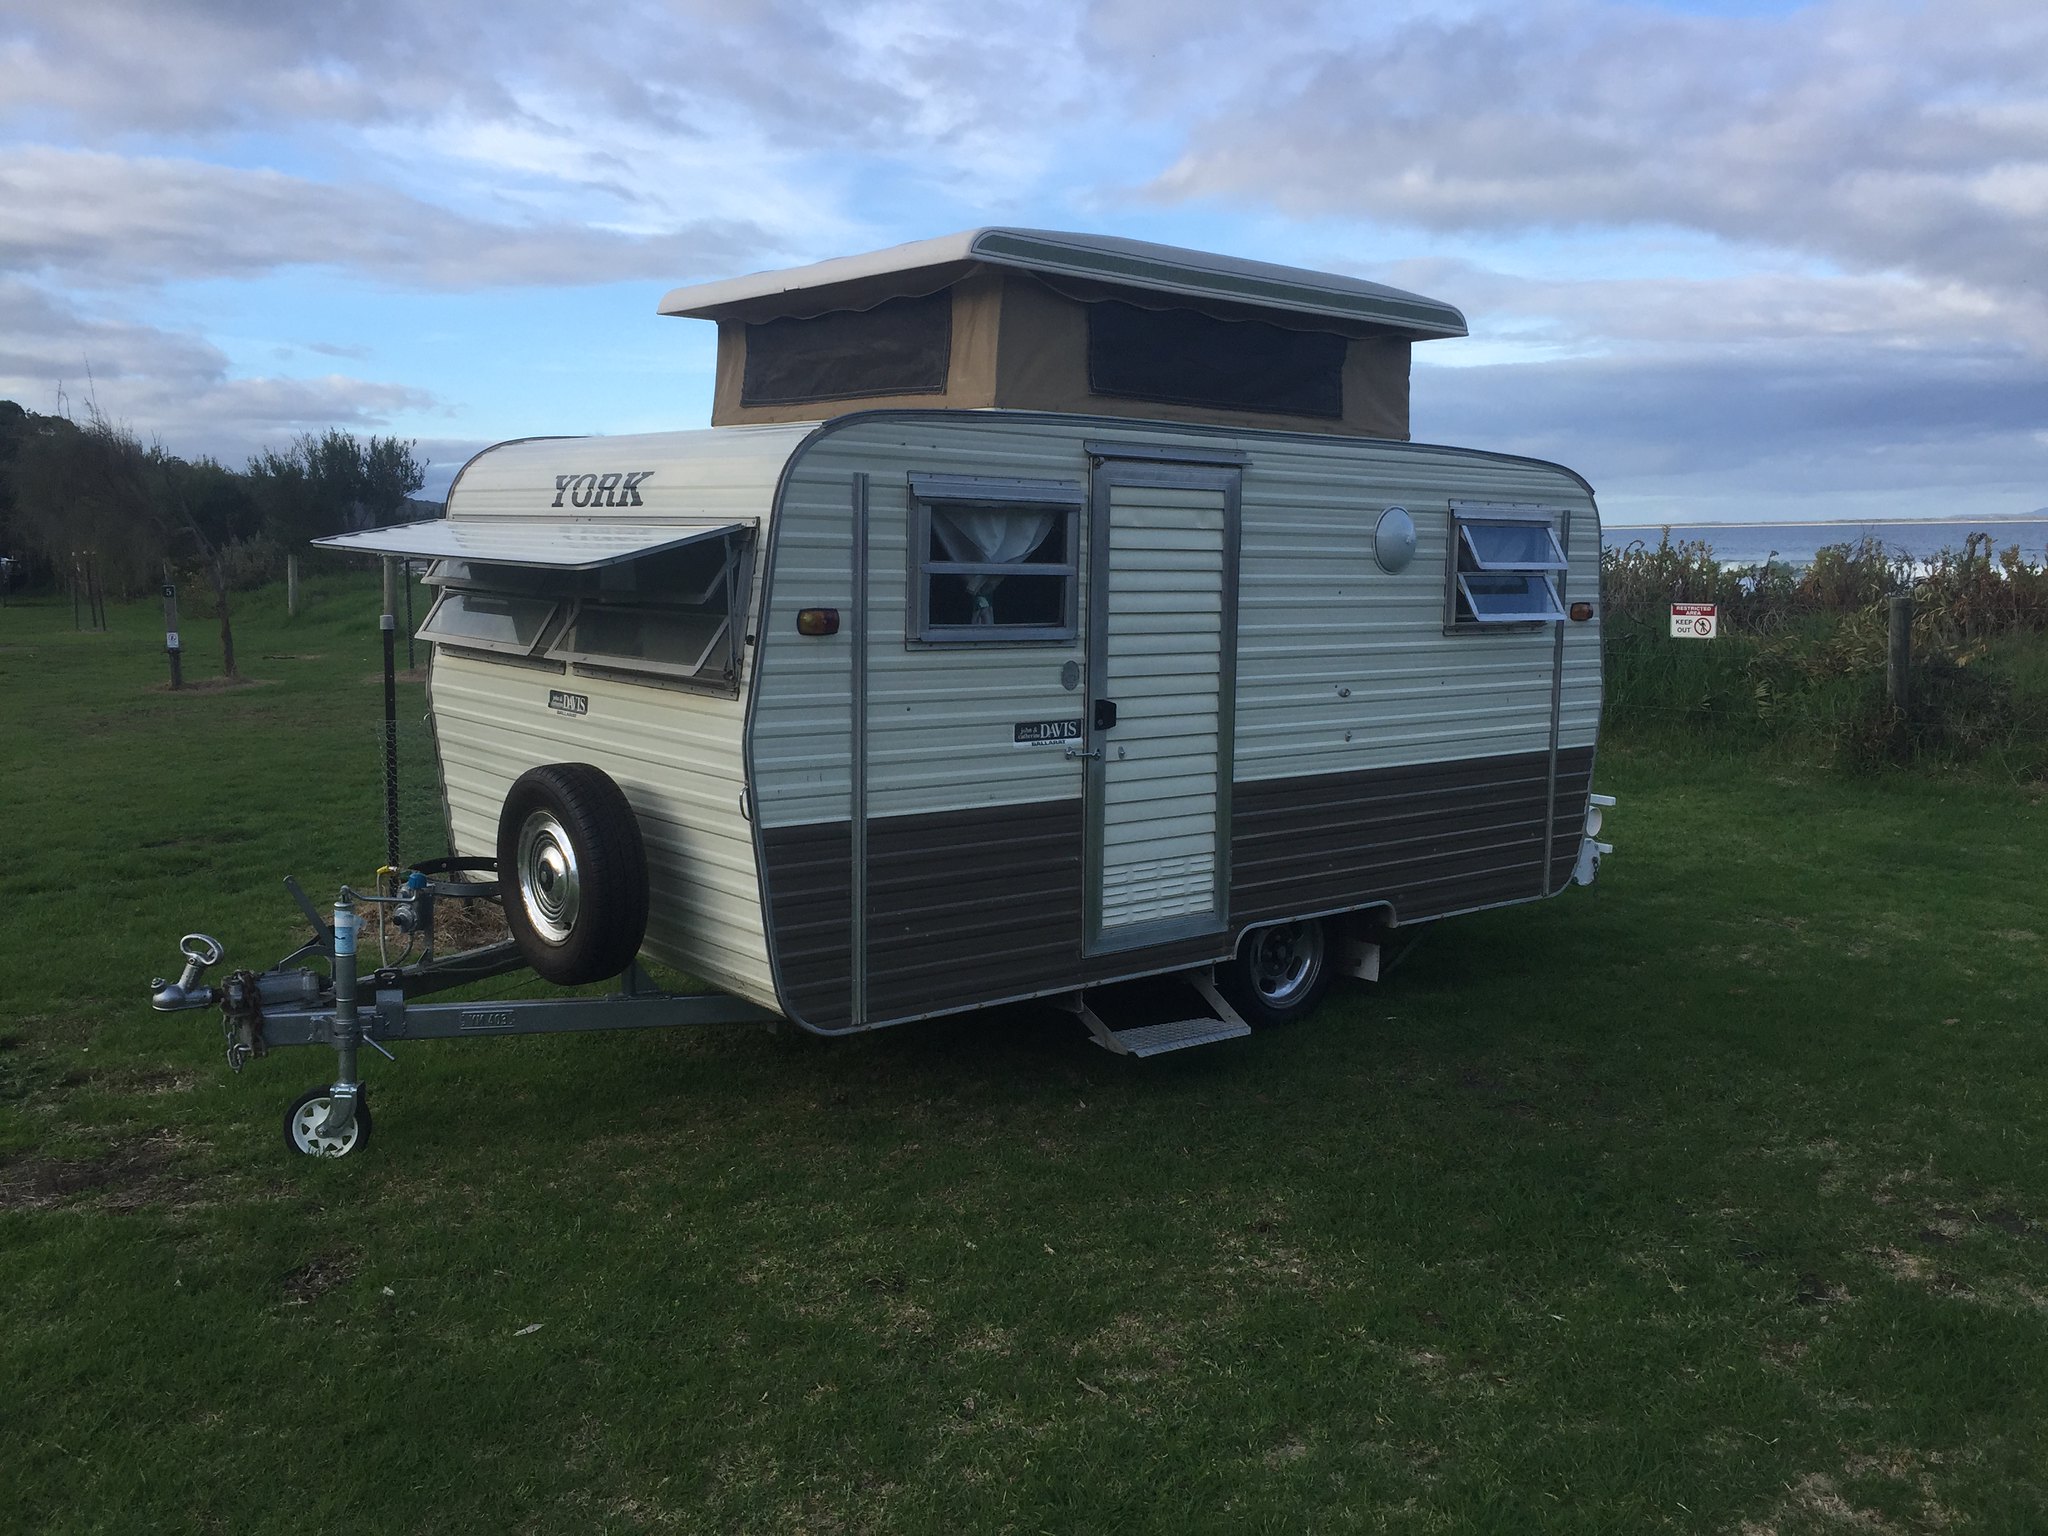 Untitled Untitled by Gavin Gregory, on Flickr  Untitled Untitled by Gavin Gregory, on Flickr Both lovely little vans, and both straigh as an arrow and in great condition. it's nice to be in good company. 👍😊 |
|
|
|
Post by snoops on Apr 28, 2018 15:20:19 GMT 10
Dropped in to see the couple with the 10' Travel Home - Mid 70's. Teresa and Rob allowed me a look inside and to take a couple of pics. It is in beautiful original condition and Teresa is collecting some nice little period nick knacks to go with it. 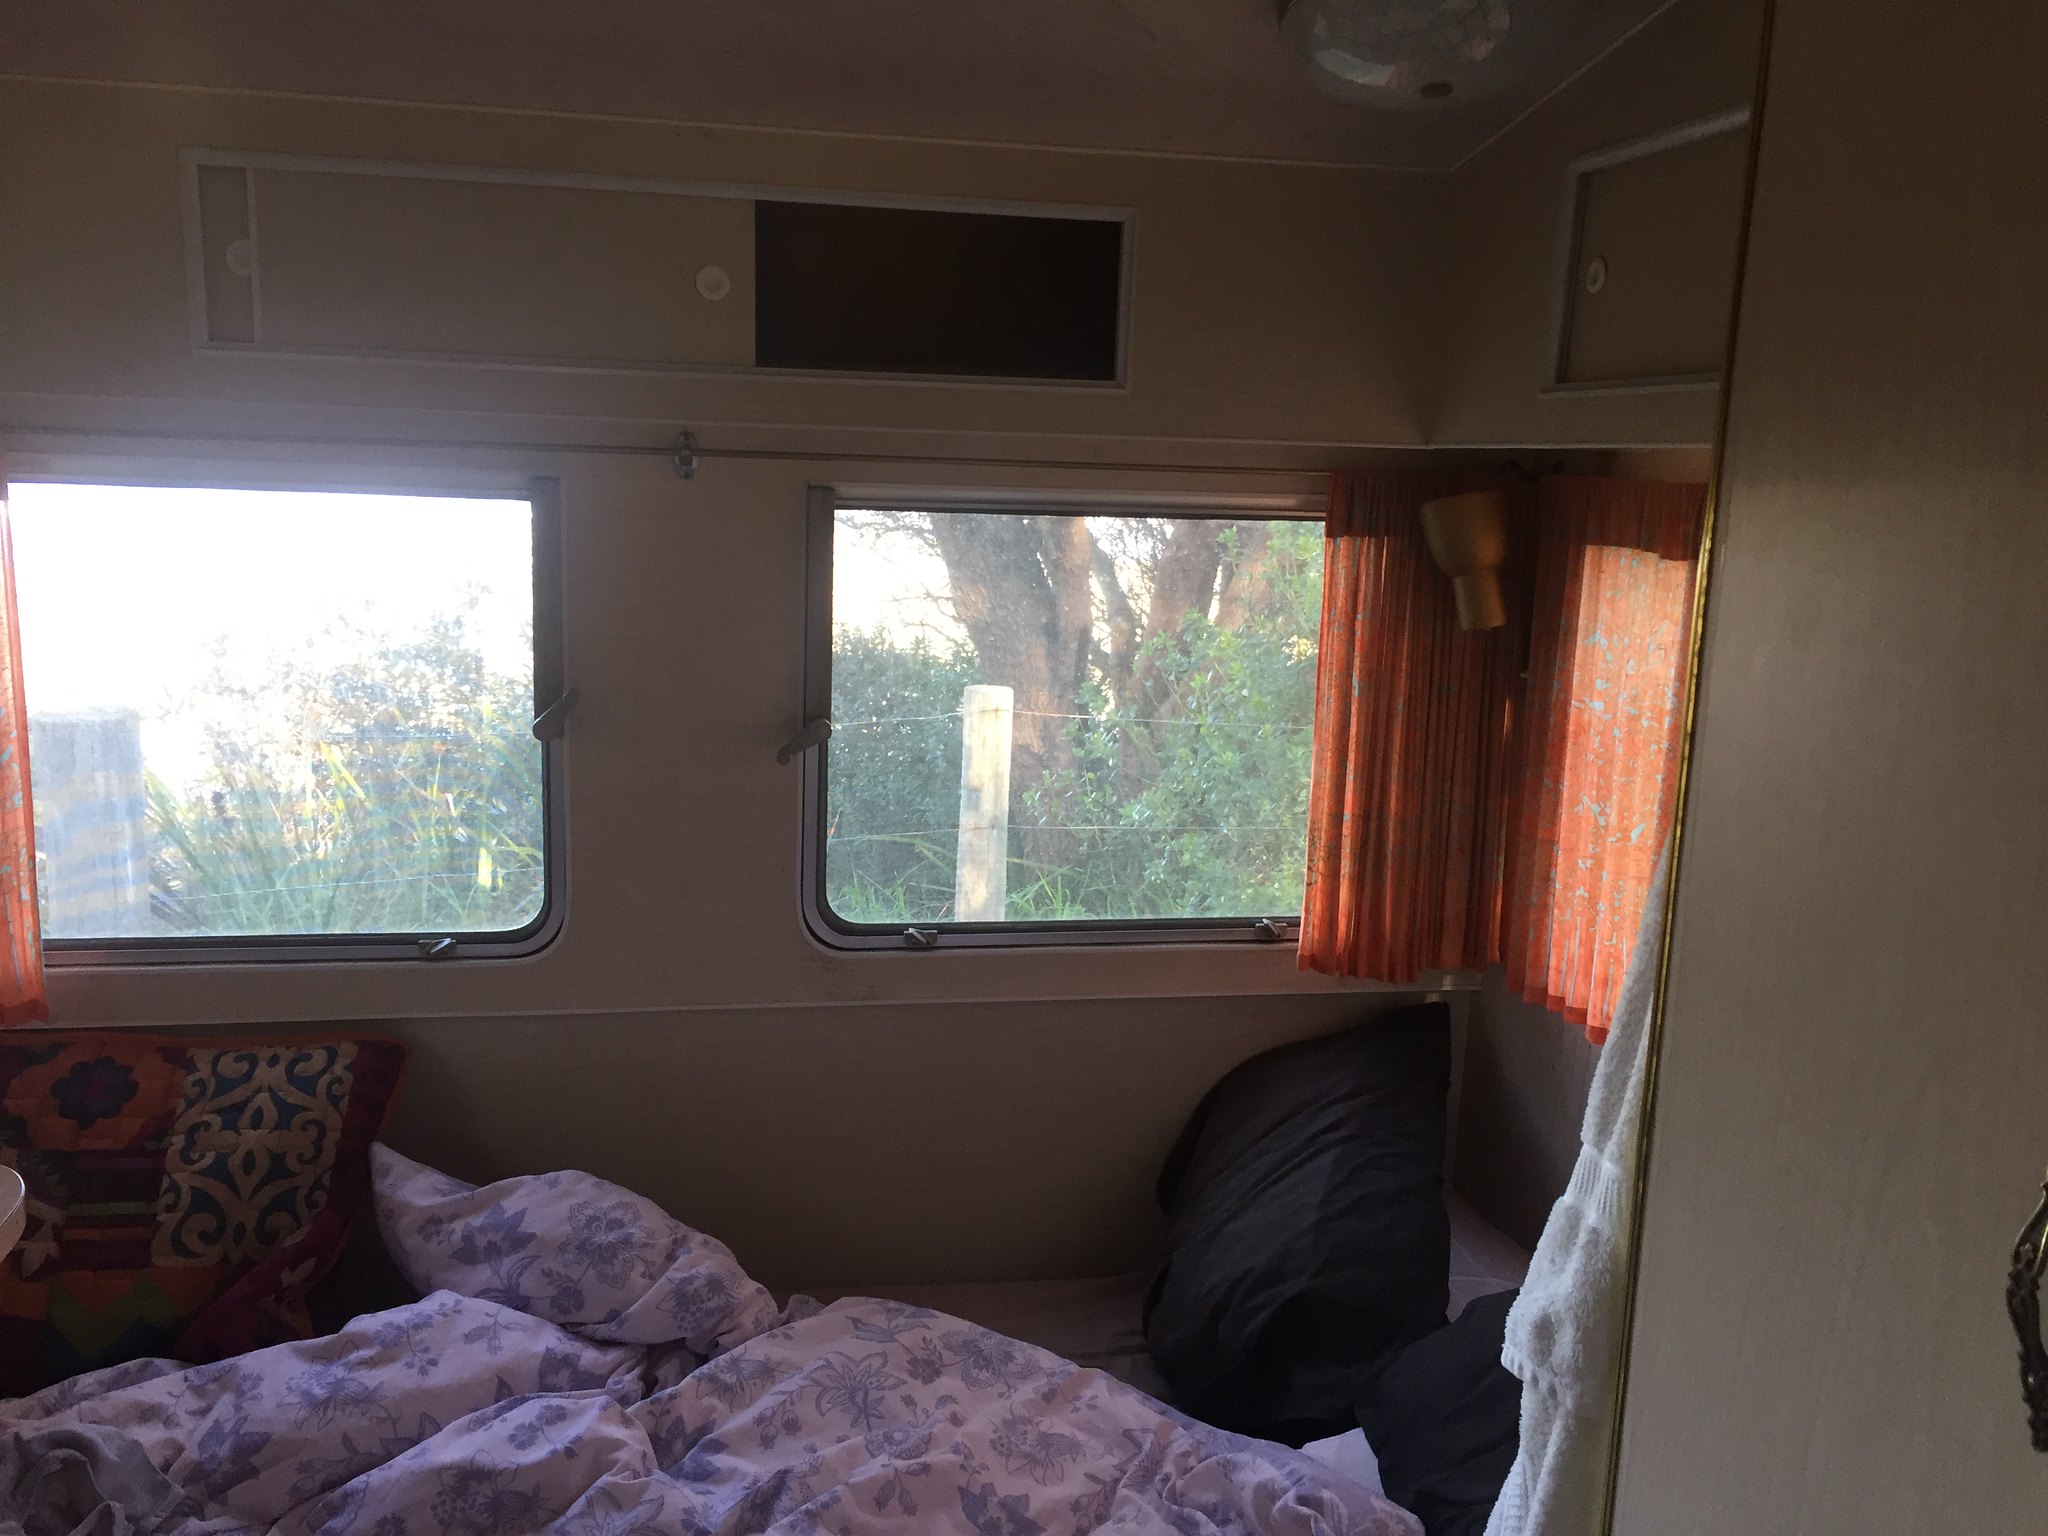 Untitled Untitled by Gavin Gregory, on Flickr 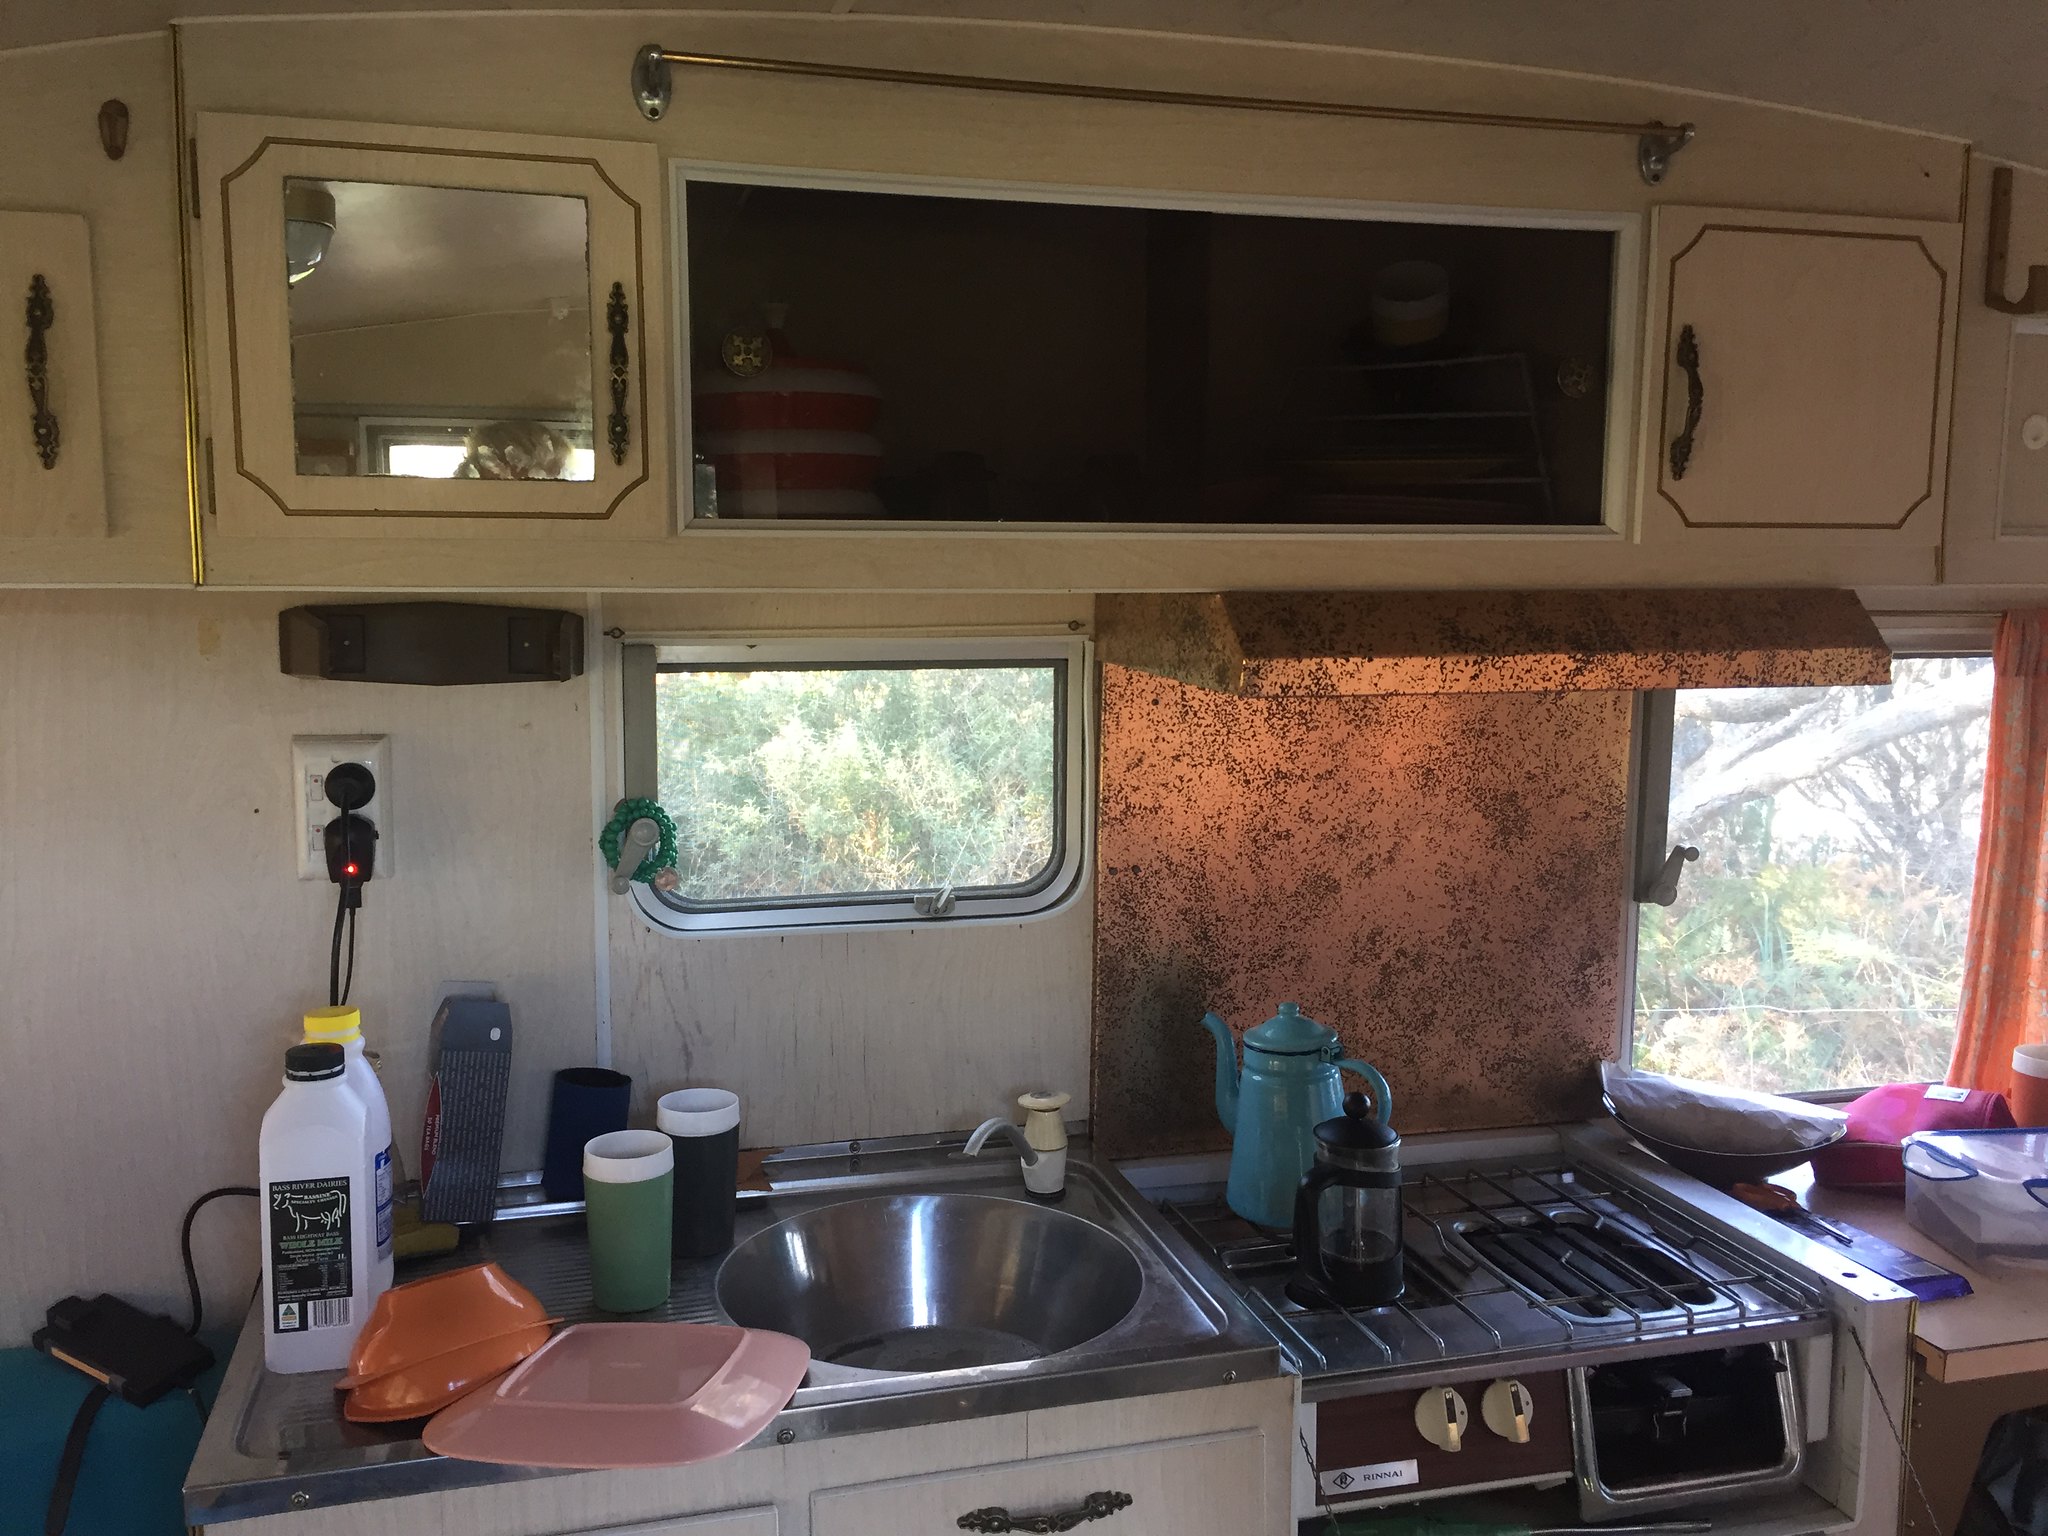 Untitled Untitled by Gavin Gregory, on Flickr |
|
|
|
Post by Husky on Apr 28, 2018 19:12:17 GMT 10
Looking good bud, so cant wit to get away in ours. i know the 2 weeks in Sth Aust will be here before i know it just hoping the Viscount will be ready. so dont want to tow the Scenic over there.
Looking at your van though i seriously cant wait till you get a coat of paint on it. i think it's the only thing letting it down. Enjoy your time away and catch up with you soon
|
|
|
|
Post by snoops on Apr 28, 2018 21:38:08 GMT 10
Yeah, looks pretty shabby but will be a long way off paint yet I fear. Until the interior is finished and I get all the J moulds resealed and windows done, I won’t get to exterior paint.
|
|
|
|
Post by atefooterz on Apr 29, 2018 14:46:17 GMT 10
Yeah, looks pretty shabby but will be a long way off paint yet I fear. Until the interior is finished and I get all the J moulds resealed and windows done, I won’t get to exterior paint. A note to any lurkers & or renovators, if your treasure is registered never be shy travelling and really finding out the priorities, on the tick list! Nothing worse than a year or more creating the perfect dream and then life gets in the way keeping you close to home & not adventuring. I have met up with more than one couple who ended up getting a great spray job from panelbeater and another via a panelbeater mate, who could not stand to look at the "aged process" then given quotes and time frames, that made a lot of sence. #spraybooth #matesrates Such is the interest of folks seeing what you are doing inside plus mechanically. Hint if the time consuming prep work is done, no flaking / powdery paint is an issue so a quick highbuild- primer then top coats plus gloss can go on, then it makes it appertising for those who create smooth shiney bling. |
|
|
|
Post by snoops on Apr 29, 2018 15:58:01 GMT 10
Yes, same as the Franklin, this renovation will happen as it can between trips so paint will almost certainly be the very last thing done. This trip has turned up a few things that need attending to quickly. Given that the weather is cooling down and it getting dark early, I found I need at least 3 reading lamps installing to allow comfortable reading in the evenings and we’ve decided the single beds are no go for us so need to install a double now - quite a big job and need to have this done in the next 5 weeks before we head out again. 😊
|
|
|
|
Post by Rattles on Apr 29, 2018 16:49:44 GMT 10
Spoops - If it was me painting, I would paint before the J moulds were installed so as to provide a smooth clean surface for the sealer to bond to.
Rattles
|
|
|
|
Post by snoops on Apr 29, 2018 20:58:51 GMT 10
Yeah, I get what you’re saying but once the J moulds are off, I clean the siding back to bare aluminium then use high quality PU to resell them - made the Franklin tight as a drum. If I have to paint after I’ve got the J moulds off I’d have to do the entire van in almost one hit which is basically impossible. Will do the moulds as I have time and paint after that. Maybe not ideal but it will work like I need it to.
|
|
|
|
Post by snoops on May 5, 2018 11:02:28 GMT 10
Ok, after a couple of decent trips under its belt, the biggest change is about to happen - as it turns out, single beds aren't for us, so they are coming out and a double going in. Not going to get greedy and try and fit a queen, there just isn't room. A double worked fine in the Franklin even with the Pugs. Plan is to carefully remove the 2 singles - I will be reusing almost all of the materials I'm about to remove and want to make it look as factory as possible at the end. Will be an island bed but as you'll see there will be a couple of small compromises but nothing we won't be able to live with. So, onwards.... Before.  Untitled Untitled by Gavin Gregory, on Flickr |
|
|
|
Post by snoops on May 5, 2018 14:56:45 GMT 10
Ok then - that was easier than I thought... Pulled everything out.  Untitled Untitled by Gavin Gregory, on Flickr Swapped the beds left to right. You can also see below how I've cut the cupboard in half and swapped that left to right as well. It's just sitting there to see how it would all fit. 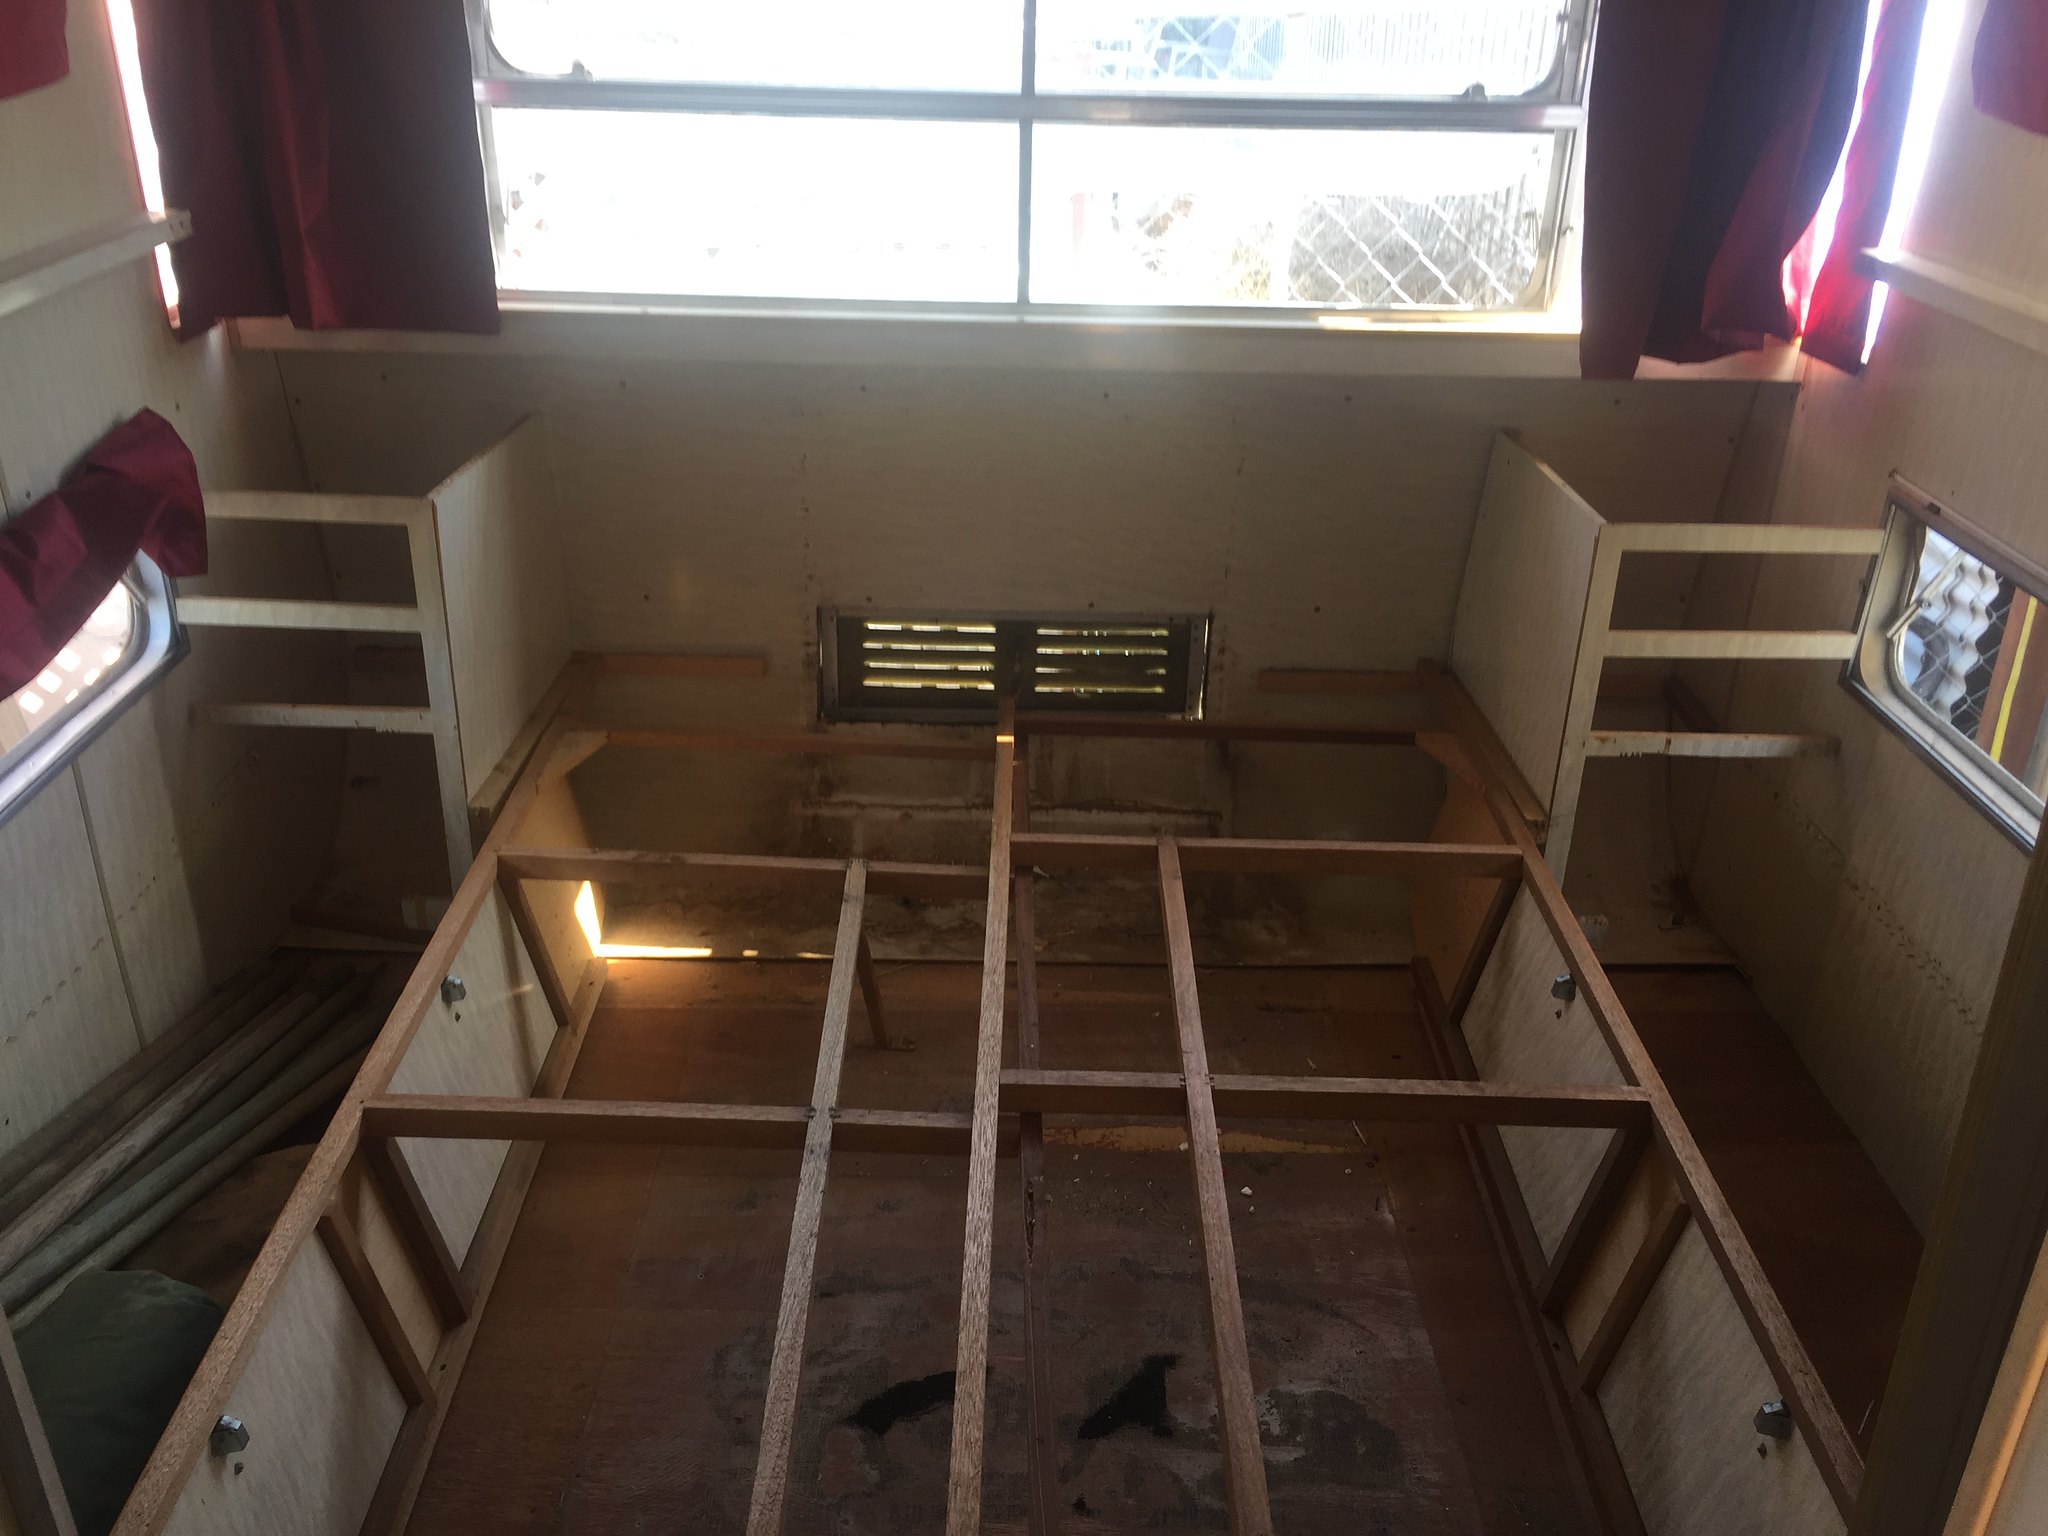 Untitled Untitled by Gavin Gregory, on Flickr And all screwed down again, ready to go. Looks a bit crappy as I've overlapped the ply rather that cut it down but this was both easier and made the resulting structure stronger. When the matress is down, you won't see it. 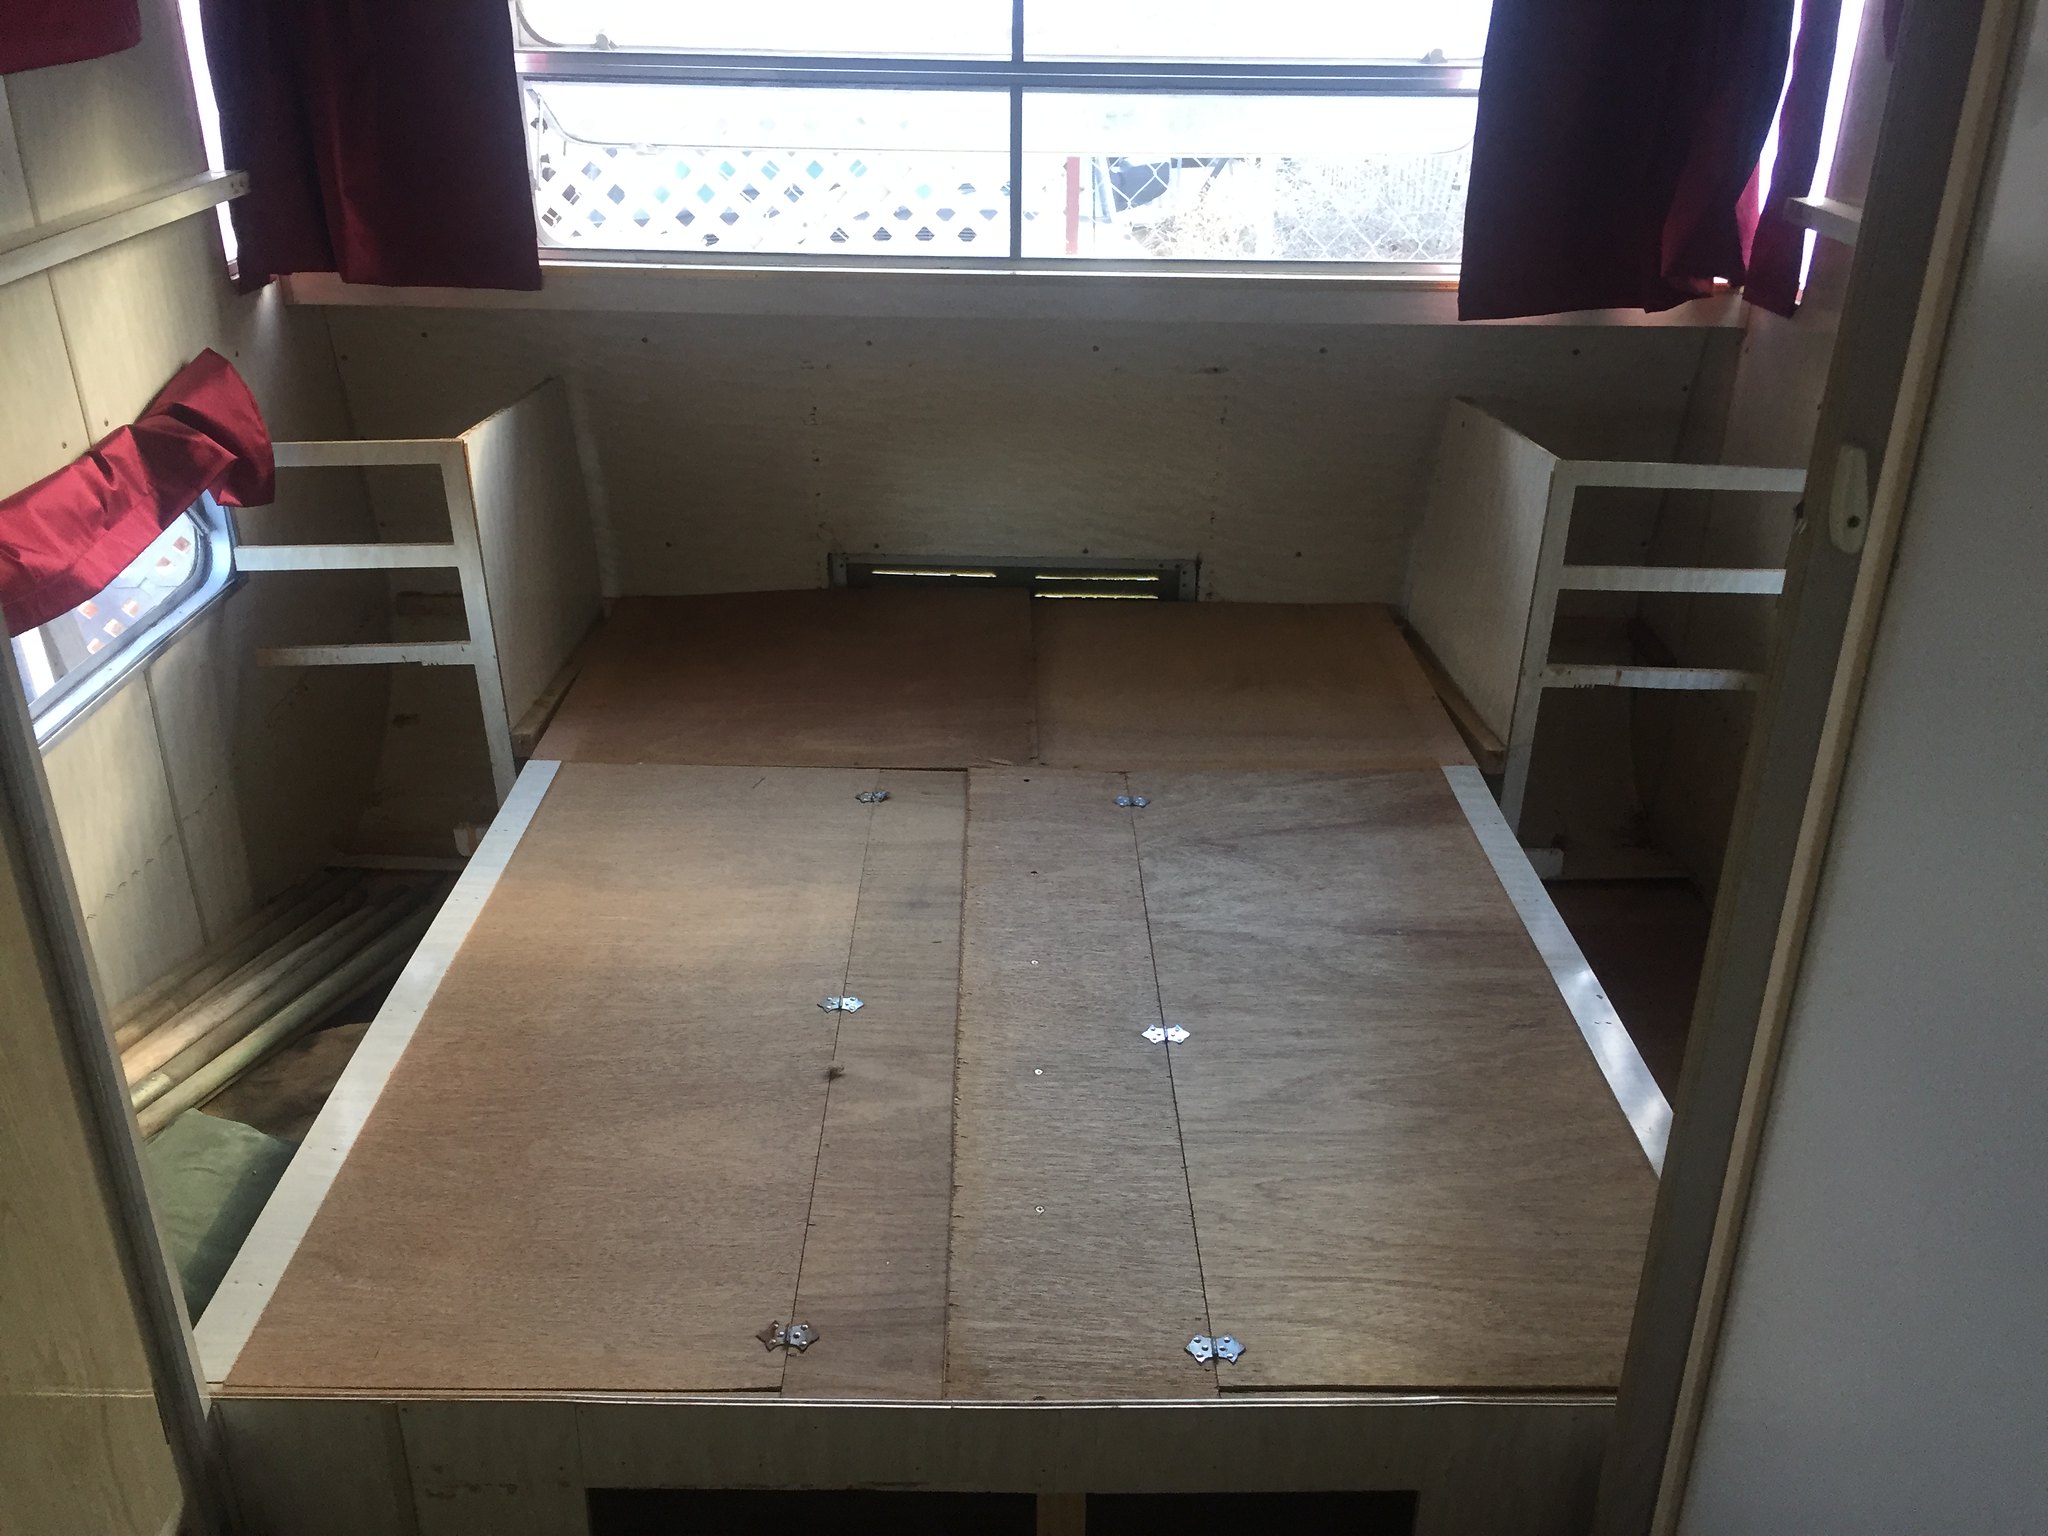 Untitled Untitled by Gavin Gregory, on Flickr I'll start on the cupboards tomorrow and tidying up the staples that are sticking out everywhere. Going to make up a new padded bedhead that folds out at the bottom to allow the bed to be used as a day bed - more to come on that. Nothing stopping me putting the mattress in and heading out again! Not bad for 4 hours work. 👍😊 |
|
|
|
Post by Mustang on May 7, 2018 18:22:39 GMT 10
AMAZING!!!!!!!!!!!!!!!!!!!
That rear vent may need attention?
|
|
|
|
Post by snoops on May 7, 2018 18:55:59 GMT 10
Thanks. Yes, the vent will go somehow - it was for the AC unit I removed. Could be a bit chilly leaving it there all Winter. 😁
|
|
|
|
Post by snoops on May 13, 2018 15:56:15 GMT 10
Got one side cupboard finished. Lots of stuffing around cutting the old bits down but worth it. I did make a big stuff up cutting the top - I made a pattern up - that ended up a bit small by the time I trimmed it all down. I knew I needed to add 10mm to each edge that was showing. A mate showed up for a cuppa before I cut the top and and you guessed it, when I got back to it, I just used the template and didn't add the 10mm. 😩 Had to use the black quad to cover the gap - same stuff as runs all around the floor so not too out of place but not what I had in mind. Bottom opening will stay open for shoe storage, etc. Have some trims to fix around the opening once the glue has dried on the last bit of trim that the clamps are holding on, but that's another day... 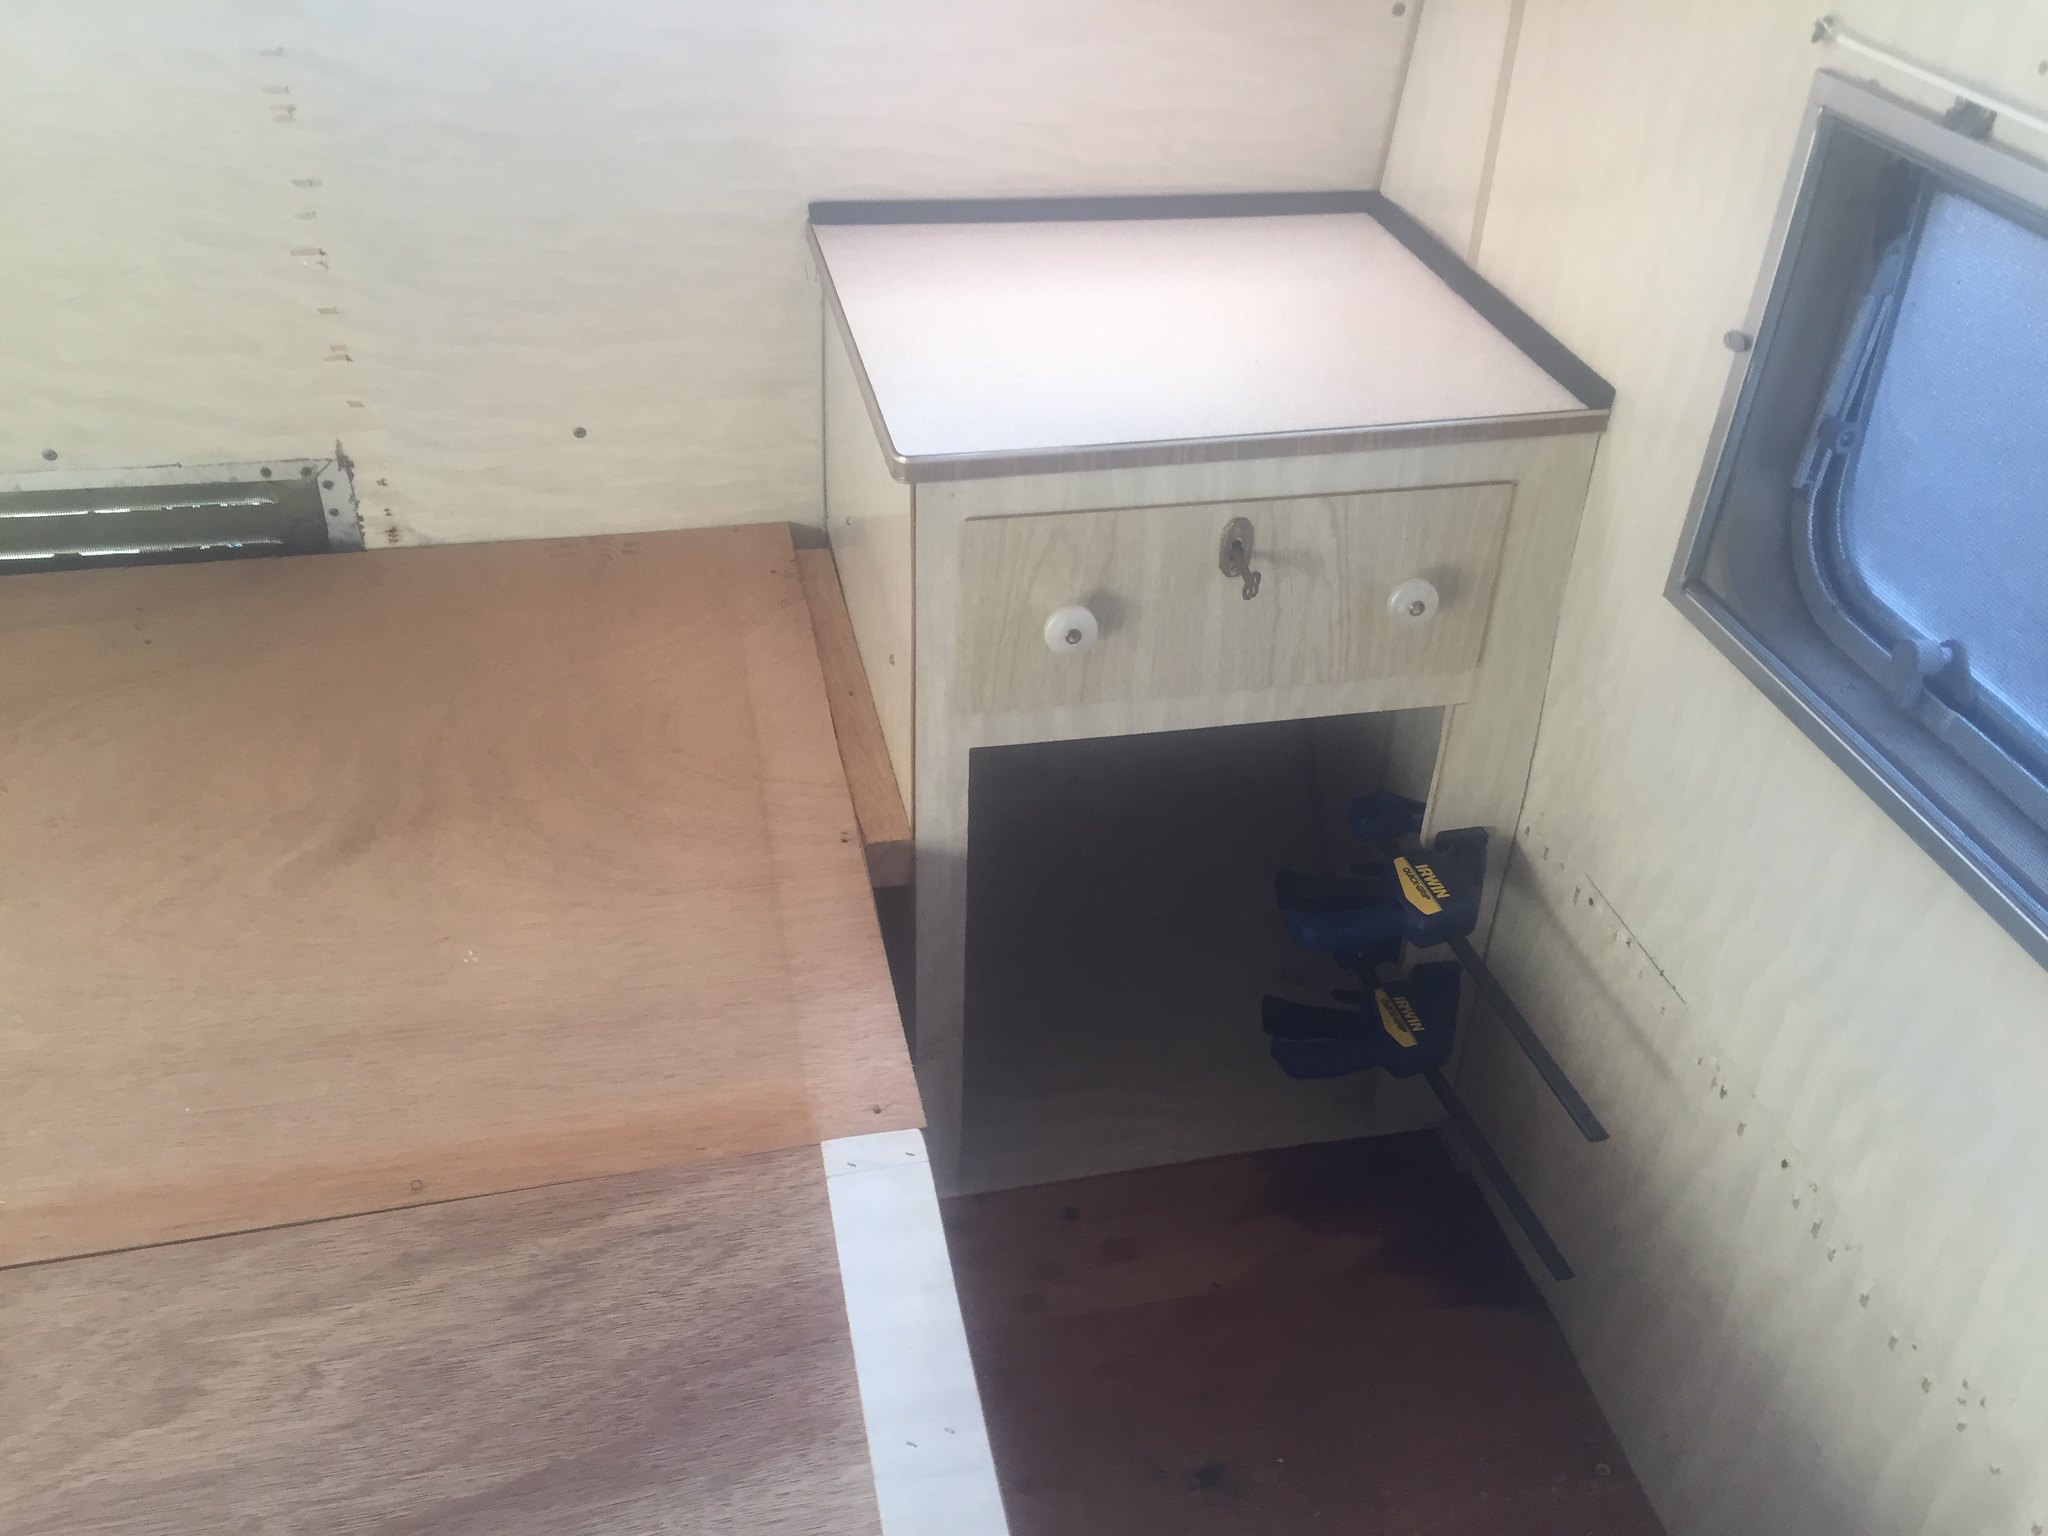 Untitled Untitled by Gavin Gregory, on Flickr |
|
|
|
Post by Mustang on May 13, 2018 18:27:03 GMT 10
Our cupboards front & back were buggered, I,m so glad we restored them, they really set the period.
|
|
|
|
Post by snoops on May 13, 2018 19:15:51 GMT 10
Yeah, I want this to look like the double bed was always supposed to be there. Time will tell if I get it right. I still need a few bits and pieces to finish the pther side, and some nice anodised reading lamps too - I'm on the hunt for a good matching pair.
|
|
|
|
Post by tasmillard on May 14, 2018 7:48:42 GMT 10
Just having a laugh... isnt it amazing how theres always something to do with our old vans. Tweaking here and there, refining and truly making it unique and fit for purpose. With all the experience it gets easier and quicker to do mods.
|
|
|
|
Post by snoops on May 16, 2018 19:39:15 GMT 10
So, a little side project this afternoon. Bought an anodised lamp off Gumtree - I'm still after a matching pair for the bedside lamps, but also needed one up the front as well and this one fitted the bill well. As per the pic below it is a very good quality unit, brass knobs at the ends and high quality castings for the arms. Not exactly a colour I couud live with though.  Untitled Untitled by Gavin Gregory, on Flickr So, after Murray posted about some anodised look paint off I trotted to pick up a can. After some disassembly.  Untitled Untitled by Gavin Gregory, on Flickr Polished the end knobs - turned from solid brass.  Untitled Untitled by Gavin Gregory, on Flickr The arms are plated good quality die castings so had to be carefully cleaned so I didn't remove the plating. Cleaned the gunk off them with some metho, then a light buff with a greenie. Sanded the anodising off with 400 wet sanded then polished a bit more with 800 wet sanded. All the scratch marks were kept in one direction as the coating is transparent. 3 coates later, drying each in the oven at 50 degrees between coats, it is now all reassembled. To say I'm happy is a bit of an understatement - it looks fabulous. Will be fitting 12 volt globes and hardwiring it in somewhere at some stage.  Untitled Untitled by Gavin Gregory, on Flickr 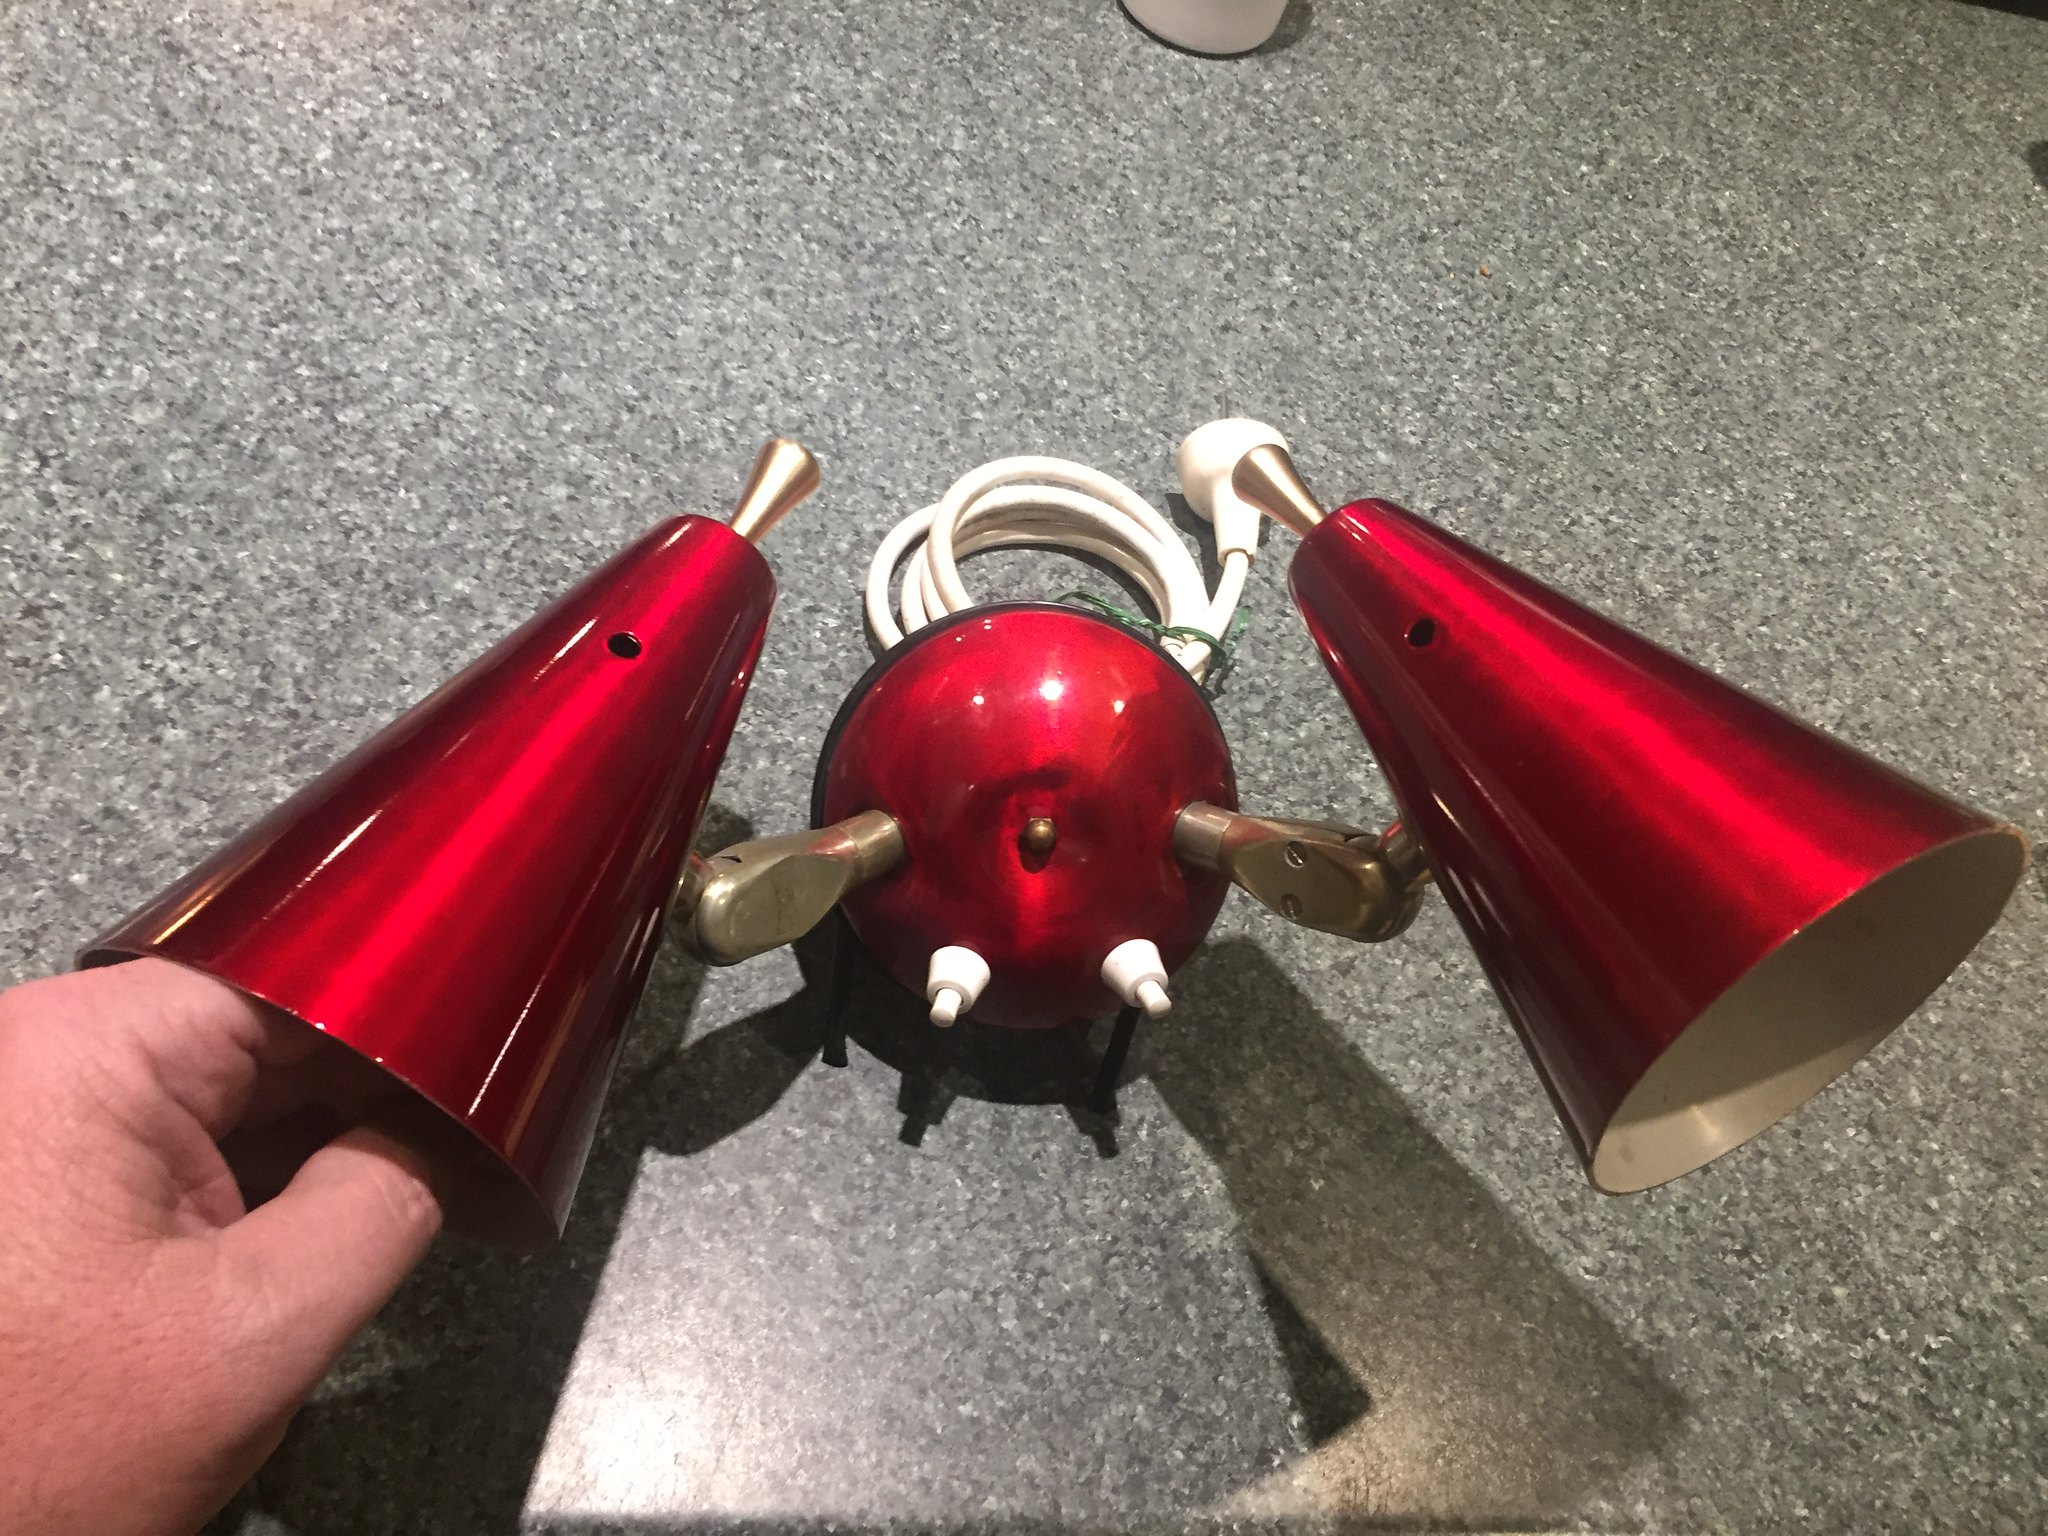 Untitled Untitled by Gavin Gregory, on Flickr Pretty good for a few hours work this arvo. 👍😊 |
|
|
|
Post by 78466noM on May 17, 2018 9:18:07 GMT 10
That looks excellent and so much easier for you to make the pair you get look like part of the set  |
|
|
|
Post by 78466noM on May 17, 2018 10:11:06 GMT 10
That looks excellent and so much easier for you to make the pair you get look like part of the set
|
|
|
|
Post by pisces51 on May 17, 2018 21:47:07 GMT 10
I gotta hand it to ya snoops...within a mere 4 days you've gone from asking for the lights, to buying them, to restoring them! That would have to be something of a record for a job like this!!  I usually take 4 days or more just THINKING about what I'm gonna do!  Congratulations on a truly magnificent result. cheers, Al. |
|