|
|
Post by snoops on Nov 22, 2018 14:08:07 GMT 10
Well, getting a bit done at the moment. Some things have changed and I've been changing the weight of a few items. I'll be using the van over Christmas/New Years and I'll have access to power, so I've stuck my small portable AC unit in it (26.5Kg). The 4 batteries I have in it are overkill, so I have removed 2 of these (31Kg each) The old inner spring mattress I had in there (35Kg) has gone and I've put a new Koala foam mattress in (24.5Kg) So even with the AC in there, It's now over 45Kg lighter than it was and the weight is better balanced as the AC is directly opposite the battery bank over the axles. Have the front axle out at the moment as it needs some TLC and as the axle U bolts needed replacing anyway, it was just as easy to pull out to do the mods and repairs to. Pics to come.  |
|
|
|
Post by snoops on Dec 16, 2018 8:13:23 GMT 10
Ok, so I’ve finally got the brakes sorted. Found it wasn’t an adjustment issue, but the drum was rubbing in one spot on the backing plate. The mounting plate I welded on wasn’t quite central - not my fault really as the plate was laser cut and was a snug fit over the axle, but being just a mm off centre caused the issue. A lick with a flap disc on the grinder sorted this out.
All back together and a 300km run down to the in-laws and it was good as gold. Got proper trailer brakes and no overheating. Ran the van across the weighbridge on the way down - didn’t disconnect it, but the axles came in at 1440kg with the AC, all the batteries (put the 2 I took out back in as I may not have power over Christmas like I thought. The AC will be a paperweight if this happens but having an each way bet). I know the hitch weight is around 150kg, so all in just under 1600kg - well under my GTM.
New mattress is awesome, I slept very well too. 👍
It will sit at the in-laws this week and I’ll pick it up on the way to Mums next weekend - only a 150km jump for it then.
Hopefully when I get home in the new year I’ll make a start on the exterior. All the other faffing about I needed to do is done now, so can concentrate a bit of time on the Viscount again. Although I did find an old 70’s Jag XJ6 I like the look of the other day.... 😉
|
|
|
|
Post by Mustang on Dec 16, 2018 18:18:46 GMT 10
1600 kg is great, ours went 1360kg fully loaded (about 1200) normal.
|
|
|
|
Post by Husky on Dec 23, 2018 20:08:33 GMT 10
i'm curious to find out what mine will weigh fully loaded for a trip with dogs, business stuff, clothing and Food. so long as i come in under 350 ball weight i can play with the rest.
|
|
|
|
Post by snoops on Dec 29, 2018 19:28:06 GMT 10
Well decided I’m going to get stuck into the exterior now. Currently at Mums with the van, but heading to the in-laws tomorrow for a few days and will leave the van at their place for a bit - sounds back to front but I always get more done on it there than at home as I have nothing better to do there - it’s only a few hours away from home so can nip down any weekend I have free which will probably be every third weekend. Have 4 days there coming up so see what I get done.
Played around with some 1200 grit wet and dry today on the worst of the corrosion on the window frames followed by some polishing with some fine steel wool - came up pretty well. Will take a window out tomorrow and completely go over it and keep going like that until I have them all done and the J moulds polished. Then I’ll prep, prime and paint it - aiming for at least some of this to be complete by March when I head out in it for a week. 👍
Will post some before and after pics tomorrow.
|
|
|
|
Post by snoops on Dec 30, 2018 16:47:45 GMT 10
Well have struck a snag but not a show stopper. Thought I’d pull a window out today to clean and polish it - but they won’t come out... The frame that is - tried several different ones (not the ends though), the mastic is still softish after nearly 50 years and they are stuck fast. I would damage the cladding trying to remove them, so pulled the sash out and polished the frame in situ. The sash’s have some corrosion on them so starting with some wet and dry and working down to some fine steel wool bought them up fine. It isn’t highly polished like some others here are, but it does look good. Measured up the glass while I had everything apart and will have tinted acrylic cut for them shortly. The wrap around ends will present some issues when I go to do this - my acrylic supplier says he can make them no dramas, but hasn’t given me a price yet. Thinking I may be able to make a form up to heat and bend these over - will see. I have a lot of windows to clean sand and polish in the meantime, so not too pressing.
I may try and get an end window at the back out tomorrow with the 2 wrap arounds as the bit of timber that makes up the sill needs replacing. The FIL place is ideal for this as he has a very well kitted out woodbworking shop.
Will see what tomorrow brings.
|
|
|
|
Post by Mustang on Dec 31, 2018 7:02:27 GMT 10
Hi Snoops, The plastic trim inside is riveted (in ours anyway) some of the rivets may need drilling out as they can hold the window frame to the wall frame. If they havn't been silly-coned then once the external screws are removed, there shouldn't be anything else holding them. With the two double windows front & rear there are wooden uprights between the corner wrap arounds. I removed the J moulding first to remove the corner windows, I was removing every thing front & rear anyway as it rotten.  |
|
|
|
Post by snoops on Dec 31, 2018 9:36:06 GMT 10
Thanks mate. No silly cone thankfully anywhere on this van. 😁👍
Didn't think about the rivera holding the interior trim - that all needs to come out anyway as the UV has wrecked it all. Will have a go at that. 👍
The end windows look easier (famous last words...) so see what I find there.
|
|
|
|
Post by Mustang on Jan 1, 2019 15:31:55 GMT 10
Thanks mate. No silly cone thankfully anywhere on this van. 😁👍 Didn't think about the rivera holding the interior trim - that all needs to come out anyway as the UV has wrecked it all. Will have a go at that. 👍 The end windows look easier (famous last words...) so see what I find there. Caravans Plus have the replacement trim in white. |
|
|
|
Post by snoops on Jan 1, 2019 18:06:32 GMT 10
You’re a gun mate - 2 problems solved. 👍
|
|
|
|
Post by snoops on Jan 1, 2019 18:10:25 GMT 10
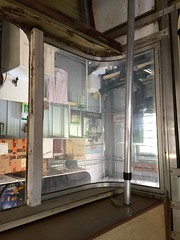
So, removed all the back windows today and replaced the bottom timber as it was stuffed. Had to go from sealed up to back together by tonight as I’m still out staying in the van at the in-laws place. 😁. Didn’t fancy having no windows in tonight so managed to get them all out, one frame cleaned and polished, new timber cut, thicknessed and installed, then all the windows back in - no sealant or anything, they’ll all come out again in a couple of weeks when I’m next down with some new acrylic and mastic.  Untitled Untitled by Gavin Gregory, on Flickr  Untitled Untitled by Gavin Gregory, on Flickr And the polished window next to one not yet done - not perfect but looks great and will do me once they all look like this. 👍. This is certainly a job that would sort out the men from the boys (or women from the girls because I know Shelley is doing this to hers right now too) 👍  Untitled Untitled by Gavin Gregory, on Flickr |
|
|
|
Post by twocutekelpies on Jan 1, 2019 20:56:17 GMT 10
Looking good too Snoops  I gave up on the polish, after I did the Viscount and found it didn't last very long, I opted for painting the York frames in fake aluminium.  Bloody slotted screws did my head in though  Cheers Shelley |
|
|
|
Post by snoops on Jan 5, 2019 11:10:28 GMT 10
Yeah, the slotted screws are a one way trip on mine. I know some hate the looks of Phillips head screws because ‘they aren’t original’ but I used stainless Phillips head screws in the Franklin and will do so again on the Viscount - I still have a couple of hundred left anyway. Easy to use, stay looking good for years - win/win.
I’ll have a pile of the original slotted heads if someone wants them for originality sake. 😉
|
|
|
|
Post by pisces51 on Jan 5, 2019 13:22:23 GMT 10
G'day snoops,
If nobody else needs the old screws desperately, I'll certainly take them off your hands if they become 'surplus to requirements'. I'm always on the lookout for slot-head screws, so let me know down the track if they're not required and I'll arrange to take them.
cheers, Al.
|
|
|
|
Post by snoops on Jan 5, 2019 17:12:02 GMT 10
I’ll put them aside for you Al. Will be a while before I’m all done but should be a couple of hundred all in. Once I have a big pile, I’ll get your address and post them to you. 👍
|
|
|
|
Post by bogwot on Jan 6, 2019 6:12:25 GMT 10
Well have struck a snag but not a show stopper. Thought I’d pull a window out today to clean and polish it - but they won’t come out... The frame that is - tried several different ones (not the ends though), the mastic is still softish after nearly 50 years and they are stuck fast. I would damage the cladding trying to remove them, so pulled the sash out and polished the frame in situ. The sash’s have some corrosion on them so starting with some wet and dry and working down to some fine steel wool bought them up fine. It isn’t highly polished like some others here are, but it does look good. Measured up the glass while I had everything apart and will have tinted acrylic cut for them shortly. The wrap around ends will present some issues when I go to do this - my acrylic supplier says he can make them no dramas, but hasn’t given me a price yet. Thinking I may be able to make a form up to heat and bend these over - will see. I have a lot of windows to clean sand and polish in the meantime, so not too pressing. I may try and get an end window at the back out tomorrow with the 2 wrap arounds as the bit of timber that makes up the sill needs replacing. The FIL place is ideal for this as he has a very well kitted out woodbworking shop. Will see what tomorrow brings. I have just finished removing and replacing the timber window plates (top and bottom). Information for those thinking about doing this: The timber is around 14mm thick top and bottom plates. I have also found that if you are having difficulty finding curved windows, try painting the inside. I did our van black and the one we are doing up now, white. Works like a charm and looks great. |
|
|
|
Post by snoops on Jan 6, 2019 9:45:17 GMT 10
Well have struck a snag but not a show stopper. Thought I’d pull a window out today to clean and polish it - but they won’t come out... The frame that is - tried several different ones (not the ends though), the mastic is still softish after nearly 50 years and they are stuck fast. I would damage the cladding trying to remove them, so pulled the sash out and polished the frame in situ. The sash’s have some corrosion on them so starting with some wet and dry and working down to some fine steel wool bought them up fine. It isn’t highly polished like some others here are, but it does look good. Measured up the glass while I had everything apart and will have tinted acrylic cut for them shortly. The wrap around ends will present some issues when I go to do this - my acrylic supplier says he can make them no dramas, but hasn’t given me a price yet. Thinking I may be able to make a form up to heat and bend these over - will see. I have a lot of windows to clean sand and polish in the meantime, so not too pressing. I may try and get an end window at the back out tomorrow with the 2 wrap arounds as the bit of timber that makes up the sill needs replacing. The FIL place is ideal for this as he has a very well kitted out woodbworking shop. Will see what tomorrow brings. I have just finished removing and replacing the timber window plates (top and bottom). Information for those thinking about doing this: The timber is around 14mm thick top and bottom plates. I have also found that if you are having difficulty finding curved windows, try painting the inside. I did our van black and the one we are doing up now, white. Works like a charm and looks great. Yeah, just did the back window and curved panels. These came out ok. I thicknessed the bit of timber I had down to 1/2” and that worked out fine. It’s the side windows that are stuck, but I haven’t tried again since moving to the back. Won’t be back on the van until the long weekend now - it’s still at the in-laws place. |
|
|
|
Post by Husky on Jan 10, 2019 18:43:06 GMT 10
i have a number of surplus corner windows from vans I've stripped Snoops so if you after a couple to have a play with let me know and I'll add them to your pile of bits up here. There are also a couple of frames only as the original perspex was shattered.
Good to see you back into it. I've hit a major snag with mine and haven't touched it since Xmas eve. It's called a mother and four new born pups surrendered to a rescue in horrid condition that the misses and i volunteer for so until they can go outside I'm stuck doing office work for the business. needless to say my deadline is totally blown.
Have fun
|
|
|
|
Post by snoops on Jan 11, 2019 15:03:28 GMT 10
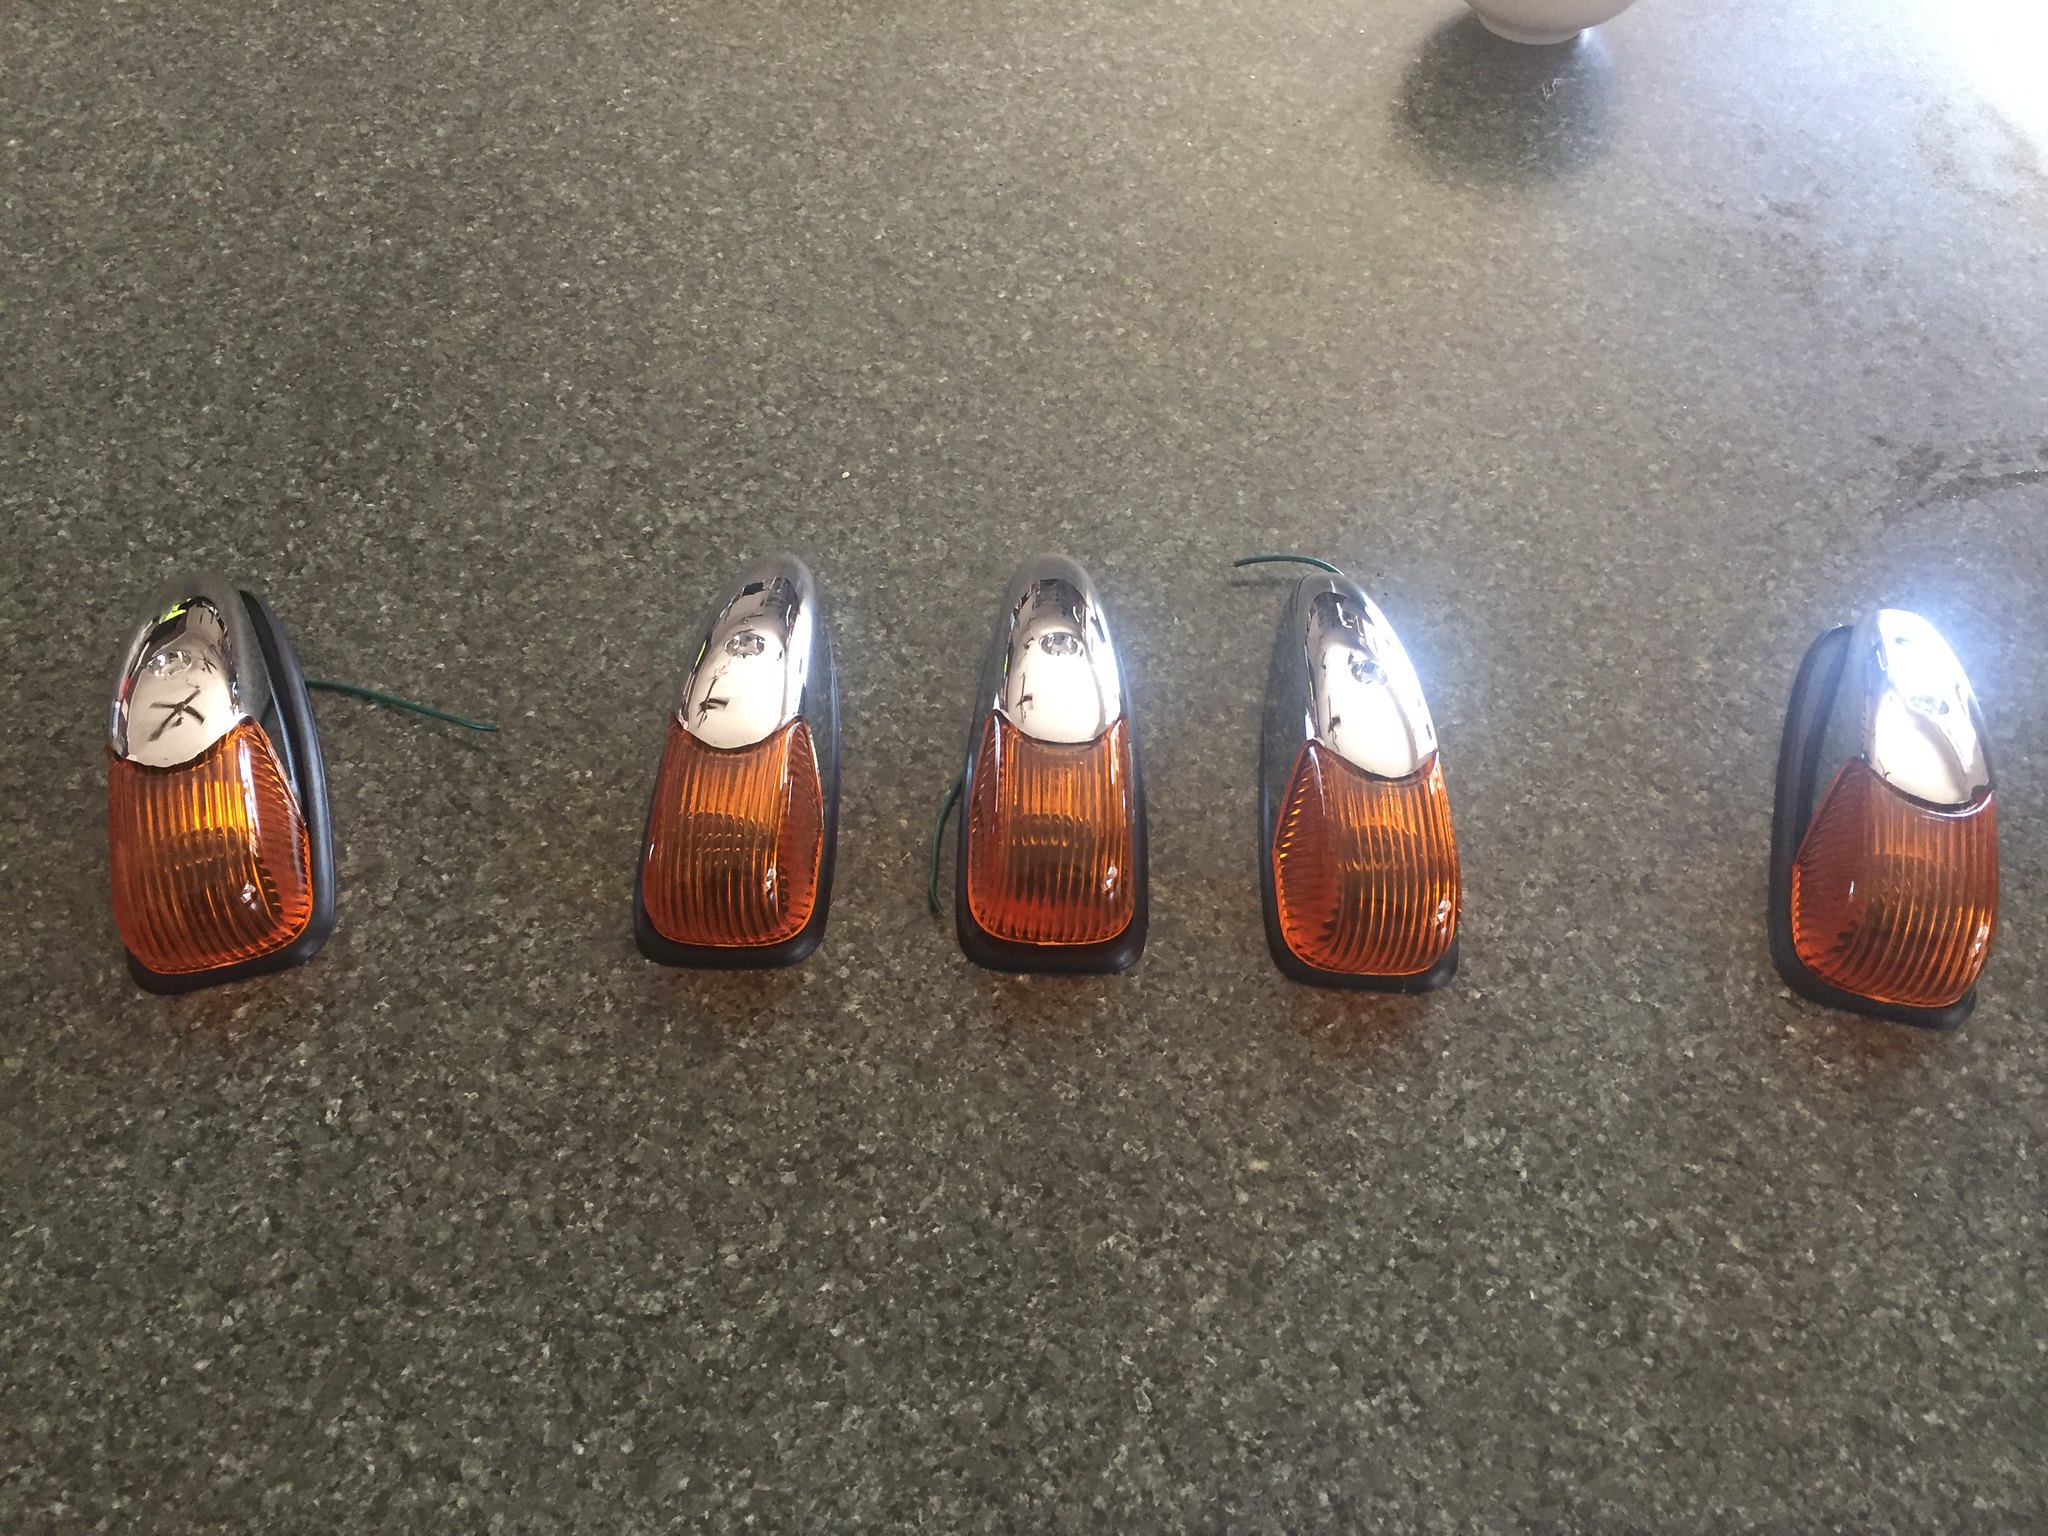
Ok, so maybe I'm getting a bit carried away given I haven't painted the van yet, but while ordering some other parts from Vintage Caravan Spares, I got a rush of blood and ordered 5 clearance lights I'm going to mount across the front. Not original I know, but should look pretty good and are period correct. And it gives me something else to knock off when driving under trees....   Untitled Untitled by Gavin Gregory, on Flickr |
|
|
|
Post by snoops on Jan 19, 2019 10:23:22 GMT 10
Getting everything together for a big weekend on the van over the long weekend. Ordered all the acrylic yesterday - will be ready mid week. Very reasonable in price I think at around $300 for everything - gone a light tint which I think will look good.
Just have to make the form now to bend the curved panels - that's tomorrows job with some luck but with the Jag home now, I really just want to play with that instead...
Too many toys...
|
|
|
|
Post by bogwot on Jan 20, 2019 7:09:57 GMT 10
Getting everything together for a big weekend on the van over the long weekend. Ordered all the acrylic yesterday - will be ready mid week. Very reasonable in price I think at around $300 for everything - gone a light tint which I think will look good. Just have to make the form now to bend the curved panels - that's tomorrows job with some luck but with the Jag home now, I really just want to play with that instead... Too many toys... I will try and take a photo of the form I made. It isn't very hard. I think the important thing is to get the length right before you apply heat for the bend. Good luck |
|
|
|
Post by snoops on Jan 20, 2019 8:02:13 GMT 10
Thanks - will probably make it today - I have pattens from the 2 windows I had out traced and they match each other so will build it from those. Fingers crossed. 😊🤞
|
|
|
|
Post by snoops on Jan 26, 2019 17:48:15 GMT 10
Happy Australia Day everyone!
I spent mine working on the Viscount and now have the back windows finished. New tinted acrylic fitted including the curved bits. Will take pics tomorrow and hopefully get a few more windows sorted.
|
|
|
|
Post by snoops on Jan 27, 2019 12:31:09 GMT 10
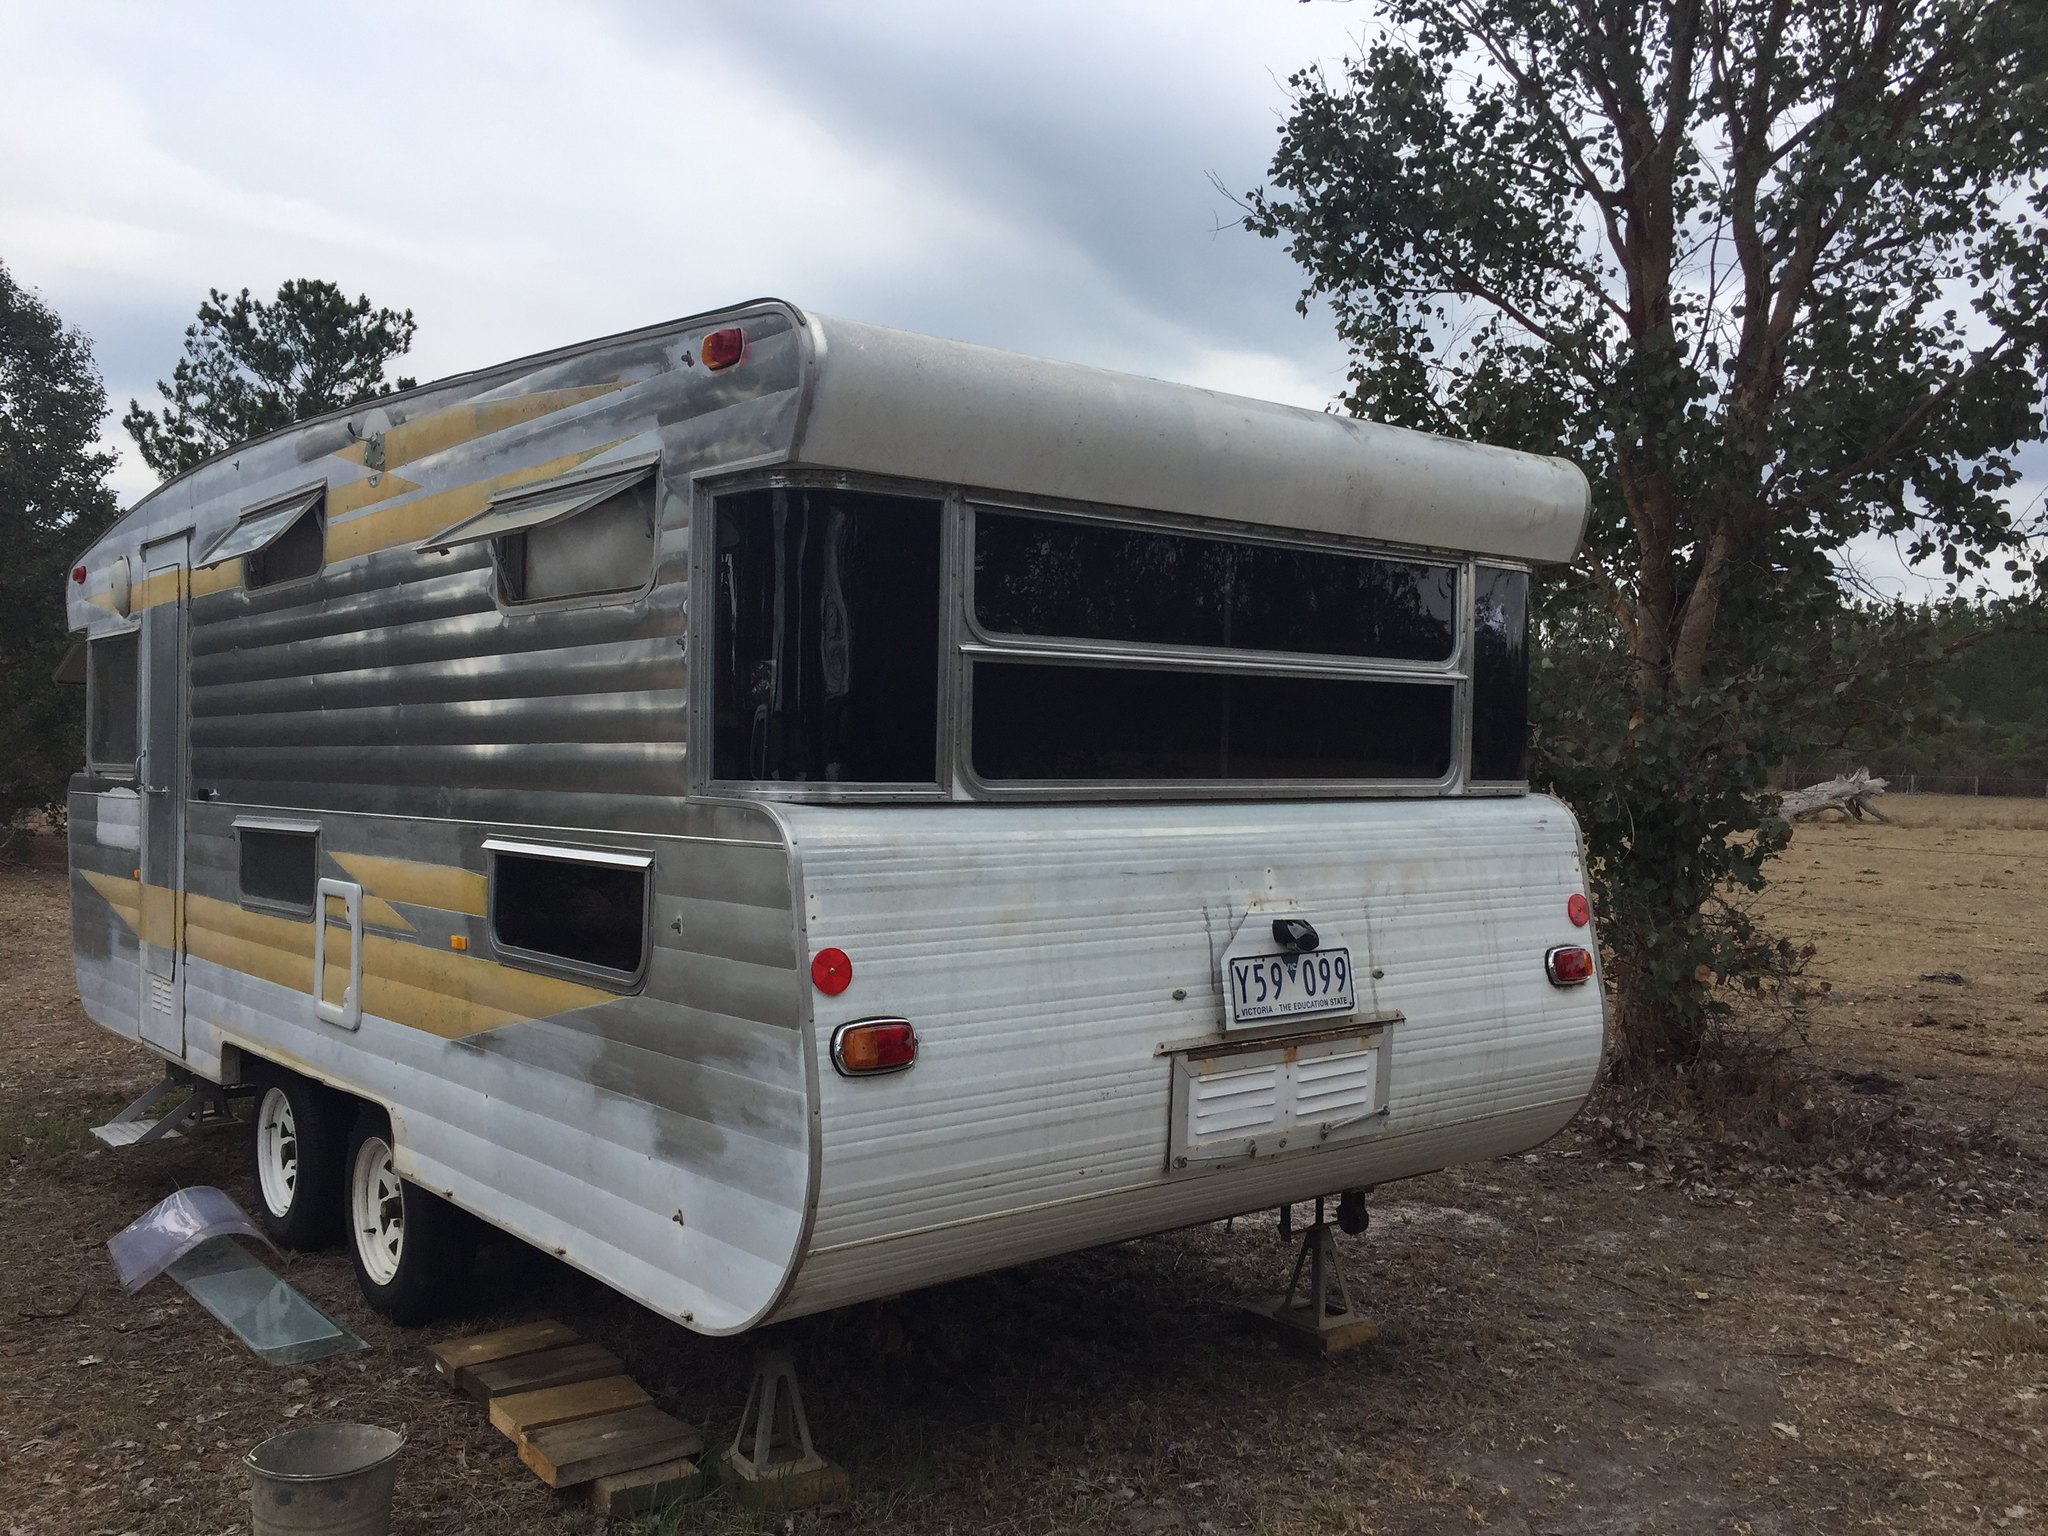
Well here’s a couple of pics. Back end all done window wise, ready for paint next time I’m here. Looks great if I do say so myself. That took a lot longer than I thought (I should know by now...) 😁 Will work around the van as I feel like it - the back is the most important bit at the moment as I’ll be taking the van back home in a few weeks and I can’t get to the back of it once it’s in the driveway, so trying to button that up while it’s at the farm.  Untitled Untitled by Gavin Gregory, on Flickr  Untitled Untitled by Gavin Gregory, on Flickr |
|
|
|
Post by snoops on Jan 27, 2019 14:07:37 GMT 10
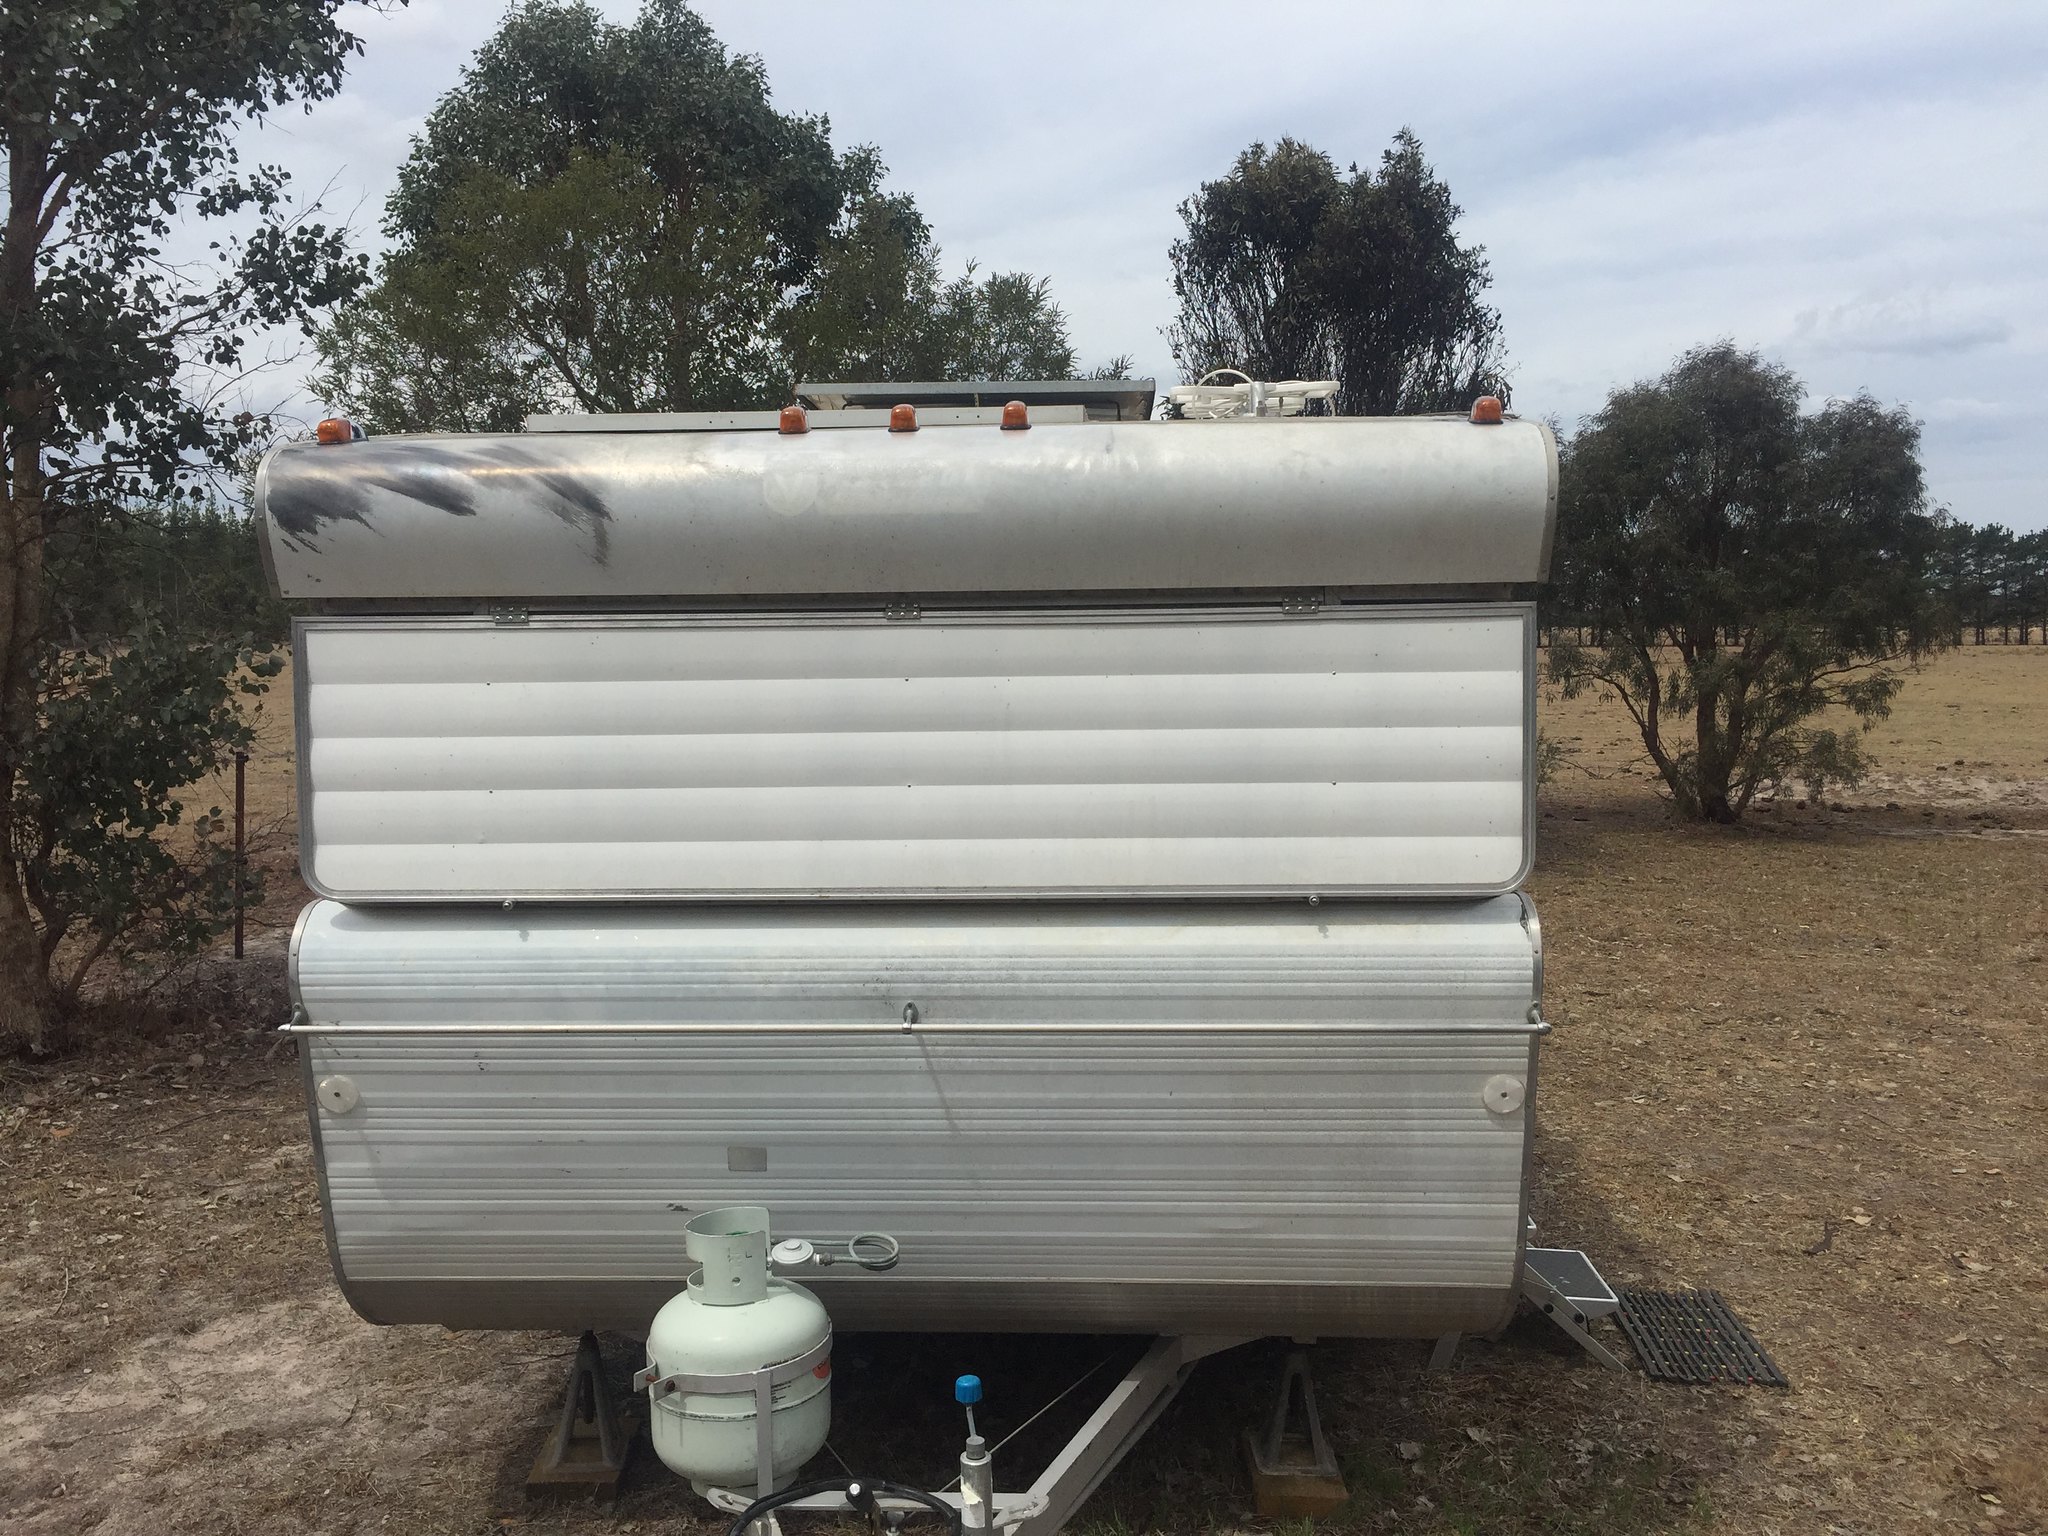
So as they say all work and no play makes Jack a dull boy... So took a break from the windows to fit the 5 clearance lights shown in a previous post. Hard to see properly on the pic but they look great IMO. Will wire them up after I’ve had an afternoon kip - the afternoon Southerly buster has just arrived which has cooled things down nicely. 👍  Untitled Untitled by Gavin Gregory, on Flickr |
|