|
|
Post by twocutekelpies on Dec 17, 2018 7:26:37 GMT 10
Hi all, just thought I'd share some progress photos of my little 1972 York I bought this in May this year, sight unseen, just going by photos posted online and knew she needed a lot of love. Thankfully hubby is a boilermaker so the chassis and drawbar wasn't a big turn off and I figured anything above that, I could pretty much do myself. 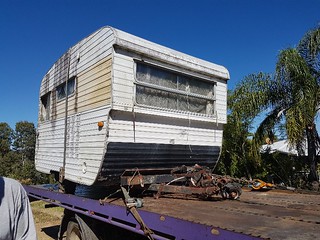 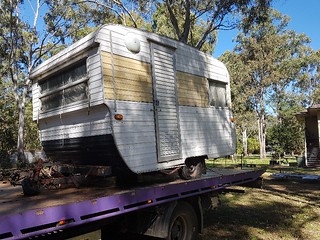 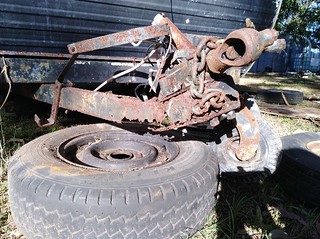  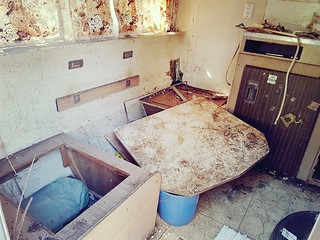 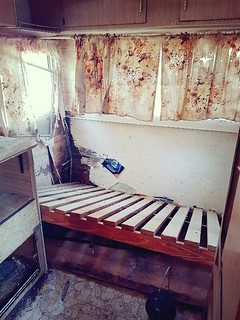 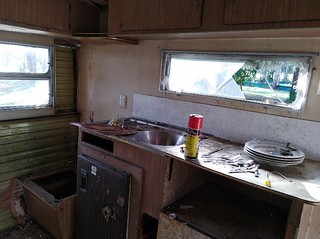 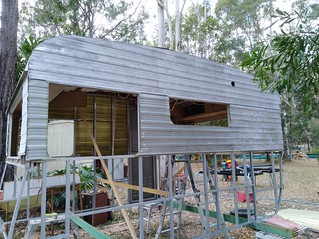 Most of the chassis was replaced and the new drawbar built slightly longer than the old one. (Yes I also have a '73 Viscount Ambassador in the background, another work in progress  )  Found the build date written behind the plywood next to the front window - Y3845, 107-3 (model), not sure what L and 9-115 are, 14-3-72 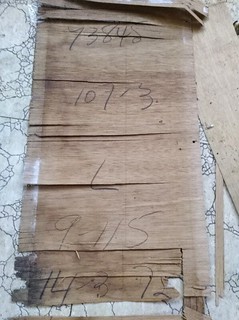 Bottom of the front cladding had corroded 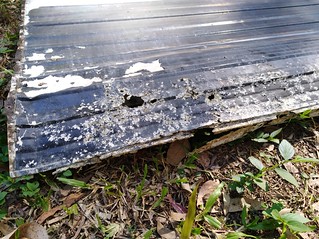 Both sides of the cladding had corroded where it was in contact with the chassis so I trimmed them off. 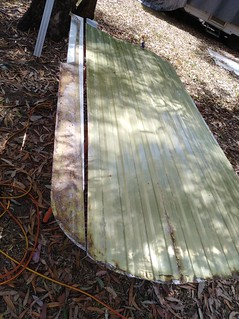 Floor replaced with 12mm Formply, edges rebated for overlap 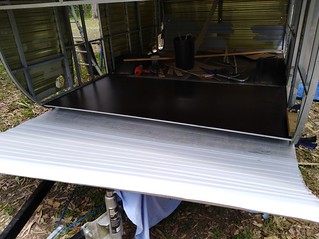 Bottom of the front cladding replaced with a piece from a Viscount Royal. I cut and folded the original piece, sikaflexed and riveted the new piece under and used Crommelin waterproofing and reinforcing bandage on the inside.  Bottom of the sides were replaced with 1.2mm flat sheet, inside coated with the Crommelin to prevent a repeat 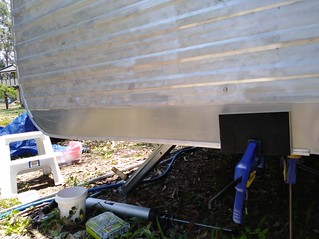 Trims back on and most of the paint prep done 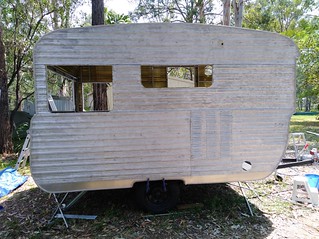  I pulled the door apart to remove the badly applied house paint on the outside and to freshen up the inside part 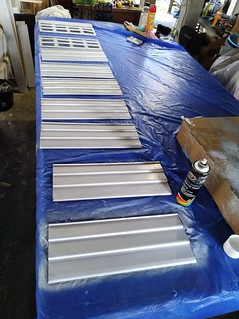 New lock, new flyscreen, new dust seals 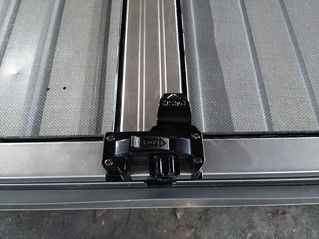 I cut the acrylic panes yesterday with aluminium blades and they're ready to go into the window frames once I finish cleaning them up. 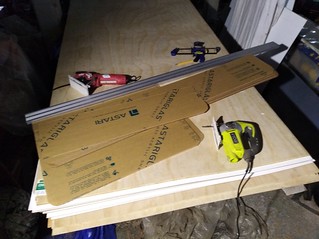 And that's where I'm up to so far  Cheers Shelley  |
|
|
|
Post by Mustang on Dec 17, 2018 8:03:42 GMT 10
OMG!!!! thank goodness you are experienced.
Keep the progress pics coming, great progress.
Cheers
Brent
|
|
|
|
Post by twocutekelpies on Dec 17, 2018 8:10:11 GMT 10
Thanks Brent  I have a detailed build log over in the caravaners forum "reno shed" but thought she belonged in here as well  |
|
|
|
Post by snoops on Dec 18, 2018 11:17:48 GMT 10
Great to see a little beauty like this rescued by someone who could see past the issues - not many would have taken it on, glad you did.  |
|
|
|
Post by Mustang on Dec 18, 2018 17:50:50 GMT 10
I used acrylic in the 17 windows in Vincent, must have lowered the weight significantly.
|
|
|
|
Post by twocutekelpies on Dec 18, 2018 17:57:58 GMT 10
I used acrylic in the 17 windows in Vincent, must have lowered the weight significantly. I weighed the front double hopper window before removing the glass and it was 9.6kg, I'm keen to see what the weight difference is when the acrylic panes go in, I'll post when I find out.  |
|
|
|
Post by Husky on Dec 23, 2018 20:02:02 GMT 10
Good to see i'm not the only crazy one on here
Top Job TCK will follow along with interest.
|
|
|
|
Post by twocutekelpies on Dec 26, 2018 18:07:22 GMT 10
Cheers Husky, I'm in good company then  Ok, I have replaced the front double hopper window panes with 3mm acrylic and new rubber and it came in 3kg under the glass weight at 6.6kg, just for those who were curious as well.  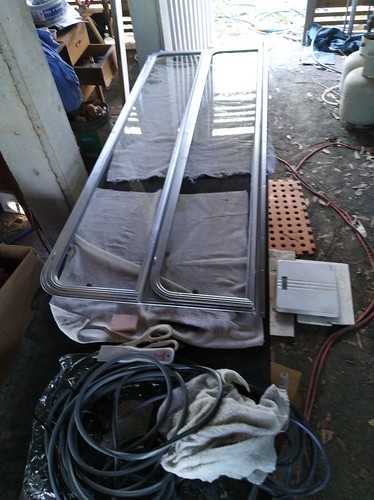
3 windows done, 2 more to go. I also refurb'd the existing window stays and locks.  
And no, that's not polish, that's paint  Locks were soaked in nappy san  |
|
|
|
Post by Mustang on Dec 27, 2018 19:02:44 GMT 10
WOW !! Nappy San ah, no wonder it dissolves your S**t in the cannister, can you enlarge on the painted frame?
|
|
|
|
Post by twocutekelpies on Dec 28, 2018 3:58:56 GMT 10
Not sure what you're after Brent, did you want to see more of the window frame? This is part of the first one I did with the soapy water and rubber in the pic. 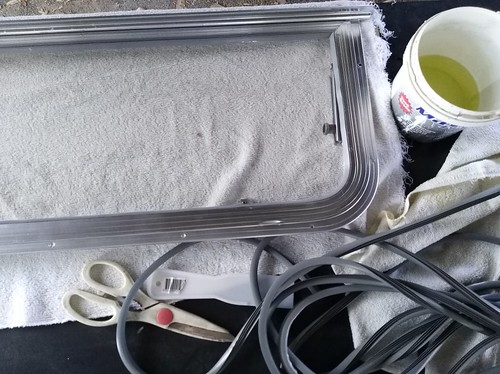 For anyone interested, the rubber is from Vintage Caravan Spares, this is WR031, the same size as the one I used on both my Viscounts (WR013) but in grey.  |
|
|
|
Post by snoops on Dec 28, 2018 10:54:44 GMT 10
All of my latches in the Viscount fell apart as soon as I touched them so had to get all new ones for mine - in grey, but at least they are available. I like the grey rubber - I've only bought the black before - will be using this stuff on mine I think when I get around to the windows.
|
|
|
|
Post by twocutekelpies on Dec 28, 2018 15:40:31 GMT 10
Mine did too Snoops so bought new white ones from Vintage Caravan Spares. I didn't realise he had the grey rubber then and used the black on my Ambassador, I think the grey looks better, you can see the black more from inside (this is from my Ambassador, I cleaned and reused the glass panes for the bunk windows as they were still in great condition) I polished those windows, not painted but they didn't stay looking that great for very long, hence painting the York frames  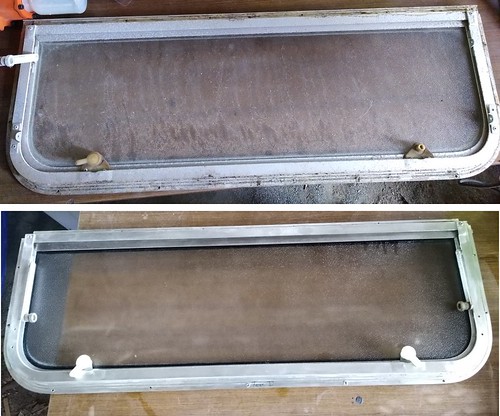 |
|
|
|
Post by twocutekelpies on Jan 3, 2019 8:57:33 GMT 10
|
|
|
|
Post by twocutekelpies on Jan 4, 2019 8:33:04 GMT 10
Newpaper article I found a while ago while researching Millards and Yorks, I didn't know at the time that I'd end up with this same van  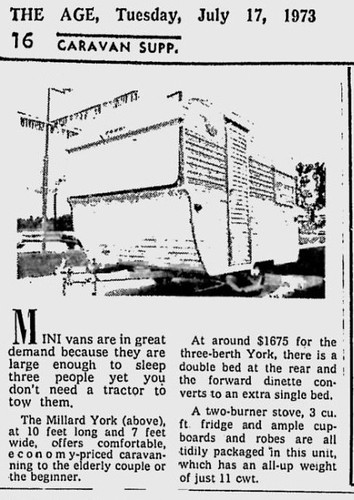 |
|
|
|
Post by twocutekelpies on Jan 27, 2019 12:36:40 GMT 10
Had to move the little York out from under 3 owls that were crapping all over it, project car needed a run as well. Not sure if you can make out the two kelpies along for the ride.  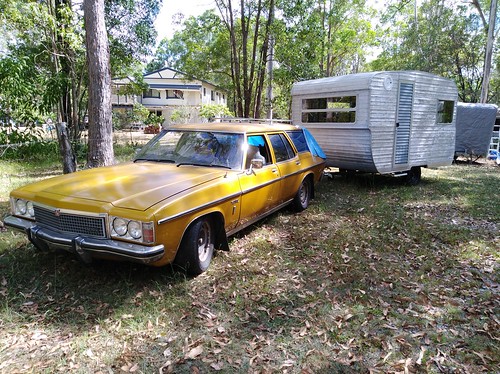 |
|
|
|
Post by snoops on Jan 27, 2019 17:45:44 GMT 10
Nice Prem. 👍
|
|
|
|
Post by twocutekelpies on Jan 28, 2019 15:14:39 GMT 10
It doesn't really look like much has been done between the first and last photos until you factor in what came between them. Feeling pretty chuffed with the progress so far. Can't wait to paint her and get stuck into the inside. 😌 Waiting for the rain test before I insulate and do anything major inside but I can still start on the cabinetry and rough in the 12v wiring etc. Build log updated - caravanersforum.com/viewtopic.php?f=103&t=76924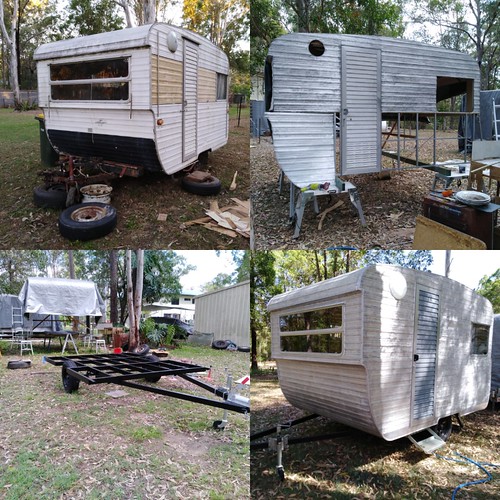 |
|
|
|
Post by twocutekelpies on Feb 18, 2019 5:44:56 GMT 10
After almost a week of rain and finding one small leak (a screw in the back window, now fixed) I am able to move on to working inside knowing she's watertight. I started cutting out my templates last week, I had traced the curves onto 2nds plywood while the sides were off so I could play with that instead of my good ply. A few minor tweaks and it fits well. I did the front and back this way - 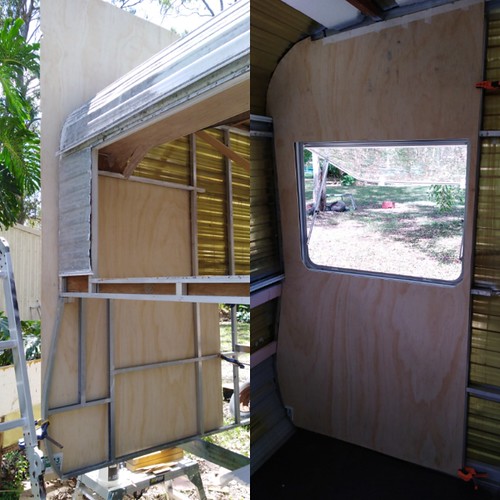 Insulation is now done 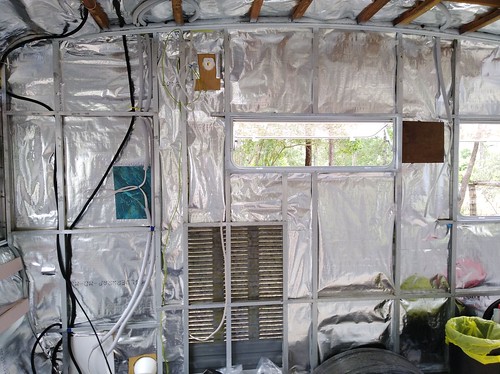 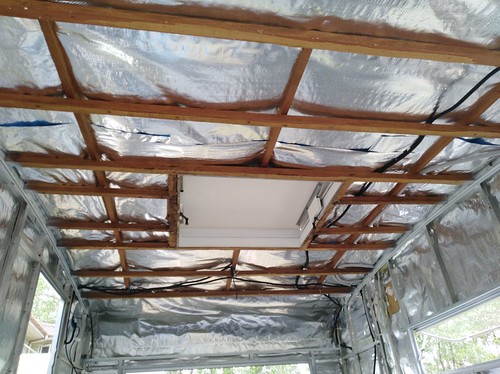 I've used Ametalin foil and left the original styrofoam in the ceiling as an extra barrier, not to mention it was wedged in there tight. As you can see, I've started running the 12v wiring and roughed in the 240v, all through conduit. An electrician has already been out to check my 240v and ok'd it, he'll come back when the walls are up to attach the powerpoints etc. We've got some more hot days on the way so I'll be able to compare the temperature inside this van with the Viscount which currently has no insulation. Not the best handwriting and hopefully it will never make an appearance but I felt it was important to replace this bit of historical information in its original location next to the front window and add a little footnote.  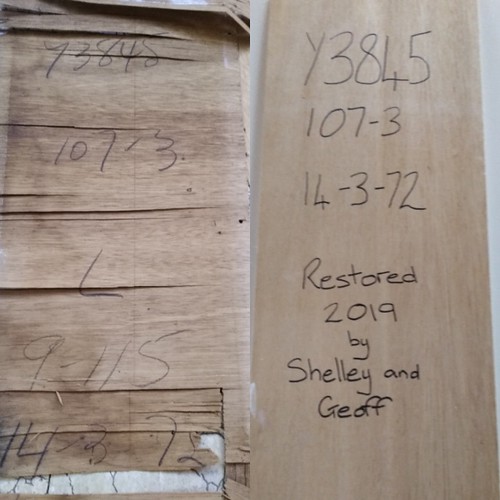 |
|
|
|
Post by Mustang on Feb 18, 2019 7:44:53 GMT 10
Wonderful progress in such hot times. Just above you mentioned not much done  ? go back to the original images here, wow what an improvement. |
|
|
|
Post by twocutekelpies on Feb 18, 2019 7:54:01 GMT 10
Wonderful progress in such hot times. Just above you mentioned not much done  ? go back to the original images here, wow what an improvement. Cheers Brent, I'm between Maryborough and Gympie, it hasn't been too bad here, a few hot days but I'm an early bird so able to get a bit done before the heat sets in.  Where I mentioned not much done, I meant how it looks between the first and last photo until you look at what happened in between them being taken.  |
|
|
|
Post by Mustang on Feb 18, 2019 8:00:39 GMT 10
Ahh Maryborough, we lived there for 15 years.
I owned Beresfords on the corner of Adelaide & Kent.
|
|
|
|
Post by twocutekelpies on Feb 18, 2019 8:06:40 GMT 10
I've only been up here about 4 yrs, I'm originally from Ilkley on the Sunshine Coast and before that Buddina.  |
|
|
|
Post by twocutekelpies on Feb 19, 2019 9:54:17 GMT 10
Table hardware before and after 2 weeks in molasses. 6:1 water:molasses. Still need a bit more of a clean up but majority of the hard work is done.  NB - If doing this, don't put anything aluminium in there, it will dissolve it.  Thankfully we learnt this from someone else's mistake.  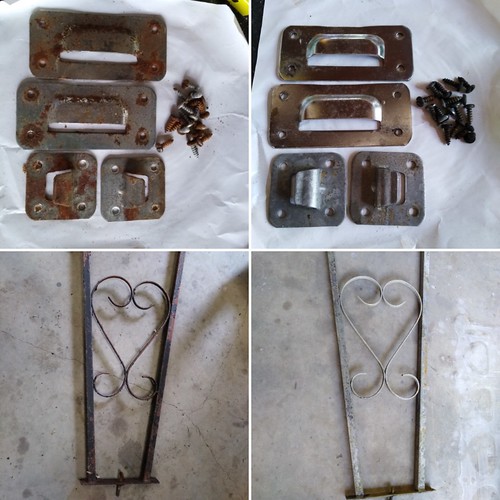 |
|
|
|
Post by murray on Feb 19, 2019 20:36:58 GMT 10
Table hardware before and after 2 weeks in molasses. 6:1 water:molasses. Still need a bit more of a clean up but majority of the hard work is done.  NB - If doing this, don't put anything aluminium in there, it will dissolve it.  Thankfully we learnt this from someone else's mistake.   SWEET !!!  |
|
|
|
Post by twocutekelpies on Mar 14, 2019 8:28:10 GMT 10
Work on the little York is progressing well, I've installed all my runnings lights now so can finally work on the inside  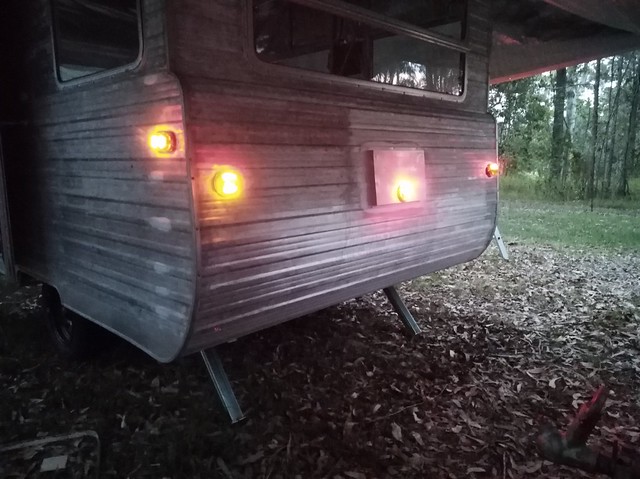 Just a few minor differences between then and now  (the screws won't be seen as they'll be behind the bedframe when it goes in) 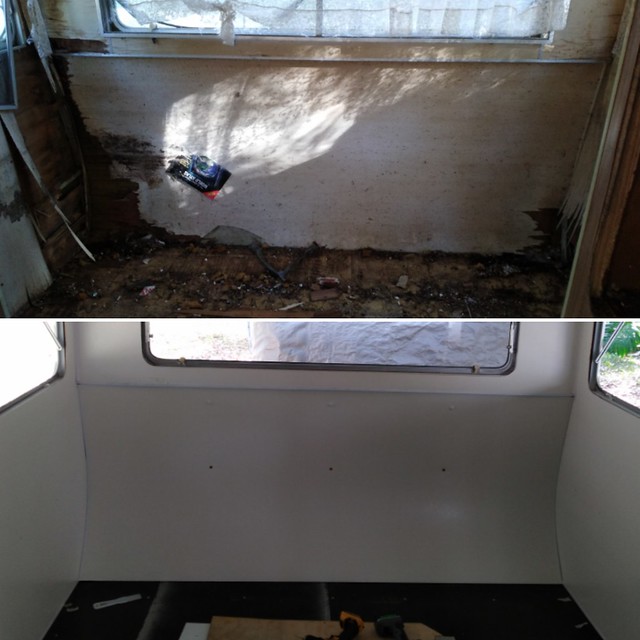 Rear overhead cupboard rebuilt and reattached 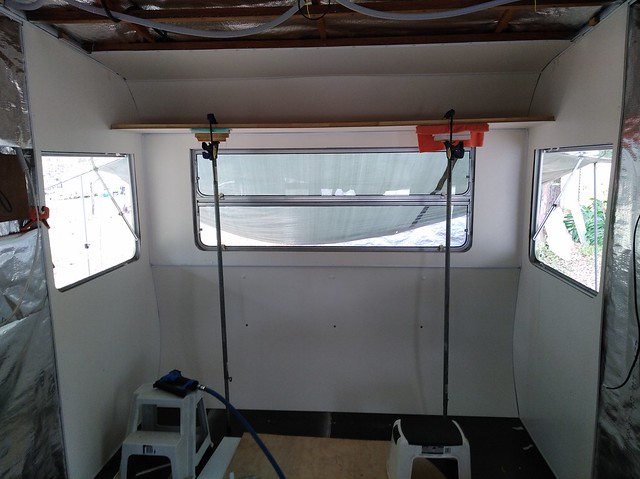 How it looks now, I still have to attach the face and trims but that's a minor detail   More details on the cupboard build here - caravanersforum.com/viewtopic.php?f=103&t=76924&start=60#p1210300 |
|