Deleted
Deleted Member
Posts: 0
|
Post by Deleted on Mar 11, 2017 17:42:40 GMT 10
Looks good and by the time to you set up the bed (another 10-15 kg) will be spot on.  |
|
|
|
Post by tasmillard on Mar 13, 2017 11:39:46 GMT 10
I thought ill give two of the rims a 'quick' clean up and spray. Well didnt go to plan... looks like the red undercoat I used didnt like the black top coat. Yes two different brands, should of know :S So now I got to wait till its dry and start again. The photo shows the front of the rim, the back I managed to salvage and didnt worry too much as long as it is rust free and painted. 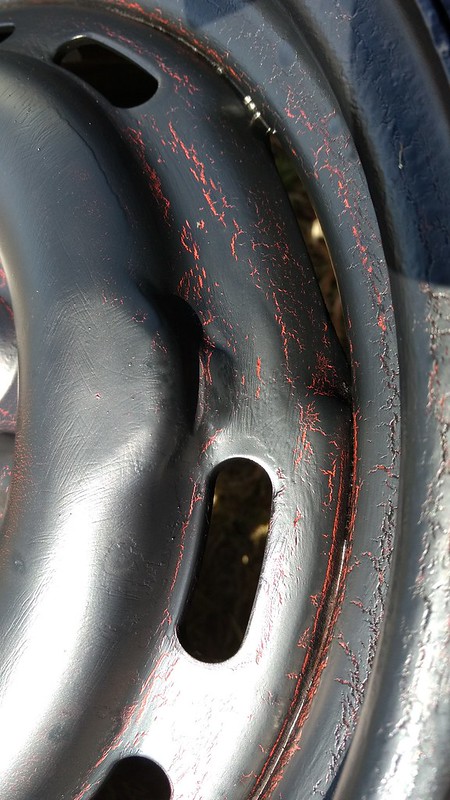 |
|
Deleted
Deleted Member
Posts: 0
|
Post by Deleted on Mar 13, 2017 11:57:27 GMT 10
I like the distress look.
|
|
|
|
Post by Mustang on Mar 13, 2017 15:43:42 GMT 10
With rattle cans I will only use "Rustoleum" made in the States, The cans when full weigh noticeably more than competitors.
Some are undercoat/top coat in one, can be cut & polished when hardened.
Available from Bunnings.
|
|
|
|
Post by atefooterz on Mar 13, 2017 19:19:51 GMT 10
If i had a few spare $ i would try rustoleum undercoat then matt top coat to see if they matched the expansion rate of both coatings.  My fave is the car place... repco- super cheap undercoat stuff (KD or KH?) that regardless of prepsol or even going to a 500ish grain to get mechanical bond, any topcoat still peels off like gelcote after a few months. |
|
|
|
Post by tasmillard on Mar 15, 2017 7:12:27 GMT 10
Got some Rustoleum yesterday arvo at Bunnings. Price wise its comparable with the other brands. I applied the Primer only paint first and tonight ill put the top coat on. The paint job is not a permanent thing, just to keep it looking cleaner and also covering the surface rust. In future I would like to have them blaster and powder coated.
|
|
|
|
Post by Mustang on Mar 15, 2017 7:26:09 GMT 10
Got some Rustoleum yesterday arvo at Bunnings. Price wise its comparable with the other brands. I applied the Primer only paint first and tonight ill put the top coat on. The paint job is not a permanent thing, just to keep it looking cleaner and also covering the surface rust. In future I would like to have them blaster and powder coated. I had mine soda blasted at the same time the chassis was done, originally I was not going to use them they looked "so bad". |
|
|
|
Post by tasmillard on Mar 18, 2017 18:47:26 GMT 10
So I got started with the hatch lid, and boy did I underestimate the work involved! So the hatch lid alloy is made from separate pieces, the top, the 4 sides and the 4 'j-rails'. As soon as I started pulling the fibreglass off I knew I was in for a complete disassembly. However, we got lots done today so we should have it back in the van tomorrow evening.
Of course, video to come.
|
|
|
|
Post by Husky on Mar 20, 2017 13:52:12 GMT 10
The hatch was something i really struggled with on the scenic. Even built a complete custom one as i wanted a sky light due to mainly camping in winter. Lifted and peeled back the skin on the van roof to re seal . Double layered the corners with aluminum sheeting and used a crap load of good quality sealer trying to prevent leaks and it still leaked  Curious to see what you do different as I'm going to replicate the feat by two on the Viscount and turn them into sky lights as well. |
|
|
|
Post by tasmillard on Mar 20, 2017 20:04:58 GMT 10
Here is the hatch lid rebuild. I ran out of time to clean the top alloy, but its sealed.
|
|
|
|
Post by 78466noM on Mar 21, 2017 8:13:22 GMT 10
Looks excellent another job well done .
|
|
|
|
Post by tasmillard on Mar 21, 2017 12:25:10 GMT 10
I think ill be pulling the lid off again over the weekend to give it that extra bit of tlc, clean etc. Its kind of annoying me that I didnt get the chance to finish it off. But yes, much happier now with it.
|
|
|
|
Post by Mustang on Mar 21, 2017 19:20:09 GMT 10
I like the natural timber against the white. I also like the look of the hatch as original. Sympathies I know the work you did: One of two of Vincent's 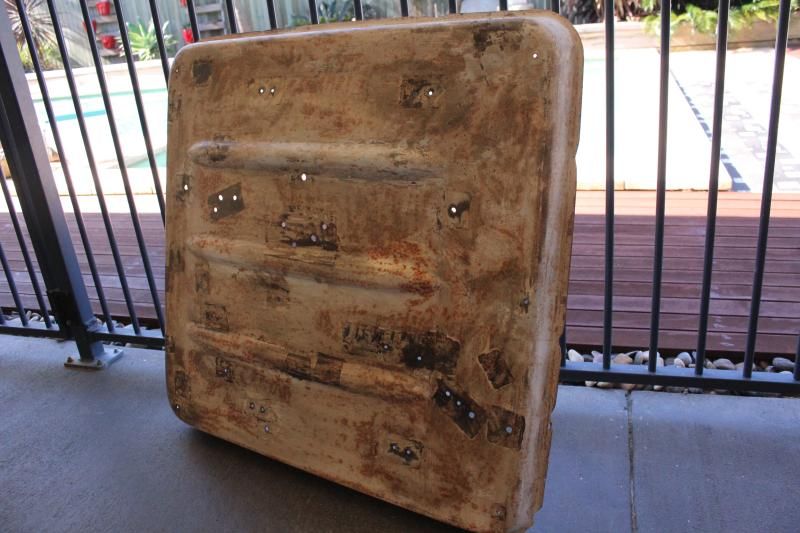 |
|
|
|
Post by liberate on Mar 24, 2017 15:01:37 GMT 10
Another great vid mate. I see you got yourself a GoPro head mount. Much easier working with both hands I'd imagine!!!
|
|
|
|
Post by tasmillard on Mar 24, 2017 15:32:18 GMT 10
Yes it helps with the gopro but also hinders as well. Plus I noticed with too much head movement the vid ends up making me feel giddy, so I minimise it.
|
|
|
|
Post by tasmillard on Mar 25, 2017 19:43:15 GMT 10
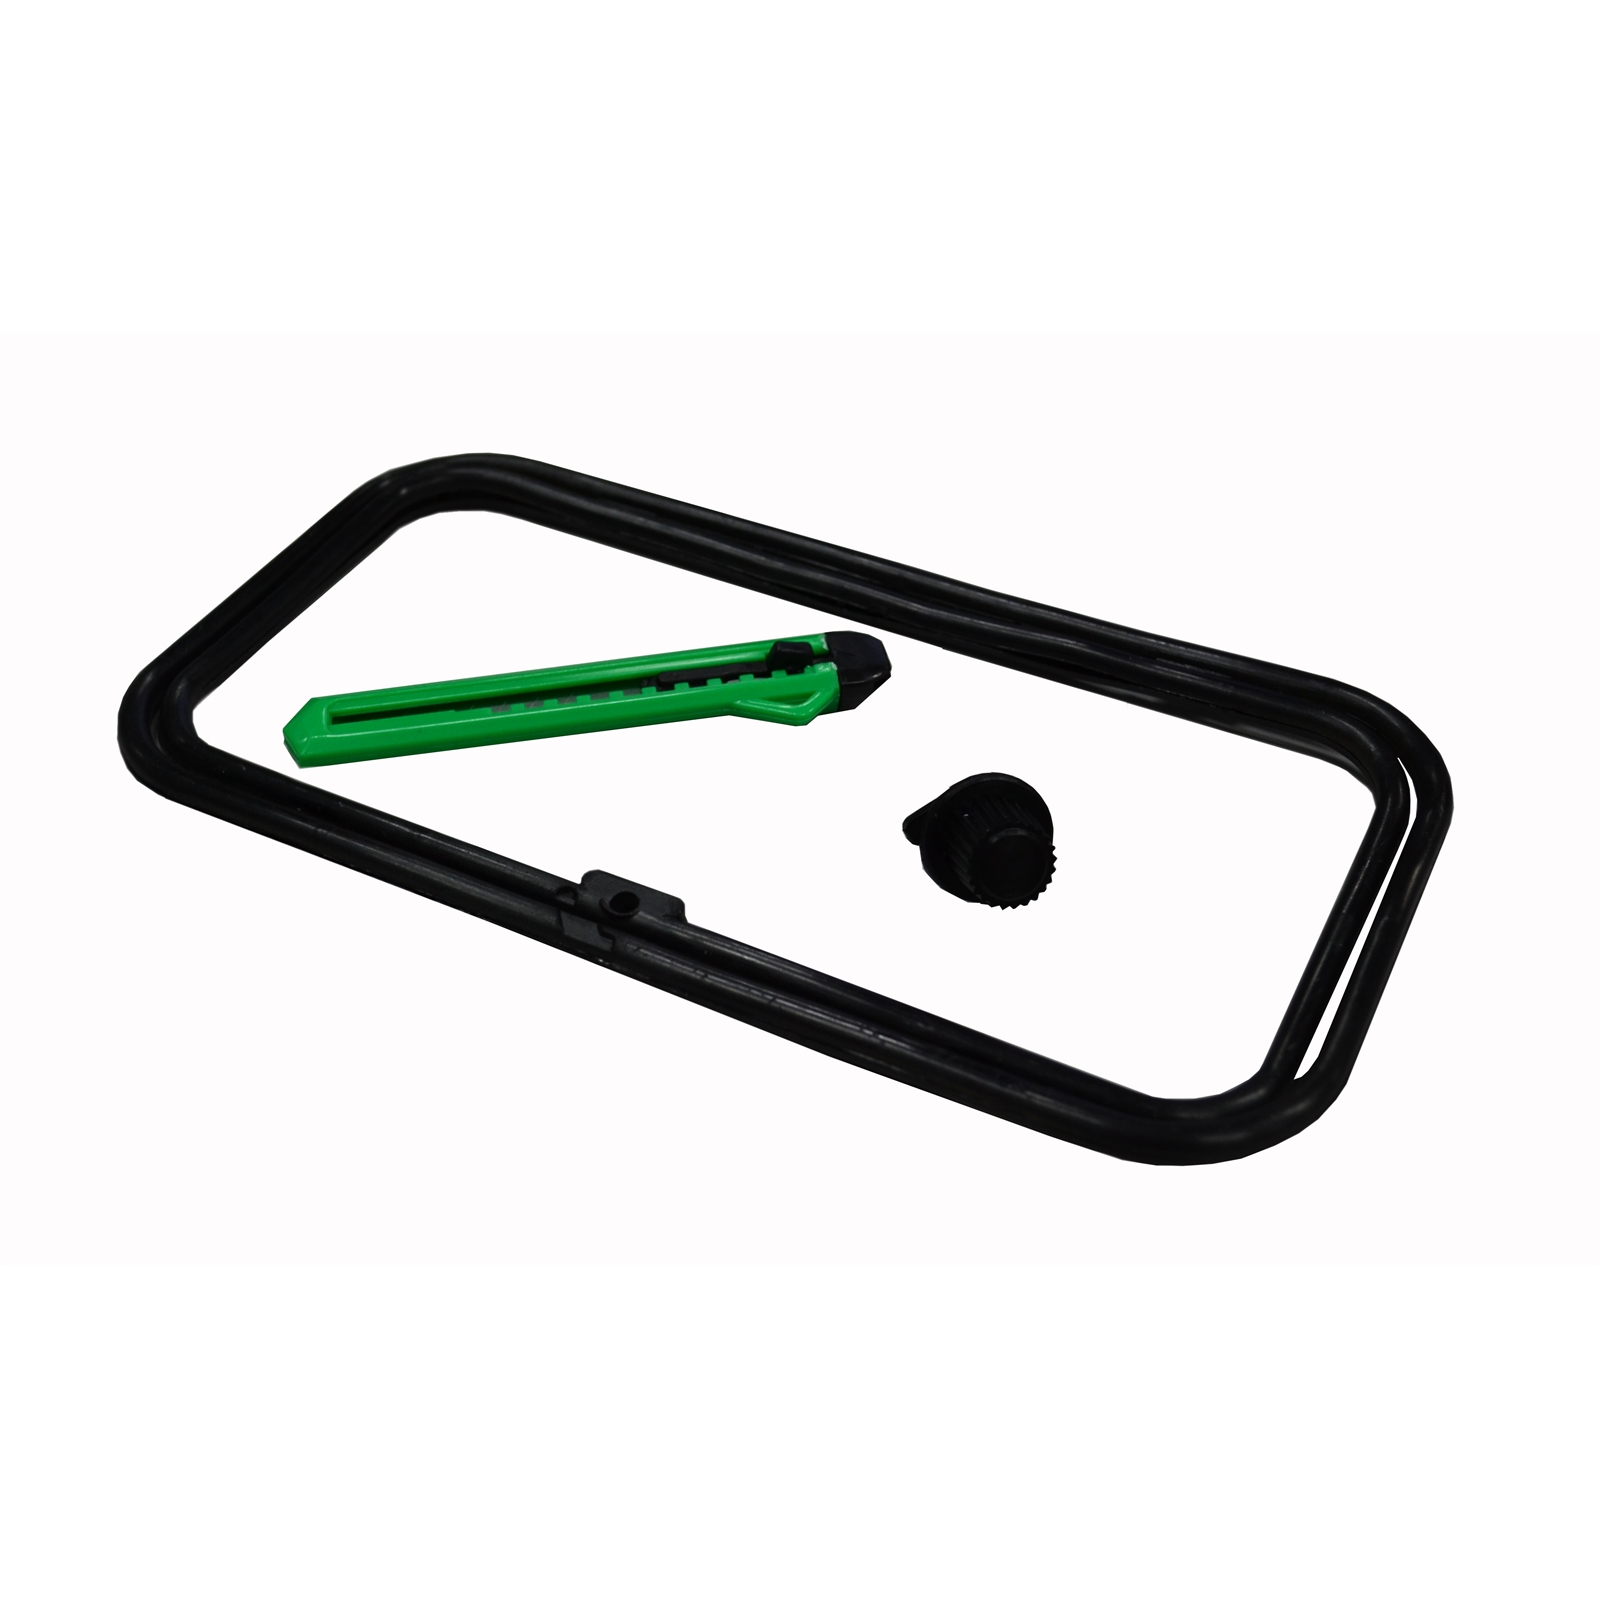
No resting yet for me, still prepping for Easter outing so got stuck into the flyscreen for the hatch.
|
|
|
|
Post by 78466noM on Mar 25, 2017 23:10:45 GMT 10
Another important job well done
|
|
|
|
Post by snoops on Mar 26, 2017 9:37:28 GMT 10
Is there room above the screens to mount a 1/2 quad bead or similar so the screens all close against something solid? Would make sure the mozzies stay out and give those 2 larger screens something to sit against so they don't fall out during transit.
|
|
|
|
Post by tasmillard on Mar 26, 2017 10:13:29 GMT 10
Actually snoops, I was thinking of sticking door jam mesh (the ones to stop wind drafts) around the edges of the frame. Its about 2-3 mm so would fit perfectly. Edit: No time like the present, heres what I did. Just also noticed the damn fly screen has moved again, I think I need to tighten the edging around the frame so the rubber doesnt come lose. 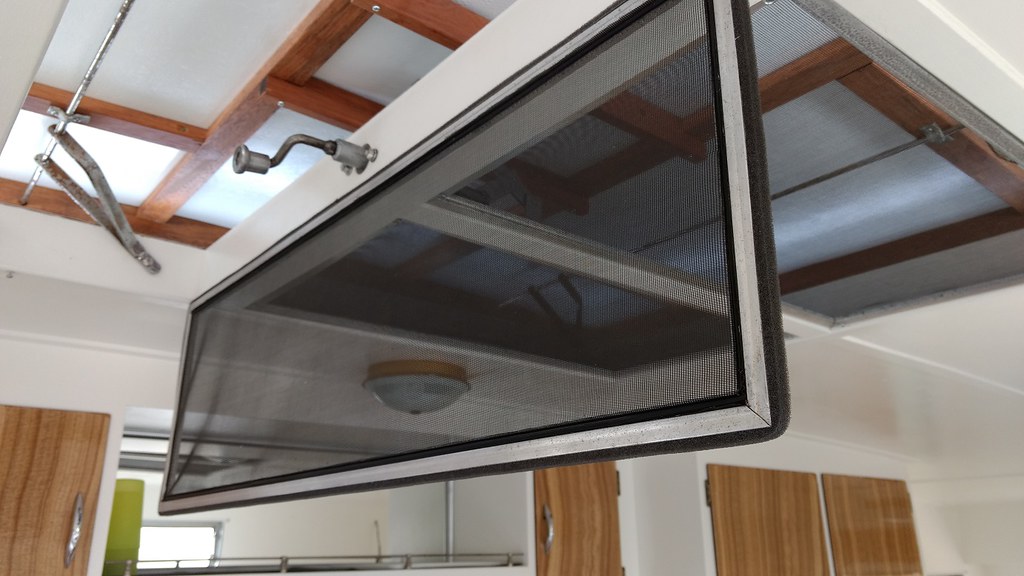 |
|
|
|
Post by Rattles on Mar 26, 2017 11:51:55 GMT 10
I think Snoops is on the right track however the foam is also a good idea, the foam seal when mounted on the edge of the screen as you have done will keep moving due to the friction when opening and closing and even as the shell moves when travelling.
I suggest putting a 12mm square batten (I prefer Square section over Quad) around above the screen position by about 5mm and stick the foam on the bottom edge of the 12mm batten, then when the screen is closed the foam is in compression this will prevent the foam from shifting also will add tension to the toggle clips preventing them from turning when travelling.
Just my thoughts.
Rattles
|
|
Deleted
Deleted Member
Posts: 0
|
Post by Deleted on Mar 26, 2017 12:08:01 GMT 10
Yes, what Snoops and Rattles suggest it is a good idea.
In any case looks heaps nicer and tydy that the original design.
|
|
|
|
Post by tasmillard on Mar 26, 2017 16:12:53 GMT 10
Tried it out and its a snug fit this way, where I can see what you are saying. I really dont want to add another timber strip if i can avoid it, so ill see how this goes over a period of time. I may well be that the strip peel off with lateral forces it wasnt designed for...
|
|
|
|
Post by Rattles on Mar 27, 2017 6:48:37 GMT 10
|
|
|
|
Post by tasmillard on Mar 28, 2017 12:58:50 GMT 10
Easter is approaching and the last item left as a must have is privacy, ie curtains. Guess what, I will be making these myself  Seriously tho, had a look at a few youtube vids and found that it is pretty easy with just a sewing machine which my daughter has. So this will be interesting in how it turns out. |
|
|
|
Post by Mustang on Mar 28, 2017 17:25:55 GMT 10
Easter is approaching and the last item left as a must have is privacy, ie curtains. Guess what, I will be making these myself Seriously tho, had a look at a few youtube vids and found that it is pretty easy with just a sewing machine which my daughter has. So this will be interesting in how it turns out. "Seriously tho, had a look at a few youtube vids and found that it is pretty easy"  |
|