|
|
Post by supreme78 on Oct 10, 2015 18:58:05 GMT 10
The van is looking the goods. Well done with the project.
Regarding the power from your car to the van it's worth while running a decent wire to an Anderson plug on your tow bar and then into the van. This allows you to use the second Pajero battery to run your van as well. It is also much faster than a solar panel to charge the battery.
I have on my viscount supreme 2x 100ah AGM batteries and in the car I have two batteries with a redarc isolator between them. An Anderson plug to the tow bar and then into the van. Use decent wire to the tow bar from the battery so you don't loose power. Then the black can just be short to the chassis. My van has a 200w solar panel on the roof and a 20a controller. I also have a portable one but hardly use it. I run a 12v TV a water supply pump all lighting a 12v upright compressor fridge and charge phone laptops and iPads as well. It does in no worries. Even a few days rain and it's still able to last.
I am traveling full time in mine so the setup was part of my plans all along. It works very well.
I upgraded my springs and my axle as the old tube axles are no longer legal. And the end snapped off it on the 3 rd day of my trip.
Good luck with the renovations
Paul
|
|
|
|
Post by supreme78 on Oct 10, 2015 19:03:59 GMT 10
I forgot to add that the Anderson plug on the front of the van or rear of the car can be used to attach a portable solar panel to charge your battery's in both tape car and van.
I also have an inverter I use and just connect it to the Anderson plugs for the 12v input. It's handy outside the van when charging drill batteries ect. I also have an Anderson plug on my 12v compressor and it just plugs in where I need it on the van or car.
|
|
Deleted
Deleted Member
Posts: 0
|
Post by Deleted on Oct 13, 2015 20:58:19 GMT 10
Paul, sounds like you have got a pretty good set up of 12 V for the van. Might need to hit you up for a bit more info when I get to that part of my resto.
Cheers
Trav
|
|
Deleted
Deleted Member
Posts: 0
|
Post by Deleted on Oct 13, 2015 21:01:03 GMT 10
Andrew, doing an awesome job on the van. Will be following to see progress going forward. Great satisfaction in doing all that great work and seeing such an awesome result.
Cheers
Trav
|
|
|
|
Post by awbeattie381 on Oct 14, 2015 11:58:56 GMT 10
Thanks guys, its slow but already very rewarding! Paul you sound like you have a magic setup. I cant wait to free camp with my van...2016 it will happen!
|
|
|
|
Post by supreme78 on Oct 14, 2015 13:07:28 GMT 10
I enjoy my van and the mod cons I have installed into the van during the restoration. It all works well and I did extensive research on the solar before setting it up. The battery was the most expensive thing I purchased. $320 I think for the 120ah AGM battery. I was lucky enough to get a battery from my work that's is 100ah AGM that was not required for a project we were doing. So I have 220ah of battery. I never let it go below 11.6v as they say it's bad for the batteries.
I have a 1986 land cruiser turbo diesel MWB and I fitted a new 80a alternator to charge it all up when driving. My fridge is the best thing I ever fitted. It uses bugger all power and keeps everything cool including the beer. It's got a remote compressor so it's got more internal space and the compressor is mounted beside the fridge and it's very quiet. It's 90l and fits quite a bit of food and drink.
I upgraded the axle after the old one broke on the way from glen Innes to Tenterfield. I found that the axle was very badly made and so have and other stronger one made by a great guy in Lismore. It cost $250. So it's worth finding out if you have a solid axle or a hollow axle if you have the later get it replaced. They are very badly made.
|
|
Deleted
Deleted Member
Posts: 0
|
Post by Deleted on Oct 21, 2015 14:44:48 GMT 10
Hi guys,
I'm just new to this today, interesting stuff reading your posts I think I've found the right place for a few questions! I just brought this beauty last week and the stickers say its a Viscount Ambassador, however Andrew it looks a lot like your Valiant..mine measures 13ft on the chassis and 15ft including the draw bar, have you got similar dimensions?
|
|
|
|
Post by awbeattie381 on Oct 22, 2015 12:12:38 GMT 10
Just sent you a PM. Viscount Valiant it is!
From your avitar it looks the same length as mine, but mine is 15 ft excluding drawbar.
Which way does your bed run? Mine had 2 singles running along the length of the van. If yours is 13ft Im guessing you have a double bed running across the back?
Would be good to see some inside photos. You may like to start your own thread!
|
|
|
|
Post by awbeattie381 on Dec 22, 2015 12:42:27 GMT 10
After a bit of an absence on here ill be putting a solid week into the van over the xmas break. I hope to have installed the 3 windows I have removed (replacing glass with lexen), painted the passenger side inside wall and finished the frame of my kitchen overhead cupboards. Once the wall is painted I can install my bed, so really looking forward to the moment when I start installing more than I am removing!
Stay tuned!
|
|
|
|
Post by tasmillard on Dec 22, 2015 17:35:21 GMT 10
Good to know I am not the only one working over tyhe break on the caravan resto! Remember, pics please  |
|
Deleted
Deleted Member
Posts: 0
|
Post by Deleted on Jan 4, 2016 14:53:58 GMT 10
Also Andrew I'm looking for cushions just like yours and I saw you said you wanted to change them...do you still have them at all?
|
|
|
|
Post by awbeattie381 on Jan 4, 2016 21:10:27 GMT 10
Great weather for working in Wollongong...under a tarp...still progressing though. Last week I started reassembly of the 3 windows I have out. Those dust seals are a bastard to get back in...took me 4 hours for one alone (channel was a little damaged though). Managed to find a better technique with the other 2. I have also been progressing with my cupboards. Ill put some more photos up over the course of the next week on any visual progress I make.
lululoosey, The two single bed cushions were very average and got thrown out. The dining cushions are in pretty good nick so I think we will keep them but just get them recovered. Foam is pretty expensive!
|
|
|
|
Post by awbeattie381 on Jan 8, 2016 17:53:57 GMT 10
First step before I can do anything on the van is unwrap it. I have a good quality caravan cover however I think my father in law has a bit of OCD. He insists on covering the caravan cover with 3 massive shade sails, plus a bit of vinyl flooring I ripped out out of the van, plus the remnants of my original cheap and nasty caravan cover that disintegrated with UV. For anyone that doesnt know the van is stored at my inlaws. There is also a polystyrene lid that covers the north facing tyre and a pot plant for good measure. 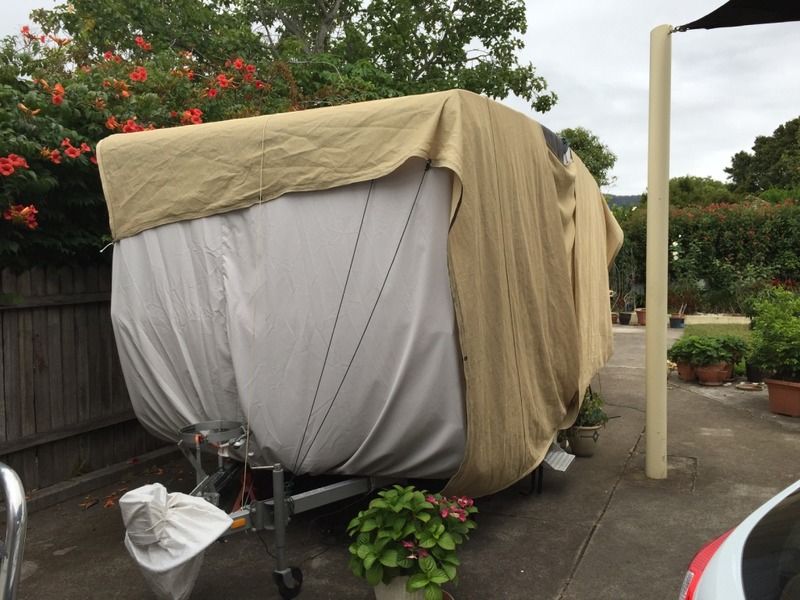 The first window I worked on reassembling. New flyscreens, new glazing wedge and dust seal. Ill need to apply a frosted film for privacy later as this window is for the kitchen. 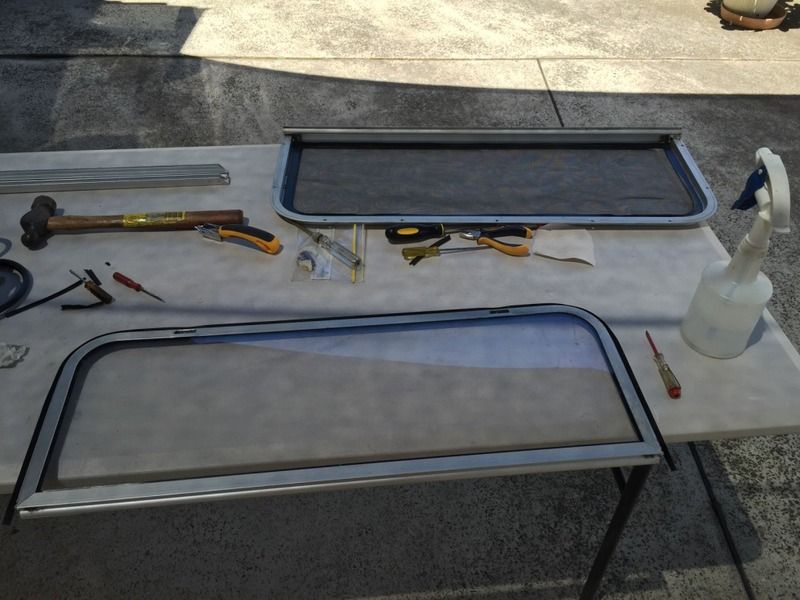 The cupboard frame is taking ages. I think I am almost there though. I have cut out all the plywood interior/exterior cladding except the 3 face pieces. I will build the doors at my place in Sydney but have already built 3. I am going to run some sort of 240V lighting under the cupboard for the dinette, sink, stove and maybe a couple over the bed with separate switches. For 12V Ill use LED strip lights that will be hidden somehow. Central section 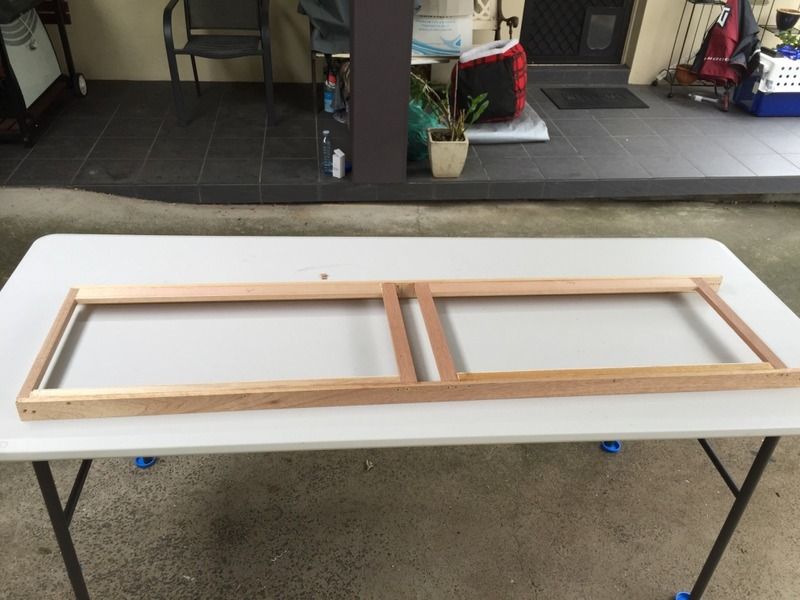 Rear section 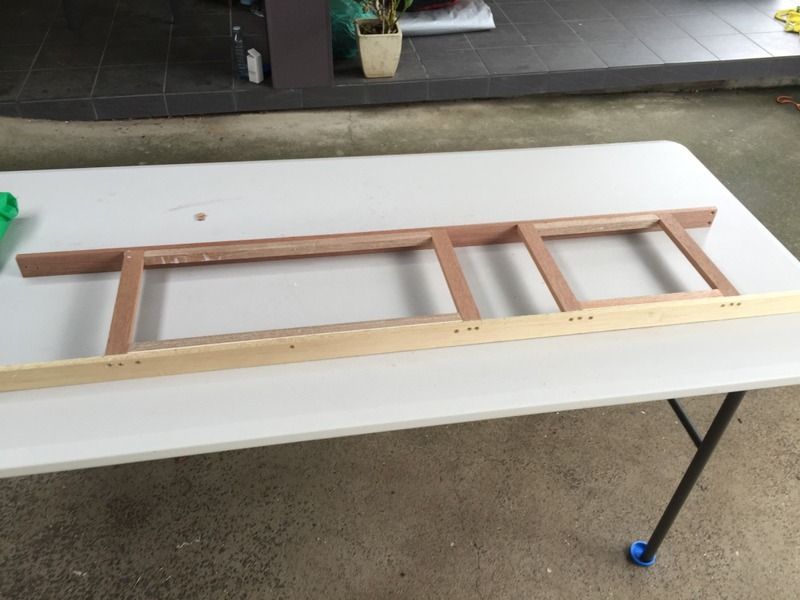 Detail 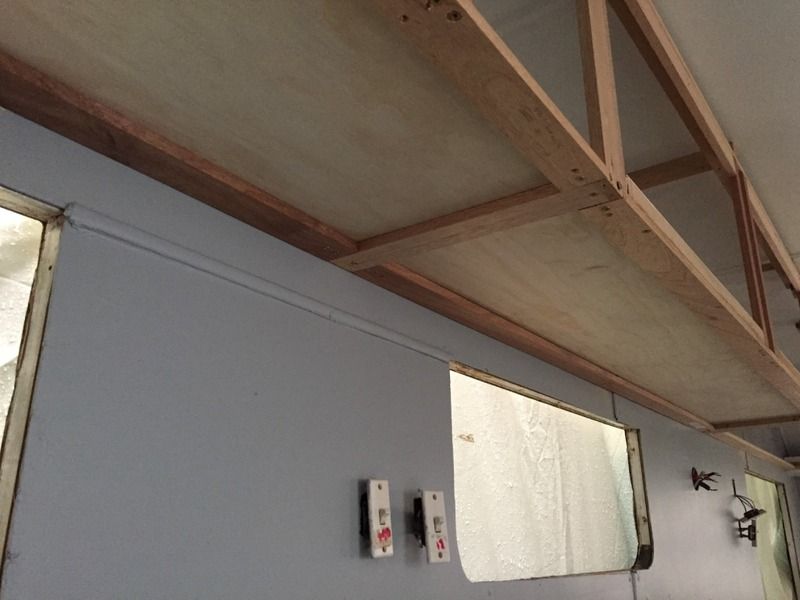 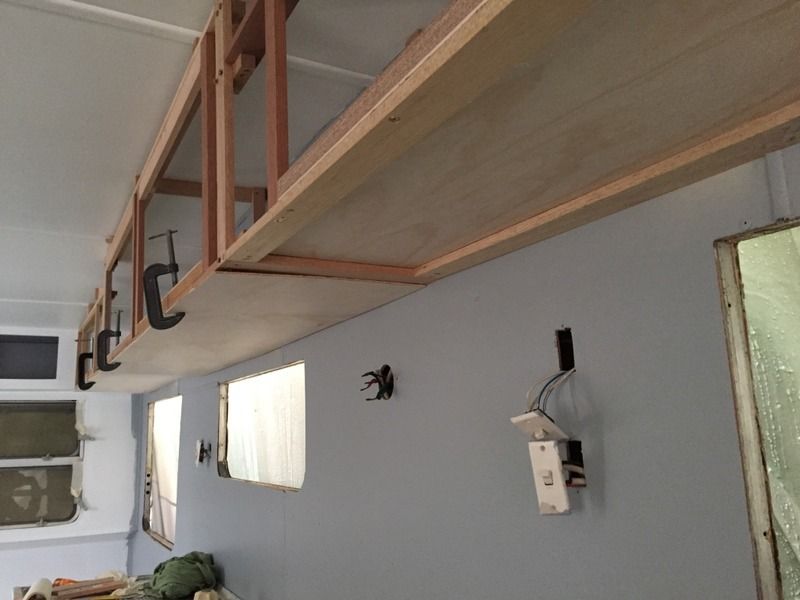 Full extent 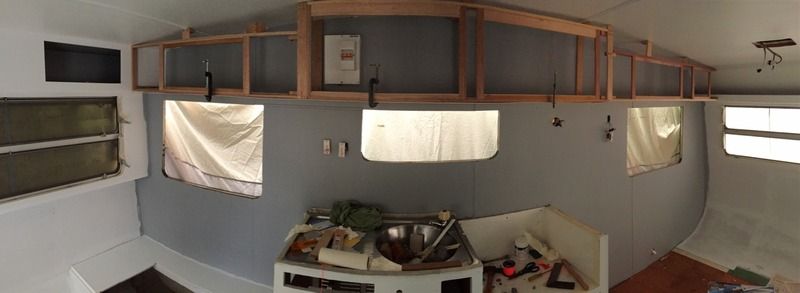 Due to the weather, I had to setup a big tarp over the shade sails I work under. Being a tarp, they always pool water (even when being draped over a shade sail (see props) 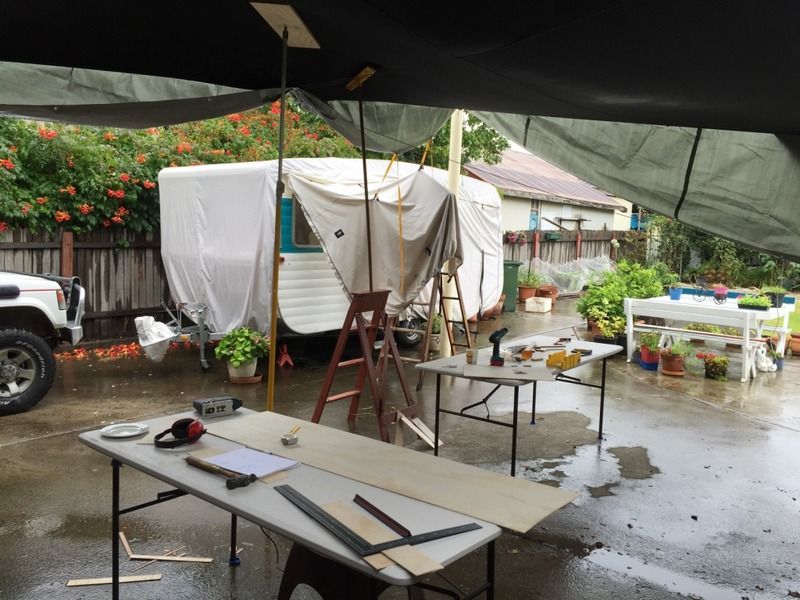 Im going to have a crack at installing the kitchen window on my next visit. |
|
|
|
Post by tasmillard on Jan 9, 2016 9:34:03 GMT 10
Wonderful work there, love looking at these kinds of photos. Im about to do some mods on my Millard re cupboard space so its interesting to see how you went about it. From the photos it seems you placing a cover on both the inside (of cupboard) and underneath, is there a reason for this? Just saying as my Millard only has the bottom outside cover only.
|
|
|
|
Post by awbeattie381 on Jan 10, 2016 7:19:06 GMT 10
My gut was telling me I needed an inner and outer. The inner was so I had a neat/flat space for storage, the outer was obviously to finish it off and make it look factory. There is also the added benefit of strength and protection (not that I will be storing heavy stuff up there). Its probably over engineered but I really don't want to have to rebuild this again! Oh, and I may use the cavity to conceal wires for lighting (if I need to). Its still all pretty temporary at the moment. Once I am happy it will be glued and screwed together.
|
|
Deleted
Deleted Member
Posts: 0
|
Post by Deleted on Jan 10, 2016 20:09:35 GMT 10
Nice work!! I am following your thread with interest.
|
|
|
|
Post by awbeattie381 on Apr 25, 2016 22:36:38 GMT 10
|
|
|
|
Post by supreme78 on Apr 29, 2016 11:24:26 GMT 10
Bostick v60 is the way to go. neutral cure. the original stuff is just prone to leaking as it doesn't flex and drys out. i swore i would never touch that horrible stuff ever again. (Chalk tape)
|
|
|
|
Post by Mustang on Apr 29, 2016 18:58:58 GMT 10
awbeattie381
I used your method, at least if a frame has to be removed it can be.
|
|
|
|
Post by awbeattie381 on Apr 30, 2016 20:03:13 GMT 10
When I pulled the windows out originally all the caulking tape was still soft, and this method seems to be giving a pretty good seal. Time will tell! Im just going to trim the overhang to neaten it up a little. I think the whole frame will continue to tighten up with compression too, as i cant quite wind the windows all the way in just yet (need a bit of external assistance).
Mustang did you use any silicone at all (even just the top edge) or didn't bother?
|
|
|
|
Post by Mustang on Apr 30, 2016 21:27:33 GMT 10
When I pulled the windows out originally all the caulking tape was still soft, and this method seems to be giving a pretty good seal. Time will tell! Im just going to trim the overhang to neaten it up a little. I think the whole frame will continue to tighten up with compression too, as i cant quite wind the windows all the way in just yet (need a bit of external assistance). Mustang did you use any silicone at all (even just the top edge) or didn't bother? I intended to, just to make the job look neat , but after advice from Caravans plus, I trimmed the excess then rolled the off cuts into strips & forced them into any of the openings that still appeared, (log cabin cladding) then trimmed again, using a dull edged damp putty knife with soapy water/spray. If you still have gaps I would use a liquid mastic as it will accept paint, silicone will not. A silicone/mastic bead attached from the outside seldom seals, the sealing comes from the sealant oozing from the inside out. (see "doublechevrons"posts on the issue, its well explained.) doublecheron link |
|
|
|
Post by awbeattie381 on May 1, 2016 9:05:24 GMT 10
thanks mate, makes sense.
|
|
|
|
Post by awbeattie381 on May 8, 2016 22:25:15 GMT 10
I had a pretty productive weekend (for a change). Re-registered the van (determined to not let it lapse), then pulled 2 more windows out, cladded the underside of the kitchen cupboard and replaced a missing section of ceiling in the wardrobe. I am really happy with the cupboard, particularly as it has taken so many hours to get to this point. For quite a while it felt like a never ending challenge but I can finally see the light! I am currently in search of some really slimline 12v lights before I can clad the base inside the cupboard and the outside face. Next job...refurbing another 2 windows and painting the wall those windows were removed from. Once that is done I can remove the rear window, so I can paint that wall, then I can install the bed (already built), then lay the floor, remove the front window, dining table etc etc etc (you get the hint)! Oh, also got to test out my wife's new company car, a Subaru XV. It towed the van with ease. My V6 Pajero tows it ok as well but you definitely know you are towing something. I reckon the Subaru will be just as good when the van is complete and weighing close to a tonne. 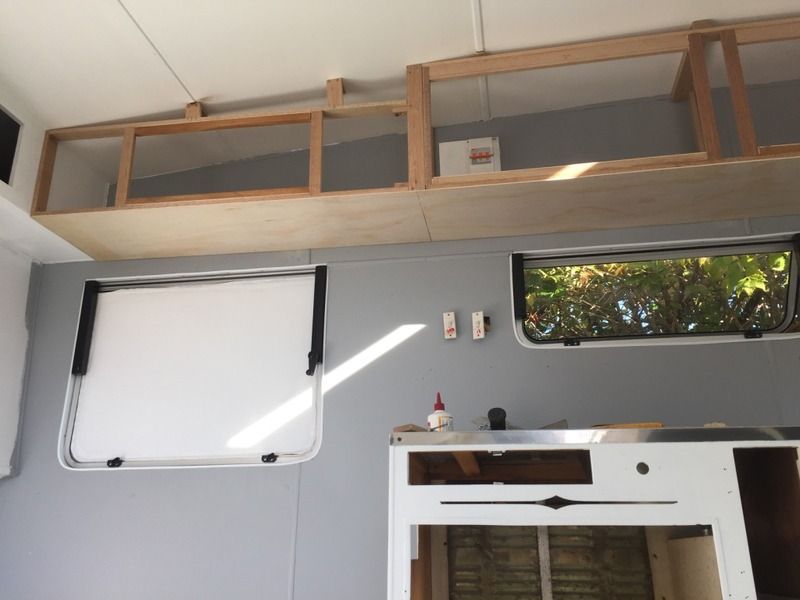 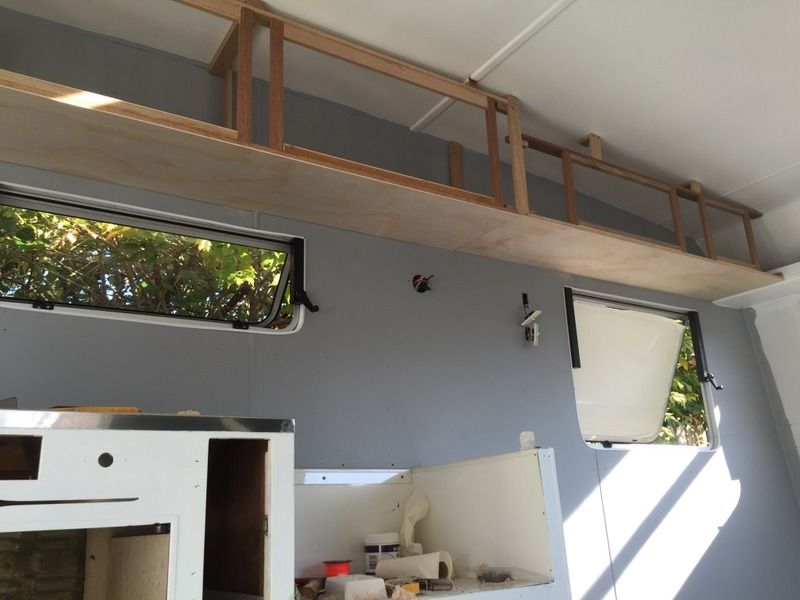 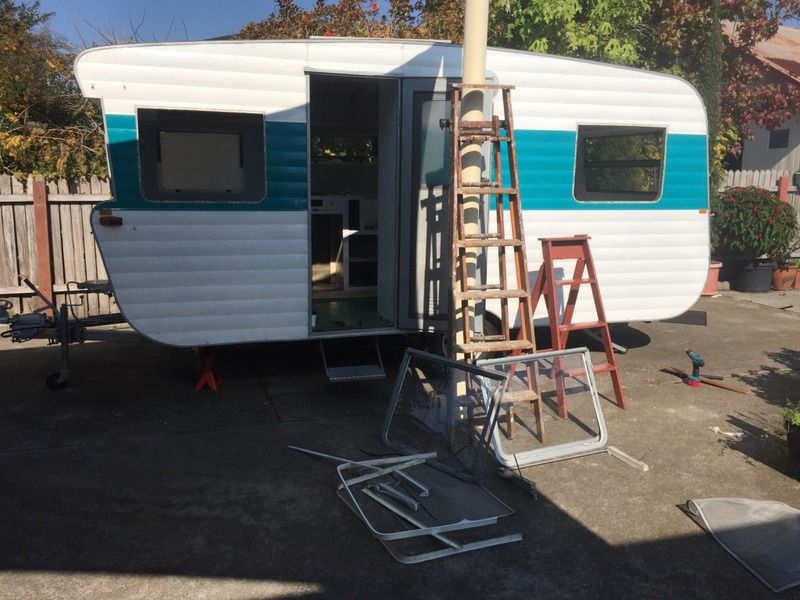 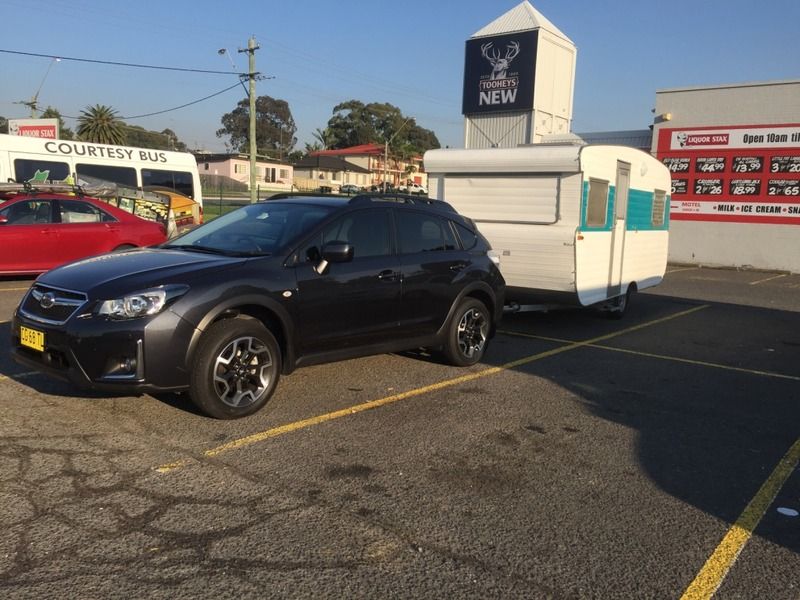 |
|
Deleted
Deleted Member
Posts: 0
|
Post by Deleted on May 9, 2016 10:48:25 GMT 10
Well done job, looks very nice.
|
|
|
|
Post by 78466noM on May 11, 2016 10:53:10 GMT 10
Looking very good a job well done.
if it is any help to you i will be using 12volt led down lights under the cupboard they run from a 240volt transformer i am sure if you aren't using a pure sine wave inverter as we are an electrician should be able to place a switching box of sorts so they will run off your battery safely .
have fun i still have a fair way to go with ours
Bruce
|
|