|
|
Post by kharde on May 15, 2016 16:42:34 GMT 10
If your battery is 12v... You can run the LED straight off the battery. Just ensure you have a 12v safety switch or fuse on the circuit.
FYI... When plugged into 240v power, I run all my 12v appliances from a chemistry transformer purchased from jaycar.... ALOT cheaper. Just make sure the power output is sufficient if your are running electric pumps, etc.
|
|
|
|
Post by awbeattie381 on May 16, 2016 13:52:35 GMT 10
Went to an awesome little truck accessories shop (hy-way truck accessories) over the weekend to pick up a new lead assembly for my UHF aerial, and managed to find some under cupboard lights for the van while I was there. They are truck cabin lights. The lady even tested them for me as I didnt want that 'cool white' that has a blue glow...very happy. I intend on running these from the battery only, and use the main ceiling lights when on 240v. Ill pick them up next weekend (had to be ordered with a white surround) so I can take a photo of them then. www.hyway.com.au/home/lamps-and-lighting/led-interior-lamp/led-interior-lamp-12v-only/ |
|
|
|
Post by awbeattie381 on Aug 7, 2016 19:37:02 GMT 10
Lights are installed just need to wire up. Also plugging away with scraping paint off the windows (4 down 3 to go including the two big buggers front and rear). I have realised that I have had this van for 2 years now...time flies...I didnt expect this resto to take more than 6-12 months. How wrong could one be! My wife and I have written a list of jobs we need to complete to have the van useable by the first weekend in Dec (4wd club xmas party). Then we are hoping to do a little tassie trip around easter 2017 with some kiwi friends which means finishing off all those jobs we don't complete by December! Nothing like a deadline, if we didn't have one we would be chipping away at this van for another 2 years!! 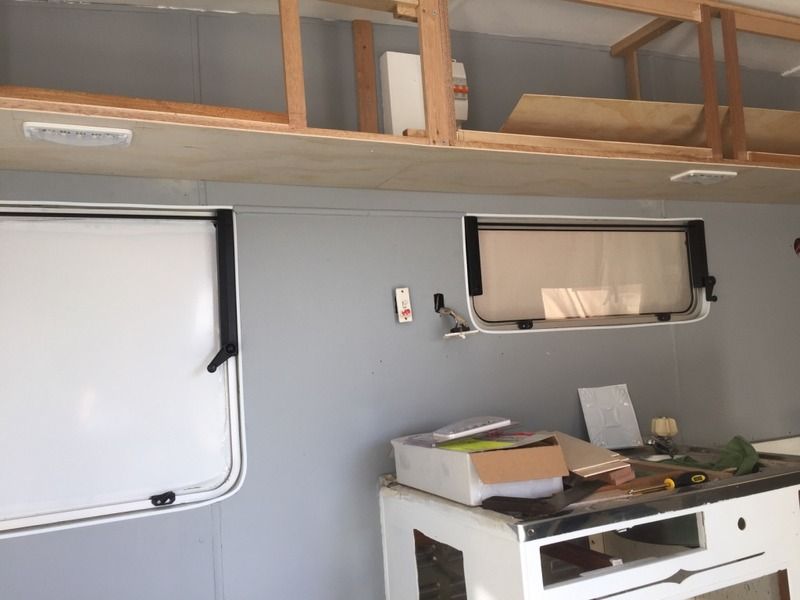 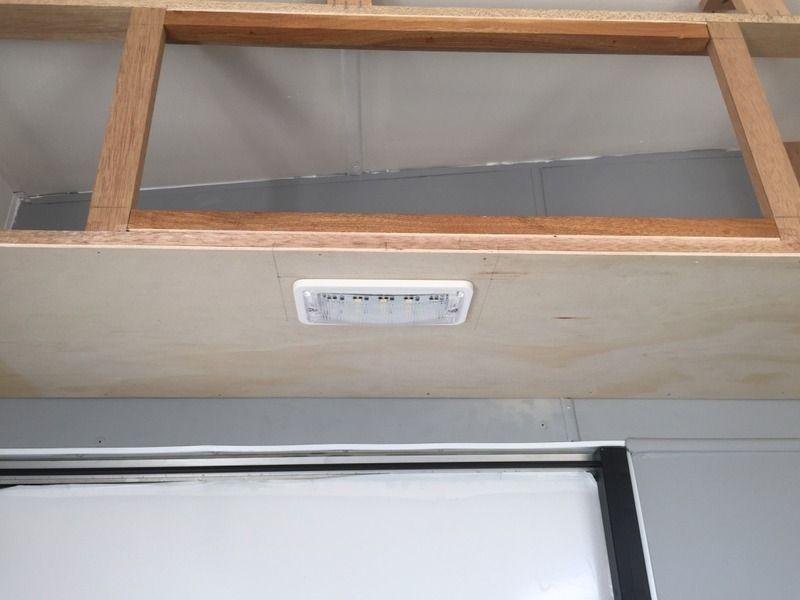 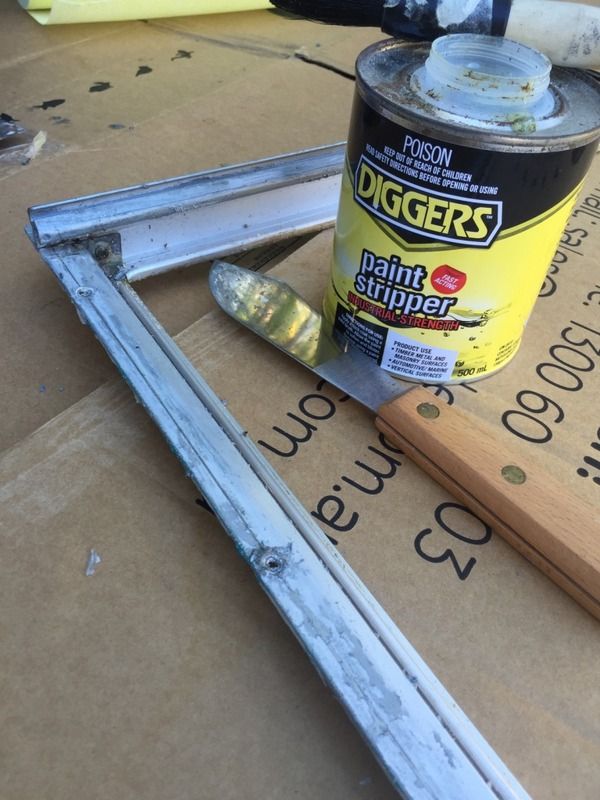 |
|
|
|
Post by Mustang on Aug 7, 2016 19:45:31 GMT 10
Mate,
Re Easter in Tas I would book now both ways for the dates you want. You can change up to 24 hrs before departure.
All looking very neat.
|
|
|
|
Post by tasmillard on Aug 7, 2016 19:57:41 GMT 10
Correct Mustang. I foolishly tried to boom a month in advance thinking winter and all, realising that the next available booking is Nov to take a caravan!! Also, i found calling them is much better than booking online as they ask additional info not available online which is strange, but soooo much easier.
|
|
|
|
Post by awbeattie381 on Aug 7, 2016 20:20:35 GMT 10
I was just telling my wife about your 3 month wait tas...and said exactly the same thing Brent! We had better get onto skype and start discussing dates, but as you said, we can always change the dates.
|
|
|
|
Post by awbeattie381 on Aug 7, 2016 20:22:40 GMT 10
|
|
|
|
Post by 78466noM on Aug 8, 2016 11:30:29 GMT 10
I don't know if this is any use to you but the old chesney kamper we had had the stove set in recess like yours laminated in aluminum sheet tacked to sides not glued and had a lid that was also covered on underside with aluminum sheet top was bright yellow laminate to match table.Walls of kamper were canvas the stove was so well used when we got van hobs had rusted and were unusable it was a early seventies model.If your splash-back is a plastic type tile this could be your best bet to make a laminated lid with aluminum or stainless steel sheet underneath.This would also give more bench space when stove isn't in use.
I think my millard I have now may have had a similar set up but don't quote me on that as sink and stove section were pulled out when I brought it. I am only going on picks of other vans I have looked at getting ideas for this one.
looking good
Bruce
|
|
|
|
Post by awbeattie381 on Oct 8, 2016 22:21:46 GMT 10
So a bit more has been achieved over the last couple of months. Windows are such a slow and painful process. I just have the big buggers front and rear to go, so am starting to finally see the light! Still have the winders to clean and respray, and more paint to strip off the front and rear frames. I am determined to take it away in December for the 4wd club xmas party. All I need is a finished bed and all windows back in. However, I will be in the US for the next 5 or so weeks so dont have many weekends left! All windows are now out 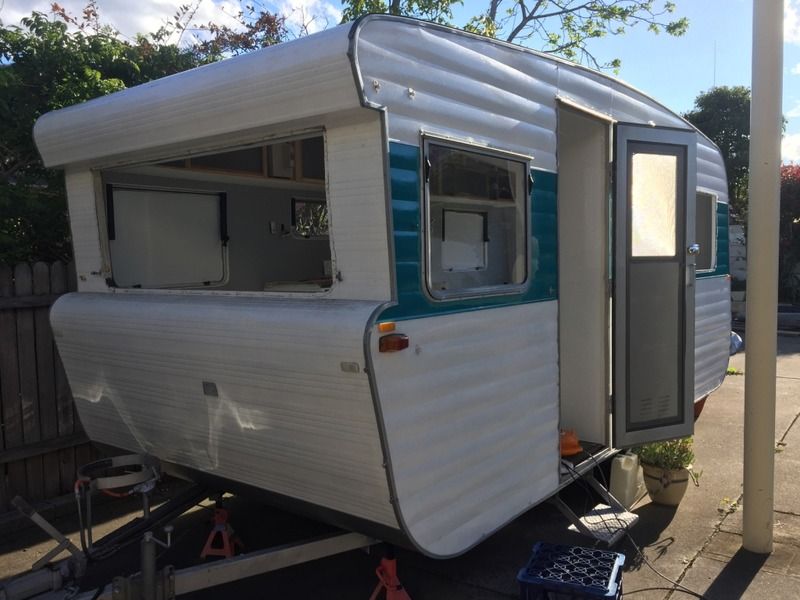 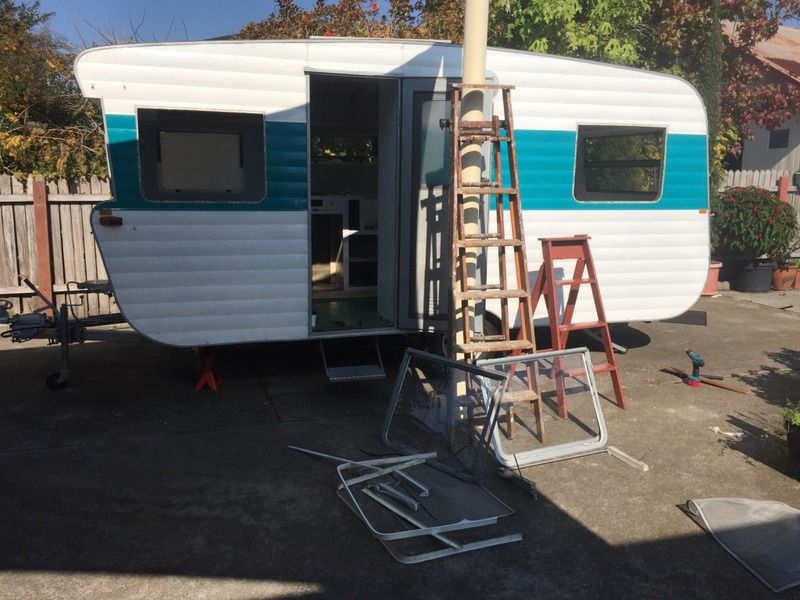 2 more windows back in 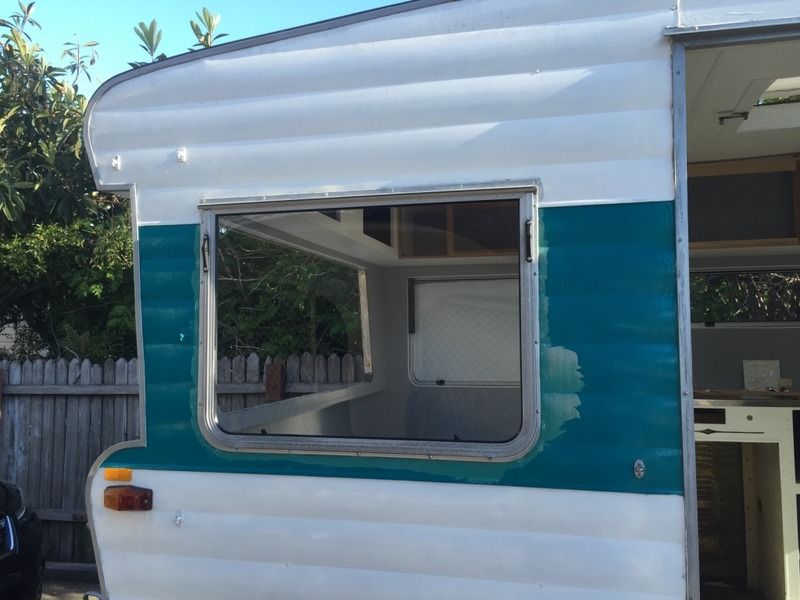 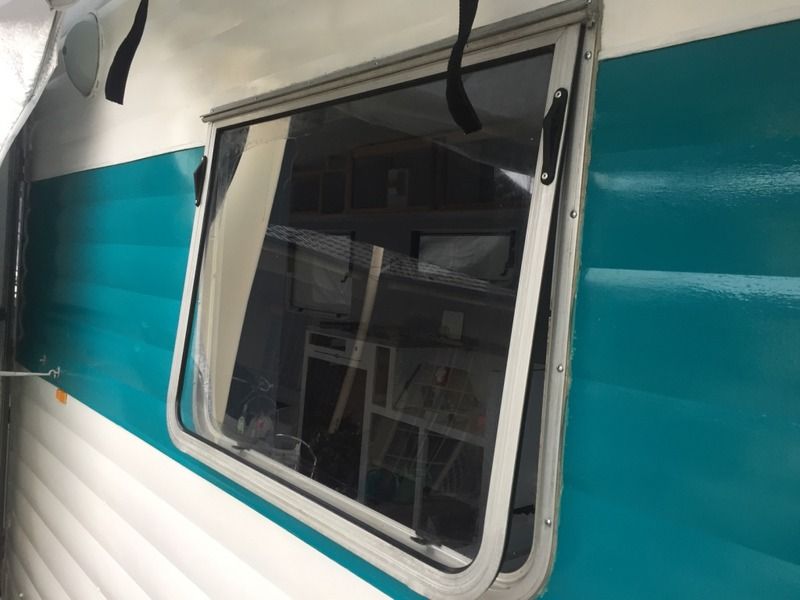 I am happy with the seal - it looks water tight...fingers crossed! 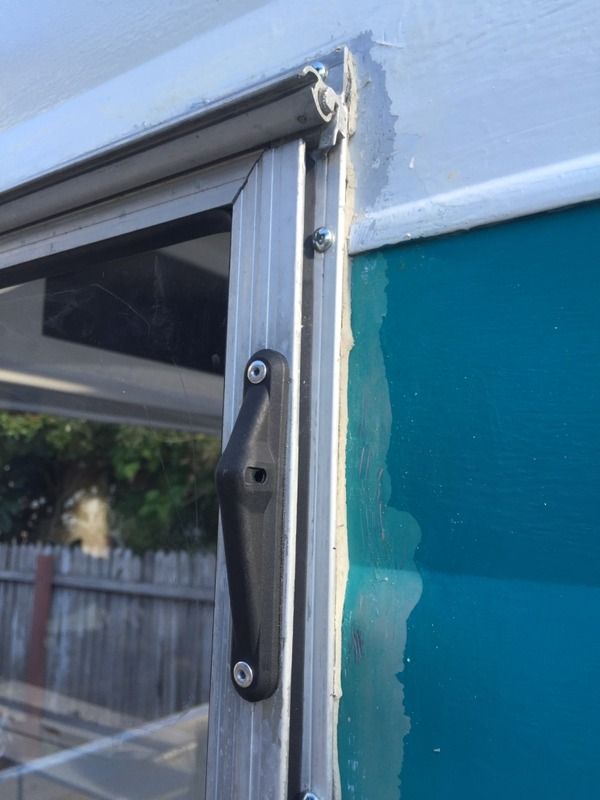 Front and rear walls painted (all grey complete) 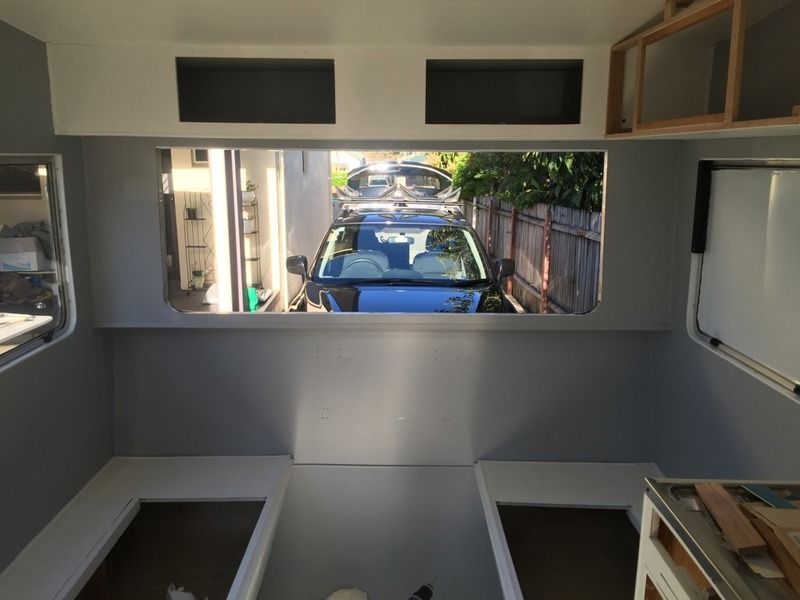 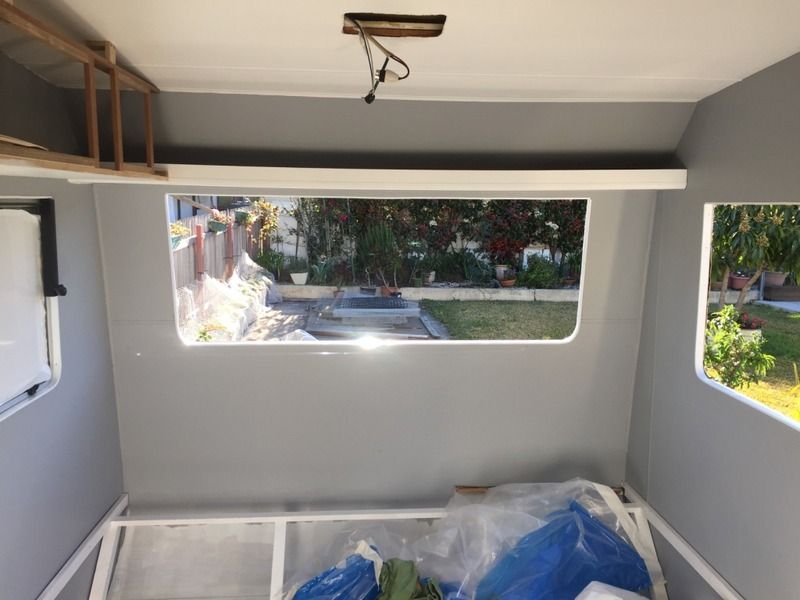 Front extra wide window sill moulding 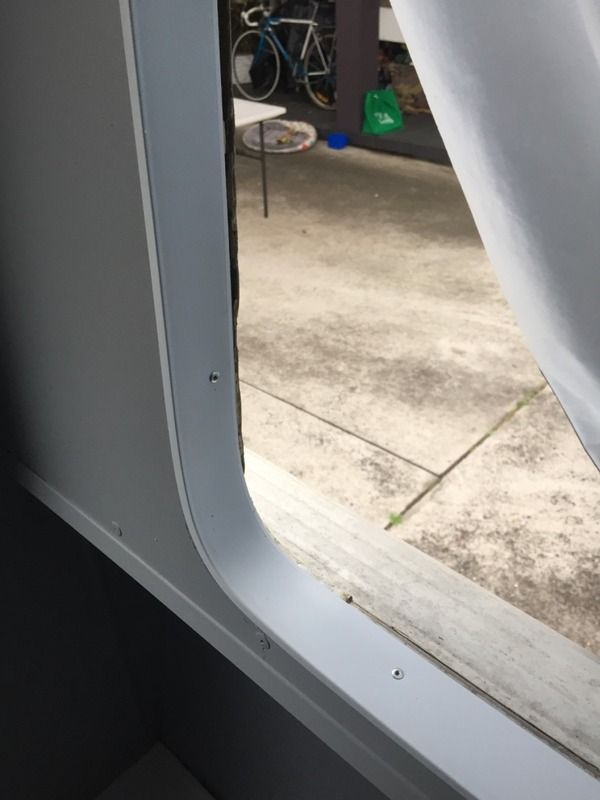 Bed base installed. Just need the slats, a mattress and gas struts 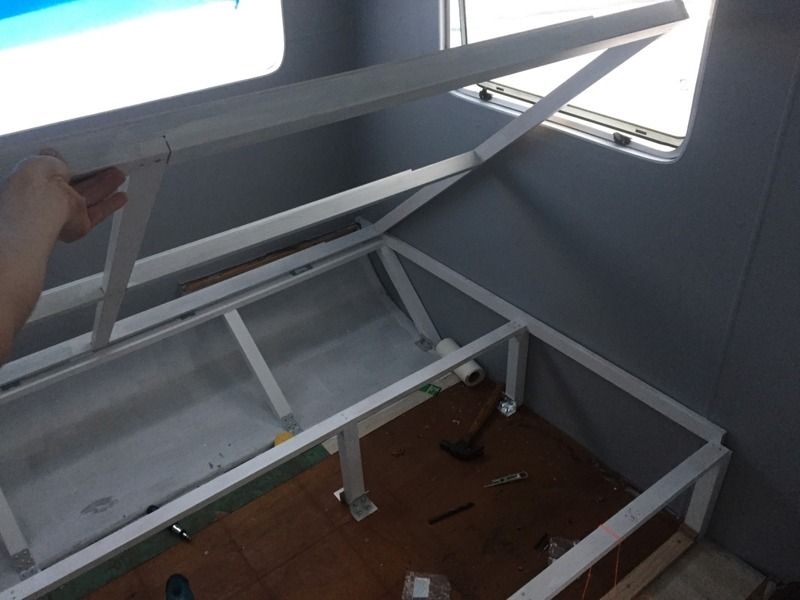 |
|
|
|
Post by tasmillard on Oct 9, 2016 7:27:37 GMT 10
Great progress, looking very good indeed. As for the bed, did you use ally rhs?
|
|
|
|
Post by awbeattie381 on Oct 10, 2016 8:26:57 GMT 10
42x42 pine legs, 19x42 pine rails and sides.
alluminium right angle to secure to the floor (found them at my in laws), side rails screwed into walls, and will make one more support to run along the rear wall as the rear legs are cut at a 45.
|
|
Deleted
Deleted Member
Posts: 0
|
Post by Deleted on Oct 13, 2016 10:25:00 GMT 10
It coming very nice, I am following the progress with interest
|
|
|
|
Post by awbeattie381 on Dec 29, 2016 21:57:35 GMT 10
It's been a while since my last update and I don't have many pictures to show but today was a milestone for us. We finished our window restoration! I had to check back over my post to see when I pulled my first window out...18 months ago!! Its funny reading back on old posts. It took me 4 hours to install my first dust seal on my first mid size window. Over this past week I have been reassembling the front and rear windows (the widest ones) and I have the dust seal time down to around 15 minutes! Practice makes perfect I guess... I am so glad I no longer have to lug window frames and parts of windows to and from Wollongong, and spend hours and hours stripping paint because the previous owner thought it would be a good idea to paint them...One lesson learned: Don't ever buy Diggers paint stripper. Its crap. We only realised this after we ran out of the stuff with one window to go. We bought poly strippa for the last window and what a difference that made to getting the paint off!! One issue I seem to be having with 4 of the windows I have reinstalled, and that is they wont quite wind in all the way for me to lock them closed. My wife has had to assist from the outside by pushing them in. I have attacked rivets and window stops with a dremmel, made sure the window closes evenly and even adjusted the tightness of some of the screws holding the frame to the van but no luck. Any clues? 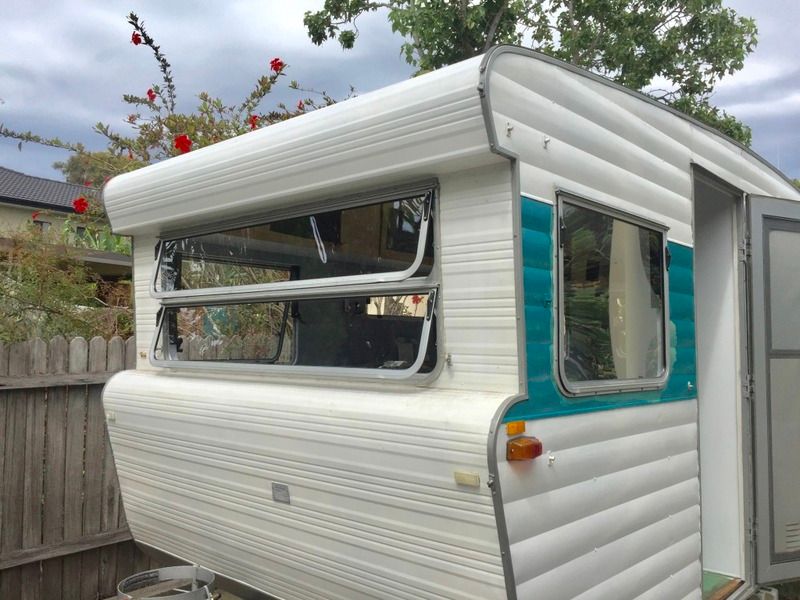 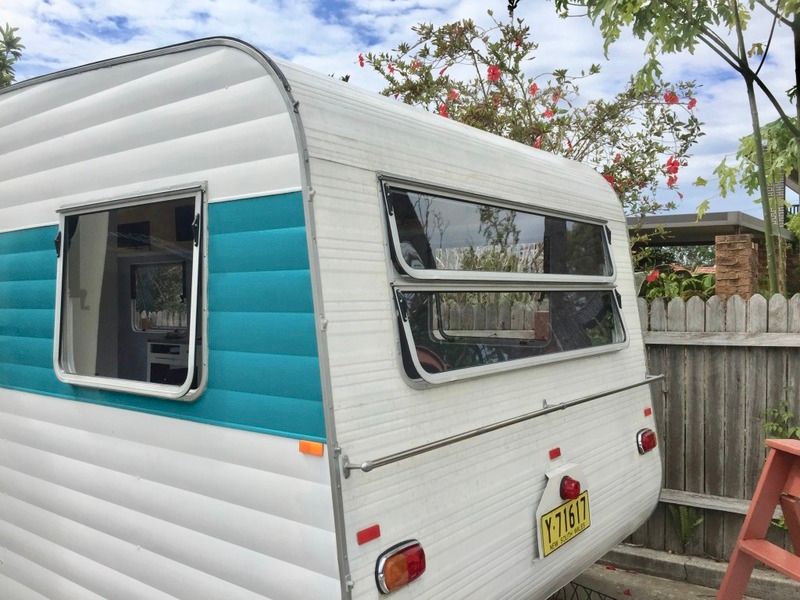 |
|
|
|
Post by 78466noM on Dec 29, 2016 22:53:31 GMT 10
Those windows are worth every day of the eighteen months they look fantastic.
with your windows maybe a spacer under the winder box to bring it away from the window a little house type ones can be stubborn also in the wooden frame I have had move winder unit a couple of millimeters to the inside to get window to shut firm and since you have rebuilt them completely they may now sit slightly different to what they did.
|
|
|
|
Post by snoops on Dec 30, 2016 7:33:03 GMT 10
Great job! Those windows look fab - hope I have the dedication to make mine look that good when the time comes to sort them!
Those are the same windows I have - do you mean the handle just goes around and nothing happens or are they hitting something? I have 3 in mine that need assistance from the outside to latch them - all have worn winders. New ones are readily available from Caravans Plus if that is the issue.
Or is it that the new rubbers are causing too much tension for the winder to pull them in? In this case, time will help you as the rubbers conform to their new home when locked shut.
|
|
|
|
Post by Mustang on Dec 30, 2016 8:27:39 GMT 10
Hi Andrew, You appear to have covered all the bases re frame warp etc. When I replaced our winder hardware I opted out of riveting the arm that connects the window to the box. Reasons it didn,t look like a factory job & it tightened the arm inside the external plastic holder. Also by using a metal thread it is easy to remove next time. May be worth trying one this way? Note: The bar that connects the winding boxes has to be synchronized. 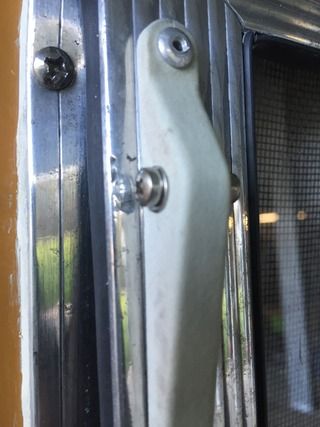 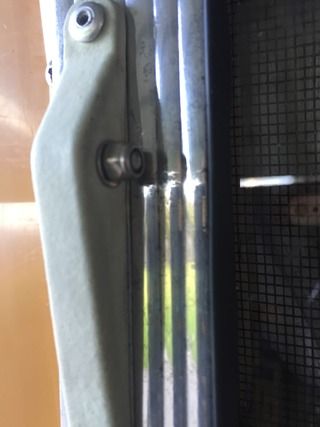 |
|
|
|
Post by pisces51 on Dec 30, 2016 23:39:11 GMT 10
|
|
|
|
Post by Mustang on Dec 31, 2016 8:40:34 GMT 10
Good advice there Al, I think most members, inc me, forget the wealth of knowledge in "search"
|
|
|
|
Post by awbeattie381 on Jan 9, 2017 11:41:28 GMT 10
Thanks for the replies and the links. Glad to hear I am not the only one suffering this problem.
My winder boxes are definitely closing in sync with one another, as I made sure I was mm perfect with those - the gap that I cannot close is identical on both sides (I guess that is a good thing!).
All of my winder boxes are in good working order (1 set was replaced).
One of my issues could be that I was working with batches of windows (did all the squarish ones at once, then the front and rears at once). So its highly likely I have mixed all the frames up that were of the same size/same batch.
Another cause could be the inner not sitting flush, so there is too much mastic. I did get a little excited with it and it was a pain to reinstall these inners when tolerances were almost non existent!
Is it possible that the 'hinged' part of the frame has a limitation ie assuming everything is square the hinge 'runs out' at the same point the window closes flush with the inner frame? The top piece of each window frame that wont close looks like it cannot hinge as far as it needs to to close properly, so when I close them from the outside most of the pressure goes into those plastic window corner inserts (you can see the stress in the join - look at the close up photo of the link box above). Sorry its hard to explain...
I might try tapping the window gently both forward and backward to see if that helps...I feel like I have done this a thousand times though before I connected the control boxes to the link boxes!!
As an aside, do those little plastic plugs that sit in the 'hinge' to stop the window falling out also serve a function of keeping water/rain out? I have hacked a few to within an inch of their lives to try and get these non cooperating windows closing!
|
|
|
|
Post by awbeattie381 on Apr 23, 2017 21:25:32 GMT 10
Disappointingly, it seems to be a long time between posts, but I am pretty much finished the kitchen overhead cupboard now. I wired up the lights which meant I could install the bases, then the fronts, then the doors. I ran out of hinges so have one more door to hang. Even my wife is getting excited she can now see progress! The seating cushions are also now at the upholsterer getting remade. Really looking forward to seeing his work! Next job is painting the cupboard, then rebuilding the dining table and kitchen bench followed by a fridge respray and install, curtains, flooring. Getting there, and our first trip is now planned to be in August for a week. We have a real deadline! 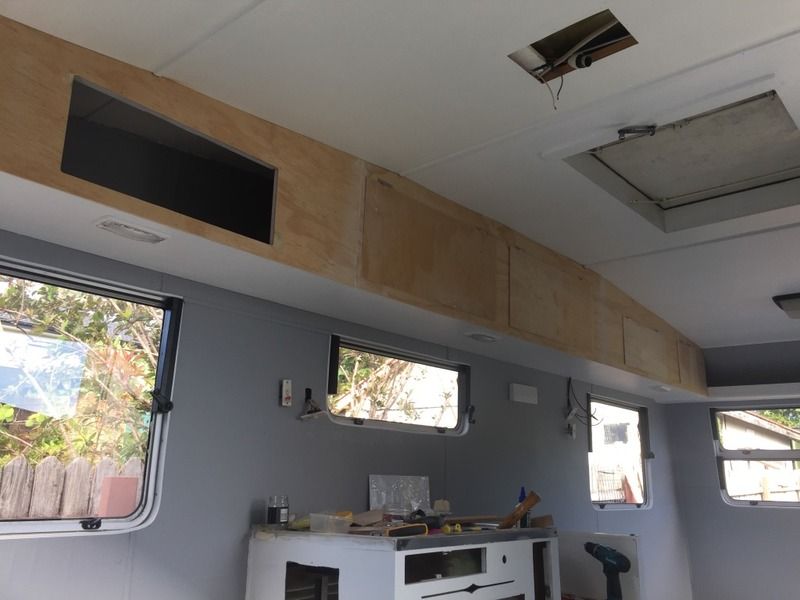 |
|
|
|
Post by Mustang on Apr 25, 2017 19:26:46 GMT 10
Great work AWB, keep us in the loop!!
|
|
|
|
Post by awbeattie381 on May 1, 2017 13:09:15 GMT 10
Thanks Mustang. I'll be putting in another weekend over mothers day. Stay tuned for another update soon.
|
|
|
|
Post by awbeattie381 on May 22, 2017 22:19:31 GMT 10
We have put a couple of solid weekends in over the last few weeks, which allows for slightly better progress. Pink sip today (it passed) so another photo opp with my wife's car. Van is booked in for mid-July to have the new 12v cupboard lights wired up, the 12v system setup with battery and inverter, anderson plug for solar or car charging and fridge re-install/gas check. 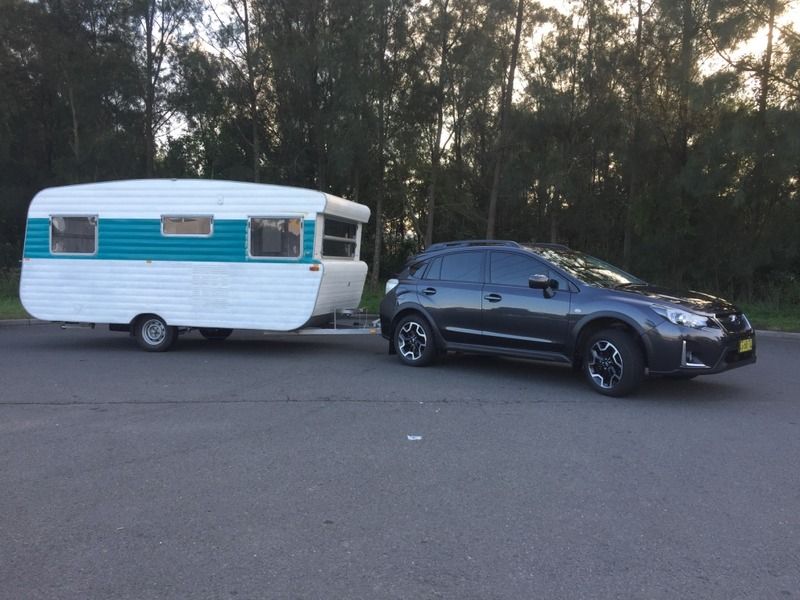 My new cupboard has been painted as have all the doors. I started hanging doors today. Funny how you then have to start with the fiddly adjustment process too...I didnt realise so many doors werent closing properly! My wife decided to paint a few random door fronts in a buttery type colour. It doesnt look too bad. 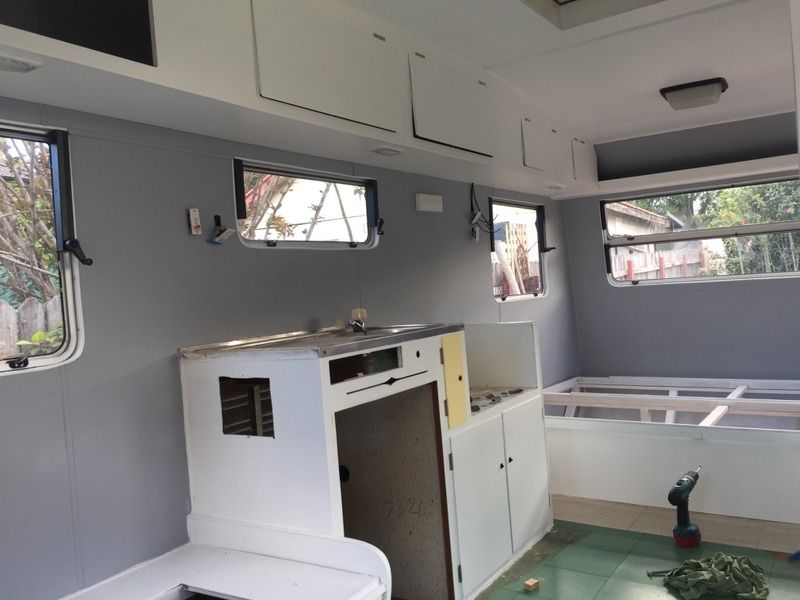 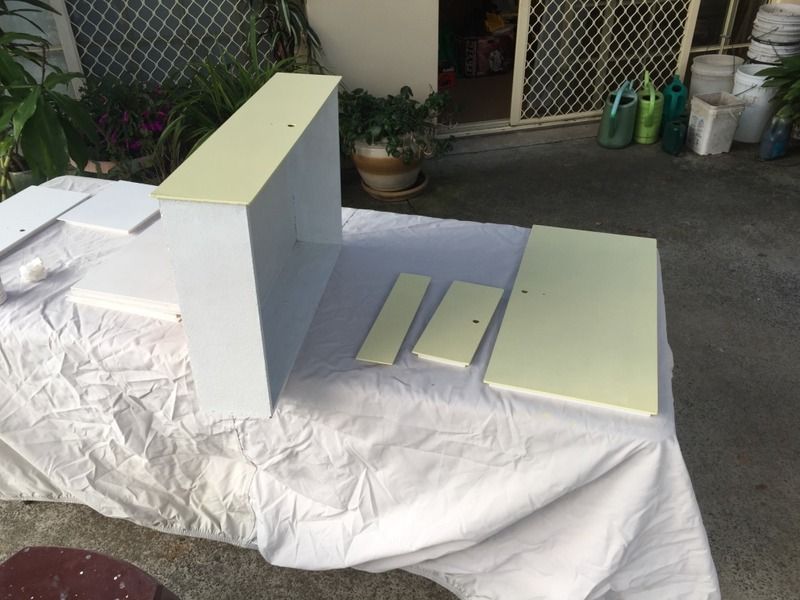 I also picked up the seat backs and bases from the upholsterer today - I cant believe how good they look! $180 well spent!! 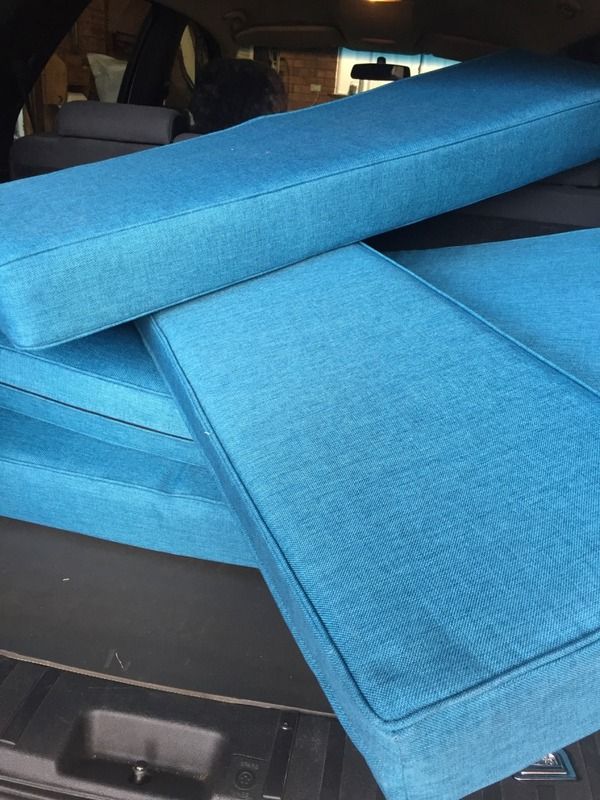 |
|
|
|
Post by pisces51 on May 22, 2017 22:40:11 GMT 10
G'day Andrew, Your van is really coming along VERY nicely!  That upholstery is "top shelf stuff" and will look fabulous in the finished van. I also commend the "chief painter" on her selection of colour for the cupboard doors...lovely!  Keep plugging away...you'll be on the road in a fairly short time, by the looks.  cheers, Al. |
|
|
|
Post by Mustang on May 23, 2017 8:49:19 GMT 10
I never want to be an upholsterer @ $180.00 !! great price.
Looking very smick
|
|