|
|
Post by atefooterz on Aug 8, 2015 13:30:57 GMT 10
That looks to me a textbook case of electrolysis, dissimilar metals plus the moisture content of the timber. The quality of that timber & the well bedded screws have just formed a top crust that stopped any serious moisture doing damage to timber there, by the looks. Another decade or so and a very different story i imagine. A nice cheap bit of spongey big green shead pine there would have given a very different result.  |
|
|
|
Post by doublechevron on Aug 19, 2015 13:52:03 GMT 10
Well this stuff finally arrived .... $13.00 for 36meters and it's ideal. 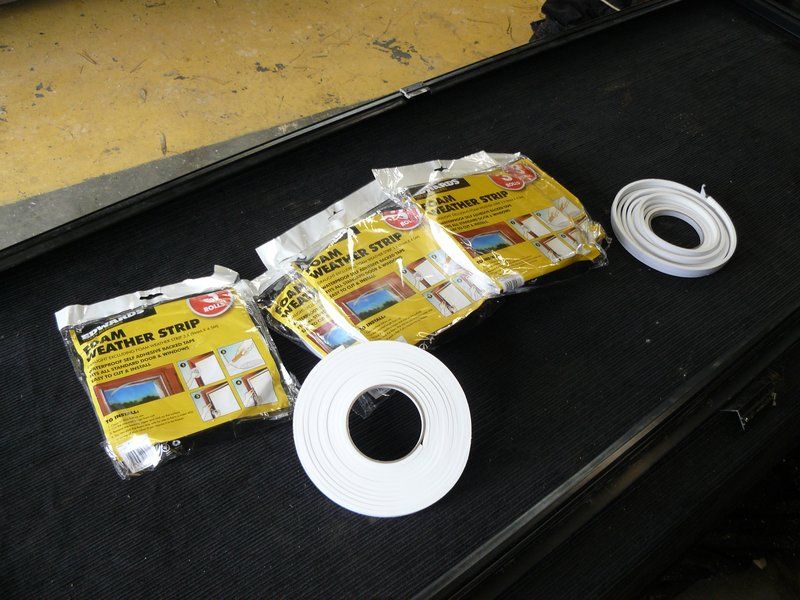 www.ebay.com.au/itm/191372685376?_trksid=p2057872.m2749.l2649&ssPageName=STRK%3AMEBIDX%3AIT www.ebay.com.au/itm/191372685376?_trksid=p2057872.m2749.l2649&ssPageName=STRK%3AMEBIDX%3AIT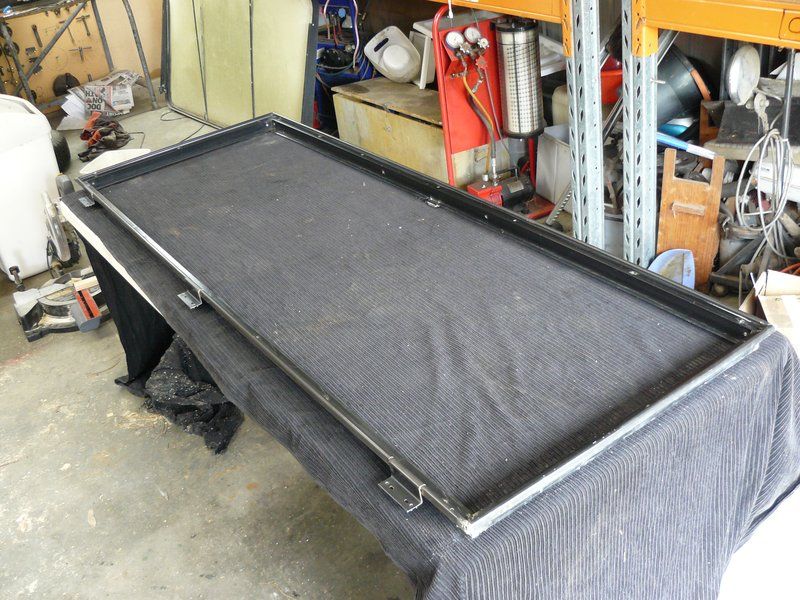 So I whipped the door frame back out and gave it a good clean. 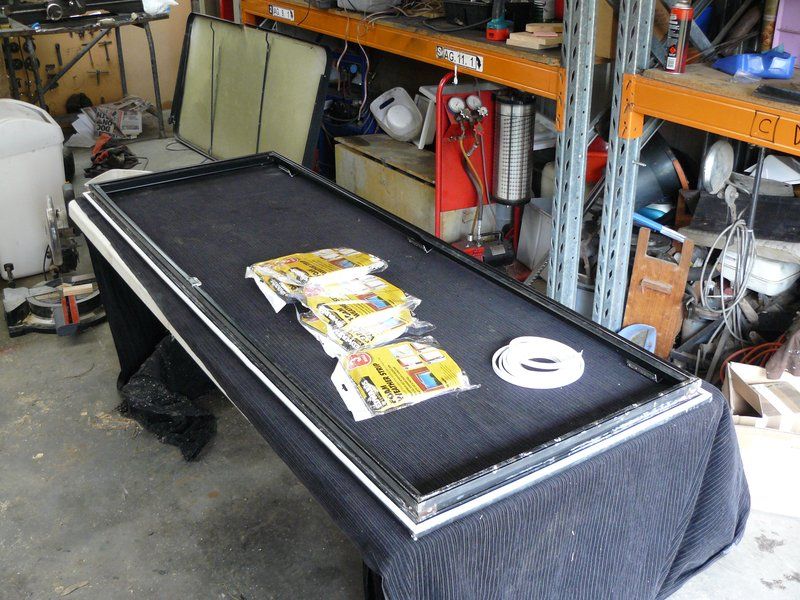 And run a length of the foam seal around the outer edge. It's ideal, not too thick, so leaves plenty of space for the mastic to be pumped on. 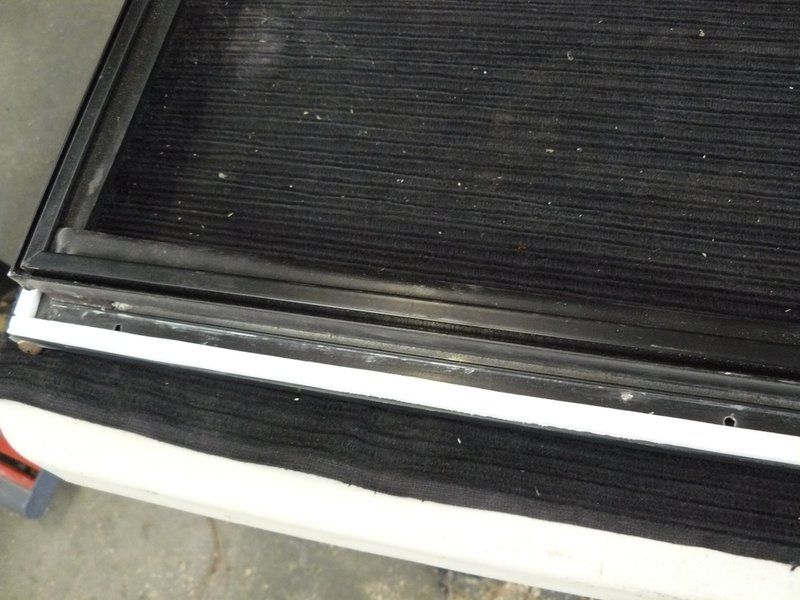 It's self adhesive on only one side .... So very easy to apply. 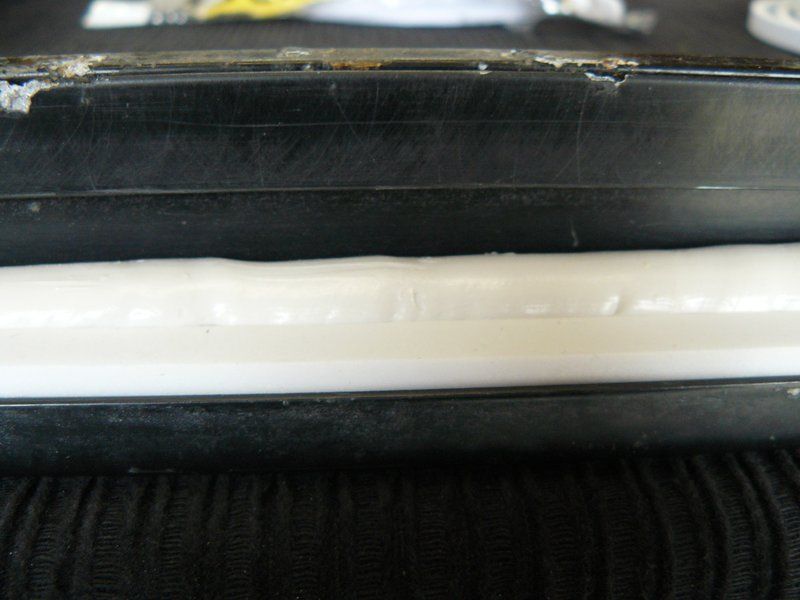 Pile on the mastic.... Don't be stingy  After all the efforts of getting this sucker out and cleaning it .... Finally read to just screw back in. 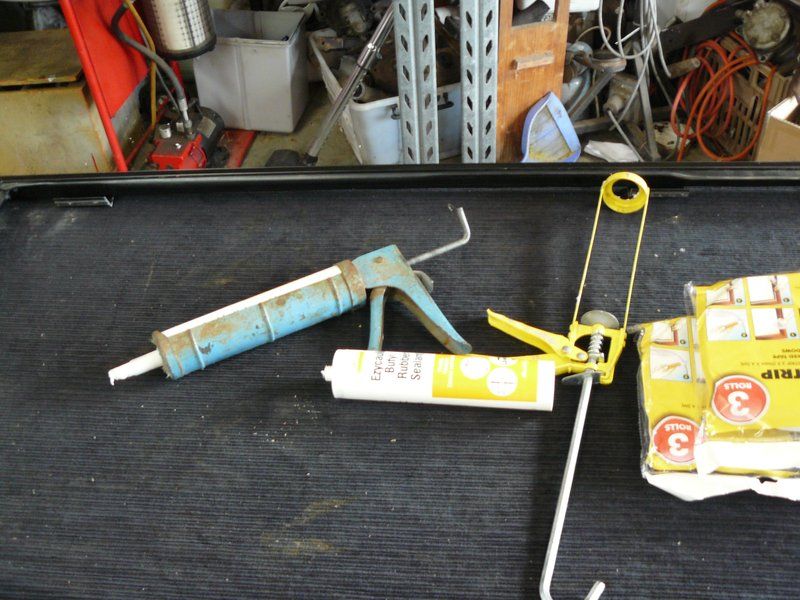 It was very bloody painful to pump that mastic out though. I've buckled both of these now.... Damn it was hard work and took forever. I think I'll try heating the mastic tubes next time to try and thin it out a little. 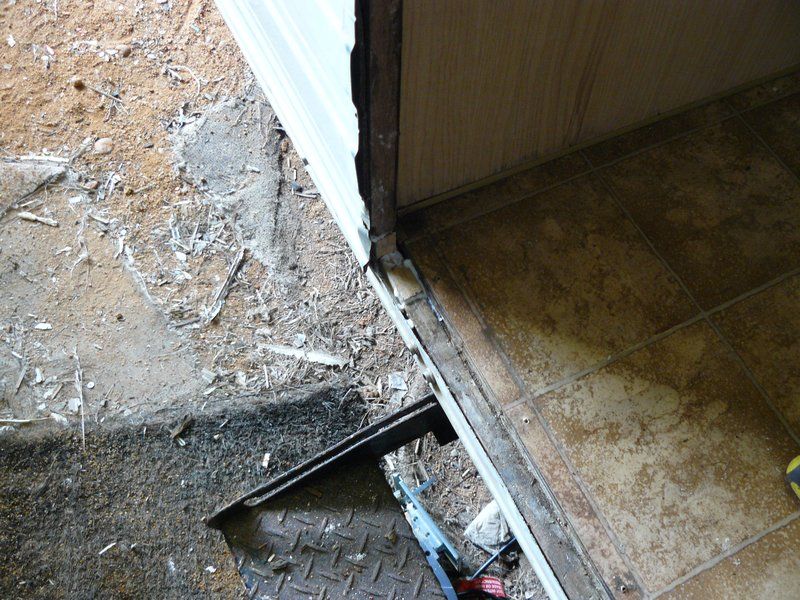 The wood was a little soft in this bottom corner, so I chiseled it out nice and deep, and glued some fresh stuff in. 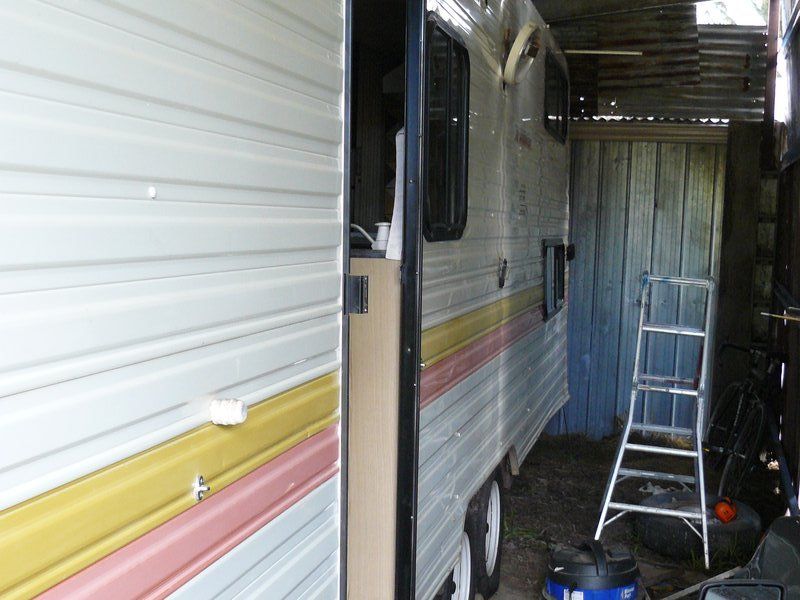 It screwed back in with no problems. I just used the slightly larger screws for the door. 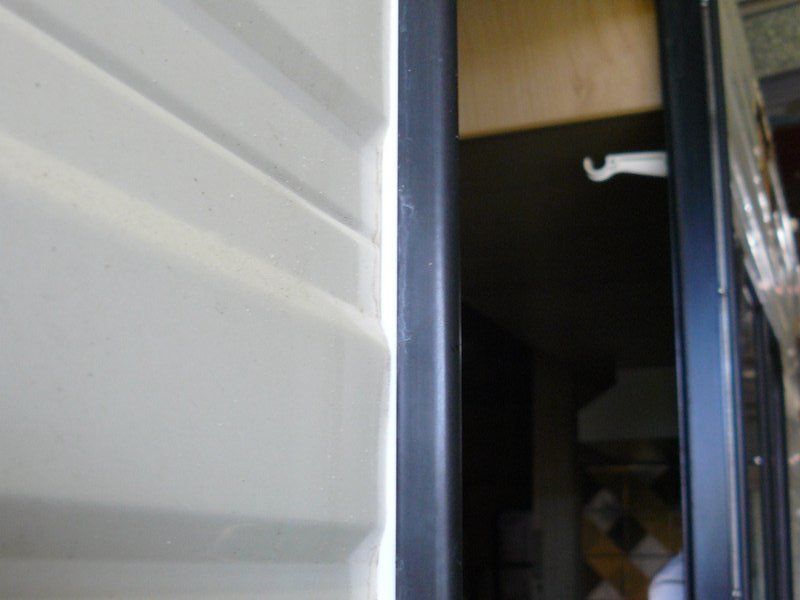 The foam seal isn't there to prevent leakage. It's just to protect the mastic from the weather so it doesn't dry out. 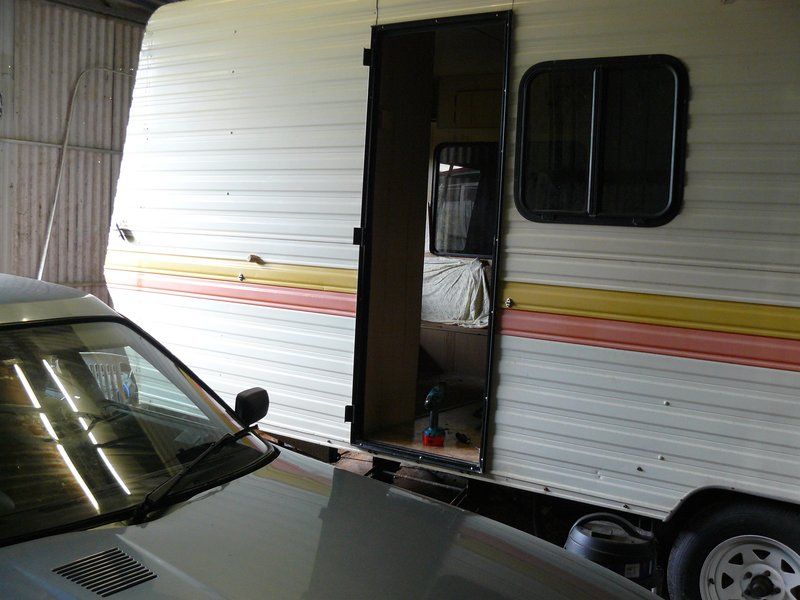 All done. 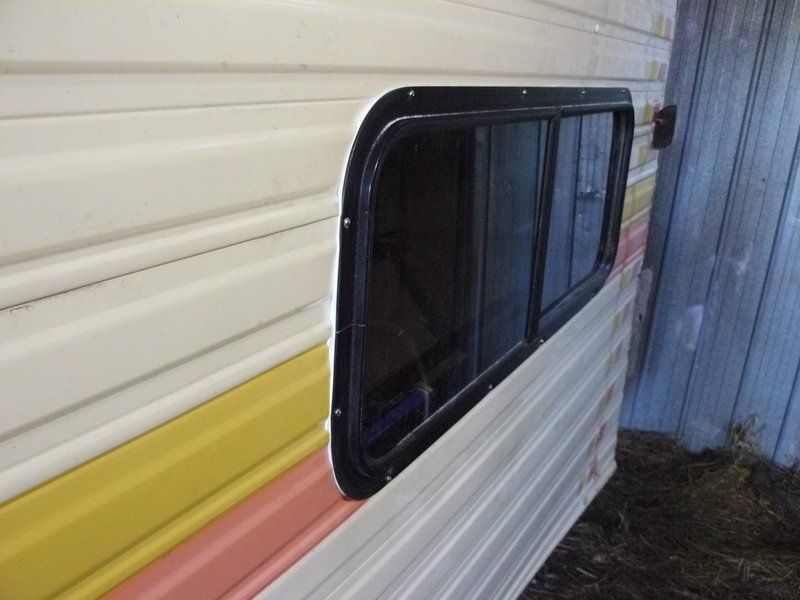 All the windows down this side of the 'van are done too.... 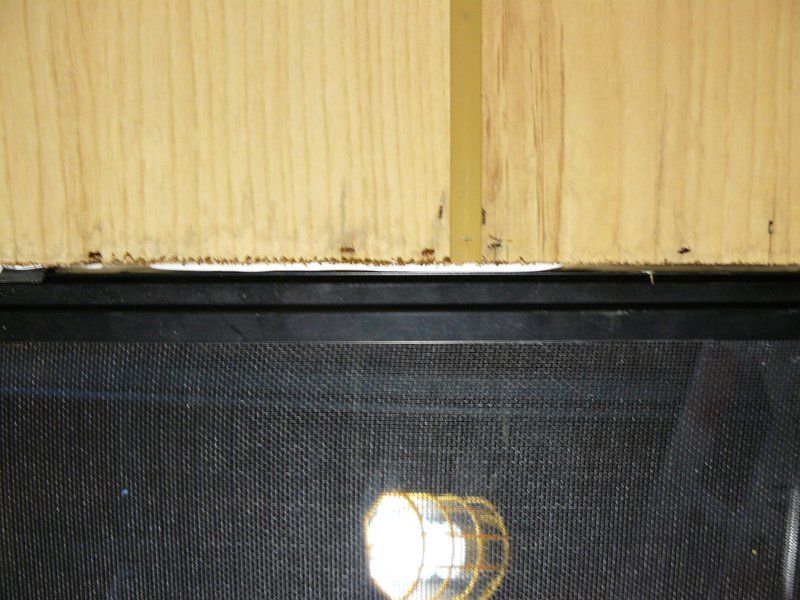 If I've used enough mastic you should see evidence that it's "squeezed through" into the inside of the 'van. 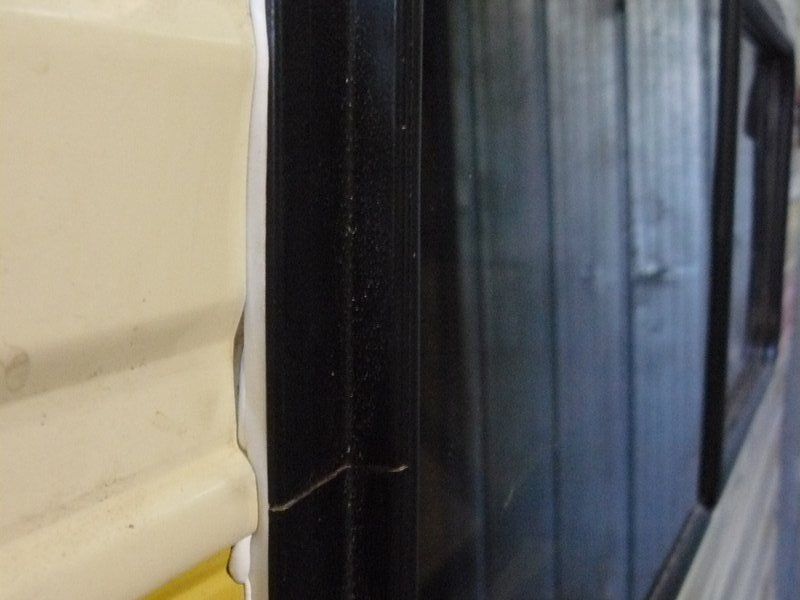 Interesting, look how deep the profile of the cladding is around the coloured portion. It won't leak, remember the foam is to just protect the mastic from the sun and drying out. 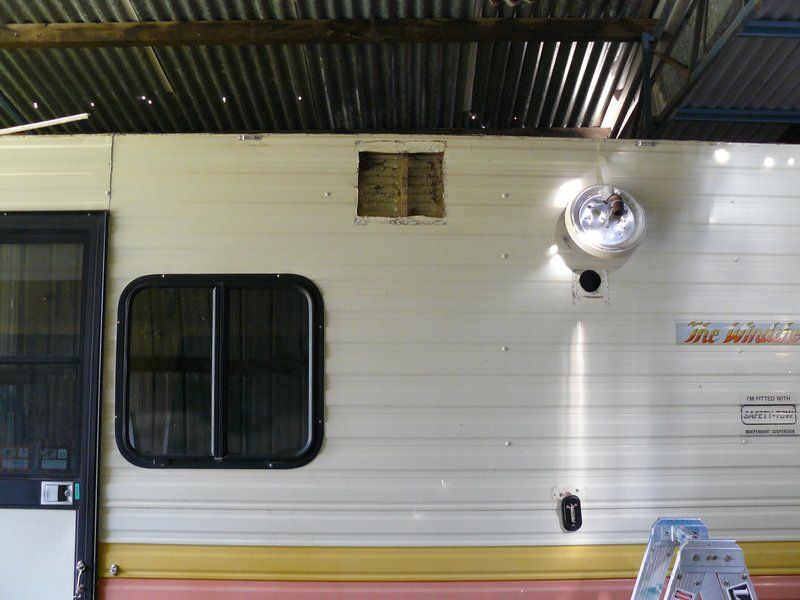 Look how huge that microwave vent is versus the tiny hole for the stove. 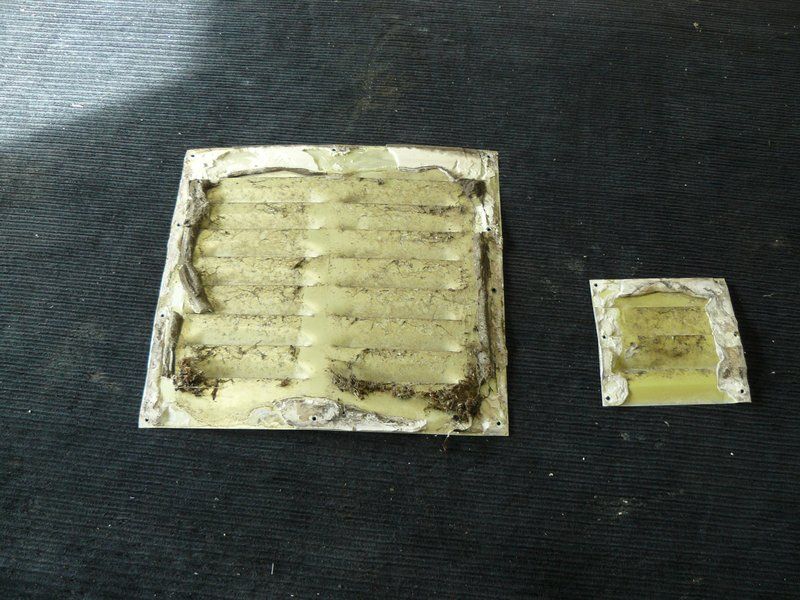 these have been cleaned and are ready to refit with roof and gutter silicon (not mastic, you'll be able to get a knife under them to cut the silicon away if they need to come back off. The silicon is vastly superior IMO as a sealant over mastic. I'm ever so slowly plodding away at this .... another couple of months and I'll be done! seeya Shane L. |
|
|
|
Post by Mustang on Aug 19, 2015 18:47:36 GMT 10
Hhhmmm wish you had posted this before I sealed my windows.
Guess the difference between our restos is I have used ribbon mastic, & lots of it, but no tape to seal it. (Just didn't know)
When we paint my helper suggested we undercut the mastic around the edeges & the use a liquid mastic to reseal the edges.
When Vincent enters the real world we will find out???
Nice feeling putting something BACK!!!!
EDIT:
The beauty of soft mastic is if you have a problem its no sweat to remove the window.
|
|
Deleted
Deleted Member
Posts: 0
|
Post by Deleted on Aug 20, 2015 7:09:10 GMT 10
Hi Shane
I will start pulling out some of my windows shortly and will do it the same way you have, looks very neat.
|
|
|
|
Post by doublechevron on Aug 20, 2015 10:10:30 GMT 10
Hi Guys, I just copied "Cabcars" instructions (the caravan repairer that was on the caravaners forum a few years back). If I ever want to figure what is the best way to do something, I go lookup his username on the caravaners forum. The amazing bit was everyone would then argue with him saying "no me using sikaflex/silicon/etc " is better. So he would forever again and again say "If you use silicon on a window ... or even worse sikaflex, as a repairer we will NEVER be able to get it out without destroying the wall of the caravan"..... He's the one that constantly stated in nearly every post "You MUST --squeeze out-- any sealer used. IT's the hydraulic pressure generated squeezing out the sealant that fills every void and hole with sealer. If your not wasting 1 in 3 tubes due to squeeze out... it'll likely leak and your not using enough sealant". Everything he states makes 100% sense to me, so i follow his instructions If I pumped a lot of silicon around one of these windows and "squeezed it all out" fitting the window like I have with the mastic above .......... That window would be almost impossible to ever remove. It sure would never leak though .... You just cross your fingers and hope like hell it never has to be removed. seeya, Shane L. |
|
Deleted
Deleted Member
Posts: 0
|
Post by Deleted on Sept 2, 2015 21:18:32 GMT 10
Shane, great job on the windows. I will be following the same method as yourself in the coming months. The result looks so neat. Hopefully after following the method I should never need to do any further works on the windows, well hopefully not before I've handballed the van to the kids!! Cheers Trav |
|
|
|
Post by snoops on Sept 3, 2015 8:56:41 GMT 10
While I do agree with all that Shane, my thoughts are that once I've sealed the windows in with sikaflex or similar PU product, should it leak again in say another 40 years, then maybe it's time for a new van...  I haven't done my windows yet, so not 100% sure which way I'll go yet, but I can get PU by the box full FOC, so that may sway my decision. |
|
|
|
Post by snoops on Sept 3, 2015 9:25:54 GMT 10
...
|
|
|
|
Post by doublechevron on Sept 3, 2015 14:32:33 GMT 10
While I do agree with all that Shane, my thoughts are that once I've sealed the windows in with sikaflex or similar PU product, should it leak again in say another 40 years, then maybe it's time for a new van... I haven't done my windows yet, so not 100% sure which way I'll go yet, but I can get PU by the box full FOC, so that may sway my decision. It doesn't even need to be a fancy urethane adhesive like sikaflex. Given how stable the 30year old silicon on the roof of this caravan is, silicon would last the life of the caravan too. My issue is if you need to remove the window. One of the bunk windows in the windsor had a bulls eye in it. I must have had it in and out 1/2dozen times while I was cleaning and prepping it. You would bloody believe it. When I was doing the final fitting, I gently placed my palm on the glass to hold it in place while I screwed it down ..... You wouldn't bloody believe it ... the sucker cracked from the bulls eye out in 4 different directions .... sigh  ..... Oh well it could have been worse, the kids might have been playing in that bunk and got covered in glass  Bottom line is that entire window may need to come back out to go to a glaziers! if I'd used silicon or sikaflex I would literally destroy the wall of the van to get it out (not an exaggeration sadly). Once you glue a window in with a urethane... It's NEVER coming out again. This is incredibly frustrating trying to find time to work on the caravan. It would be nice to be able to use it this soon given spring is now here 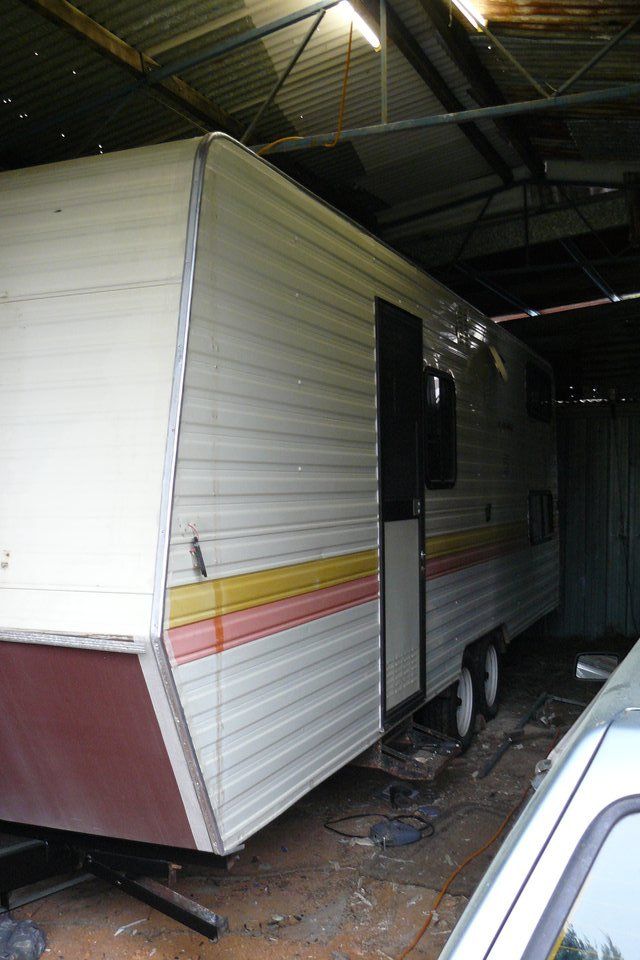 Many hours of cleaning tru-mold and they were ready to be refitted. So I screwed them on. 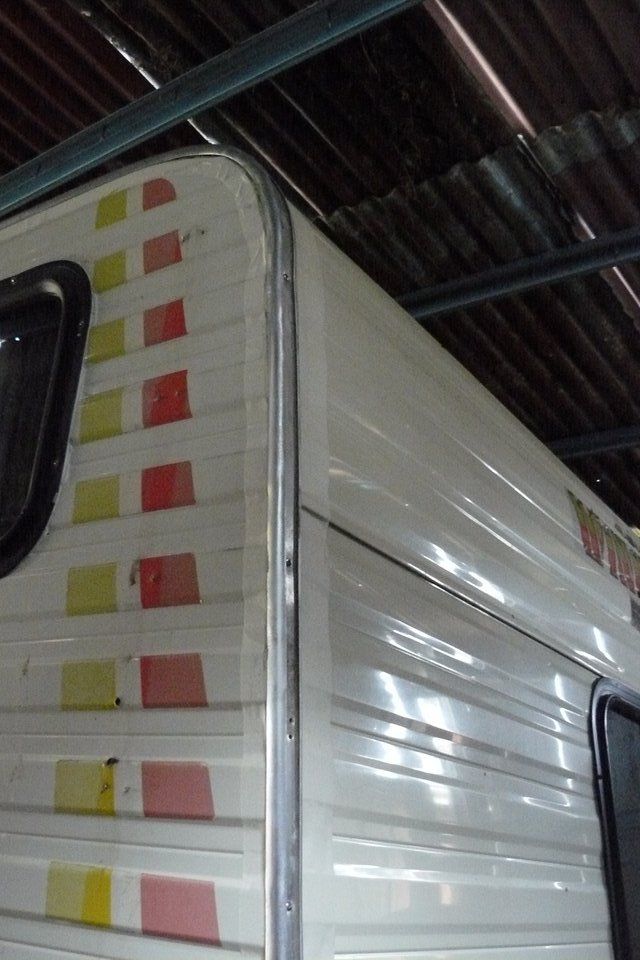 And taped them all up. 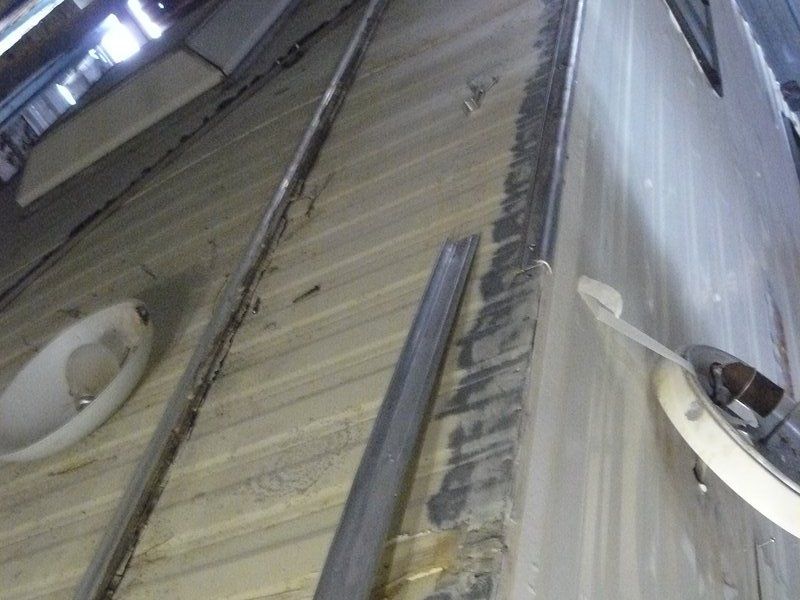 I started with the small center section of tru-mold as I wasn't sure how much sealer was required.... 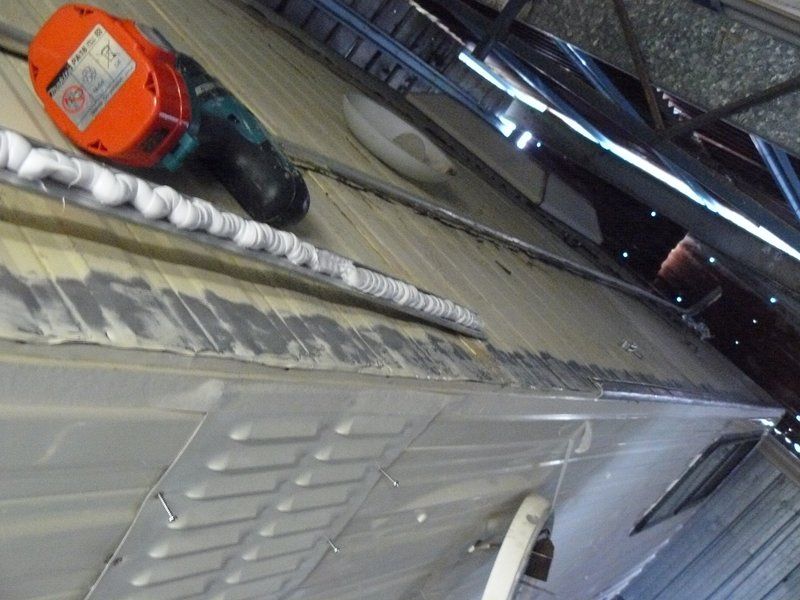 The technical term for the amount needed is "sHiTloads" .... 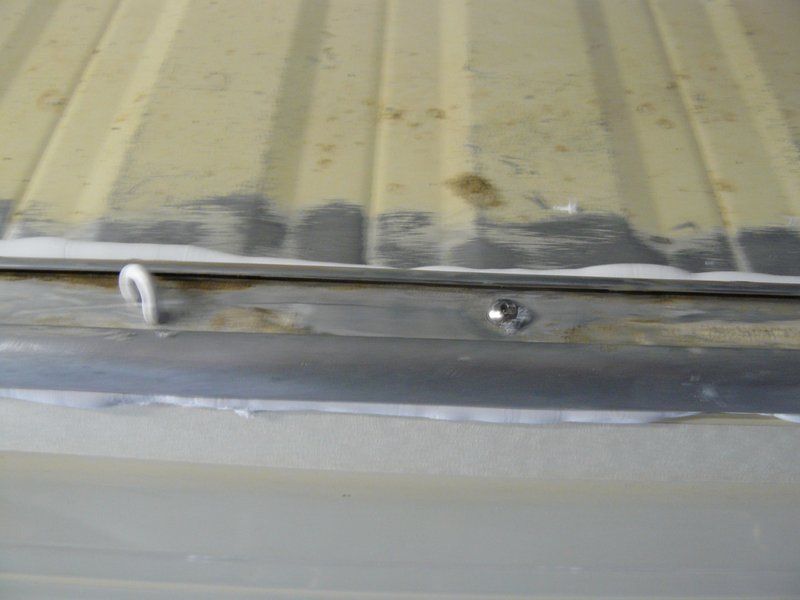 Plenty squeezed out. 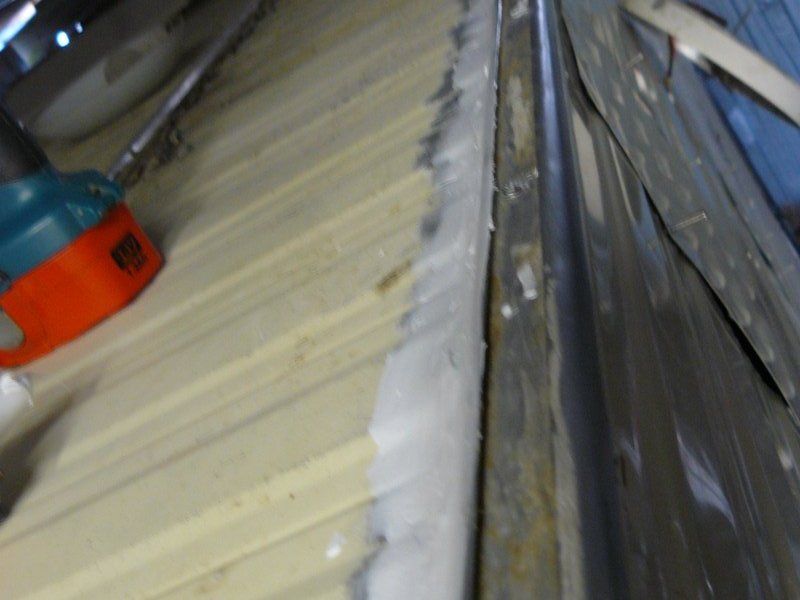 roof side I just troweled out with my finger .... You can't see it so finish isn't really relevant (unless your 10foot tall I guess). 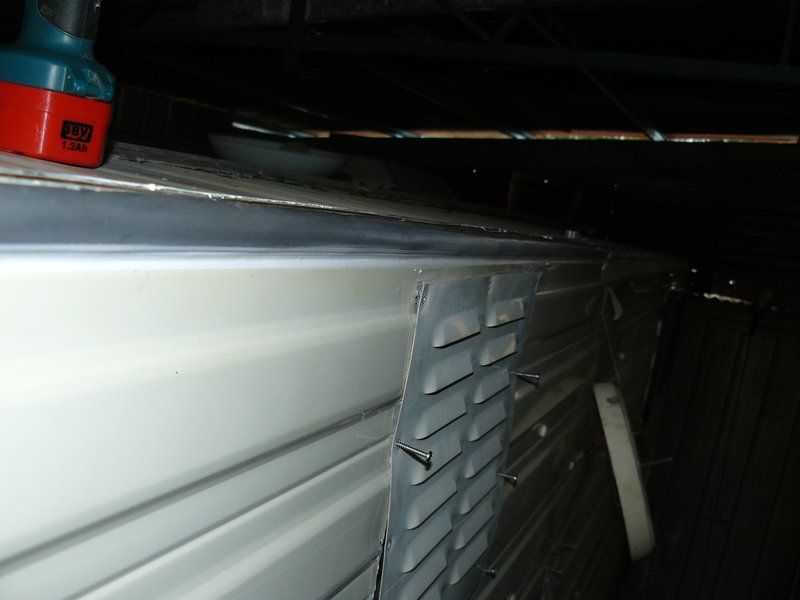 Lots of time cleaning off the silicon and trying to finish it. I had a few rolls of cheap paper towel there and just wiped the excess silicon off with my finger then wiped my finger with the paper towel .... throwing the paper towel on the ground under the ladder to be picked up after the silicon had set. 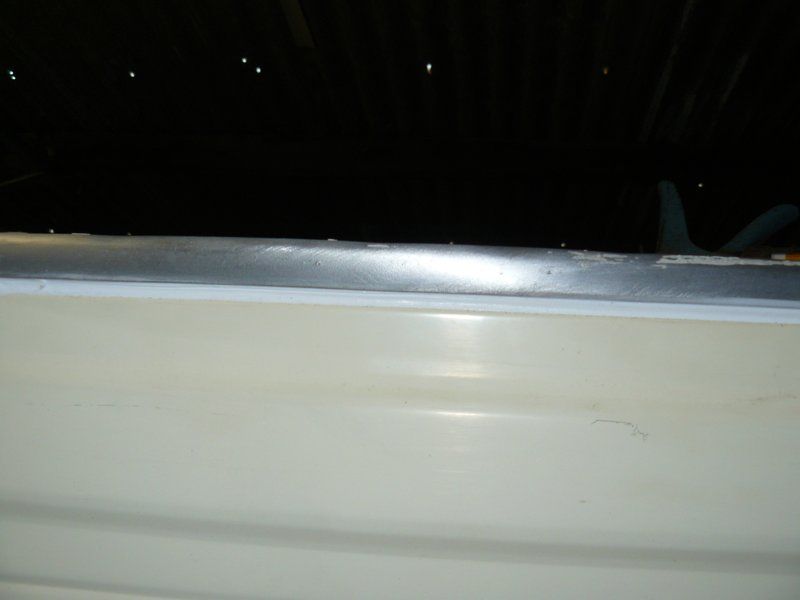 remove the masking tape right away before the silicon skins off. 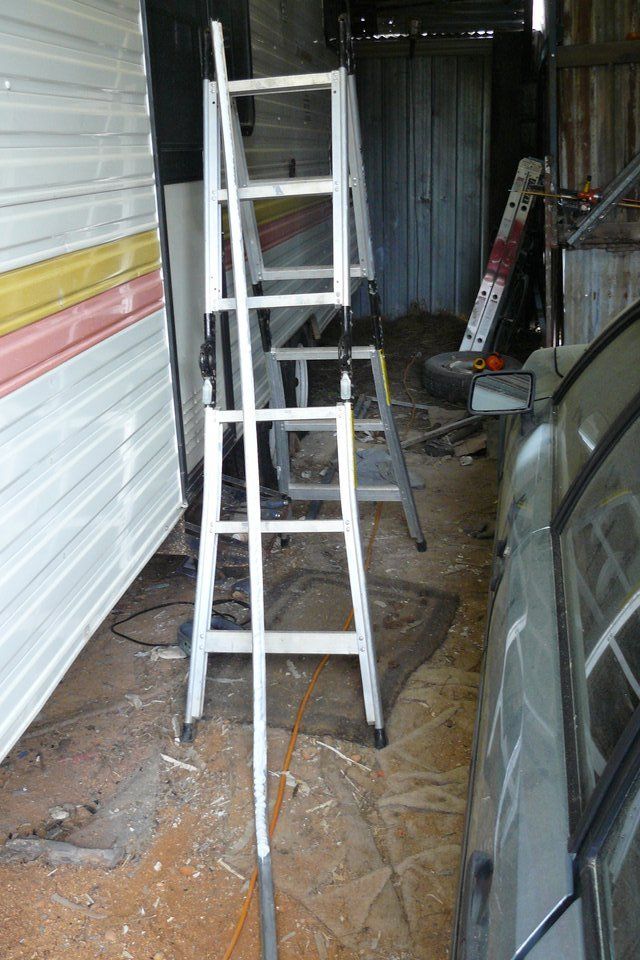 The two other sections of tru-mold are a lot longer. I pumped heaps of silicon into the roof section of tru-mold and front corner. 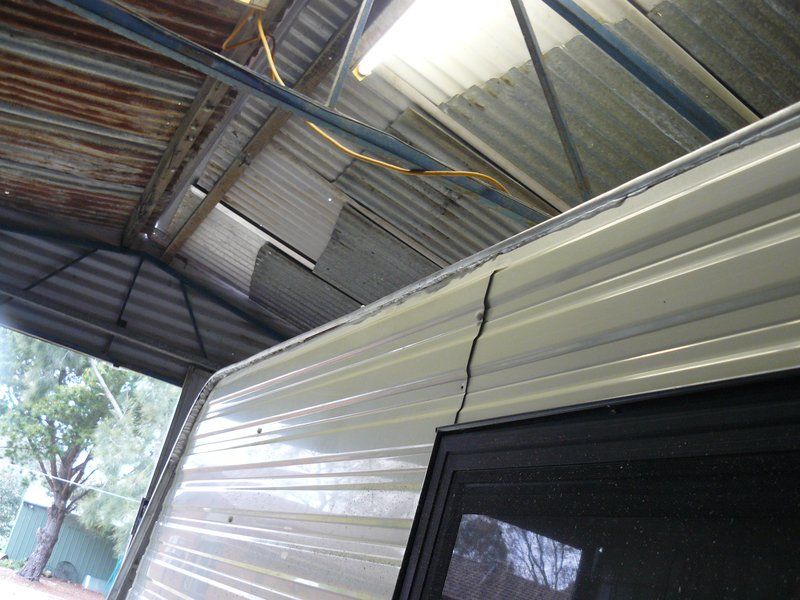 and screwed it down. 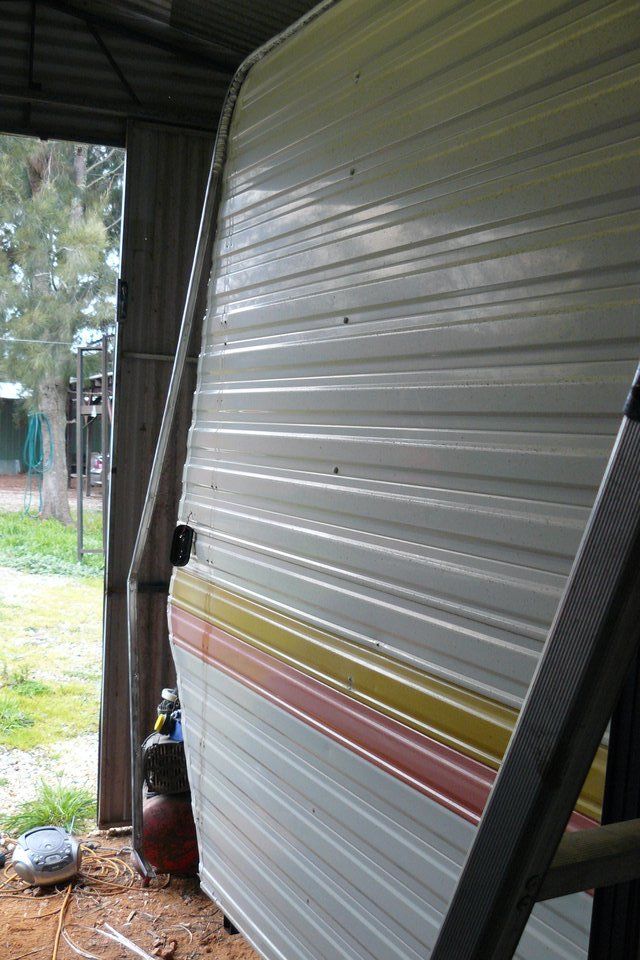 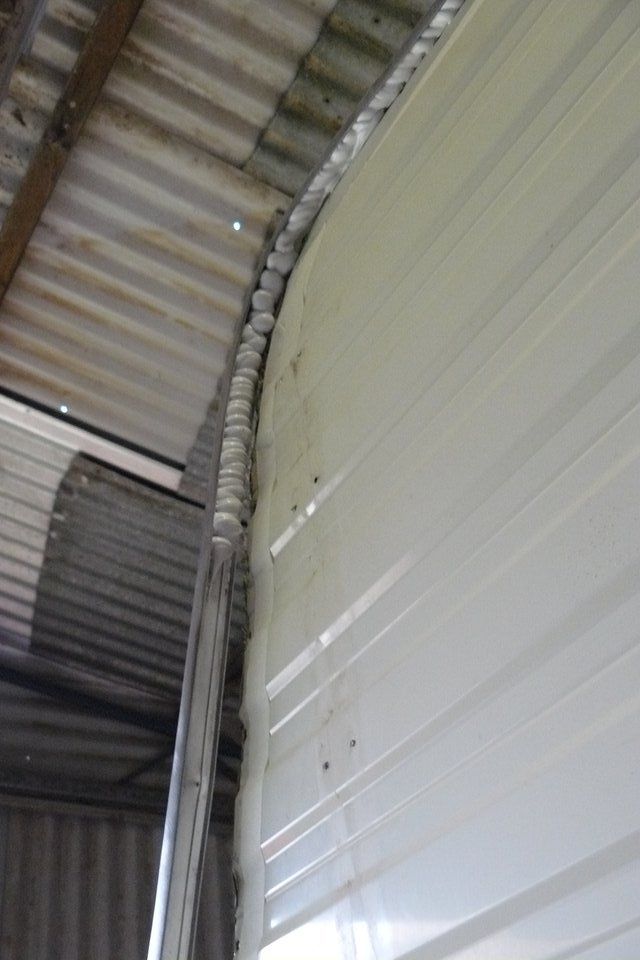 Now the tru-mold is secured I can fill the rest of the tru-mold with sealer. 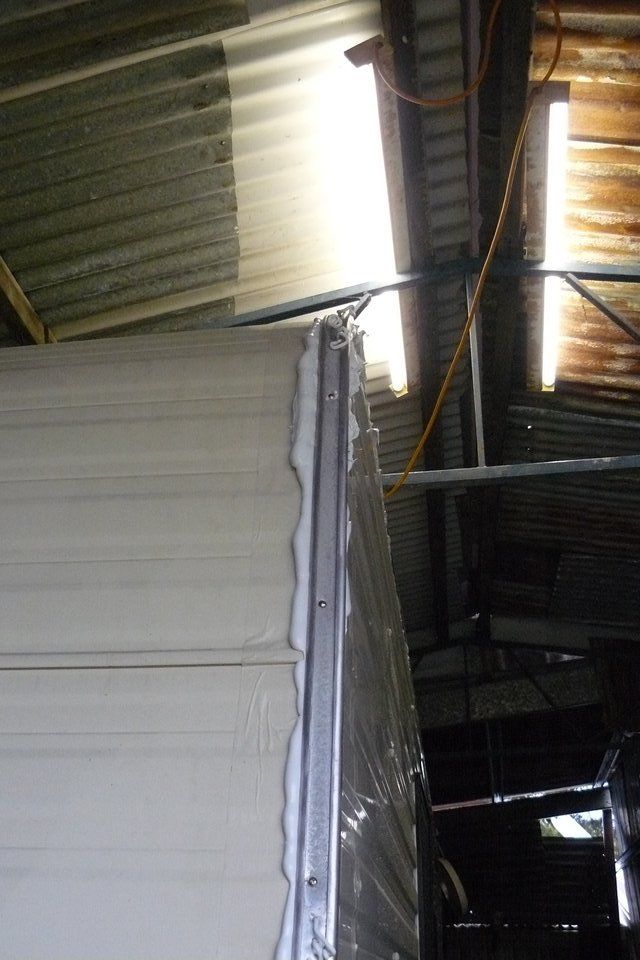 I doubled up on the sealer around the corners .... what a mess to clean up! 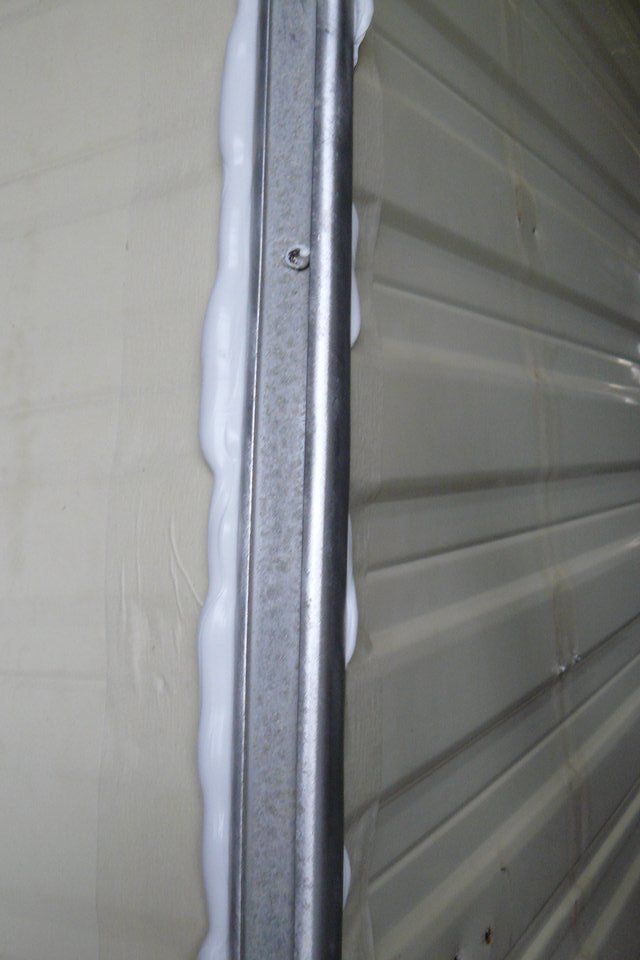 plenty of squeeze out. 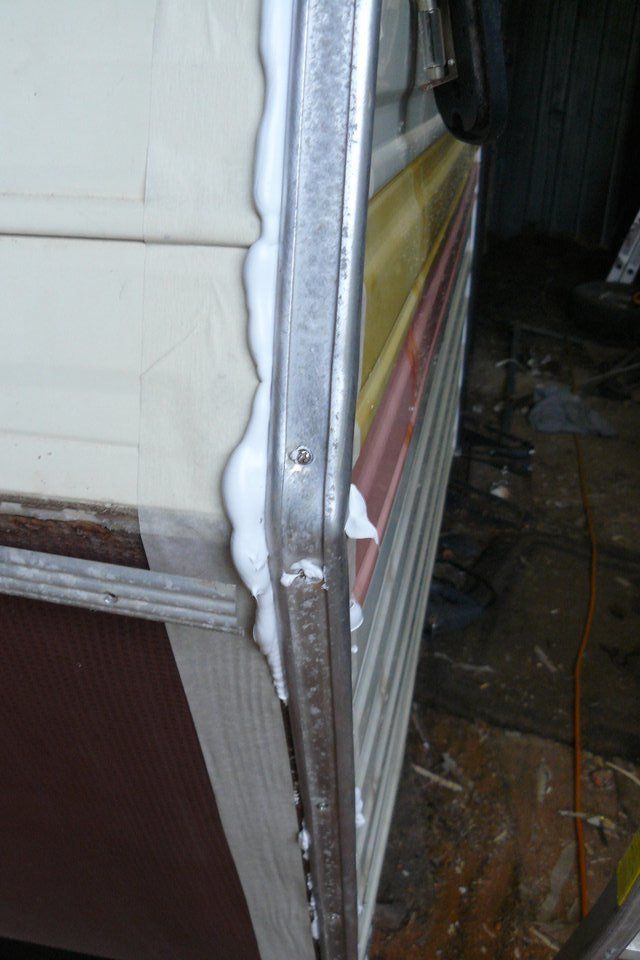 I started at the top and worked my way down the wall to screw it down. Otherwise the tru-mold corners won't fit properly. 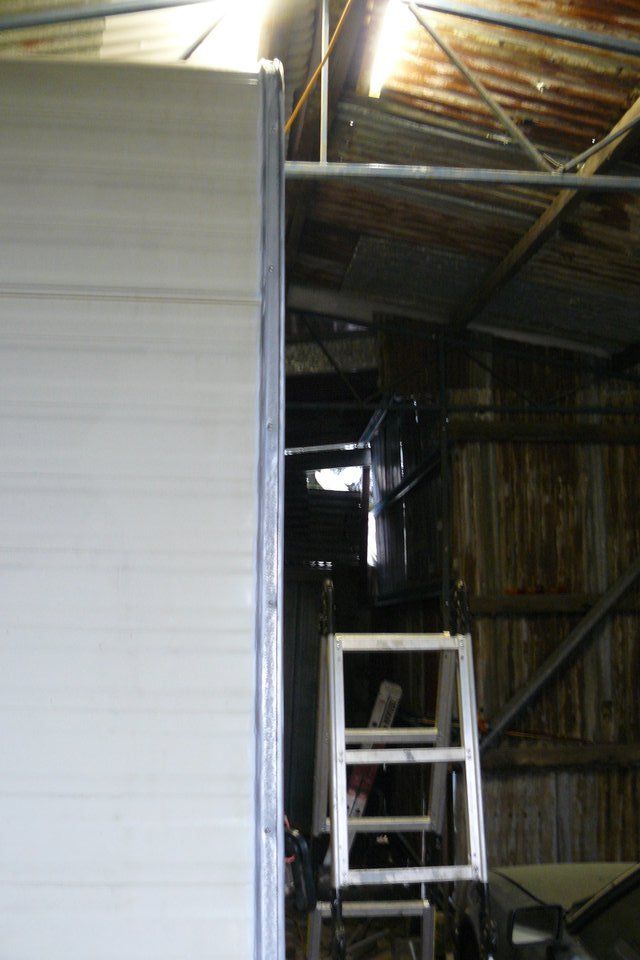 I ran into a problem cleaning and finishing the silicon. I simply couldn't work fast enough. 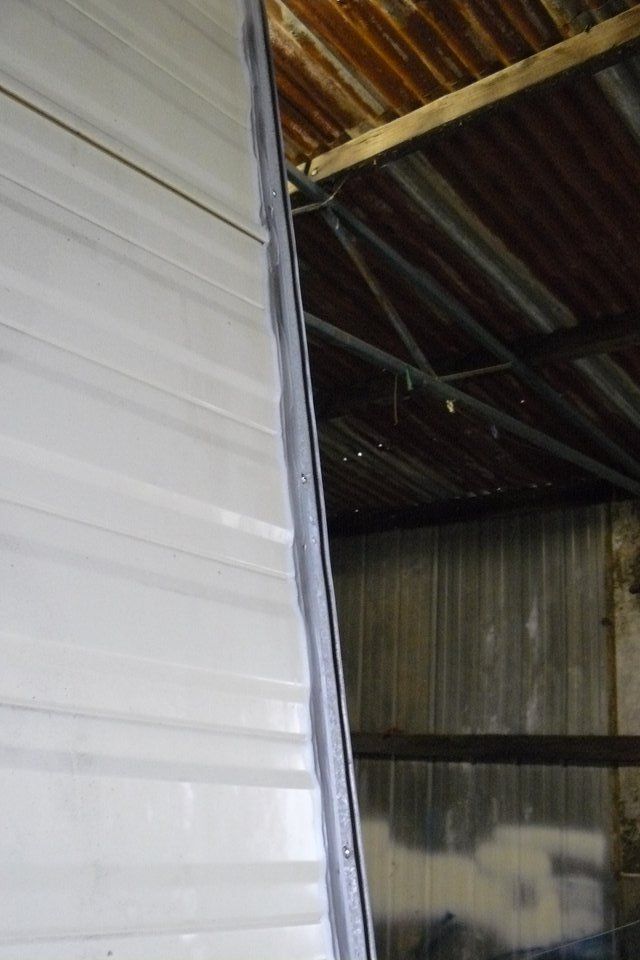 ![]() i1373.photobucket.com/albums/ag378/CitroenCollector/P1170820_zpsyr33spbx.jpeg]/img] i1373.photobucket.com/albums/ag378/CitroenCollector/P1170820_zpsyr33spbx.jpeg]/img]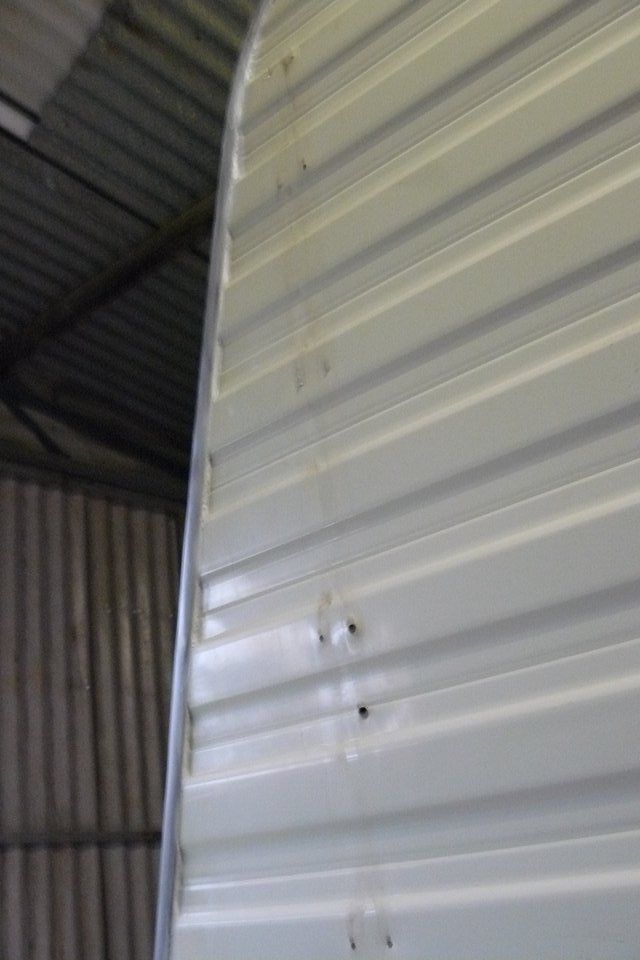 Though the finish looks quite good. 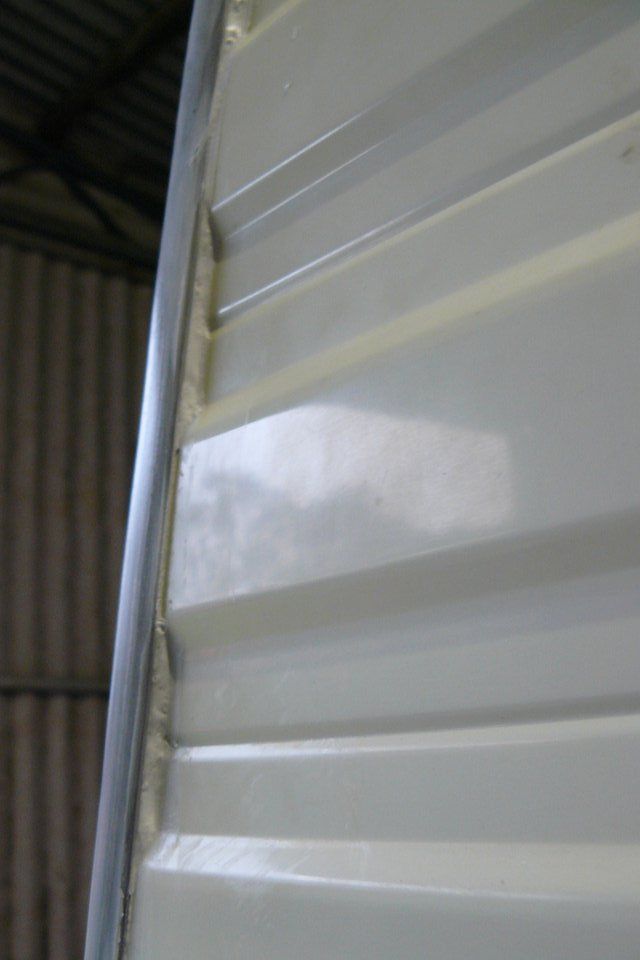 In places you can see it's not really nicely finished as it skinned off before I could get to it. You really need two people tooling it in order to finish it cleanly given how quickly it skins.  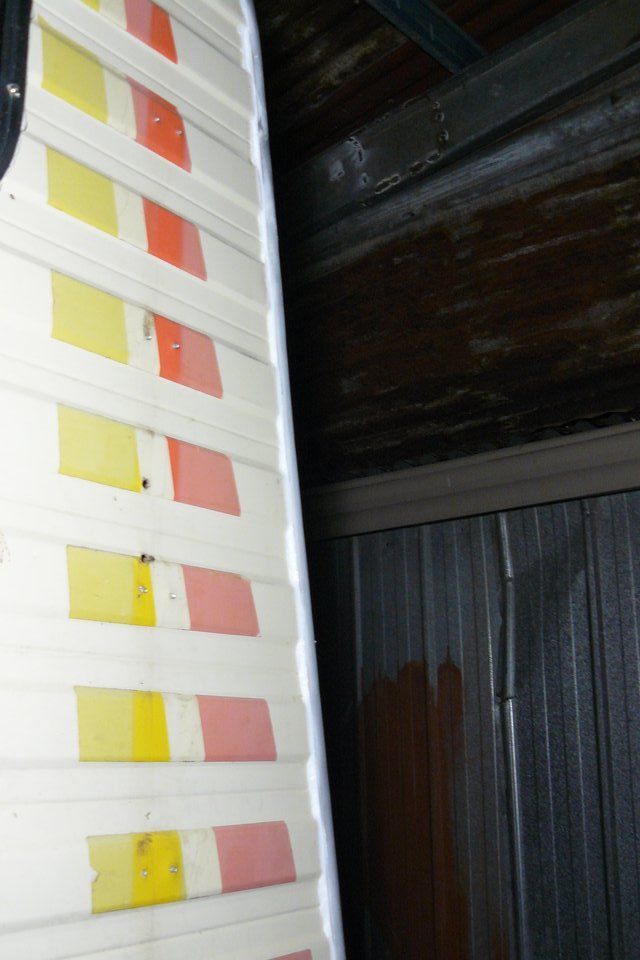 Back wall section of tru-mold was even longer .... I managed to get a reasonable finish, really you could use 3poeple working it to finish it cleanly before it skins. 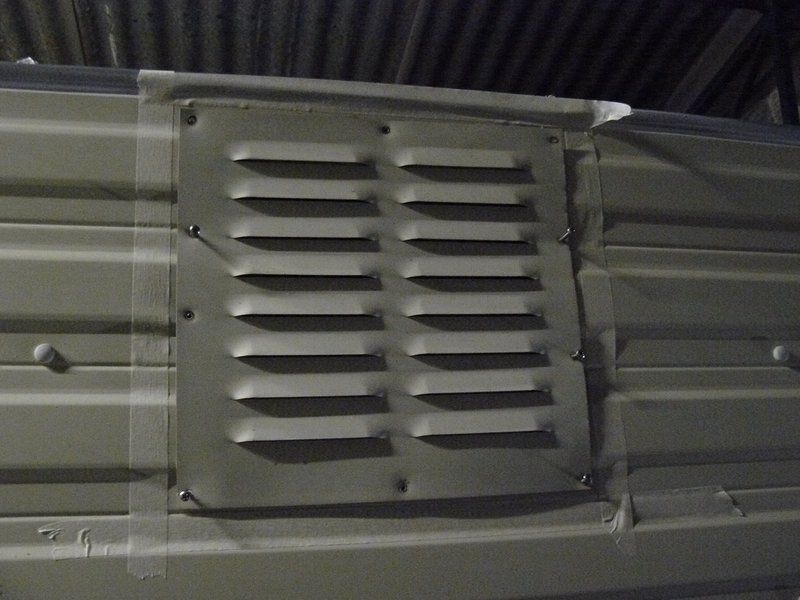 I refitted and taped up the microwave and stove vents. 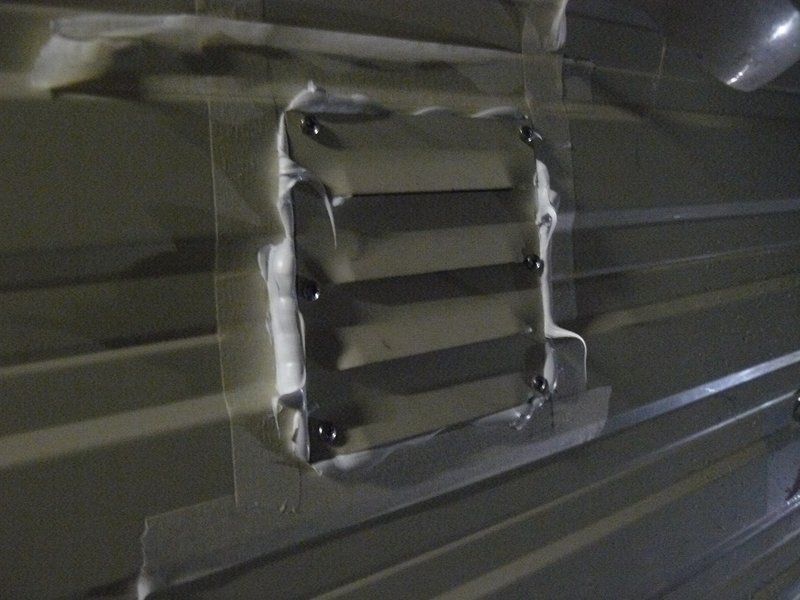 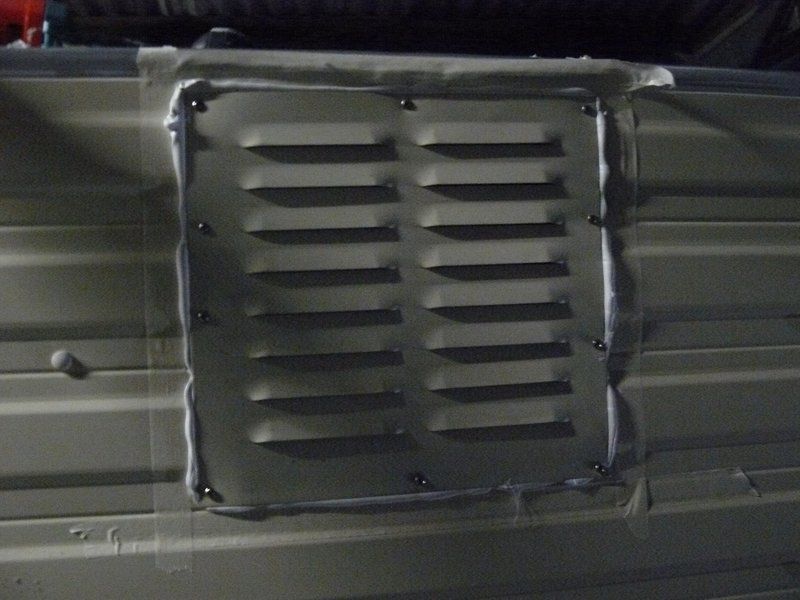 plenty of squeeze out again. 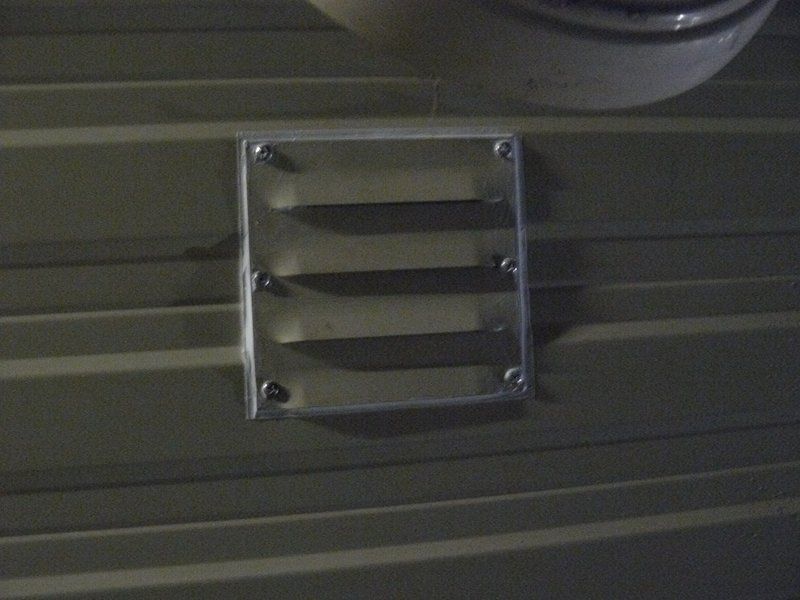 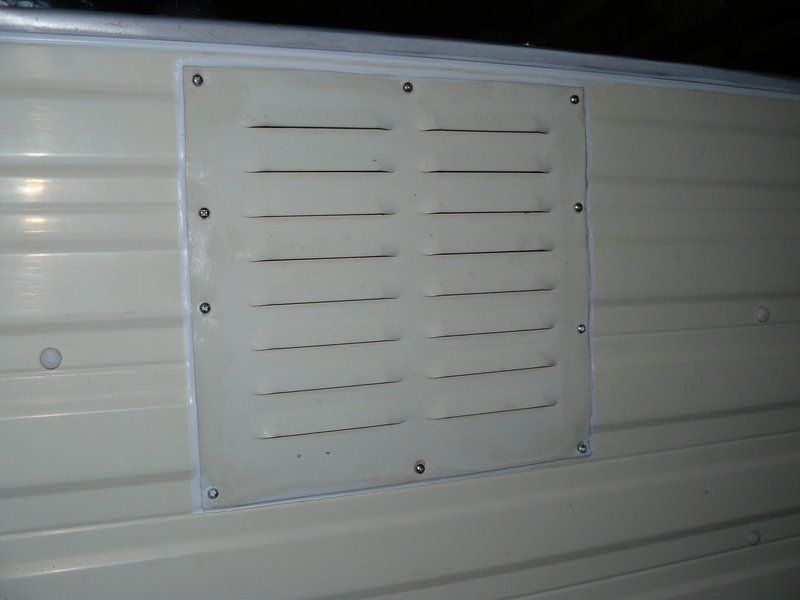 tooling it was almost simple after the rush to try and finish those long corner molds. 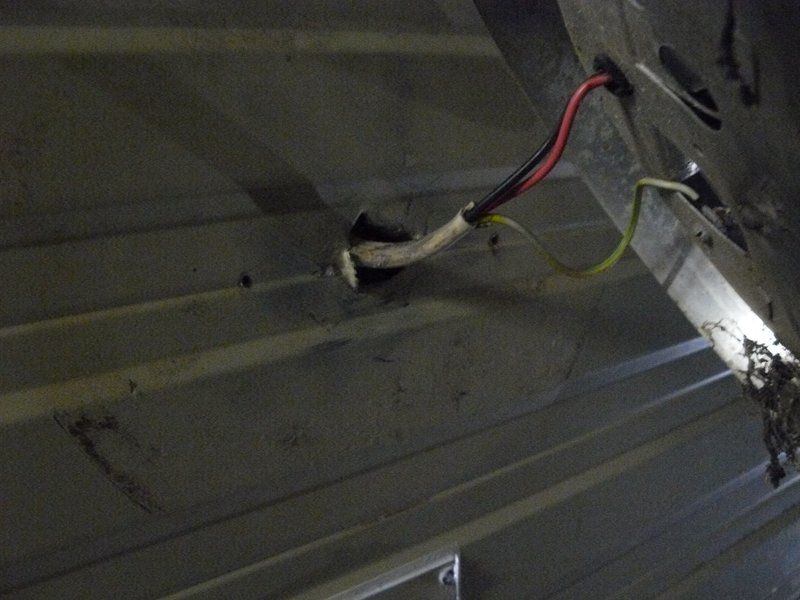 Do they just hammer a chisel through to make the holes for the wiring ? 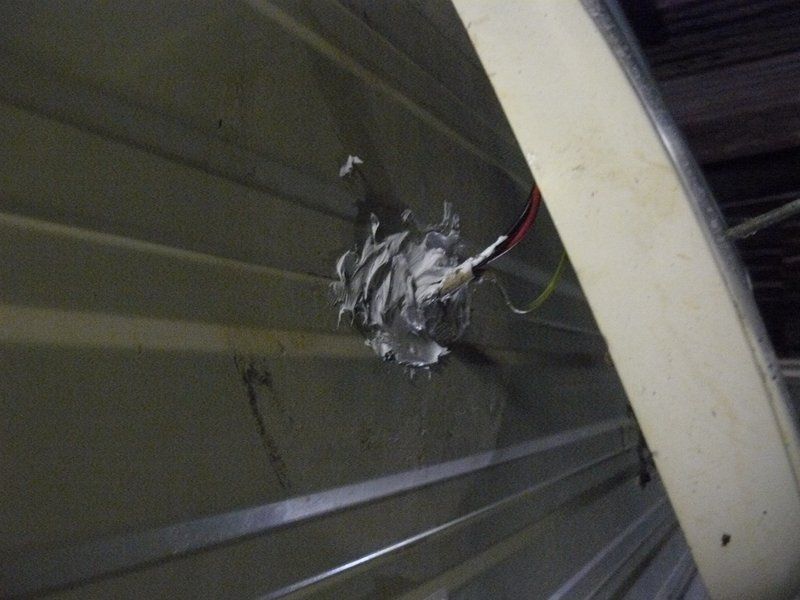 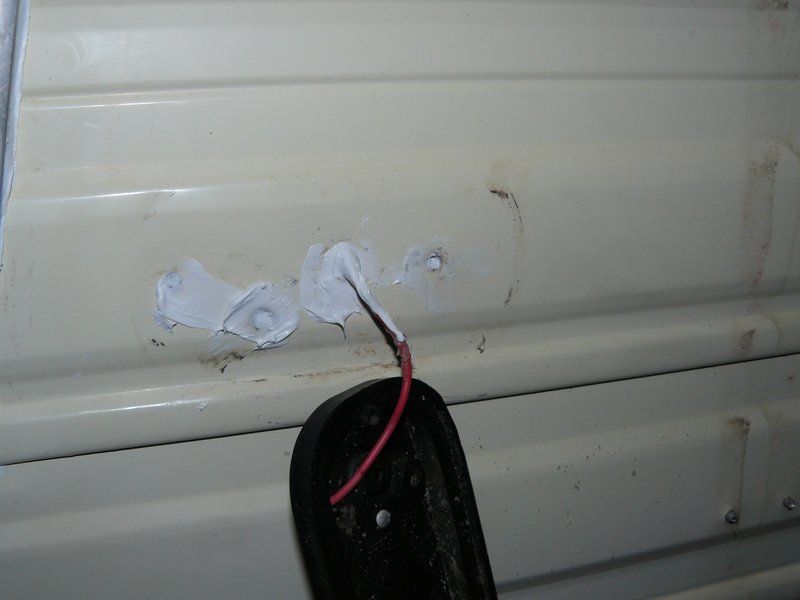 Fill all the wiring holes down the side of the 'van with silicon ... I want to let it set fully before re-assembly so I don't end up with the lights stuck down to the point where they would be destroyed if removal is attempted in the future. 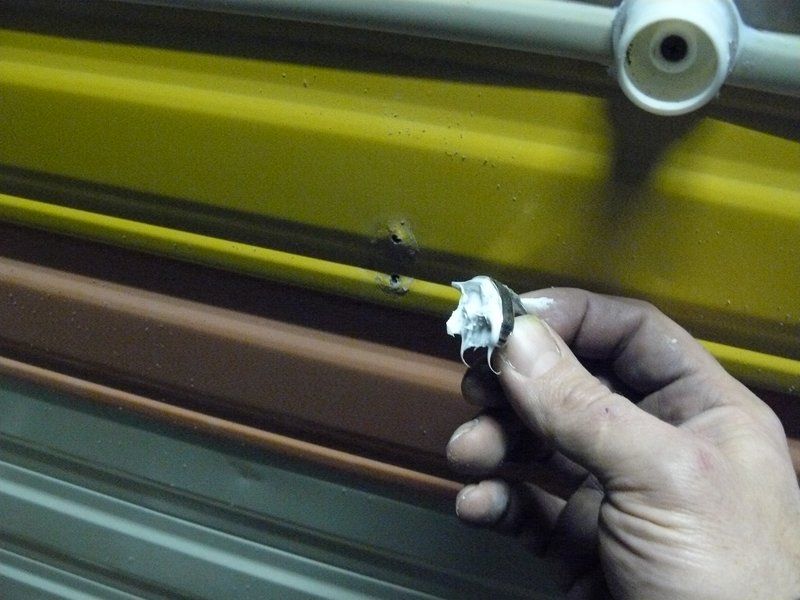 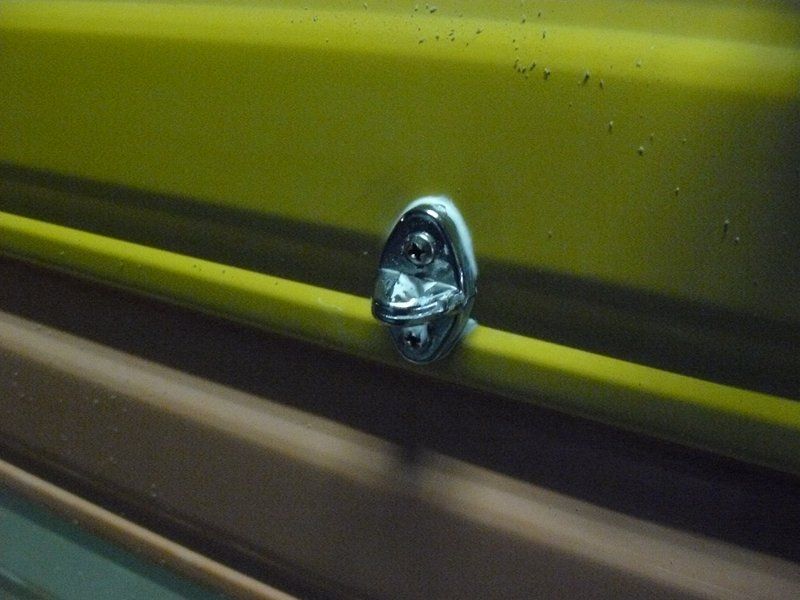 Looking down the side of the 'van. We also have two of these to remove, scrape the rock hard mastic from and refit. 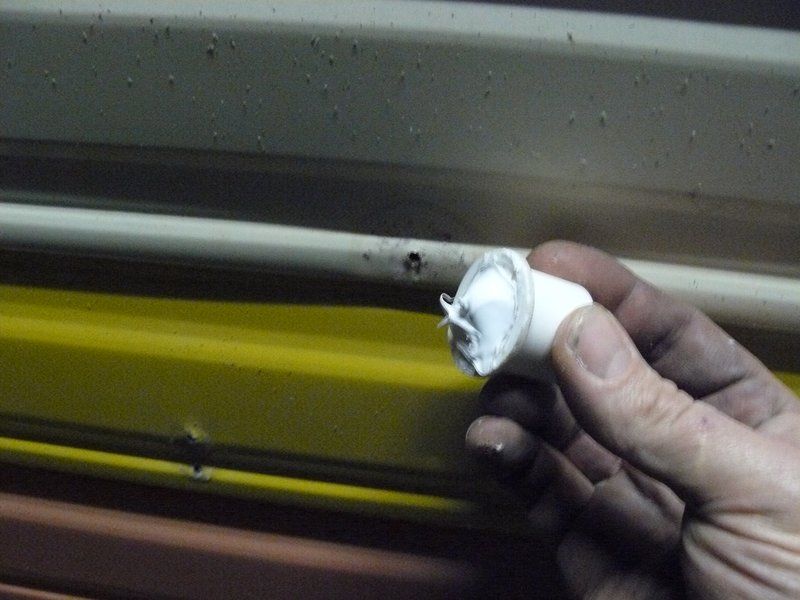 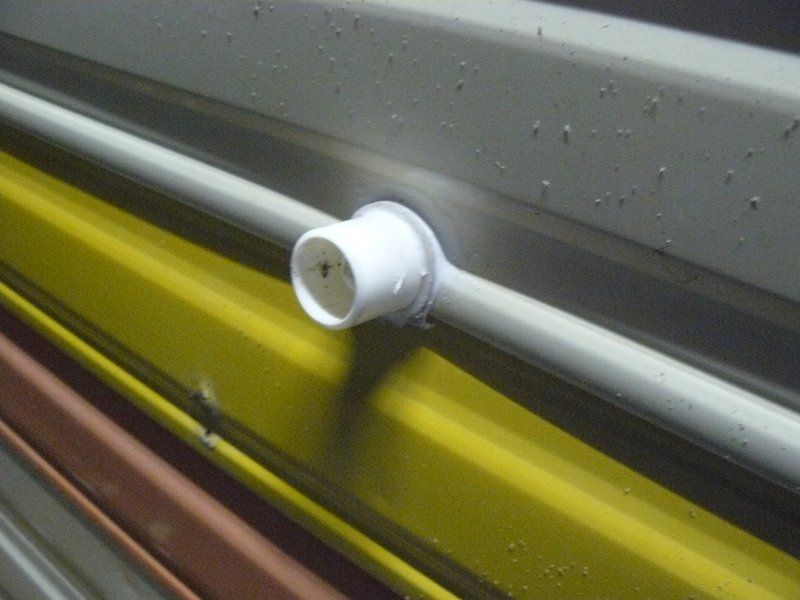 One of these. No wonder caravans leak from bloody EVERYWHERE. Everything I've removed from this was sealed 30years ago with mastic.... that would have turn to concrete 25years ago and leaked. 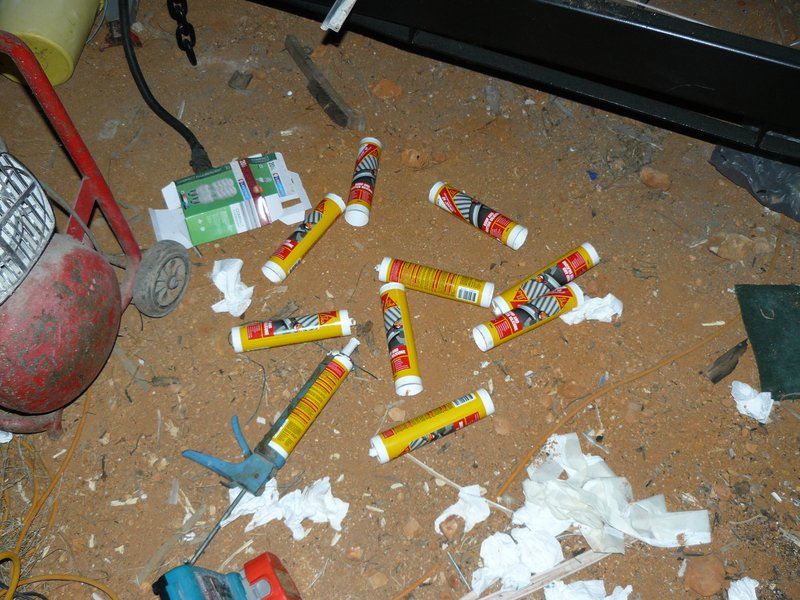 How much sealer to do this ....well for this 22foot caravan I used.... Is that 9.5 tubes of silicon for 1 tru mold, 2 tiny vents and a few light holes. I'd say 8.0 tubes minimum was the tru-mold. I thought that would be enough silicon for the entire caravan .... And I've used every tube I purchased on just one side of the 'van .... I'll have to find another $100 bucks to buy some more silicon. |
|
|
|
Post by Mustang on Sept 3, 2015 16:04:18 GMT 10
WOW hellava job Shane.
Next time send a text to your mates "FREE DRINKS at Shanes on Sat arvo, starting at 1PM.
|
|
|
|
Post by doublechevron on Sept 3, 2015 16:39:04 GMT 10
WOW hellava job Shane. Next time send a text to your mates "FREE DRINKS at Shanes on Sat arvo, starting at 1PM. I've still go the other tru-mold to go yet .... it hasn't even been removed Yeah right ... imagine the mess you would be left with if a few mates turned up for a few beers while your working  |
|
|
|
Post by snoops on Sept 3, 2015 20:15:06 GMT 10
Top job mate! Now I feel really slack for what I haven't done on mine! That will be so water tight, you'll be able to go boating in it... |
|
Deleted
Deleted Member
Posts: 0
|
Post by Deleted on Sept 6, 2015 9:29:05 GMT 10
Shane, awesome job on the van. The more I read on this forum the more I see how committed the fanatics are at restoring their vans to beyond better than how they came out of the factory. I agree with snoops, but a mount on the back for an outboard and she'll double as a houseboat. Your post does show me how much I have ahead to do though. Plenty of planning should hopefully make the job go smoothly.
Again great job and thanks for all the tips through the post.
|
|
|
|
Post by doublechevron on Sept 6, 2015 22:38:34 GMT 10
Shane, awesome job on the van. The more I read on this forum the more I see how committed the fanatics are at restoring their vans to beyond better than how they came out of the factory. I agree with snoops, but a mount on the back for an outboard and she'll double as a houseboat. Your post does show me how much I have ahead to do though. Plenty of planning should hopefully make the job go smoothly. Again great job and thanks for all the tips through the post. That's hilarious, I know you can't be talking about me LOL.... I haven't restored or modified a single thing. I'm just simply trying to make the sucker water tight so we can use it and spend the tiniest amount of money that is possible!. 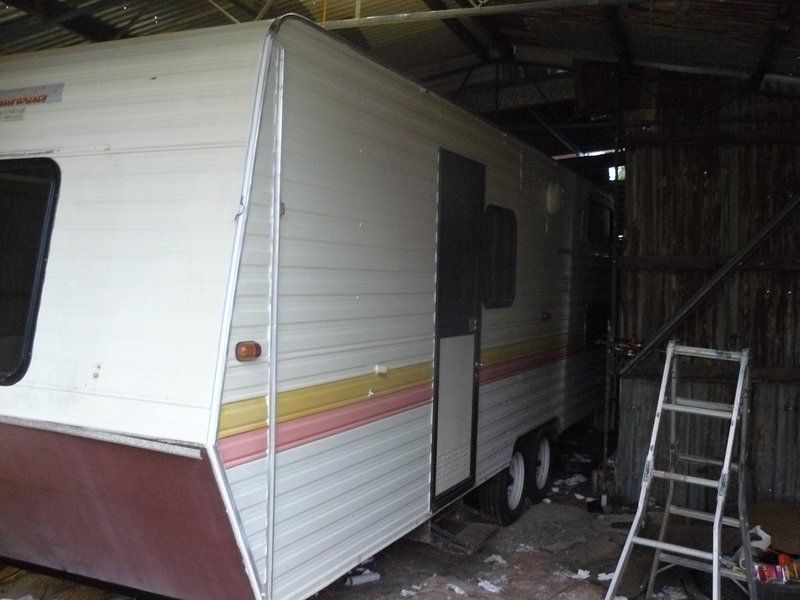 Well finally, one side of the caravan is completely finished. Those annex rails were incredibly bloody painful. I cleaned them all up nicely. and piled the silicon onto the back of them. The roof rail was easy to screw on. The wall rails, I got nice large deep aluminium pop rivets. I really struggled to drill the remains of the old pop rivets out... Infact I was making a real mess. I finaly figured out how to do it.... drill out two rivets.... and pop rivet the annex rail back on.... Now you use the existing holes in the annex rail as guides to drill out the old rivet bases without trashing all the fragile cladding around the harder rivets..... Once all the holes are cleared, then drill out your two rivets you added so you can add the sealer behind the rails (does that make sense). Anyway, the next problem was I put heaps of sealer on the back of the wall annex rails and started to pop rivet them on ..... 24 big heavy pop rivets.... 2/3rds of the way through them your hands are stuffed.... and your getting slower and slower .... By the time you get all 24 rivets installed.... the silicon has skined and you have a mess you can't readily clean up. hey at least it's all sealed now though (it never was from the factory, the wind and rain would have blown in behind the wall rails). My hands needed about 4 beers to fix after the 48 heavy pop rivets  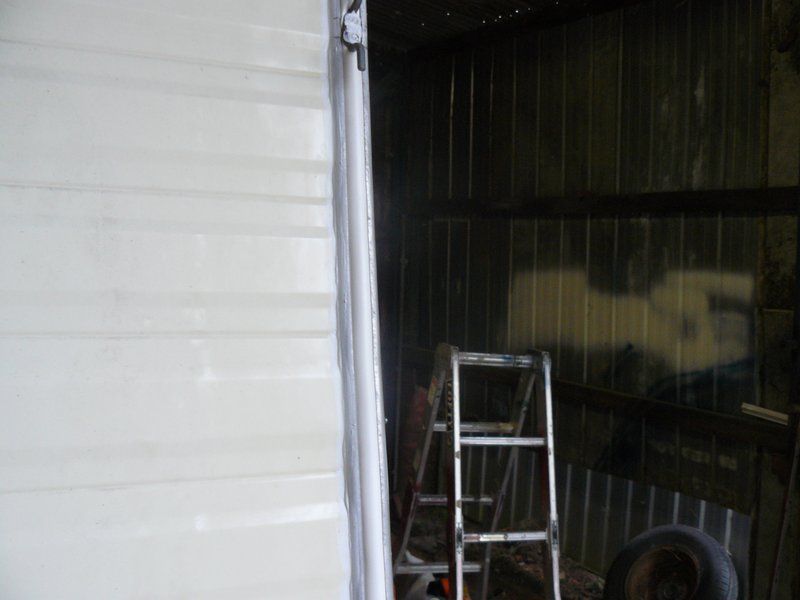 I pulled the caravan out of the shed and put it back in about 2meters further away from the wall so I could get to the other side. Oh yeah, that new Tru-mold decorative trim is very simple to install and dresses it up nicely  front corner 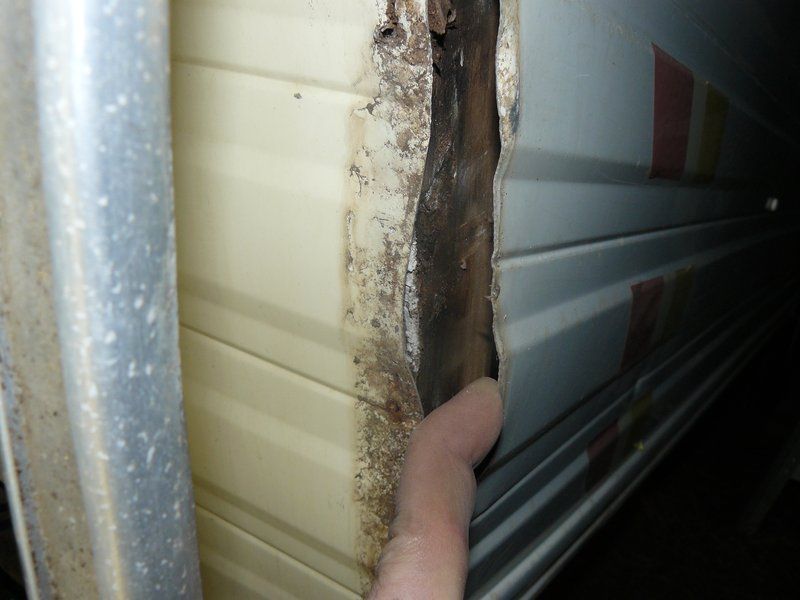 back corner I've released the Tru-mold from the other side at both ends. There is damage to the wood, but it's still sound...... I'm guessing this will be fine ... I'll spend some time cleaning everything getting ready for re-assembly.... if I can't think of a good reason to cut the mostly sound wood and and replace it, I'll leave it well alone. it's only a soft area about 2mm deep along a 10cm section. 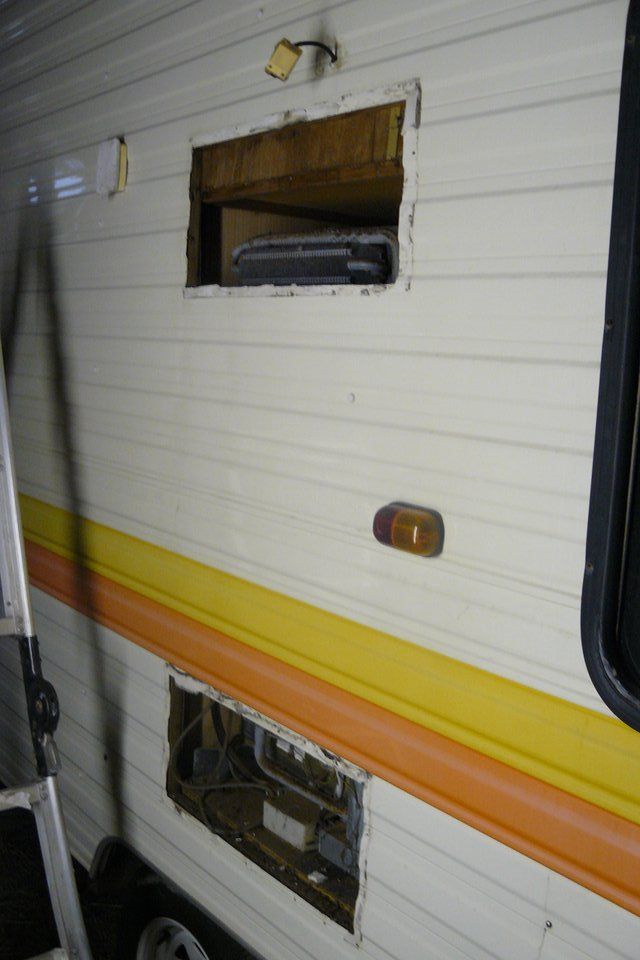 That's an amazing amount of venting this fridge has .... this is an area I've been itching to check. You see it's some of the existing water damage I found inside the caravan prior to purchase. 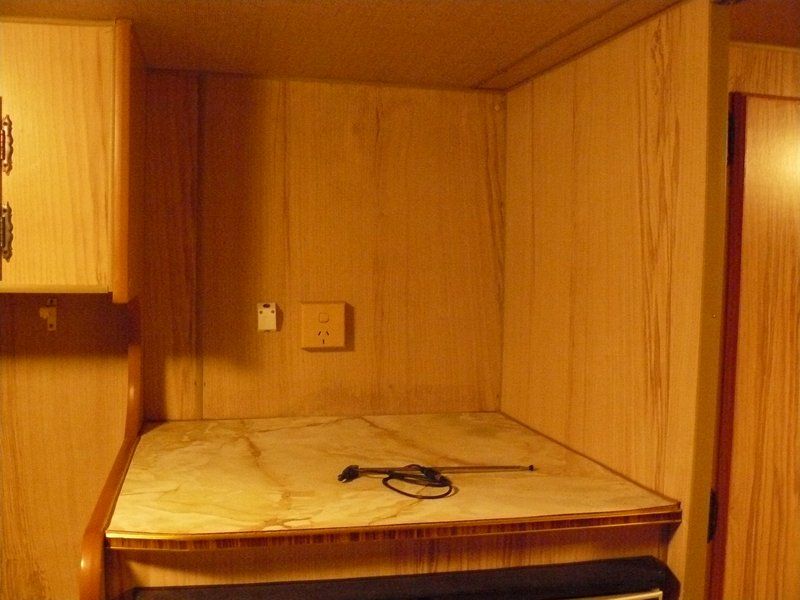 See the staining on the wall up high and at shelf level ... Yes hardly noticable, and will be 100% hidden by mounting a TV here. 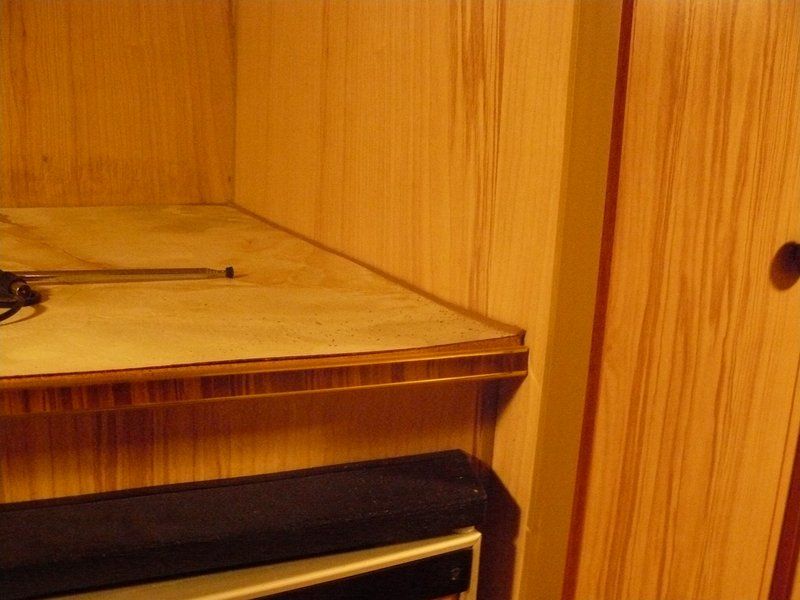 THis tell the story better, the shelf above the fridge has been soaking in a small amount of water for many, many years like a big sponge. It's still fine, but you can see it's slightly buckled and swollen in places. I'm not going to fix or replace this ... The caravan has lived 30years to earn this sort of patina Given it's structurly sound and still look acceptable it's fine with me. 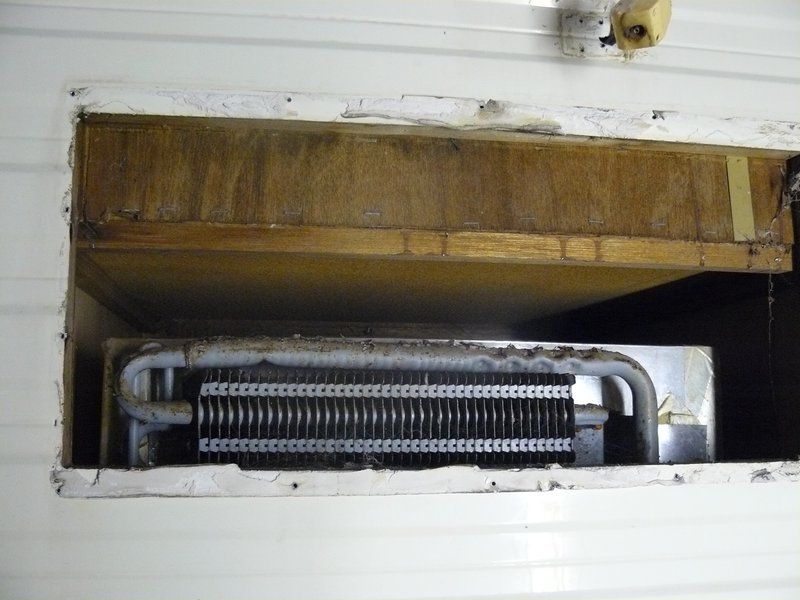 ![]() ![]() 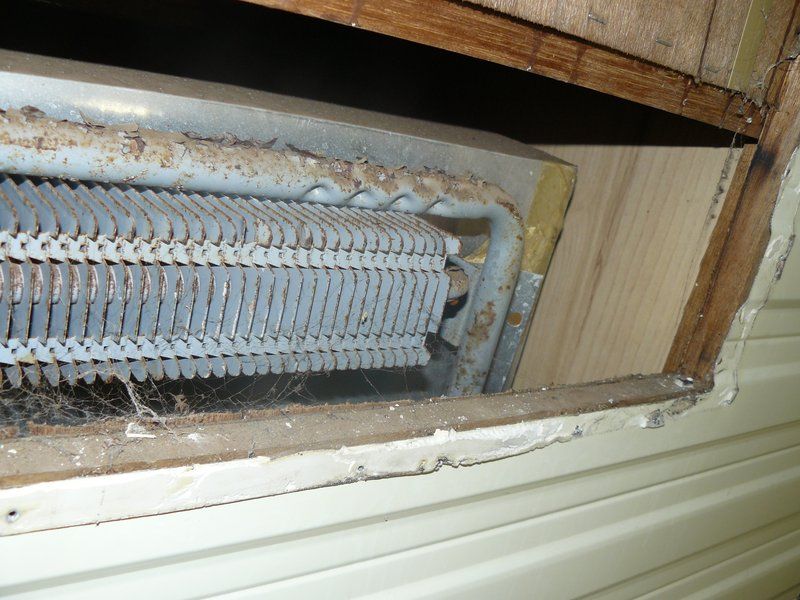 Now that upper fridge vent. I was sure I was going to have to replace all the frame in here due to water damage ...... But it's like bloody new  I've found a moron fitted an aerial to this thing when it was new... this leaked water down the wall, which the chipboard fridge top soaked and and prevent going any further .... so everything else is like brand new. 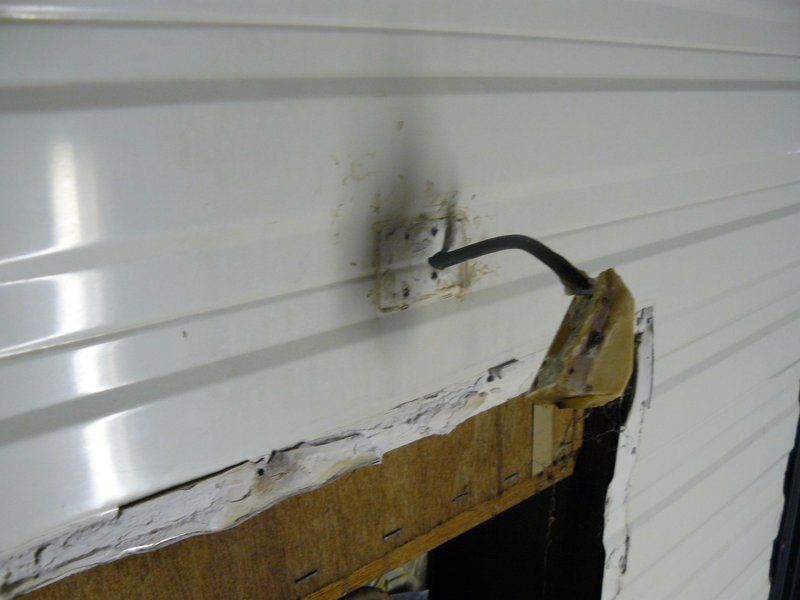 aerial plug has very modern looking silicon on it .... and straces of no other sealant... so whoever fitted it ... let the water pour straight in behind it. And it was fixed untile decades later I'd say.... It Gets Better Though !!! 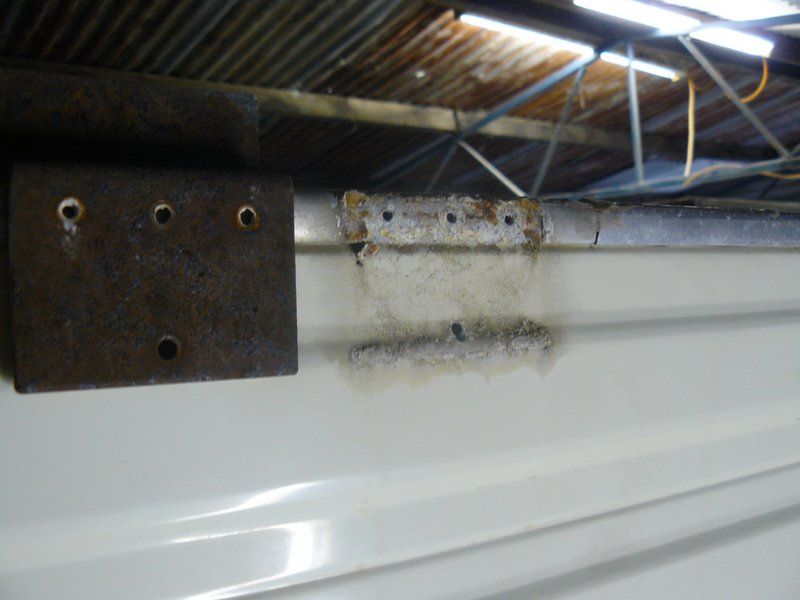 They fitted this bracket to the tru-mold and cladding .... No sealer, metal bracket unpainted...... and damn it all... a hole through the cladding ... that is screwed into "nothing" that would have allowed water straight inot the wall for 30years ... Oh well, miraculously no structural damage done.... just a slight bit of staining on the inside wall. 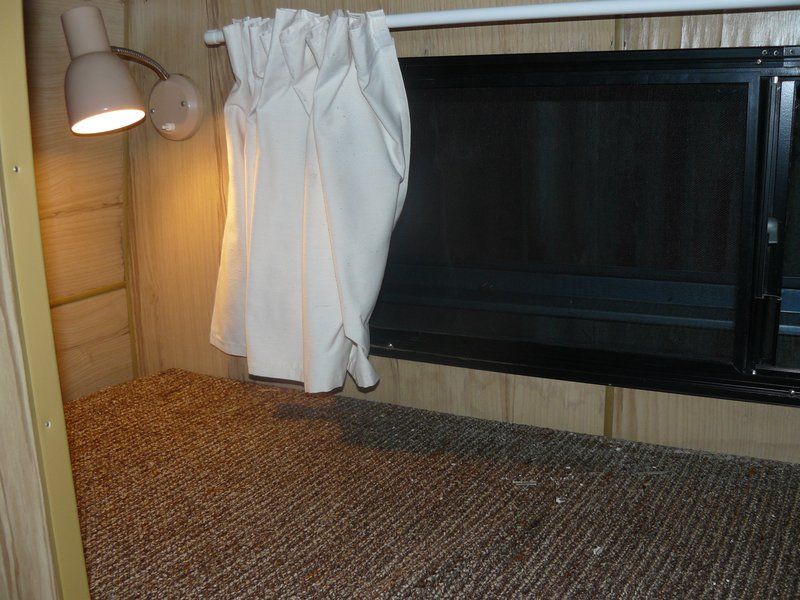 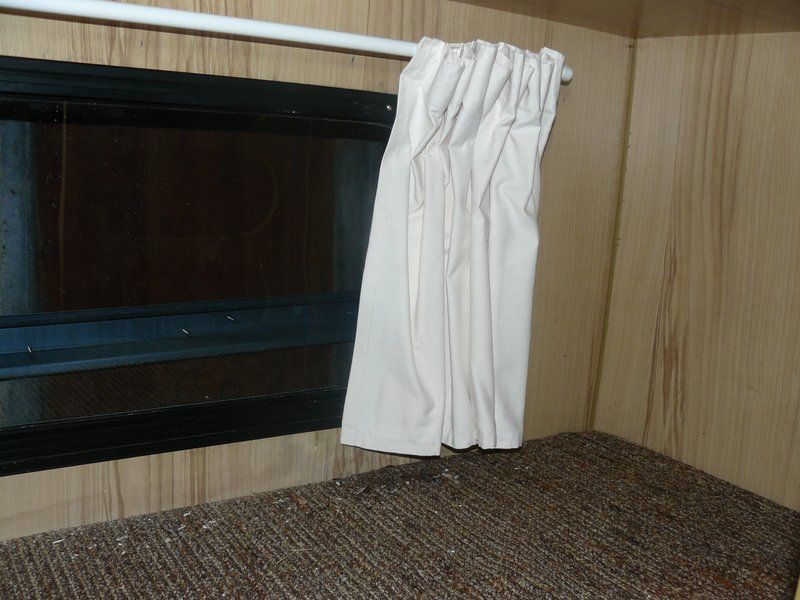 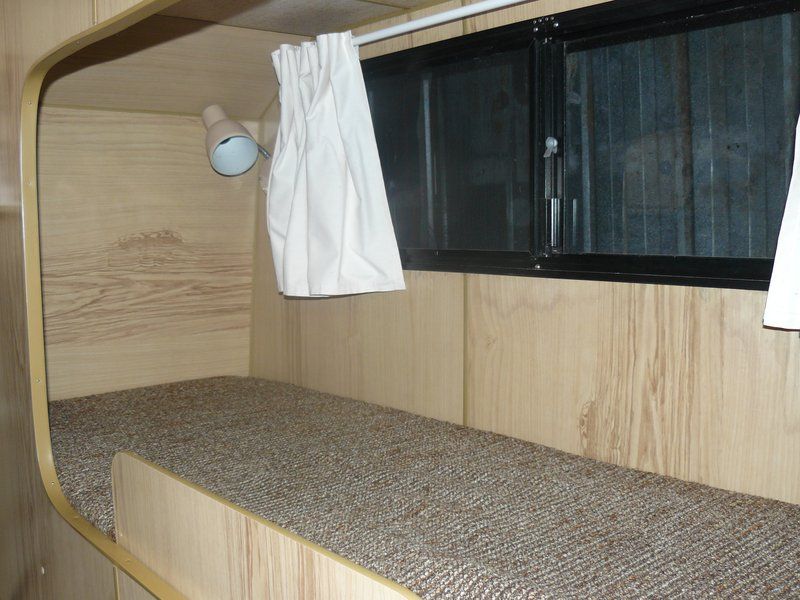 the main curtains and inner window trims refitted. This is the worse window for water staining and damage in the caravan. See what I mean by the window frame and curtains hiding 98% of it seeya, Shane L. |
|
|
|
Post by Mustang on Sept 8, 2015 16:47:01 GMT 10
I think they call those sh*t jobs "professionally done"
|
|
|
|
Post by doublechevron on Sept 10, 2015 9:48:29 GMT 10
Well I drilled all the pop rivets out of that window cover.  As soon as you remove the big hinge across the top it all falls apart. It's incredibly flimsy one apart. 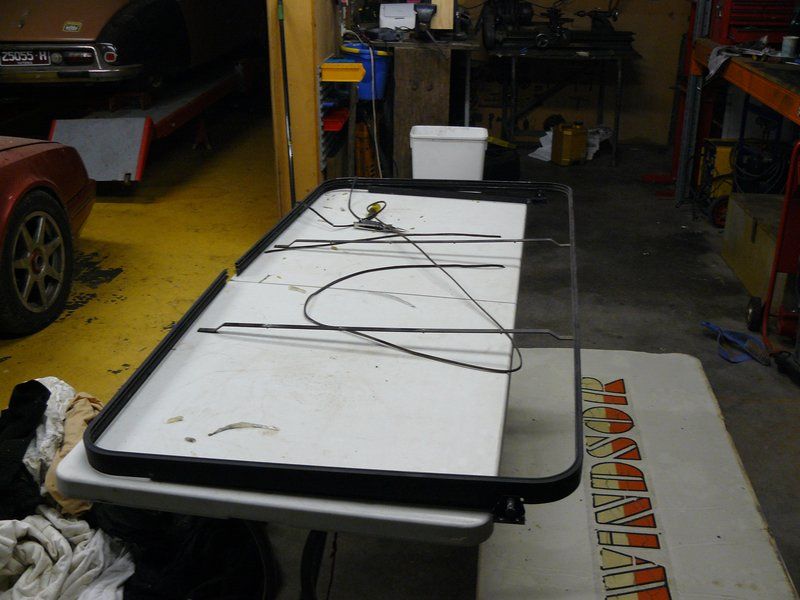 It's been repaired numerious times over the years (given the caravan still has it's original unworn cross plies on it I'd say this sucker fell off and popped apart every time the caravan was moved). I removed the silicon that must have been trying to hold it together as well. 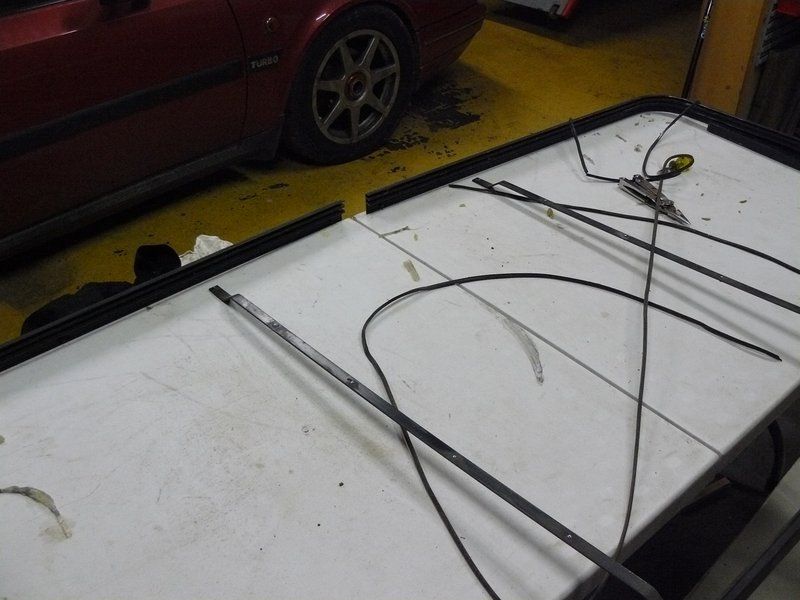 with the top hinge off it "opens" along the top edge. the rubber seal is all that holds the edge of the aluminium into the frame. The seal looks like a long length of window wiper blade rubber. 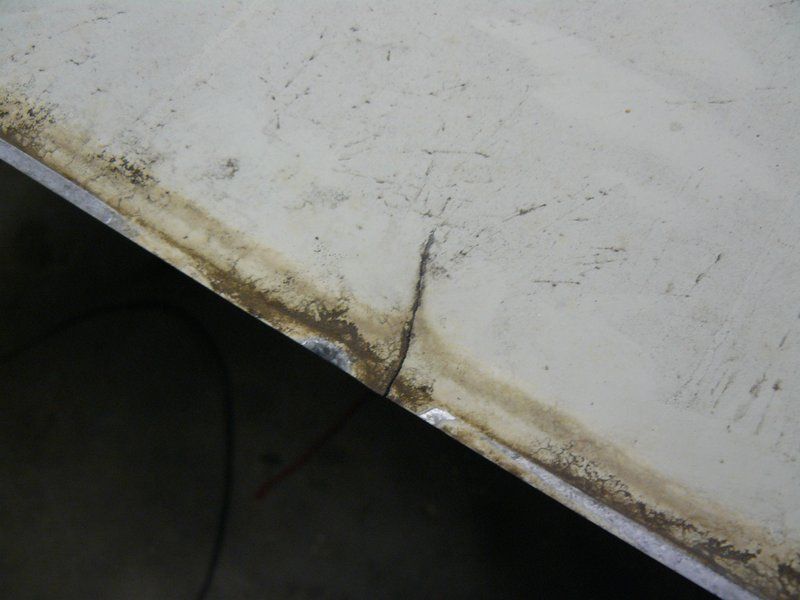 Look how old the cracks in it are.... I'd say this happened when the caravan was new. 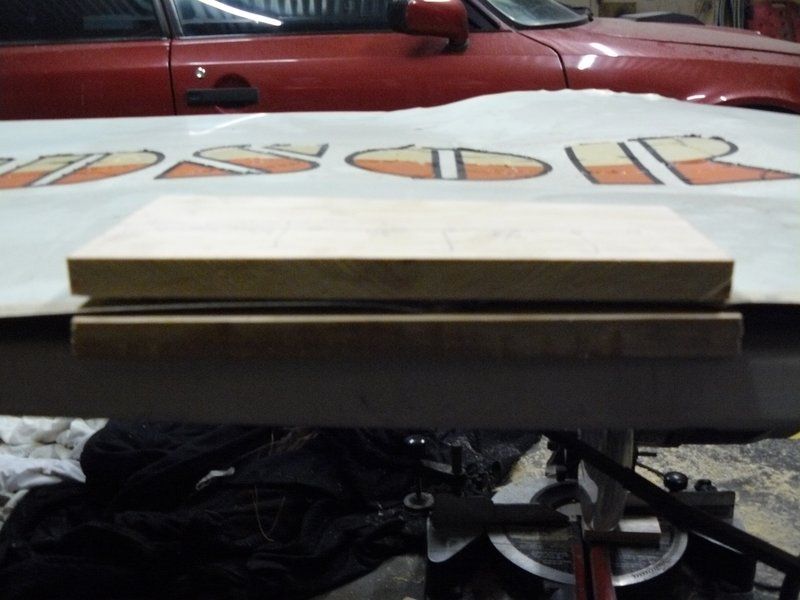 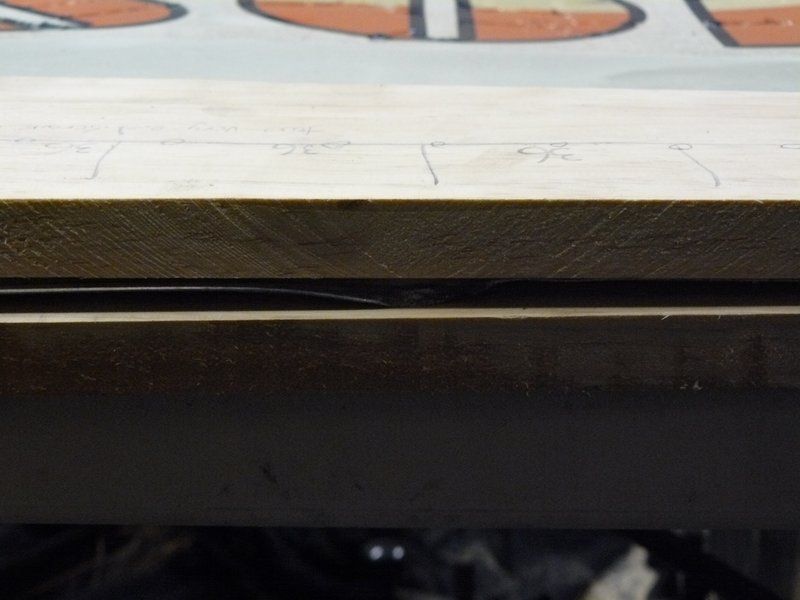 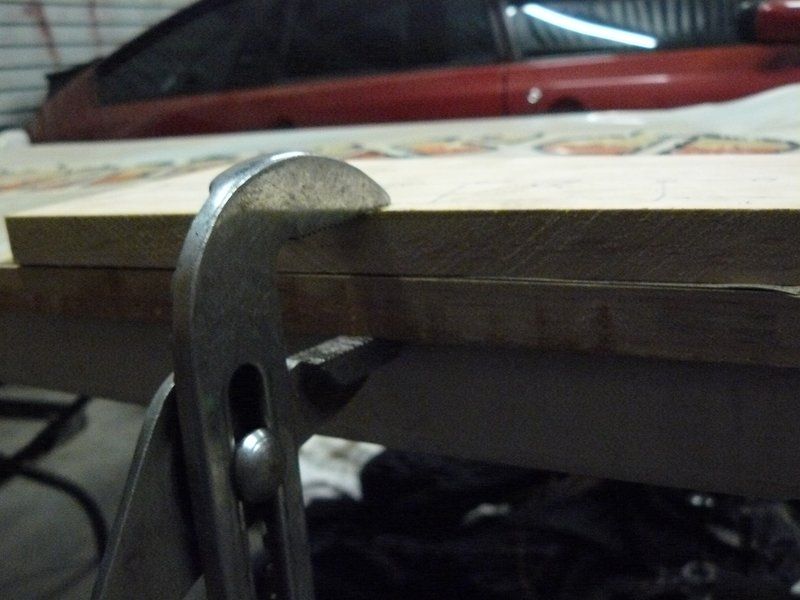 To straigten out the bend edges where it's popped out of the frame I used to pieces of very soft pine to spread the force and avoid further damaging the surface. 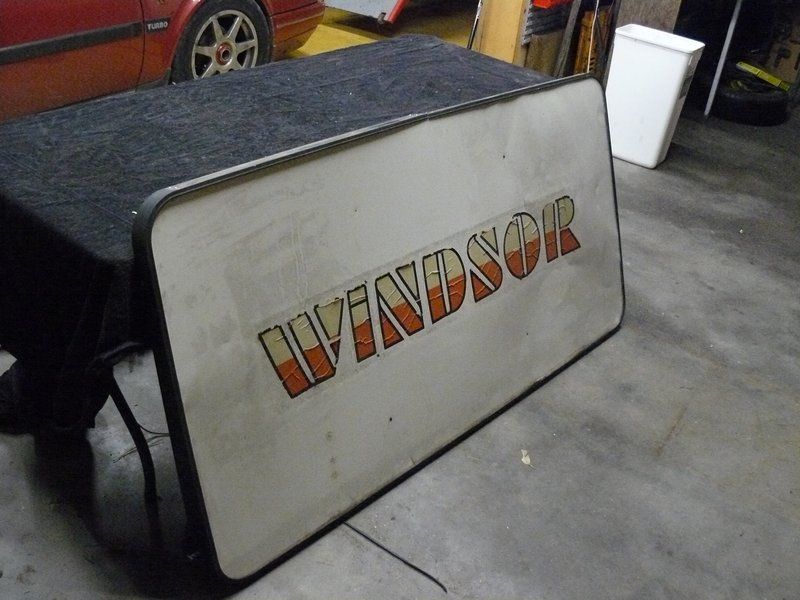 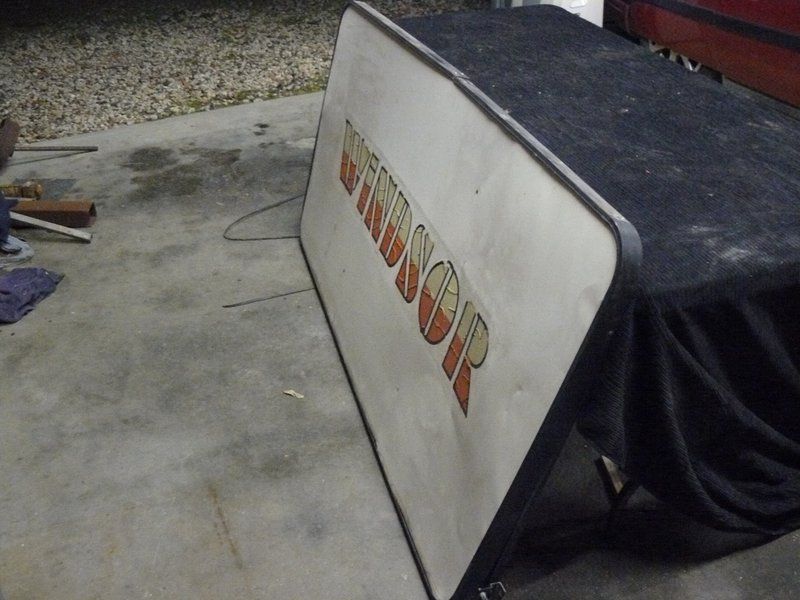 It's just sitting together here ... What I'll do is give it a really good clean and rivet it all back together and refit the seal. If it looks reasonable I'll coat the back of it with sikalfex adhesive, that way the panel can never blow out again (though given it will now be screwed to the caravan frame rather than the cladding, it's unlikely it'll twist/fall off allowing the big cover to twist along it's length now....it's the twisting along it's length as it's mounting screws fall out that will have allowed the cover to pop out of it's frame). seeya, Shane L. I finally got back to this (I'm sick of it cluttering up the shed, a much better place for it is screwed to the front of the 'van). 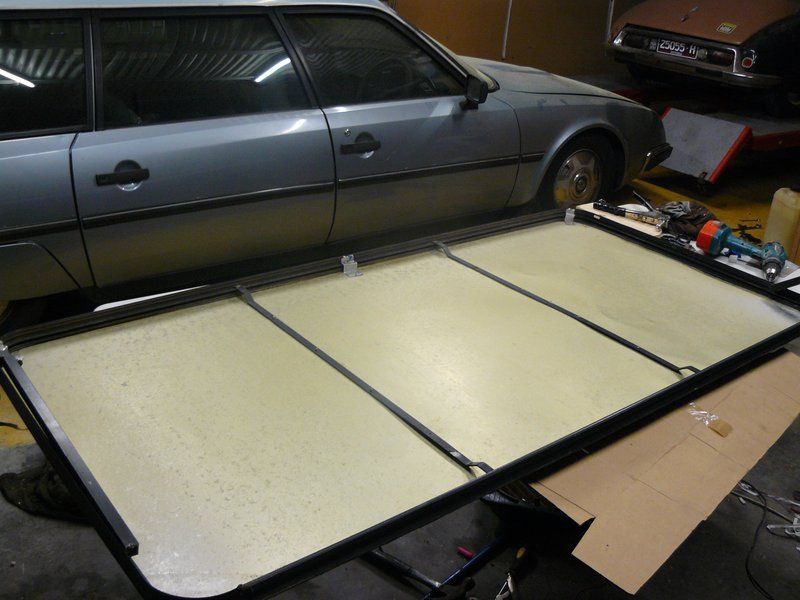 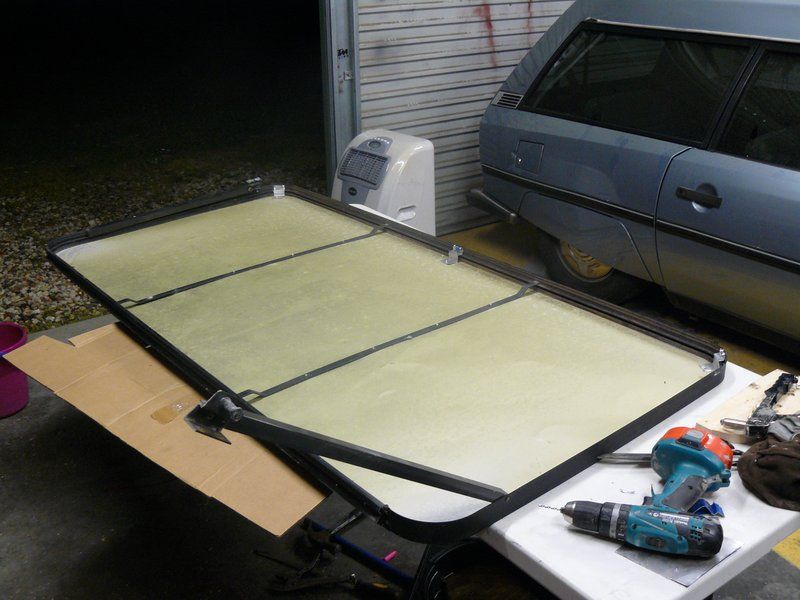 I re-assembled it.... As far as I could see it would just blow out again. The design of it is to fragile and crappy. You can see I've bent up some soft aluminium braces along the bottom and riveted the panel to the frame with a few aluminium pop rivets. 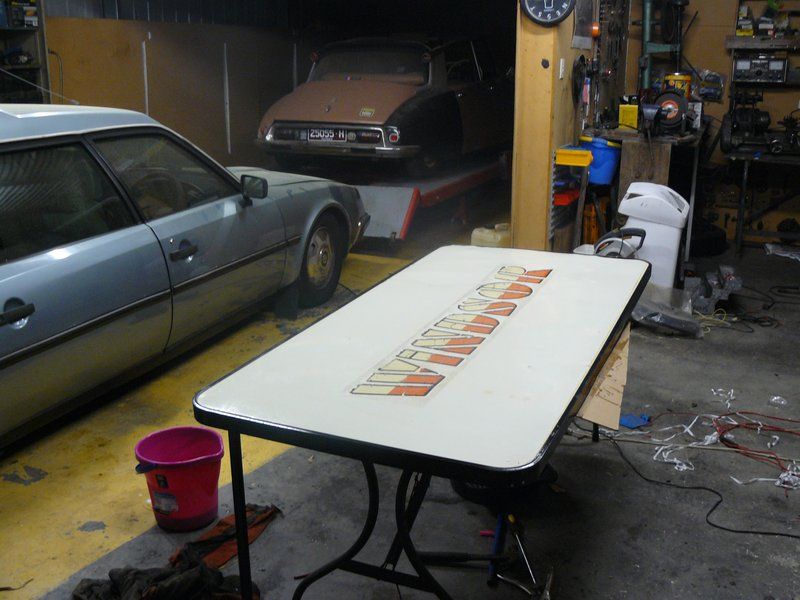  It looks far better than I ever expected. It's not perfect, but it being slightly bent is hardly noticeable. 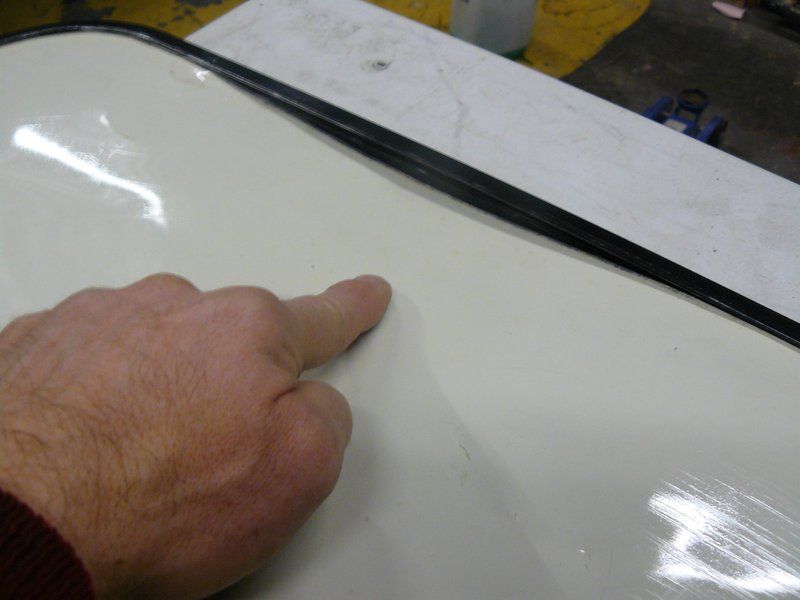 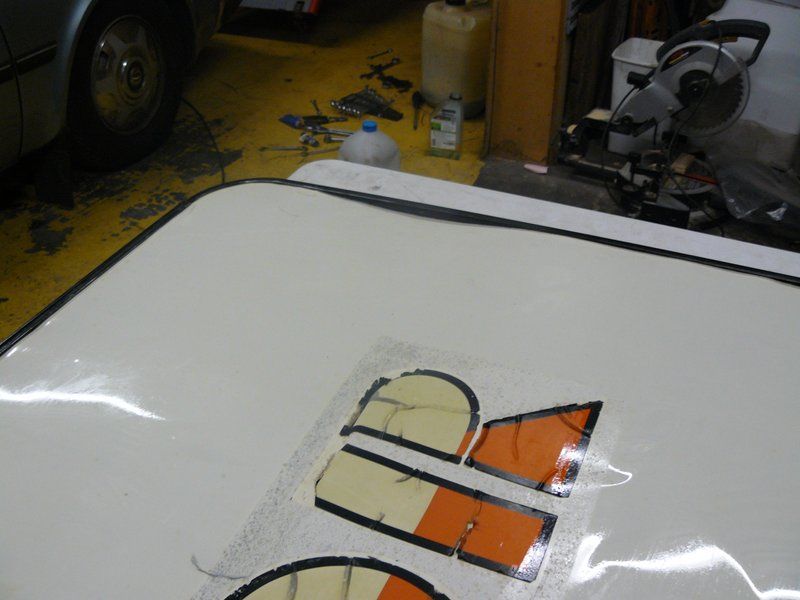 This front cover was never going to work from the factory, it's cut slightly too small. (even forgetting they "forgot" to fit the bits of timber to the caravan frame to screw it too Everything I've fixed on the caravan, should have been fixed 30years ago under warranty! Amazing right ?). 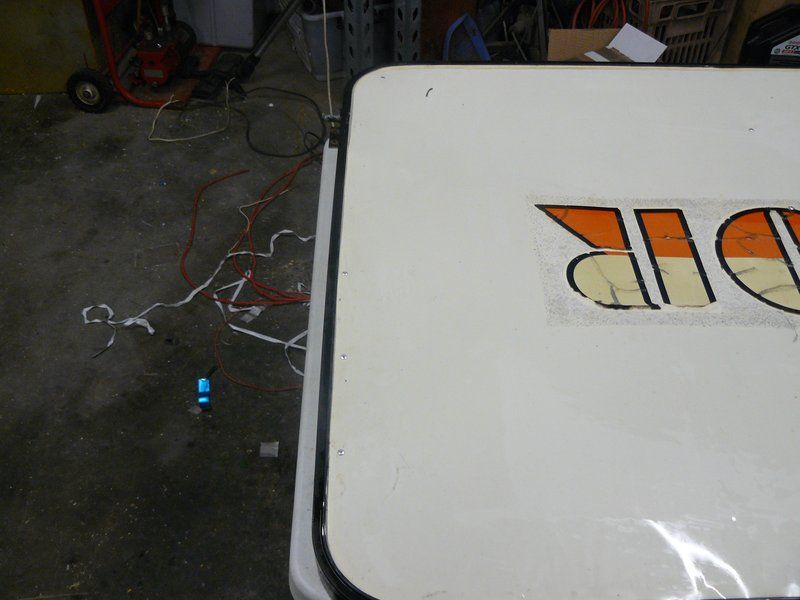 I cut out a strip of aluminium sheet and pressed it into the frame and pop riveted it as you can see to "slightly lengthen" the panel so it now slots into the frame correctly. It's frustrating how long everything is taking! seeya, shane L. |
|
|
|
Post by Mustang on Sept 10, 2015 18:20:20 GMT 10
I cut out a strip of aluminium sheet and pressed it into the frame and pop riveted it as you can see to "slightly lengthen" the panel so it now slots into the frame correctly. It's frustrating how long everything is taking!
seeya, shane L. ....................................................................................................................................................................................................................................... Haaah , you who had a timetable on windows!!!!!  This happenens to me EVERY day...... This happenens to me EVERY day......
If I were closer I would come & help...Rethinking no I would come & drink beer & watch you!!! Cheers |
|
|
|
Post by doublechevron on Sept 11, 2015 8:38:52 GMT 10
I cut out a strip of aluminium sheet and pressed it into the frame and pop riveted it as you can see to "slightly lengthen" the panel so it now slots into the frame correctly. It's frustrating how long everything is taking!
seeya, shane L. ....................................................................................................................................................................................................................................... Haaah , you who had a timetable on windows!!!!! This happenens to me EVERY day......
If I were closer I would come & help...Rethinking no I would come & drink beer & watch you!!! Cheers I've only finished the wiindows on one side of the caravan ..................................................................... |
|
|
|
Post by Mustang on Sept 11, 2015 17:41:21 GMT 10
At least you are on your second reno I'm still in primary school...  Good effort on the front window, image what still goes on with these so called repairs to the poor bast**ds who have no idea?? |
|
|
|
Post by tasmillard on Sept 28, 2015 13:13:29 GMT 10
Good read and great progress here. Everything takes time, doesnt it!
|
|
|
|
Post by doublechevron on Sept 30, 2015 10:50:41 GMT 10
Well all the windows are back in, the other side tru-mold is done, the fridge vents are done. I've got the 4seasons hatches to go and we can start using it. Obviously I'll pull the wheels and regrease the bearings and check the brakes first. I still need to paint underneath and the rear bar ... but it'll be nice to have a break from it for a bit Anyway, the front window, I sealed it up and screwed it in .... As I screwed the last screw down ..... I thought DAMN IT ... the bloody bits of wood for the front cover to be screwed too.... there still in the bloody shed. So I removed the window 5minutes after it was fitted (just as well I didn't use silicon or sikaflex right ?) and glued in the bits of wood above the window frame for the front cover.... 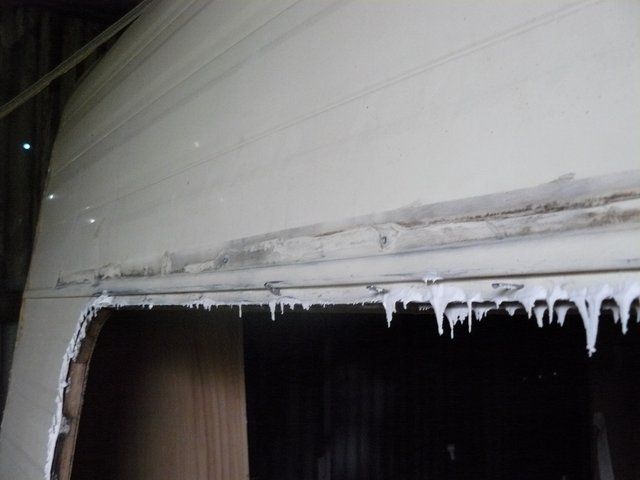 But look what I found when I removed the window. The lip in the cladding profile shows no squeeze through of sealer ... It's holding the window frame out to much. So I put a 2nd massive thick bead of sealer across the body of the caravan as well as the window and screwed it back in. You know, I reckon that window would have leaked if I hadn't been stupid enough to forget the bits of frame for the front window cover. 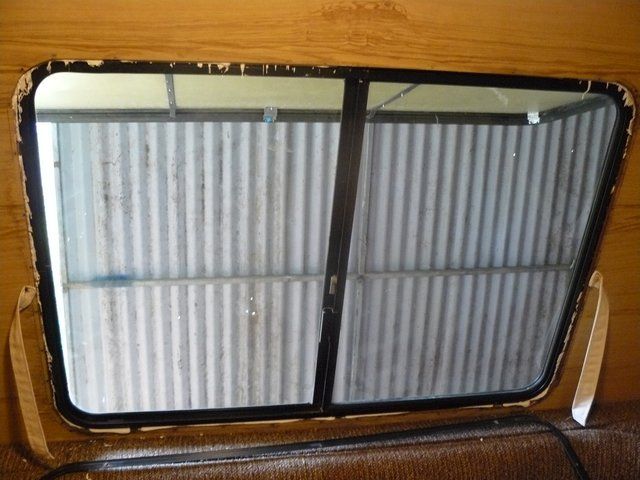 Look at the squeeze through I got the 2nd time around  The caravan while I work is my little helpers favorite spot. The kids are obsessed with it... Now it's warmer they want to go outside and read books in the bunks and do jigsaws while I'm working on it. Just imagine how much more they'll enjoy it... if the caravan is somewhere other than there own backyard seeya, Shane L. |
|
|
|
Post by Mustang on Sept 30, 2015 17:31:39 GMT 10
I like that laminex in the table!!!
|
|
|
|
Post by doublechevron on Sept 30, 2015 19:19:48 GMT 10
I like that laminex in the table!!! If you like the laminex, you should see the 80's splash guard beside the stove |
|
|
|
Post by doublechevron on Oct 3, 2015 12:54:11 GMT 10
Hmmm.... This roof hatch wasn't leaking by the looks of this. Only the back one was damp when I collected the caravan. This roof hatch is actually sealed up really well and I doubt it would have ever leaked (I'd never have removed it if I'd known). 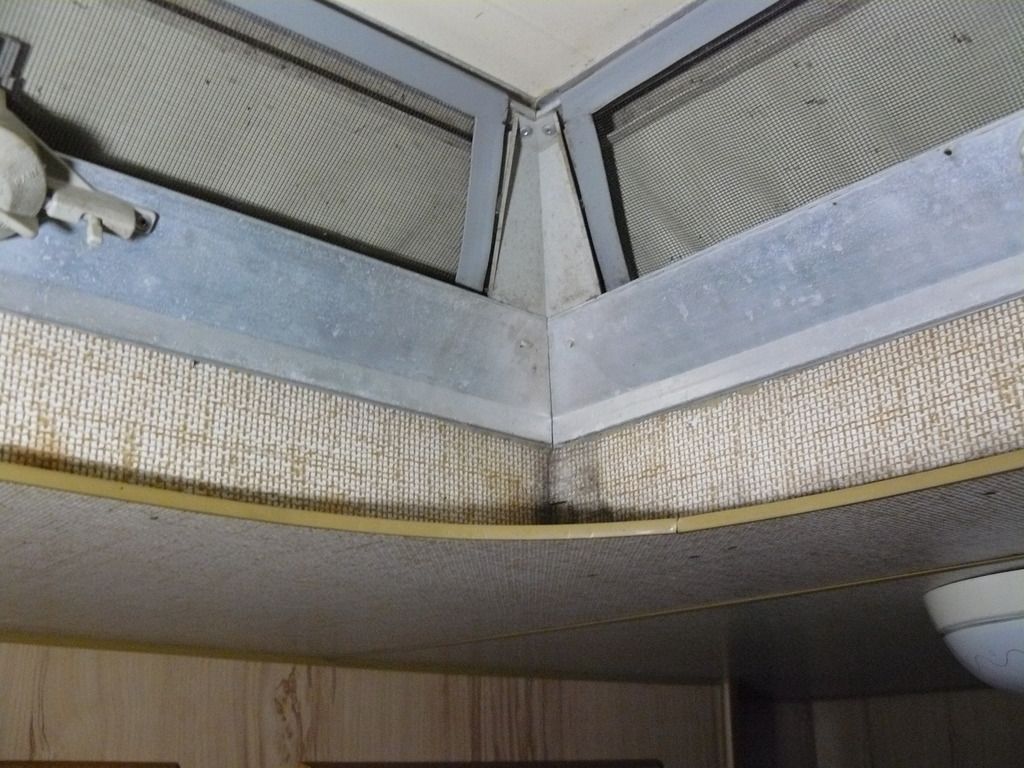 there is some water staining in a corner ... 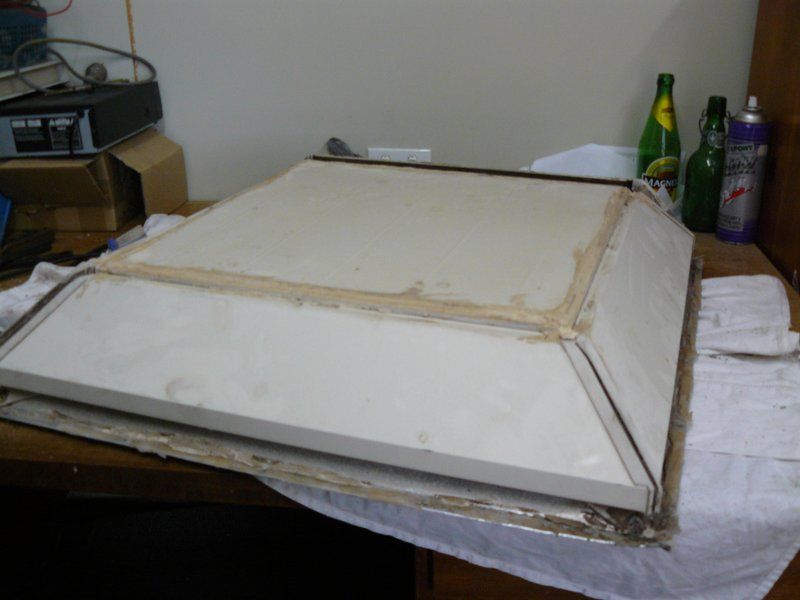 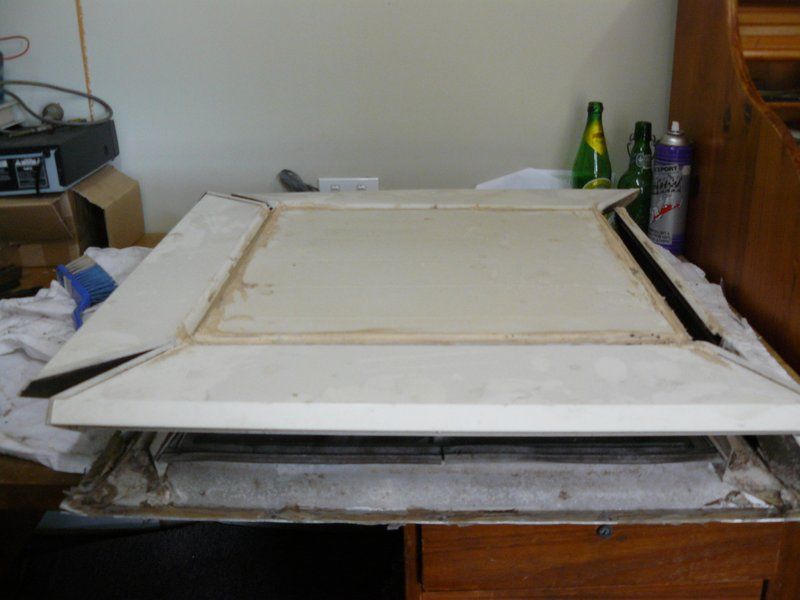 I was wrong, it was sealed in at the factory with silicon around the bottom then mastic over the top... However in the last 10years someone went over the housing with white silicon .... and were pretty effective at making this water proof. 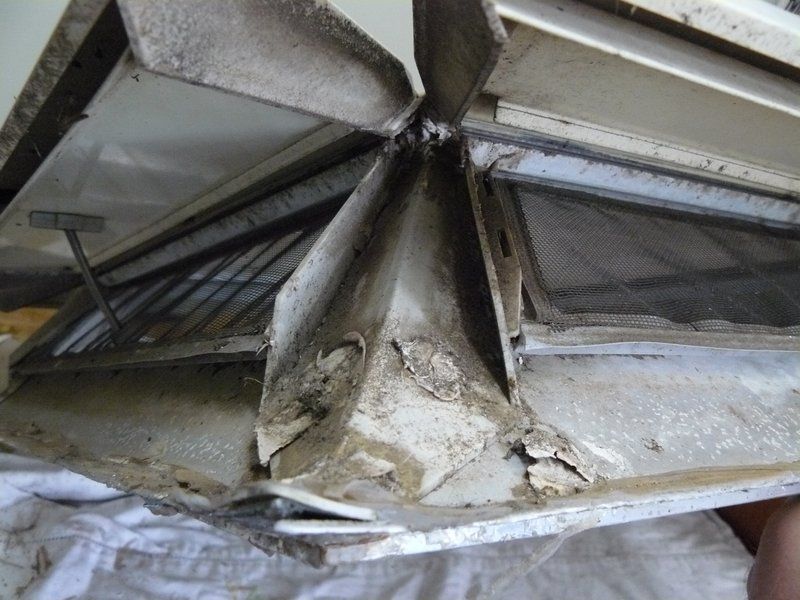 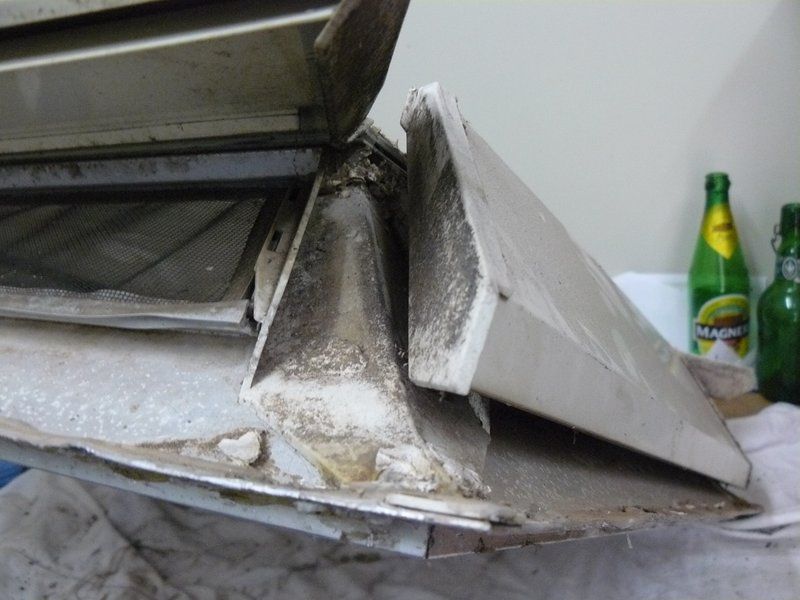 whoever siliconed the hatch up did a pretty good job, every rivet head, every corner where water could get under (as the plastic probably shrunk slightly over the years allowing the hatch flaps to weep in heavy rain. 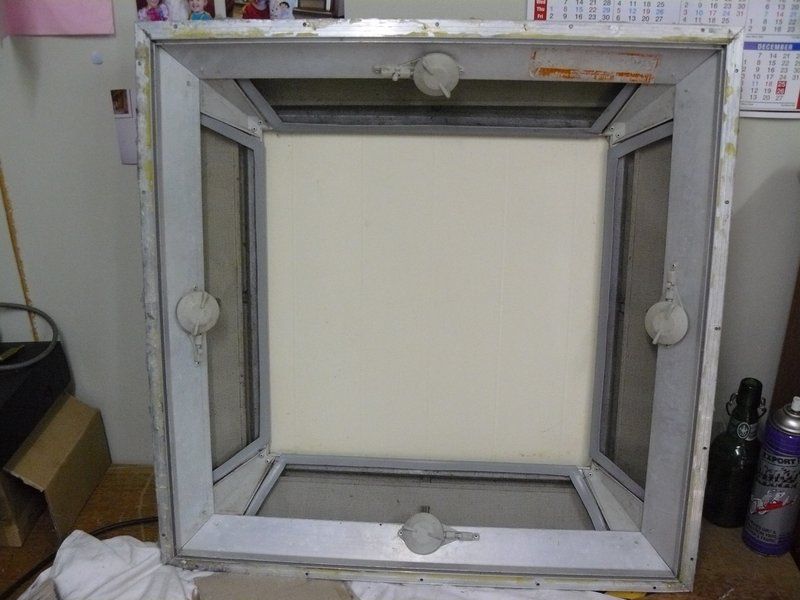 No sign of it ever leaking. Very clean, no signs of water tracking anywhere. 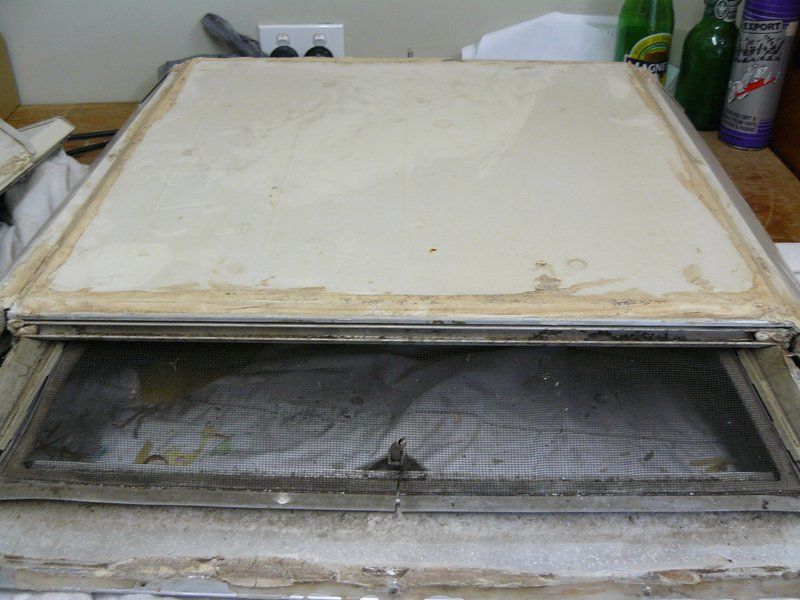 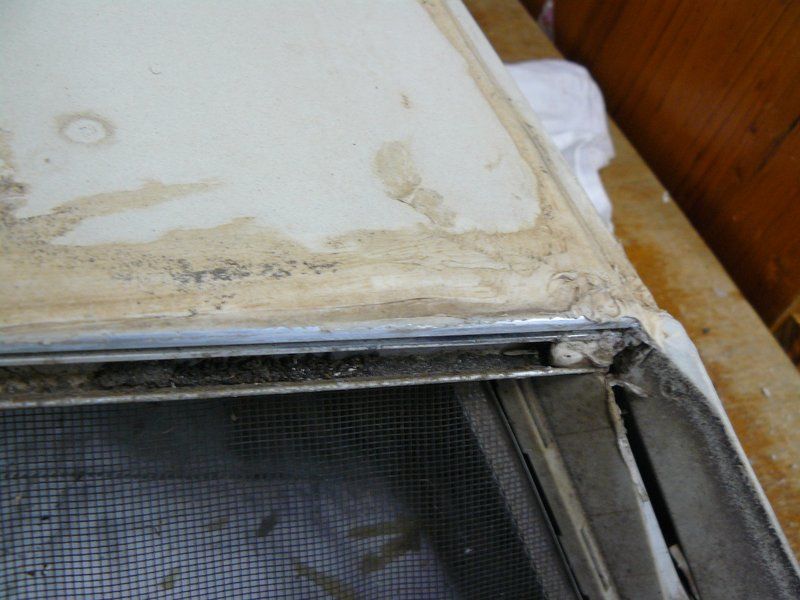 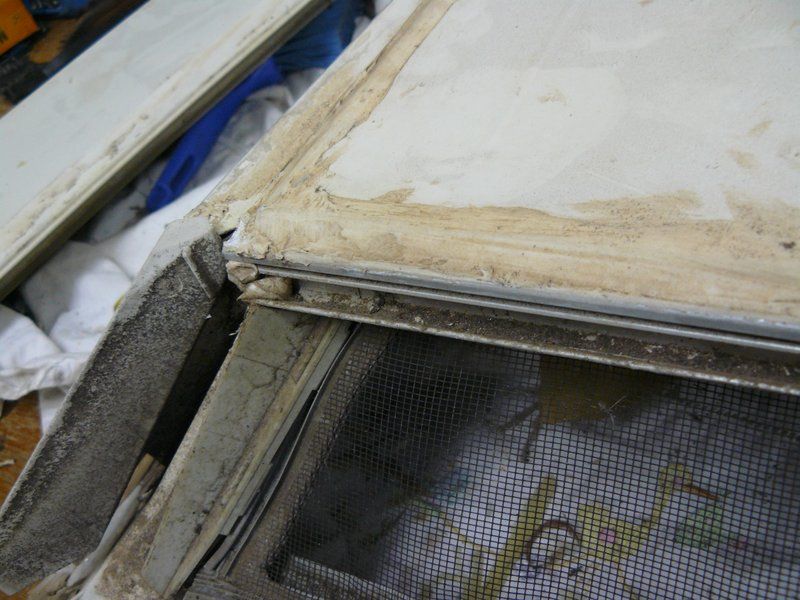 this is the flap that had blown out .... Notice the dirt down under the hinge area.... Now that's a guide to catch any water than gets past the hinge and guide it over the corners and down the edges so it can't get inside. Notice they have been silicon'd closed, these will flood eventually and allow water to drip straight intot he caravan in heavy downpours. I'll remove the silicon from here. 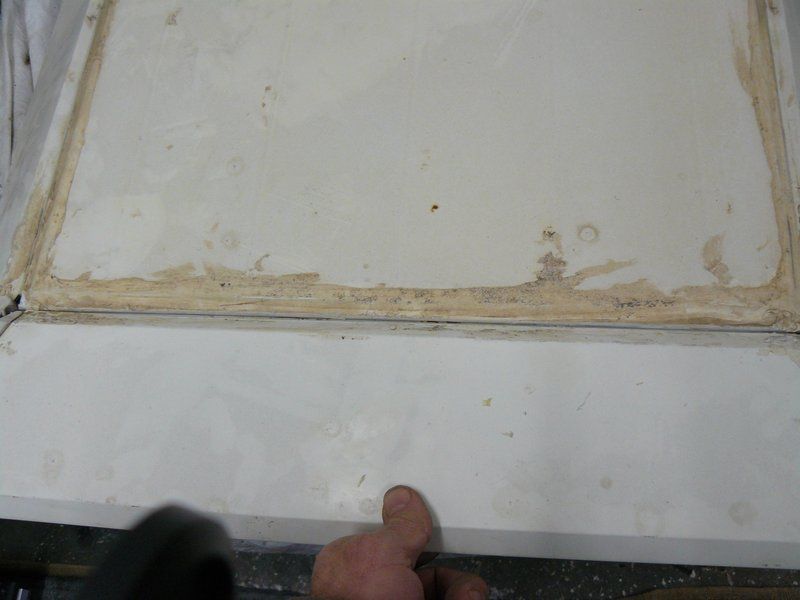 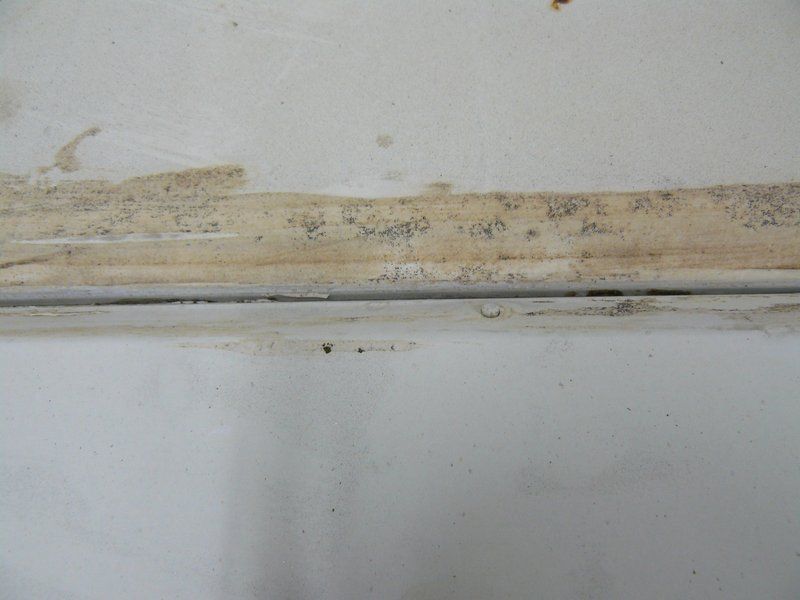 The flap that had blown out... it slots in nice and snugly............ But falls straight back out again. I couldn't see how on earth it was supposed to stay in place. So removed one of the flaps that didn't blow out. 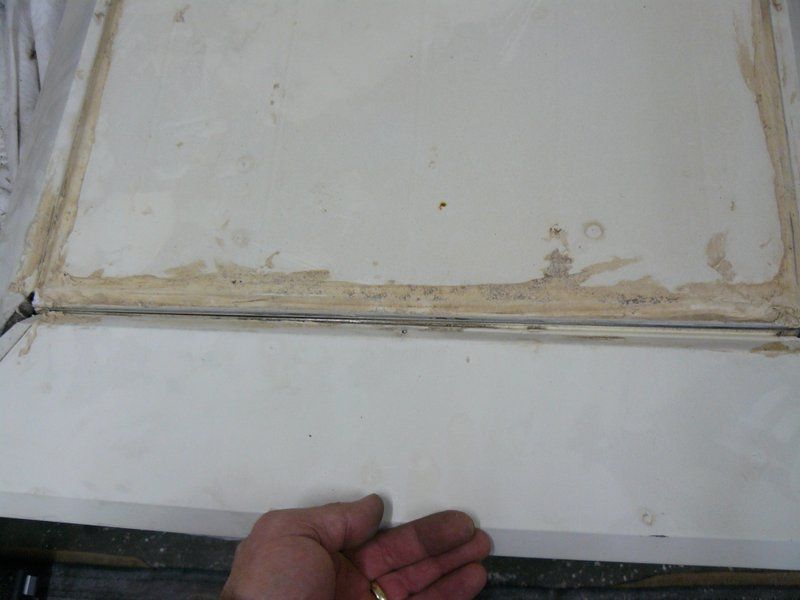 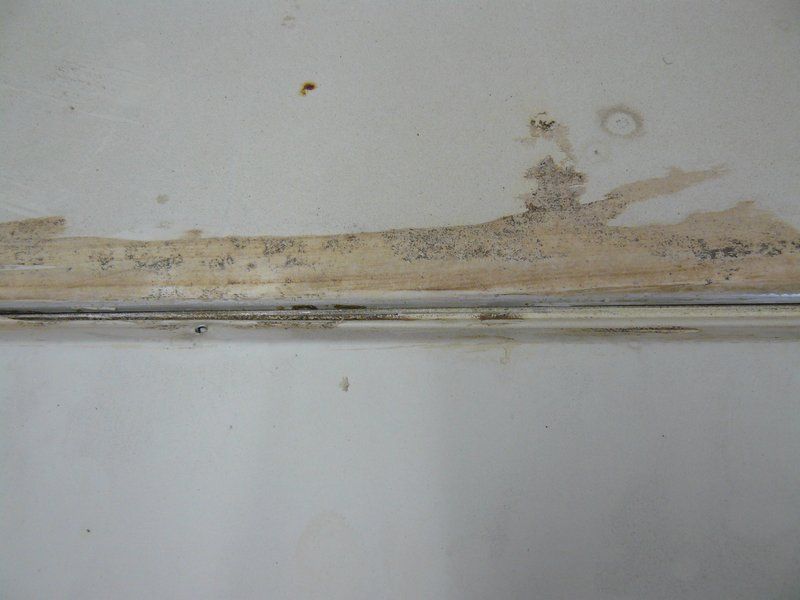 Wow.... How dodgy, that's bloody hilarious..... How did the factory stop the 4season flaps falling out ? The deliberatly slightly buckled the flap so it has to be flexed along it's length to slot in in/out. 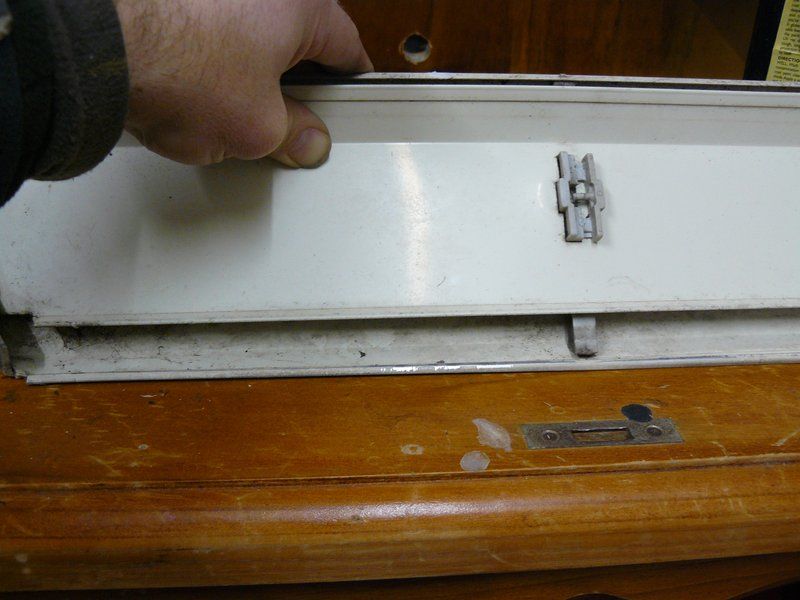 The bent one that doesn't fall out. 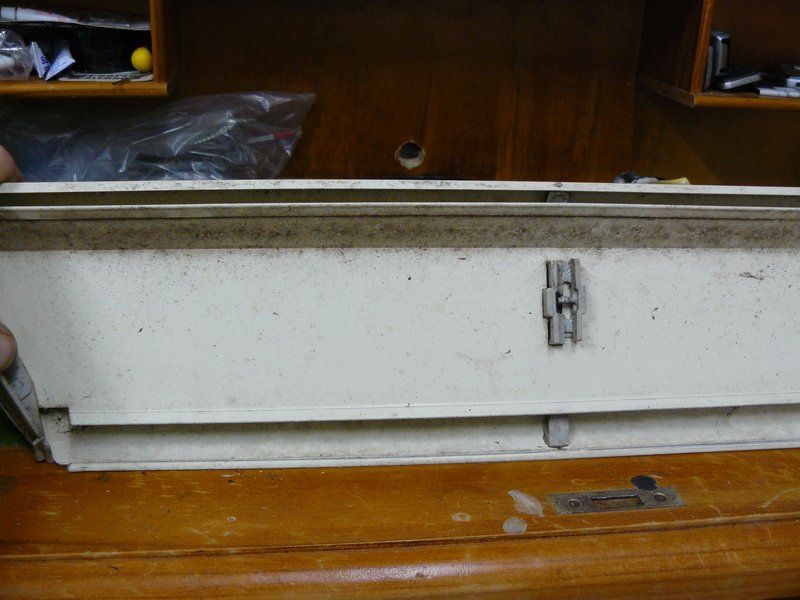 Nice and straight .... looks perfect... This is the one that had blown out. I just need to put a bend into it so it won't fall out. Oh yeah, note the plastic clips, you just use a screwdriver to separate them as shown so the wire that opens the flaps will pop off. seeya, shane L. well I thought I better get back to the 4seasons hatches. To remove the rear one I gave up on trying to cut it out... and just hammered a screwdriver underneath and all the way around the base of it with a panel hammer. You have to be really careful not to hammer a hole through the cladding. It made getting the 4seasons hatch out far easier. than the last one. 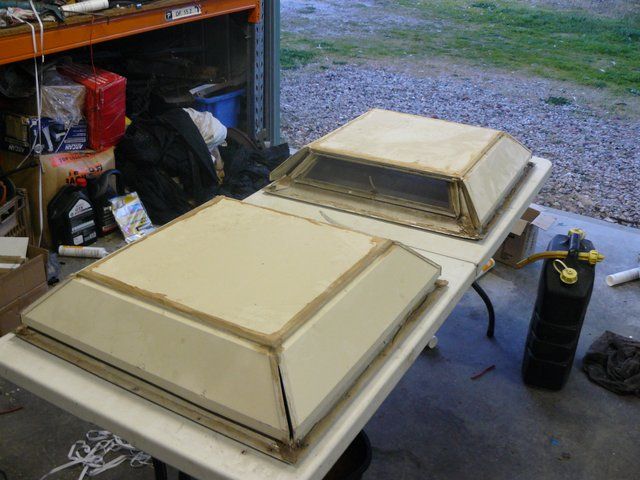 I gave them a quick wash and decided to fix the one that already had the flaps off first. 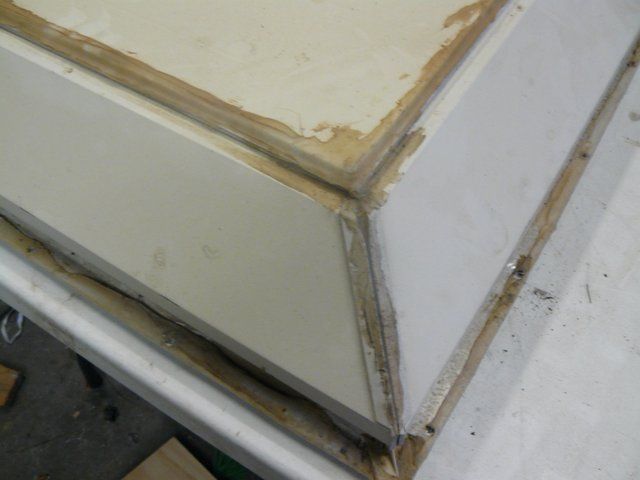 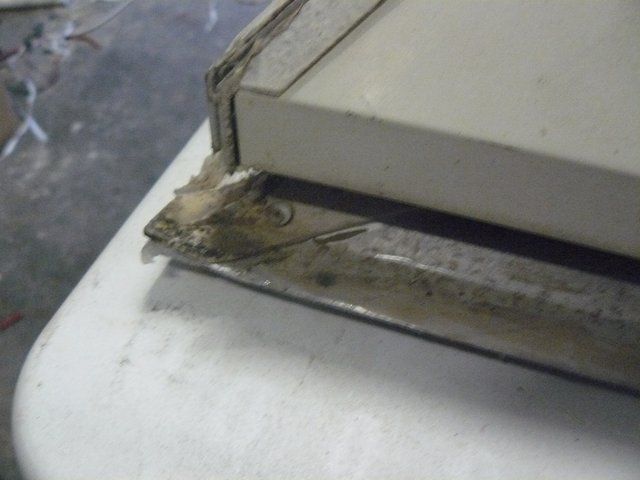 This is the leaky one ... I've sat it back in the hole on in the caravans roof so mice and rats can't get back in for now. Silicon everywhere, the flaps are even glued shut with silicon. note: it would still be leaking around this lower edge I'm sure. 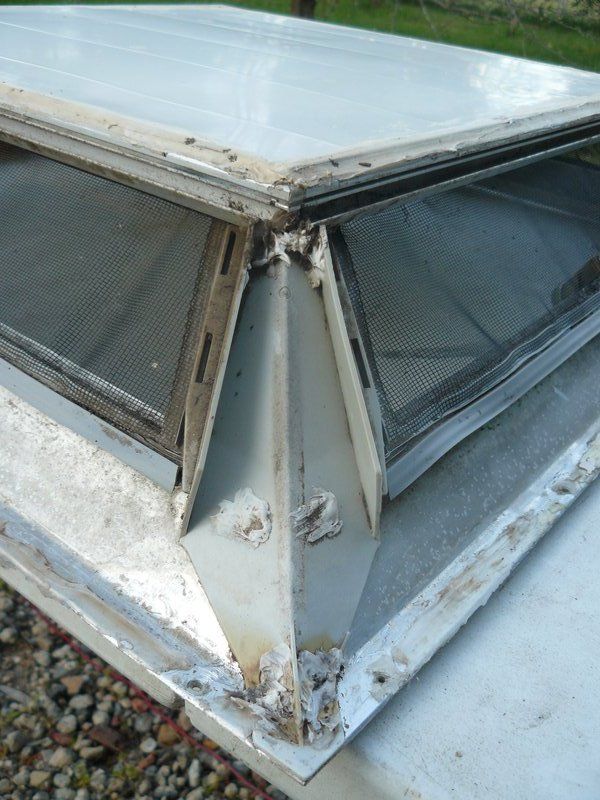 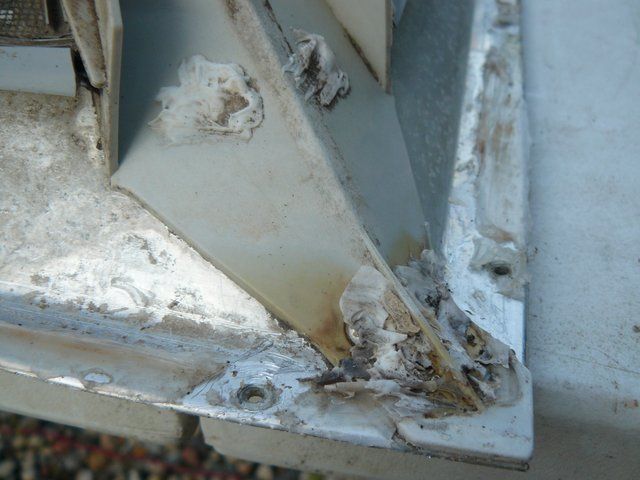 I started by removing the flaps and cleaning off the old silicon. Most was applied over dirt so wasn't sealing anything either way. 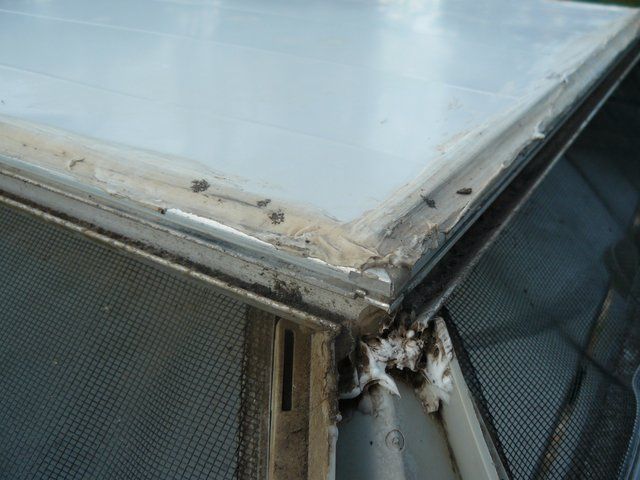 The drains were all siliconed shut. I dont' understand this. Just looking at the 4seasons hatch you can see these drain the hinge area down the corners ... with them siliconed shut the only thing that can happen is that area will eventually fill with water and overflow into the caravan. 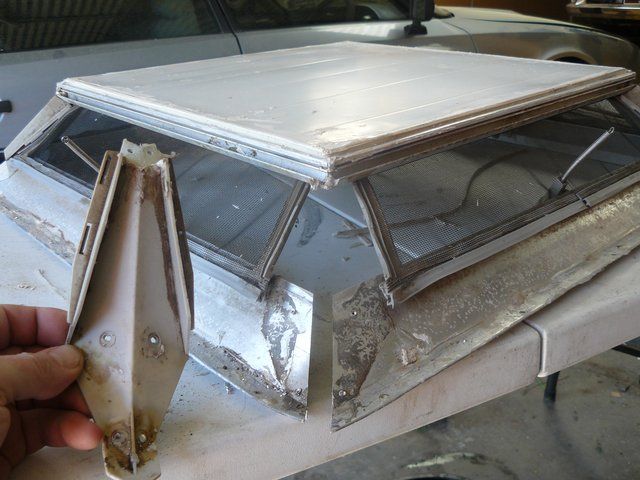 I got the silicon ready to apply and as I was about to squirt it on I decided this was as stupid a way of sealing something as pushing a little bit of silicon around the edges of windows and J-molds with your finger and calling it "sealed"............ So I decided to pull it apart and see if there was a better way of doing this. Note: The only thing that holds the whole 4seasons hatch together is that frail plastic corner piece and 6 pop rivets. 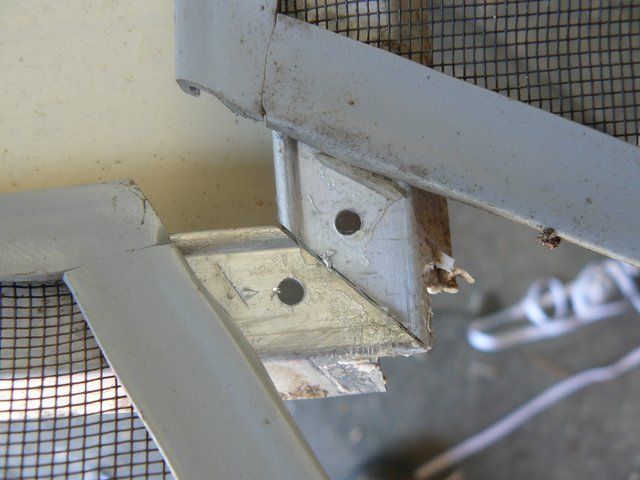 the top part appears to have been sealed with a smear of silicon at the factory. 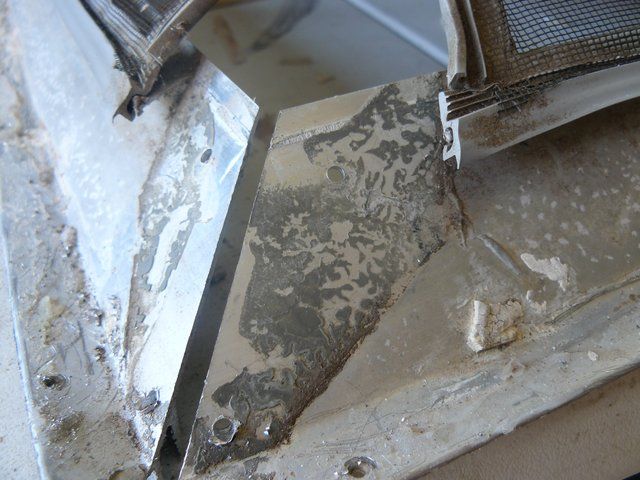 The bottom part is sealed with something hard ... that doesn't seal (well it might have for 5minutes 30years ago... maybe a tiny smear of mastic?). Either way the only way to clean it off is with a sharp blade. 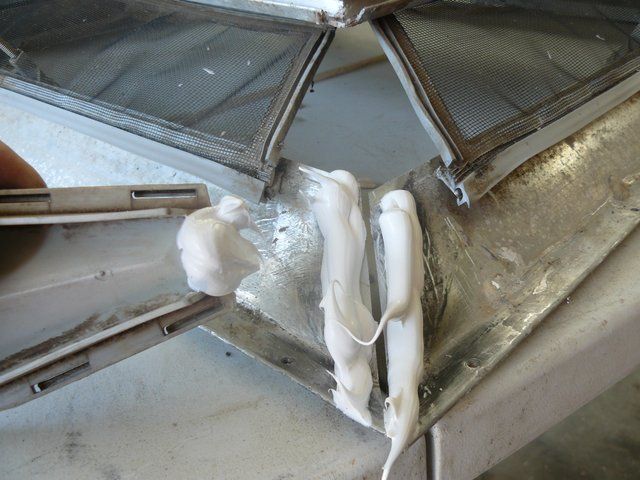 Heaps of sealer .... 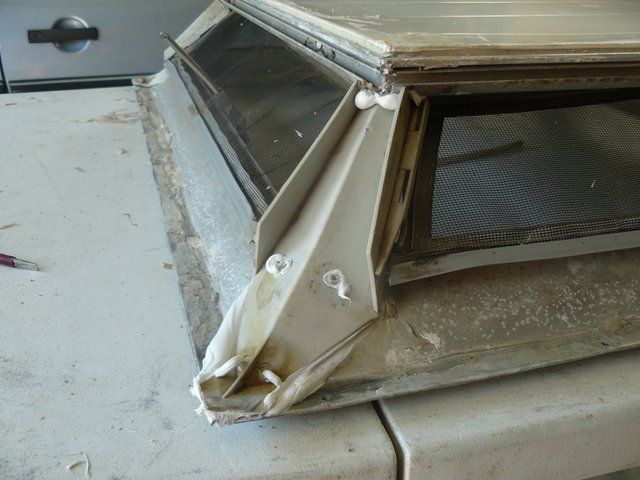 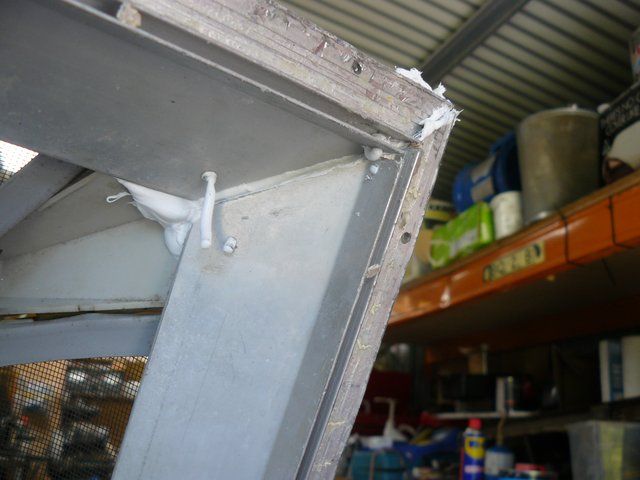 curse and yell at it 'cos you can't get the holes to line up to insert the pop rivets..... and make one hell of a bloody mess. 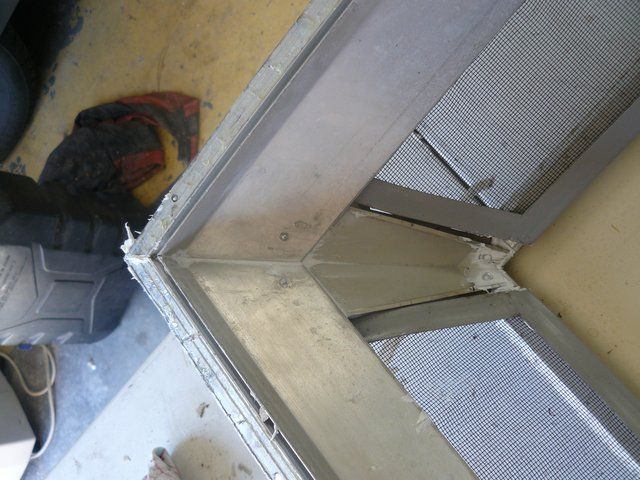 It squeezes right through, so I imagine should be nice and water tight. You have to turn the 4season vent over and quickly try and clean up the mess ... as this is visible inside the caravan. 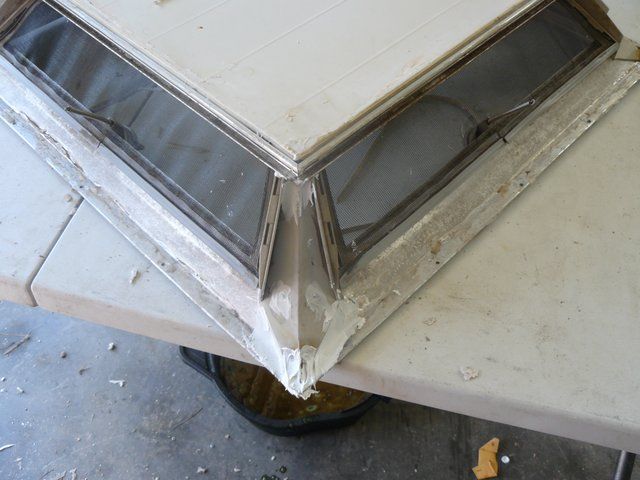 1 corner done .... 7 to go. 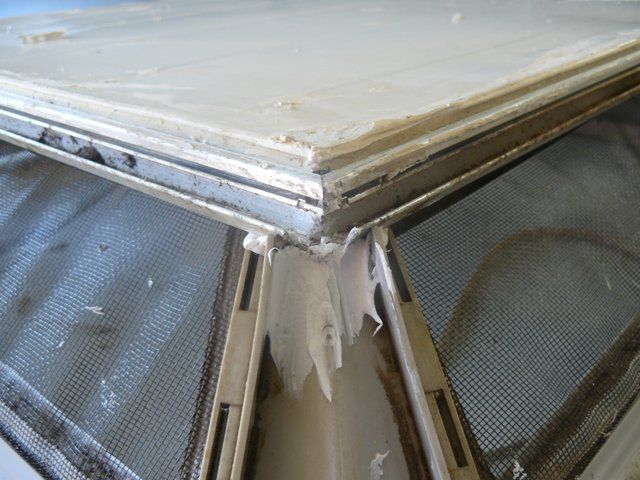 double check we haven't blocked the hinge drain. 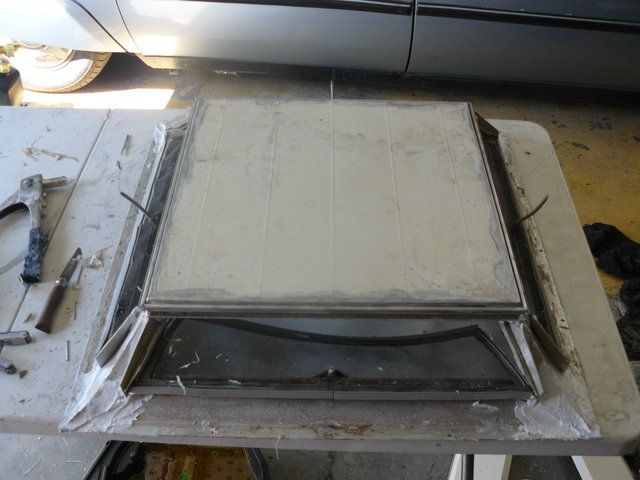 I stripped the top back. The way the top is siliconed was fine. It would never leak, so I'll leave this area of the other one alone. 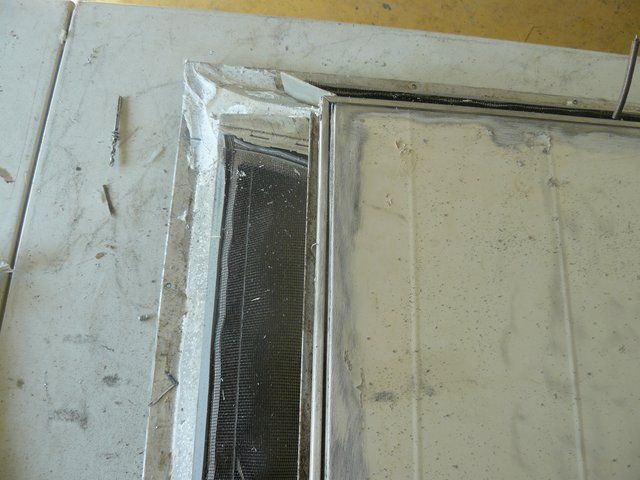 the silicon was pushed down into the recess all the way around.... so it would never have leaked. 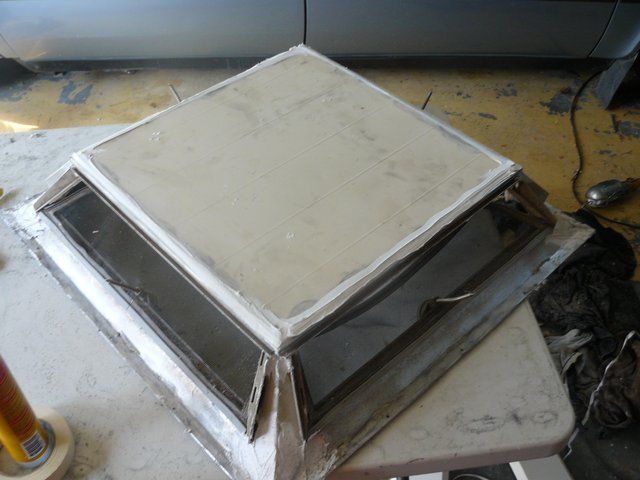 I just taped it up and re-siliconed it. 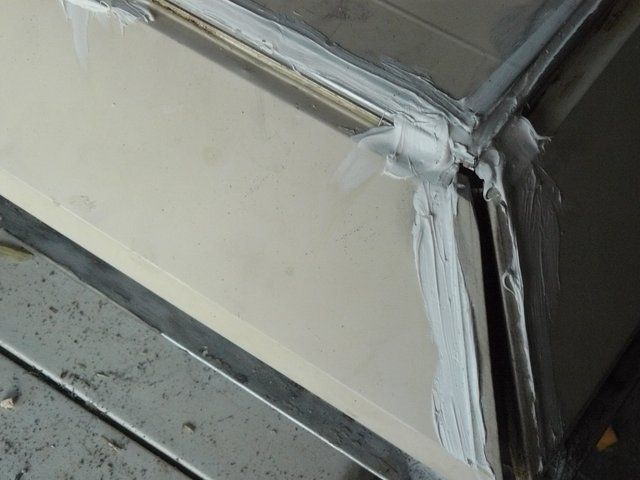 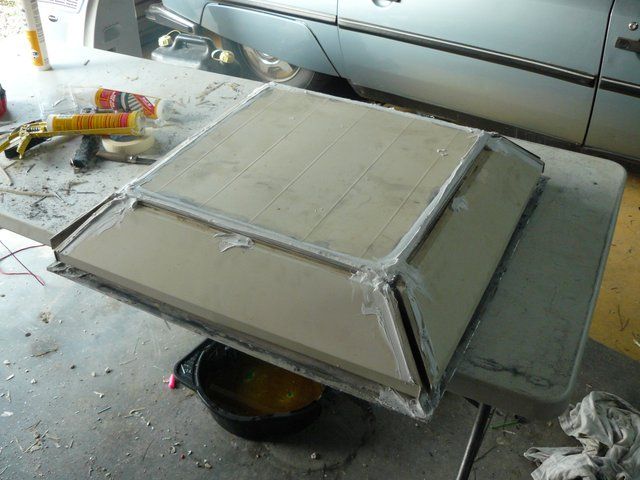 I'm not at all happy with the flaps. It doesn't seem to matter how you twist or bend the hinge area, within a dozen open/close operations, the flap falls out again. What an absolute nuts of a setup. I put too big blobs of silicon at each end of the track hoping to encourage them to stay in. Is this why the flaps on the back one are siliconed together?? to hold them in ? It can't understand how this ever worked from the factory. 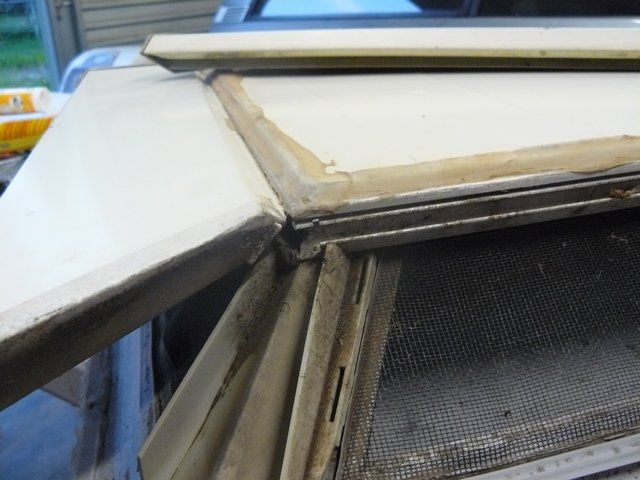 Anyway, in frustration I chucked the front 4seasons hatch back into the caravans roof for now and started on the other one........... I cut the silicon that holds the flaps together and opened them ............................................. I DON'T BLOODY BELIEVE IT ..... DAMN IT ALL, LOOK AT THAT. The flaps hinge INTO THE SLOT ABOVE THE GUTTER. From the post a few months back..... SOMEONE HAD ASSEMBLED ALL THE FLAPS IN THE FRONT 4 SEASONS HATCH INTO THE HINGE DRAIN .... So I had tried to copy this when I re-assemlbed it. No wonder the caravan arrived with one of the flaps already blown out. 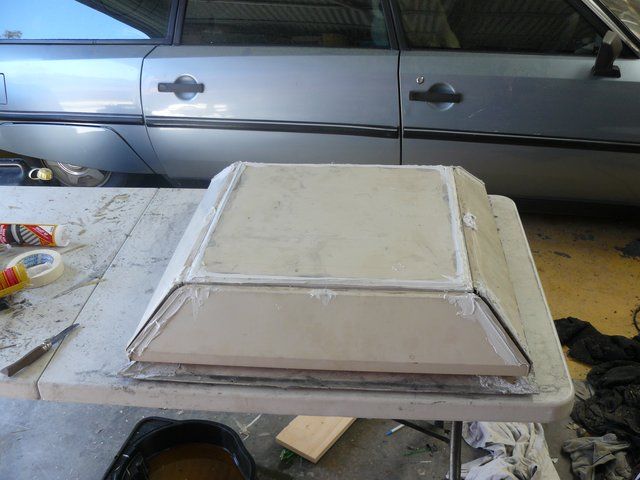 OK, back to that front 4seasons hatch ... remove all the flaps again, clean off the silicon I added, clean up the drains and REFIT THE BLOODY FLAPS INTO THE HINGE SLOT NOT THE DRAIN. You know, I reckon they'll stay in place now! This thing should now work well and not leak or fall apart. Now to dismantle and re-seal the 2nd 4seasons hatch and refit them both. Hopefully I'm then close to done. seeya, Shane L. |
|
|
|
Post by Mustang on Oct 7, 2015 17:50:10 GMT 10
WOW I think my rusty old Jobbies were simple compared to yours!!!!!
Very good sealing as usual!!!
|
|


 ..... Oh well it could have been worse, the kids might have been playing in that bunk and got covered in glass
  Bottom line is that entire window may need to come back out to go to a glaziers! if I'd used silicon or sikaflex I would literally destroy the wall of the van to get it out (not an exaggeration sadly). Once you glue a window in with a urethane... It's NEVER coming out again.


