|
|
Post by awbeattie381 on Jul 25, 2014 13:59:05 GMT 10
Hi all, I have been searching since Feb for a small viscount van 13-15 ft in good condition with an east west double bed, a 4 seater dinette and a recessed rear window (similar to the front). Managed to settle on this 1974 Viscount Valiant in western Sydney. Took me a week to decide whether I wanted it because it ticked so many boxes but a few things I wasn’t happy about. Length: 15ft Tare: 580kg On the positives:New gal drawbar New bearings New tyres Refurbed LH Torana wheels Chassis painted with that rust paint New hatch and winder LED lights Full annexe in good condition A spare set of original HT holden wheels with original viscount hubcaps I didnt have to travel interstate! almost forgot...also came with a flat screen TV haha (i dont think ill keep it in the van) On the negatives:The outside has been painted with a brush with house paint for aluminium clad houses. It’s a pretty average job and patchy in places The van doesn’t have recessed back windows The last thing was the van has single beds at the rear 1 cracked window No water tank I decided that there were too many positives not to make an offer, and the other things I didn’t like I are either cosmetic or easy/cheap to fix. The obvious exception being the rear window design. I think I will grow to love it. Anyway, here are the pics! I will update the thread with more photos once I get a spare 5 seconds to take them in good light. The interior is pretty basic, with not much in the way of head height cupboards - I will have to build some. Mods:Remove those nasty plastic chrome hubcaps. I intend on either putting the new rubber on the original rims with hubcaps or buying some LH torana chrome hubcaps for the current wheels. Replace cracked window Install water tank Install battery so we can free camp Change configuration of beds Build some additional head height cupboards, especially over the sink New floor covering (will have to check out the original flooring which is apparently original) New curtains and seat covers etc Paint the interior Repaint the exterior (the stripe is also the wrong shade of green – I am yet to determine if it was olive or just a more pastel shade) Its probably a blessing I have this van because if it was mint like the day it left the factory I wouldn’t be touching a thing with the interior! Anyway, will post updates as things progress. Itching to use it! It tows better than I thought it would! 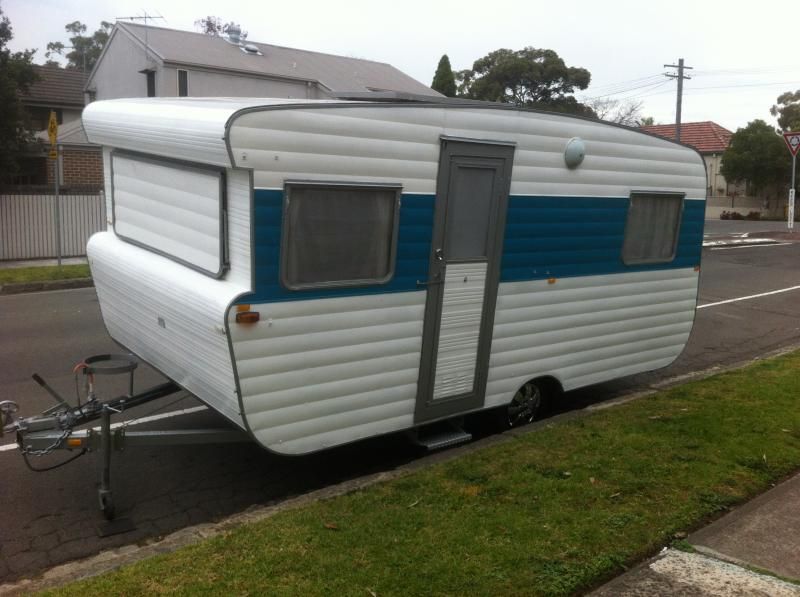 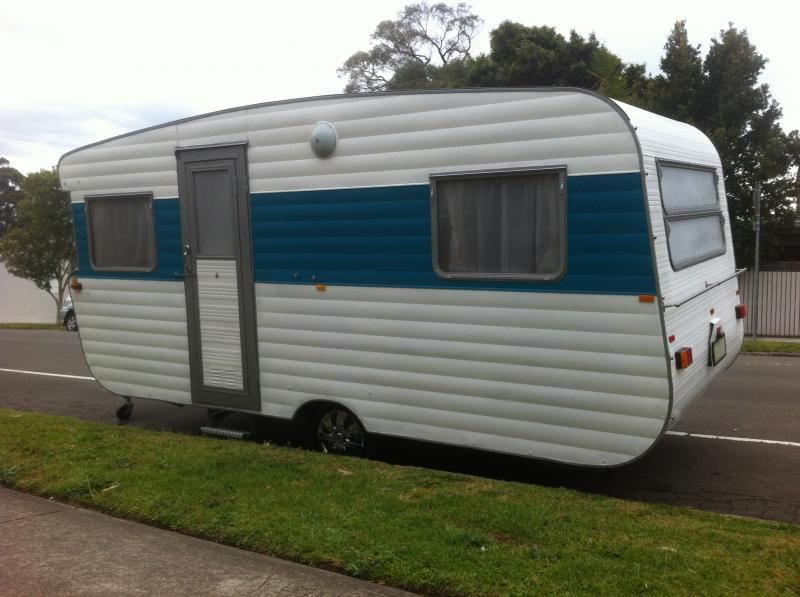 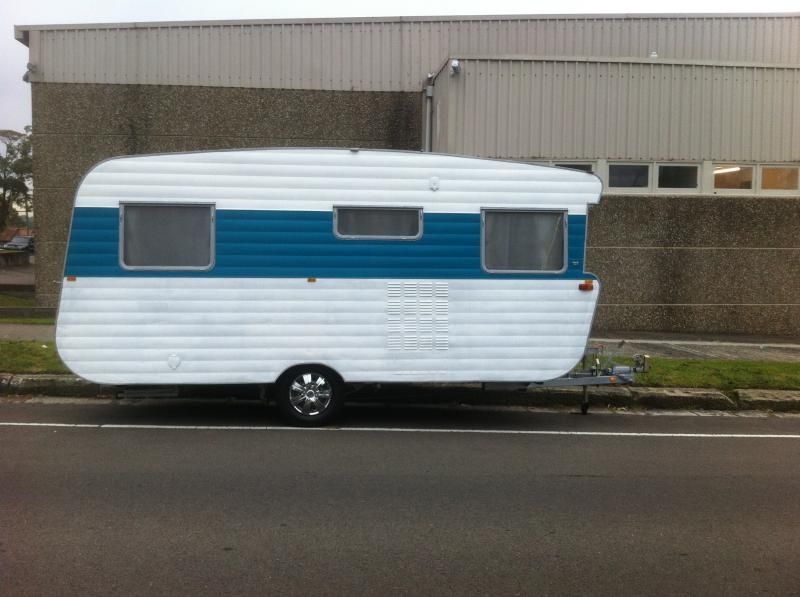 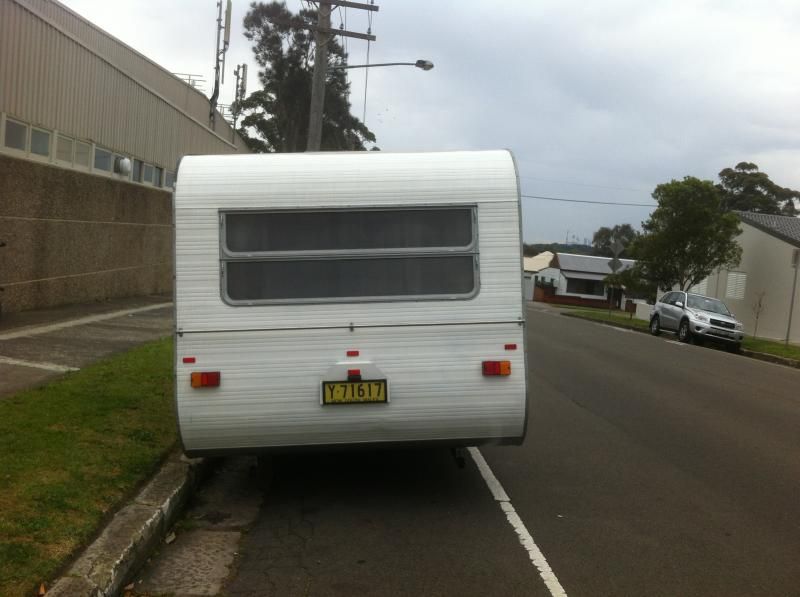 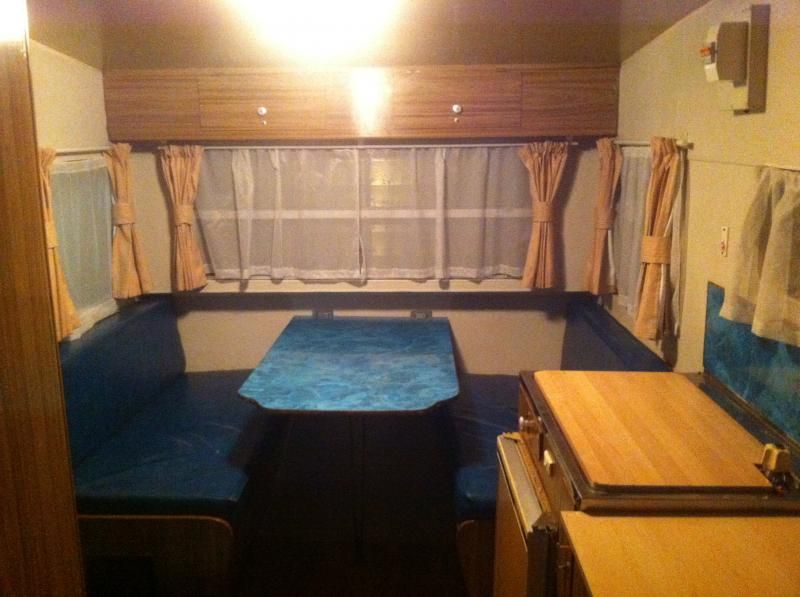 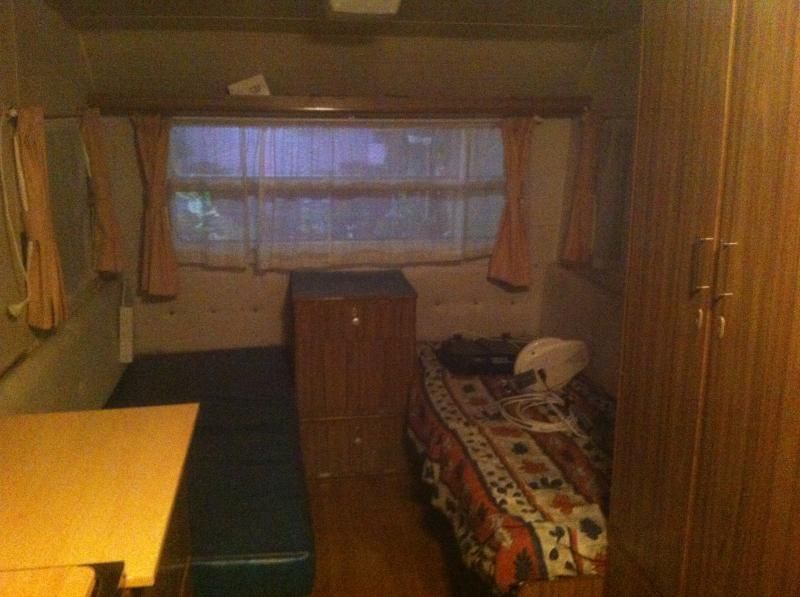 |
|
|
|
Post by ForumMod on Jul 25, 2014 18:00:29 GMT 10
G'day Andrew, Congratulations on finally getting hold of a van.  At least you can now enjoy caravanning, while you keep an eye out for your "ideal" van.  It took us two years to find our current van, but in the meantime we had many wonderful trips in the old Millard poptop we had. Funnily enough, my ideal Viscount would have the same rear shape as your van, but would have an island bed in it (it'd have to be 18ft long). I've looked at the Viscounts with the wrap-around windows at the rear, and I've realised the bottom window ledge encroaches on the pillow head room at that end of the bed. I had visions of waking up and whacking my head on the bottom window sill as I raised my head off the pillow. I don't know whether that's actually an issue for other Viscount owners with the wrap-around windows, but it was something that made me want to steer clear of that set-up. Converting the two singles to a double bed is often done. You can leave the chest of drawers there if you want, and put extra framework between the beds and put the mattress east-west on the framework and existing bed bases. Or, you can remove the chest of drawers and do whatever you like at the back. You might like to read this other thread about a possible 1974 Valiant. Scroll down the thread and you'll see some photos of another '74 Valiant I looked at a couple of years ago. You'll see in my post what the Valiant sticker looked like: Valiant V.104. 1974 (?)Keep posting in this thread as you work your way through sorting out the van to suit you.  cheers, Al. |
|
|
|
Post by awbeattie381 on Jul 28, 2014 21:35:25 GMT 10
Thanks for the reply Al. Yeah will be interested to see how we enjoy this van, especially after the few mods we have planned. I am already growing to love the rear end of it however would have still preferred something a little shorter (15ft still probably too big for us). Funny what happens when you finally buy a van...two 13.6ft viscounts came on the market over the weekend - one in Sydney and the other a couple of hours out! I was only looking for ideas and came across them. I am really enjoying researching and learning about as many viscount as I can though. Back to my van...took it away last weekend just for the night. I have no power, no gas and no water tank so essentially rather than putting up a tent I backed the van in and leveled it up. I only slept in it! haha It really is the poverty pack model though, as there are only head height cupboards at the front and the only other head height cupboard (now removed) was over the sink - but it didnt extend the full length of the van on that side. The back end there is only a shelf. I guess that is why the weight is so light. I really enjoyed it and all I want to do now is go road tripping. My unproductive day at work today was due to my obsession with constantly refining my 'to do' list with the van! It towed really well and didnt get too upset over rough uneven roads or when trucks overtook (or I overtook them on the freeway). Cruised easily at 100km/h most of the way. The old Paj did a great job. First mod done - hubcaps gone! Any ideas on where I may be able to get original tail lights from? The rectangular LED jobbies really do let the team down - they dont really go with the age of the van. Maybe I can put replacement LED globes in original housings so I can retain that original look? Also, are the rubber wheels on the stabliliser bars replaceable? I flat spotted them getting the van up the in laws driveway over the weekend... 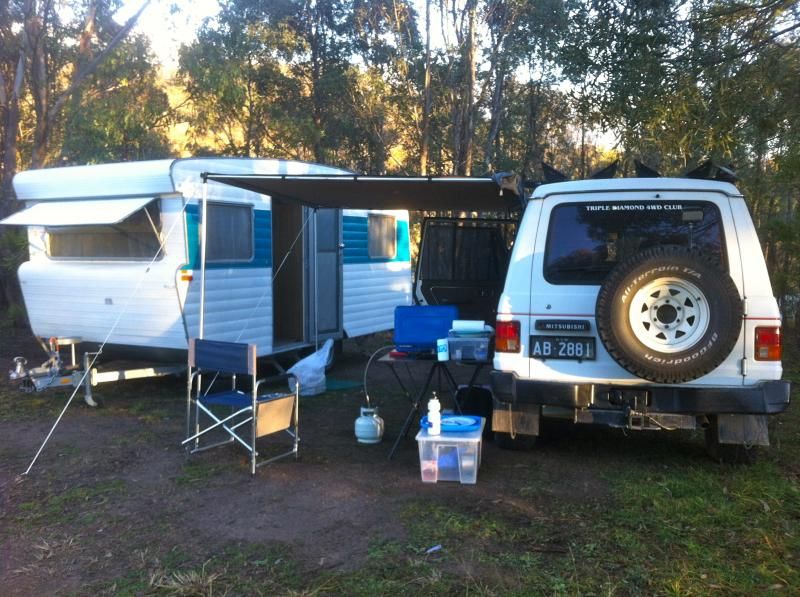 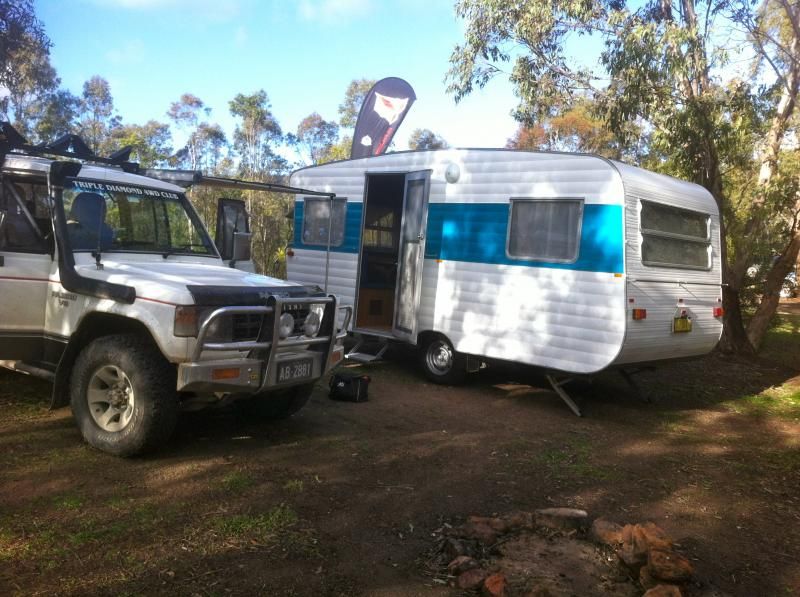 |
|
|
|
Post by ForumMod on Aug 1, 2014 19:24:14 GMT 10
G'day Andrew, So, your first night in the van is a success, hey?!  Tail lights: Tail lights: most of the Viscounts had the second light down in this listing: CaravansPlus tail lights However, the originals were the Hella brand, but the Narva brand is a duplicate. If you want the genuine Hella brand, you have to go hunting for them in NZ, where they pop up on TradeMe on occasions. The Hella brand doesn't seem to pop up here in Oz these days. Rubber wheels: I'm sure you could find something that would suit, somewhere out there. Check out this listing from Blackwoods and see if there's anything in the "solid wheels" or "miscellaneous wheels" categories. Search the internet for "castor wheels in australia" or "solid rubber wheels in australia". Somewhere out there will be a suitable wheel. The big problem will be changing your old dud one over, so you might have to first look at how the old one is removed and a new one fitted. You might have to grind the axle stud off to remove the old one, and then what do you use for a replacement axle? cheers, Al. |
|
|
|
Post by awbeattie381 on Aug 2, 2014 21:56:01 GMT 10
Yep loved every minute of towing it, setting it up and sleeping in it! Just have to convince the wife that we need to take it away even if we are working on it (she wants to have the inside to her taste before taking it away - a motivational thing). Thanks for the suggestions with the lights and stabiliser wheels. Bought a new 64L water tank today which fits perfectly into the factory brackets I was given. Also bought some new tail lights with a nice little chrome trim. Yes they are a Narva product. 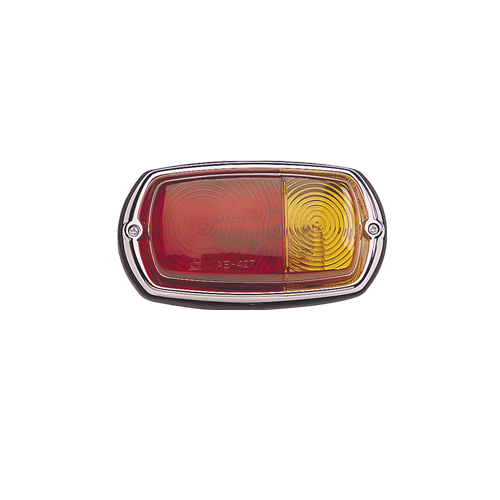 Considering I already have a dual battery system installed in the Paj I am probably leaning towards permanently mounting a solar panel to the roof of the van to take care of charging the caravan battery while on the road. Not overly keen on doing something so permanent but I like the idea of charging the van battery while on the road and the alternator will be struggling to charge battery 1, battery 2 and have enough leftover for battery 3. Next task will be fitting the tank and sorting out the cracked window while I continue to ponder my power options/plans. Another question, is there a 'best place' for storing the spare tyre? I am mindful of not wanting to load up the drawbar as I only have a 75kg ballweight on the Paj. Are there any issues I should be aware of if I get a rear bar made up to acommodate the spare tyre? I guess the added benefits would be being able to store bikes (on a bike rack) and add a bit of extra protection to the rear end. |
|
|
|
Post by awbeattie381 on Aug 3, 2014 22:41:30 GMT 10
Test fitted the water tank this afternoon. For some reason the bolt holes are quite a long way back on the chassis - midway between the axle and rear of the van. I am probably going to move it closer to the axle. I can also see why the previous owner had issues with scraping the tank on his driveway - the 13 inch wheels dont do any favors for ground clearance!
Looks like I will be going back to the original 14 inch holden HT wheels and buying new tyres to give the van that extra bit of height. Something else to add to the list!
|
|
|
|
Post by ForumMod on Aug 4, 2014 8:02:43 GMT 10
Andrew, before changing the tyre size, double-check you'll have enough clearance between the top of the tyres and the mudguard, especially allowing for bouncing on rough roads. It may not be an issue, but it's always worth checking beforehand. I still remember the fella who bought a vintage fibreglass Sunliner caravan from the Vintage forum. It had 14" tyres recently put on it to replace the original 13" wheels. The new owner picked it up from the north coast of NSW and towed it back home towards Victoria on a rainy weekend. They stopped part-way to have lunch in the van - opened the door and the floor was awash with water. Checked everything out in a panic and found the tyres had worn through the fibreglass mudguards. Big disappointment when you've just spent $8000 on a van...
cheers,
Al.
|
|
|
|
Post by supreme78 on Aug 16, 2014 18:34:50 GMT 10
Hi there Andrew
Nice van you have there. I like the rear and on your van as mine is the same. I have wrap around windows on the front and they were a lot of work to rebuild. They also are a weird setup with the curtain setup. Seems like a waste of space I the front end but I guess it lets in plenty of light.
My van is a supreme so it's got plenty of cupboards it's in the hall of fame section under S81091. The rear end is a more modern setup. I have a shower toilet room in the back end and it's a very handy room for me anyway. I have added extra batteries for free camping. I have all 12v lights setup now and the only 240v is the power points and my battery charger. I will be adding solar to the van when funds permit. The old viscount is my pick of vans as they have alloy frame and were quite strongly built.
Enjoy your van and use it whenever possible. They are great fun.
regards
Paul
|
|
|
|
Post by awbeattie381 on Aug 17, 2014 22:39:44 GMT 10
Thanks Al for the tip re wheels. The ones I am going to fit are the originals. They were on the van when bought by the previous owner and look to be factory with original tyres. Paul I have been quietly watching your build up with your old viscount. Yep the aluminium frame and look were the main drawcards for me - the back end is growing on me though!! Its hard working on the van when its not with me - its in Wollongong (we are in Syd) so we have somewhere off street to work on it. It will eventually live on the street up here though. In the meantime, I have managed to chip away at some HUGE jobs...new tail/number plate light (to replace ugly LEDs), polishing hubcaps and factory rims resprayed. Just need rubber. What size should I be going for in the LT construction? New light 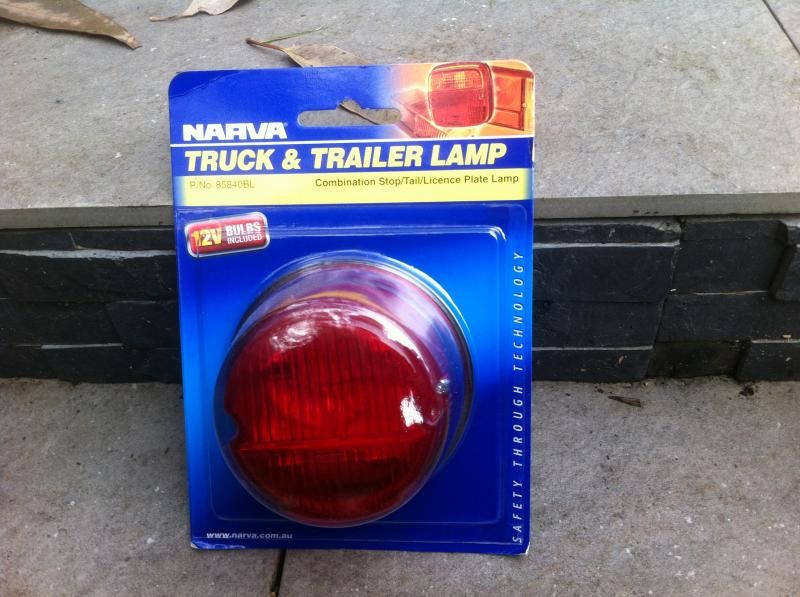 Before first wheel 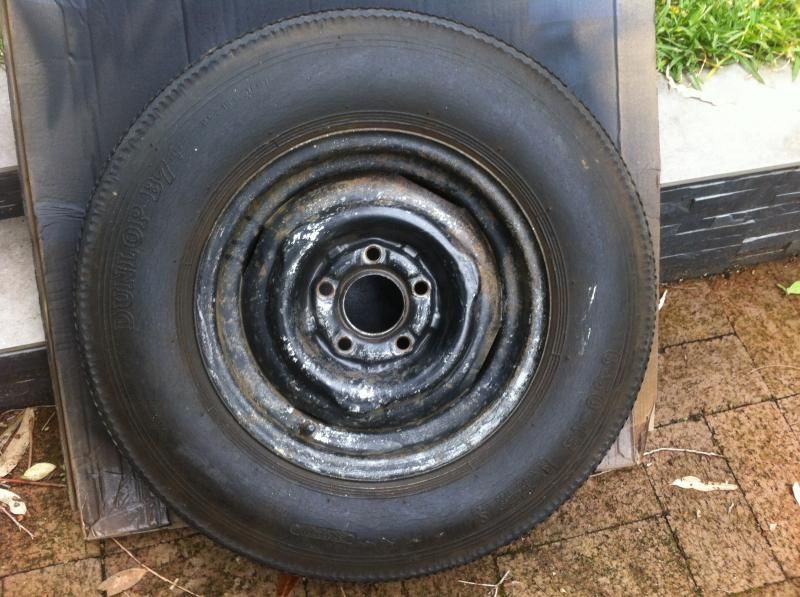 Before wheel 2 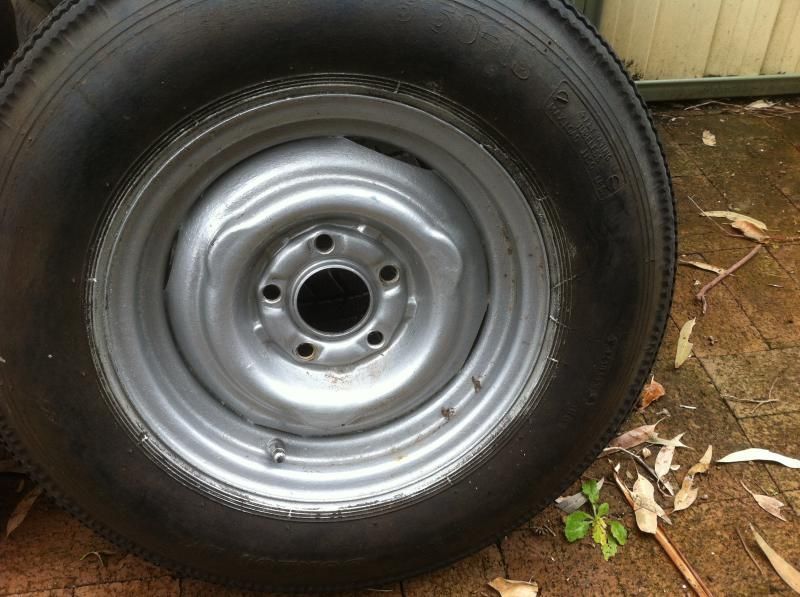 After both 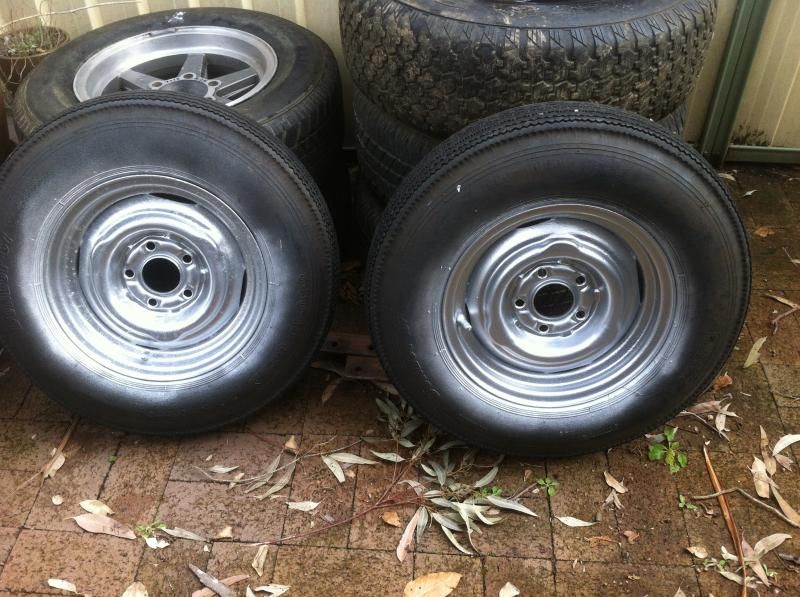 Original rubber 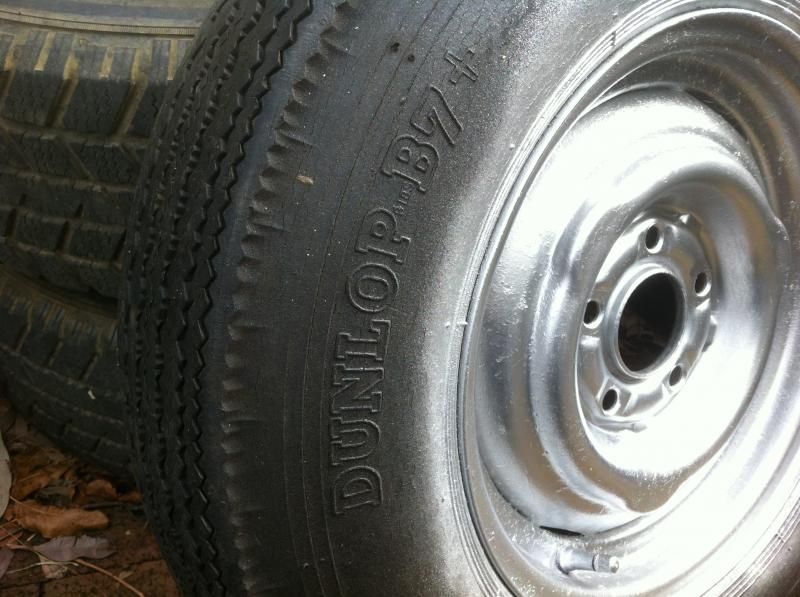 Hubcap before 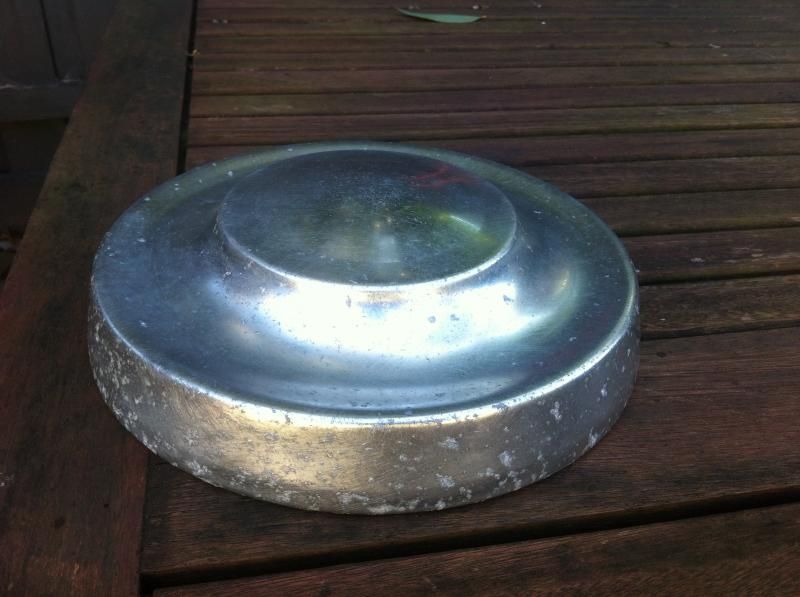 Hubcaps after (still work in progress) 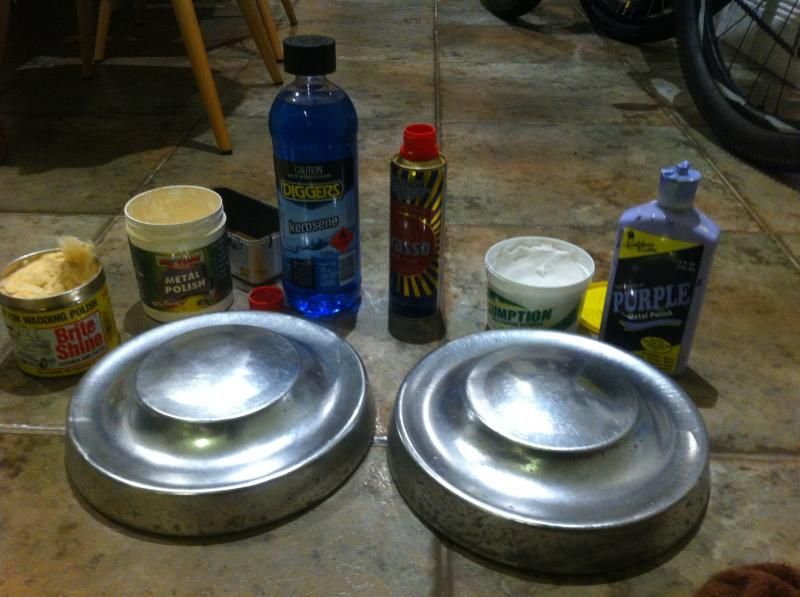 |
|
|
|
Post by awbeattie381 on Sept 7, 2014 22:10:57 GMT 10
Managed to get stuck into a bit if work today - removed one ceiling panel over the dinette which had rotten at one end and housed a rather large nest of ants. Also managed (wife mostly) to remove the rear beds and rear drawers. Geez there are some staples in these things!!!!! The insulation in the ceiling is pretty basic polystyrene foam but what a difference it makes to the inside temp when I took a few sheets out!! One thing I am really not looking forward to is replacing the ceiling panel - it's going to require a lot of mucking around, sweat and profanities I think... I really like the way all the cabinetry is built. Thin sheets of ply over a basic frame to save weight. Is there a product on the market that is a flexible and sandable putty? I did a bit of damage trying to pry the drawers off the rear wall and really don't want to replace the whole panel as it's in good nick. I guess if I need to replace the whole panel I can knock out a few dings along the rear. There also looks to be the letters 'amb' on some of the cabinetry removed which I assume means ambassador? obviously a lot of interior woodwork is used for all models. 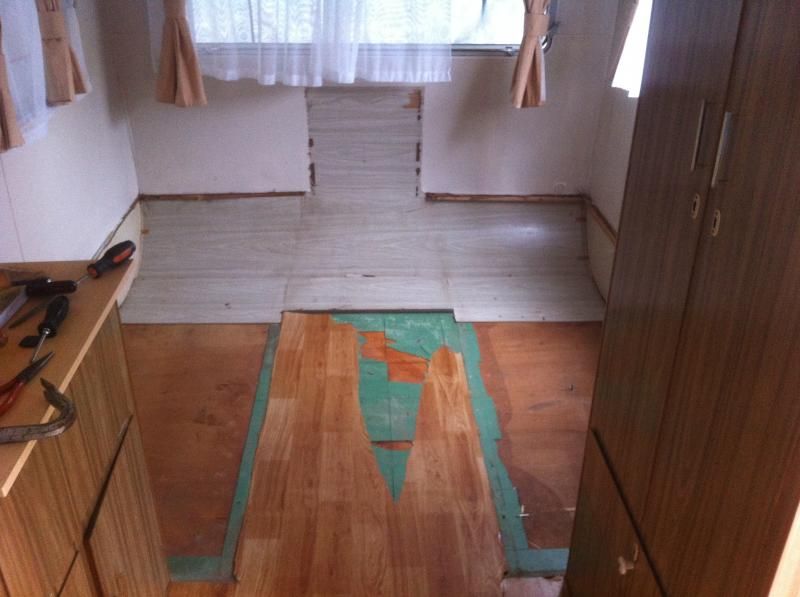 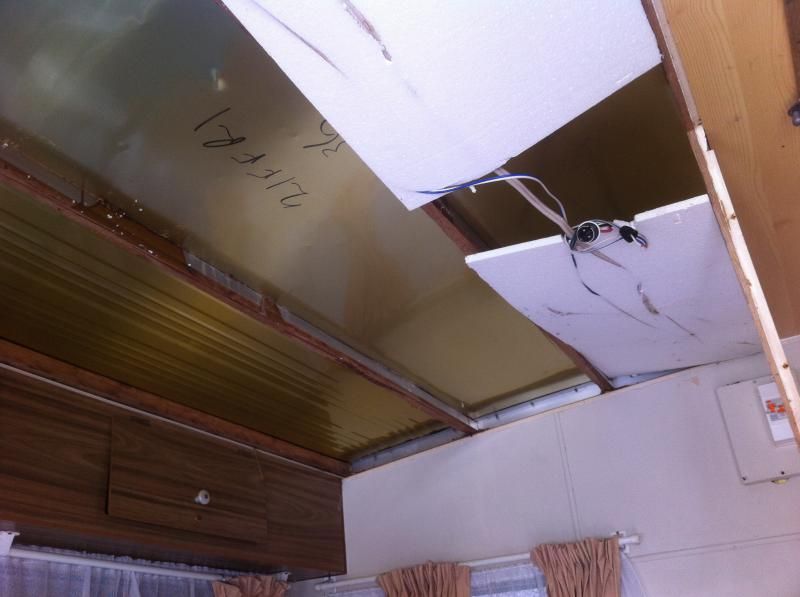 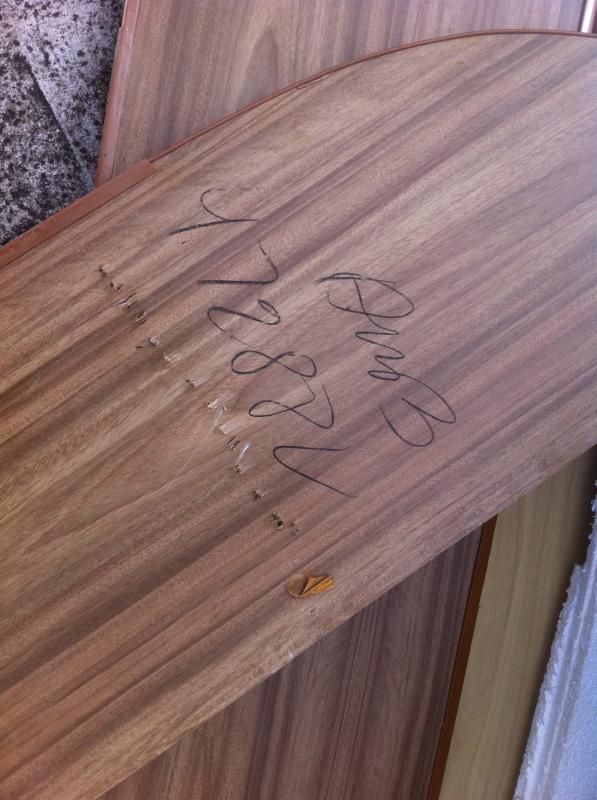 |
|
|
|
Post by supreme78 on Sept 7, 2014 23:37:57 GMT 10
I would go for 185x 14 tyres for the van it's a common size and gives a bit of width so would help with stability. Most vans and utes had this size so they should be quite cheep. I have sen new Chinese ones for $55 but would suggest you aim a little higher quality wise. Tyres are quite important and why save $100 to watch your van destroyed because of a cheep tyre letting go.
You have to love the viscount staples. They must have gone through a lot of them over the years using 1000 for a van.
Great work watching with interest.
Regards
Paul
|
|
|
|
Post by doublechevron on Sept 8, 2014 10:47:47 GMT 10
You not seriously considering towing the caravan on those ancient cross ply tires are you :EEK: :EEK: That sucker wouldn't leave my yard with those tires on it! There only fit for holding the stationary 'van up off the ground  seeya Shane L. |
|
|
|
Post by awbeattie381 on Sept 8, 2014 12:28:47 GMT 10
ummmmm no!! hahaha
going to buy some new tyres. The current wheels/tyres make the van sit so low the step is almost useless (and the water tank will drag) hence my keeness to get the van a little higher off the ground with origanal size wheels/tyres.
|
|
|
|
Post by awbeattie381 on Sept 14, 2014 15:37:18 GMT 10
Bit more work done this weekend. Finished cleaning up/removing the remnants of the ceiling panel/beds/drawer. Ended up using an angle grinder to remove all the staples which I found to be quite a satisfying job! Also removed and cleaned (well my wife did the cleaning bit) the fridge which was full of black mould. In the process I worked out that the fridge will never run on gas if it isnt connected to anything! Last job was installing the water tank. I just need to buy food grade pipes and plumb it up to a new pump tap. The photo is a little blurry, but it was supposed to show the cleaned out channel where the new ceiling panel will be inserted. 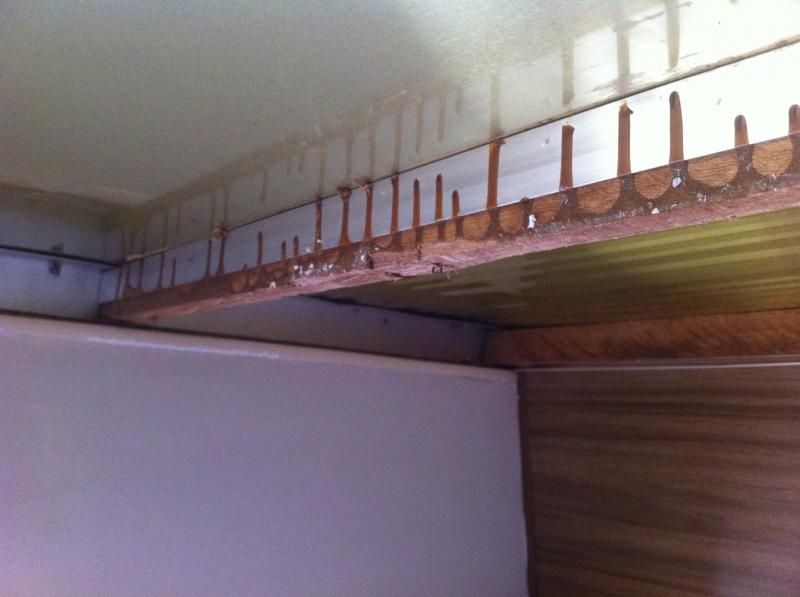 An example of the fun that was about to begin removing the staples 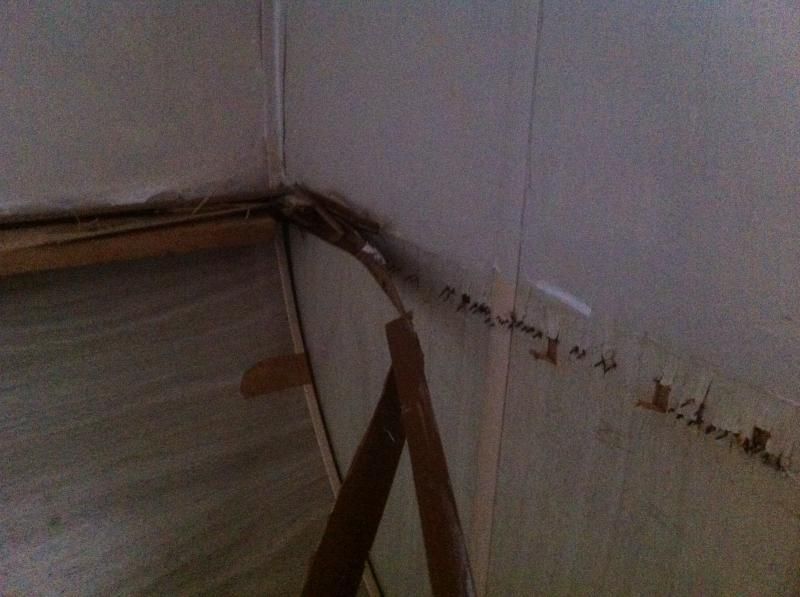 No more fridge 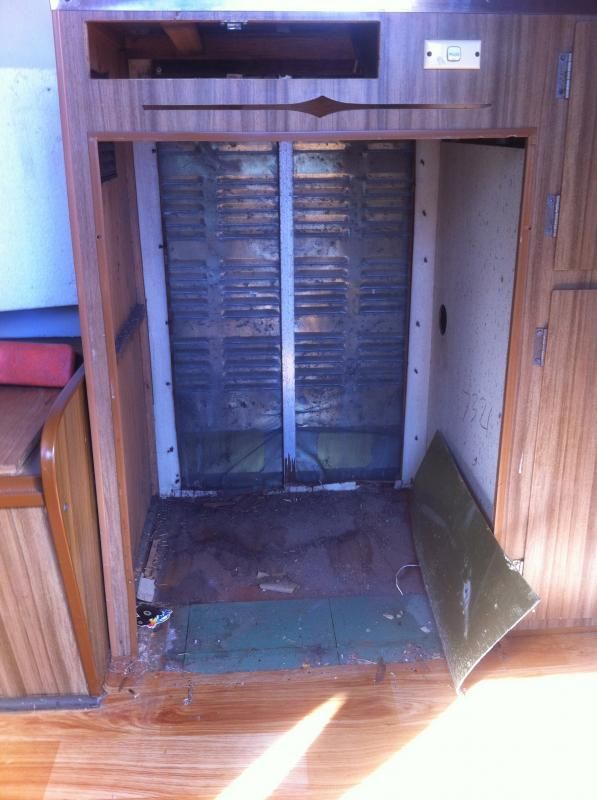 Fridge ready for cleaning 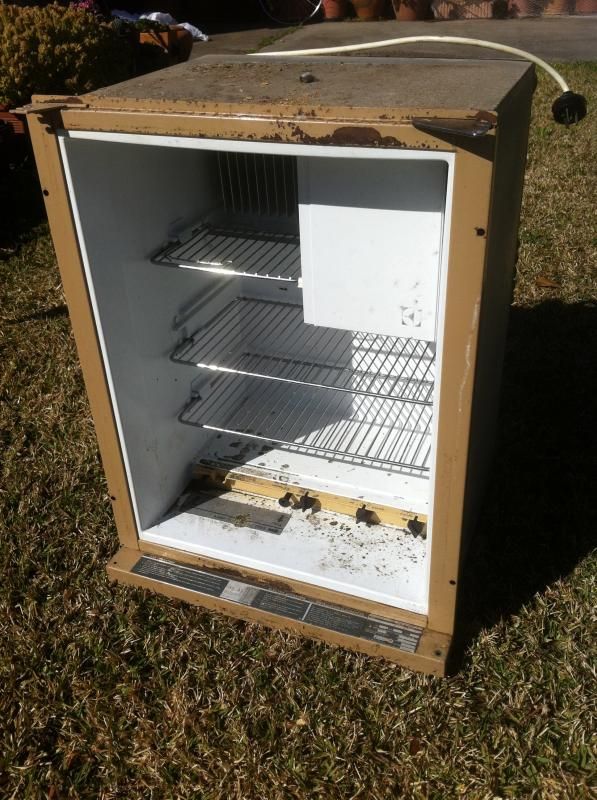 Water tank installed and ready for plumbing 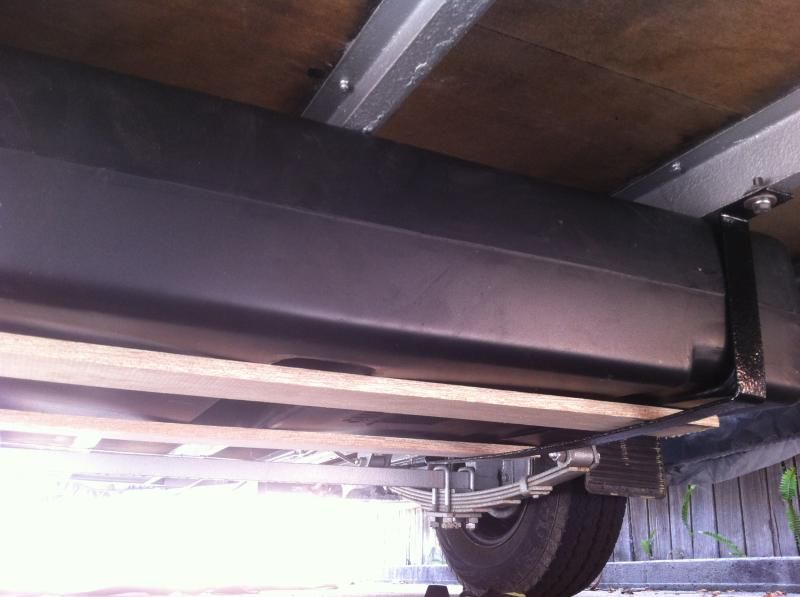 A few questions. 1. The floor tiles are the asbestos variety. We are going to remove the broken tiles (only a few at the bed end) and seal them before we lay new vinyl flooring over them. What is the best sealant to use? 2. When I pulled the fridge out there was a piece of aluminium sheet that was left behind. It looks like it was stapled to one part of the van at some point. Is it a wind guard to stop the pilot light on the fridge from going out? Should I reattach to the wall behind the fridge? 3. Is it worth taking the fridge to a gas fitter to check the gas plumbing/connections and get it re-connected etc? I think I am leaning towards the specialist route - you can never be too careful. 4. The caravan parts guy told me to put a couple of planks of wood between the water tank and the bottom of the brackets to stop the tank bowing when full of water. Has anyone else done this? I am probably going to have to adjust and trim the timber I used as I am not happy with how its sitting under there. |
|
|
|
Post by supreme78 on Sept 20, 2014 23:54:00 GMT 10
Andrew in response to your questions.
The tiles might be asbestos so treat them as such. If they are not scraped or ground causing small particles then your safe. And a simple face mask is a good security device.
As far as the fridge goes turn it over and back onto its feet and try it on 240v to see if it works. That will establish if it's worth continuing with. If it works on 240v then gas should also work. Turning it over will move the gas and liquid around to help it work better after sitting for so long. Some say it does not work but I have a fridge that would not cool and after giving it the turnover treatment it now works well and has been for over a year. If the fridge won't work on 240v then it's a throw away job as the cost to replace the cooling module is way to expensive and it's cheeper to buy a 12v compressor fridge of the upright type. Unless you had a reason you would like to use gas as the fuel for cooling. The plate might have been fitted above to direct the heat out of the van and assist with cooling. On the forum there are tips on getting the most from your fridge by removing heat at the rear using plates to divert heat away from the rear of the fridge. I have added a couple of 12v fans and on my build thread it discusses the benifits of the fans. Also fill in the slot at the front above the fridge as all it does is add heat to the van and does nothing to assist with the fridges cooling ability.
My viscount had a ply sheet under the water tank for stability and I guess for security from damage also. It also had a piece on the front edge to stop stone damage I guess. I went to a galv tin cover over the whole tank for protection. I want to add straps for extra securing of the tank. The galv covers were cheep and gives piece of mind as to not getting a hole from a stone or something wacking it while driving.
I hope that's the info you are after happy to supply more info as required.
Regards
Paul
|
|
|
|
Post by supreme78 on Sept 20, 2014 23:59:56 GMT 10
When replacing the ceiling put plenty of styrene foam to as much of the void as you can it makes a huge difference to the insulation of the van. I used 25mm styrene as I found some under the house from the previous owner. Made a huge difference as there was about 3 pieces in the whole front section of the van. The sticker that says insulated should read some insulation installed but not much. Haha
|
|
|
|
Post by atefooterz on Sept 21, 2014 0:18:40 GMT 10
Great advice Paul, i have noticed with old fridges that those that move house regularly fridges seem to live on longer than my mates ones who stay in the one home one possie, apart from an upright move forwards to clean behind & at the sides ( owner V renters usually) So the roll over thing must have some scientific street cred behind it!
|
|
|
|
Post by supreme78 on Sept 21, 2014 0:33:52 GMT 10
I am not sure of the scientific's of the rollover of the fridge but I guess it makes the liquid and gas in the cooling module to mix and redistribute in the system. My fridge is a decent size and on gas can get very cold to freezing in the fridge section. I fitted a temp gauge to the van so I know where the temp's are so I don't freeze the beer . A friend of mine who lives in his van in nsw. His sprung a leak and all the gas leaked out and they had to evacuate the van due to the horrible stink from the ammonia in the system. I went up and helped him to convert his fridge to a domestic 240v fridge. He now has more room and better performance. I need to stay with the 2 way fridge as I am going to travel next year and so need the convenience of the gas. I would love a nice new 12v compressor fridge but cost is a little scary at the moment.
|
|
|
|
Post by awbeattie381 on Sept 23, 2014 14:05:55 GMT 10
Thanks for the replies! Makes life that little bit easier knowing someone else has been there/done that. The tiles I think we will leave as they are with the exception of removing the broken ones. Will then just put new floor covering over the top of them. It too big a job (and risky) pulling them all out as they all sit under the cabinetry so may break when trying to remove.
The fridge we will test out this weekend. The previous owner assured me the fridge works on 240 which makes me think it should work on gas. I have been getting similar responses to a post on the caravan forum and also from speaking to the caravan parts place over the weekend (who also recommended the roll over). If it works on 240 it should work on gas. If not, chuck it! Might flip the fridge this weekend anyway and then turn it on to see how cold it gets. Then its just a matter of trying to re-connect the gas fittings, see if the ignition works and keep my fingers crossed. We want to be able to free camp so 240 just isnt going to cut the mustard. Interesting point you make about the heat build up of the fridges. Will have to keep an eye on that.
As far as the insulation goes yeah its pretty thin stuff, but even that makes a difference to none at all. Will invesitage putting thicker insulation in.
The tank I will keep as is - I might just modify the timber I have used so it sits a little more comfortably between the tank and the brackets. I think I will add the stone guard to the list of things to do but is not a priority at this stage.
|
|
|
|
Post by awbeattie381 on Oct 7, 2014 13:12:59 GMT 10
Had a very productive weekend over the long weekend, as I was able to spend 3 solid days working on the van (well excluding the 500 trips to bunnings and timber yard!). Managed to make the bed (well 95%) as I still need to install in the van, buy some gas struts and cut a face piece with door. Ended up using 42mmx42mm pine for the sopport posts and rails of the 'lid'. The rest was 42mmx19mm. I am pretty happy with it. Oh, and the slats are ikea. The mattress will probably also be an ikea inner sprung jobbie. My wife unscrewed all the cupboard doors and drawers and sanded them ready for painting. Yesterday afternoon we spent an hour or so with some putty for the smaller screw holes and this flexible bog stuff for some damaged ply at the rear where I was a little enthusiastic with ripping out the central bedside table. I also plugged the fridge in to see how it worked. I was very excited to see that it did work (I burped it first just in case). Not sure if the temp guage I had was correct but it was reading -20 at number 6, and -10 at number 3 - this was the fridge not the freezer. My next job with the frige is work out how to get the gas part of it working?!?! My wife also wants to paint/refurb the exterior too. The more we do the more we seem to need to do! It has been an enjoyable process so far though. Bed base 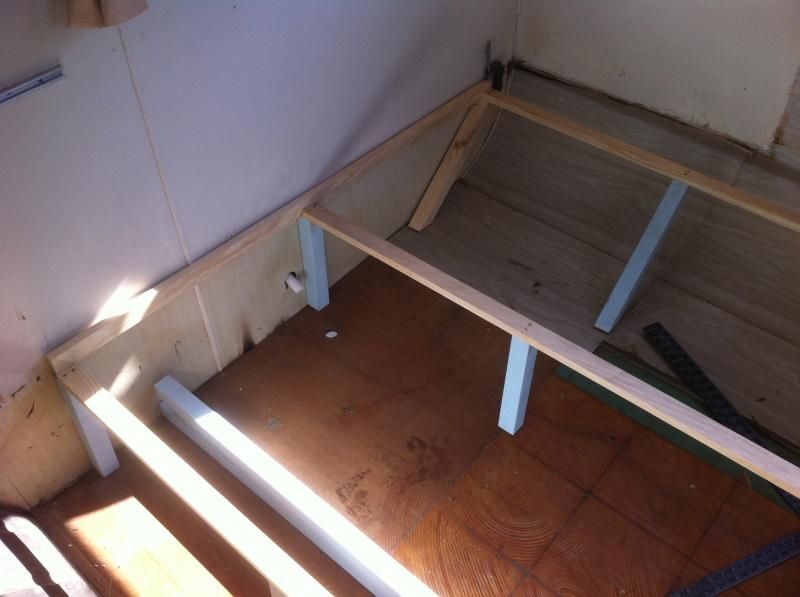 Bed base 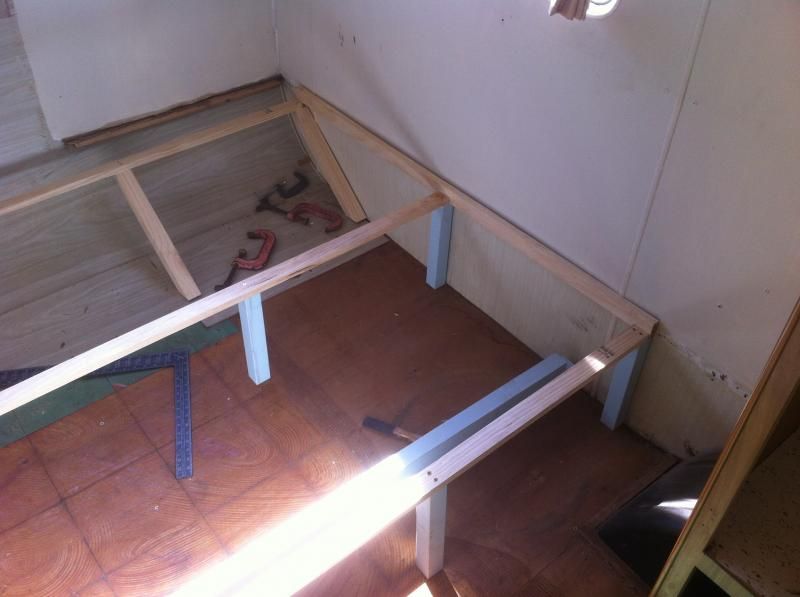 Bed base 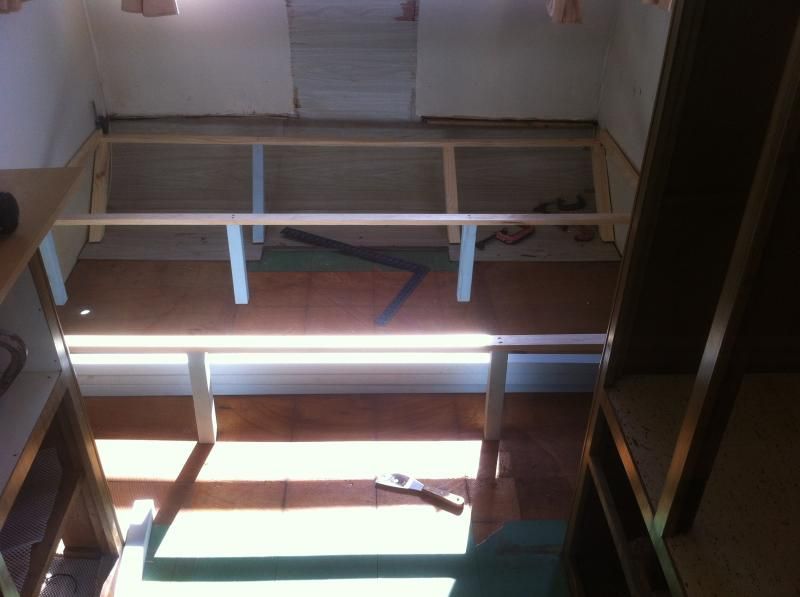 Bed 'lid' 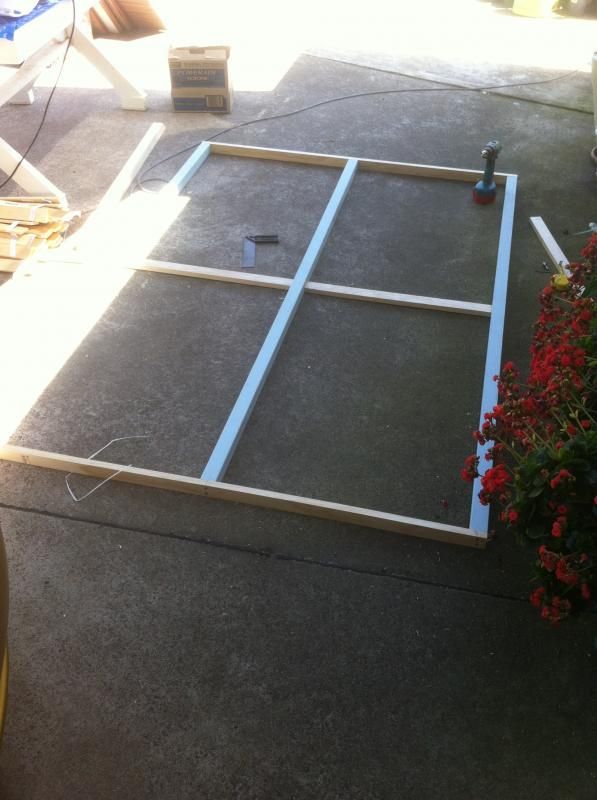 Bed 'lid' 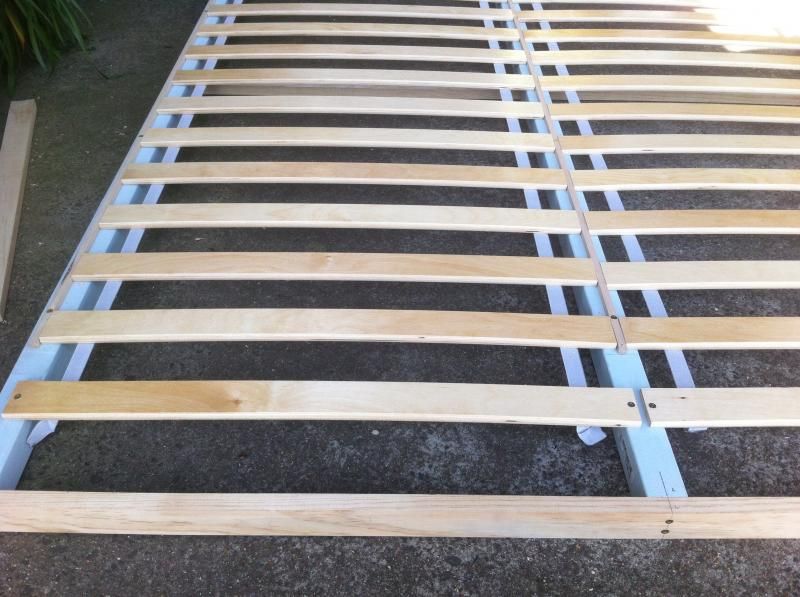 Bed 'lid' 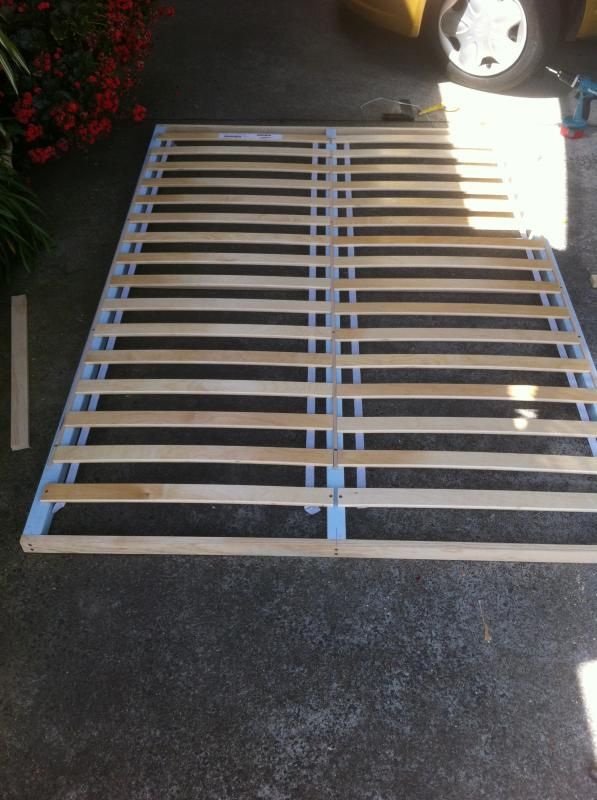 Bogged up and reading for sanding 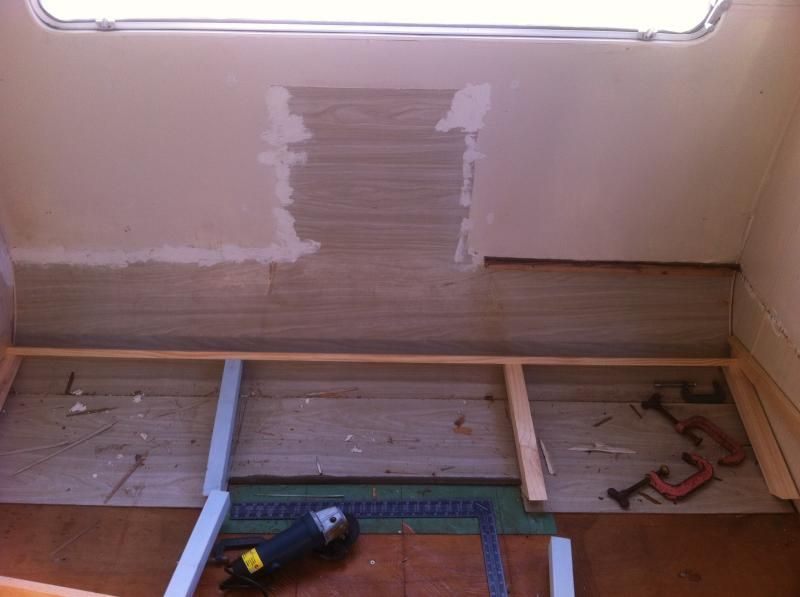 Kitchen a bit of a mess 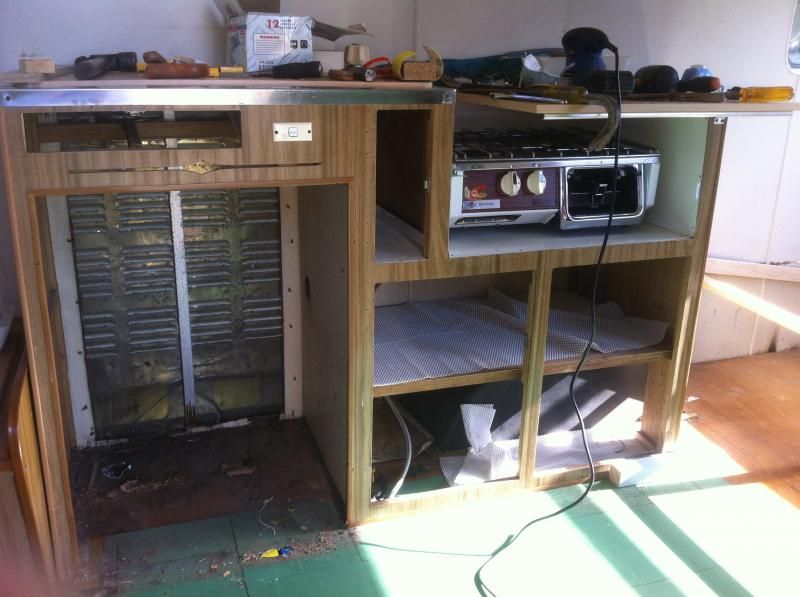 Work site 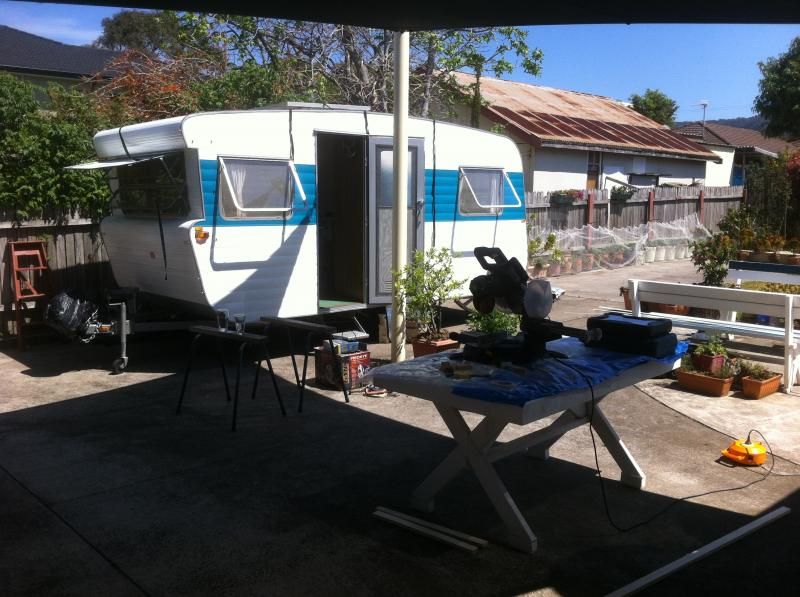 |
|
|
|
Post by awbeattie381 on Nov 10, 2014 8:43:06 GMT 10
A bit more work achieved over the weekend – geez its slow going though. Its funny how you plan to tackle certain tasks but you find another bit that needs more urgent attention. So over two days I managed to refit the 2 ceiling panels (a couple of expletives towards the end – and quite a few fit/refits), and replace a bit of sh!tty chipboard that was disintegrating under the front window (the bit I didn’t realise needed replacing until I was digging around a loose bit of plastic trim). I only cut out the rotten bit, so roughly half of the panel. The other end isn’t perfect but you have to draw a line somewhere. This is proving to be the issue – my wife is a bit of a perfectionist and I am the practical one. I keep having to tell her this is a 40 year old van. It will never be perfect. But I can see why so many people strip their vans down to a chassis. Our van is in really good nick but yet I have still needed to spend time fixing rotten areas and dodgy repairs from a previous owner. New ceiling panel awaiting light. 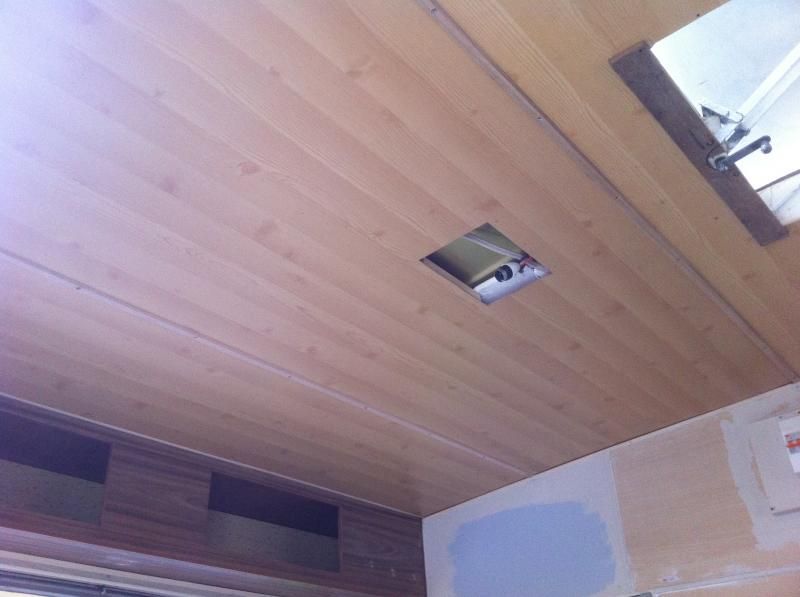 Replacement section under front window with new plastic trim 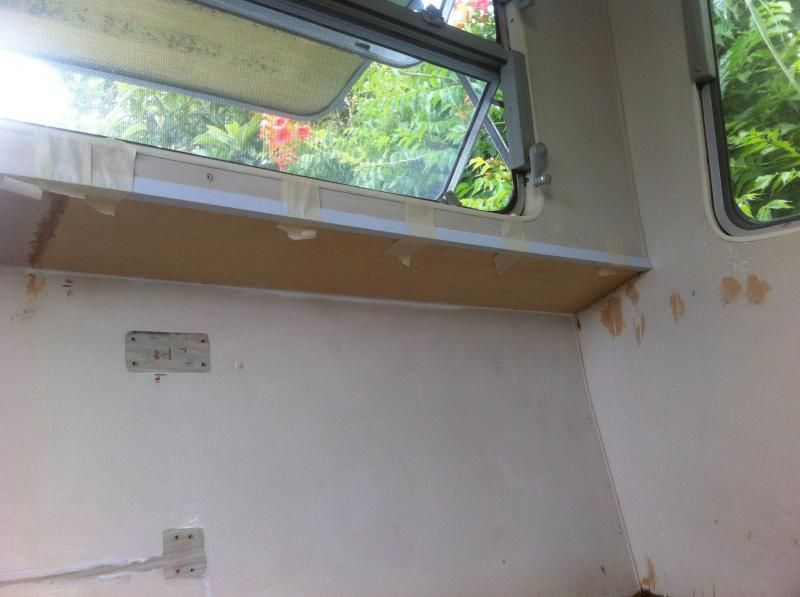 My wife spent 2 days sanding the entire interior, vacuuming 40 years worth of dust and spaghetti (it was everywhere) out of it and I finished up last night with a silicone/nor more gaps gun so it is ready for paint. Test patch of wall paint. My wife's domain. This wont be the first test pot used... 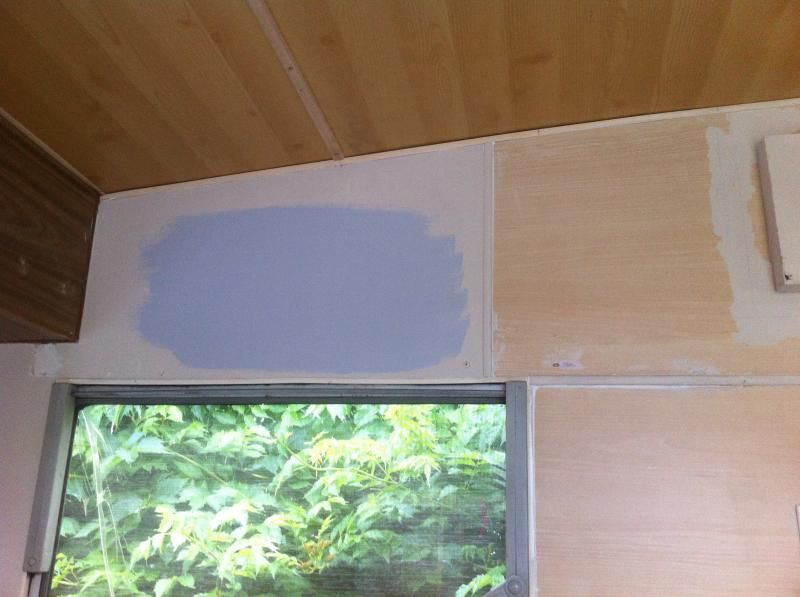 In good news, under the kitchen side dining seat I found the 12v wiring harness which had been brought through the floor and looks ready for a battery to be fitted. I was dreading sorting out the wiring for this, but looks like someone else has had a battery fitted at some stage previously. What is the best way to wire up a solar panel to charge the battery? Was initially thinking mounting a panel to the roof, but making a neat job of the wiring could be harder than I first thought. Other option is to have a portable panel that you can move around depending on the location of the sun. I am starting to think (well in the last 30 seconds) this might be a more practical/easier option. |
|
matt
True Blue
   A wise man once said..... "the journey of 1000 miles is easier when stabiliser legs are up!"
Posts: 84
|
Post by matt on Nov 18, 2014 8:02:06 GMT 10
Hey there Andrew. Nice job on the van so far.
I'm about to install a stand alone solar power system to our 78 Explorer. Talk to your local 12volt solar place as you can get watertight connection panels that you plug the solar panel into then run the wiring internally, and also the plastic mounts that look more professional. We were going to try a portable panel and wire up a charge point to charge a deep cycle but got warned off it after hearing about a few people getting panels pinched (have to chain everything down now!)
I suppose its more personal taste. Having it permanently mounted is more convenient and secure. Portable will keep your van looking more original and can be used elsewhere if needed.
|
|
|
|
Post by supreme78 on Nov 24, 2014 19:03:09 GMT 10
The thing with having a solar panel fixed on the roof is you need the van in the sun to get good power and it's nicer to have the van in the shade especially in summer. I think I will be going with a folding unit as I can focus it where needed for full sun.
|
|
|
|
Post by kharde on Nov 26, 2014 22:14:01 GMT 10
NOTE: This may NOT be the case for other vans, but my battery will be able to charge if I connect solar panels to my caravan trailer plug. Note: The most powerful panels I can get will be 120watts though (tail lights have 10 amp wiring). Also, you will need voltage regulation to ensure 12-14V hits your battery. By doing it this way, I can park my van in the shade and move the panels into the sun (locked to a brick) without removing my caravan battery.
Note: My Van wiring may not be conventional (I designed the circuits myself using high school Physics (electro-statics and circuits knowledge). Pretty sure I thought of all safety concerns (raise them with me if you have concern I could have forgotten anything though);
- All 5 12V circuits are fully fused
- a reverse diode to the trailer plug exists to protect my car circuitry from reverse current flow.
|
|
|
|
Post by kharde on Nov 26, 2014 22:25:53 GMT 10
Ha, I see from the photos of your bed you had the same trouble as me; the blasted curves either end of where the flooring stops. You loose ALOT of potential living space from those curves. I kept conventional vertical bed leg (to keep strength and measurement simplicity), but cut mine alittle shorter and rested them on some aluminium channel Alittle more expensive (channel was not cheap), but made life alittle easier.  Photo not the greatest, but it kinda shows what I did with my Futon/ double bed (ikea futons are surprising light).. there is some Aluminium channel underneath it allowing me to place the futon into that curved area that would have been wasted space. The channel is no longer noticeable (cut ALOT shorter now and bolted to the floor) so you don't see it [photo is 2 months old]). |
|


 At least you can now enjoy caravanning, while you keep an eye out for your "ideal" van.
  It took us two years to find our current van, but in the meantime we had many wonderful trips in the old Millard poptop we had.


