|
|
Post by youngdazza on Nov 27, 2014 8:24:49 GMT 10
G'day Kharde
That looks like quite an interesting setup you have there. I'm curious, what is that shelf above the futon? Is that a bunk bed for the kids? Is it fixed in position or does it move?
Cheers
|
|
|
|
Post by kharde on Nov 27, 2014 11:08:45 GMT 10
The shelf is Two bunk beds for the kids -fixed in place (IKEA again... IKEA beds are unbelievably light weight). I have a telescopic ladder that fixes in place so the kids can climb up and down.
Also The final van (finishing my van this week) has a bench seat next to the futon that joins with the rolled out futon to turn it into a king size double bed (I had to design some cunning luxuries into the van before my wife even let me consider the idea of buying or renovating caravan)....
|
|
|
|
Post by awbeattie381 on Nov 27, 2014 11:45:43 GMT 10
Interesting comments re the solar panel. Ideally I would like a panel on the roof so while in transit the battery can be charged up, and a portable panel to follow the sun when I am camped under a tree. If I didnt have a dual battery system in the Paj I could probably go down the anderson plug path and upgrade the wiring to keep the battery topped up, but after the alternator charges the cranking battery, tops up the second battery and keeps the fridge cold there would be nothing left for the poor little van battery...
Kharde, yeah those curved floors are a pain! I have it all worked out in my head, just hoping my non-engineering mind will result in something that is strong enough. Since posting those photos I have lengthened the wall rails so they now extend to the rear wall of the van. I will be then attaching another rail along the rear wall of the van so there is support on all three sides plus the 9 legs. While each rail/leg in isolation isnt all that strong, I am hoping that a combination of all rails and legs will result in a bed that is sturdy enough. Fingers crossed. Who knows, I might have to build a few versions to get it right. Your vesion looks good. I did consider buying a bed frame from ikea but couldnt find one that would work in the space I have (my bed is going across rather than long ways).
|
|
|
|
Post by kharde on Nov 27, 2014 13:09:10 GMT 10
If all else fails, check some of the largest size Aluminium Angles and Channels (I joined 2 Angles together to make my channels) from Bunnings (I think they are $50-ish). They are easily strong enough (so long as the vertical does not twist) and weigh bugger all. You can support under your wall rails using channel or angle (personally I find working with Angle easiest). Not being a builder; I was very cautious joining metal (because they expand and contract with heat) so I the stayed on the cautious side and liquid nailed every bolt in place.
I feel your pain with those curves. I spent absolutely AGES maximising the space in the front curved section of my van!!! In the end, I literally raised the floor by 15cm to make that section useable (once again supported by Aluminium Angle to save weight).
|
|
|
|
Post by kharde on Nov 27, 2014 13:19:41 GMT 10
Not being a car mechanic: I suspect the alternator is not the limiting factor in your circuit... your wiring would likely be the issue - 10 amps (or 120watt) wiring to your tail lights running fridge, etc. Charging a battery would likely not be possible. I get around this issue as I'm dropping dry ice in my fridge for extended trips so the fridge can stay unpowered. If this is the case, I'd consider yanking the battery out everytime I drove and manually connecting it to a 10amp car cigarette socket in your car. . A more car savvy person may have stronger opinion here; but I suspect your alternator would be protected against drawing excess currents (car fuse box). Carry a few spare fuses with you  ?? Note: I knew nothing about cars or caravans 12 months ago (learnt alot from SuperCheapAuto, forums, etc)... so do not rely on my opinion alone.. just talking (typing) out loud. |
|
|
|
Post by camper2van on Dec 23, 2014 22:20:02 GMT 10
Hi Awbeatte381
Been reading up on your posts . Will be doing the same bed conversion and repainting like you .
Just wondering how its all going, especially with your painting !!
Keep up the good work.
Cheers Mark
|
|
|
|
Post by awbeattie381 on Jan 9, 2015 8:07:01 GMT 10
Hey Mark, sorry for the delay in responding - been in the US and Canada for 5 weeks over christmas...
Getting stuck back into it this weekend, although I only really have half a day which will mainly involve drawing up plans/measuring my new set of cupboards over the kitchen.
Painting is next on the list though when we get a full weekend to do it. I have undercoated most of the cupboard doors which is a start at least!
|
|
|
|
Post by camper2van on Jan 9, 2015 23:13:01 GMT 10
Luck you with the trip OS
Hope the painting goes well , better then mine
Wife chose the color for the interior only to say that she thinks the off white is a little to yellow !! after l finished
|
|
|
|
Post by awbeattie381 on Jan 25, 2015 21:22:25 GMT 10
2 undercoats completed! Man what a difference a bit of paint can make! It feels so much cleaner - there were so many types of timber inside and the previous owners were a little grotty so it really neatens the whole interior up. The walls are going to be a grey and all the cupboards/wardrobe/kitchen will be white. The ceiling will also be white. Floor will be that textured rough sawn floorboard tile you can get from bunnings (still not sure whether to go light or dark). My wife is also talking about painting the odd cupboard door a lemon colour. Overall the theme is white, grey, with teal and lemon the feature colours. These photos were taken after the first coat... 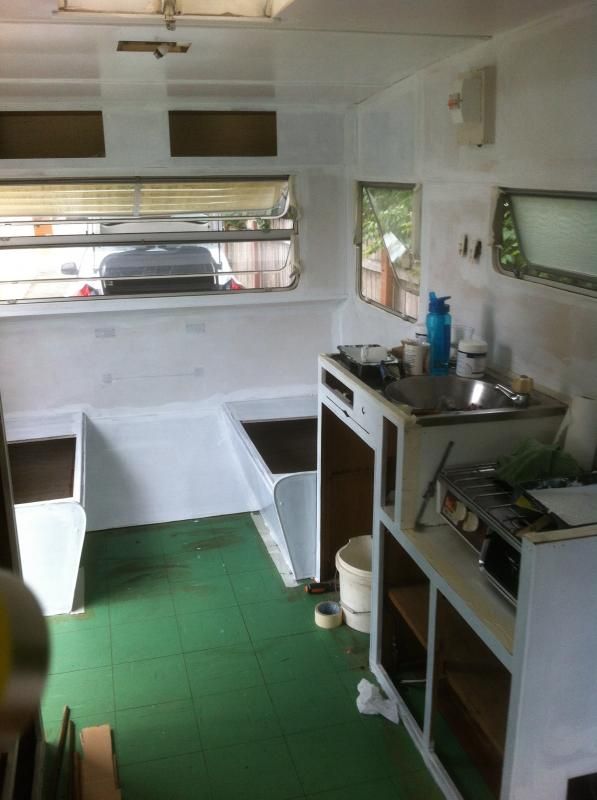 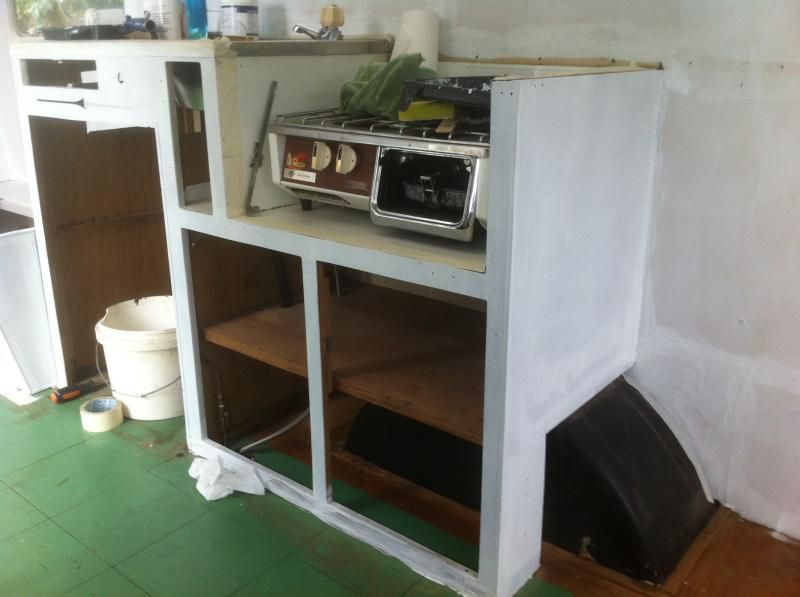 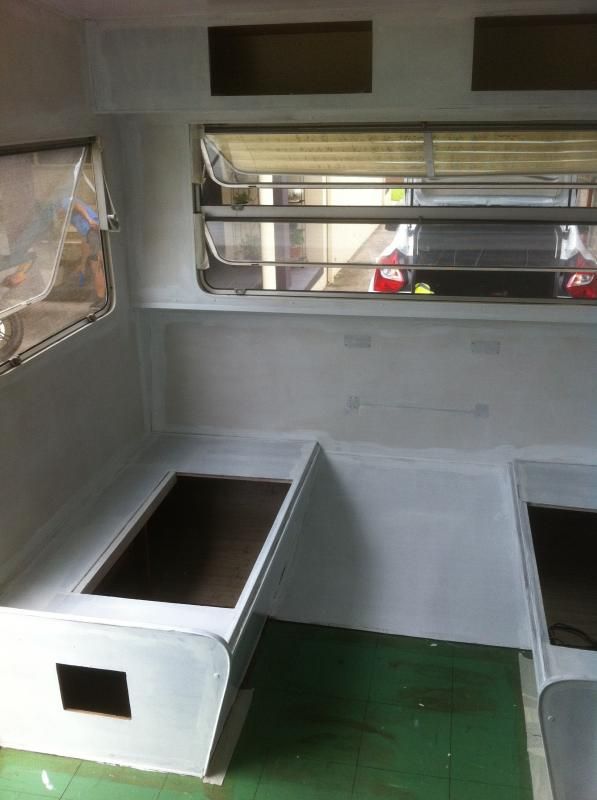 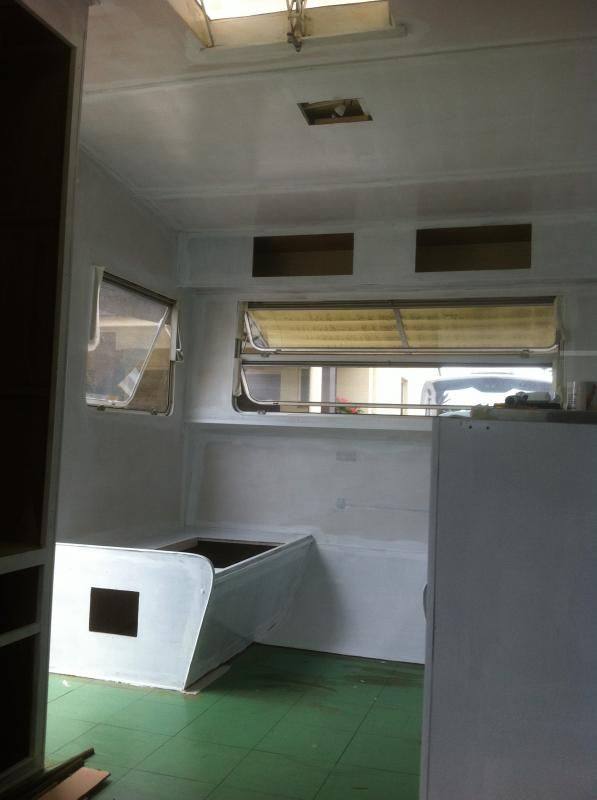 |
|
|
|
Post by awbeattie381 on Mar 11, 2015 12:18:17 GMT 10
Its a little depressing how little work is being done on the van at the moment, but after May (when we are back from an OS trip) it will be all systems go! Since my last update I have chipped away at some rediculously small jobs such as cleaning up the aluminium benchtop slide by removing the paint (do people not know how to use masking tape??) and giving it a polish. I have also given the stove a good clean/polish. The ignition system works fine after putting in some batteries which is a plus. There is even a little spare ignition tucked away safely which I thought was pretty cool! The stove looks to be in good nick so I am hoping it works ok. Time will tell! 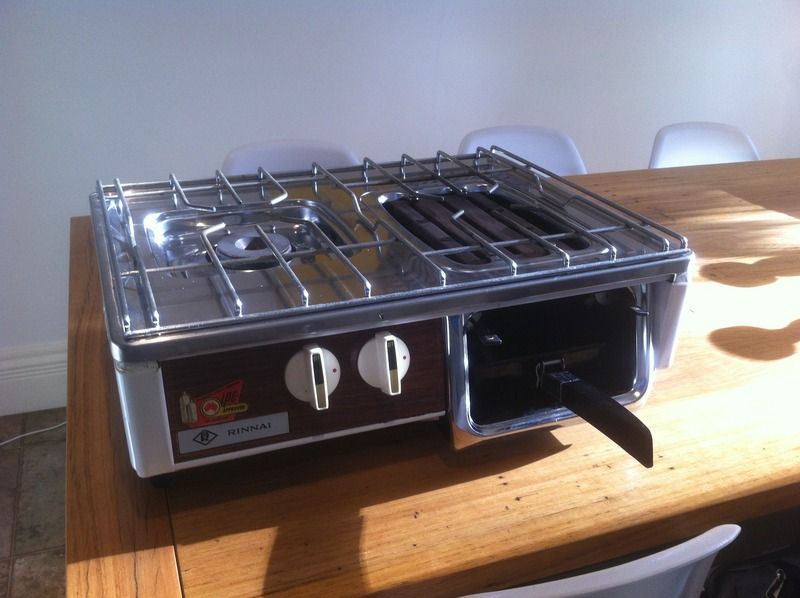 I am going to get a pink slip and rego the van in a couple of weeks time rather than letting the rego lapse - I didnt realise they were like cars and needed a blue slip if it falls out of rego after a period of time. I intend on finishing the van later this year so I want to keep it registered, which would mean less hasstles down the track! I found a caravan place in Wollongong that does pink slips and work on old vans so I might have a chat to the guys there about a few things. The most important thing is the safety chains are too short for my car and need to be extended. I also want them to install a spare tyre bracket on the drawbar and some PVC pipe holders. I also need to ask them about reconnecting the fridge and installing a 12V system for free camps. Stay tuned... |
|
|
|
Post by awbeattie381 on May 20, 2015 18:28:09 GMT 10
Minor update time. On Saturday I went for a rego check and it failed. The plates, bushes and pins of both leaf springs are cactus. On top of that the inspector noticed the new drawbar had been welded on OK but in a very average way with very average welds. So back I go on the 30th to get the suspension sorted, the dodgy chook poo welds redone and some new (longer) safety chains to suit my Paj. To cheer myself up, when I got home I decided to remove the existing LED tail/indicator and number plate lights and replace with classic lights. These poorly fitted lights (which look out of place) have been bugging me since I bought the van (as much as those plastic chrome bling hubcaps did which were removed immediately). It really irritates me how lazy some people are with DIY jobs on caravans. Why on earth would you bother to repaint the van if you don’t remove any of the fittings to give the whole thing a more professional look?? As much as I would love an original and mint 15 footer from the early 70s in some ways I am glad my van isn’t showroom condition…It allows me to learn how to correct bodgy workmanship. Anyway back to my lights. I am pretty impressed with the end result. At least my weekend was semi productive even if the van did fail rego. Before 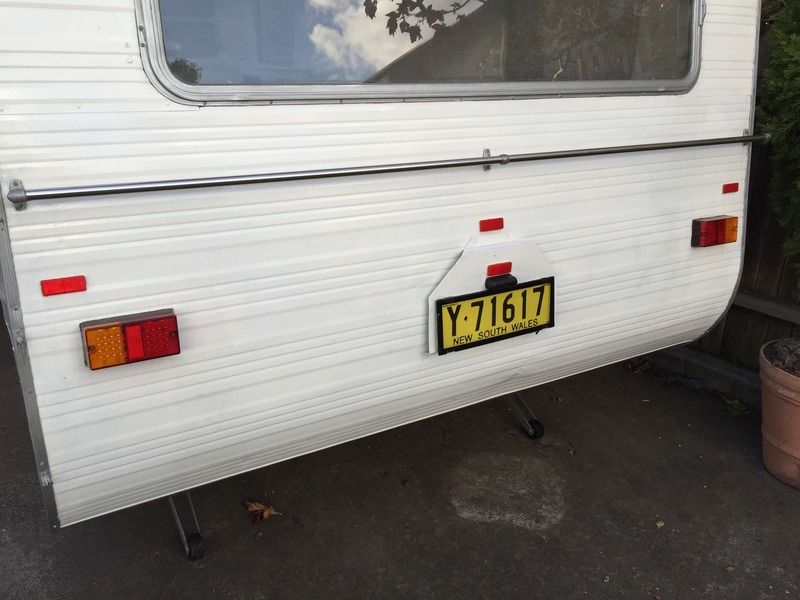 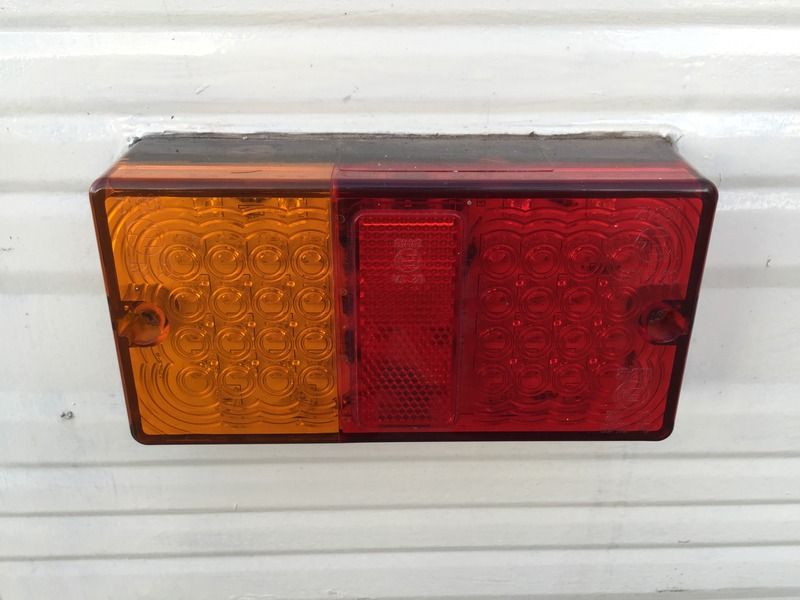  After 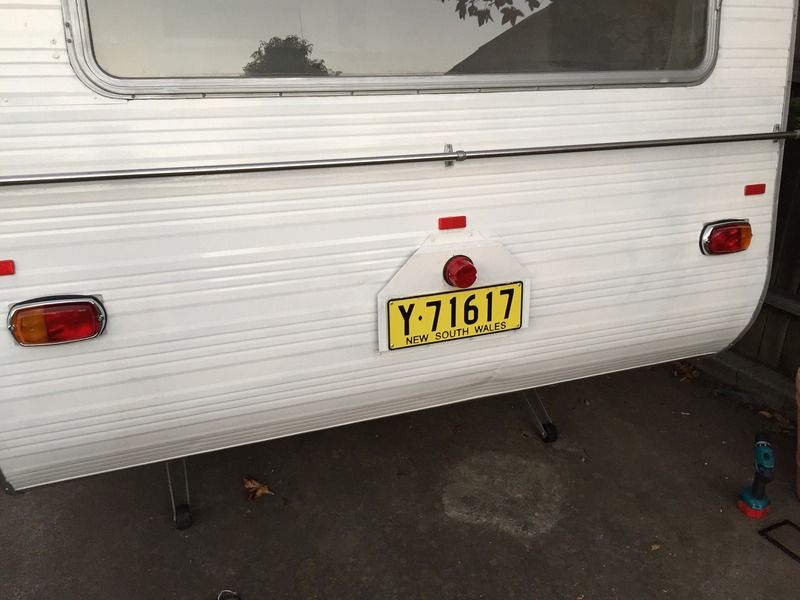  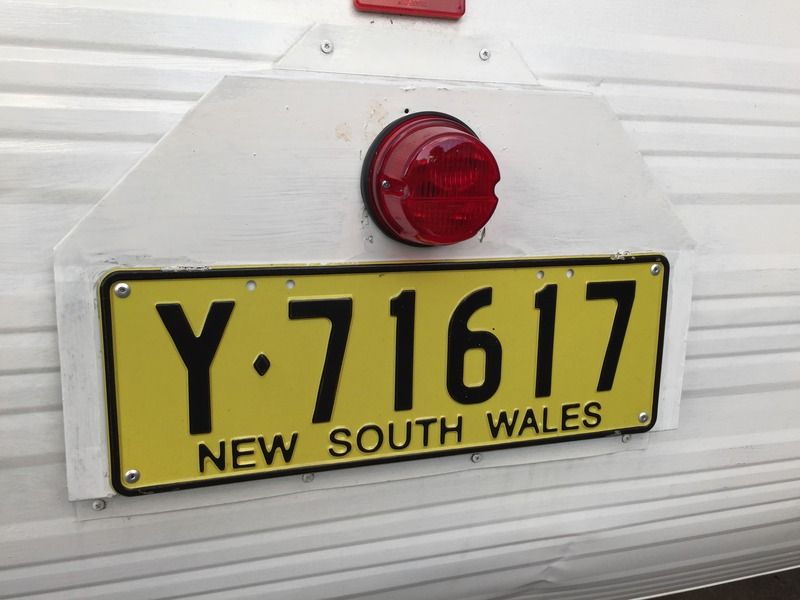 And just because it doesnt happen very often...a pic of the tow rig for good measure (while waiting for rego check). I have to say that even with nothing in the van, it still tows really well. Doesnt get upset by bumps or trucks. 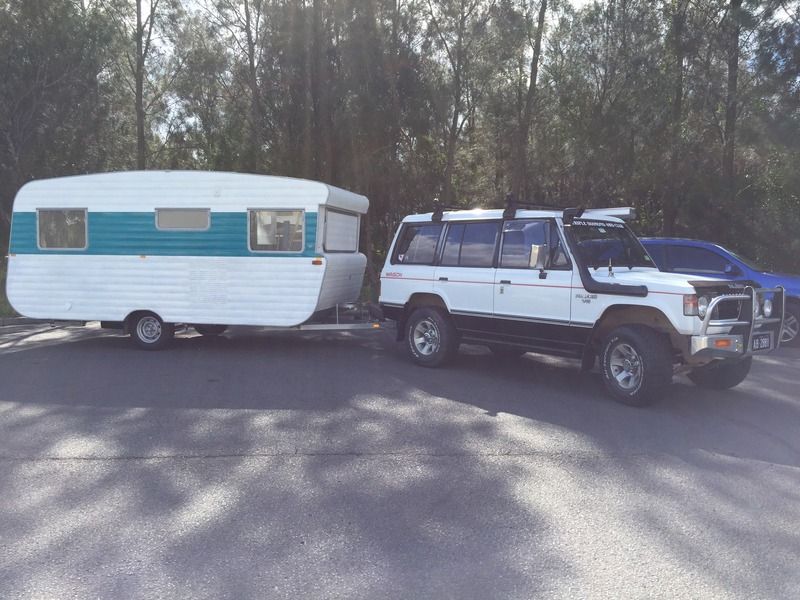 |
|
|
|
Post by awbeattie381 on Jun 1, 2015 13:35:47 GMT 10
The van had a bit of work done over the weekend. Spent half a day in a caravan repair shop getting the suspension, welds and safety chain sorted. $750 later and I have a pink slip!
My wife laid a few self adhesive floor tiles down in the space that is currently bare plywood, so when we finally lay our floor the surface is level.
While she did that, I managed to remove one of the dining windows. I was pretty excited to find most of the parts are available on the caravans plus website. I have ordered some new link boxes, rod, seals and flyscreen. I was also going to order new winder boxes in black but thought at $44 for the pair, I might as well try spraying the ones I have (that work fine) black and see how it looks. I think I only have one dodgy winder box so when the time comes I can replace that one.
The only thing I havent been able to find is the plastic surround the window sits in. I have been told that camec sell them but I cant find any on their website. I found one of their stores in a southern Sydney suburb that are open on Saturday so I might take that plastic trim in to see if they sell it. All of ours are dirty, discoloured, half painted, chipped/broken and wobbly. Apart from that they are in great condition!
This long weekend I am hoping to clean up the window (strip paint and clean) and make a start on my new kitchen cupboard. The caravan repair centre was saying meranti is the best timber to use as its light and withstands moisture better than ply. Current vans use it today. I am hoping to make a lightweight frame and cover with 3mm ply. I am using the front cupboard construction as a guide.
Wish me luck!
|
|
|
|
Post by Mustang on Jun 1, 2015 17:38:43 GMT 10
Its a little depressing how little work is being done on the van at the moment, but after May (when we are back from an OS trip) it will be all systems go! Since my last update I have chipped away at some rediculously small jobs such as cleaning up the aluminium benchtop slide by removing the paint (do people not know how to use masking tape??) and giving it a polish. I have also given the stove a good clean/polish. The ignition system works fine after putting in some batteries which is a plus. There is even a little spare ignition tucked away safely which I thought was pretty cool! The stove looks to be in good nick so I am hoping it works ok. Time will tell!  I am going to get a pink slip and rego the van in a couple of weeks time rather than letting the rego lapse - I didnt realise they were like cars and needed a blue slip if it falls out of rego after a period of time. I intend on finishing the van later this year so I want to keep it registered, which would mean less hasstles down the track! I found a caravan place in Wollongong that does pink slips and work on old vans so I might have a chat to the guys there about a few things. The most important thing is the safety chains are too short for my car and need to be extended. I also want them to install a spare tyre bracket on the drawbar and some PVC pipe holders. I also need to ask them about reconnecting the fridge and installing a 12V system for free camps. Stay tuned... Looks like it just came out of the factory |
|
|
|
Post by awbeattie381 on Jun 2, 2015 9:02:30 GMT 10
I love it! Wish the rest of the van was in that good nick!
|
|
Deleted
Deleted Member
Posts: 0
|
Post by Deleted on Jun 3, 2015 8:25:06 GMT 10
Mate after seeing what you have done with that stove, I think that van of yours is going to look great 
cheers |
|
|
|
Post by awbeattie381 on Jun 4, 2015 20:03:49 GMT 10
a couple of pics from last weekend Pink slip time 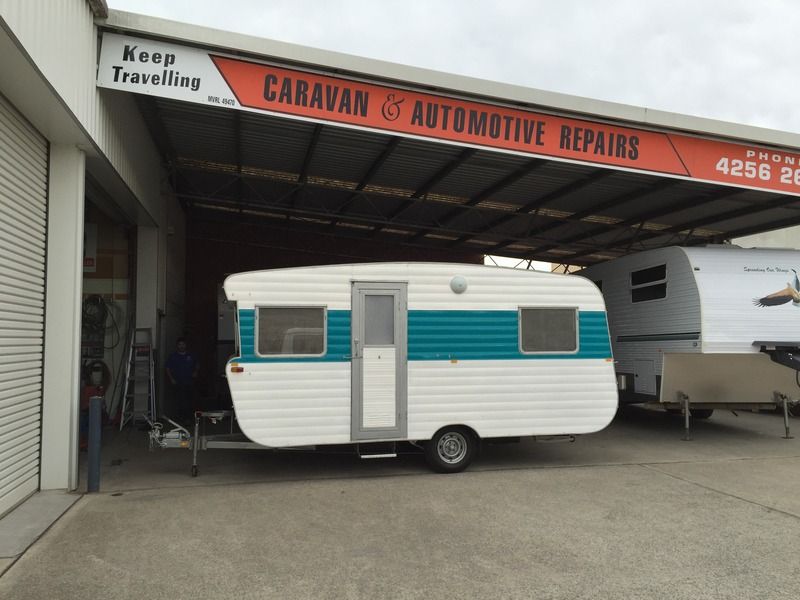 Suspesnsion getting sorted 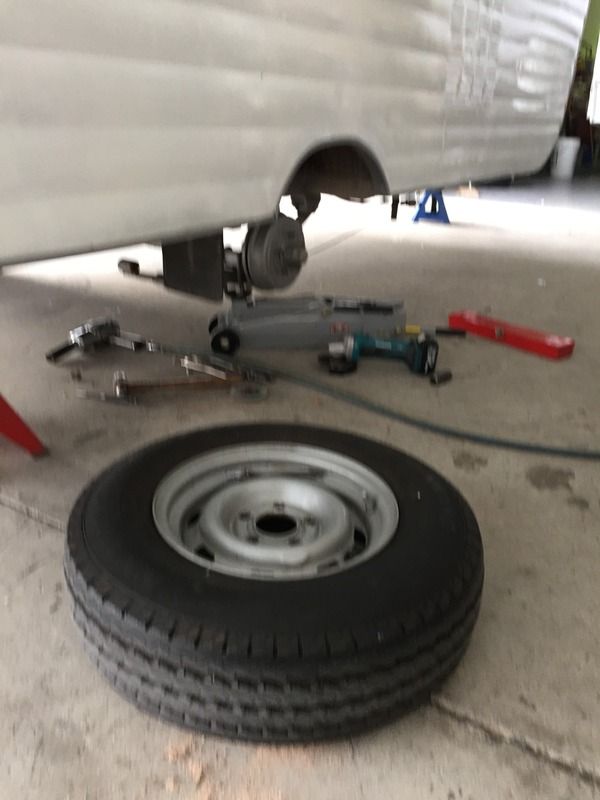 A lot of cr@p to clean! 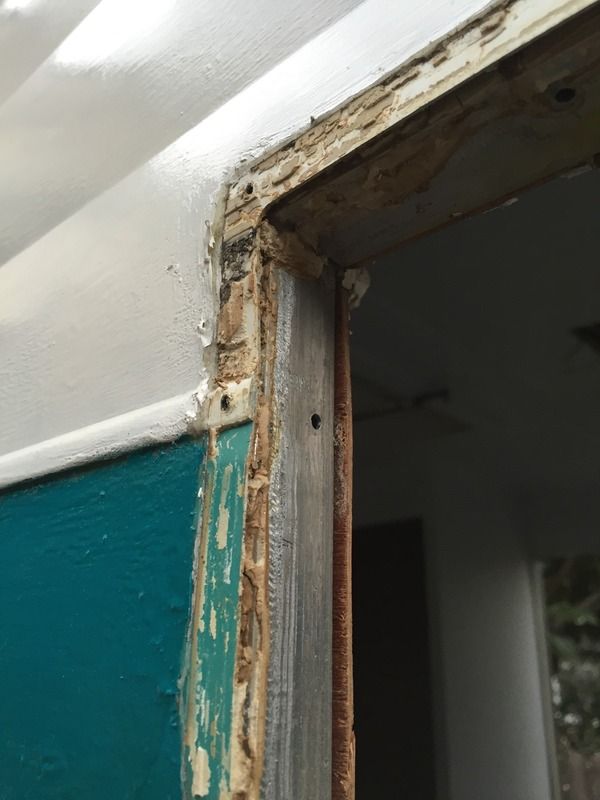 |
|
|
|
Post by Mustang on Jun 5, 2015 7:02:08 GMT 10
I love that Turquoise colour, I was so close to changing ours...but when "she" suggests something, which is not that often, the whole family "pays attention"
so close to original it stays.
|
|
|
|
Post by awbeattie381 on Jun 5, 2015 13:59:37 GMT 10
haha sounds like a fair policy!!
The van actually looks pretty good from a distance. That side shot of the van outside the workshop is prob my fav. You can see in the window close up what the original colour should be - a lighter/more pastel shade. I know I would like to respray the van because I really hate the quality of the paintwork, but as far as keeping that colour or going back to the original shade (or going to another 'period' pastel) I am not sure! The current colour actually works with the interior colour scheme my wife has picked so perhaps it will stay.
|
|
|
|
Post by awbeattie381 on Jun 17, 2015 22:40:22 GMT 10
Spent 3 solid days working on the van over the long weekend. Was so busy I actually forgot to take photos! These photos are mid way through constructing the frame for the overhead cupboard. It extends to the rear of the van now and I have also worked out how to secure the thing to the rafters(?). I am really happy with how its coming along although because every piece needs to be individually measured and cut, and I am using screws (and eventually glue), its like a 1 off puzzle. It means I need to mark out exactly where every piece goes, as I keep needing to partially disassemble for each stage before I reassemble again to check on progress or work out the next stage. Fiddly but enjoyable. The timber I am using is meranti. Not sure why I didnt use this for the bed base as its really light, strong and still used in caravans today! Apparently its a better timber for areas more susceptible to moisture such as around the kitchen area. Next job is to continue with the cupboard frame, then I can sheet inside and out in 3mm ply. Last job will be making the doors exactly the same way as they were made in the factory. Its going to take a while but I really enjoy working with timber. I have ordered 1 strip of window sill/surround from camec. Will collect this weekend and see how it looks in the opening. It is a few mm different to the original but has the same profile so can't wait to see how it looks. If it's the right size I'm in for a lot of work as every window will need to come out to satisfy the other half... 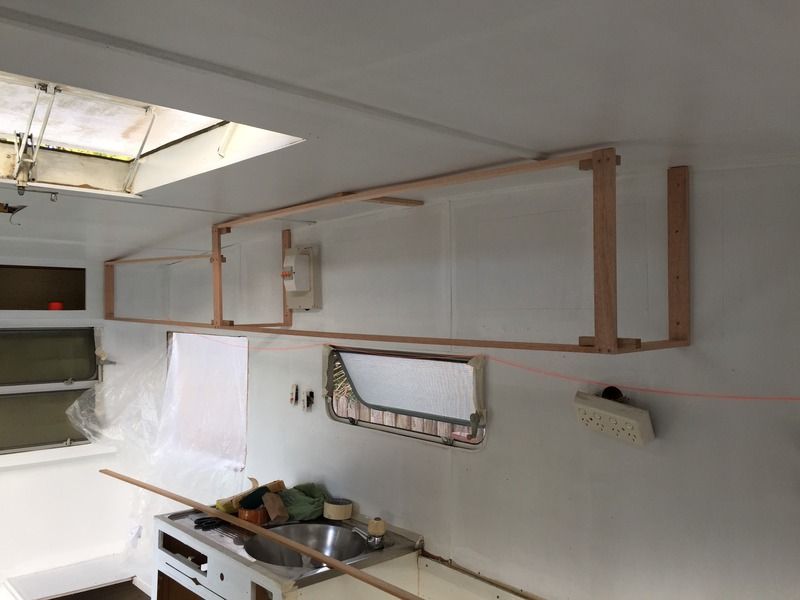 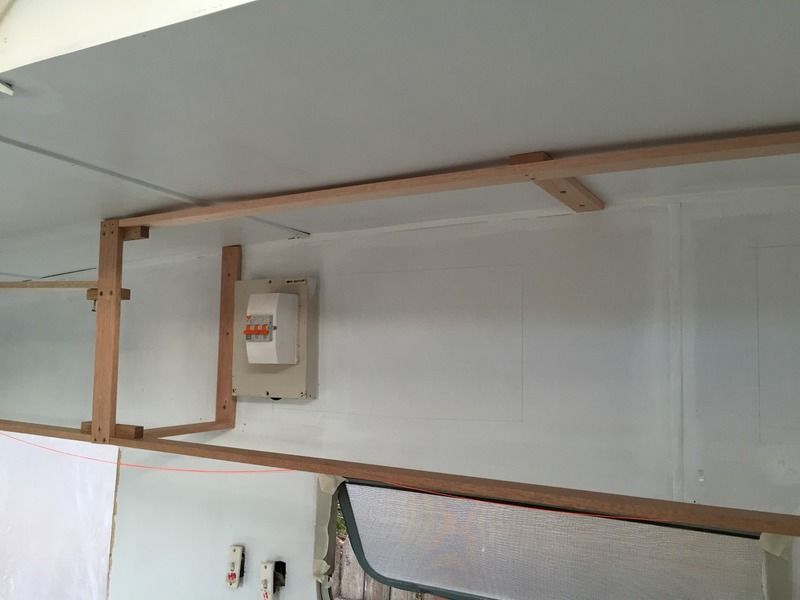 |
|
|
|
Post by tasmillard on Jun 18, 2015 12:50:25 GMT 10
Looking great. Im at a similar stage, perhaps a bit behind. Everytime I see a white interior it confirms that I have also made the right choice, so much lighter/brighter!
|
|
|
|
Post by awbeattie381 on Jun 18, 2015 20:14:25 GMT 10
you're not wrong about the white interior. This is still just 2 coats of undercoat. Will start painting top coats when cupboard finished.
|
|
|
|
Post by awbeattie381 on Jun 22, 2015 13:14:15 GMT 10
Bit of an update. More work on the cupboards. The left (front) section is complete. Now working on the back section (which will have two doors) and the mid section (two larger doors). Happy with how its progressing. 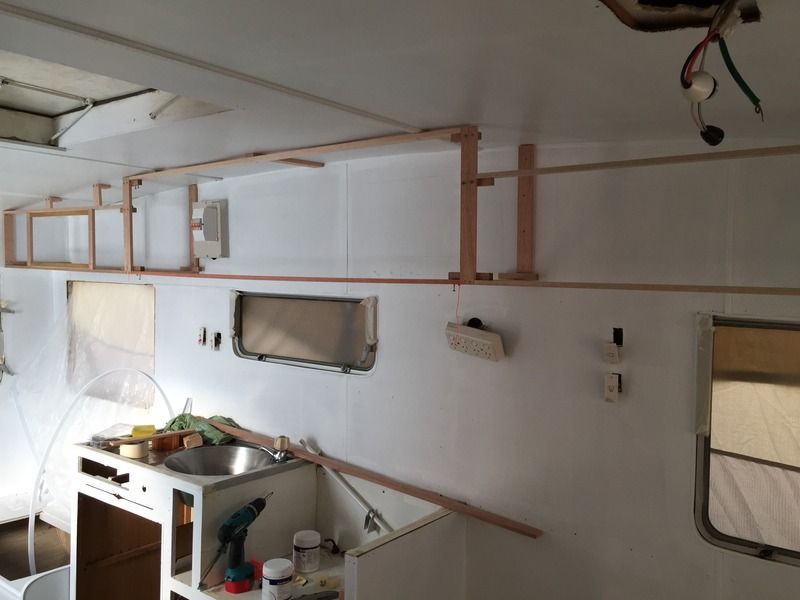 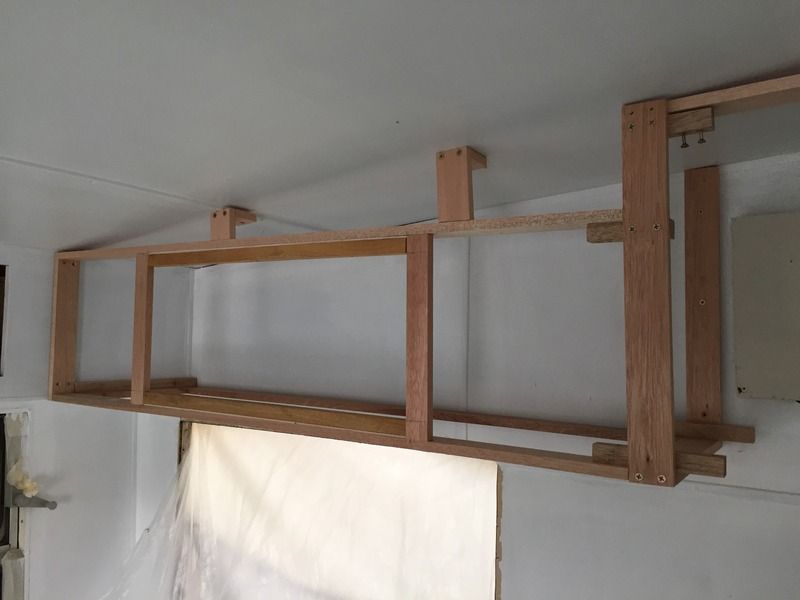 I also did a test spray of the pair of winder boxes I have out already. They were really grotty/tatty so after a good clean (paint strip off the arms - the previous owner was a little excited with painting) and a spray with dulux undercoat for plastic and top coat of dulux satin black I am really happy with the end result! Also test fitted the new bit of window sill/surround I bought. Its the right size and fit so every window will now be coming out for a full refurb/plastic surround replacement. Ill be spraying each of the winder boxes black, replacing the cross shafts, and buying a new pair of winder boxes for the dodgy one in the rear window. Knowing that I can now spray the boxes means I save $44 per window. Ill also be replacing glass for perspex while Im at it. Massive setback actually (because it involves striping paint from every window frame - looks tatty leaving them painted) but will be worth it in the end! 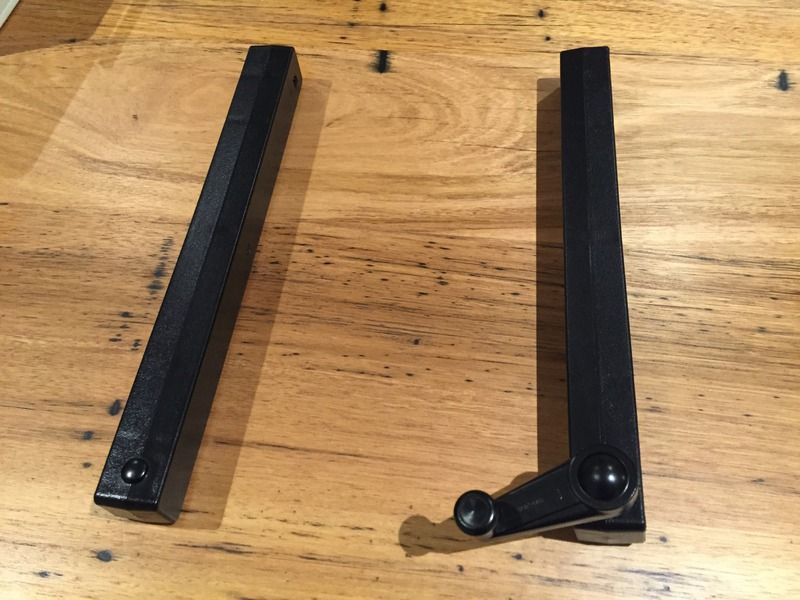 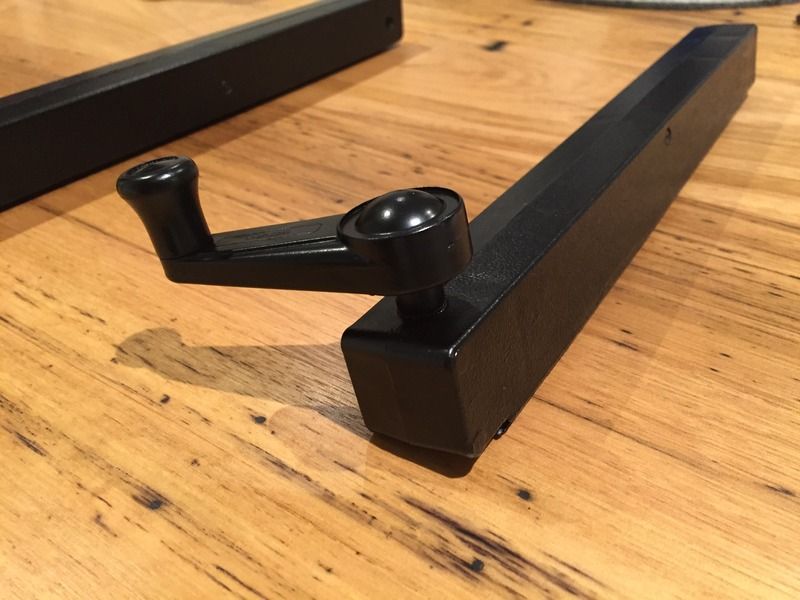 |
|
|
|
Post by awbeattie381 on Aug 24, 2015 13:36:16 GMT 10
So a bit more has happened since my last update. Took out the other 2 windows on the kitchen side as we have decided to tackle one side of the van at a time. This wall has also now been painted with two top coats of grey. We are hoping that by keeping the ceiling, kitchen, overhead cupboards, wardrobe, bed and seats white there will be enough lightness to balance out the grey we have chosen. Next step is to paint the ceiling with a couple of top coats then I can recommence building my overhead kitchen cupboard. I have decided to get some quotes to have all window/door frames sand blasted. It will save a heap of time stripping all that silver paint off them and remove the remnants of any caulking tape I leave behind. Stay tuned. 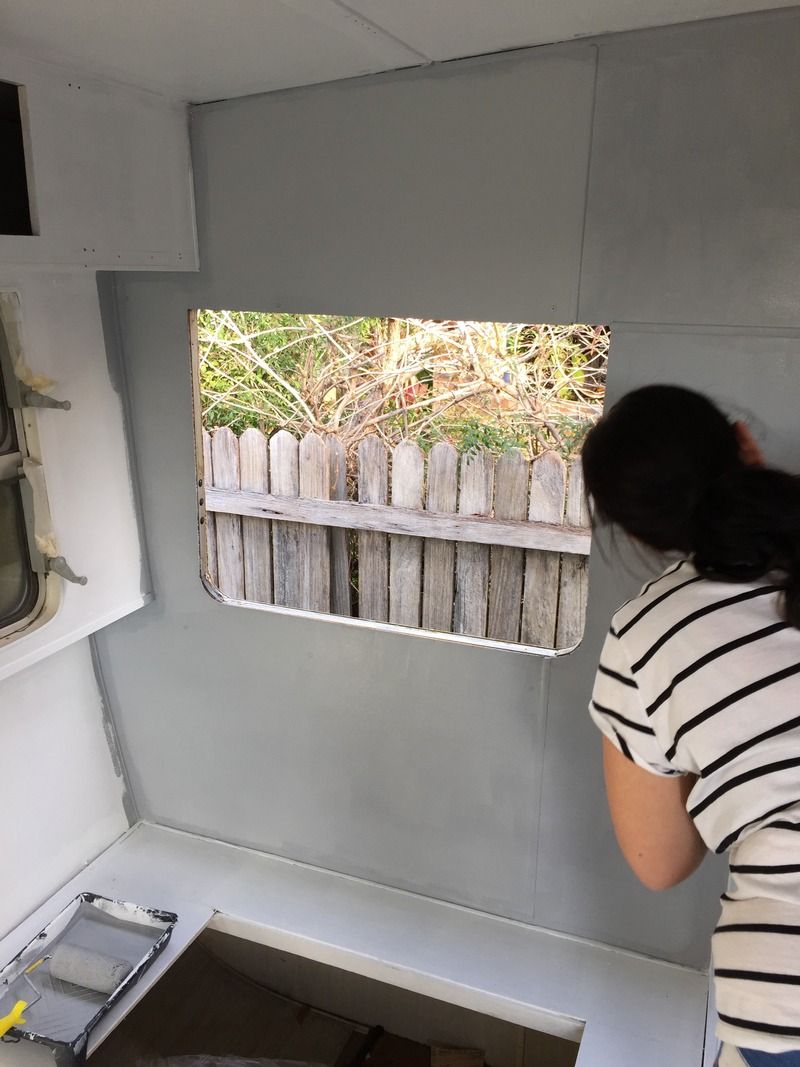 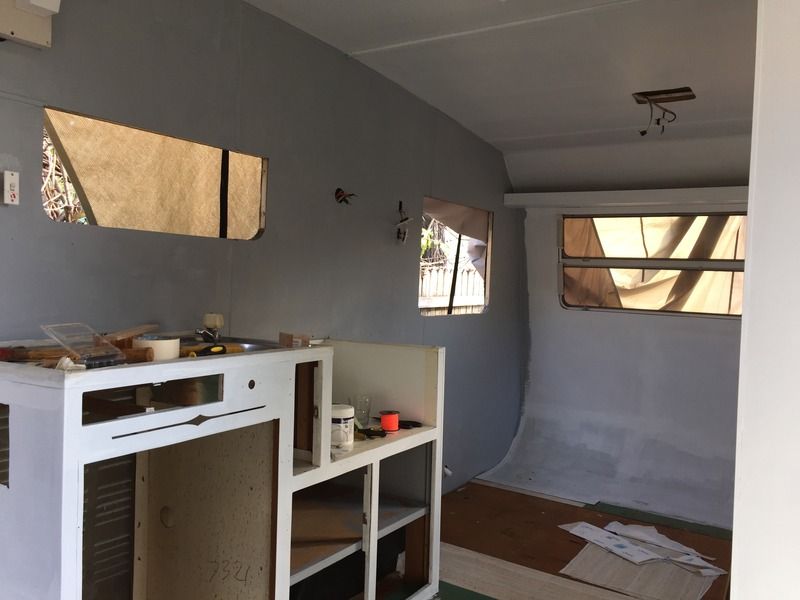 Lastly, for the sake of completeness here is a pic of the new window sill/surround I was able to get through camec. 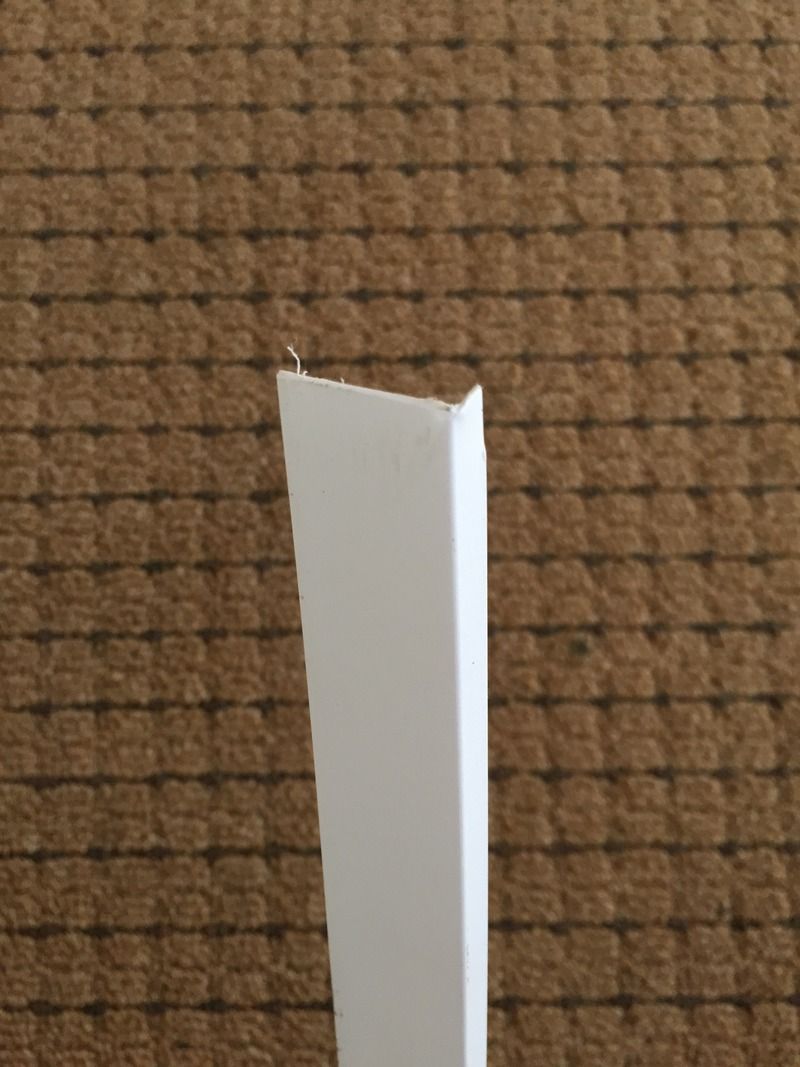 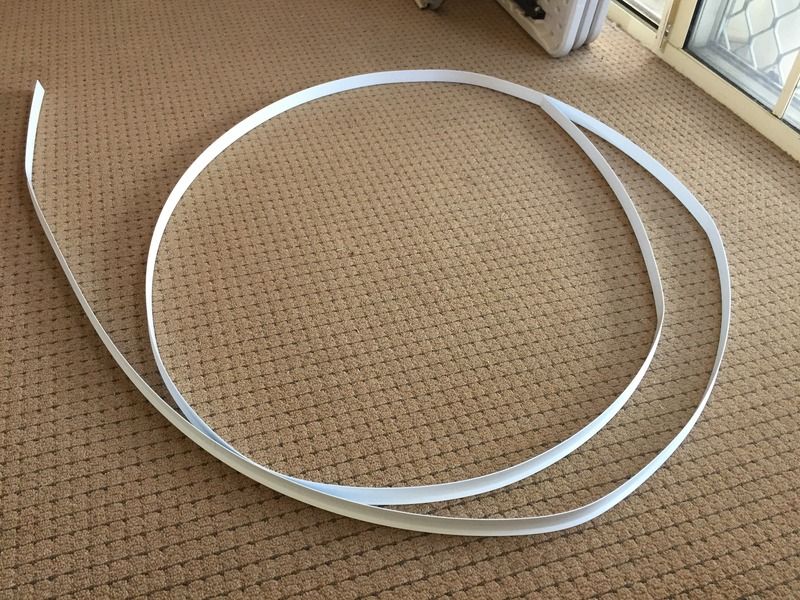 |
|
|
|
Post by project_kate on Aug 24, 2015 15:33:31 GMT 10
Great work so far. I'm going to follow your thread, because we just got a van and look like we'll be doing something similar to yours. Keep posting! K |
|
|
|
Post by awbeattie381 on Oct 7, 2015 13:08:19 GMT 10
Quick update (and to keep my van on page 1!) The work undertaken to date wont look any different if I took photos, so you will have to make do with a description. The kitchen side wall has now been painted with 2 coats of grey and is finished. The ceiling, wardrobe and cupboards have now all been given 3 coats of white. It looks amazing. Just need one more coat on the kitchen seats and all white surfaces will be finished (except the kitchen cupboard I am still building). The windows are still progressing. Now we have daylight saving I might be able to get more stuff done after work. Bought a pack of wire brushes for the drill. Its a bit too serious to get remnant paint off, but a good way to clean the back surface ready for new mastic. I have also put in a $500 order with caravans plus for window parts and seals so very excited for that to arrive. Will probably have a chat to a perspex supplier in Sydney this Saturday and then its just down to elbow grease and time. As far as the kitchen cupboard goes, I have already built one hollow core door and half way through the two larger ones (directly over the kitchen). I am building as per factory specs to keep weight down. I am happy how they are turning out, even if its slower than just cutting up one piece of thicker ply. 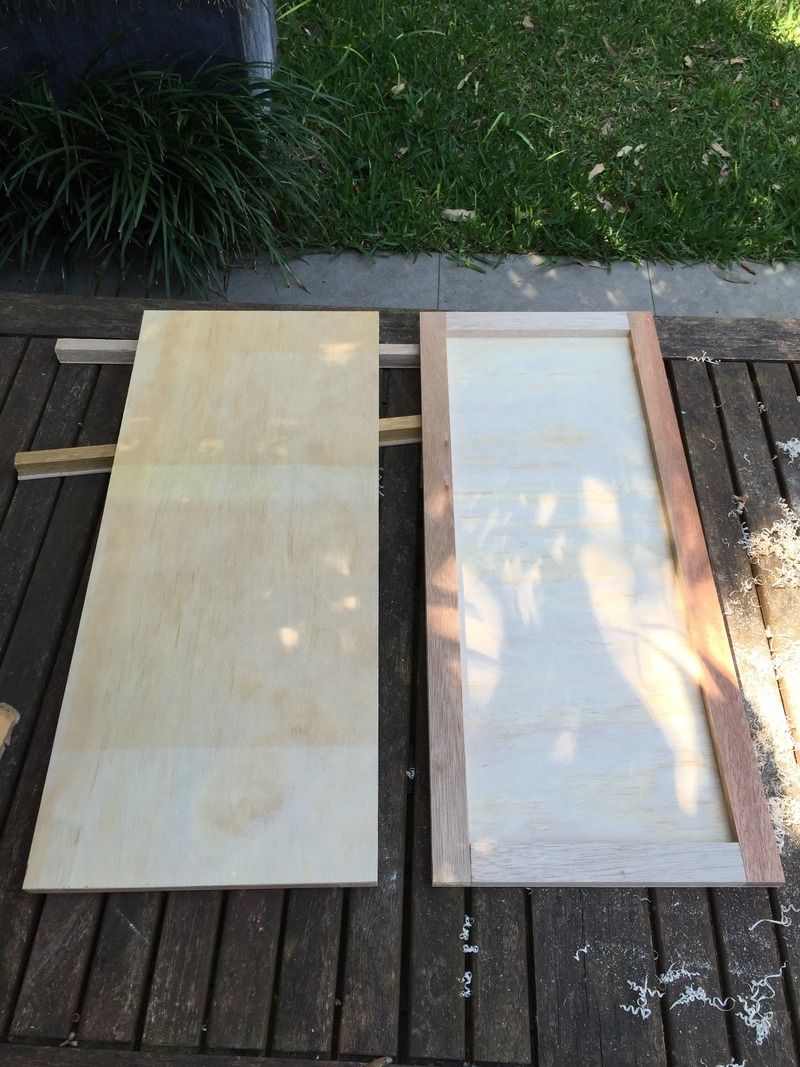 |
|