Deleted
Deleted Member
Posts: 0
|
Post by Deleted on May 29, 2014 18:44:56 GMT 10
Thanks Murray...I didn't think of adding something to the underside of table, that would work too. Al DID scare me! lol I will have a play round (not tomorrow sadly, I have to go to work) and be sure to update this thread when I've got a solution  cheers Karen |
|
Deleted
Deleted Member
Posts: 0
|
Post by Deleted on May 29, 2014 20:04:21 GMT 10
OK...I am officially an idiot!! I looked at telescopic legs on google images which quickly confirmed mine was upside down so i went and got it from the garage to have another look at it. Look what I found once I turned it up the right way... 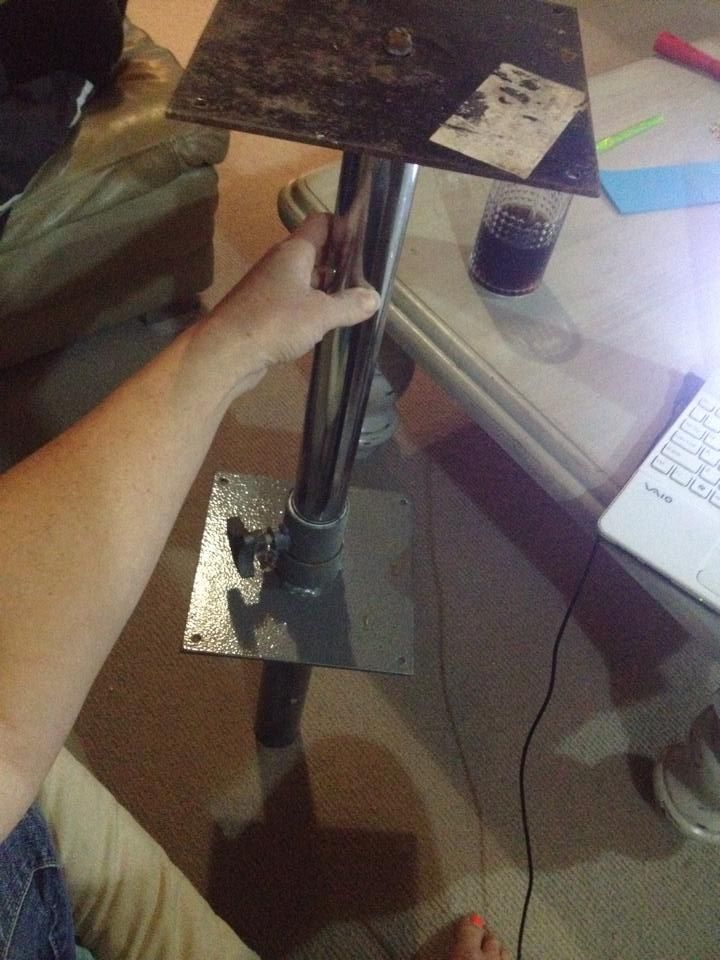 |
|
Deleted
Deleted Member
Posts: 0
|
Post by Deleted on May 29, 2014 20:06:39 GMT 10
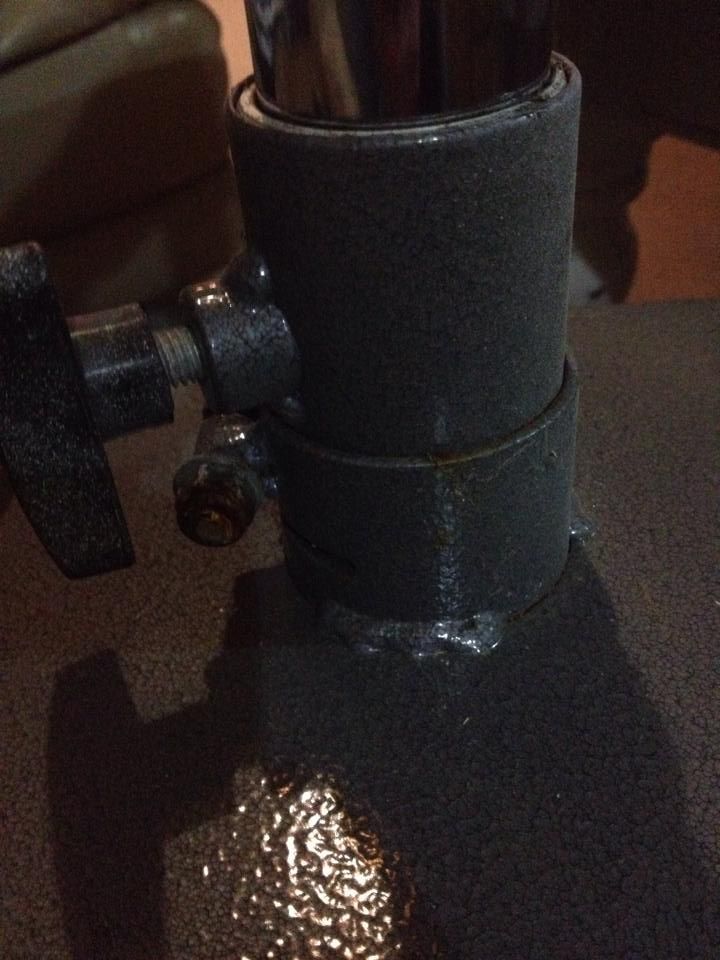 It has a hose clip type of adjustable ring which moves the square plate up and down! Yay! I am so silly I had no idea that was on there because I've always looked at it upside down and it was hidden from view. Lesson learnt...look at something properly! Thanks again to Al and Murray for helping me to see what was staring me in the face all along  |
|
Deleted
Deleted Member
Posts: 0
|
Post by Deleted on May 29, 2014 20:08:48 GMT 10
|
|
|
|
Post by ForumMod on May 29, 2014 20:22:53 GMT 10
Nowwww it all makes sense!  |
|
|
|
Post by murray on May 29, 2014 20:54:31 GMT 10
OK...I am officially an idiot!! I looked at telescopic legs on google images which quickly confirmed mine was upside down so i wnt and got it from the garage to have another look at it. Look what I found once I turned it up the right way...  That glass of red"cordial" on the table helped  cheers |
|
Deleted
Deleted Member
Posts: 0
|
Post by Deleted on May 29, 2014 21:10:31 GMT 10
haha Murray I had a night off the hard stuff tonight because I have work tomorrow at 6.30am. My brain must have been dehydrated as a result  Will have a couple tomorrow night to celebrate having paid $15 for a telescopic table leg that I now know works perfectly! I love this forum and would be so lost without it! |
|
Deleted
Deleted Member
Posts: 0
|
Post by Deleted on Jun 5, 2014 16:27:56 GMT 10
Hello everyone, thought I would pop in with some pics and update the state of play. I'm feeling quite upbeat about the van project right now which is great  I've finished the demolition stage and I am starting to put stuff back in...yay! The main part of the wall lining that I removed is in the back of the van where the bed and dressing table go. I decided to add some timber supports between the aluminium frame to give me more secure pieces to reattach the wall lining. I don't think I am very good at using a rivet gun (I find it impossible to squeeze in hard enough, maybe I am doing it wrong?) so with the timber, I can use my air staple gun to attach the lining and I will be more sure it is on securely! 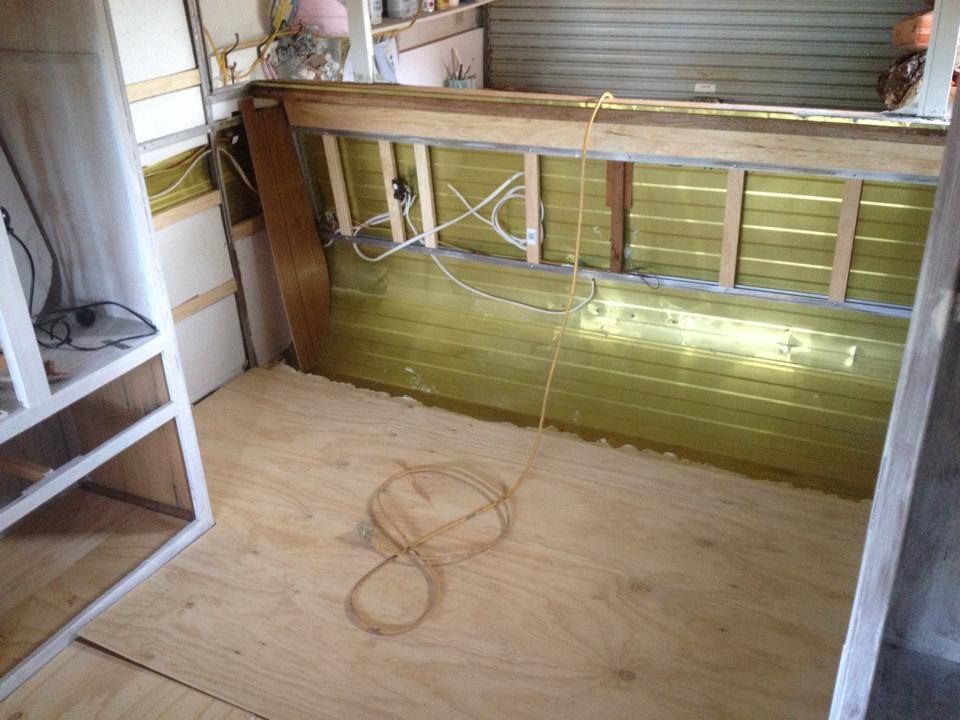 |
|
Deleted
Deleted Member
Posts: 0
|
Post by Deleted on Jun 5, 2014 16:35:36 GMT 10
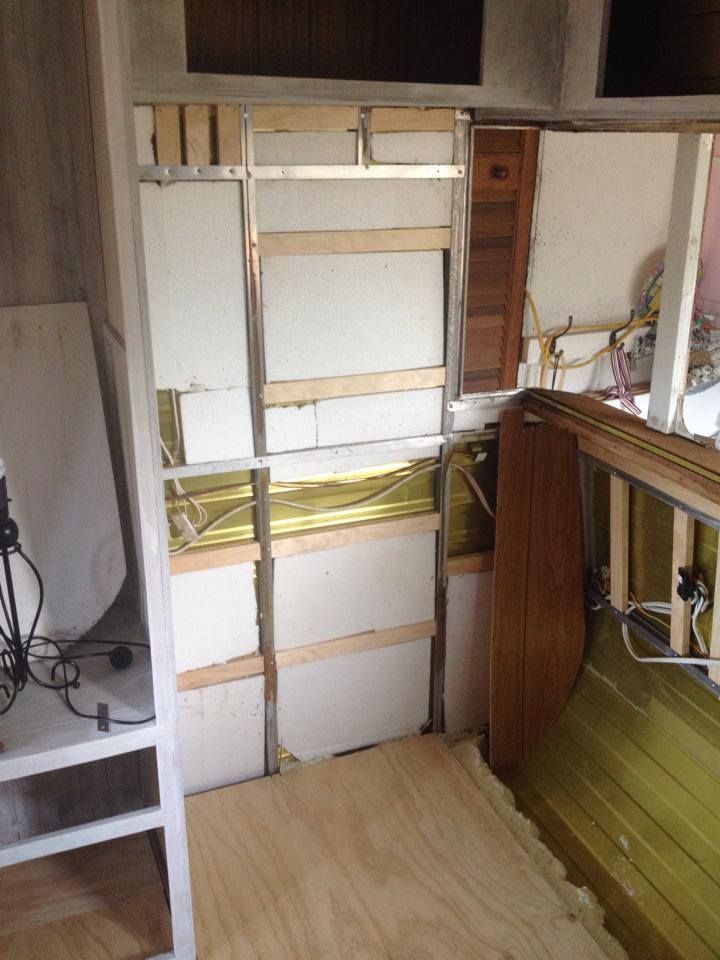 I've also put some extra timber up this wall, 1. to attach the wall lining and 2. to support the eventual new dressing table unit I will build. Ive even put some timber in to hang the eventual wall mirror on  I had an electrician here today who identified and checked all the wiring, did something with the main wiring (think he called it GPO?), made sure the van was bonded (what I know as earthed I think?), and installed a RCD. He also shortened the cord and replaced the plug on my fridge as it had been chewed by rats. Today was the first time I plugged the fridge in to test it and it works! Yay! I'm not bothered about having too many gadgets in my van, and don't need to go all high tech with my lighting and wiring. My main concern is that the van is safe. He showed me how to put silicone around any holes in the aluminium framing that wires pass through where the plastic grommets have come loose (there was only a couple that I could see, god knows what is happening behind the walls I haven't taken the lining off!) |
|
Deleted
Deleted Member
Posts: 0
|
Post by Deleted on Jun 5, 2014 16:37:50 GMT 10
I've also cut the two curved end wall panels, boy that was nerve wracking and time consuming (well the first one was!) but I am proud to say that I did it. 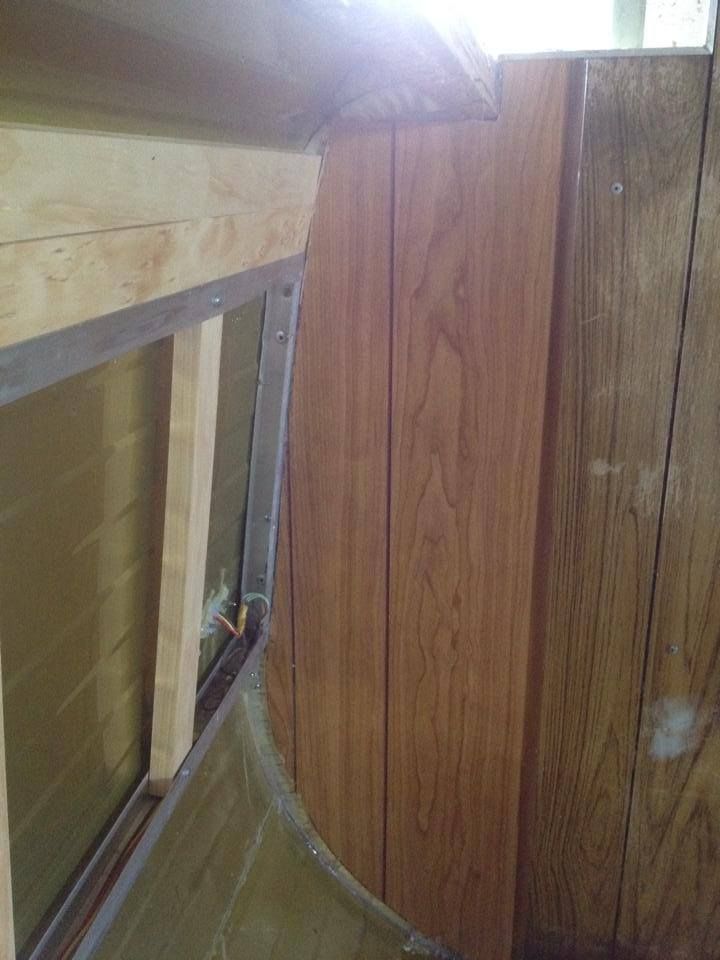 I realise that I haven't put the plastic edging trim on, I played around with some different options and couldn't get anything I was happy with for that curve so I am putting trim over the end wall piece which I am hoping will cover the edge of the side wall curve. |
|
Deleted
Deleted Member
Posts: 0
|
Post by Deleted on Jun 5, 2014 16:42:02 GMT 10
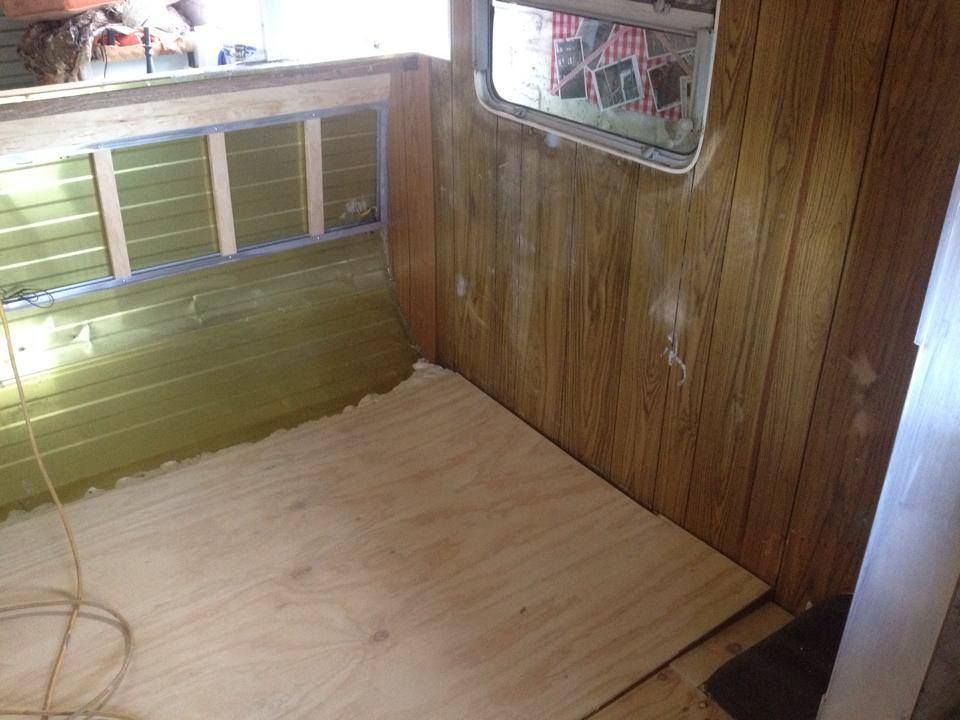 Don't mind the bouncy looking floor in this pic, I haven't attached it yet (over top of the existing floor) as I want to get the end wall lining back on and tuck that underneath the new floor panel. Hopefully this weekend when hubby is home to help me manhandle it...I can do it but it needs more than two hands methinks! I'm thinking about adding a couple of timber pieces down near the floor across the back curved panel of the caravan, as I thought they might be handy to secure the bed frame to once I am at that stage (I will do the bed frame last so I have plenty of working space left in the caravan for the majority of the project). |
|
Deleted
Deleted Member
Posts: 0
|
Post by Deleted on Jun 5, 2014 16:46:21 GMT 10
As you can see I've filled up the channel where the chassis ends, I could see fresh air through a gap all the way across so I put silicone along it after replacing some of the loose rivets with screws, then foam filled it.
Oh and yes the new panels are a different colour to the existing ones. I'm painting them all white so it doesn't matter. I was happy to find these panels at my local Mitre 10, the brand is 'Project Panels' and they were around $38 each. Not cheap but what I needed, I only needed two so not too bad. I'm using plain 3mm ply for the back wall, same as what was used on the front wall. Bunnings used to stock these sheets 'random groove ply' but they no longer do, and they called their supplier Gunnersons who said it is no longer made. Well someone makes it still because Mitre 10 told me it was a regular stocked item of theirs. They even had it in different woodgrain shades, and grey I think.
|
|
|
|
Post by ForumMod on Jun 5, 2014 22:13:45 GMT 10
Making good progress there, restyledvintage!  Trying to cut anything to fit inside a border or around a curve can be a real challenge at times. The method I use is to make a cardboard template using empty breakfast cereal boxes. For straight edges, it's easy to cut straight cardboard, but for curves I cut short lengths of cardboard and trim it with scissors to match the curve as close as possible. Then I do the next short length, and keep working my way around the curve, joining pieces of cardboard together as I go. I've got a project I've been working on-and-off for over 3 years now, and it's the rebuild of a 1960 vintage caravan. I post the progress over on the Vintage caravans forum, and if you read this post and this post , you'll see how I used that cardboard template method for cutting both laminex and plywood. Both those examples involved straight edges, but in the third photo down in this post I used that same method to get the plywood on the seatbox to match the curve of the front wall. I think it's a great method for helping to get ply to match the existing contours in a van. Cardboard is cheap, and you can muck around with it to your heart's content until you get the template right. With a bit of care, it's fairly easy to make a template that is very close to the dimensions and outline you need, or at worst will be only be about a millimetre out. Cardboard is far cheaper than stuffing up a good sheet of plywood.  cheers, Al. |
|
Deleted
Deleted Member
Posts: 0
|
Post by Deleted on Jun 6, 2014 9:12:59 GMT 10
thanks Al! I did make a template out of newspaper but it wasn't ideal, cardboard would have been far more sensible, I will check out those links and use that method for the next bits (thankfully no more curves)! I'm about the head downstairs to the garage and do some painting - the front interior curved panel, I thought I would paint that before I start reconstruction the dinette club seating. I've still got a long way to go but it's very exciting (and satisfying) to be putting stuff back into the van rather than pulling it out  |
|
|
|
Post by Sharky on Jun 7, 2014 22:48:31 GMT 10
Nice work there, its a very good feeling when it starts to take shape. I love van reno's, the best!
|
|
Deleted
Deleted Member
Posts: 0
|
Post by Deleted on Jun 9, 2014 8:41:27 GMT 10
thanks Sharky! We got the wall linings back on today which feels like a huge leap forward  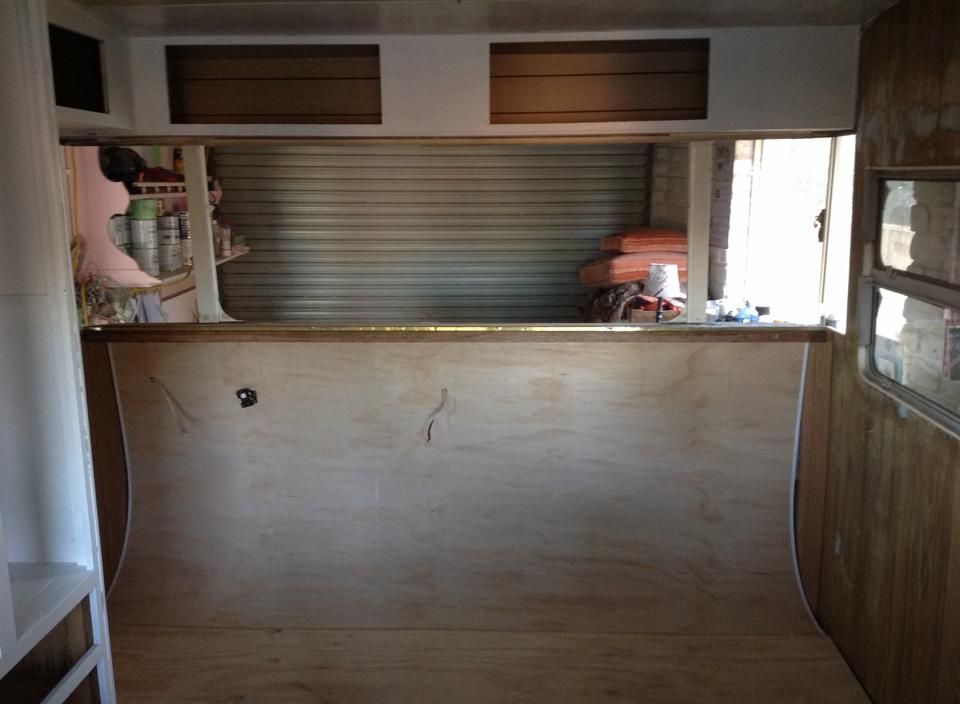 |
|
Deleted
Deleted Member
Posts: 0
|
Post by Deleted on Jun 9, 2014 8:42:48 GMT 10
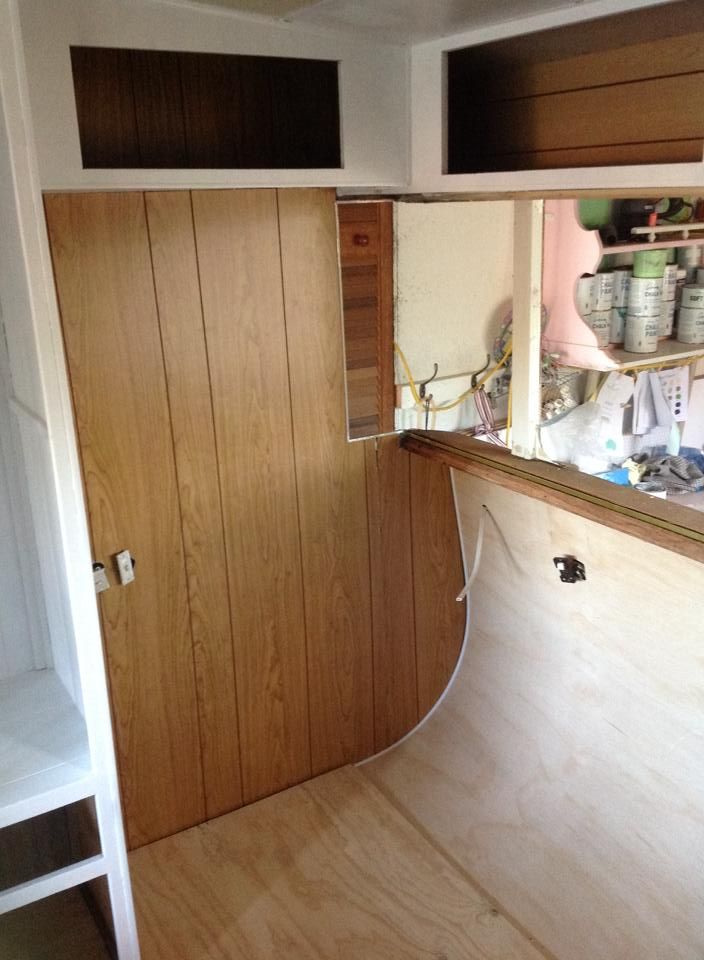 I'm headed to Bunnings now to get the trim to join the sheets together - I already bought some but it is for a thicker sheet than the one I'm using - never realised this till I tried to install it yesterday  |
|
Deleted
Deleted Member
Posts: 0
|
Post by Deleted on Jun 9, 2014 8:43:40 GMT 10
|
|
|
|
Post by ForumMod on Jun 9, 2014 11:31:03 GMT 10
Well, that ended up being a pretty neat job, restyledvintage!  Gotta be happy with that!!  cheers, Al. |
|
Deleted
Deleted Member
Posts: 0
|
Post by Deleted on Jun 9, 2014 13:35:12 GMT 10
Thanks Al, I'm pretty pleased with myself! Truth be told, the back panel is about 5mm too narrow but nothing a bit of silicone and gap filler won't fix  I'm painting the van interior white by choice but it's quite a bonus that paint and bog can cover all manner of sins haha! |
|
Deleted
Deleted Member
Posts: 0
|
Post by Deleted on Jun 9, 2014 13:38:04 GMT 10
Just to clarify the above, all manner of sins to me means less than perfect cuts etc, not rot and yuck that needs to be properly repaired!
|
|
Deleted
Deleted Member
Posts: 0
|
Post by Deleted on Jun 12, 2014 8:07:05 GMT 10
Question please: can anyone tell me what would be good dimensions to build the new dinette seating in the front of my van? What was there was well beyond saving and the seat cushions weren't original. They were very uncomfortable to sit on, the backs too fat and the seats not deep enough...see photos on page one of my thread showing what was there. I know I only have a certain amount of space but as I have the 'luxury' (lol) of being able to redesign from scratch (and will build a tabletop to suit) I figure I might as well make it better than original and as comfy as I can. Does anyone know of any threads that have rebuilt the front dinette area that I could look at?
Thanks in advance...
|
|
|
|
Post by ForumMod on Jun 12, 2014 10:42:46 GMT 10
G'day Karen, looking at your earlier photos, I get the impression someone has changed the foam cushions and used thicker mattress-type foam instead. I'd look at using a thinner foam with a higher density. Probably the best bet is to take one of your old cushions to the foam supplier, and talk with them about the relative densities of the foam types available. A typical seat foam thickness would be around 100mm-125mm thick. Once you get the foam sorted out, there's nothing stopping you remaking the dining setting layout exactly how it was originally, if that's what you prefer. It worked well for the people who used your van back in the '70s, so there's no reason why it wouldn't work again now. If you intend to be able to convert the dining setting to a double bed, then all foam cushions need to be the same thickness (obviously  ). That might be where you have to compromise a bit between what's good for sitting on, and what's good for sleeping on. Your friendly foam supplier should be able to help talk you through the situation, I reckon. cheers, Al. |
|
Deleted
Deleted Member
Posts: 0
|
Post by Deleted on Jun 12, 2014 20:45:15 GMT 10
Thanks for that Al, I hadn't thought of using thinner higher density foam. The cushions that were there were thicker mattress type, and were awful so I chucked them. Think I will pay Clark Rubber a visit them go from there. The dinette seating will double as a bed for my two kids aged 10 and 7 so it needs to be comfy for them, and easy to put up and down. I'm also still thinking about whether to make the back rest cushions fixed and have an infill cushion for the table top to become a bed hidden away, or whether to have them all moveable. I think I've seen a photo of the original seating in these vans and it's fixed/deep buttoned all over?
|
|
Deleted
Deleted Member
Posts: 0
|
Post by Deleted on Jun 19, 2014 16:12:07 GMT 10
Hi everyone, well I've spent this week building the framing for my dinette seating and I'm feeling pretty pleased with myself! Here's the progress: 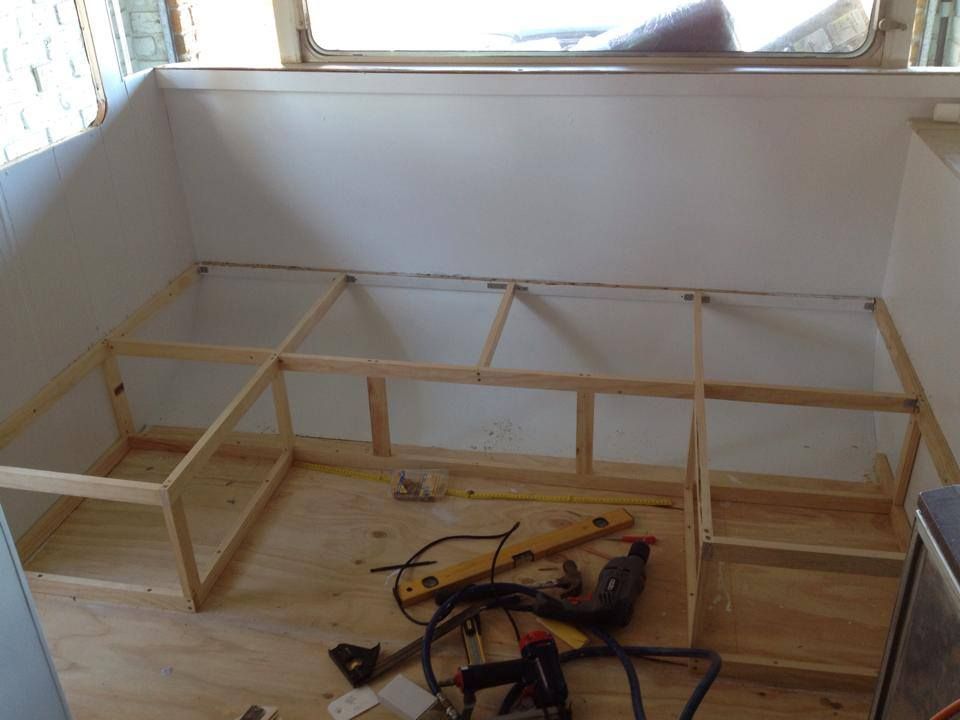 |
|