Deleted
Deleted Member
Posts: 0
|
Post by Deleted on May 2, 2014 19:06:59 GMT 10
Karen I think you might need to look at the worst case scenario that you might have to pull the caravan apart completely and start from the chassis up to repair everything properly. And once you have done that then there is no escaping the cost involved to rebuild. The best thing I have found is that it's a long term project so your cost is bit by bit and not a big cost all in one go. I have kept a record of everything I am spending on the caravan restoration, I'm pretty sure it's going to be pretty expensive by the time I have completely finished. And if I was to ever sell my caravan (I have no intentions to) the fact is it's still a old caravan and I won't get the money back I will spent on restoring. I'm doing this for myself and my family. It's my project and I'm loving the challenge. And the thought that I can stand back and say I did that all by myself is an amazing feeling. I'm a mum of 5 kids and also work, but I'm pretty good with tools and nutting out how things work and how to fix them. My husband has not helped me at all with any of the restoration, and he is only now starting to realize that I know what I'm doing and trusts me. At the start he was concerned that the caravan would never be a caravan ever again lol.
I'm certain that there would be a lot more people out there who starts a caravan restoration who never finish than there would be people who completely finish as it can get to a point where you either loose interest or find it too hard.
Good luck with what ever you decide. This forum is brilliant for information and help where ever you need it.
|
|
Deleted
Deleted Member
Posts: 0
|
Post by Deleted on May 2, 2014 19:23:46 GMT 10
Wow Graham I've just read your thread and I'm blown away by your project, it is just awesome but far beyond my capabilities, makes me wonder what the hell I am thinking attempting this, lol! I don't think I need to remove or replace the cladding although I understand if that is off it might make the rebuild simpler as that is how they were built to start with, from the inside out? I've only had my caravan a week tomorrow so I suppose I shouldn't worry about the amount of progress (or discovery more accurately!) that I've made thus far... I've sent a few 'eek...help!' messages to my Dad (he's in NZ...I'm a Kiwi who ran away from the Chch earthquakes in 2011). Dad is very handy and can fix anything and I need him here more than ever I think! He is telling me to remember that 'sh!t happens' and to not get hung up on the bad stuff, keep moving forward and to treat it as a learning experience. He says that pulling stuff apart is a great way to understand how stuff works, and I totally agree. A week ago I never would have thought I would pull a window out of a caravan and now I have, and I understand how it all goes back in again (I hope, lol!) I don't like to be beaten by stuff and don't give up easily so I guess I'm committed to seeing this through as best I can... thanks again Graham  cheers Karen |
|
Deleted
Deleted Member
Posts: 0
|
Post by Deleted on May 2, 2014 19:28:12 GMT 10
Thank you Dede, I am very inspired by everyone on here but particularly other women who get in and give it a go, makes me feel like I can do it too  The floor in my van looks good and solid and it just got rego so I'm hoping that means it's sound in the chassis? Besides, I'm too scared to look haha! I only have two kids, and a husband who's not very handy either but I call for his help when I need more muscle power than I have  Is your van project posted on here? I'd love to look at progress so far... cheers Karen |
|
Deleted
Deleted Member
Posts: 0
|
Post by Deleted on May 2, 2014 19:31:10 GMT 10
I agree with your dad 100%, pulling stuff apart really does give you an understanding on how stuff works and how to put it back together. If you decide to continue make sure you take lots of photos and make heaps of notes and even a detailed plan. It all helps to look back at for reference.
|
|
Deleted
Deleted Member
Posts: 0
|
Post by Deleted on May 2, 2014 19:34:34 GMT 10
My post is 1977 coronet Poptop. I have a long way to go but I know the direction I'm going and just taking one step at a time. If I looked at the big picture I would probably just give up. But bit by bit I'm making progress.  |
|
Deleted
Deleted Member
Posts: 0
|
Post by Deleted on May 2, 2014 19:56:22 GMT 10
thank you Dede, was just putting the kids to bed. Now I can relax with my bourbon, eat chocolate and surf Pinterest for caravan eye candy while hubby watches the rugby  I will go look up your thread now. You are right, bit by bit is the way to go, otherwise I feel like crying! thanks xx Karen |
|
Deleted
Deleted Member
Posts: 0
|
Post by Deleted on May 2, 2014 20:09:23 GMT 10
The guy I brought my caravan from also knew about issues with the caravan. The more I got into it the more problems I found, and the more I realized that the old owner knew there were big issues and just covered them up to sell to some poor sucker (me  ) Makes me mad that there are dishonest people out there who just don't care. Know wonder when we made an offer much lower than what he advertised he didn't even think twice about it. We thought we got a bargain. But knowing what I know now we paid way way too much. |
|
Deleted
Deleted Member
Posts: 0
|
Post by Deleted on May 2, 2014 21:06:00 GMT 10
|
|
Deleted
Deleted Member
Posts: 0
|
Post by Deleted on May 3, 2014 17:58:09 GMT 10
Thanks Scotty I've read that thread. I'm hoping to be able to bend the perspex enough without a form but we shall see. I have a hair dryer and a heat gun for heating to help in need. Was hoping to try today but spent all day clearing space on our garage to get the caravan inside. It was tight getting it in, we even had to let the air out of the tyres to fit the hatch under the garage door but we did it with 10mm to spare!
|
|
|
|
Post by supreme78 on May 10, 2014 20:42:53 GMT 10
I guess a viscount is a good van for a project as it's an alloy frame. I did a reso on my 1978 viscount supreme. Have a look at my project supreme s81091. It was a great project and although I didn't replace the wall lining I did replace some of the ceiling in the bedroom. I just cut in an inch from the outer wall. Spaced the roof beams with ply to bring it level with the bit that was left and glued a new panel to the small existing bit left. So the new ceiling is now below the original ceiling by 3 mm. I hope that makes sense. It's to hard to go under cupboards and things. I just then run a bead of sikaflex around the whole thing. It looks ok. Remember this van was built from the inside out so the outside was put on last.
Sent from my iPad using Tapatalk
|
|
Deleted
Deleted Member
Posts: 0
|
Post by Deleted on May 11, 2014 16:50:18 GMT 10
thanks supreme78 I will have a look at your project. An update as to where I am at, I have decided not to gut the whole van because after reading on here and watching youtube videos and just having a good hard think about things I have decided that there are parts worth saving (all the upper cabinets, the wardrobe and most of the ceiling, along with the whole passenger side of the van are fine). I have ripped out the kitchen cabinetry and the dinette seating which was all mush anyway. I've removed all the cabinet doors and hinges (some were hard to get out as the screws wouldn't undo!) and I am going to make new ones. I've removed almost all of the windows (will take them all out but I need the van towed out of the garage before I can get at one side, there's not much space between the caravan and garage wall). For the worst of the rot which is at the top of a corner window, underneath an overhead cabinet, I have dug out the rotted timber then used a product called Earls Wood Hardener which I found out about on youtube, I bought it yesterday at Bunnings. I've sprayed that all over where the rot was and once it is cured I will used a wood putty/bog called Poridon or something like that (haven't got the tub in front of me right now) to fill in the missing timber bits. Once sanded and painted over it should be good as new, I hope! I've been applying sealant around any gaps that I can see while I have the lining off the back of the van, and tomorrow I am hoping to reline the floor (over top of existing) to get around the probably asbestos issue in my vinyl flooring. I've just written a to-do list to get it all out of my head and it is three pages long...lol!
|
|
|
|
Post by supreme78 on May 13, 2014 3:10:03 GMT 10
Hey restyledvintage Its relaxing doing jobs on my van I can spend all day on my van doing jobs and look back satisfied with my achievements. I have grand plans but finances hold me back from a masterpiece lol. My to do list is still a full page (40 jobs) some small little things some expensive. Like A/C, solar and roll out awning. It's an addiction you just want to make things better and the list never ends. I could never buy a new van what would I do if their was nothing to fix. Sounds like you gave most of your issues sorted out. If you go on the gunnersons website you will find wall paneling of different types and you can get it from bunnings or similar hardware stores.
|
|
|
|
Post by supreme78 on May 13, 2014 4:18:26 GMT 10
Hi there, if you are after answers I have added some info to my viscount rebuild supreme s81091 in the hall of fame section. My viscount was a little like yours at the start but I had restored an earlier viscount so knew what was involved. My supreme had ceiling rot but the walls were pretty good except for under the front window. I removed the window and remade the shelves top and bottom. That were crazy to use ply on the older models but mine was ply but still needed replacing. I just dismantled and made copy's of the pieces and back together it went. It was a slow process but outcome was great. I used ply 10mm I think and glued 3 ply to the top for appearance. Plenty of sikaflex during install and now no leaks so very happy. I live in my van at the moment but will be moving into a place with storage for my van out of the weather. I don't want to live in it over winter in Victoria. Gets to zero here and the old girl is not that well insulated and plenty of drafts. You will be surprised what older vans bring price wise and you can easily spend large amounts of money on them. I purchased mine for $2400 and have spent twice that and probably more if I added up the numbers. Just try to enjoy journey and don't get wrapped up in the cost to much or you will never finish it. Gunnersons website has wall paneling that has some nice looking colors instead of painting and it's not very expensive. $30 a sheet or less. Available from Bunnings if ordered and they even have joining strips in the same colors. Happ restoring. Regards supreme78
Sent from my iPad using Tapatalk
|
|
|
|
Post by supreme78 on May 13, 2014 4:20:06 GMT 10
Please let us know where you live and somone local might be interested in coming for a look and advice session [Moderator edit: restyledvintage has indicated in the first post at the start of this thread that she is located in the Port Maquarie NSW region  ] |
|
Deleted
Deleted Member
Posts: 0
|
Post by Deleted on May 13, 2014 11:13:45 GMT 10
Here are some photos of how it looks today. 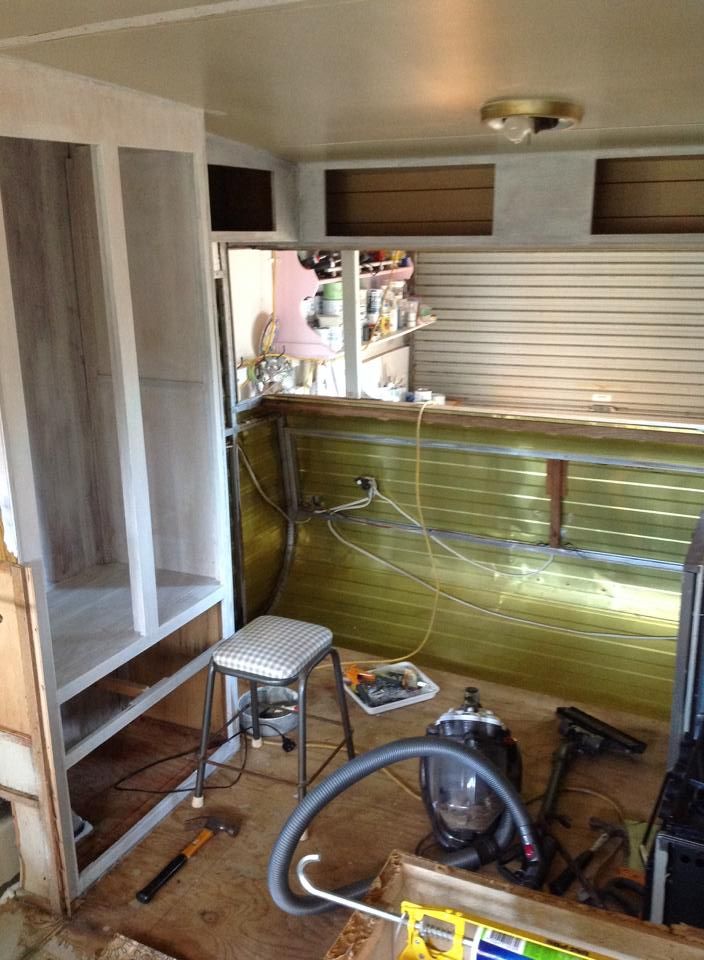 |
|
Deleted
Deleted Member
Posts: 0
|
Post by Deleted on May 13, 2014 11:16:02 GMT 10
This is the windowsill at the rear that was rotten, I was going to rip out the whole thing then discovered I could treat the rot with Earl's Wood Hardener then fill with Porion. I dug out more timber than I needed to so I had more to fill but never mind. This is only the first layer, I will do another one then maybe the final one with bog. Then I will reline the whole sill with 3mm ply once the windows are back in. 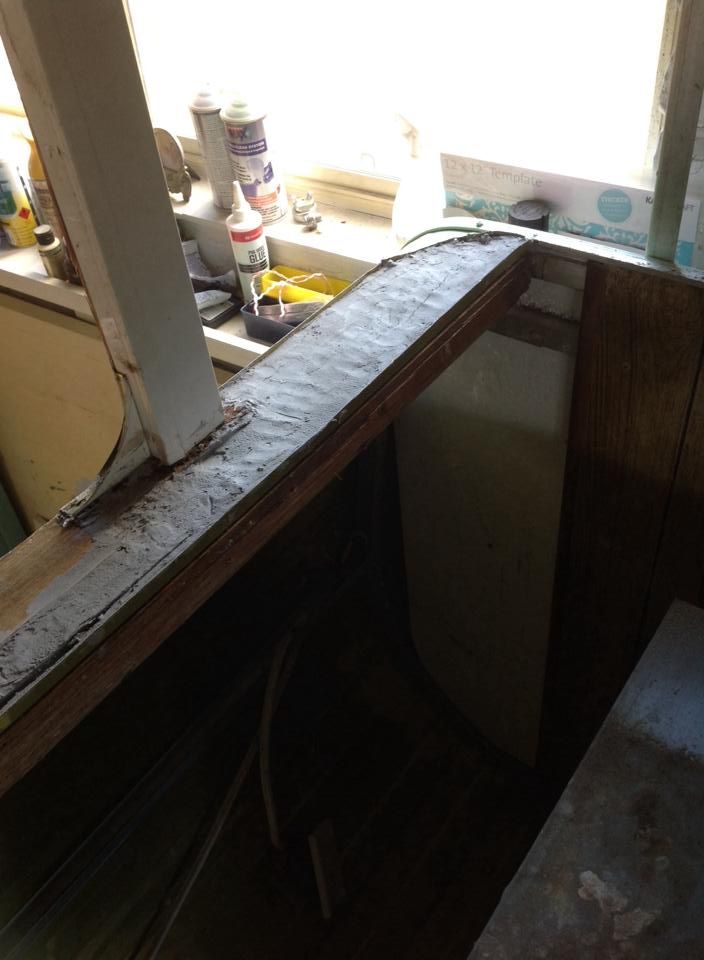 |
|
Deleted
Deleted Member
Posts: 0
|
Post by Deleted on May 13, 2014 11:17:50 GMT 10
I've filled, sanded, and started priming some of the cabinets. I love painting...I run my own furniture refinishing business so there are not many days I don't have a paintbrush in my hand! 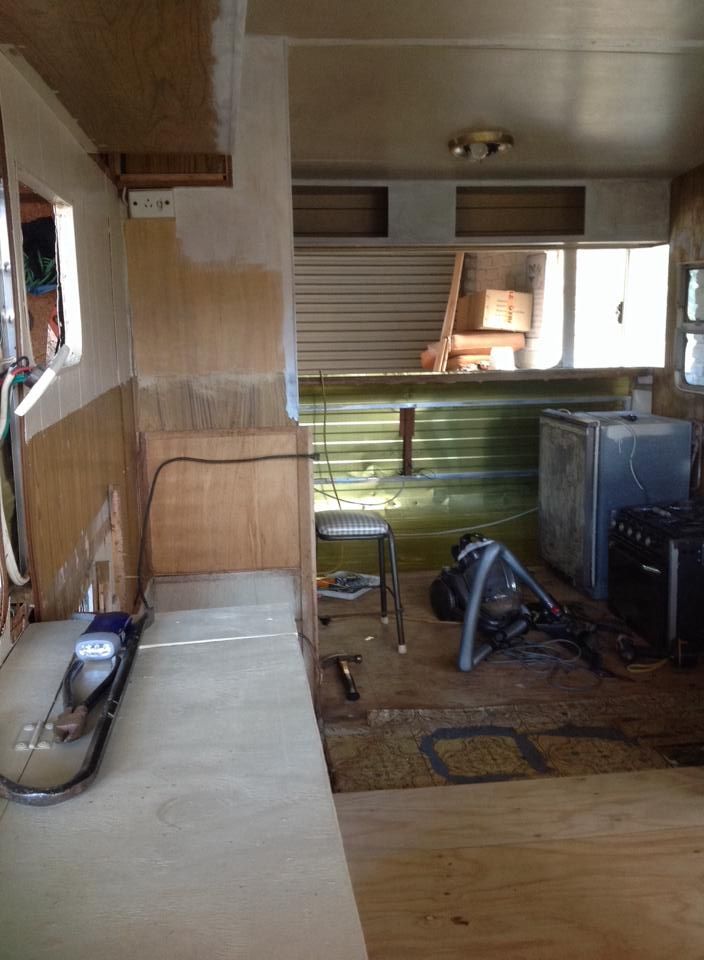 |
|
Deleted
Deleted Member
Posts: 0
|
Post by Deleted on May 13, 2014 11:20:45 GMT 10
I stopped priming on the side of the wardrobe/pantry because I will put a backsplash around there, not sure what yet though. Here is where the kitchen was...it was awful and not worth saving. There was a rat's nest behind the fridge (and also one under a veneer cover on the wheel arch). 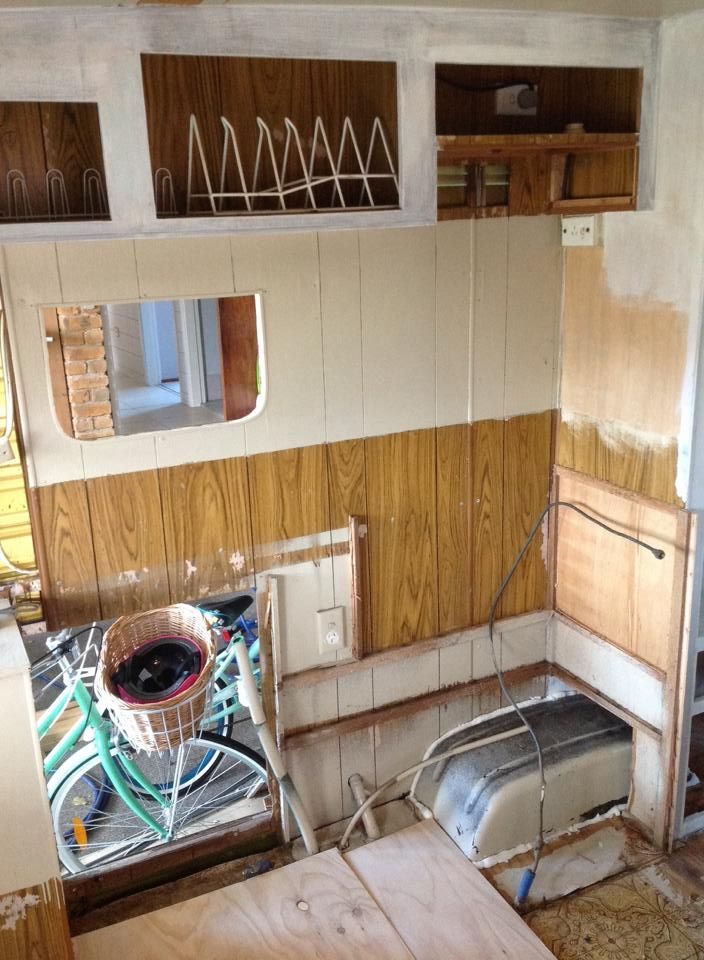 I want to put a new bottom in the upper cabinet where the rangehood was, I don't need or want one in the van. If anyone can suggest how to do this and make it strong enough to hold a microwave that would be much appreciated. |
|
Deleted
Deleted Member
Posts: 0
|
Post by Deleted on May 13, 2014 11:22:41 GMT 10
I've started laying a 7mm ply floor over the top of the existing one (and the old vinyl which I suspect is asbestos backed). Haven't glued or screwed it down yet but it looks and smells so much fresher already! 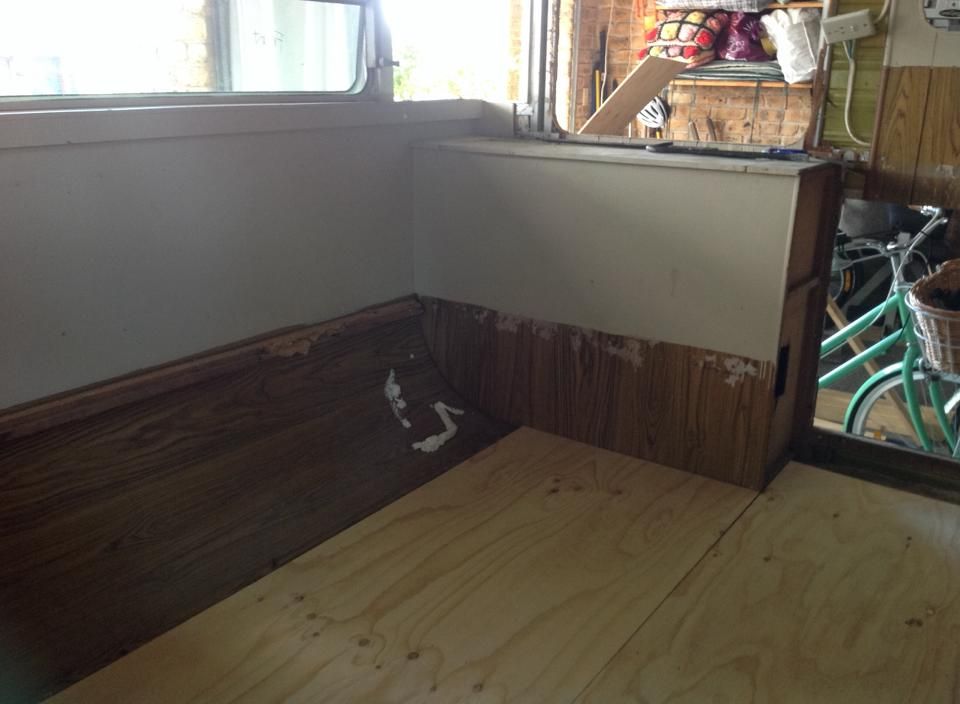 |
|
Deleted
Deleted Member
Posts: 0
|
Post by Deleted on May 13, 2014 11:24:56 GMT 10
This is the other only bad rotted area, above the front drivers side window (diagonally opposite to the one that I filled the sill on). So far I have dug out the rot, treated it with Earl's Wood Hardener and filled the void with expanding foam. Not quite sure what I will do next, still working it out. 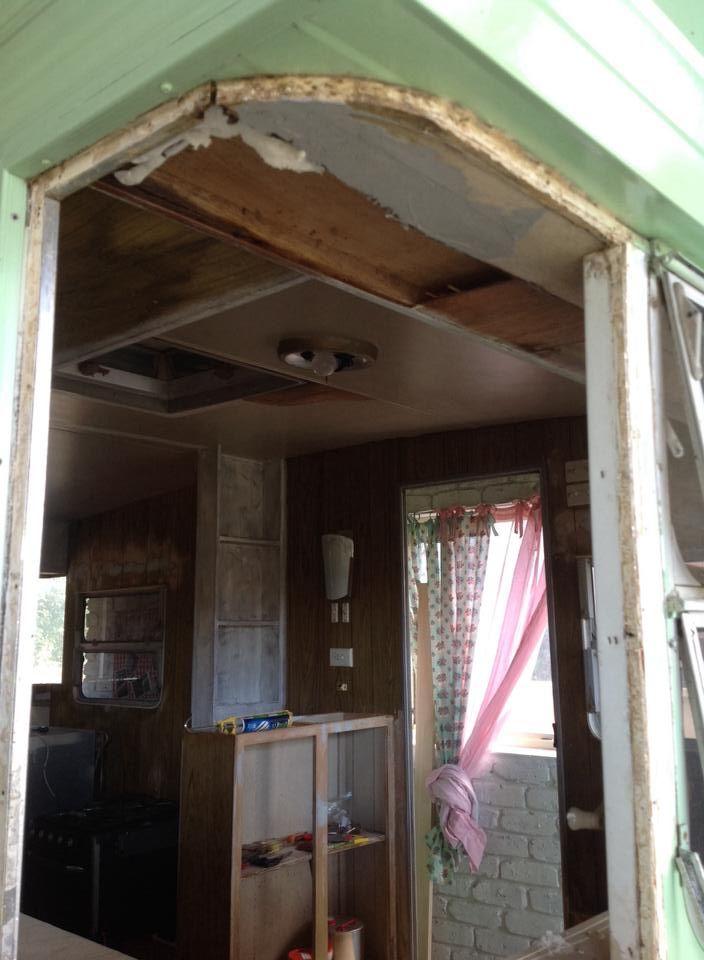 |
|
Deleted
Deleted Member
Posts: 0
|
Post by Deleted on May 13, 2014 11:26:43 GMT 10
|
|
Deleted
Deleted Member
Posts: 0
|
Post by Deleted on May 13, 2014 11:27:09 GMT 10
|
|
Deleted
Deleted Member
Posts: 0
|
Post by Deleted on May 13, 2014 11:28:14 GMT 10
Just realised this shot is from a similar angle as the previous one...I love seeing progress! 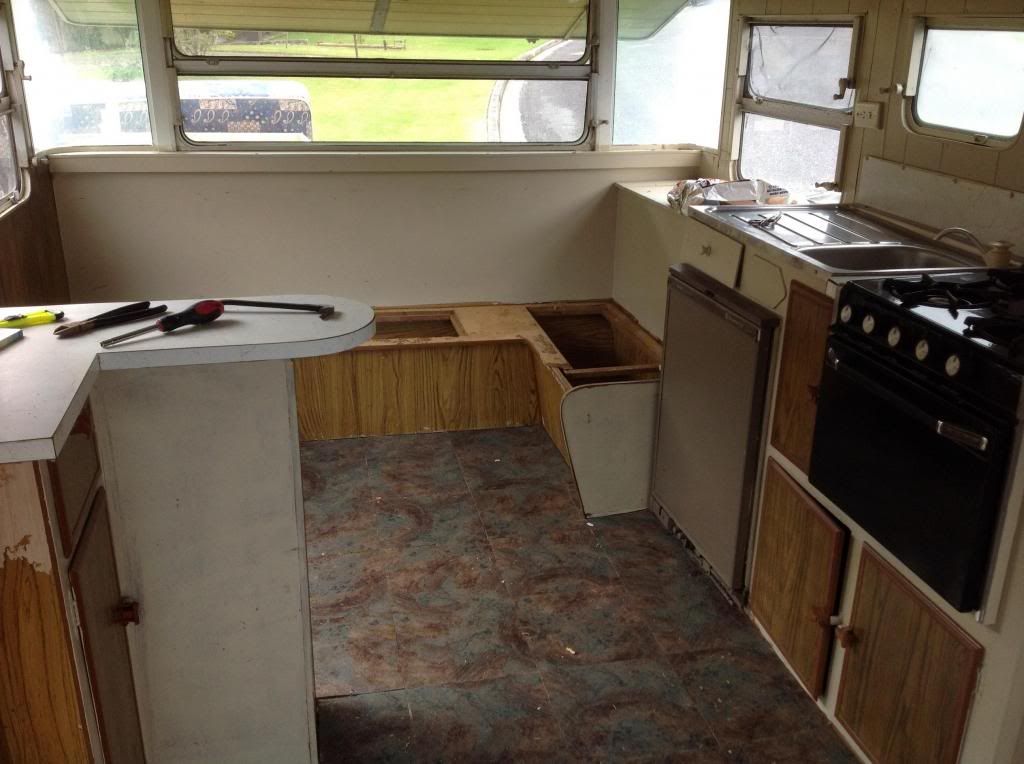 |
|
Deleted
Deleted Member
Posts: 0
|
Post by Deleted on May 13, 2014 11:29:33 GMT 10
|
|
Deleted
Deleted Member
Posts: 0
|
Post by Deleted on May 13, 2014 11:32:55 GMT 10
The old guy I bought the van off told me he was about to paint the van on the day I saw it and decided to buy it so he let me choose the colours. I love the colours I chose, and they will both feature in the end product somehow, but the paint job is very poor (you can see a patch in this photo, and when you rub your hands over the outside, it feels gritty). I will strip it all back and redo it myself, and use either pink or mint with white. I've decided vans need really need some white on the outside to make the other colour look decent. I regret letting him paint it because what a waste, and more work for me. 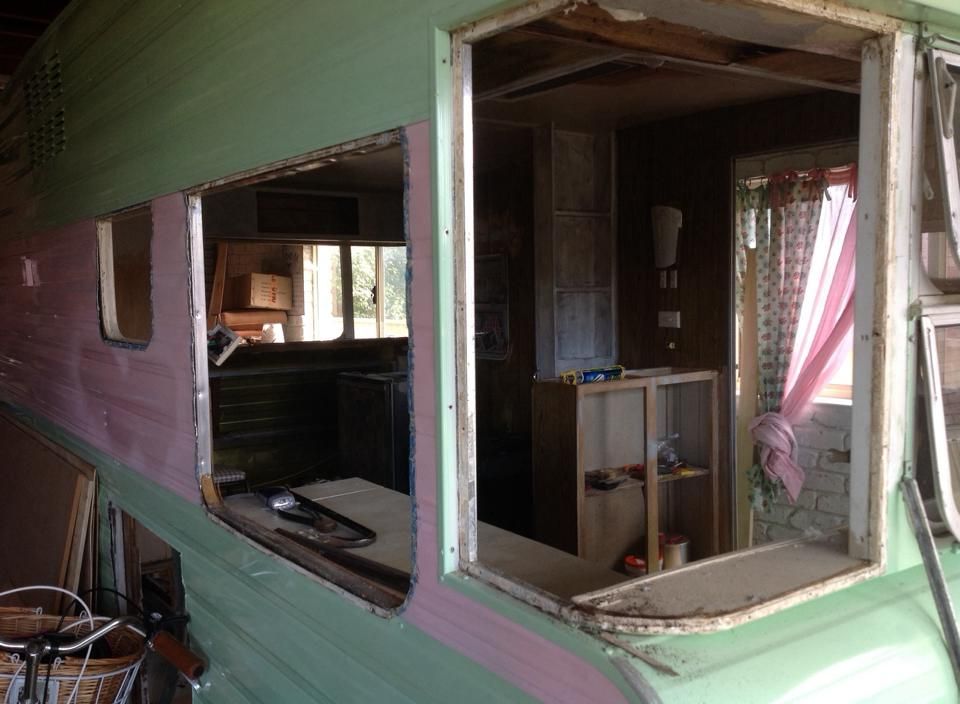 |
|