Deleted
Deleted Member
Posts: 0
|
Post by Deleted on Apr 19, 2014 17:46:42 GMT 10
Hi, I am new here  A couple of days ago I purchased a Viscount Supreme 1978 (think it is a 16ft). Chassis number is S88038. We picked it up on Saturday and it has quickly turned into a bigger job...uh-oh! I'm fairly handy, not scared of hard work but I'm not a builder and neither is my husband. I want to learn how to do this and I want to do it right. I discovered some damp damage on internal panels so I pulled them off. There is still more to remove. Also the window sills are rotten under the curved corner windows and there looks to be some damp damage above the corner windows too. At this point I know I'm in for a big job. I've read lots on here, it is a great forum. I will probably have lots of questions, but my first one for now is...should I go for gold and pull everything out, and start again, (and teach myself how to build cabinetry!?) or should I just patch and fix where I can see the damp damage? My gut feel says pull it all out but I'm a bit scared! Today I've sourced some random groove ply lining locally (Port Macquarie) which is what the van has in it currently, and I quite like it. So I know I can match up the new lining to the existing in need. The first thing that is bugging me is that the dinette area at the front of the van has 'club' seating, I think that is the correct term - it has seats along the side walls and the front wall forming a U shape. The dining table is freestanding. From the threads I've read so far on here and the pictures I've seen, the original dinette area should be just two seats on the side walls facing into the centre of the van, with a table that winds down to become a bed base. I want to change my van to be like that, can anyone please help me with how/where I could find the wind up/down table leg mechanism? Or have any other suggestions for me on how I could achieve this? thanks a lot  Karen ![]() |
|
Deleted
Deleted Member
Posts: 0
|
Post by Deleted on Apr 19, 2014 17:57:00 GMT 10
|
|
Deleted
Deleted Member
Posts: 0
|
Post by Deleted on Apr 19, 2014 17:57:47 GMT 10
yay I got pics to work! 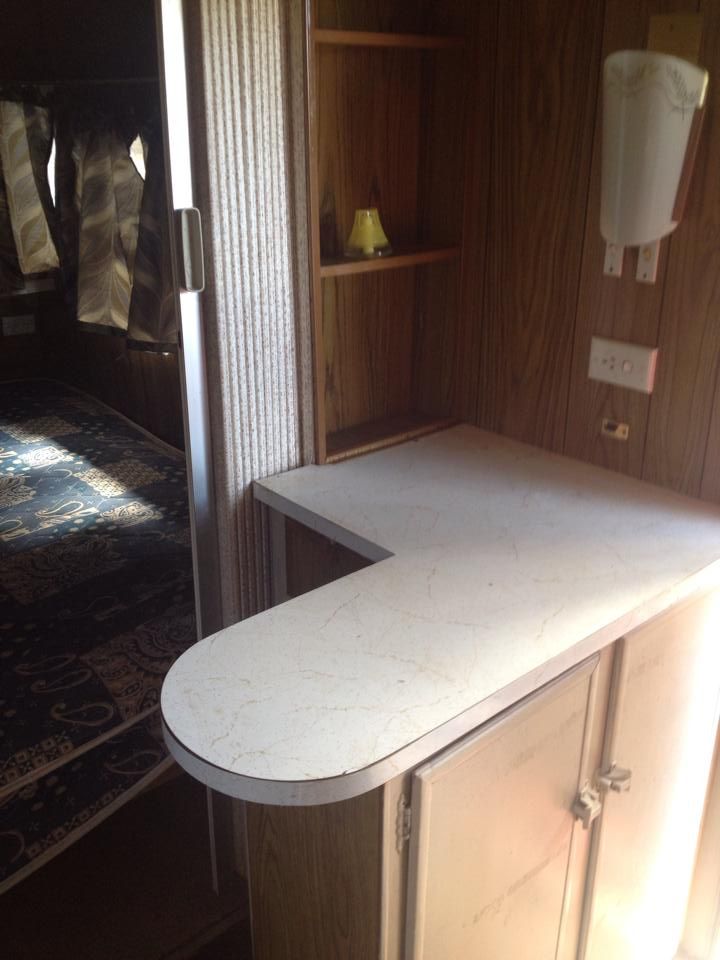 |
|
Deleted
Deleted Member
Posts: 0
|
Post by Deleted on Apr 19, 2014 17:58:20 GMT 10
|
|
Deleted
Deleted Member
Posts: 0
|
Post by Deleted on Apr 19, 2014 17:58:42 GMT 10
|
|
Deleted
Deleted Member
Posts: 0
|
Post by Deleted on Apr 19, 2014 17:59:02 GMT 10
|
|
Deleted
Deleted Member
Posts: 0
|
Post by Deleted on Apr 19, 2014 17:59:36 GMT 10
|
|
Deleted
Deleted Member
Posts: 0
|
Post by Deleted on Apr 19, 2014 18:00:37 GMT 10
|
|
Deleted
Deleted Member
Posts: 0
|
Post by Deleted on Apr 19, 2014 18:01:22 GMT 10
|
|
Deleted
Deleted Member
Posts: 0
|
Post by Deleted on Apr 19, 2014 18:01:51 GMT 10
|
|
Deleted
Deleted Member
Posts: 0
|
Post by Deleted on Apr 19, 2014 18:02:34 GMT 10
|
|
Deleted
Deleted Member
Posts: 0
|
Post by Deleted on Apr 28, 2014 21:01:28 GMT 10
|
|
Deleted
Deleted Member
Posts: 0
|
Post by Deleted on Apr 30, 2014 9:15:46 GMT 10
Hi Karen. I love your type of van. My favorite. Um, if you have some detailed photos about your concerns, please see if you can post them. Your issues are typical of most on this forum and I am sure one of us can "show you a torch" to help you get through the renovating tunnel. I have been able to tackle issues on my van way beyond my skill level and my percieved capacity via the support on this forum. It is fabulous seeing women out there having a go and making their vans useable and gorgeous. I learn something new each time I log on. I have also had fun visiting the hardware stores and solving problems in the aisles. I was also blessed to visit one of our forum members who showed me his renovation top to bottom and was truly inspired to be shown how to set up a van creatively on a budget. Keep us posted :-). oh and if you need some other inspiration, have a look at the website Pinterest and search on vintage caravans or vintage or classic travel trailers and feast your eyes. Eye Candy.
|
|
Deleted
Deleted Member
Posts: 0
|
Post by Deleted on May 1, 2014 8:45:05 GMT 10
Thank you Enidb, I have already been inspired by this site and so impressed/blown away with all the knowledge and helpfulness on here  Will definitely upload some more photos when I am on my laptop later today. I agree it is nice for us girls to get stuck in and have a go...even if I am only doing it as a means to an end to get to the part I really want to do, the decorating...lol! I've been on Pinterest a bit, google images, blogs, etc. I have a little furniture refinishing business called Restyled Vintage (hence username!) and through that was approached recently by Vintage Caravan magazine to review her new book Vintage Caravan Style which I was thrilled about and that is what spurred me into putting this dream into action actually. I have banned myself from setting foot in my van this week until my client paint jobs are done...but that hasn't stopped it consuming every waking thought in my brain haha! I look forward to chatting to you and hopefully others on here some more soon! Cheers Karen |
|
Deleted
Deleted Member
Posts: 0
|
Post by Deleted on May 1, 2014 18:06:22 GMT 10
|
|
Deleted
Deleted Member
Posts: 0
|
Post by Deleted on May 1, 2014 18:18:36 GMT 10
I've ripped the bed frame out and chucked the mattress. Today I managed to remove one of the curved perspex windows which had lots of cracks in it, and was leaking. It was easier than I thought...I undid the screws around the outside of frame, ran a Stanley knife around the old sealant from the inside, and tapped it a few times with a crowbar. The frame came undone with screws then I pulled out the old window rubbers and it all came apart. I did mark each piece of the frame before it fell to bits...top bottom right and left  I bought a sheet of 3mm polycarbonate sheeting from Bunnings today for $40 and that is enough to do two windows. I bought a fine 40 tooth blade for my circular saw to cut it with following the recommendation of the Bunnings tool shop guy who told me he had cut lots of this stuff. It is quite bendable even without being heated so I am hoping once I have cut it to size I can bend it into the curved top and bottom aluminium frame then I can get the sides back on to hold it all in place (and find some new window rubber!) I've been thinking about my gut job dilemma and decided that I won't gut it, the whole passenger side wall is fine apart from some staple holes where I ripped out a couple of funny shelves, then the staples. I can bog those and plan on painting the panelling anyway. I want to try and build a new windowsill for the rear of the van, it is rotten in each corner under the curved windows. I was thinking of making a template out of cardboard or paper then cutting a piece of marine ply to shape before reinstalling the windows. Has anyone else done this? I also want to rip out the old lino, there is the tiles that can be seen in photos then an older original one under that. I am wondering whether it might be asbestos backed, I think I need to send some away to get it checked. |
|
Deleted
Deleted Member
Posts: 0
|
Post by Deleted on May 1, 2014 18:21:40 GMT 10
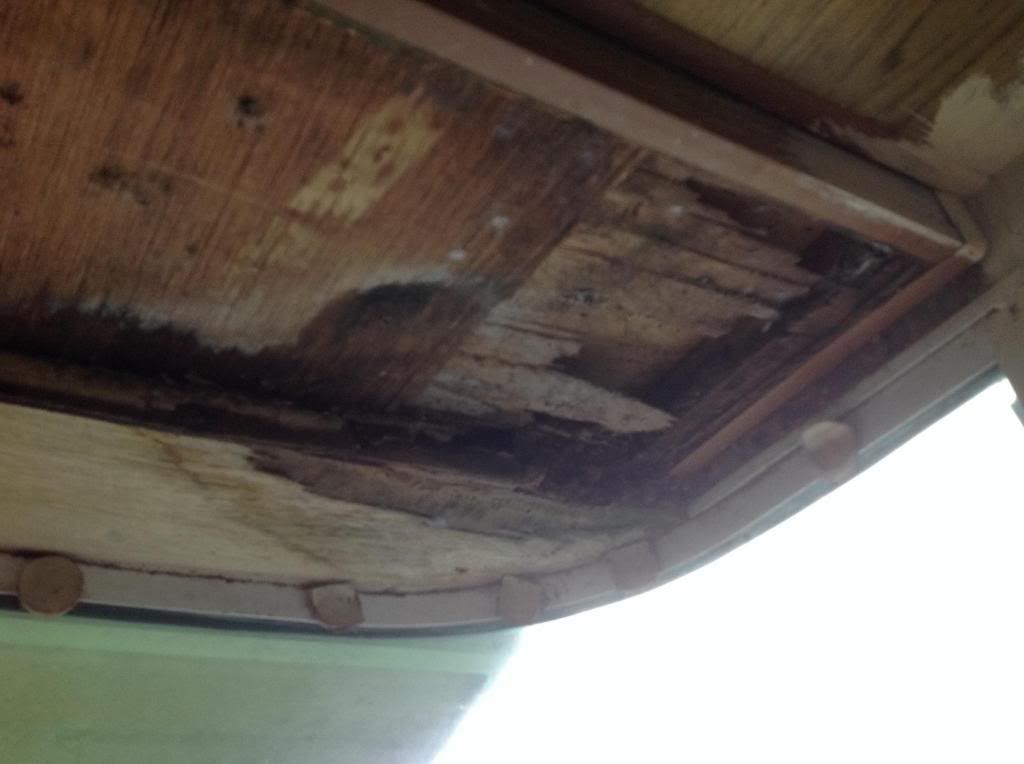 this mess is on the bottom of the ceiling cupboard at the front driver side of the van. I have NO idea what to do about that! |
|
Deleted
Deleted Member
Posts: 0
|
Post by Deleted on May 1, 2014 18:24:53 GMT 10
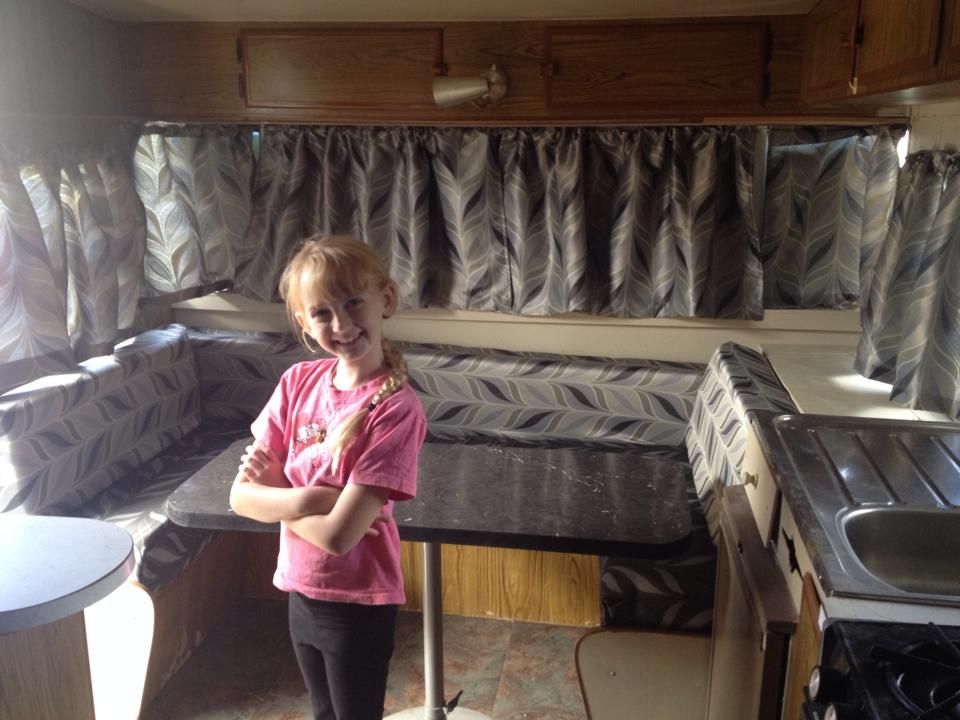 Dinette area not original squabs obviously, I've already chucked them, and the table. I got a telescopic table leg from the guy I bought the van off for $15 and plan on building a tabletop on it to squash down and become a bed base to turn the dinette into a bed for the kids. I thought about adding bunks but that's in the too hard basket lol. The only thing is, the lowest height on the telescopic table leg is too high for the current built in seating (which has turned to weetbix so needs replacing anyway, so I will have to try and rebuild the built in seating but make it a bit higher. |
|
Deleted
Deleted Member
Posts: 0
|
Post by Deleted on May 1, 2014 18:29:24 GMT 10
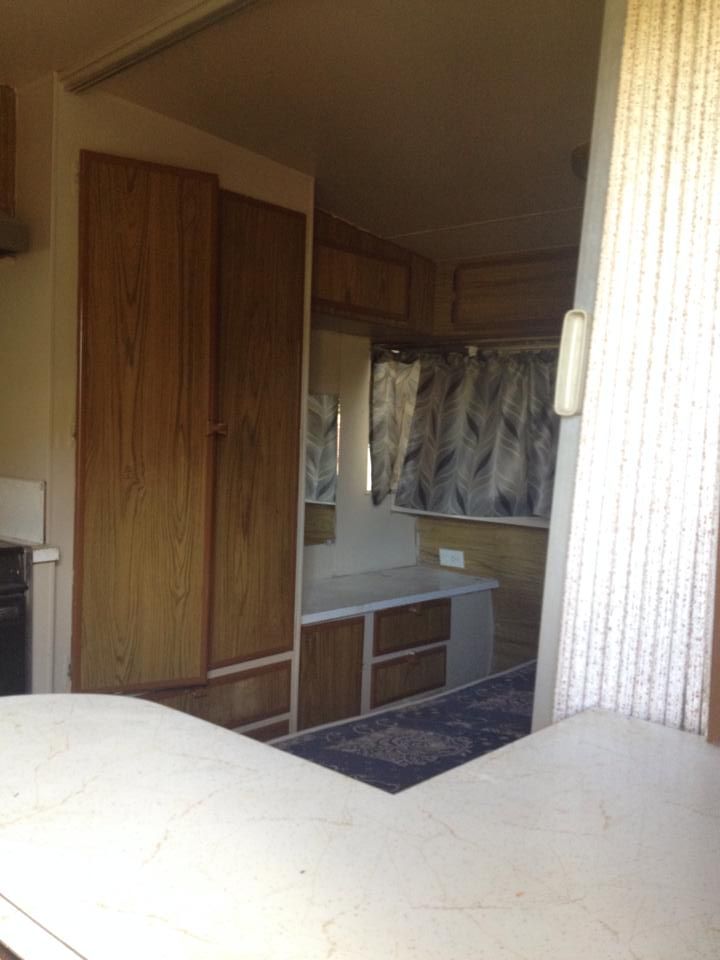 I've ripped out the concertina door and the track it sat in, and will just hang a curtain if I feel the need once everything else is done. The built in drawers in the back corner of van were all wet inside and turned to mush so they had to go. It is this corner that I've ripped the wall panel off due to leaking. It was raining at the weekend and I could see the water running down the inside of the van cladding. Haven't actually been up on a ladder to look for the leak yet but I think it must be coming from the join between roof and wall. |
|
|
|
Post by murray on May 1, 2014 18:39:28 GMT 10
It is quite bendable even without being heated so I am hoping once I have cut it to size I can bend it into the curved top and bottom aluminium frame then I can get the sides back on to hold it all in place (and find some new window rubber!) I will look forward to how you go with the perspex windows . If it won't bend far enough you could apply some heat with hairdryer or heat gun where you want it bent . I need to make a few myself and have found a few youtube clips how to do it . Good luck with it all Cheers Murray |
|
Deleted
Deleted Member
Posts: 0
|
Post by Deleted on May 2, 2014 7:55:21 GMT 10
Thank you Murray...I thought it was worth a crack as the local plastics factory was going to charge me $200 per window...outside of my budget! Thanks for the heating tip, I do have a hairdryer (lol of course, I am a girl!) and also a heat gun (I am a girl with powers tools!) I'm going to give it a go tomorrow when my husband is home to help me, I think it might need more than 2 hands! Will let you know how I go, and I will also check Youtube, thanks for that tip too  cheers Karen |
|
Deleted
Deleted Member
Posts: 0
|
Post by Deleted on May 2, 2014 12:48:55 GMT 10
argh I just noticed that some wooden trim around the 4 seasons hatch had bubbling paint on it and it didn't look like this when I inspected/purchased the caravan. I unscrewed it only to find rotten and wet ceiling lining underneath  I am a bit gutted, I think the guy who sold me the caravan just covered up all the damp damage with extra boards and paint. Two weeks later and it's starting to show through again. Now I'm back to thinking strip the whole lot out and start again. All I really wanted to do was repaint and decorate a caravan not rebuild one  |
|
Deleted
Deleted Member
Posts: 0
|
Post by Deleted on May 2, 2014 12:55:22 GMT 10
Last weekend we purchased a Viscount Supreme 1978 for $2300 with a blue slip. We went and got it registered straight away. It was a bit of a mess inside but I thought it was nothing I couldn't manage to tidy up with some cleaning and painting, decorating etc, something I love doing. This week however, especially today, I've found quite a lot of damp damage which was covered up with extra boards/trim and paint by the seller. I was toying with the idea of gutting it and relining it earlier in the week, then went off the idea because I am scared of whether I can do the work, and of overcapitalising on my project. Now I'm back to thinking in order to do a proper job, I am going to have to. I think I am looking to other members here for support, encouragement, answers, suggestions and advice. Any or all of that would be greatly appreciated  cheers Karen |
|
|
|
Post by 2lateagain on May 2, 2014 17:09:54 GMT 10
Karen, I can tell you from personal experience that to reline/rebuild is not cheap, we have just about finished a 1978 Millard. It was either dump it or have a go and we decided to have a go. It has taken about 2 years virtually full time, but we stripped ours right down to the chassis as other than the chassis and the frames for the walls there was nothing worth saving. Have a look at our van in the hall of fame under 1978 Millard 16ft M54550. It shows a lot of the steps that were taken and might give you some idea, but there is a lot of money needed to complete the job, but we feel that we now have a van that suits our needs instead of one that is considered to suit everyone. There are numerous other vans that people have done the same to, you just have to be committed once you start or it will all be a waste of money and time. Hope this helps a bit.
Graham
|
|
Deleted
Deleted Member
Posts: 0
|
Post by Deleted on May 2, 2014 18:46:05 GMT 10
Wow Graham 2 year full time  , here I was hoping to get mine finished for Christmas this year (maybe not) I can only work on mine probably once or twice a week and I'm up to 7 months and I also stripped mine down to just the chassis and I have a long way to go yet. I better keep the tents ready for Christmas camping then lol.  |
|
 A couple of days ago I purchased a Viscount Supreme 1978 (think it is a 16ft). Chassis number is S88038. We picked it up on Saturday and it has quickly turned into a bigger job...uh-oh! I'm fairly handy, not scared of hard work but I'm not a builder and neither is my husband. I want to learn how to do this and I want to do it right.
![]()
 A couple of days ago I purchased a Viscount Supreme 1978 (think it is a 16ft). Chassis number is S88038. We picked it up on Saturday and it has quickly turned into a bigger job...uh-oh! I'm fairly handy, not scared of hard work but I'm not a builder and neither is my husband. I want to learn how to do this and I want to do it right.
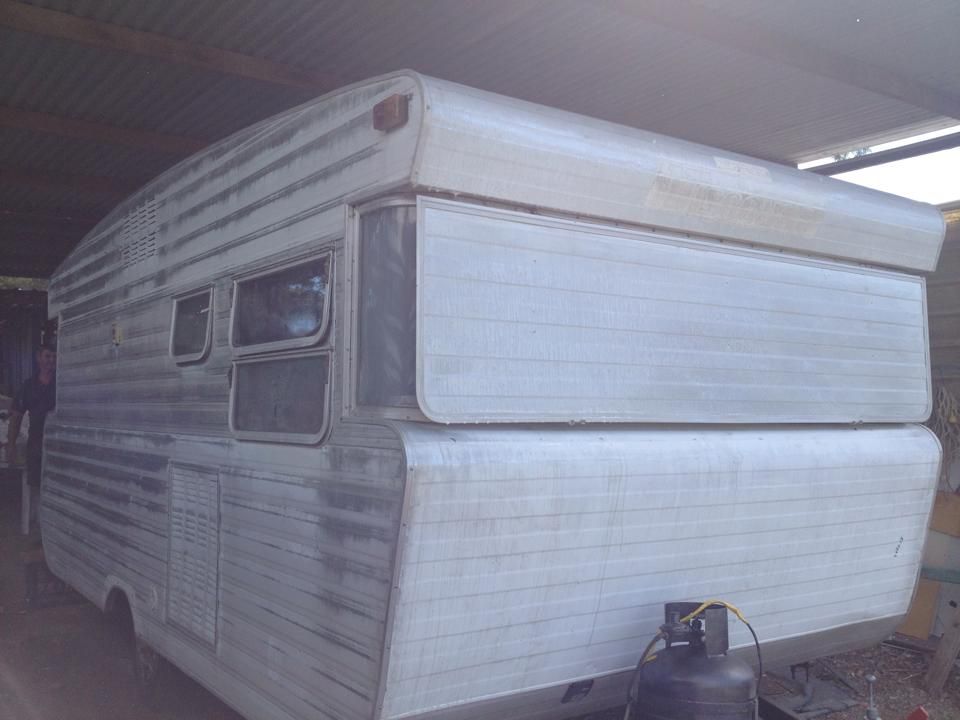


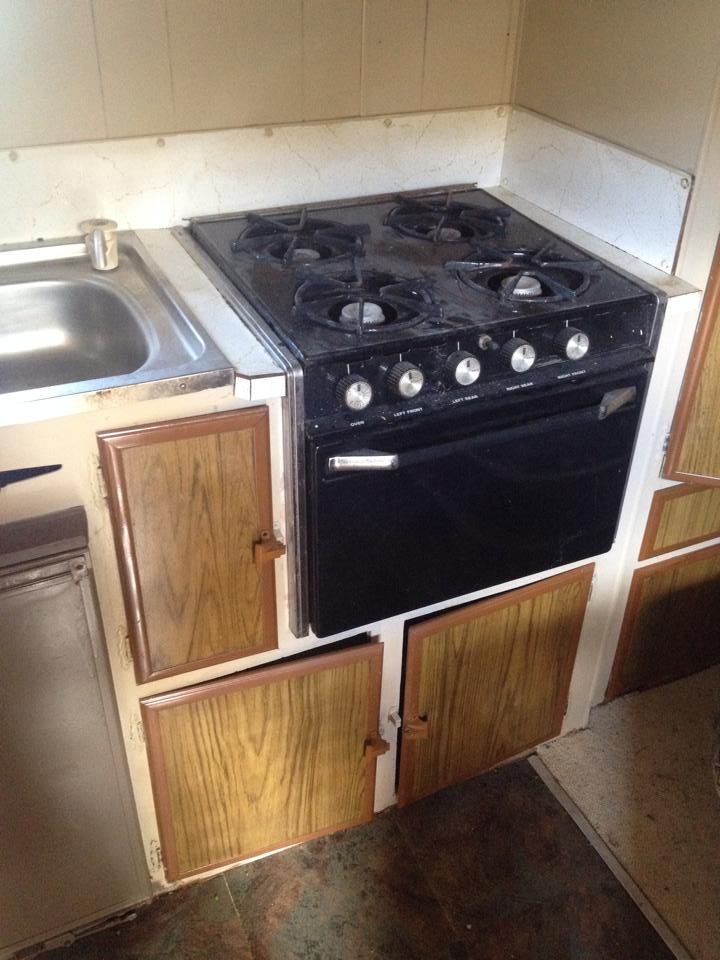
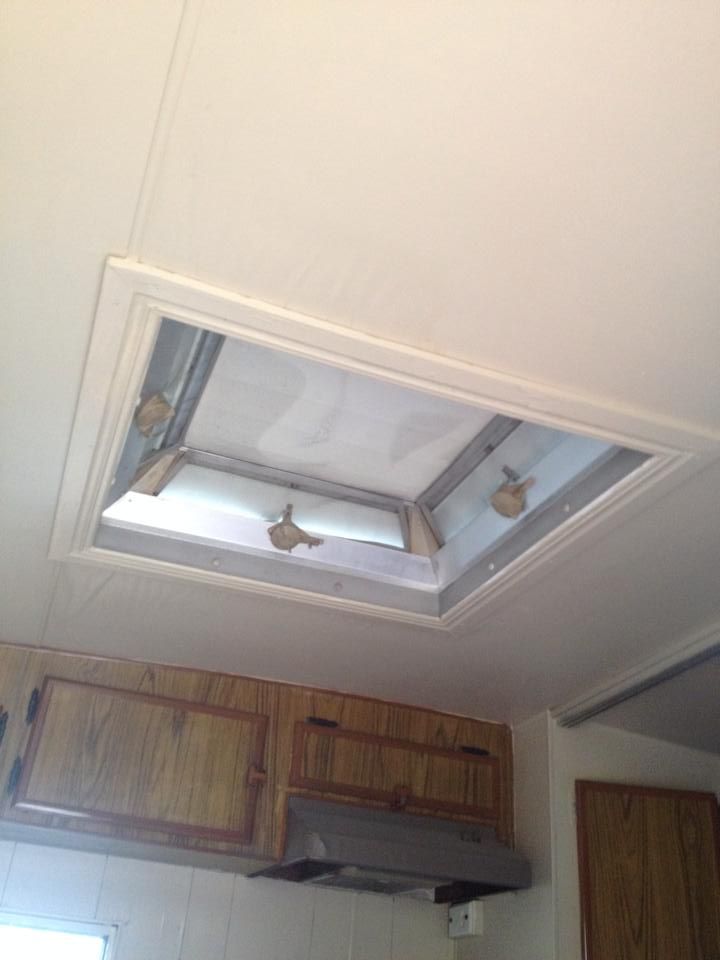
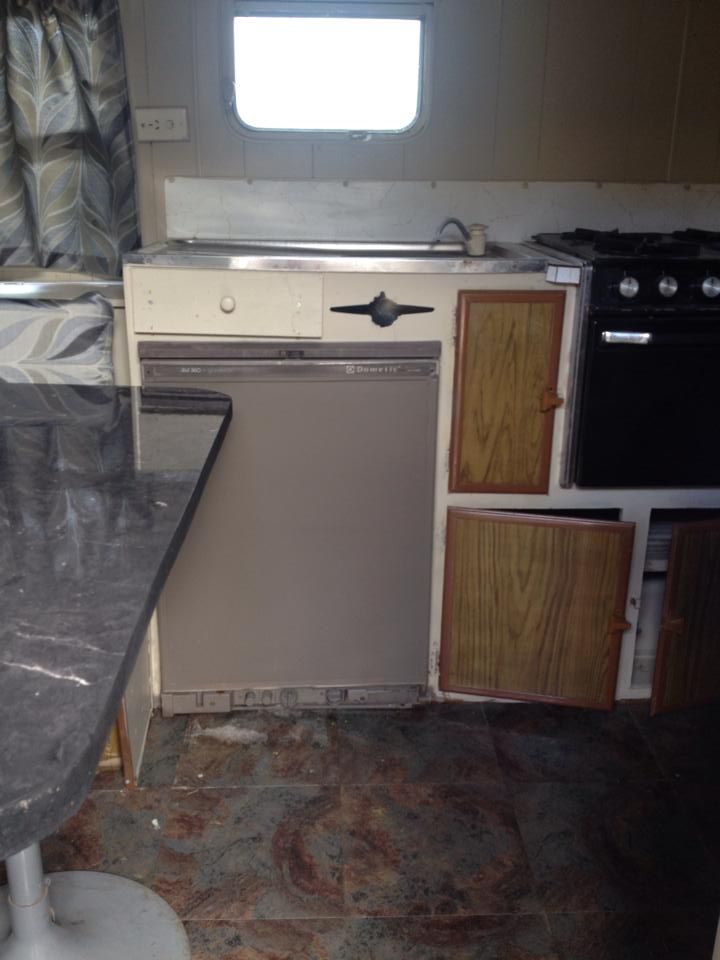
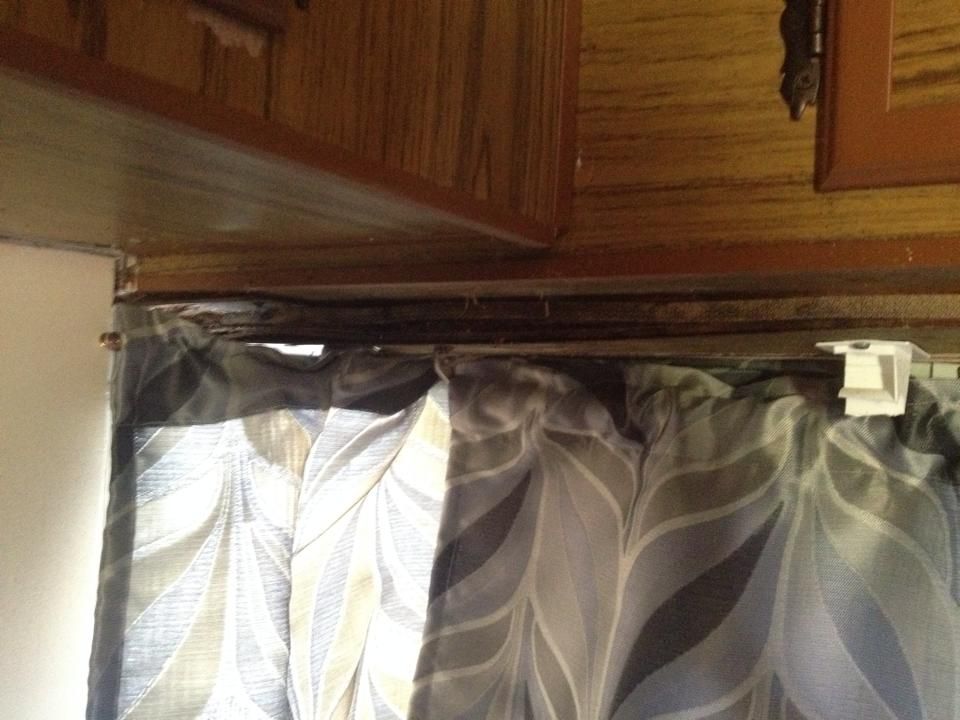
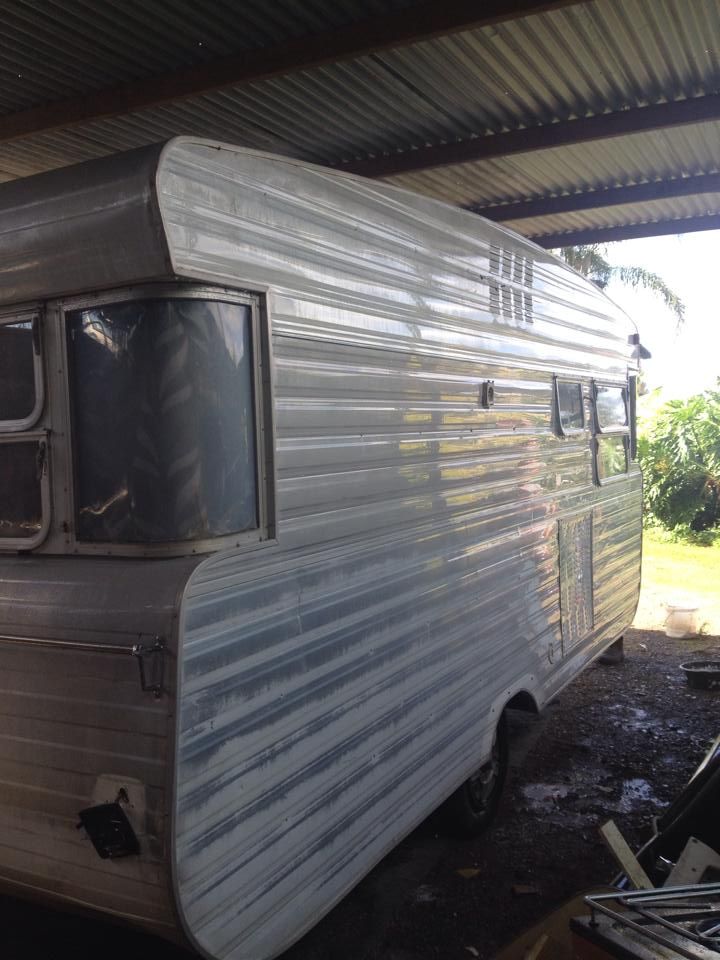

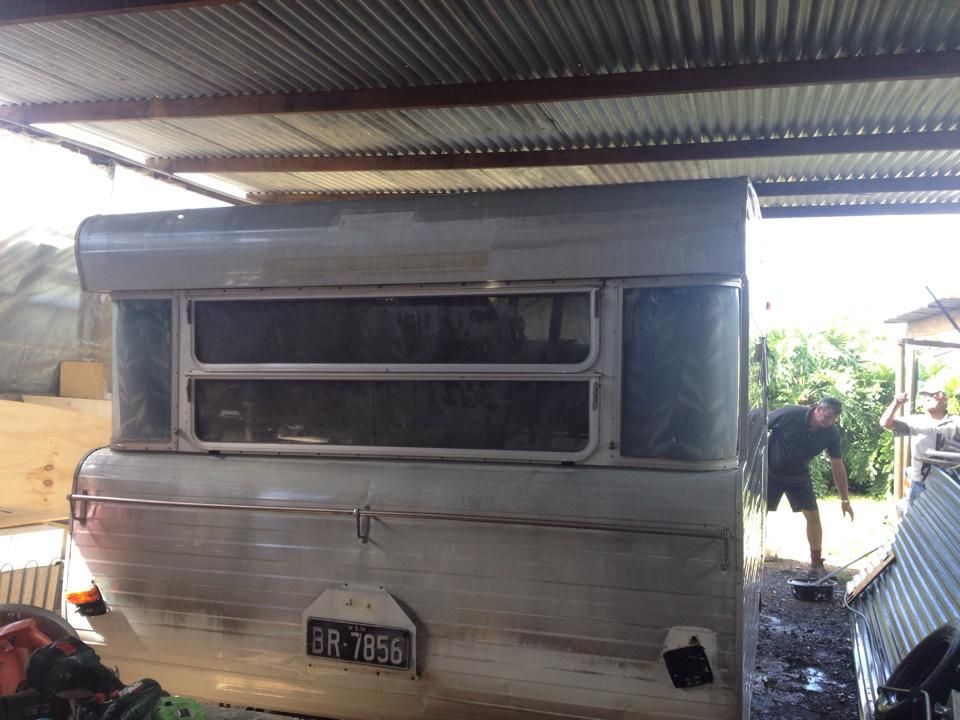
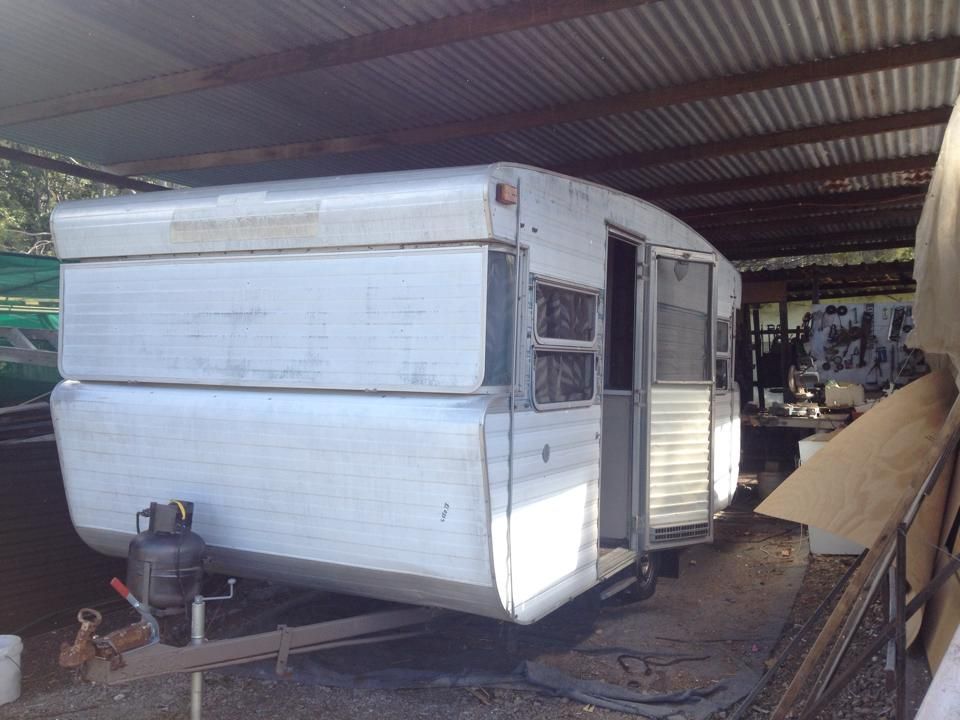
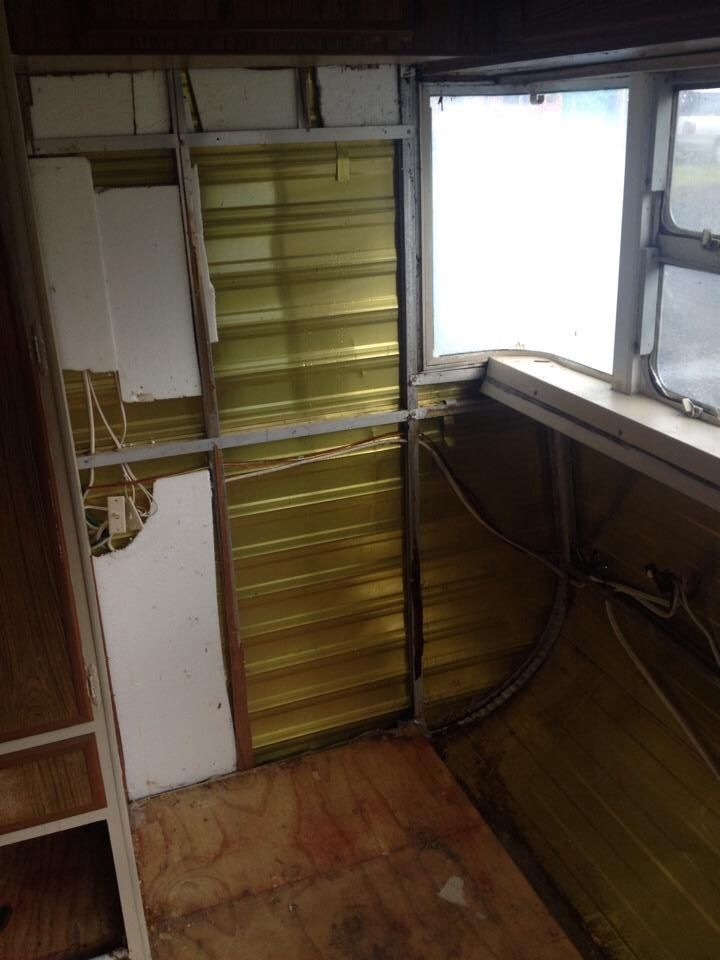
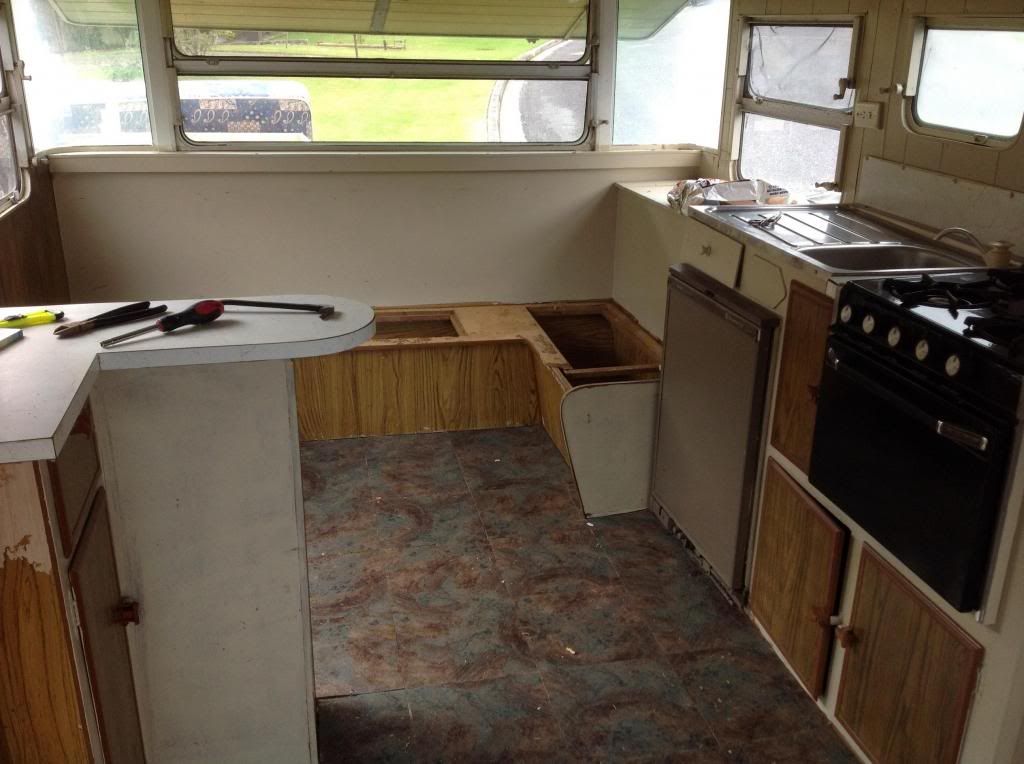


 I am a bit gutted, I think the guy who sold me the caravan just covered up all the damp damage with extra boards and paint. Two weeks later and it's starting to show through again. Now I'm back to thinking strip the whole lot out and start again. All I really wanted to do was repaint and decorate a caravan not rebuild one
  , here I was hoping to get mine finished for Christmas this year (maybe not) I can only work on mine probably once or twice a week and I'm up to 7 months and I also stripped mine down to just the chassis and I have a long way to go yet. I better keep the tents ready for Christmas camping then lol.