|
|
Post by 78466noM on May 4, 2016 21:42:26 GMT 10
Re the under floor, I was going to seal mine, the chassis blaster/painter advised against it, he suggested its easy to trap water in, by sealing, leaving it bare leaves it to dry quickly ? Just a thought. never thought about that has been there since 1978 so will leave it thank you for the advise makes a lot of sense  |
|
|
|
Post by 78466noM on May 6, 2016 8:28:39 GMT 10
 Last day off for a while well half day any way had a gallery night for the wife's Tafe class all went well got one side roof down with foam tape second line of defense against water. Mastic will be the first when trims get on. no photo's unfortunately nothing looks too different. have fun will be a little while before i get more done the jungle is calling me for my day off have to tame it back to a lawn, :-D
|
|
|
|
Post by 78466noM on May 10, 2016 10:25:30 GMT 10
I have ordered mastic tape for windows vents and door the same as this post ditzygypsy.proboards.com/post/27250/thread I couldn't use silicon or other types of glue type sealers as my sliding windows need to come out if the fixed window is broken. It was also what was used originally and was still not leaking since it was built in 1978 now the roof a sieve would have kept out more water. I have put closed cell tape on both edges under roof and side so far only one side the plan is to do the other side this Sunday. thinking of putting wider angle in place of j-mold on flat parts of roof to make sure i get all the staple holes . Then was reading about a caravan paint on roof sealant may help to keep air from mastic and dirt and water out of the joins in roof . have fun and be safe . Bruce. |
|
|
|
Post by 78466noM on May 18, 2016 10:49:48 GMT 10
I got a bit done last weekend still looks the same so no photo's but every pop rivet i could find has been replaced over 300 of them didn't think there would be that many but i did use them for roof and top sides instead of staples they hold in aluminum much better :-D now to do a little panel beating and fixing of a few cuts and holes then paint and seal. Looking forward to starting inside . If i can wrangle some extra time onto it it should come along nicely. have fun  Bruce
|
|
|
|
Post by Mustang on May 19, 2016 8:26:28 GMT 10
I got a bit done last weekend still looks the same so no photo's but every pop rivet i could find has been replaced over 300 of them didn't think there would be that many but i did use them for roof and top sides instead of staples they hold in aluminum much better :-D now to do a little panel beating and fixing of a few cuts and holes then paint and seal. Looking forward to starting inside . If i can wrangle some extra time onto it it should come along nicely. have fun Bruce Re-pop rivets: Before I relined the Viscount in the bed area, I was surprised how the rear windows would pop the sealer out on a short run (just getting work done) I used 40 rivets between the sheets. The journey to the Nationals & return..no movement at all, so you can't have too many IMO. |
|
|
|
Post by 78466noM on May 23, 2016 14:07:08 GMT 10
 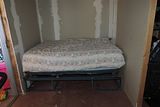 New bed still needs a little welding done with thin small diameter steel bottom base is about 25kgs top about 15kgs then the mattres unable to estimate weight as it is awkward to pick up but i can carry it on my own. It is designed to have a draw in the middle and a place for blankets and sheets top will lift with help of gas struts i know it is a bit on the heavy side but i intend on having two batteries a 9kg gas bottle and a ruffly 10kg as hot water heater on draw bar rest of cupboards will be small pine battens and three ply to keep the weight down a little. It is a little tall forgot to allow for top section but nice and comfortable has been set up in sun room at home very easy to get in and out of and did i mention sooooooooooo soft. Bruce |
|
|
|
Post by 78466noM on Jun 8, 2016 11:32:26 GMT 10
Just picked up the new fridge for van weighs 25kg's a big weight loss from the three way it is also a 12volt with a converter that is 240volt with a cigarette socket makes for an easy switch over use a three position toggle switch with switching for positive and negative traveling and free camping off batteries switch it the other way and run it off the 240volt converter same goes for the 12 volt TV and the under bench 12 volt led down lights. Was off work for a week to do van got a chance to cut patches of aluminum for the holes then it rained and rained so no painting was done now it will be too cold to paint so i will clean edges pull windows and door paint around edges not worried it isn't very good under the edges wont be seen just means i will have a lot of extra work masking up.  On the up side a lot of work got done inside the house so my wife was very happy makes for less to be done after i finish van. Bruce photobucket is having problems at the moment so i will post a photo but if you want to see it just search polycool 92litre fridge we got it at a very good price and is much bigger inside than it looks in pictures slowly the extra weight of the bed is being offset . 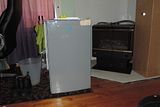 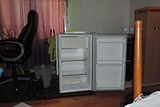 |
|
|
|
Post by 78466noM on Jun 20, 2016 10:36:00 GMT 10
Another wet week end in Sydney nothing done on van but have on order one 30A PWM 12V-24V PWM Solar Panel Regulator Charge Controller and one 200w solar panel. The panel will become the rear window shade. Idea is two fold for that it will shade the window and I don't to worry about holes in roof leaking there are enough holes there now and the wind getting under it while traveling and blowing it off and maybe killing or injuring someone. When I have the extra cash I will pick up one 130amp hour battery. the original plan was for two panels and two to three batteries but reading though here I had a rethink weight is a big factor many people have said one battery has been plenty for free camping it only has to run the 12volt fridge led lighting and very little use of a 12volt pump if for the time being it does need a recharge the car will be set up to supply power to the battery so about 15min at a fast idle should top the battery up if needed later i am going to make a 12volt generator with a small electric start stationary engine and a 80amp alternator from a car I can make an exhaust for the motor to make it a little quieter and it doesn't have to run fast with a large enough pulley on motor a four or five horsepower motor will push in full charge at low rpm.The electric start is so motor can be set up out side and operated remotely from inside the reason for this setup is if it is a 240volt generator outside and it gets wet while running there is the risk of electrocution and the weight difference is massive for an electric start generator and cost is prohibitive when you factor in cost of Ute to cart it around. Plus i have a 900w two stroke generator and it has a large whipper sniper motor to run it the generator piece on its own must be about 30kg. Have fun am slowly getting there and have probably seen a few of you on the road( next part is describing vans as it seems like cars the vans have a wide age of enthusiasts ) the oldies always stand out on the highways all the best for your travels Bruce |
|
|
|
Post by 78466noM on Jul 4, 2016 21:15:56 GMT 10
 Off for a week and wouldn't you know it rain tomorrow and Wednesday got a fair bit done today lower front and rear cladding is secured and one molding is half on got too dark to finish it. Now that I am putting back together I can see the the previous repairs have caused a fair bit of damage to the roof edges not covered by the molding I was going to put wider molding on but the right thickness to get the strength is too wide so the extra holes are getting drilled and adding a blind pop rivet with mastic to stop any leaks they are on top of the aluminum square tube I used to replace the wood so should make a strong seal. I am replacing most of the screws with blind pop rivets because they give a fairly even bite down and no thread for water to track down if hole is a little bent or elongated. Have battery for camera on charge hoping to get a fair bit more done tomorrow stuff that you can see done. have fun be safe B ruce
|
|
|
|
Post by 78466noM on Jul 6, 2016 17:53:51 GMT 10
Weather forecast was wrong had a bit of rain but mostly fine and cool. so have now got all molding trims on except lower rear drivers side have to buy or find in my bits and pieces. I have the problem i should have thought of that since I used closed cell foam stripping along both edges of the roof I miss out on the staple holes so i am going to get some aluminum flat bar 3mm thick and use it flush up against the molding with mastic underneath of which i need to buy more I have one left out of twelve. It has been too dark when I have finished to take photos so when I get a chance I will post them. Another big day tomorrow hopefully other than axle and suspension and paint all of the out side should be close to finished then able to start on inside am certainly looking forward to that as big things make it look like something is done other than all the hundreds of little things I have done that are out of site but have to be done to strengthen and waterproof van. have fun and be safe Bruce |
|
|
|
Post by 78466noM on Jul 8, 2016 0:18:39 GMT 10
|
|
|
|
Post by 78466noM on Jul 11, 2016 9:36:19 GMT 10
Finished putting the aluminum flat down the drivers side of van shouldn't leak there now knock on wood this was the worst side as for some reason they went mad with the staple gun and a few dent on the edges from I assume looking at it a few tree branch falling on it over time I first thought someone walking on it but on closer inspection I believe it would have to be tree branches it is probably what caused the leaks that rotted the timber that the roof was fastened to then someone put silastic then when that stopped working another layer of silastic then after that put bitumen tape down both sides may have worked for a little while but dirt got in under the low section on the high sections it is impossible to remove so has stayed there. I can't see it so paint over top won't hurt.
Haven't got photos at the moment but drill pop-rivet gun and me were covered in mastic, air hose and ladders had blobs of mastic on them. So when I get to start the other side I will take photos of other side before I start may be a couple of weeks back to work and a family birthday this Sunday.
The zbond butyle mastic from caravans plus is dryer and harder to get out of gun but is very sticky the shelley's stuff is thinner.I put edge molding and am confident that the shelly's worked as it came out the edges and inside it had worked its way into the high bits of profile where the zbond is ideal for what I am with the flat.both i think are excellent products .
have fun and be safe Bruce
|
|
|
|
Post by 78466noM on Jul 17, 2016 18:01:28 GMT 10
|
|
|
|
Post by 78466noM on Jul 20, 2016 10:04:27 GMT 10
arrived home from work in the early hours and we had a steady rain perfect time to check van and we have two leaks one is a seam on the edge was hoping I had gotten it pulled together enough but didn't. Not leaking to drip on the floor just enough to wet the end of a rivet better to find now than later with the insulation in it would have become a wick and that tiny wet spot on end of a rivet could become a giant wet spot. Second one is the four seasons hatch not the seal but from the top corner that I read in the section for them on this site is a blocked gutter so I was hoping to pull this off and clean it up as one of the last jobs while the van was being used has now jumped the cue though I can still start on interior before just can't do flooring. have fun and be safe Bruce   |
|
|
|
Post by 78466noM on Jul 22, 2016 18:26:39 GMT 10
Had to move van to get rid of a tree all done now van can now park closer to house leaves a decent space to get mower etc out . so too a couple of pic just with phone so quality may not be the best . 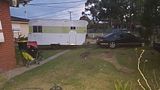  have fun and be safe Bruce |
|
|
|
Post by Mustang on Jul 22, 2016 18:53:56 GMT 10
Had to move van to get rid of a tree all done now van can now park closer to house leaves a decent space to get mower etc out . so too a couple of pic just with phone so quality may not be the best . have fun and be safe Bruce Your pics are very small. If you are using an outside host it is easy to enlarge your image. |
|
|
|
Post by atefooterz on Jul 23, 2016 0:00:16 GMT 10
They are clickable thumbs Mustang. Heya78466noM does photobucket have an option for thumbs size? eg 150pixels 200px 350 etc? ( before or after you have uploaded). I like the 350pix as for most views on a decent screen it is big enough, unless you are really needing to see detail not described, or a general sticky beak.
|
|
|
|
Post by Mustang on Jul 23, 2016 18:27:21 GMT 10
|
|
|
|
Post by 78466noM on Jul 24, 2016 11:16:07 GMT 10
Yes atefooterz I forget who told me in photobucket when saving link choose img thumb and that lets the thumb size pic into thread that when clicked on takes you to photo in photobucket. If you are out with weak WiFi or dial up if that is still around the thumb still shows up a little detail and saves waiting for ages for pic to load or not .
have fun be safe Bruce
|
|
|
|
Post by 78466noM on Jul 24, 2016 11:23:42 GMT 10
<a href="http://s1075.photobucket.com/user/bruce_brown3/media/20160722_173003_zpspcyqhhw2.jpg.html" target="_blank"><img src="http://i1075.photobucket.com/albums/w437/bruce_brown3/th_20160722_173003_zpspcyqhhw2.jpg" border="0" alt="if only it was ready photo 20160722_173003_zpspcyqhhw2.jpg" style=""></a> this is a html thumb I see html thumbs don't work  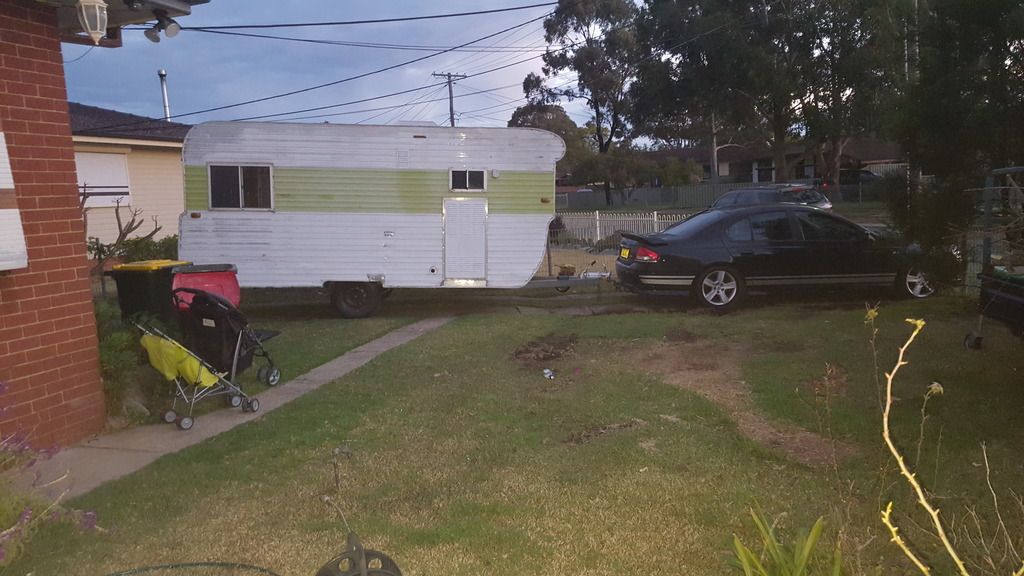 Edited by Moderator. |
|
|
|
Post by atefooterz on Jul 25, 2016 0:00:58 GMT 10
Ahh Bruce on forums you need to post BB Code not HTML or in our speak, look for things that have [bizzo]inserted what you wanted [/bizzo ] NOT the <bits> etc <e=mcSquared % bits > ! I have avoided photobucket for years,mostly as no thumbs option and not only slow loading but rather expensive MB visits to threads ( with mobile internet) with pages having lots of the same pics seen last visit,each visit,to see new stuff. Plus pics randomly turn into frogs after a time, even just 2 year ago in Peter92 thread. Glad to see the bucket catch up with what others have been doing the last 10-15 years |
|
|
|
Post by 78466noM on Aug 15, 2016 0:11:40 GMT 10
|
|
|
|
Post by 78466noM on Aug 30, 2016 22:22:16 GMT 10
I have finally started putting the conduit in roof for lights and light switches. As plans for my time off have withered away I had four days off now just one day to go first job was fix heater in falcon should take about 6 hours I allocated 9 hours 20 hours of work later car back together heater still not fixed. Glad the van hasn't been as stubborn though the bearing cases in the new brake drums were a pain to remove the rest has been just a few hick ups in cutting timber to short or ordering wrong parts axle size again wrong measurement my problem.
So tomorrow being home alone I hope to get insulation in pic's taken as I go and roof ply in place.
I got the ply from bunnings today I wish they had the same product when I brought the last lot that was 4mm hardwood the new ply I have is 3mm pine so the ones I had marked up for the roof will be used for furniture and the ones marked up for sides will stay for sides as i carefully took off what was left of the sides and used them as templates which gives me the curve for the windows and door I am going to take them out they need to be resealed any way and cut them out with sheet attached to wall with my measuring powers I think that is the easiest way for me to get it right ruin two sheets and I would have to replace all of it as bunnings no longer sells what I have and 1mm is a big difference side by side.
hope to have some photos up tomorrow so until then have fun and stay safe Bruce
PS any one in the Sydney area wanting a unused Trailer Axle 45mm Square X 90 Inches Natural Finish*** rated at 1500kg's I have one for free looking for a good home
|
|
|
|
Post by 78466noM on Sept 1, 2016 9:56:35 GMT 10
|
|
|
|
Post by atefooterz on Sept 1, 2016 19:34:13 GMT 10
Why not more alum beams & so much timber? Just a choice question not suggestion. Those almost cheap,self piloting TEK screws are awesome.. soo 1990s haha. |
|


 Last day off for a while well half day any way had a gallery night for the wife's Tafe class all went well got one side roof down with foam tape second line of defense against water. Mastic will be the first when trims get on. no photo's unfortunately nothing looks too different.


 Off for a week and wouldn't you know it rain tomorrow and Wednesday got a fair bit done today lower front and rear cladding is secured and one molding is half on got too dark to finish it.


