|
|
Post by thehohars on Feb 5, 2018 9:31:06 GMT 10
In with the new - including a modern mains inlet with check valve so I can simply whack a hose in it at home or those rare occasions we end up in a Caravan park. Sureflow pump with accululator - which takes the pulses out of the watervflow at the tap and allows proper low volume running of the tap turned right down low if you need to - made a big difference and very happy wih the flow rates. 👍 Nothing fixed down yet until I'm 100% happy with the performance and that it doesn't leak anywhere. 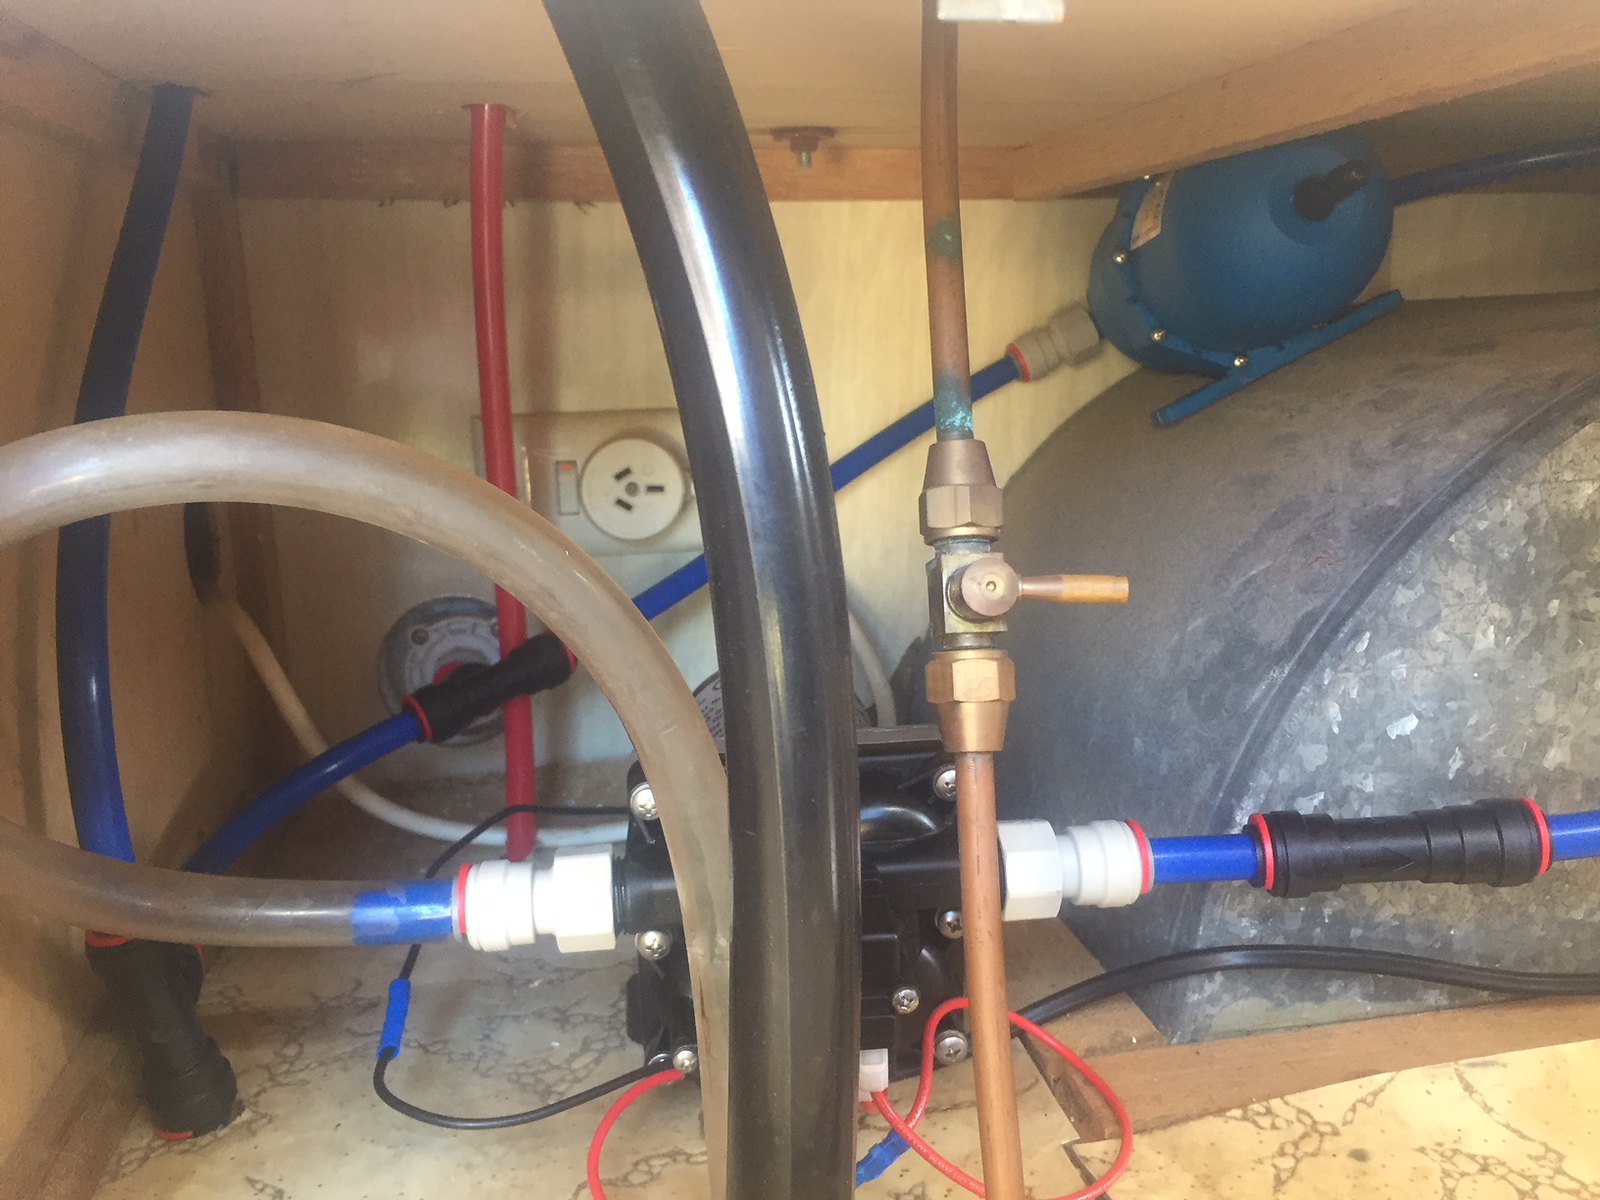 BBEA1034-BE8E-494C-A937-BC8473264F0A BBEA1034-BE8E-494C-A937-BC8473264F0A by Gavin Gregory, on Flickr 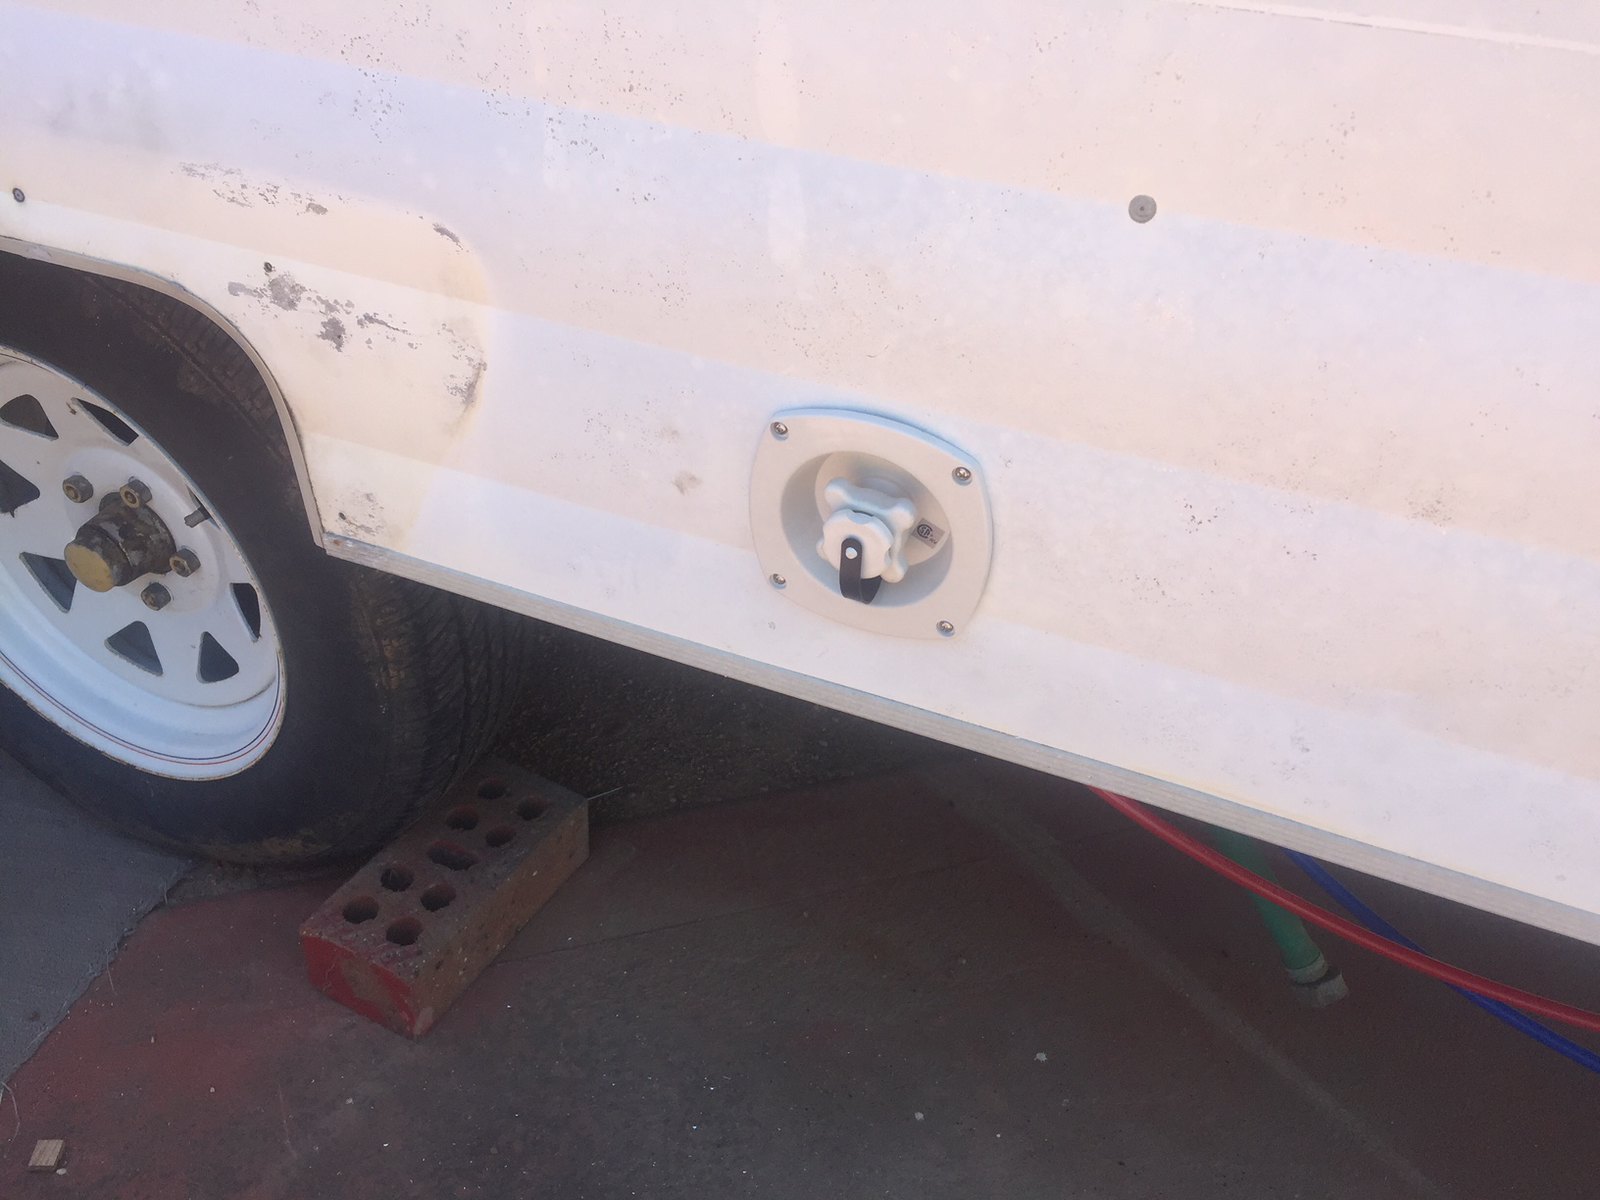 794F5E46-397F-40B0-A49F-540787E23BA7 794F5E46-397F-40B0-A49F-540787E23BA7 by Gavin Gregory, on Flickr Ran new lines to where the new HWS will go -which is where the old one was. Left a large loop as I don't know where the connection points are yet (I'll have the HWS when we go out on our first trip - it's being bought down from Qld by some friends). Just need to run a gas line into there as well - once the fridge is out, I'll run that line into the compartment as I won't need gas for the new fridge. 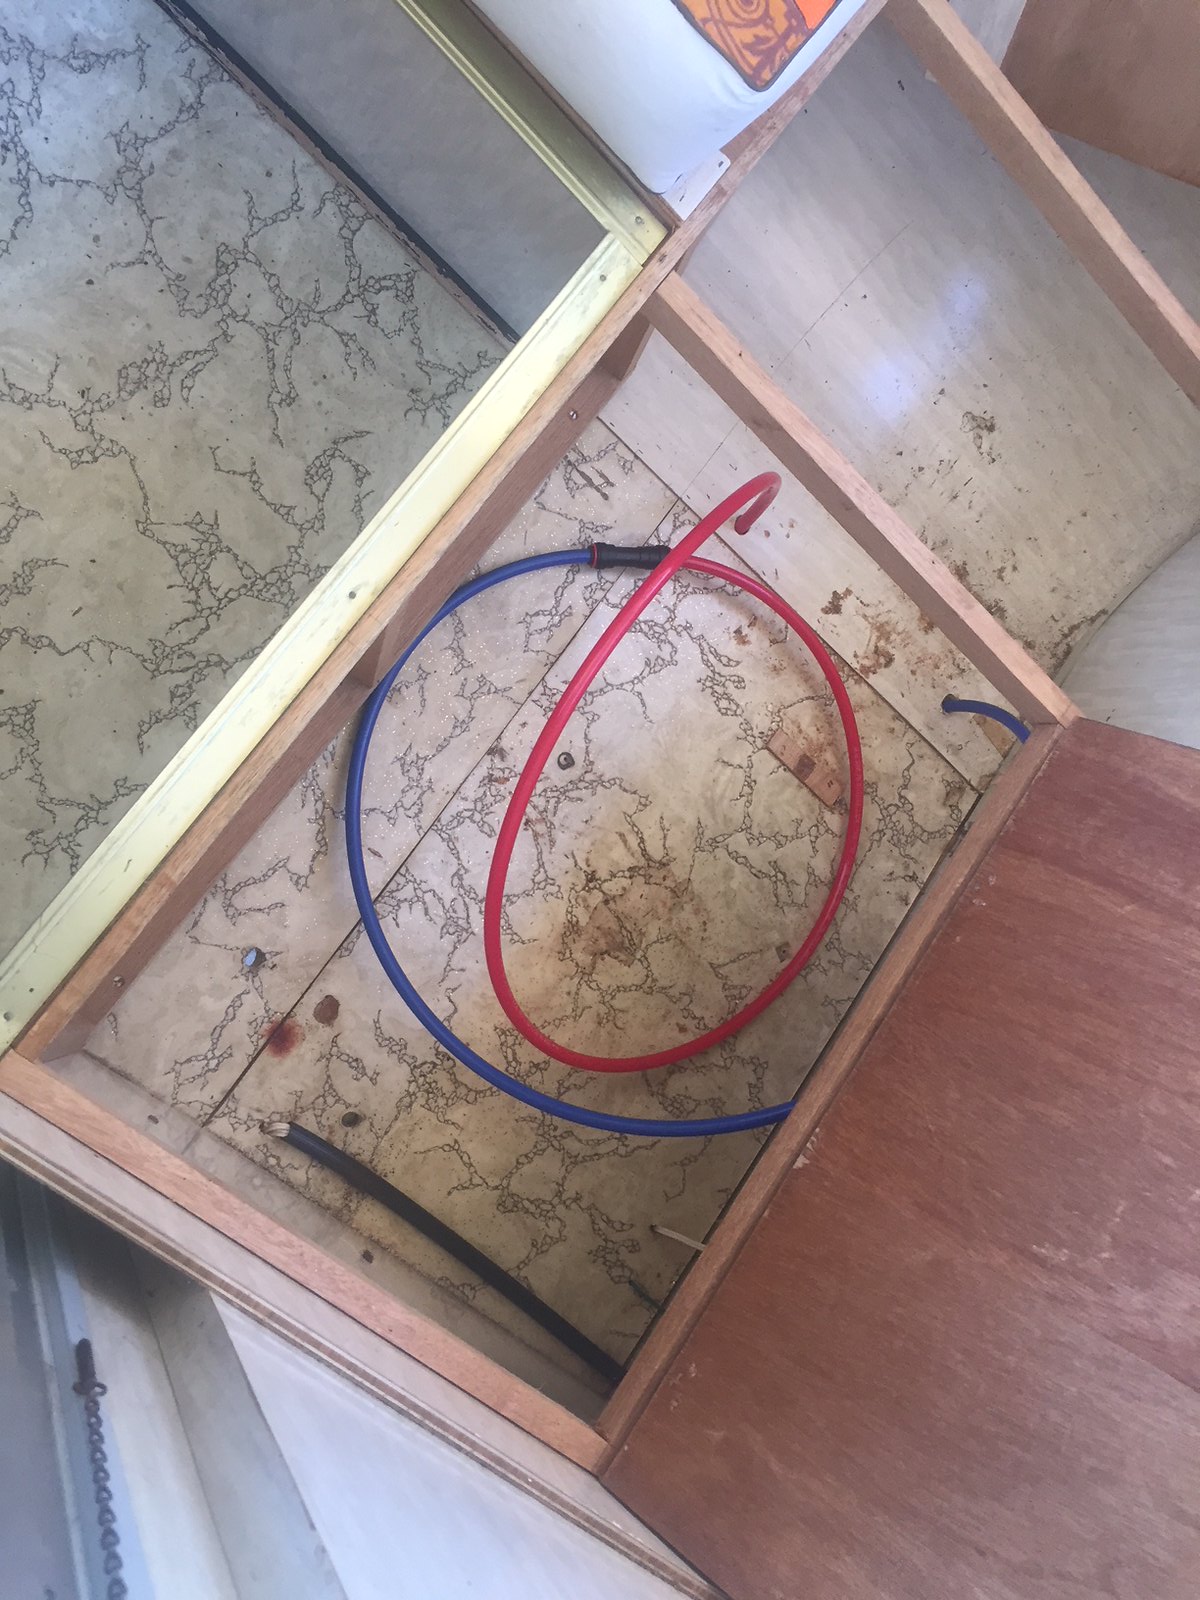 CE604404-AF2B-4212-8A11-3A7BA5AAB675 CE604404-AF2B-4212-8A11-3A7BA5AAB675 by Gavin Gregory, on Flickr As the shower isn't anywhere close to being finished, I haven't run the water for this - it will be easy to bang in a T piece in the hot and cold when I get to this. Well when you come and stay with us, we stayed at yours so we need to return the favor, we have a 15 amp outlet and water outlet as well as black and grey water dump points so you will be sweet trying it all out  . Haven't got the the Hot Water system yet but ranga's in laws live not far from here so we should see it soon. Looking good will post some pics of ours soonish. Mrs hh |
|
|
|
Post by snoops on Feb 5, 2018 18:13:25 GMT 10
|
|
|
|
Post by snoops on Feb 5, 2018 18:51:01 GMT 10
Fridge is sold. 👍😊
|
|
|
|
Post by Mustang on Feb 6, 2018 7:57:11 GMT 10
Looking Good there Snoops.
We have the same lino in the cupboards, but long gone on the ant trail, yours looks good enough to keep!
|
|
|
|
Post by planner on Feb 6, 2018 10:54:42 GMT 10
If there's no takers here, I'll whack it faceplant. Snoops, you've finally relented and signed up? After 5 years of me saying I don't need it, I finally weakened over Xmas, too hard to find any club info without it.  |
|
|
|
Post by snoops on Feb 6, 2018 12:54:35 GMT 10
No, I haven't - was going to get SWMBO to do it for me. 😆
All good now, have sold it.
|
|
|
|
Post by snoops on Feb 6, 2018 15:54:21 GMT 10
Well, new fridge is in. Love the space inside it, much bigger than the old one with the freezer compartment not there. It has adjustable shelves, LED light and room for plenty of beer and wine. 👍  4EA2ACF1-EB35-4C29-AF8E-ABBCBE22219B 4EA2ACF1-EB35-4C29-AF8E-ABBCBE22219B by Gavin Gregory, on Flickr BUT - it is very shiny and black... hmmmm. The old front panel of the old fridge is too small for it, so now have to work out how I make it look more period correct... Not an issue short term, but the looks of it will bug me for sure long term if I can't work out how to do this. Would love to find some panelling the same as what's inside the van... Forgive the hack job on the cupboard above the fridge - I had to cut 20mm out of it and it was very flimsy - will put a trim accross there so no one notices.  0D6BEFD2-69E5-4AEA-8667-9798FE4A488C 0D6BEFD2-69E5-4AEA-8667-9798FE4A488C by Gavin Gregory, on Flickr |
|
|
|
Post by Husky on Feb 6, 2018 16:02:19 GMT 10
Hey Snoops, Lisa wants to know if we can swap fridges.  Your new one goes well with the modern look we're going for in our new van  Looking the goods mate |
|
|
|
Post by snoops on Feb 6, 2018 16:04:46 GMT 10
Thnaks - ummm, no.... 😁
Cold beer on a hot day is more important than its looks at the moment. 😊
|
|
|
|
Post by thehohars on Feb 6, 2018 18:44:56 GMT 10
I got confused. Looking for Mick's van and couldn't find it  Then saw Gav's new Viscount, hooray I found it  Mrs hh |
|
|
|
Post by snoops on Feb 6, 2018 18:50:25 GMT 10
I asked for a title change rather than starting a new thread. This way, when you read the thread from the start, you still get the whooe history.
|
|
|
|
Post by snoops on Feb 6, 2018 20:09:19 GMT 10
Last post before bed - removed the old couch carefully so I can reuse parts of it. You can see by the pic below the issue I have with the ensuite. I knew the wheel arch was there so ready for this. Dunny will be mounted on a step atvthe same height as the wheel arch. My head just touches the ceiling standing on the arch, and SWMBO is 3" under that so no dramas there. I may be able to mount a couple of the batteries under there yet, evening out the weight distribution. Bottom window will be panelled over leaving only the top wondow operational. The shower will be an odd shape - I may put a seat in it yet, will make that up as I go. Will start framing this up Thursday night which is the next time I will have available to work on it, so more progess pics then. 👍 Hoping to keep the cubicle level with the end of the wheel arch so I can fit some shelving and the TV on the end of it - you'll get the idea as I post more pics.  09A1222C-5862-4CE3-9934-114892C00B64 09A1222C-5862-4CE3-9934-114892C00B64 by Gavin Gregory, on Flickr |
|
|
|
Post by snoops on Feb 6, 2018 20:24:28 GMT 10
Anyone know where you can get the pillars, ends and wire that make up the shelf tops to stop stuff falling off them? I'm designing the end cabinet section and will need some of this to make it look the way I want.
|
|
|
|
Post by Husky on Feb 6, 2018 21:29:36 GMT 10
Not to sure about stashing batteries under the en-suite. Though i don't doubt your ability with sausage gun in hand what would happen if you get a leak? Anyone know where you can get the pillars, ends and wire that make up the shelf tops to stop stuff falling off them? I'm designing the end cabinet section and will need some of this to make it look the way I want. not sure what you after got a google pick? heaps of places up here sell shelving |
|
|
|
Post by snoops on Feb 6, 2018 22:11:52 GMT 10
Batteries are waterproof, amleak would only get the bum of them wet - they keep acid in, so will keep water out. 😊 12 volts and water are fine together even if very wet - think about where your car battery is and how wet that gets when you're driving in the pouring rain - trust me, it gets wet. I googled 'caravan shelf edging' and found a pic - which solved my dilema as it linked to Caravans Plus who sell the stuff I need (I did check there but was obviously looking in the wrong spot) This is the stuff. They sell the rod and the pillars.  B3700709-A4EE-40E5-959B-E1F870CB4E11 B3700709-A4EE-40E5-959B-E1F870CB4E11 by Gavin Gregory, on Flickr |
|
|
|
Post by atefooterz on Feb 7, 2018 8:01:30 GMT 10
How much gap on the fridge facia? contact it on & laminate on a wider brushed alloy boarder, that will match the vibe & just be wider than the old. Any more than 25mm it just becomes a trendy "shaker style" mod.  |
|
|
|
Post by snoops on Feb 7, 2018 18:15:41 GMT 10
That's a great idea - never thought about trying to redo the boarder but thats workable I think. 👍😊
|
|
|
|
Post by snoops on Feb 7, 2018 18:25:59 GMT 10
Not much done today, it got quite warm quite quickly today here, so not condusive to spending much time in it tonight. Got the framing started though and the platform made for the toilet. All fits well and my head just clears the ceiling when I'm standing on it, so all good there. I'll make the front frame next but only dry fit it with screws until I have the panelling all done in the ensuite - This isn't planned until after Corowa, I'll only have time to get the toilet sorted for this first trip. I might just staple cardboard or something over the frame for the time being too. Got a dozen things still to come in from ebay so it's like Chistmas every time I get a text saying something is in the Parcel Locker. Got some cable and Phillips LED light globes today. 😊 Gone to 8 watt globes this time - I used 6 last time but found them just a bit dim to read by, so see how these go. The 12 volts to the lights is all working too - I was originally told it had no 12 volt electrics, but it does and it all works. I have a little mod planned for the 12 volt side of the light fittings - stay tuned.... There will also be up to 4 lamps (If I can find more of what I'm after) as well as some cupboard lighting in certain areas and lighting above the stove and sink, but waiting on more deliveries before I can do any of this.  11D3D494-D3F5-4D48-A355-30E71EC33E32 11D3D494-D3F5-4D48-A355-30E71EC33E32 by Gavin Gregory, on Flickr |
|
|
|
Post by Mustang on Feb 8, 2018 9:04:29 GMT 10
Re: Brass Rail,
I looked all over the net for this stuff, was about to import from Italy when this popped up from CP, they certainly had the line well hidden!!!
|
|
|
|
Post by atefooterz on Feb 8, 2018 16:46:53 GMT 10
Anyone know where you can get the pillars, ends and wire that make up the shelf tops to stop stuff falling off them? I'm designing the end cabinet section and will need some of this to make it look the way I want. Remember the name "brass fiddle rail", i did not understand what you were on about, figured it was a Viscount thing like the round corner windows   |
|
|
|
Post by snoops on Feb 8, 2018 19:02:42 GMT 10
Well, took a deep breath, read the instructions (yeah I know right!) measured everything 3 times, then took the plunge...  479E00D5-DA3F-48EF-8F28-C403F733C0E3 479E00D5-DA3F-48EF-8F28-C403F733C0E3 by Gavin Gregory, on Flickr First look inside the walls - there is insulation in there of sorts, enough to keep the condensation at bay. Door installed but not sealed in yet, just dry fit. Got to say this door design is a bit crap to be honest - the interior trim is only designed for wall thicknesses up to 25mm - the viscount is over 10mm thicker than that somno interior trim - no big deal, but modern vans must be quite thin... Also, I can't work out how the cut out section you reuse formthe door infil is supposed to be secured in the door -the trim that is supposed to hold it, fits in a recess outside where the panel fits - I'll have to glue it in I suppose but would have thought it would have been better than it is.  AC58652D-C0F0-464E-B964-695143819DBB AC58652D-C0F0-464E-B964-695143819DBB by Gavin Gregory, on Flickr Another thing that annoyed me is where the hole finished inside - I have checked the measurements again and they are all correct, but with this model toilet there is a gap left down the bottom. Again no biggy here as I have new interior panelling to install and I can cut the hole a good 20mm smaller on this side and not interfere with getting the cassette out.  CD7F9787-E26A-488E-BCAD-A3FE3FCDC810 CD7F9787-E26A-488E-BCAD-A3FE3FCDC810 by Gavin Gregory, on Flickr Again, working out how to secure the toilet into position is a complete mystery. Looks like the only way will be when I put the side wall up and seal around the edges to waterproof it. Anyone done one of these before? Also another pressy turned up - a cheapy ebay diesel heater. Time will tell how good it is or isn't but I couldn't justify spending $1000 plus for a name brand unit, I just don't see the value there like a lot of other caravan equipment. It came with a 10 litre tank but not sure where I can fit that yet.  378F8AF6-CDB8-4105-A5B7-010EA421602B 378F8AF6-CDB8-4105-A5B7-010EA421602B by Gavin Gregory, on Flickr |
|
|
|
Post by thehohars on Feb 8, 2018 19:22:01 GMT 10
Those toilet doors are a nightmare on classic caravans, just ask Harry, they are for straight panels and we all know we have none of those, we did however put a composite sheet in the door panel to save frustration.
Mrs hh
|
|
|
|
Post by thehohars on Feb 9, 2018 7:32:28 GMT 10
|
|
|
|
Post by Husky on Feb 9, 2018 7:58:38 GMT 10
That looks pretty neat HH. i know its great to buy and install items it's made things so much quicker on the dog float, but as you found snoops, modern day stuff is made for modern day vans. Time is short i know but custom is the way to go with the old girls. I remember back when i did the battery door in the Scenic, one of the other guys in the club sent his van off to get two doors fitted on the outside to access vacant space behind his kitchen. Cost him $400 - $500 for them to supply and fit two doors which ended up looking like crap. When he saw mine his like "How much did that cost you" so while trying not to burst out laughing at his misfortune (he is a egotistical prick anyway) i said "made it out of scrap so nothing.  To jog your memory |
|
|
|
Post by snoops on Feb 9, 2018 14:55:03 GMT 10
Well all my ebay items showed up today to allow me to do the electrics the way I want. Started simple and thought I'd convert one of the light fittings to LED globes. New Phillips 8 watt LED 240 globe fitted with standard 9 watt auto globe for the 12 volt side - very dull at night for the power input. 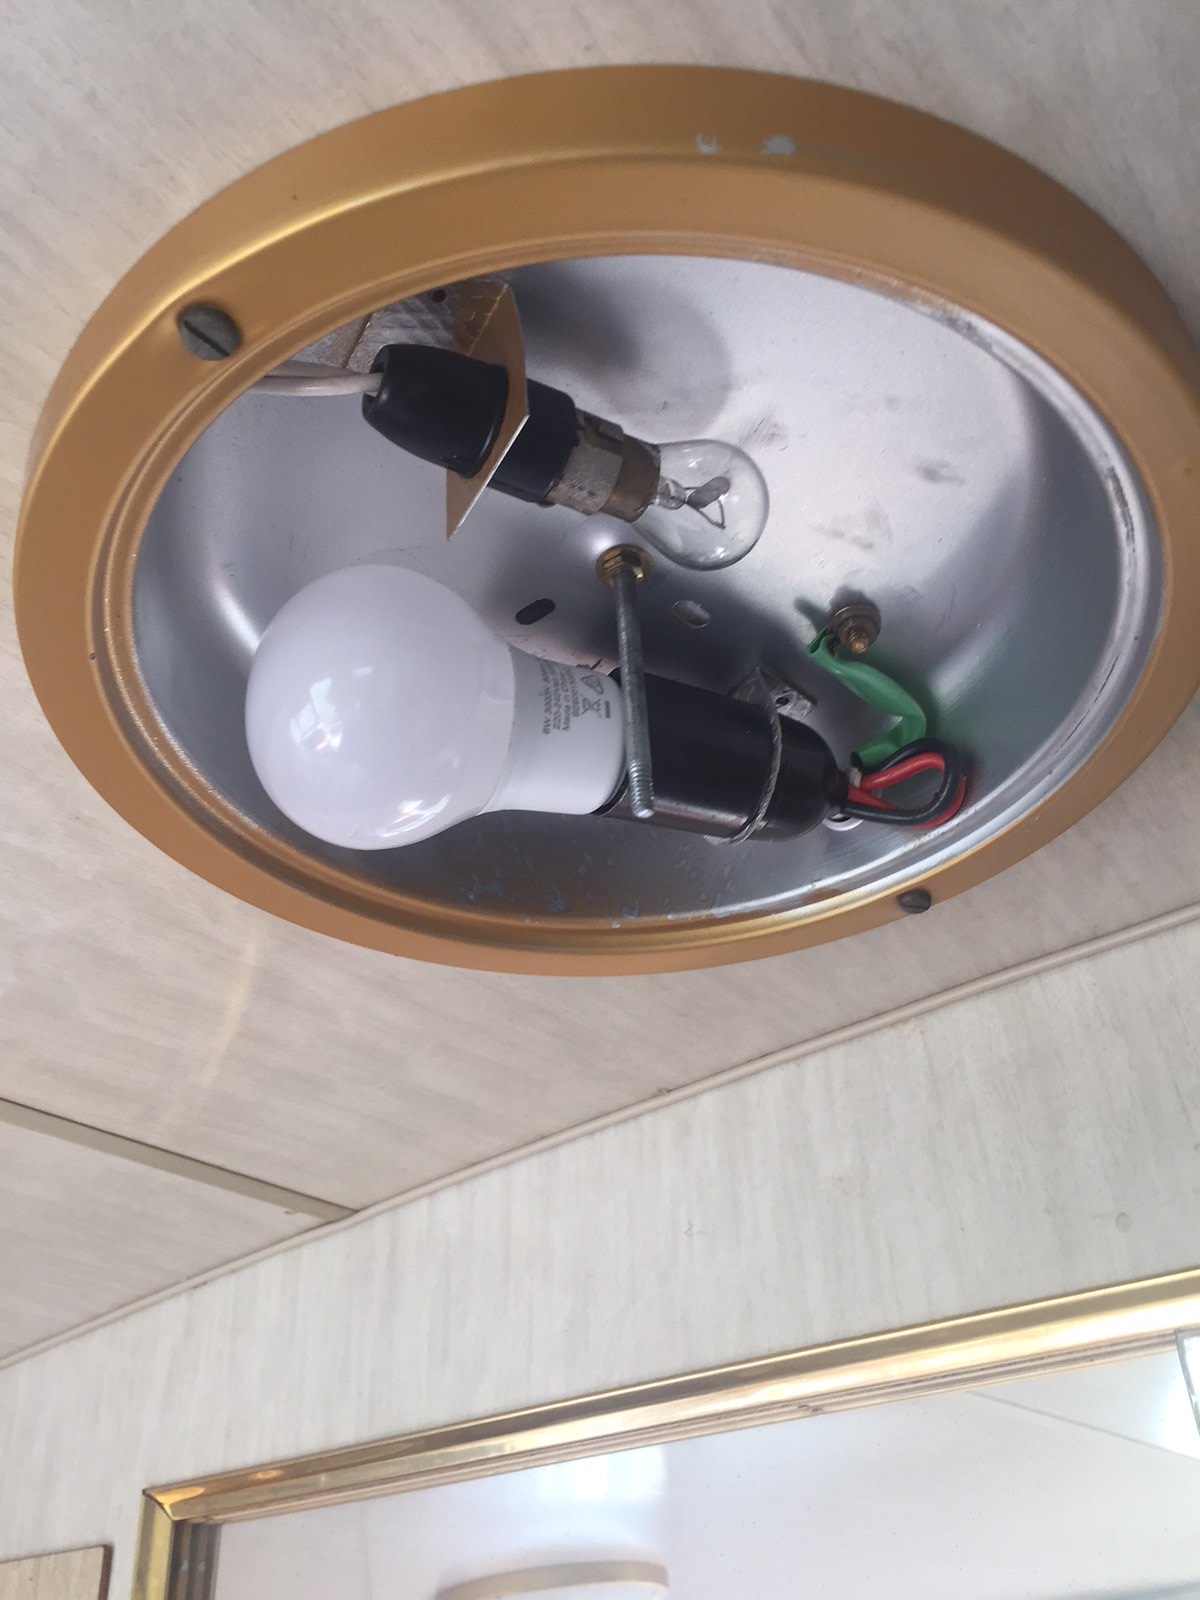 40640D4D-1289-432E-93BF-F6129C5C2B8D 40640D4D-1289-432E-93BF-F6129C5C2B8D by Gavin Gregory, on Flickr So, here's what I did. Removed the globe holder and ran an LED strip a couple of times around inside the fitting. 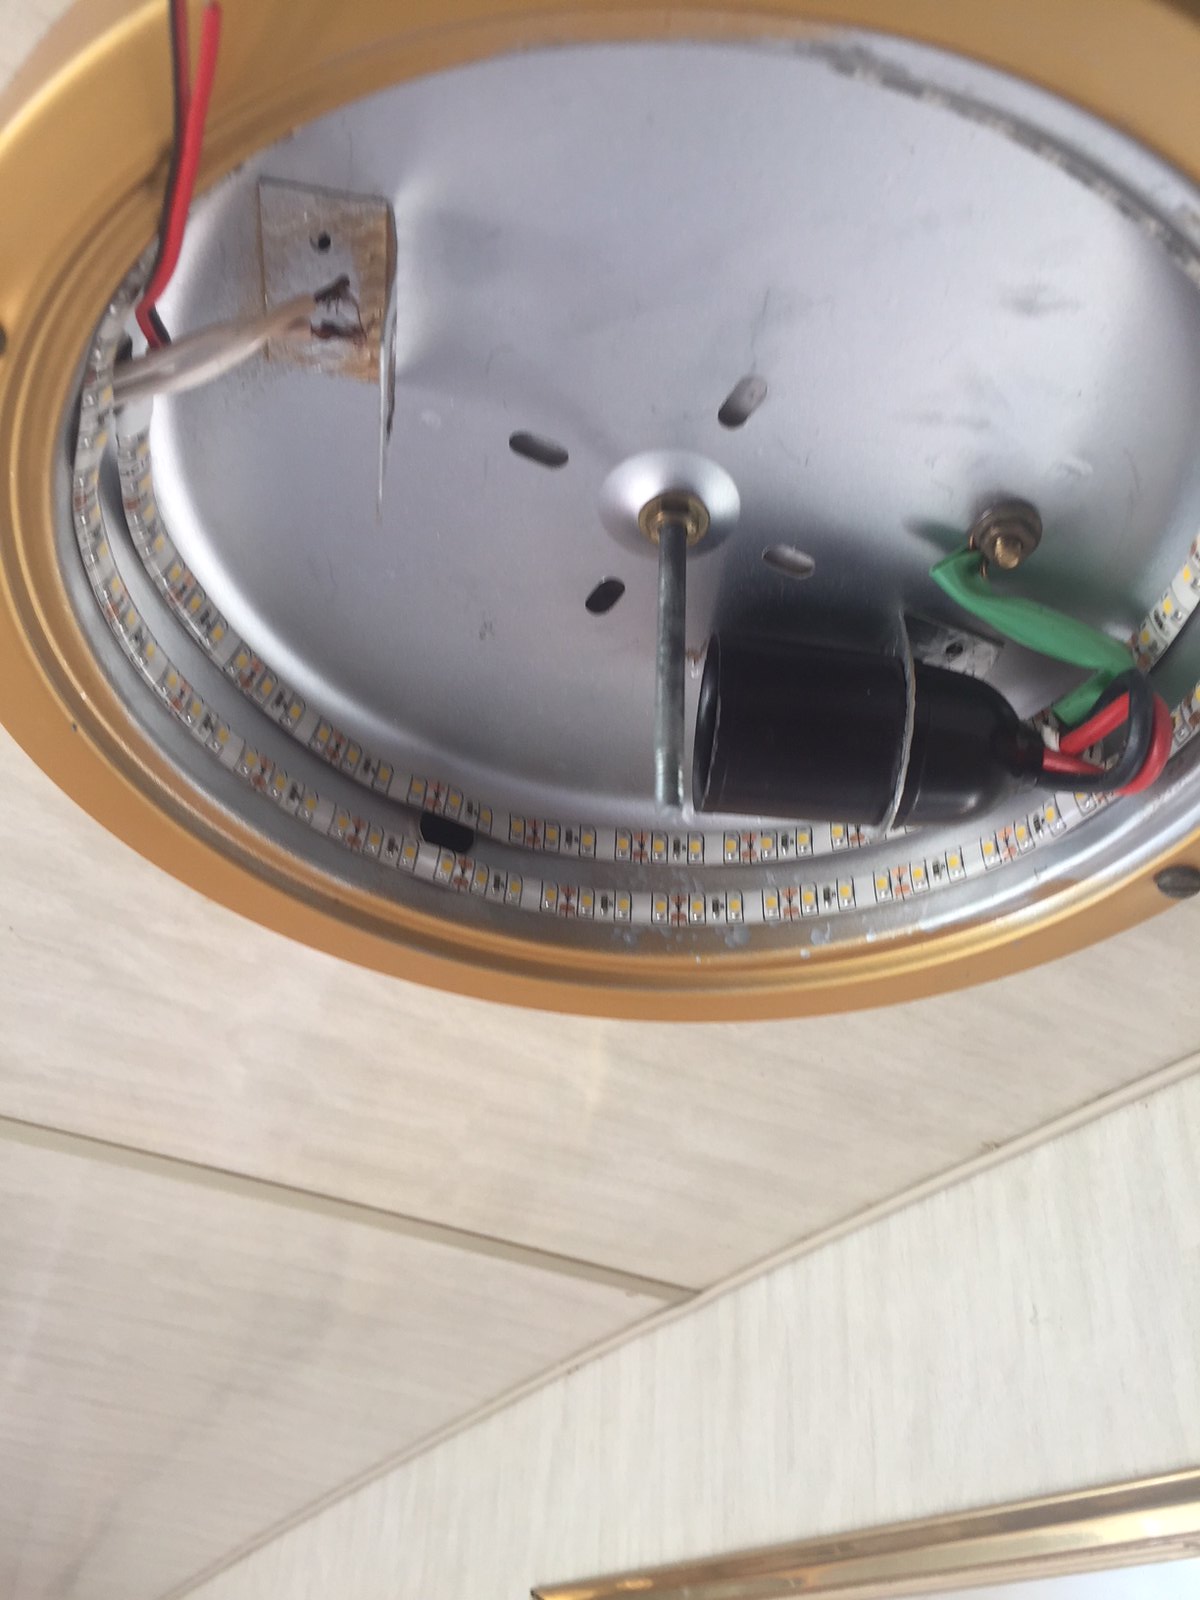 71ED4A89-7E4C-4455-8DEB-7DC20A506F0D 71ED4A89-7E4C-4455-8DEB-7DC20A506F0D by Gavin Gregory, on Flickr Wired in and tested - it draws 6 watts now, but much brighter than the other globe. It's spread out nicely across the fitting too, which looks better. Supposed to be warm white, but not quite as warm as other strips I've used, but it's not too white either, so ok with that. 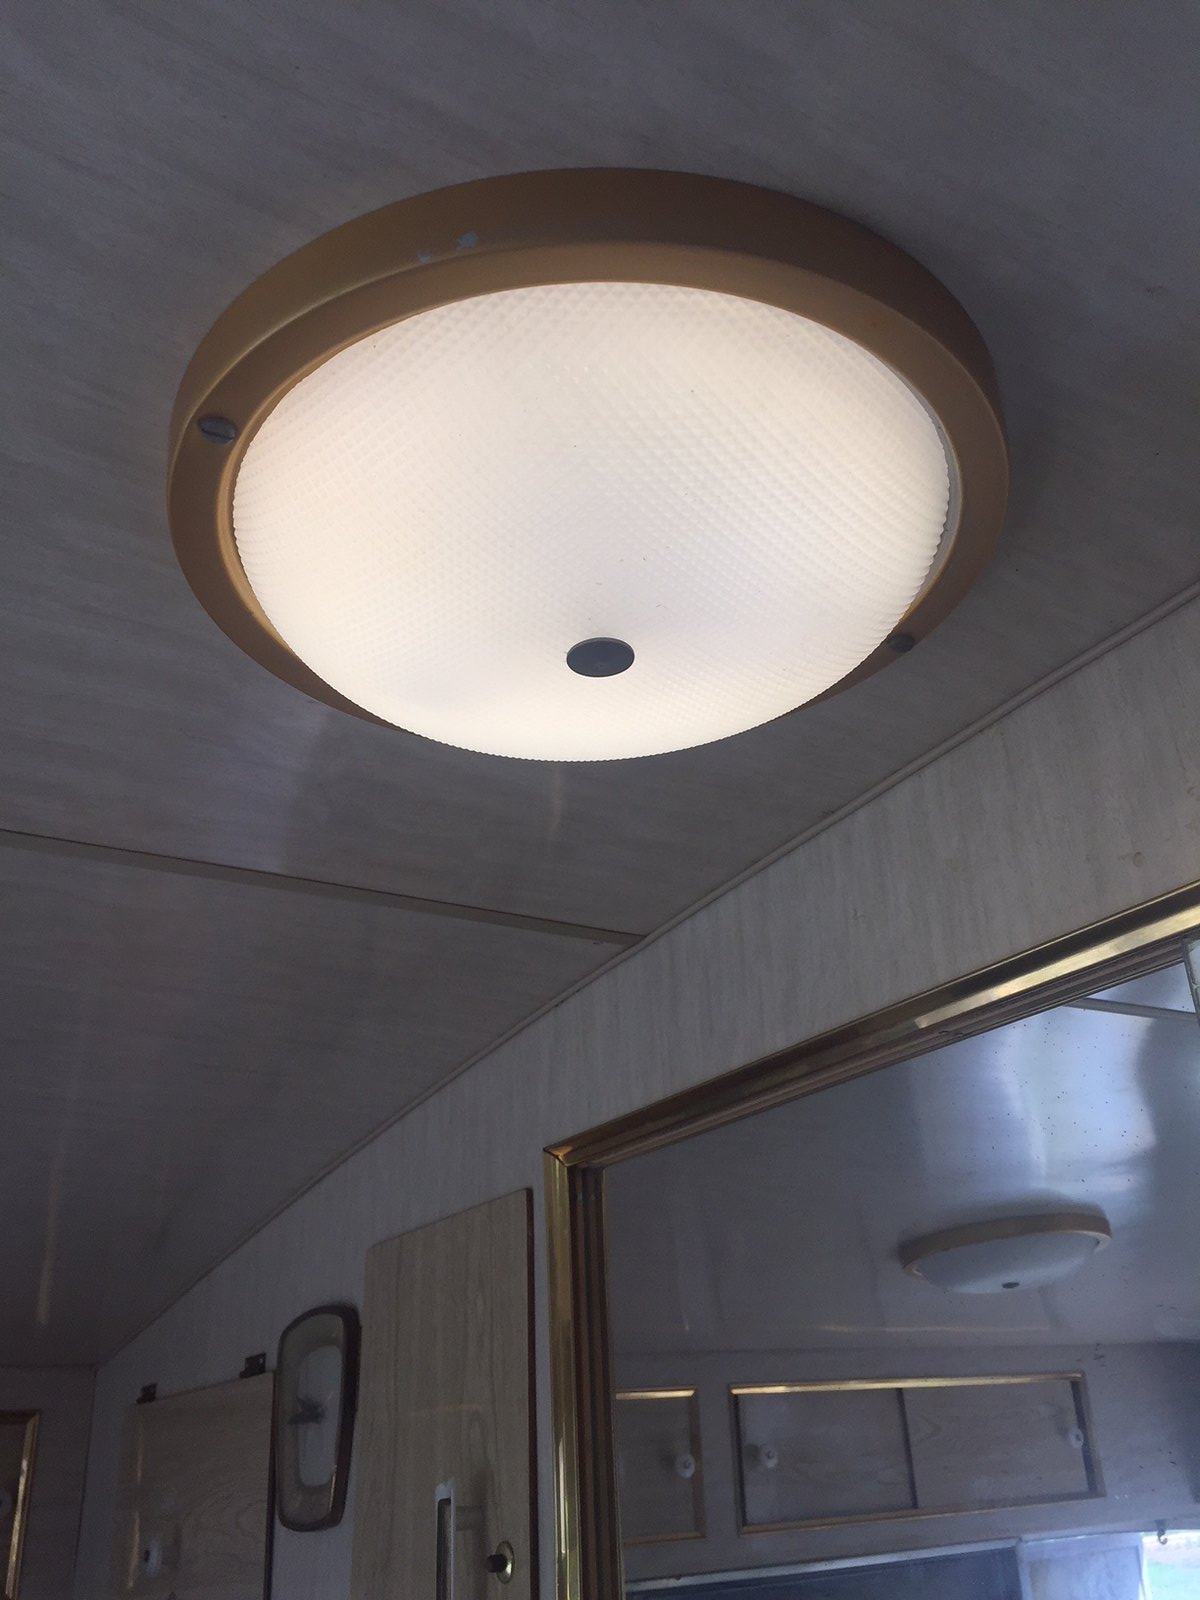 F527A73F-89C2-4FBB-8B39-477CB735F10F F527A73F-89C2-4FBB-8B39-477CB735F10F by Gavin Gregory, on Flickr Here's what the 8 watt Phillips LED globe looks like - much brighter, but all in one spot. 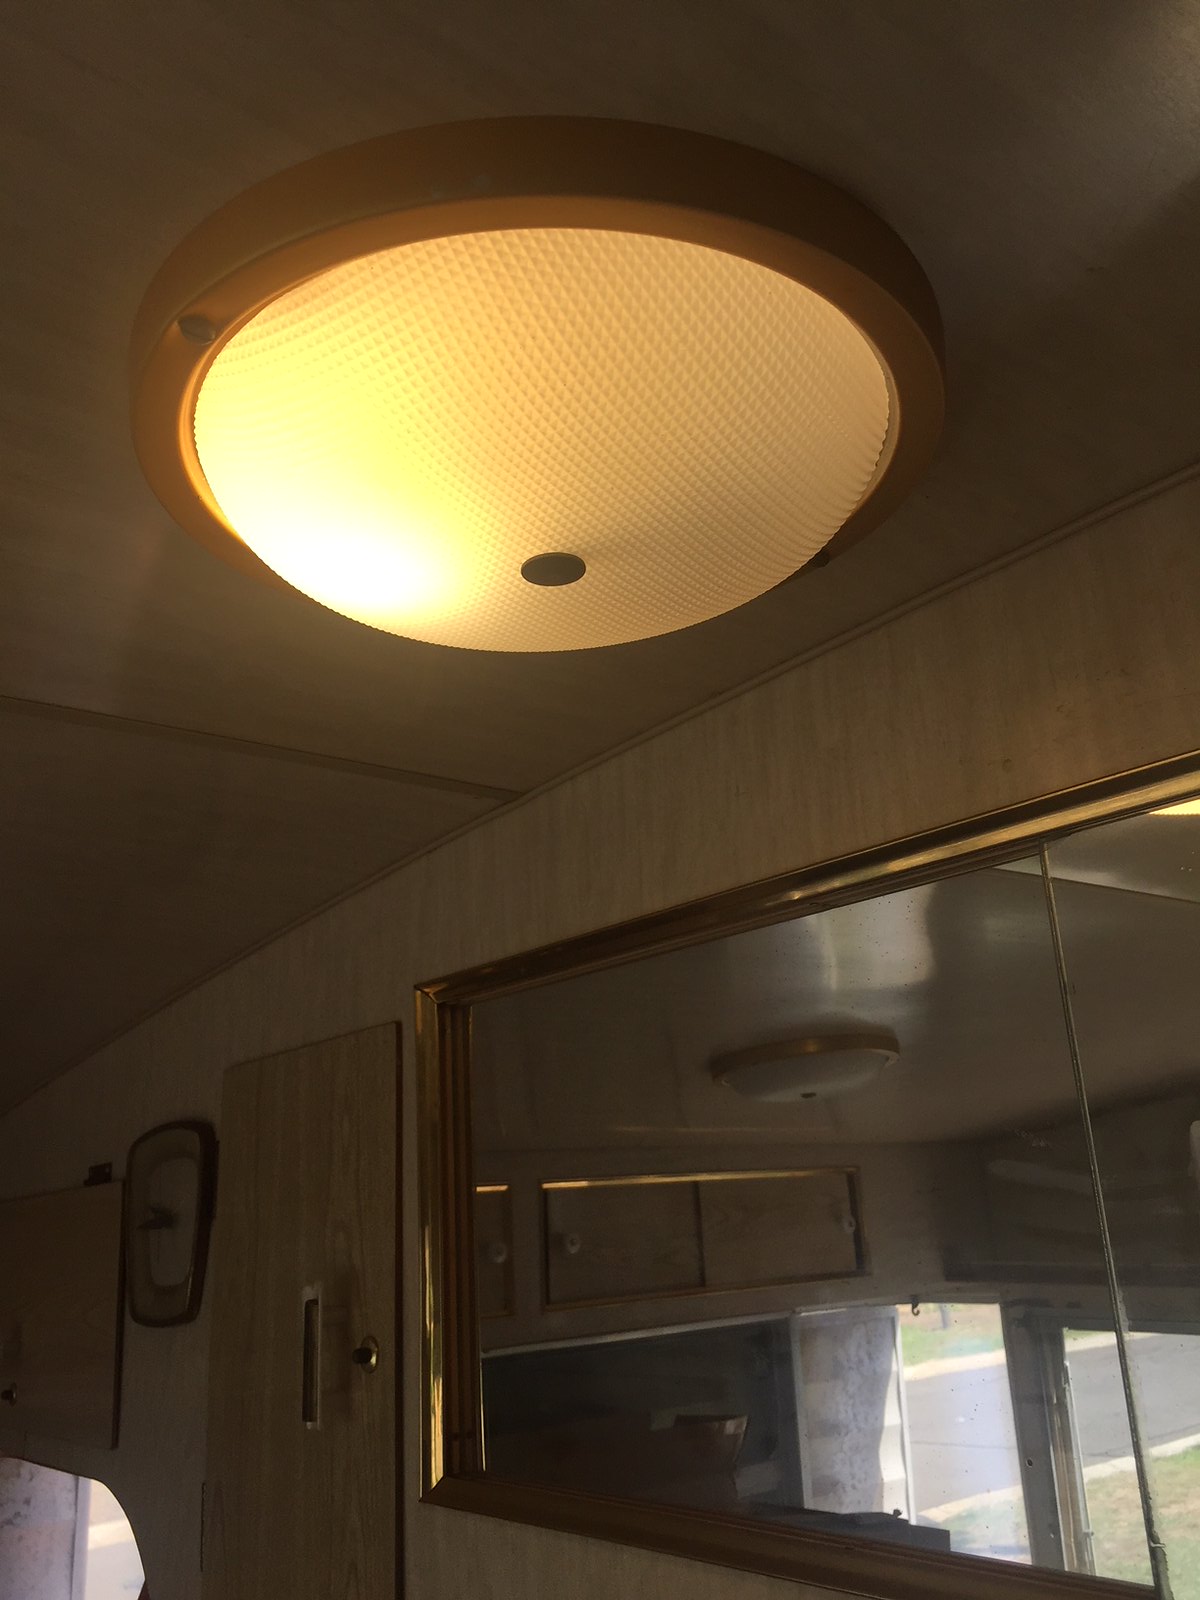 556C6764-FD1C-40DD-A85D-C59D84D5190B 556C6764-FD1C-40DD-A85D-C59D84D5190B by Gavin Gregory, on Flickr Tonight I'll be able to tell if the change was worth it - I'll let you know. Easy and quick and didn't damage anythung original so can be put back if I need to go to plan B |
|
 BBEA1034-BE8E-494C-A937-BC8473264F0A by Gavin Gregory, on Flickr
 794F5E46-397F-40B0-A49F-540787E23BA7 by Gavin Gregory, on Flickr
 CE604404-AF2B-4212-8A11-3A7BA5AAB675 by Gavin Gregory, on Flickr
 . Haven't got the the Hot Water system yet but ranga's in laws live not far from here so we should see it soon. Looking good will post some pics of ours soonish.


