|
|
Post by doublechevron on Dec 1, 2015 9:56:04 GMT 10
You shoud be able to drill to new backing plates to suite whatever mounts are on your axle i would have though ?? I'm sure I did this with my box trailer. Failing that, chop the old mounts away and weld a new backing plate bracket to the axle. This certainly wouldn't be difficult  And would save a LOT of $$$  The issue is with a new backing plate, you may find you need new drums. So costs will start to add up. seeya, Shane L. |
|
|
|
Post by doublechevron on Dec 1, 2015 9:50:53 GMT 10
I think most poeple struggle with solder as almost all cheap soldering irons don't get hot enough to solder wires together  My wife got me one of these for my birthday years ago. www.warrenandbrown.com.au/precisiontools/product-details/scope-irons/100 They are nothing short of brilliant. The heat and power you get out of them allows you to solder almost all automotive wiring. (be warned you need to purchase the transformer seperately .... so it ends up being "not cheap"). seeya, Shane L. |
|
|
|
Post by doublechevron on Dec 1, 2015 8:44:09 GMT 10
The solder vs crimp debate... Soldering does give a good electrical join, however the heat makes the copper brittle Probably not so much of an issue in a caravan that wont leave the bitumen and wont do a lot of km's but this is the reason why manufacturers use crimp joints just about everywhere in vehicles I prefer screw terminals myself I look at it this way ............ I've never had a soldered connection fail. So long as you have the cable tied down so it's not constantly flexing, I can't see why it would ever fatigue and break. Screw on terminals are only any good for "inside" in my experience. They fill with mud and water and the wire dissolves in them. I always solder and cover with a quality heat shrink to keep moisture out  Most crimp on connectors I find on cars (as in 99.9% of them) will easily pull out of the crimp. So are worse than useless IMO  Factory crimps would be done with a hydraulic crimper. They are crimped so tight the wire is effectively welded onto the terminal. seeya, Shane L. |
|
|
|
Post by doublechevron on Nov 27, 2015 9:24:20 GMT 10
That's hilarious, nothing I do is expert. I learn everything by stuffing it up a dozen times before I hopefully get it close to right.....  Ok, you have painted cars. Your set, it's exactly like painting cars. Painting caravans is more frustrating than cars as they may have had house paints applied to them that will fry up. I sanded and keyed that old Chesney the best I could. I simply didn't have the time or inclination to take it back to bare aluminium. I have found the Hi-chem epoxy primer sticks like nuts to a blanket. The reason I have such high opinions of that cheap single part primer is back in 2006 I painted the shiny stainless strip on my old Citroen CX with the primer, then coated them with satin black.  Fast forward 10years .... the acrylic laquer I painted the car with is absulutely stuffed ... but those strip still look like new, with no lifting or flaking of the primer. Absolutely amazing! You will need to check the existing paint on the caravan first. If there is enamel there ..... any paint with a thinners is going to make it fry up (as I'm sure you have experienced when painting cars in the past). seeya, Shane L. |
|
|
|
Post by doublechevron on Nov 26, 2015 14:56:28 GMT 10
you'll never get enough compression on teh rubber gasket to get it leak free will you ? An interesting attempt at sealing all the same. You can use white roof and gutter silicon if you want some colour there. If your painting the 'van though, keep silicon well away from it until it's painted. If you go and have a look at just about any new caravan, they are all "siliconed" from new. all the windows, Jmoulds, flaps, doors etc.... So it's obviously how industry does it. I've just spent a good 5months resealing my caravan. This is how I did it: ditzygypsy.proboards.com/thread/3241/time-another-projectEveryone tends to seal up there windows and Tru-moulds in the way they personally think is best. Just read around on how other people have done it, pick the one you like best, pick a sealer and go for it  All the work is in the prep, not the sealing itself. seeya shane L. |
|
|
|
Post by doublechevron on Nov 25, 2015 14:41:46 GMT 10
That looks spectacular. No moisture damage around any windows, tidy inside, straight cladding .... What more could you want  seeya, Shane L. |
|
|
|
Post by doublechevron on Nov 24, 2015 9:42:30 GMT 10
I put up a cubby in the backyard ........................ Only visiting kids ever play in it  It even has long flying fox from it at the top of the hill, down to the sheds from it ....... the kids still rarely if ever play in it. Visiting kids will spend hours on the flying fox though. seeya, Shane L. |
|
|
|
Post by doublechevron on Nov 24, 2015 8:50:57 GMT 10
Link? If I was ever going to find a caravan to gut and restore. It would definitely without doubt be one of those ugly Chesneys with wrap around roof and ends. You see it's done away with all the "J" moulds and removed a lot of sources of leaks. If the windows don't leak they'll probably never leak. Chesneys also have an aluminium frame so there is no concern of frame rot  seeya Shane L. |
|
|
|
Post by doublechevron on Nov 24, 2015 8:45:05 GMT 10
|
|
|
|
Post by doublechevron on Nov 23, 2015 15:43:55 GMT 10
The brakes need to be in parallel, if you have wired twin axle in series, each magnet will get 3volts rather than 12volts.... and if you have *any* wiring problems to any wheel, none of your brakes will work. Are you sure it's series ?? This doesn't sound right to me. It could be parallel off the back of the one magnet. To be series you would have one wire to one magnet, then one wire from the other side of that magnet across to the other magnet, then from the other magnet to earth. The brake controller fitted to the impala looks like an old timer control one. I fitted a primus IQ which works brilliantly for me... They are proportional. Though the way it looks will suck in the impala. It's very seemless, the harder I brake, the harder the caravan brakes. SO if you do a full on crash stop 'cos someone has pulled out in front of you... the caravan anchors will come on at full power instantly as well  this one: www.youtube.com/watch?v=RxHQvAPTMCsseeya, shane L. |
|
|
|
Post by doublechevron on Nov 19, 2015 13:58:47 GMT 10
That looks absolutely sensational. The wheel spats really do dress it up nicely next to your polished aluminium  seeya, Shane L. |
|
|
|
Post by doublechevron on Nov 18, 2015 15:25:59 GMT 10
You will need to remove the cladding to see what the problem is. I'm betting all of the framing behind there is rotten .......................  seeya, shane L. |
|
|
|
Post by doublechevron on Nov 18, 2015 13:52:24 GMT 10
Just get a sheet of aluminium chequer plate and cover the front  Like most caravans use as a stone guard. |
|
|
|
Post by doublechevron on Nov 18, 2015 9:49:17 GMT 10
 (rofl)Well the old caravan sure is a bloody ripper. I thought that fold down bed would just be made and left setup ................... Nope, straight up each morning. The living space is brilliant (why don't all caravans have a lift away bed ?). The couches are so big, we can both lay down the long one reading books and there is still plenty of seating for the kids to sit around the sides. The only issues had .... was leaking .... Yes all the sealing I did and it leaked..................... The plug in the sink weeped down into the cupboards. I'll need to unscrew it and refit the plug with a new seal now were home  The kids absolutely love the bunks in the back. It did move around quite a lot when we first left. The full water tank and luggage overwhelmed the boge leveler on the back of the rangie causing the tail to sink (the internal leakage int he unit must be to great, I'll whip it off and rebuild it before we go away again). I'll also keep an eye out for a Weigh distrubution hitch. 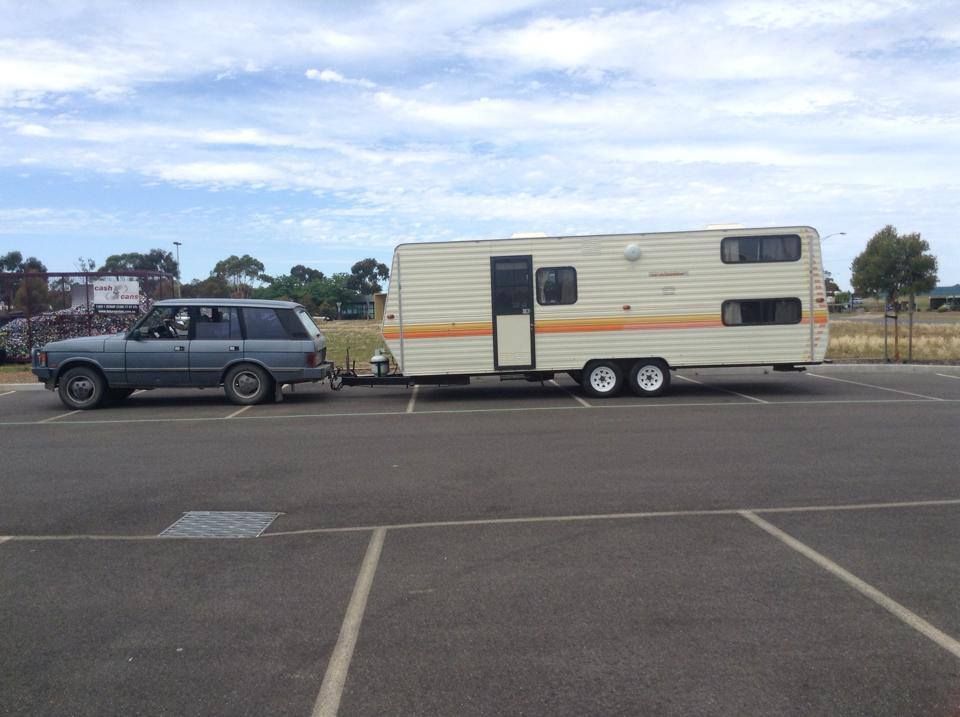 10minutes after we stopped for lunch. It does lift a small amount while moving, but not enough. Nose down means the front axle carries to much weight on the caravan so it'll move around. We'd used most of the water tank by the time we left healesville, so it towed way nicer ( some of the climbs we so steep we were back to 1st gear ( I just told the boss women, there were another 4gears if I grabbed low range   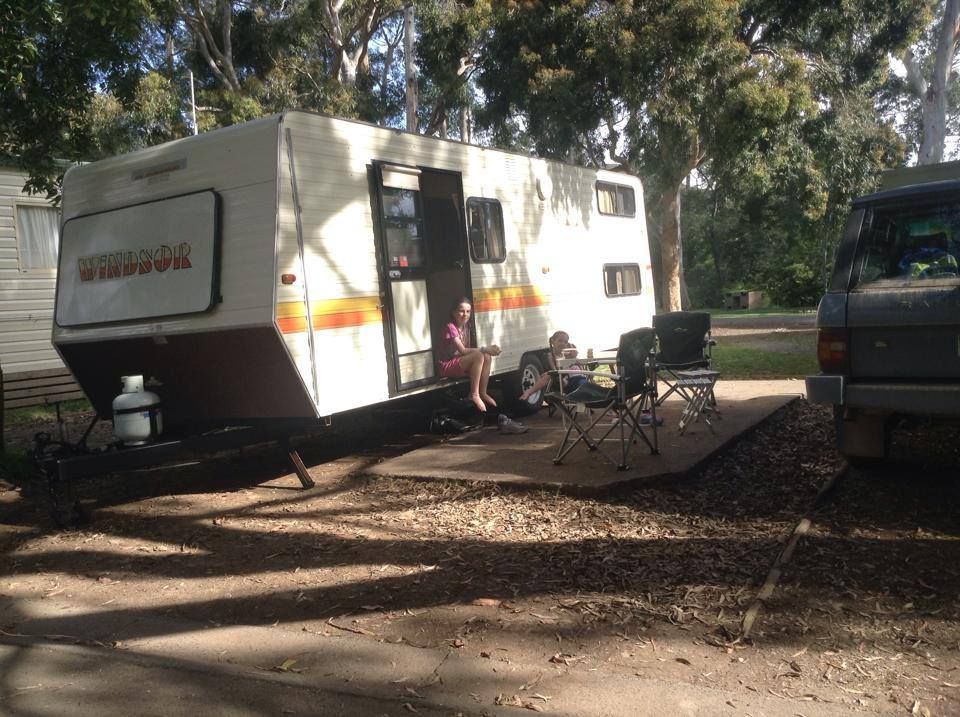 I carried the bloody huge annex all over with us too.... Never did put it up, with so much living space in the 'van, it's not really needed (that's why it looks brand new and un-used even though it's 30years old I guess). We cruised over to healesville for a few days, then down to Malden for a couple of days, then down to halls gap for a few days. What a bloody ripper of a way to travel  seeya, Shane L.
|
|
|
|
Post by doublechevron on Nov 3, 2015 10:56:01 GMT 10
Well finally after .... 5months ?? of spending every spare second I could find on the bloody thing.......... 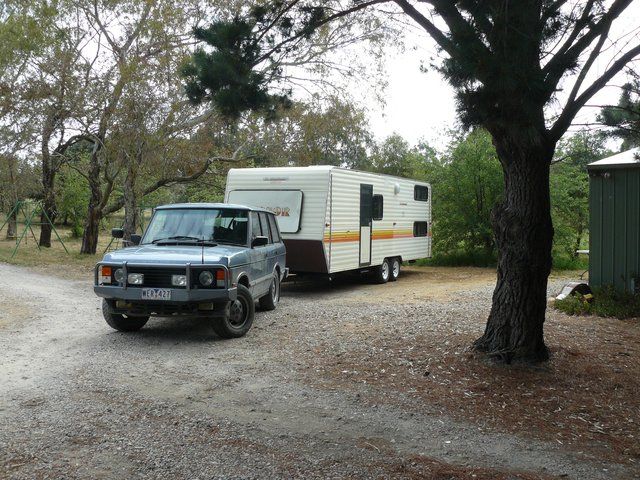 The caravan finally turned a wheel..... 5months of work .................... and it looks like the exact same caravan I parked in the shed 5months agao ...   ....... Do you like the line down the middle of the caravan that I've washed 'n' clay bar'd it up too. What a staggering difference it's made the the original paint on it. 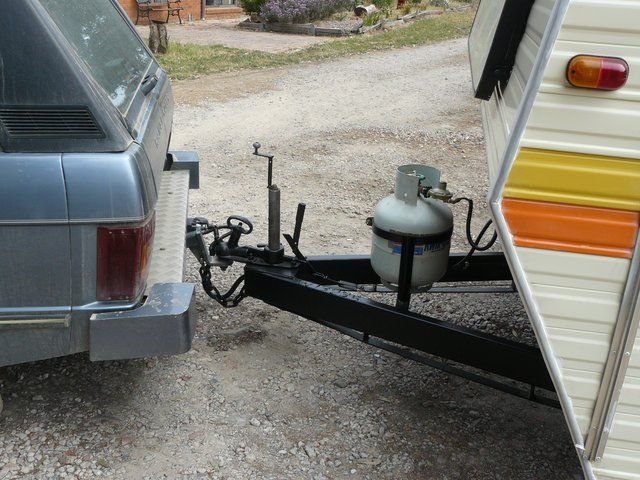 No weight distribution bars ... No nothing other than it dropped onto the towball. Note: the modified handle on the jockey wheel so it doesn't catch on the hitch when you try to turn the handle. I spent a crazy amount of time on that jockey wheel. I whipped it off, stripped it down, stuck some new bearings in the head of it. Modified the handle so it was usable.... and after it sitting in the corner for several months found I'd lost the shim that allows you to "lock" it down into it's housing. I found a 50mm round axle mount ground down to fit perfectly though. Anyway, I thought a test tow was in order. I headed out to Lal Lal, which includes that steep climb up the side of Mount Buningyong (where your forced to come to a standstill at the bottom). I would have been happy if she held 60km/h up the climb.......... I'll be damned if half way up I didn't have to lift right off 'cos that little V8 was hauling ass .... She was singing out to close to 4000rpm ...... Which is getting way out of the torque band of the motor... and 80km/h. I had to keep backing off 'cos the bloody thing wanted to sit on 100km/h. I'm not exagerating when I say you really couldn't tell it was there unless you new the car really well. It sits rock steady behind it. Doesn't rattle the hitch, the brakes are absolutely seemless (that primus IQ controller is brilliant). Even trucks passing at 100km/h didn't make it move. I'm absolutely tickled pink with the way it tows. There was no wind today, the real test will be a windy day (as it's a bloody huge sail area). This is a very smartly designed caravan, the independent coil spring suspension means you can mount the water tank where the axles usually reside. The fridgy, stove, and everything heavy inside is mounted over the axles. 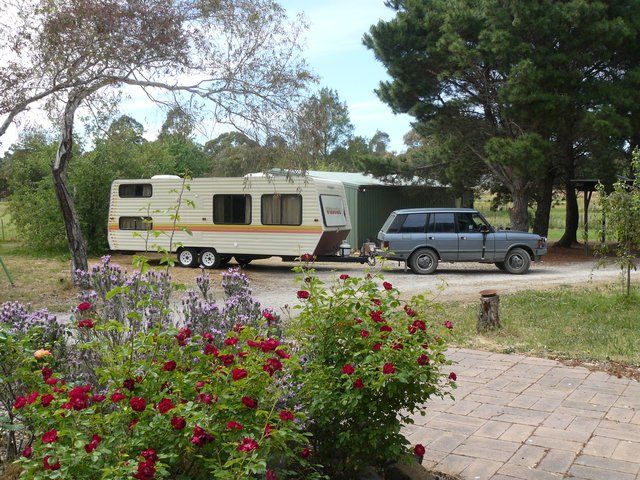 The POS rangie sure does look little hooked up to it. No I haven't cleaned that side of the 'van yet either. Were hoping to go away for a week in it in a couple of weeks time... to try it out. 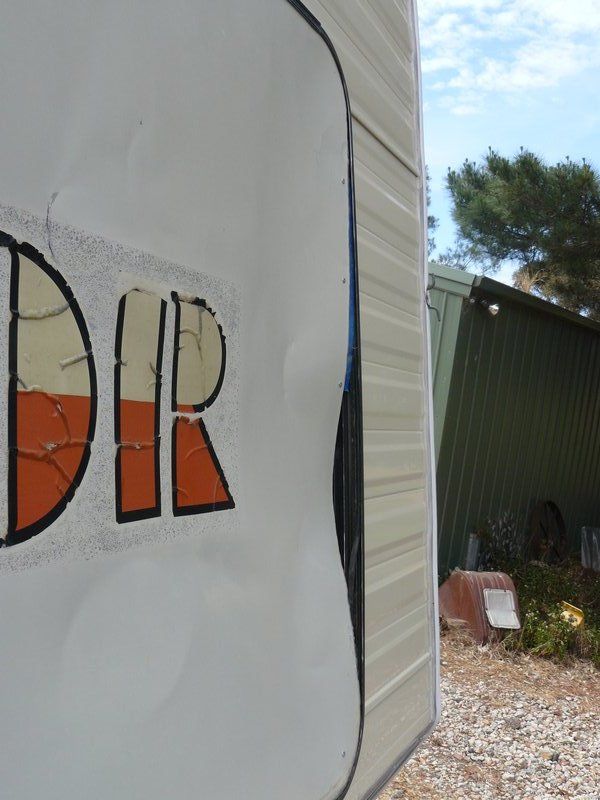 I'll need to brace the entire length of this side of the cover .... look at that it's blown out in the one bit I *didn't* put a brace on .... grrrr.... 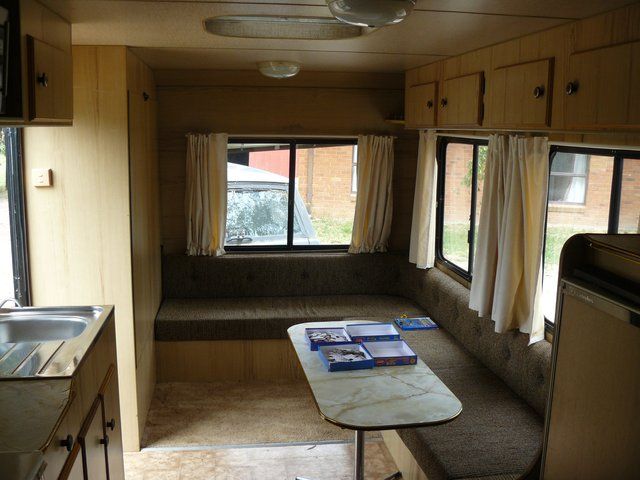 I reckon I can put a split system in above that front window. I can run the pipes up in cupboard the bed is stored in and make a really tidy install.... Just need to save up and find a nice inverter split system for there. There were on special at aldi last week for $500 too .... Damn it, I was only $499.50 short of buying one  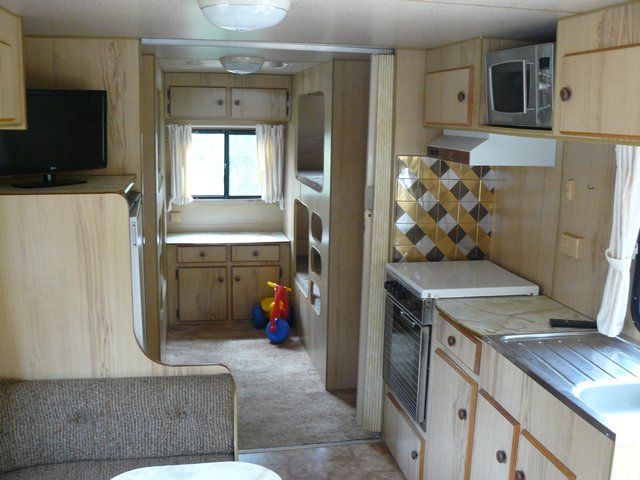 Of course the best thing about a bunk room in a caravan is ........................................ 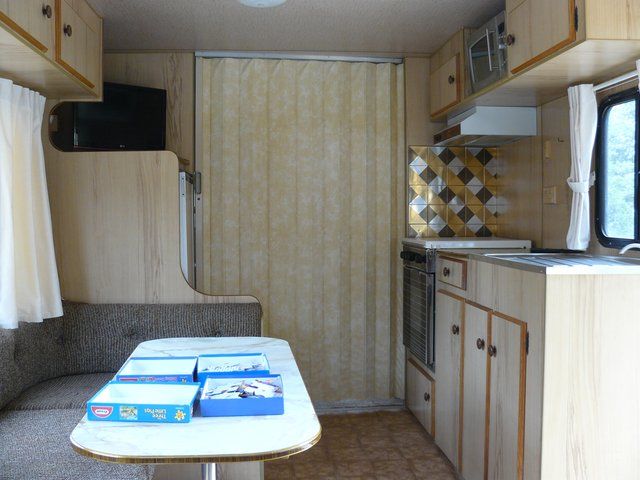 BED TIME CHILDREN  seeya Shane L. |
|
|
|
Post by doublechevron on Nov 2, 2015 10:33:53 GMT 10
Gee's I'm good at this stuff. I ran all the new wiring, soldered all the connections, back in the "A" frame I snipped off all the factory wiring and added standard colour coded wiring to run the length of the 'A' frame, so in the future whenever anyone unscrewed the connector, you could tell what the hell is what by wire colour. I earthed the caravan in two places on the drawbar. I googled electric brakes... Magnets should be 3.5 -> 4.0 ohms. So I measured the resistance of all magnets ( all 3.5 -> 3.8ohms) as I soldered and heat shrinked all of the connectors. On one of the backing plates I sure did struggle to get it soldered. I worked out later the element in my soldering iron had died  ( Those SuperScope irons sure are absolutely brilliant tools ... They came with 2 spare elements so it's no big deal). Anyway, finally all done, I plug onto the car .... Wow the caravan lights are BRIGHT now...... But why does the newly fitted brake controller flash "Sh" ...... Short right  Bullshit, I'd just spend every spare minute for two weeks trying to get that brake wiring done. So I whipped off the connector and measured the resistance .... 3.8ohms....... The can NOT be right. It's a parallel circuit so... 1/r = 1/4ohm + 1/4ohm + 1/4oh + 1/4ohm .... Resistance = 1ohm right ?? I could even work that out (probably wrong) in my head. Certainly not a short, but sure as nuts way wrong ?? So I joined the leads of my multi-meter together and got 3.8 ohms ........ AAAAARRRRRRhhhhhhhhhhhhhhhhhhhh, damn it, my multi-meter has died on the resistance setting and I hadn't realised. Everything is 3.8 ohms .... I figured I must have a shorted brake magnet, but how can I tell given my multi-meter is obviously cactus. So I snipped the wiring back at the axles, and "Sh" dissapeared from the controller.... Then hooked up the right side caravan brakes and got "c"onnected on the controller.... Hmm... Hooked up the left side and got "Sh" again. Eventually I found just the right front wheel caused the "Sh" setting on the brake controller. I cut the two layers of heat shrink away and found the soldered connection the iron had died on .... Had a "solder spike" on it. As the heat shrink .... well shrunk ... this poked through two layers of heat shrink into the other wire shorting it. I'm really good at this stuff right? There really is nothing I can't bugger up if I put my mind to it  seeya, Shane L. |
|
|
|
Post by doublechevron on Nov 2, 2015 10:15:08 GMT 10
We had the same thing happen the first weeks our caravan was down at Portarlington last year. Massive wind gusts off the bay .... Took out a lot of annexes across the park. The caravan behind us had it's roll out awning torn off and was left bashing againt the side of the caravan.
The wind gusts caused one of the wooden "tensioners" on the annex ropes to split in half.... Once one rope was release, all the extendable annex pole bent releasing the other ropes... The wall tie-downs are also torn clean out of the caravan cladding. What save any damage to anything was the fact the annex then just "fell down flat" out of the wind. Unlike all the poor b@stards around the park with modern roll out awnings.
seeya,
Shane L.
|
|
|
|
Post by doublechevron on Nov 2, 2015 10:03:40 GMT 10
Why do you need weight distribution bars? I thought that would be a very light weight caravan  See what your car sits like with the 'van attached and go from there. You may find it's quite ok. seeya, Shane L. |
|
|
|
Post by doublechevron on Oct 31, 2015 22:11:45 GMT 10
Yep, I can see it  But if you have hosted it at aulro ... I'm a member there too .... hang on I'll try an icognito window.... No go, it doesn't work unless your cookies have you logged into aulro  seeya, Shane L. |
|
|
|
Post by doublechevron on Oct 29, 2015 9:38:13 GMT 10
I started doing some work on the van, today I finished painting the draw bar which is in a very good condition but needed fresh paint. Also I fitted a new brake master cylinder. In the afternoon I removed the old silicone from one side of the roof, cleaned the surface until the aluminium was exposed and applied a nice coat of Sika marine. Tomorrow will be the other side plus getting new tyres. The plan is making the van safe and sealed so we will going to remove all the windows and reseal them with Sika marine. Then we will do small jobs on it to allow us to use the van during summer. The paint it is so old and faded that by only wipe the surface with a thinners in a rug it is enough to expose the aluminium. When the time its come to do something about the exterior of the van I will see if it would be possible to remove all the paint and leave the aluminium exposed and polished.   Did you re-do the roof seems with sikaflex ? I'll be interested to see how that works out. Will it stick over a surface that has had silicon on it in the past ? If your talking about the J moulds, you really need to remove them and clean off all the old mastic rather than wipe a bit of sealer down the edges of them  seeya, Shane L. |
|
|
|
Post by doublechevron on Oct 28, 2015 10:28:00 GMT 10
When I first got my license my parents let me use their '83 HJ60 Landcruiser. I came home from hospital in it when I was born, learnt to drive in it (in the desert) when I was 10, and then learnt to drive on the road in it later on. The first car I bought with my own money was a 1984 Mitsubishi Scorpion which was in pretty good nick despite having around 360,000km on it when I bought it! Just about everything had been replaced however with receipts for all the work so it wasn't a bad buy.  I've got the Landcruiser now, it's tucked away in the shed and has probably had it's last outback adventure now I've bought a new Triton. Not many of them around that aren't rusty/ruined so I'll try and keep it that way. Here it is towing our Franklin:  The Scorpion is up on Gumtree at the moment along with the one I bought to pinch parts from to keep it running. New job with a work car and 7 week old baby means that I'm not allowed to have 4 cars of my own any more + a caravan + a car trailer + a box trailer club permits mean all the interesting stuff is about $70bucks a year to keep on the road ... Don't sell them !!!! The boss women will never let you get anything interesting ever again otherwise   She'll demand you get modern nuts like Daepooes/Hi-undies/Kias .... A fate worse than death  seeya, Shane L. |
|
|
|
Post by doublechevron on Oct 27, 2015 14:45:44 GMT 10
Just noticed something .... Where have the colour matched mudguard trims gone ??  it would look even better still with them painted up and refitted! |
|
|
|
Post by doublechevron on Oct 26, 2015 14:02:17 GMT 10
They really need to be on gas if your going to drive them much. I doubt you'll ever get less than 20L/100km out of one no matter how gentle you drive  They'd be an excellent thing to stick on a club permit! seeya, Shane L. |
|
|
|
Post by doublechevron on Oct 25, 2015 9:27:36 GMT 10
that poor red rangie .... what happened to it's lovely sounding V8  That's a big project, interiors shot, not running, the guards are all chopped. You may find you'll need to get a parts car to scavenge the panels from ( and in the usual tradition of buying a parts car .... end up using that one to rebuild instead as it turns out to be better than the "restorer" when you pull it apart LOL ). seeya, Shane L. |
|
|
|
Post by doublechevron on Oct 23, 2015 18:13:19 GMT 10
Well stuff me, I owe the previous owner of my parents mid-80s Windsor an apology. I'm doing some work on it at the moment and discovered that the lights and brakes are all wired with extension leads. I just assumed the old guy had done it himself, now I know the factory did it! We're having similar problems. The brake and side lights operate erratically, the wrong filament lights up (which usually means dud earths) and the brakes are really weak, even though they look OK mechanically. Is there a decent 7 core trailer wire available that has a nice thick blue wire in it, or will I have to wire the brakes separately from the plug back? Tim See if the caravan has an earth. This one hasn't. The earth wire is connector inside the 7pin plug, but it's going straight to the brake magnets and doesn't actually earth the caravan anywhere. I'd suggest adding your own earth down to the drawbar. seeya, Shane L. |
|