|
|
Post by Husky on Nov 5, 2017 19:39:59 GMT 10
OK the fun continues... Axles and springs out. Golden rule that my dad taught me years ago forgotten. When removing central pivot bolt of roller rocker suspension put a clamp on it to prevent the hanger spreading and jamming up an already rusted bolt.  Spent half an hour smashing it with a four pound mesh hammer destroyed the castellated nut and end of the bolt.... ahh hell was replacing them all anyway. Remembered the clamp on the second side, two hits and out it came. Sorry dad  Thinking back to the scenic days and hours spent with an angle grinder buffing the chassis to bare metal i decided to get creative, There are over two hundred barrels where I'm currently working so if anyone wants a few let me know. Makes this work so much easier. Started bare meta-ling the chassis next and looky looky what i found.
Which is a totally different number to the rego paper of 481327 so i have no idea. i have also been told on Face Book that this was more likely a Cosmopolitan than a Viscount. Any Cosmo experts out there? Anyhow finished up for the day pretty happy with myself and how quickly the chassis was cleaning up and should be able to got to paint in a few days. Got home, told the misses all about it in every detail possible, showed her photos, so happy was almost bursting so the misses looked at me and goes
"It's forecast Rain for the next two days" 
My reaction  !!!!!!! |
|
|
|
Post by twocutekelpies on Nov 5, 2017 19:48:16 GMT 10
Capricorn Caravan Husky, not Cosmopolitan  |
|
|
|
Post by Husky on Nov 5, 2017 20:02:38 GMT 10
Well no rest for the wicked so i dragged the rusted pieces of scrap metal that used to resemble caravan parts into the workshop and kept going
The young bloke got curious as to what i was doing so i corrupted him further. He keeps saying he learns more with me than at school
One down three to go
I also went shopping for the new pivot bolts as the the old ones did not meet my standards for reuse. First place i went to wanted $20 a pair and doing quick math in my head very quickly walked out of there seeing i needed 26. Went and saw another mate in town and got the whole lot including new grease nipples for $67. i know where i'll be shopping from now on.
With weather being so unpredictable right now i've taken a break and been working on the Viscount. good weather coming though so hopefully next time we will see a complete chassis in etch.
stay tuned
|
|
|
|
Post by Husky on Nov 5, 2017 20:03:36 GMT 10
Capricorn Caravan Husky, not Cosmopolitan  lol opps my femininity is showing LOL  |
|
|
|
Post by tasmillard on Nov 8, 2017 7:41:24 GMT 10
Yeah been dropping by although not much to contribute at the moment in this forum. I will keep an eye on how you progress with these, no doubt lots of pics coming too  On the springs you pulled apart, one tip I picked up from a Land Rover forum is to grind the ends where they meet the next leaf. This prevents the springs catching and cutting a groove into the spring above it. My Series 2a springs are worn beyond repair because of this. |
|
|
|
Post by Husky on Nov 8, 2017 7:58:24 GMT 10
Good to see you're still around though. I've noticed a big drop off of active members since photobucket screwed everything up
Good tip in the springs i'll remember to do that. I'm gonna grease the leaves before putting them back together then paint them when reassembled. Challenge will be not to get grease where I want to paint.
|
|
|
|
Post by tasmillard on Nov 8, 2017 13:36:16 GMT 10
Thanks Husky. I never used photocrappet but I recon it has stuffed people around. On the grease, look up the pros and cons... "some say" that grease washes off eventually and also doesnt provide enough friction/resistance between the leafs. Like wise painting the area of friction is a no-no, as the paint will peel and gum up the friction surfaces.
|
|
|
|
Post by atefooterz on Nov 8, 2017 17:43:35 GMT 10
I was told as a kid at a BHP foundary tour, that the art of steel is to make it for purpose. So spring steel (was) made to be fairly corrosion resistant, any oxide crust would help protect the under layer. I had a bit of a lol at a smart alec ( not on the boards) friend of friend who replaced awesome Aussie rusted springs for new set of the same rating, after 6 years new set broke! Van weighs 1.2t so oldies would have hung in there with new bushes.
|
|
|
|
Post by 78466noM on Nov 14, 2017 8:10:25 GMT 10
The grease may also catch dust that in can turn your grease into a grinding paste great were grease is sealed not good in the open.
|
|
|
|
Post by Husky on Feb 10, 2018 19:18:26 GMT 10
Got the Dog Float Chassis out-sourced last night so now it's time to get stuck back into other customer work. (wish it was my Viscount) The Doug as it has now been nick named and said with just the right amount of spite. Sooner its out the gate the better. Which will be in...... seven weeks and two days   it will be heading off on it's maiden voyage with 14 dogs and two adults. No i am not joking and yes the time line is insane. Goodbye relaxation, goodbye sleep hello calling in favours from everyone i know!! lol Considering this was taken this morning.... 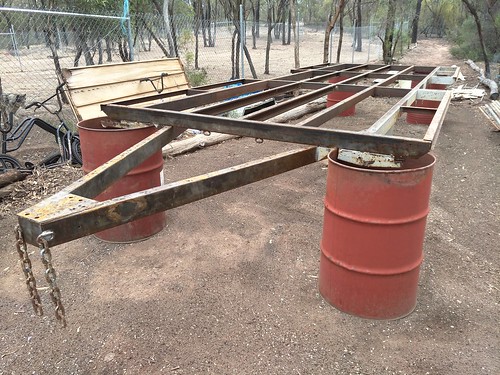 So sit back, relax and watch the madness unfold. A tidy up was first in order i cant stand working in a brothel. It's bad enough i have to fight with the elements. The last piece of the van that hadn't been disassembled was the roof so that's where i started. 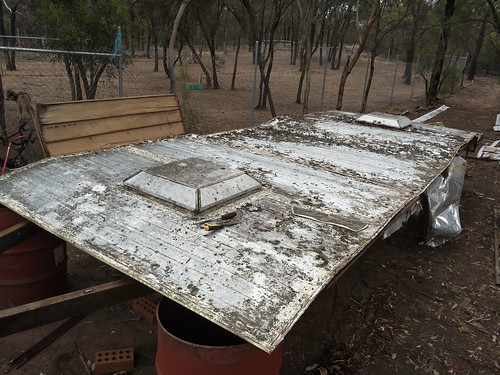 and an hour and a half later 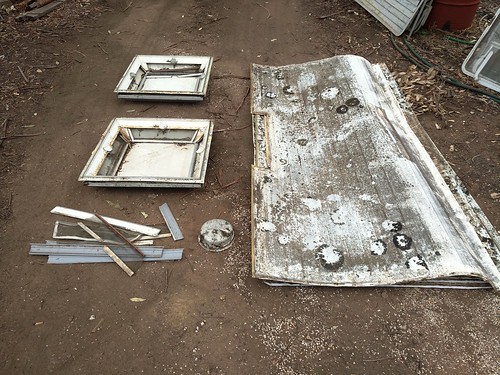 It started to piss with rain then and no way was i going to try and chemically treat, etch prim and body deaden in the rain. So i took a walk to where the misses was working on the parts van. 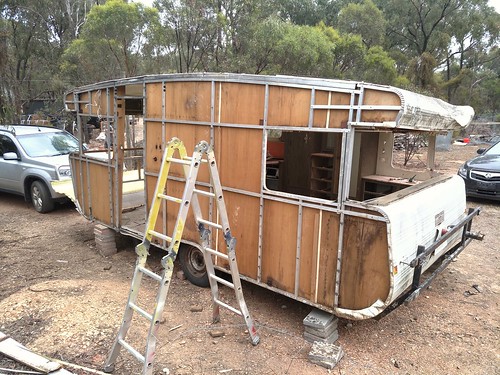 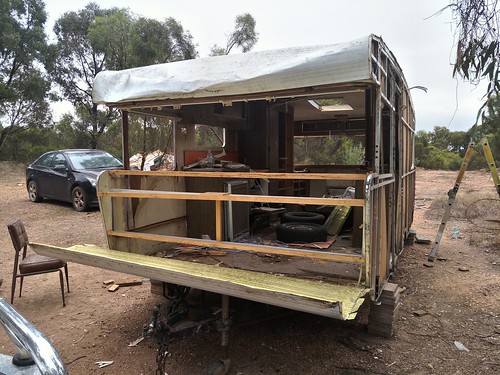 Just give her two battery drills, a hammer and pliers and she can do wonders. For those who don't know I'll be repairing the aluminum frame on this van and transplanting it to the Doug. I know what your thinking, a 16ft frame on a 22ft chassis? It just wont work. Works quite well if you ask me!!  Scroll back and look at the designs. There is a big dog box going on front. I've booked a 3000 PSI pressure washer to pick up when i start skinning the frame. It's designed for stripping concrete so i don't think the old sealer and moss will stand a chance. The Dougs skin is in pretty good condition, just needs a good clean up then can be reattached. 4 seasons hatches will be reconditioned and reused. All eight fly screens need replacing. Any tips where to go for them? Then its wiring, insulating, lining and skinning dog boxes as i'm out sourcing the frame. |
|
|
|
Post by Mustang on Feb 11, 2018 8:42:07 GMT 10
Ohh to be young & so enthusiastic!!!!!!!!
|
|
|
|
Post by 78466noM on Feb 13, 2018 10:26:46 GMT 10
I love our computer design for the van I just have to throw in before it has the potential to become a white elephant though I am sure you have thought of it but if you haven't
1) How heavy on average will the dogs make the front
2) How heavy will the furniture and equipment be in the back
I only asked these questions because I have no idea on the weight of the dogs ( mine is less than 2kg he would have trouble pulling the cat on a sled )too much weight either end the back being the most notable but to much weight on the front can also cause sway just much more unpredictable as to when it may happen.
great job on all your work
|
|
|
|
Post by Husky on Feb 13, 2018 13:36:27 GMT 10
Hey 78466noM, you're right on all accounts. The weigjt of the dogs has be a concern since I presented the design to the customer. On average a malamute can weigh between 30 - 40 kg each and all six bottom berths will have one Mal each. The top six outside berths will have huskies weighing in at roughly 20kg each and the top centre crates will have a stafy and probably another husky. If my math is right that's roughly 400 kg of dogs plus the frame and skin forward of the front axle. That is problem 1. Problem 2 isthe van part will have a double bed, kitchen bunks similar to snoops Franklin toilet and shower in an aluminium frame god knows where it's all going to fit. I have discussed these issues with the customer and he is determined that this is what he wants. He will be towing it with a MN diesel Triton.
So my thoughts are put a waste tank over the axles and two 90 litre water tanks under the rear to try and balance the load. Also while his 4wd is having the EBM fitted to look at air bag suspension or something he can increase the resistance of the shocks when towing. If anyone has thoughts on this I am open to suggestions because as they say,
the customer is always right and what the customer wants the customer gets.
Would love to find the guy who said that and do some serious damage to him
|
|
|
|
Post by 78466noM on Feb 13, 2018 16:50:14 GMT 10
could four cages move to rear with bed on top as I think you have done already or plan to do with one of your vans could be enough and make it easier to balance when he hasn't got a full load of dogs on. Also will give you the width of the cages extra space inside.
He wants to look closely at what he does to the suspension of his Ute unlike my old truck the modern Utes have crumple zones in the chassis and have seen pics of bent ones and cracked ones.
|
|
|
|
Post by Husky on Feb 16, 2018 15:01:06 GMT 10
Well the new chassis for the dog float got picked up last Monday night so i'm back to splitting my time between the two projects. Hopefully soon the parts van will be totally stripped and i can start repairs and mods on the Aluminum framing. The misses isn't well at the moment and the young bloke is being a handful but this is where they got up to on the parts van. 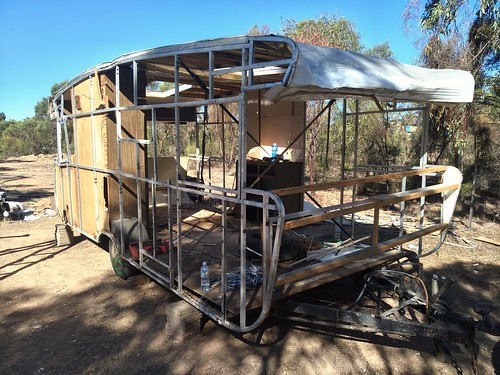 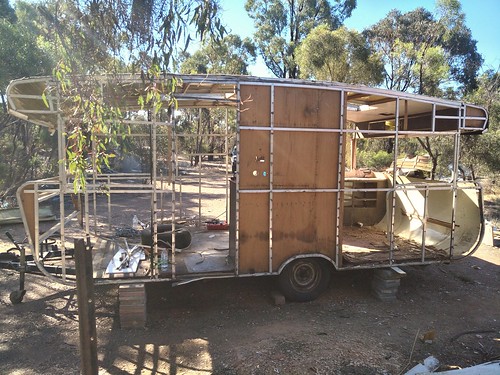 Now that i am getting close to the chassis and of course crawling around underneath removing the fridge which took all of 10 mins i am reminded of something snoops said not so long ago 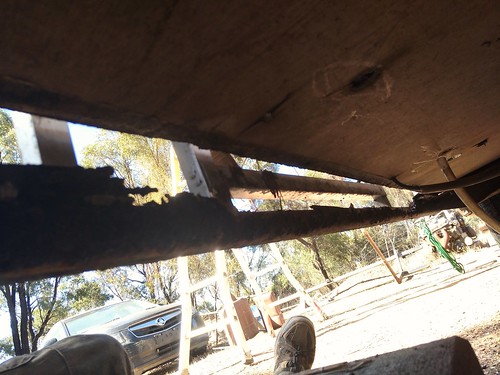 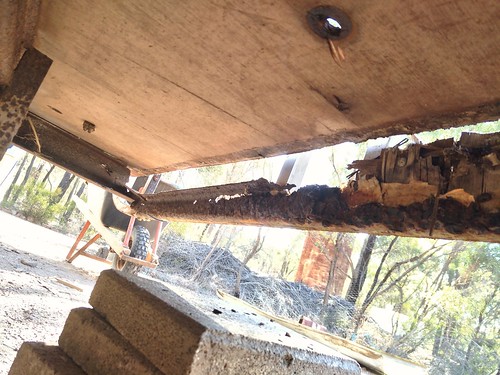 UMMMM???   you were saying snoops? The chassis rail is completely rusted out, broken and dropped the depth of the chassis. This is just one corner of it havent looked at the rest closely yet. 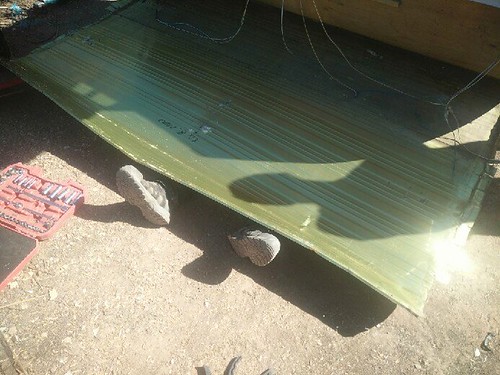 Hehehehehe  I was underneath pulling the rear bull bar off. once i got it off this happened so the misses snapped a pic. there really wasn't much room under there
Anyhow from rusted out pieces of trash to restored pretties. 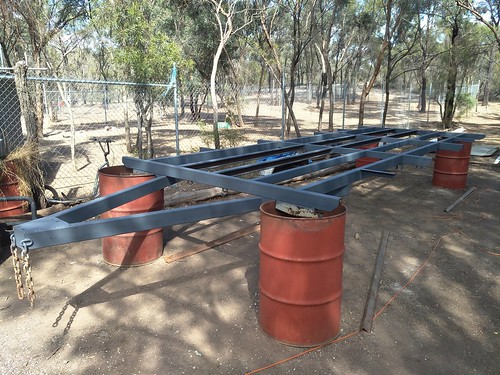 Chassis bare metaled, crack tested and etched. Side rails will be welded on when chassis widths are determined by Aluminum frame.
Finished removing the hubs off the axles next and inspected them. A mate of mine who works at Major Trailers Bendigo had a look too and there is not a mark on the stub axles of wear, brake shoes are like brand new and drums are spotless apart from a bit of surface rust. His advice was to clean them up, reassemble and test them to make sure they work. Better that than $270 for a pair of new ones. A curiosity issue next. I think I figured it out but hoping one of you guys can shed some light on it. The axles are bent but not in a load bearing way. |
|
|
|
Post by snoops on Feb 16, 2018 19:40:41 GMT 10
Ay Caramba!!!! That's a lot of rust!!!
I've seen axles bent like that before apparently deliberately, but never had confirmation of this. From what I've been told it allows the axle to become straight once loaded - only hearsay from conversations with mates though so think you're on the right track with your thinking.
|
|
|
|
Post by jikah on Feb 16, 2018 22:58:39 GMT 10
Hi Husky,
I always understood that the bent axles was to do with the wheel geometry.
Cheers,
Ian.
|
|
|
|
Post by myarrow1 on Feb 17, 2018 8:06:12 GMT 10
Awesome !! Will be great once finished 👍
|
|
|
|
Post by snoops on Feb 17, 2018 12:32:35 GMT 10
While finishing off underneath mine today, had a look at my axles - they are the same as yours so must be there for a reason. Bit hard to see on the pic, but they have the same kink in them. 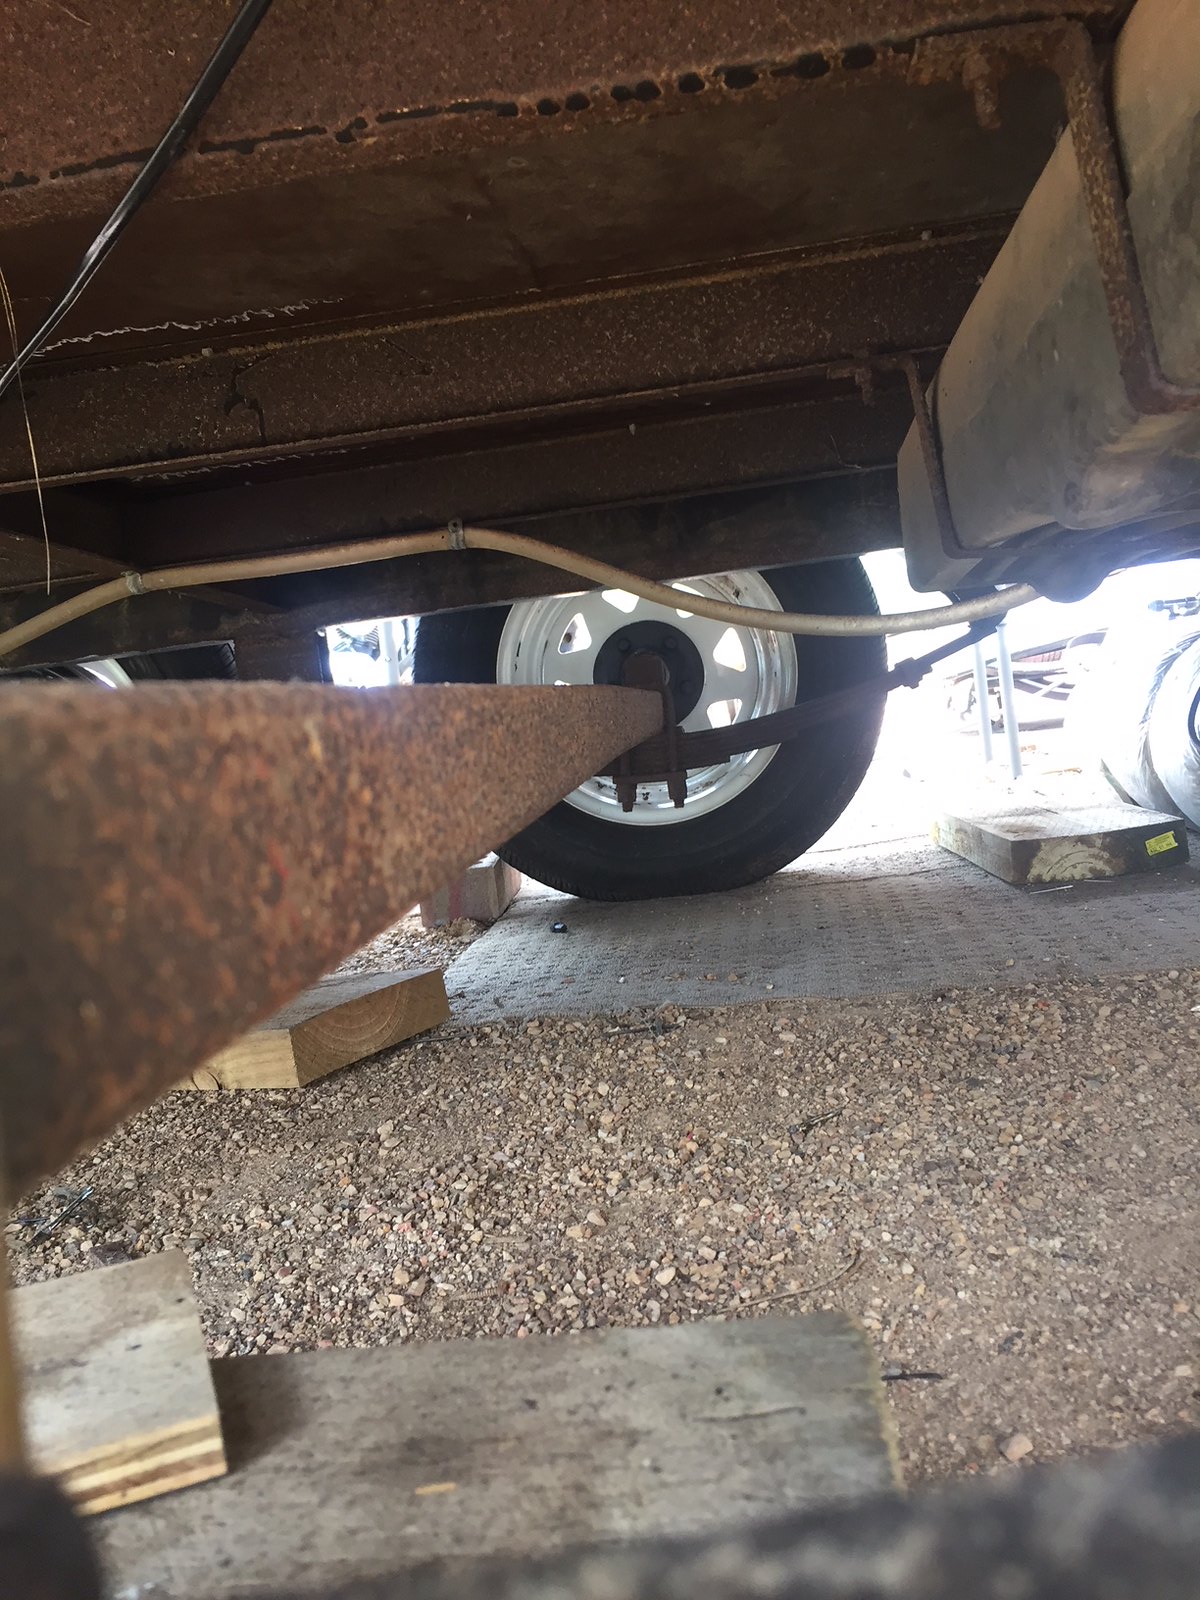 DA98E731-FB1F-4804-B8F4-4018669B06C1 DA98E731-FB1F-4804-B8F4-4018669B06C1 by Gavin Gregory, on Flickr |
|
|
|
Post by Husky on Feb 19, 2018 18:20:13 GMT 10
Thanks guys nice to know i'm on the right track and my brain isn't off in la la land yet.  Its easy to get discouraged sometimes when we are building vans. Day after day, cleaning, etching, painting, repeat. Coming home at night covered in rust, or paint and coughing or sneezing out over spray. Looking around and thinking I'm busting my guts for very little happening. Then one day.....
|
|
|
|
Post by Husky on Feb 20, 2018 17:59:43 GMT 10
Electronic Hubs all cleaned up, etched and painted ready for reassemble. Sorry no pics yet  All trailer wiring run through chassis. Seven core to the rear and 6mm twin down each draw bar drops into the main chassis rails and poke out through holes above the electronic brake axle all ready to be connected tomorrow and tested when i assemble and attach the hubs. With it being Wednesday tomorrow and the dog box steel and finished designs having to be at the welder on Friday i spent the Avo in the office. with a bit of help from guys on here (thanks 78466noM) i have managed to convince the customer that the dog boxes need re designing and moving for better weight distribution. Even threw in the en-suite being one end and kitchen / bedroom the other as who wants to watch someone on the dunny while cooking breakfast?  here are the new designs awaiting approval  The new design comes with a few bonus features like twin tool boxes above the wheel arches and below the top row of dogs, accessible from the outside. i can make either area back or front bigger and smaller just by sliding the dog boxes forward and backwards, weight is directly over the axles and en-suite and kitchen are separated. The customer wants his bed above the dog boxes. With the new design it will put his bed under the highest part of the roof. still may be tight though. Total height of boxes is 1400mm, total height of van 2100mm which leaves 700mm for mattress and sleeping area. hmmm....
|
|
|
|
Post by 78466noM on Feb 21, 2018 7:40:06 GMT 10
Looks good it would be a skinny mattress but if they are small framed people and not claustrophobic it should work leaving the en-suit at the rear should make it easier and quicker to put in no worries how to protect lower floor from water. seal the back off no smells or steam from shower in van.
If I ever go mad and redo a larger van I may have to steal the idea of the en-suit across the rear not much in the way of weight use fiberglass to make floor waterproof and wet area panel for walls.
|
|
|
|
Post by Husky on Feb 21, 2018 13:44:05 GMT 10
Sounds like some good ideas 78466noM.
Unfortunately though, the design wasn't approved so it's back to the drawing board.
Third times a charm?
|
|
|
|
Post by Husky on Feb 22, 2018 12:15:10 GMT 10
|
|
|
|
Post by Mustang on Feb 27, 2018 18:21:27 GMT 10
Time to phone the local cabinet maker!!!!
|
|