|
|
Post by snoops on Jan 11, 2018 6:09:42 GMT 10
If the paint is chalky and wioes off on your hands, even after a wash and scrub, then yes, use metho to remove more of the paint. You don't need to get it all off, just waht comes off with a wipe down I've found. I've used a litre to do one side of the Franklin and the ends so it goes a long way and isn't a difficult or time consuming job. It also gets rid of a lot of surface dirt and leaves a smooth surface to paint. If you go back to bare aluminium, best to use a coat of etch primer too, but I've found this isn't always nessesary, Paint like Wattle Solarguard or Dulux Weathershield hold on very well and are waterbased - I still may go this way with the Viscount here, I'm not 100% sure yet. The awning is only a test piece.
The rims you see in the above pics will be going. Although they look good, I'm going to try and get the exterior looking close to 100% original - I'm going to restore the orignals and repaint them, then shoe them with new LT tyres.
I have 3 of the 4 original aluminium hub caps too which should polish up well. The 4th is sligtly different but will do if I can't find one more of what I have. 😊
|
|
|
|
Post by thehohars on Jan 11, 2018 6:31:59 GMT 10
I might take a pic of the old van down the paddock. Not sure of brand but it look like yours Gav.
|
|
|
|
Post by Husky on Jan 11, 2018 6:35:55 GMT 10
I have an assortment of alum and ss hubcaps so shoot me a pic of what you have and I'll try and match it.They 13 or 14 inch?
If your going to part with the sunnies let me know cause I'll grab em.
|
|
|
|
Post by snoops on Jan 11, 2018 6:50:46 GMT 10
Thanks. I'll get a pic when I'm next up at the van. Just sprayed a second coat on the awning, its warm and no breeze this morning heading for 35 so a perfect time for it. Below is a pic - any imperfections are just my lack of prep but it looks fine and should do nicely. That second coat was all that was needed so covers very well. Gloss level is somewhere between a paintbrush job and a car, so quite good. Orange peel is quite heavy but acceptable. Certainly good enough for me. 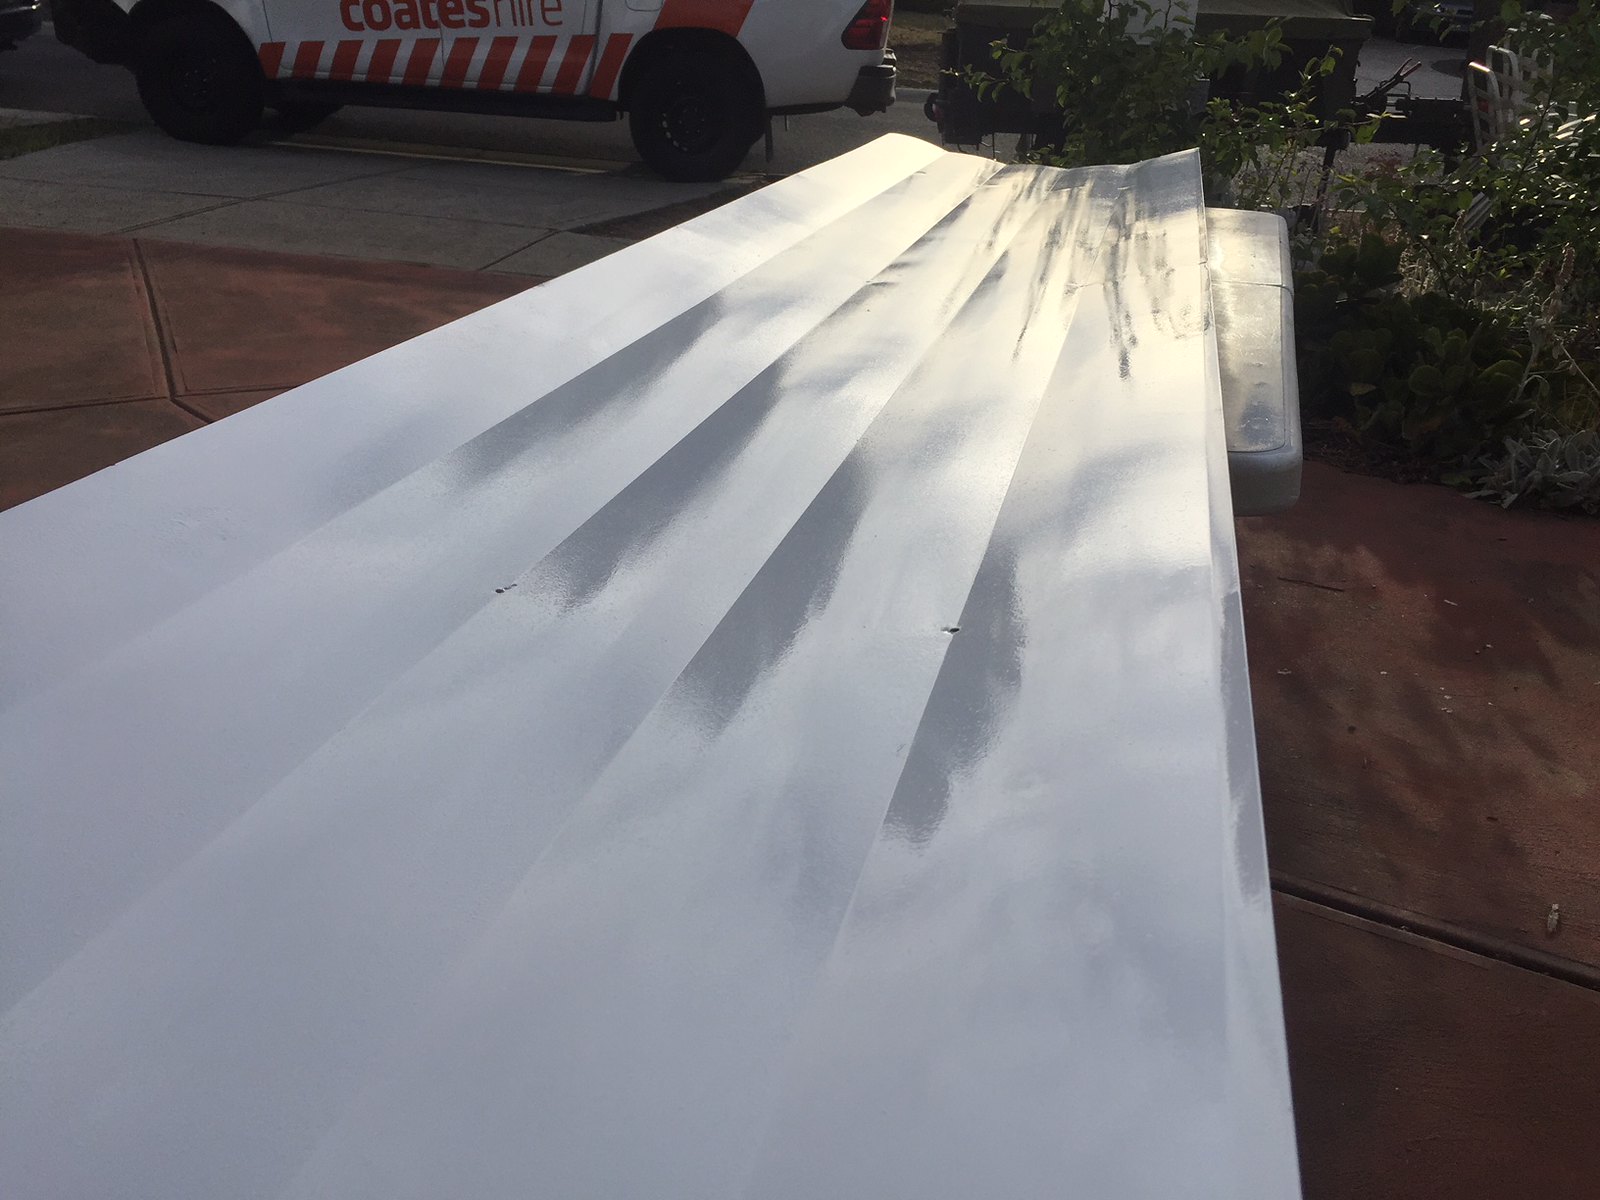 EADE4E71-8958-43BB-93CF-F5C3620E68AA EADE4E71-8958-43BB-93CF-F5C3620E68AA by Gavin Gregory, on Flickr |
|
|
|
Post by snoops on Jan 11, 2018 9:15:02 GMT 10
Well the paint goes touch dry in just a couple of hours when in the sun.👍 It's warmed up nicely and the paint was dry enough to handle, so I reassembled everything. Now it's in the sun in the pic below I feel it needs another coat of paint, but that will have to wait until I do the rest of the van. I'll refit this today or tomorrow arvo dependng on where work takes me. It looks 100% better now anyway, and with all new rivets, it is a lot stronger and stiffer too. All new rivets in the hinges will also happen, one size up from the 1/8 ones that were original. 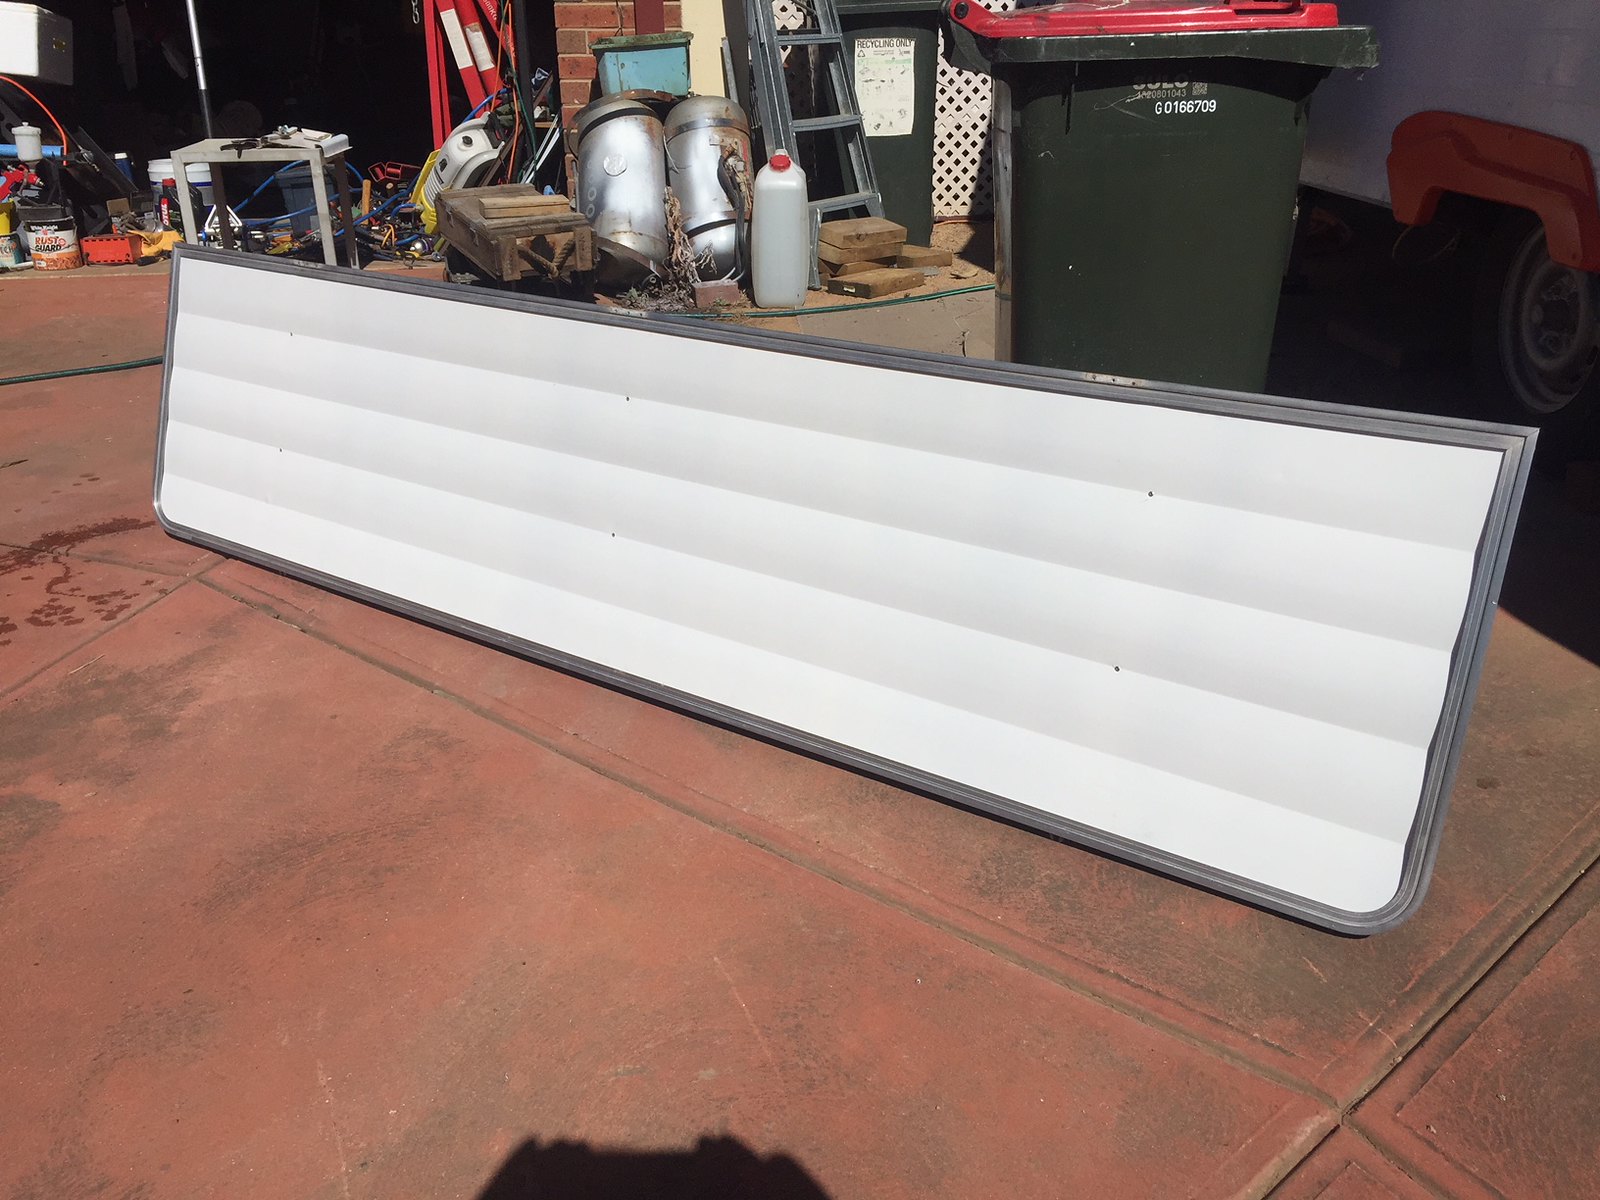 9A755977-9401-4443-BDD7-0C288D7FFD70 9A755977-9401-4443-BDD7-0C288D7FFD70 by Gavin Gregory, on Flickr |
|
|
|
Post by Husky on Jan 11, 2018 14:11:19 GMT 10
Looks shmick mate. If the whole outside if the van comes up like that I wouldn't be complaining.
I've found I've had to up the size of the rivets on mine as well. Bit of a worry on some areas of the sides though where the whole head of the rivet has pulled through and they are 4mm already. Ahh well cross that bridge when I get to it
|
|
|
|
Post by thehohars on Jan 11, 2018 15:34:18 GMT 10
I might take a pic of the old van down the paddock. Not sure of brand but it look like yours Gav. 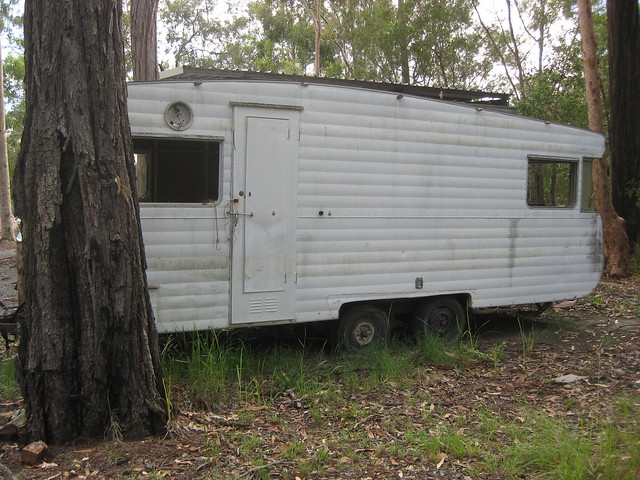 IMG_4495 IMG_4495 by c de Buck, on Flickr |
|
|
|
Post by snoops on Jan 11, 2018 15:38:23 GMT 10
Yeah, looks like an early 70’s Viscount alright. Siding looks in good condition, I assume the interior is toast with being exposed to the weather?
|
|
|
|
Post by thehohars on Jan 11, 2018 16:03:26 GMT 10
Yeah, looks like an early 70’s Viscount alright. Siding looks in good condition, I assume the interior is toast with being exposed to the weather? It was our neighbors, he was going to turn into a trailer. He is in care now and she just wanted it gone so it is here, it is fully gutted and the other wall is missing. |
|
|
|
Post by Husky on Jan 11, 2018 16:09:45 GMT 10
What are your plans for it HH?
|
|
|
|
Post by thehohars on Jan 11, 2018 16:13:59 GMT 10
What are your plans for it HH? Do you want it? |
|
|
|
Post by Husky on Jan 11, 2018 16:19:55 GMT 10
I've got something in the pipeline at the moment that may see my spare parts replenished, should know this weekend coming if not then i'm definitely interested. where is it located?
|
|
|
|
Post by thehohars on Jan 11, 2018 16:23:56 GMT 10
I've got something in the pipeline at the moment that may see my spare parts replenished, should know this weekend coming if not then i'm definitely interested. where is it located? Apparently we want the chassis to make into a trailer. Everything else is for sale. S.E.Qld |
|
|
|
Post by Husky on Jan 11, 2018 16:25:30 GMT 10
to far mate i'm in vic, bugger
|
|
|
|
Post by snoops on Jan 12, 2018 18:03:19 GMT 10
Got some more done this arvo and got a few surprises too. First up I reinstalled the front awning. 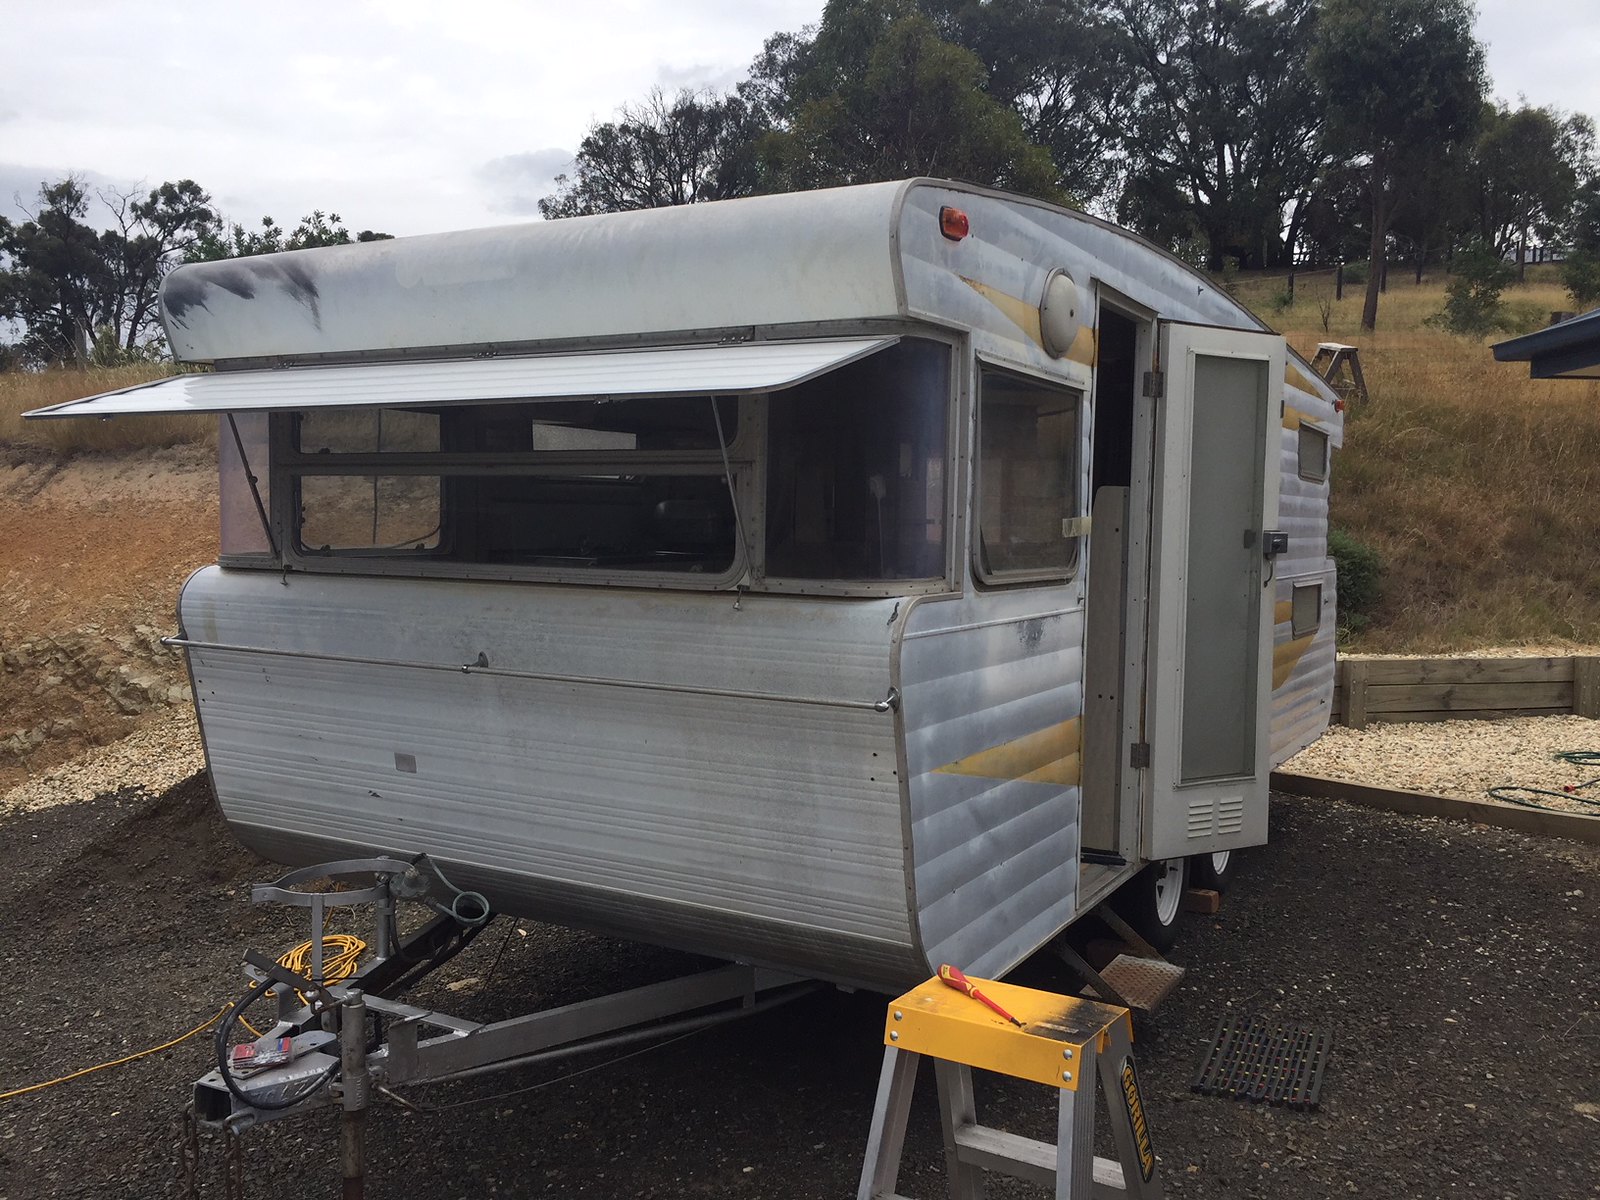 8221CFDD-64B7-4D1C-B117-3DEB621109FE 8221CFDD-64B7-4D1C-B117-3DEB621109FE by Gavin Gregory, on Flickr Definately needs another coat, but is cleaner and shinier than the rest of the van. 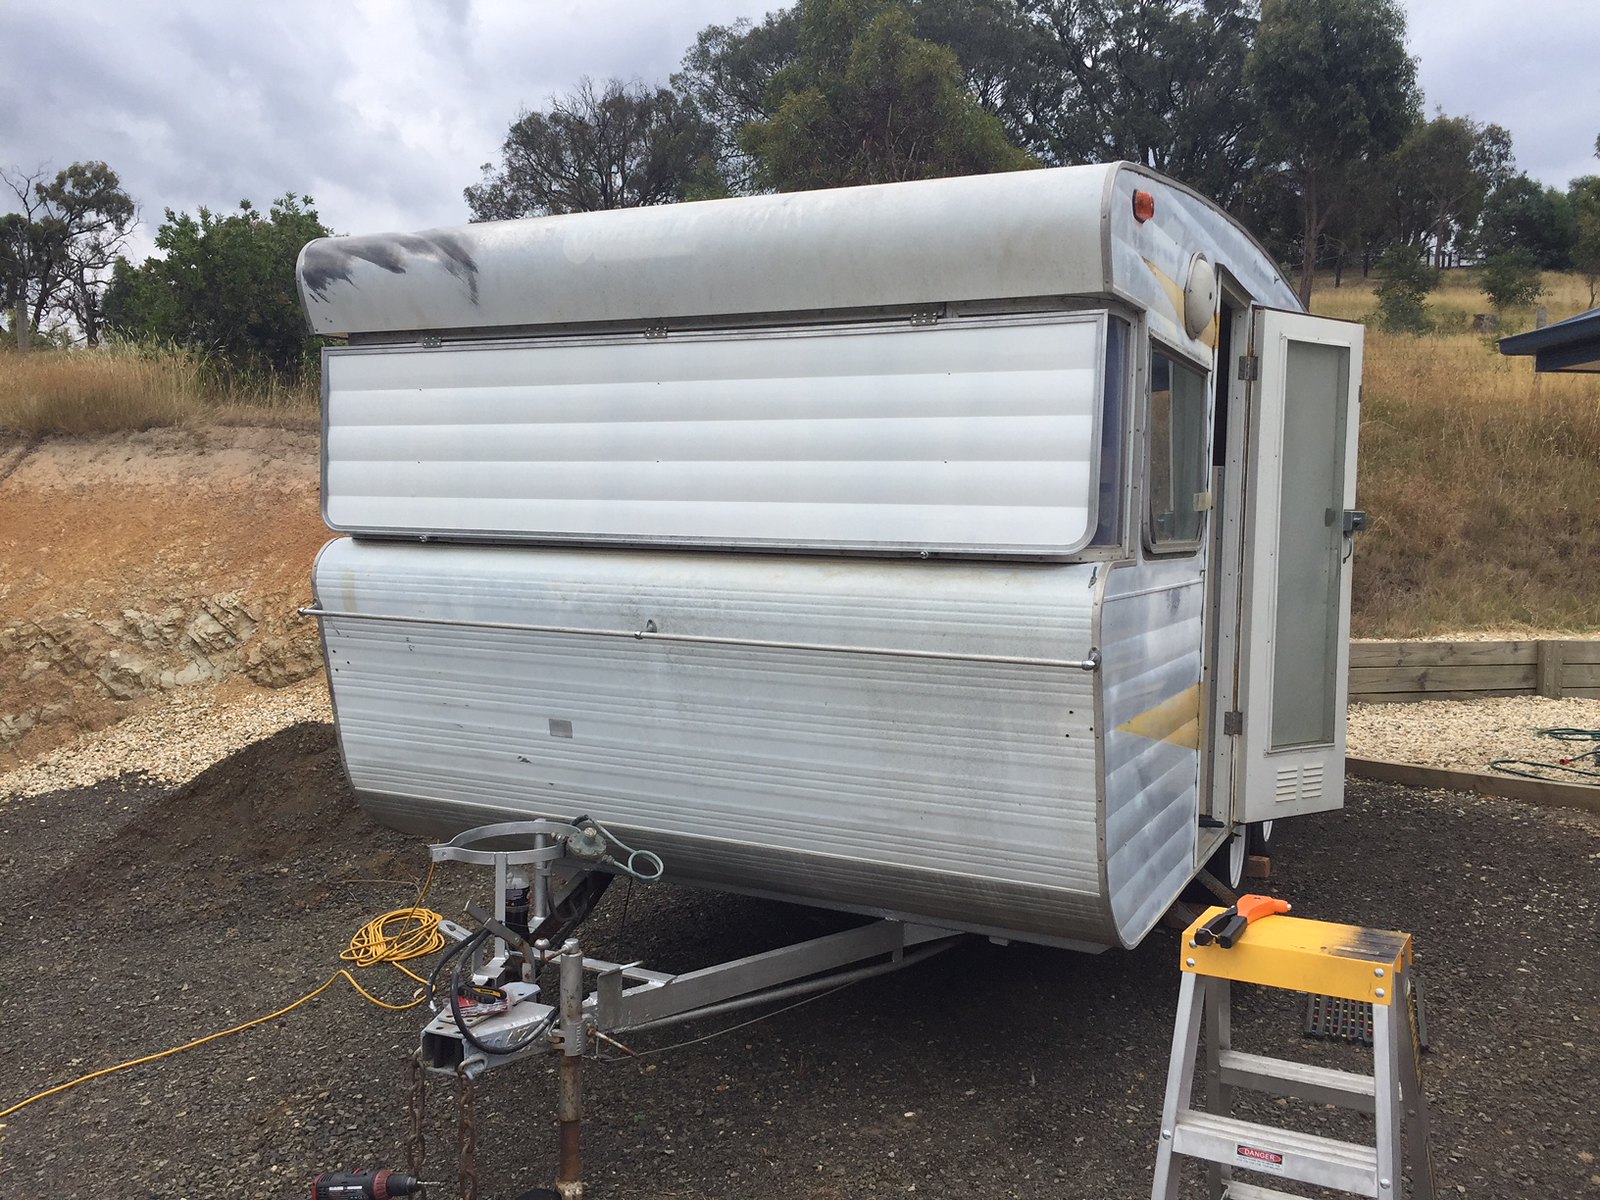 FF5BFA49-60C7-428E-80C9-8F379E002D91 FF5BFA49-60C7-428E-80C9-8F379E002D91 by Gavin Gregory, on Flickr I was then going to re seal a couple of windows but they are actually still sealed well at the moment (I'm sure that will change but I can go onto other more pressing stuff) so thought I'd start the J moulds as there is water damage down the back from these. Up the ladder and guess what I found... Marconi rail!!! Holy crap, wasn't expecting that! 🙁 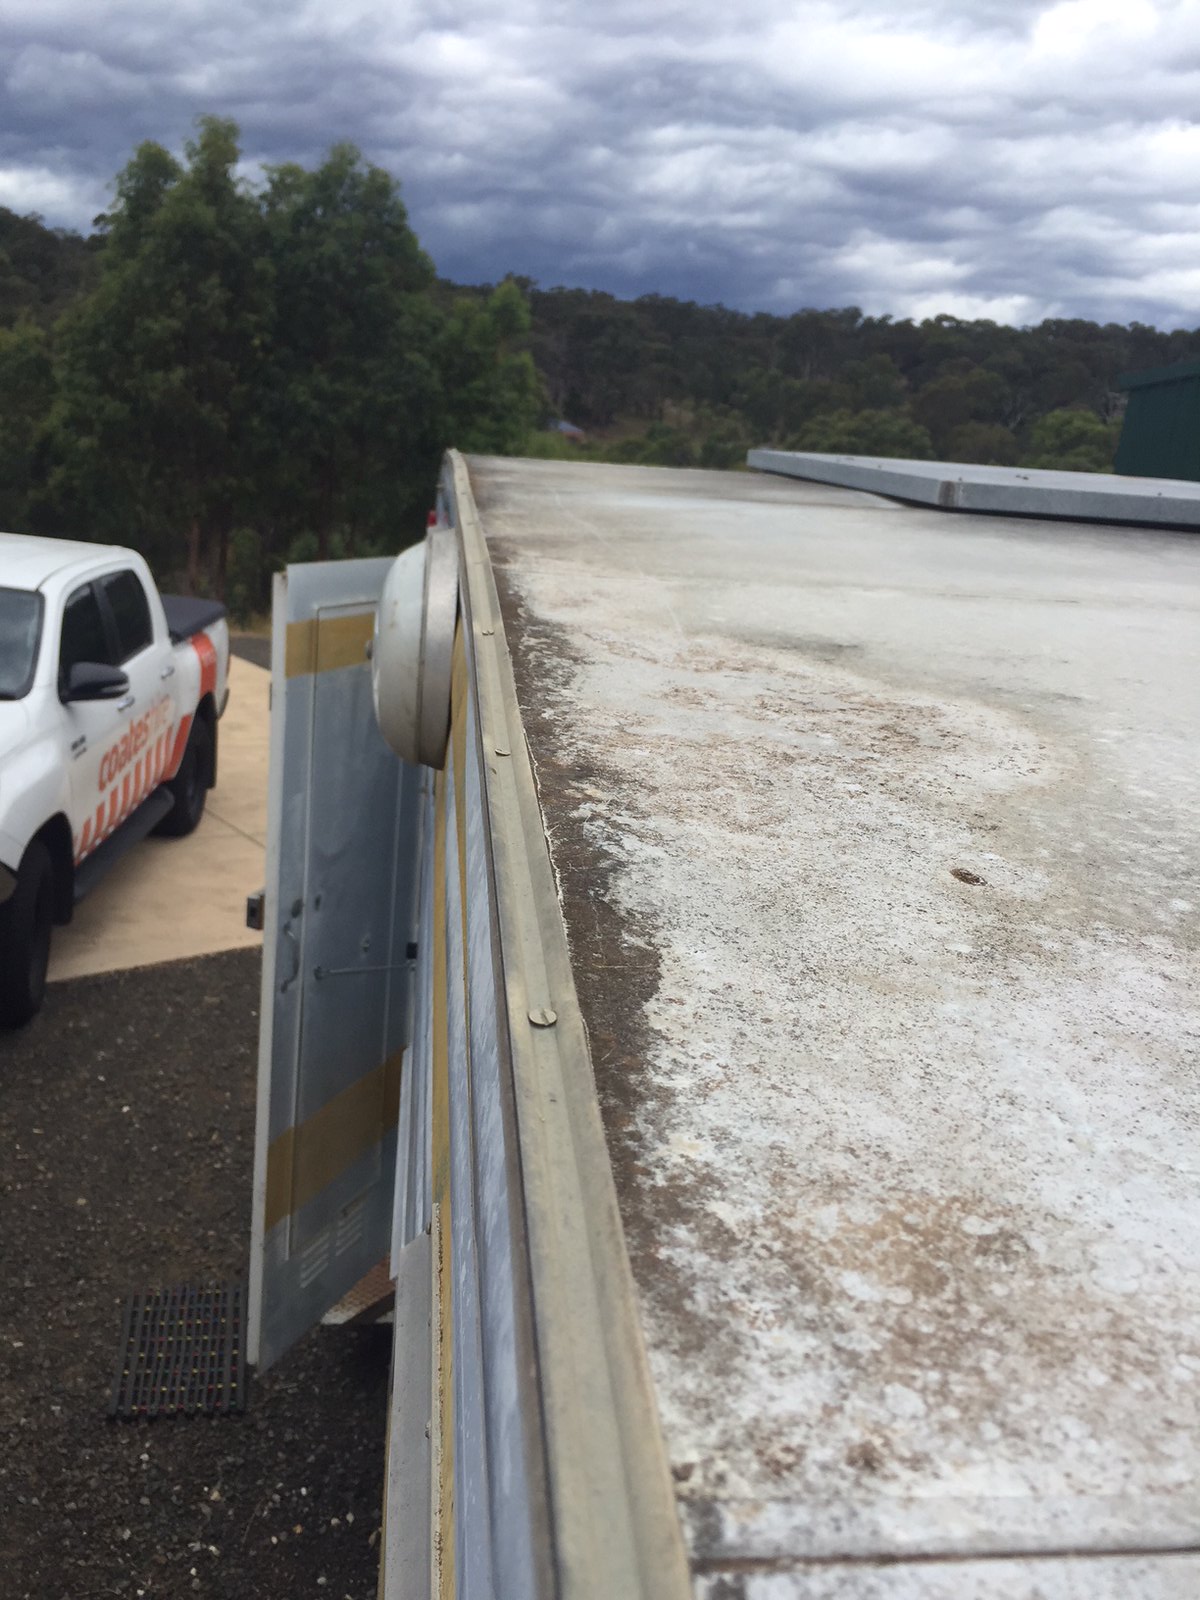 515EE0A1-B39B-4F01-A7CB-913D34F2A2F3 515EE0A1-B39B-4F01-A7CB-913D34F2A2F3 by Gavin Gregory, on Flickr So, thought I'd pull the annex out to confirm this... sure enough.... 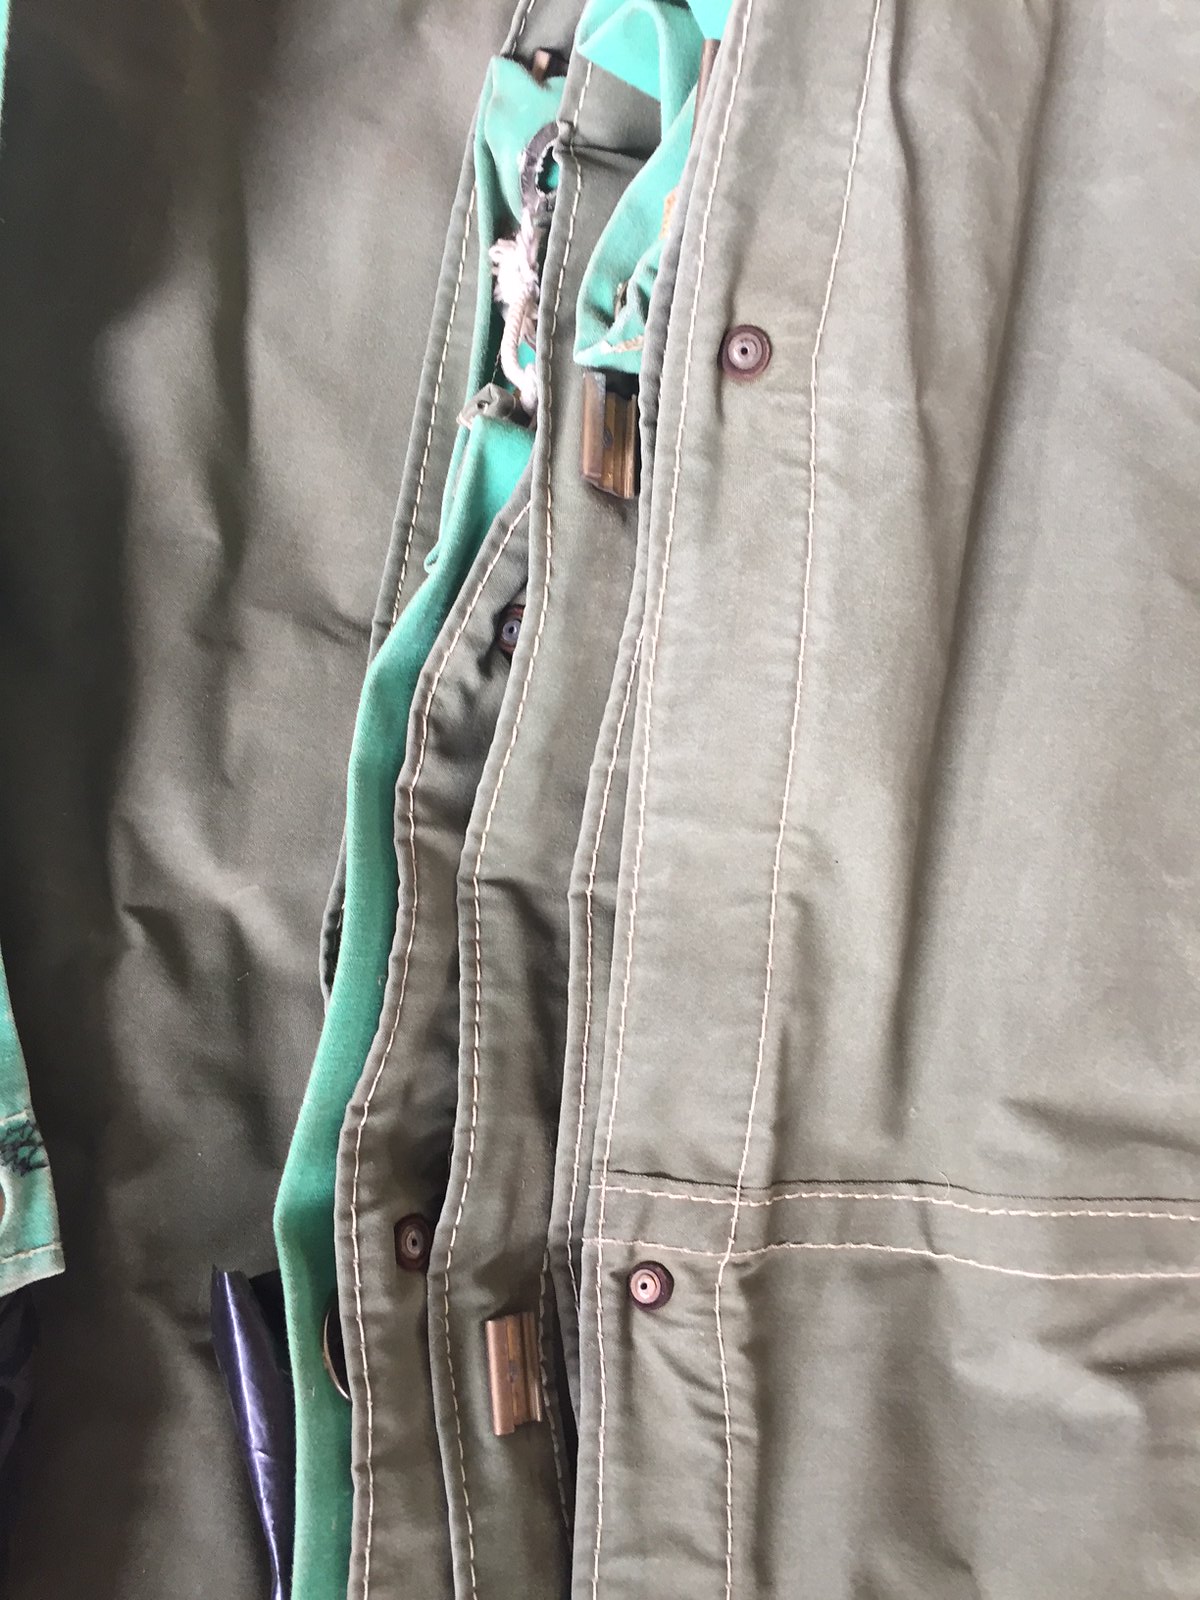 2116DE5B-6EF5-4F20-AA37-A301EC5EC906 2116DE5B-6EF5-4F20-AA37-A301EC5EC906 by Gavin Gregory, on Flickr Anyone actually used these? I have read only horror stories on the Vintage forum about getting the annex up using these.. I'll guess I'll find out as I doubt I'll have the time to modify the annex and put up sail track before its first outing. So unfolded the annex a bit more - I'ts in great condition. 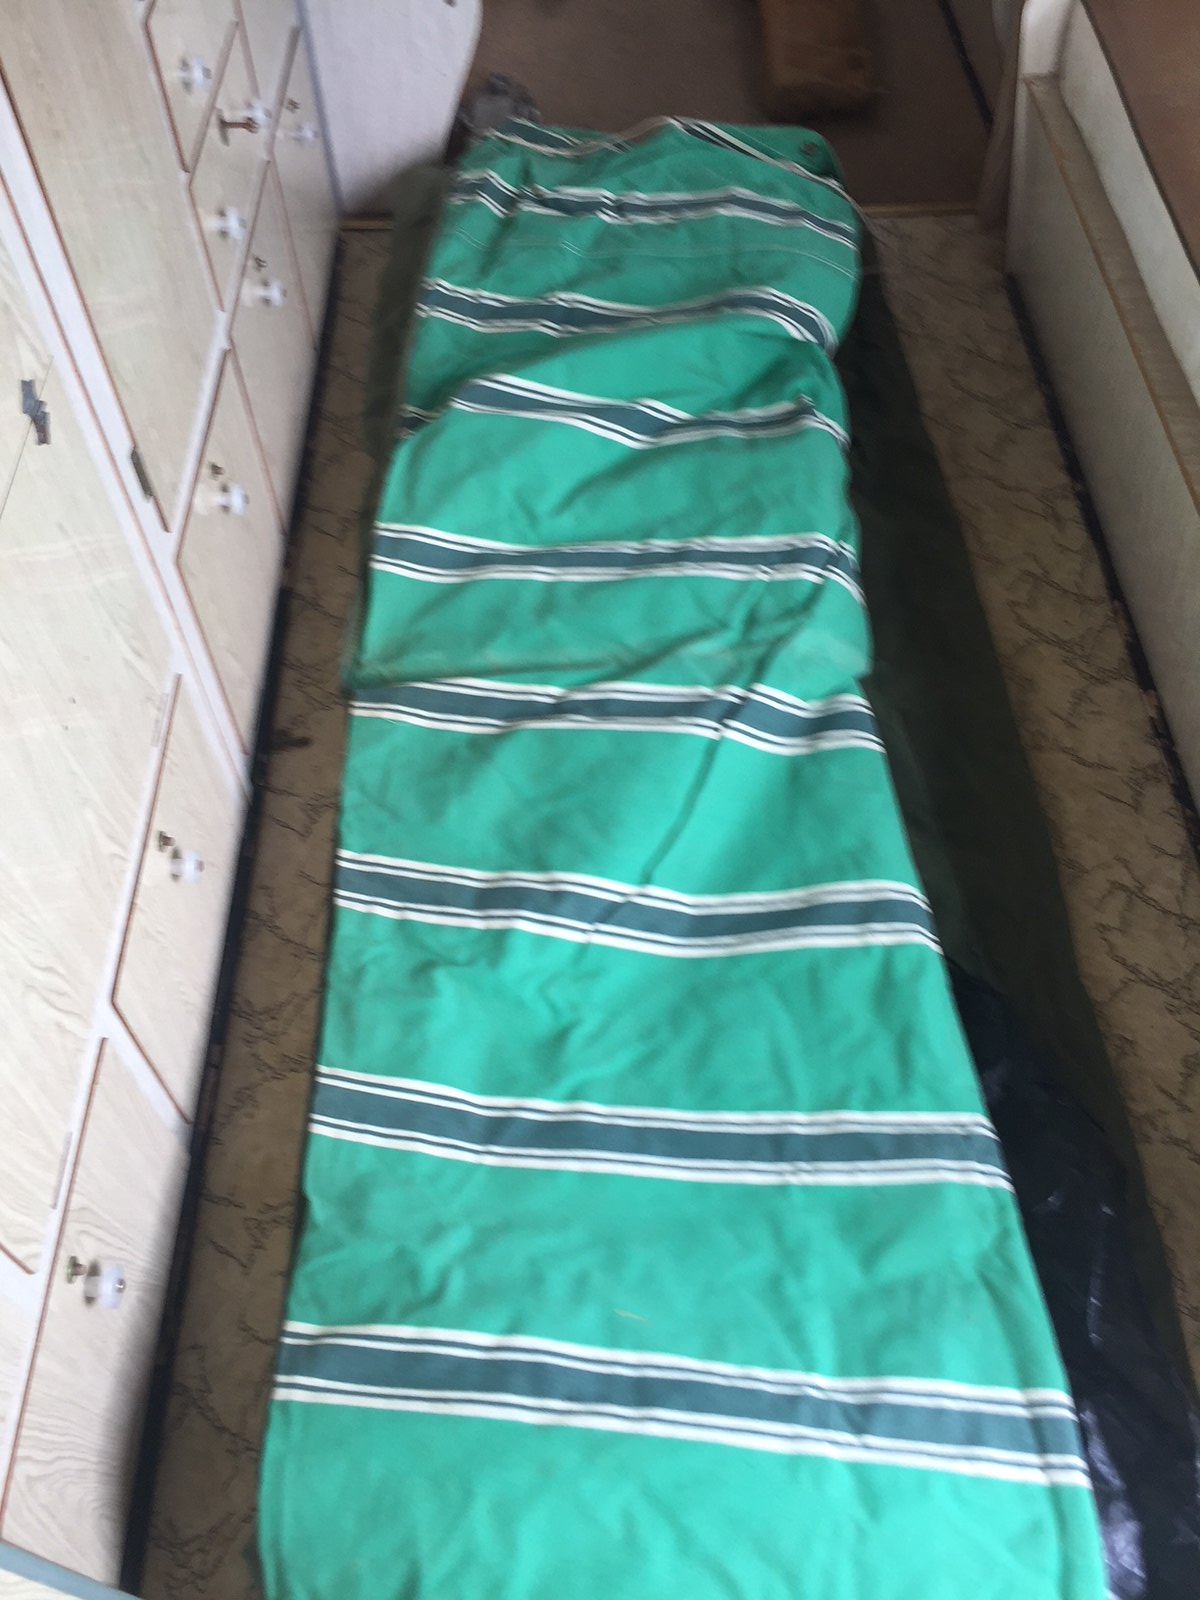 34A4A583-4062-4E28-8F63-0F38D6C2B2AF 34A4A583-4062-4E28-8F63-0F38D6C2B2AF by Gavin Gregory, on Flickr Cleaned and resealed the back half of one side, no pics, but nothing really to see. Took the back outside light off and another surprise... 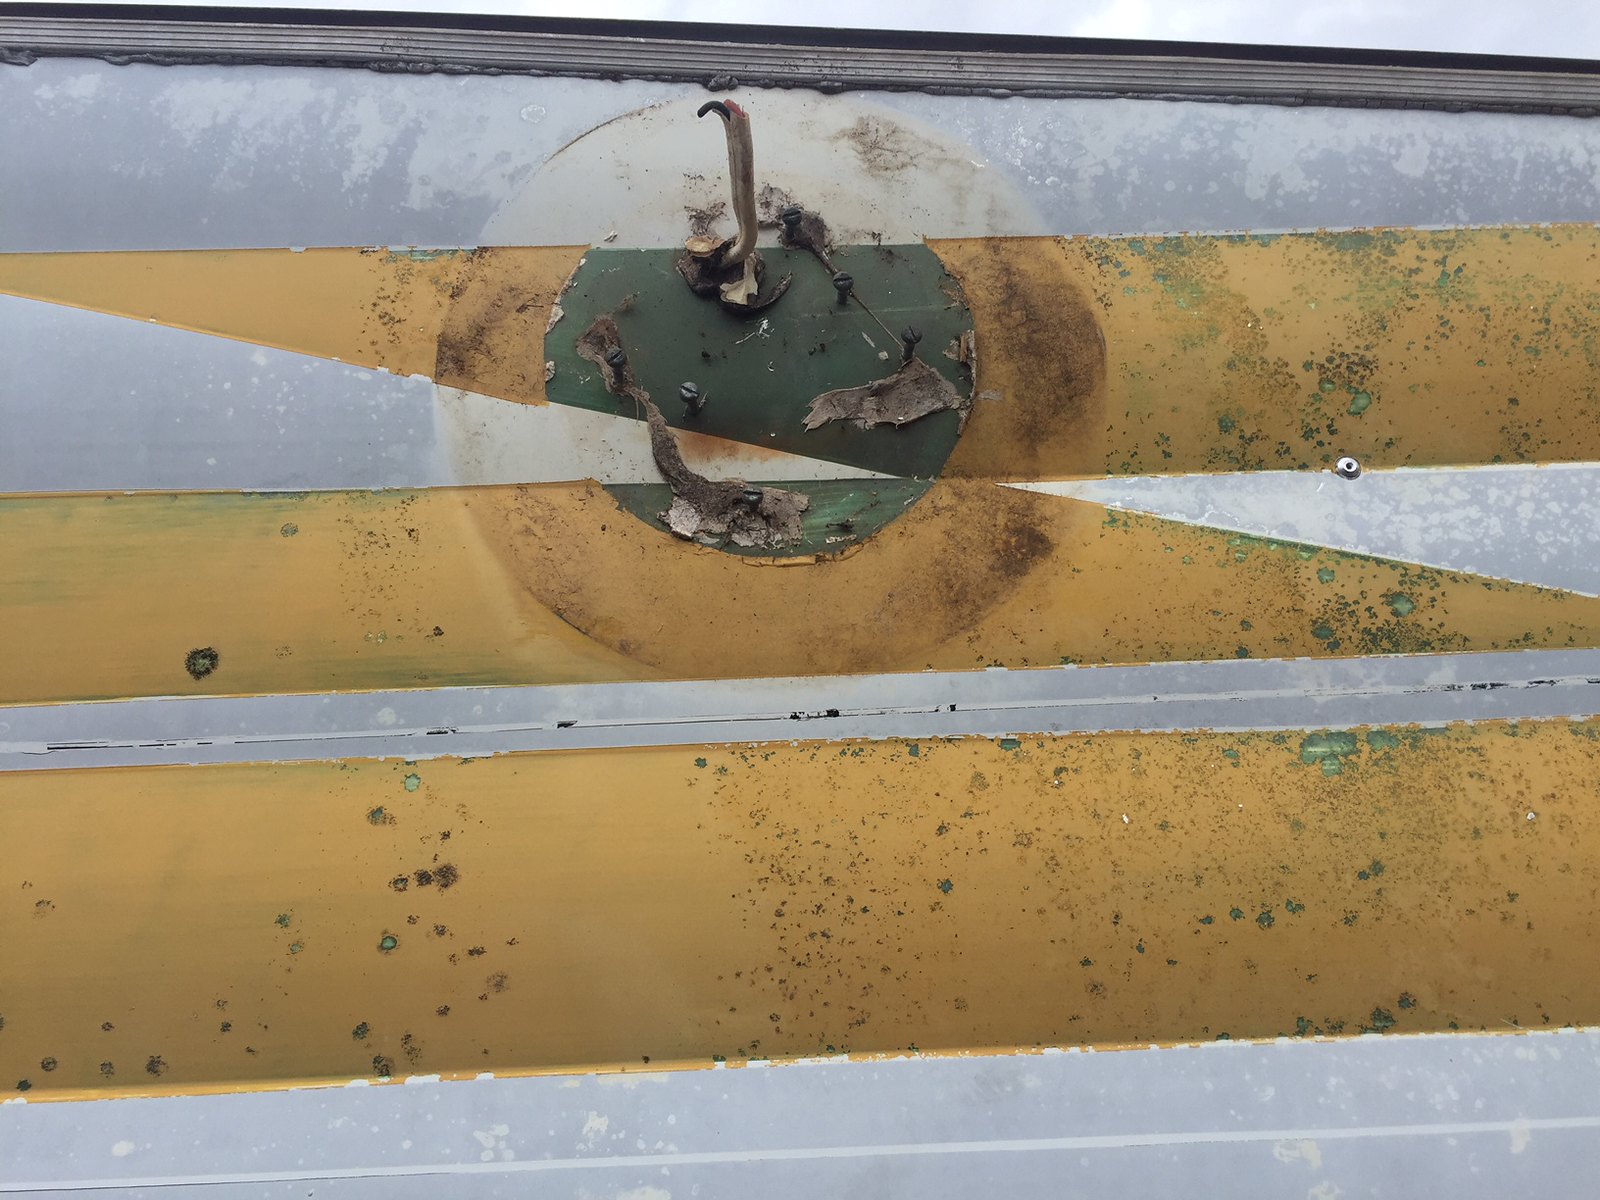 01FCC372-8153-4452-A980-3577D5A1CA9E 01FCC372-8153-4452-A980-3577D5A1CA9E by Gavin Gregory, on Flickr The original colour of the stripes used to be green! Called the original owners Son but he said he only remembers it being yellow so either it was changed early on, or changed at the factory - if someone ordered yellow would they have painted over a green stripe to use a different van rather than wait for a new van to come through the factory? Hmmm, now I have to work out what colour to do this - the green does match the annex nicely though... Still time to think about that though. I do like how Zippo did the green stripe over a silver base on his, could well steal that idea...😉 Did a couple of other jobs, installed a couole of new locking clips to one window, a few new rivets here and there and fixed uo a bit of rubber glazing wedge on the windows so it doesn't look as grotty. |
|
|
|
Post by Husky on Jan 12, 2018 19:13:19 GMT 10
I agree. Zippo's van looks awesome with the green stripe and the Aluminum check plate. A metalic stripe maybe a few shades darker than he did would not only match the awning but also ad some modern bling lol
sweet discoveries though!!!
|
|
|
|
Post by pisces51 on Jan 12, 2018 21:52:07 GMT 10
G'day snoops, I reckon someone has done a repaint of the side stripes after a number of years, probably when the original green paint had faded. The edge lines of the original green paint under the light fitting are nice and sharp, whereas the yellow edge lines show a lot of bleeding of the paint.
Marconi track and clips come in different matching sizes. Measure the width of your track to find out which size you have. From memory, there are two sizes - something around 11/16ths inches, and 14/16ths inches. The trick with marconi track is to cut the ends of the track so they have a V-shape to them (like an arrow head). The clips will slide into the arrow head and onto the track much more easily. You have to bunch 3 or 4 of the clips together and have the canvas between the clips arched like the back of a caterpillar. Feed those clips onto the track and push or pull them along the track. Repeat with the next 3 or 4 clips, and so on till the end. Hope you have a reasonable head of hair because you'll probably tear most of it out 'til you get the hang of it. A ladder helps, so you are about chest height to the track - makes it heaps easier to see that the clips are going on the track correctly. Cutting a V-shape at both ends of the track allows you to feed onto one end or the other - depends which end works best for you, or whether you are left-handed or right-handed.
cheers,
Al.
|
|
|
|
Post by Mustang on Jan 13, 2018 6:28:08 GMT 10
Hi Snoops, We have a Marconi Track. Its not all that bad as a track, its the heavy canvas that makes assembling something of an issue. I used to get "under the canvas" & feed the clips on from underneath....wrong.
We now carry a work platform with extendable legs (Gorilla, Bunnings) & feed the clips on from above the rail 90% easier, my wife pulls on a rope at the same time, silicone spray helps & as Al says"Vee"the leading edge. Others see us & say get a sail track, my opinion if you have a new lightweight material awning that may be good, but canvas is canvas & it is heavy. When ours is up its water tight, no flapping & looks neat. We have 3 x drop nose pins each end.The other option is to fit a modern ratchet style, I would possibly do this during a reno where you could reinforce the mounting points but not now on a finished van. 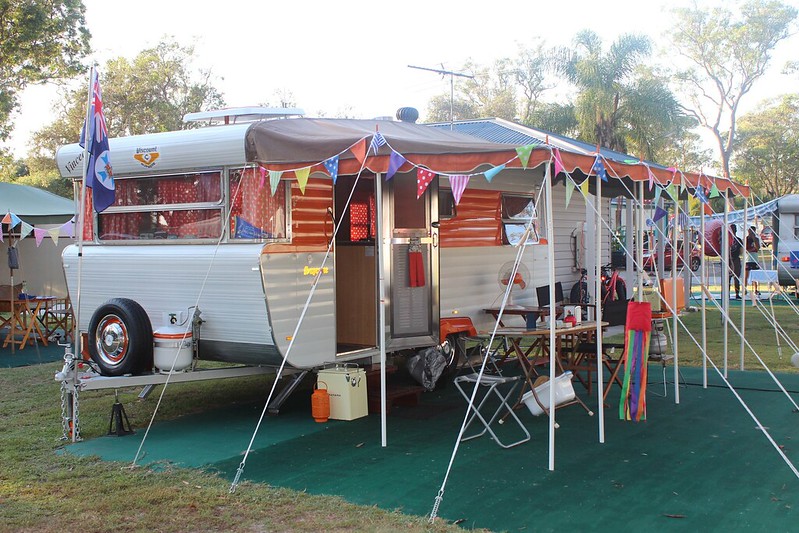 |
|
|
|
Post by snoops on Jan 13, 2018 8:37:07 GMT 10
Thanks for the repies guys. I may set up a video camera when I first attempt to put the annex up so we can all have a giggle....
Re the paint, it is a strange one as the Son of the previous owner was old enough to remember it always being yellow right back in the 70's - maybe his Dad (who bought it new) didn't like the green, we may never know but I think I may go with the green now. It will match the annex and it is probably a colour that was more likely used in the very eary 70's - the late 60's versions I've seen have darker colours, but not sure if this was always the case, but green it is.
It won't be the same shade, as mentiond I'll bring some 'bling' to the highlights when I do this. Won't be for a while anyway, so nothing that needs to be thought of immediately. Just want to get it ready for its fist outing.
Hmmm, need to find a name to it too - can't keep callin it 'it'...
|
|
|
|
Post by Mustang on Jan 13, 2018 11:29:08 GMT 10
Re your colour scheme:
We had decided on Orange/White (original van strip was tangerine) way before we unwrapped the awning, the van came with two full annexes so there was canvas & plastic in piles everywhere.
We had the curtain material, hosts of other things to do with orange.
Imagine opening the awning & finding Lime Green!!!!!!!!!!!!!
|
|
|
|
Post by 78466noM on Jan 15, 2018 9:57:07 GMT 10
The long drying paint may have the problem with dust and bugs on large surfaces. I am going to tarp off one section at a time and spay with fast drying auto paint that way I can keep the over-spray away from other items .
|
|
|
|
Post by snoops on Jan 15, 2018 16:24:35 GMT 10
Yes, been thinking about this - there was a fly stuck in the awning when it dried - it's feet are now a part of the van... 😆
It's only because I have a full tin of it that I'll look at using it - I'll have to build a makeshift spray booth anyway to paint it as there will be too much overspray if Imdon't contain it. All in the future, it will be last on the list, but hopefully this year.
Once I get it home I'll be concentrating on the 12 volt system and the water and pump system so it's usable for it's first outing in March. 😊
|
|
|
|
Post by snoops on Jan 22, 2018 21:19:53 GMT 10
Accumulating parts without even trying. Picked up a Truma HWS today at a bargain price. Never been installed, given to a mate as part payment for something by a guy that owed him. Small snag is that it is in Brisbane so may have to wait until Easter until I catch up with him at the Land Rover 70'th meet in Cooma.
|
|
|
|
Post by thehohars on Jan 23, 2018 8:04:07 GMT 10
Accumulating parts without even trying. Picked up a Truma HWS today at a bargain price. Never been installed, given to a mate as part payment for something by a guy that owed him. Small snag is that it is in Brisbane so may have to wait until Easter until I catch up with him at the Land Rover 70'th meet in Cooma. We can have it down @ Corowa if you like. That gives you time to install it before Easter. |
|
|
|
Post by snoops on Jan 23, 2018 11:09:53 GMT 10
Accumulating parts without even trying. Picked up a Truma HWS today at a bargain price. Never been installed, given to a mate as part payment for something by a guy that owed him. Small snag is that it is in Brisbane so may have to wait until Easter until I catch up with him at the Land Rover 70'th meet in Cooma. We can have it down @ Corowa if you like. That gives you time to install it before Easter. Never thought of that - that would be awesome if you have room.  Thanks so much.  |
|