|
|
Post by Mustang on Jul 9, 2015 19:57:41 GMT 10
|
|
|
|
Post by atefooterz on Jul 9, 2015 23:06:18 GMT 10
Great look, who will be the first to hook up a slide out bay into the annex area that has a beer tap, hooked up to the kegs in the specialist in van beer fridge? My home brewing relatives discovered kegs and dedicated fridge with an external tap in the late 90s after almost getting divorced over bottle clutter the other followed after a quiet word from his better half to follow suit,who then took almost 5 years for the novelty to wear off before getting serious about fishing again. In another 10 or so years i can see them getting into caravans. The older one got caraven hooked but decided hiring a Landcrusier and off road white box with the works was the way to go, they spent 6 weeks doing the red dust up NT to QLD FIFO style and loved it. Living in suburbia with no parking for a caravan project is holding them back atm,me thinks.  What i love about your tap is the great height to use it without chipping the best picnic porcelin whilst in a washing up frenzy.  |
|
Deleted
Deleted Member
Posts: 0
|
Post by Deleted on Jul 11, 2015 16:42:43 GMT 10
Beer....who said something about beer Mmmmm drool...drool  |
|
|
|
Post by Mustang on Jul 19, 2015 17:10:18 GMT 10
Just two little guys to go, that will make 13 !!! Note how neat the previous mastic was against the cladding!!!!!! 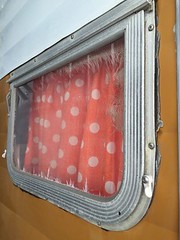 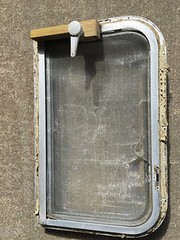 At least these two were covered in mastic & not Silly-cone |
|
|
|
Post by atefooterz on Jul 19, 2015 20:49:14 GMT 10
Those curtains are certainly glam, looks to be getting closer to what you want now!  |
|
|
|
Post by Mustang on Jul 20, 2015 7:26:38 GMT 10
Think I'm over the "HUMP"
Just saw a Viscount in the for sale section, makes one realise how far we have come.
|
|
|
|
Post by Mustang on Jul 20, 2015 17:48:33 GMT 10
Trying to make a window winder "rivet" look neat & functional without being too tight? Remendy , do not use a rivet.... this is much neater & easier. $10.00 for 25 sets. 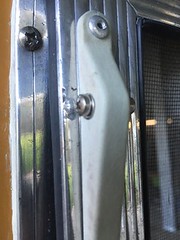 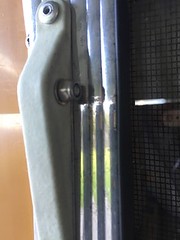 |
|
|
|
Post by awbeattie381 on Jul 22, 2015 13:37:14 GMT 10
given its a nylock nut I am guessing you dont have to nip it up all the way?
|
|
|
|
Post by Mustang on Jul 22, 2015 18:35:54 GMT 10
given its a nylock nut I am guessing you dont have to nip it up all the way? Thats why I decided on the metal thread. It leaves the lever loose to do its job. I will now drill out all the other lever rivets  & replace them. Most of the rivets I replaced drew inside the plastic holder & have that squashed look, very amaturish . |
|
|
|
Post by Mustang on Jul 22, 2015 19:53:17 GMT 10
One wonders where the weight comes from??? Today I pulled my door off, then pulled it apart, then I had bits all over the shop, then when I gathered it all up, I said s**t where did all that come from?  (The image doesn't show the main frame)  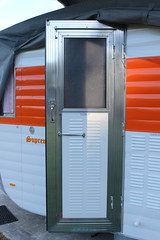 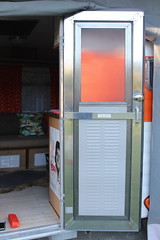 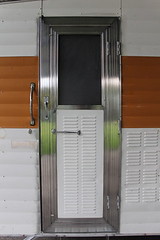
More scrubbing, BUT this is the LAST polish job....all the windows are done, not together, but done. Pheeew. |
|
|
|
Post by Mustang on Jul 26, 2015 17:10:04 GMT 10
Another milestone today, all the windows are finished & also the door (the door took 4 Days) Now I'm looking for a seal that fits on the hinge side of the door, it would have one of those fluffy seals, like below: 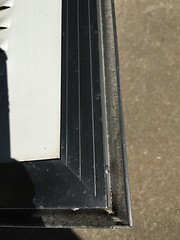 Seal required here: 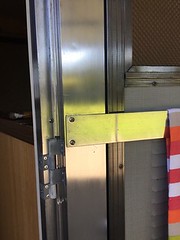 I tried a rubber seal but it won't fold back, to allow the door to close. The width also varies considerably. |
|
|
|
Post by atefooterz on Jul 26, 2015 17:46:18 GMT 10
Best polished alloy job award big time !  |
|
|
|
Post by doublechevron on Jul 26, 2015 20:13:46 GMT 10
It's really is remarkable the difference polishing all the aluminium makes! I sure hope it lasts in it's polished state for you  seeya, Shane L. |
|
leeron
In Training
  1966 Duralvan
Posts: 46 
|
Post by leeron on Jul 26, 2015 21:40:33 GMT 10
The brush seal for the door looks identical to a nylon brush seal i used to replace all the seals on the sliding windows in my house.
I think it was Raven brand by memory and was available in the door and window seal section at buunningds and came in two different widths. I used the wider brush strip and trimmed the hard plastic backing strip a little to fit my older size brush tracks.
It has a peel off adhesive backing but didn't peel this as the tracks were a very tight slide in fit.
|
|
Deleted
Deleted Member
Posts: 0
|
Post by Deleted on Jul 28, 2015 12:51:45 GMT 10
G'day Mustang, couldn't resist having a peak at your van project - excellent work you're doing there.  Pete |
|
|
|
Post by Mustang on Jul 28, 2015 19:01:09 GMT 10
The brush seal for the door looks identical to a nylon brush seal i used to replace all the seals on the sliding windows in my house. I think it was Raven brand by memory and was available in the door and window seal section at buunningds and came in two different widths. I used the wider brush strip and trimmed the hard plastic backing strip a little to fit my older size brush tracks. It has a peel off adhesive backing but didn't peel this as the tracks were a very tight slide in fit. Thanks mate for the heads up, I'll check it out. |
|
leeron
In Training
  1966 Duralvan
Posts: 46 
|
Post by leeron on Jul 28, 2015 21:42:43 GMT 10
No worries,
They do a black or grey depending on the width black was the skinny short nap fur and grey was the wider longer nap fur by memory......
was only last year.
|
|
|
|
Post by awbeattie381 on Jul 29, 2015 13:28:39 GMT 10
door looks better than new! Good job! You must be relieved to be finally getting on to other things now!
|
|
|
|
Post by Mustang on Jul 30, 2015 19:30:07 GMT 10
It's really is remarkable the difference polishing all the aluminium makes! I sure hope it lasts in it's polished state for you  seeya, Shane L. Hi Shane , I have been so slow that some windows have been done for months & still shiny, so if they need polishing a couple times a year I'm OK with that. I originally thought the same as you, "what am i doing" but no choice, either pay for powder coating or polish off all the grime. |
|
|
|
Post by atefooterz on Jul 30, 2015 21:38:12 GMT 10
The secret to alloy lustre is what it is made from,really old duralium style seems to hold shine but pitts badly. 70s stays great and better than 80s.Buffing compound seems to also help as i buffed a structure in August 88 that lived outdoors and in salt water that held up for almost a decade. However areas that stayed touching the ground and had leaves composting for 3 months, while i wa overseas never came back, the rest shined up well again just using detergent and elbow grease via a cut off piece one of those great cotton hand towel rolls.
|
|
|
|
Post by Mustang on Jul 31, 2015 19:42:21 GMT 10
Spent the day jerking more wires.
I'm hell bent on not showing any modern attributes, so all the wiring will be hidden until needed, ie leads will be hidden in cupboards. We will have TV to the front, TV to the rear via a splitter, 12v plugs to the front & rear, much disguised. 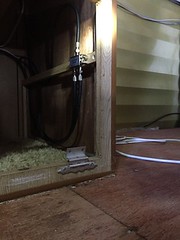 Our wiring block under the seat , out of sight. 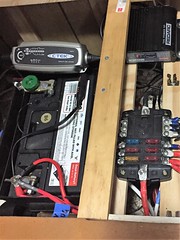 TV was invented in 1977, wasn't it? 
|
|
|
|
Post by atefooterz on Jul 31, 2015 20:20:47 GMT 10
In 1977 this nice colour TV with built in radio would be quite smart and a focal point around the campsite with the Footy, Tennis or Cricket lovers or Sounds 77 with Donny Sutherland on Saturday Mornings.   |
|
|
|
Post by Mustang on Aug 5, 2015 16:51:06 GMT 10
One of our family members was concerned that the bunk pole could be accidently lifted out of the support, causing the top bunk to swing down on to a person sleeping below. So I used these nifty pins top & bottom. 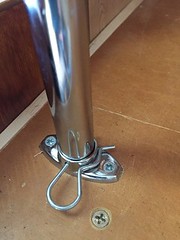
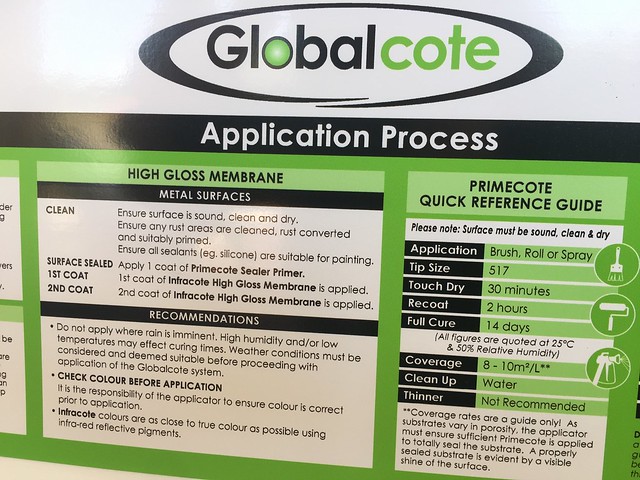
Sealing the roof, a section at a time. Weird stuff this membrane paint, needs two undercoats (the u/coat is very thin & its easy to miss a section) & three topcoats to get a decent coverage. I have been cleaning the powdery old paint off with Acetone & a wire brush on the drill, so its raw aluminium to cover. The quality seems great, as a scratch test will not budge it. 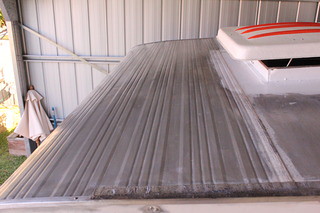 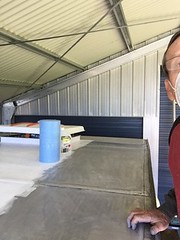
 |
|
|
|
Post by atefooterz on Aug 5, 2015 17:25:38 GMT 10
Nice membrane work and a great idea plus solution with that bunk before any carnage!
|
|
|
|
Post by doublechevron on Aug 6, 2015 10:41:55 GMT 10
One of our family members was concerned that the bunk pole could be accidently lifted out of the support, causing the top bunk to swing down on to a person sleeping below. So I used these nifty pins top & bottom. Sealing the roof, a section at a time. Weird stuff this membrane paint, needs two undercoats (the u/coat is very thin & its easy to miss a section) & three topcoats to get a decent coverage. I have been cleaning the powdery old paint off with Acetone & a wire brush on the drill, so its raw aluminium to cover. The quality seems great, as a scratch test will not budge it. I'm confused. Are you sealing the roof seams using a paint ?? I've looked at these on the two 'vans here and decided the only way to make them leak proof is to trowel silicon down them (that way you push the sealer all the way down into the seem). The Windsor here was done that way at the factory... and 30years later I have no intension of re-doing the roof seems as there still as perfect as the day they left the factory! seeya, Shane L. |
|