|
|
Post by Mustang on Jan 20, 2015 18:55:49 GMT 10
Everyone has their favorite sealer. Mines sikaflex. I have sikaflex pro sitting on the bench.  ?? Can it be that difficult to get things apart again? Asked a caravan supplier today they suggested mastic tape or Bostick V60. |
|
|
|
Post by Mustang on Jan 20, 2015 19:09:09 GMT 10
wow amazing progress so far! I go away for a few weeks OS and in catching up I find a 2 page post of your reno in progress. You sound like I did when I first brought our van home. On paper and after the first viewing I had a short list of what needed doing. After spending a good weekend assessing every little component inside and out I had a 2 page list of what needed doing. Mine didnt have water, gas, 12v, a double bed (in the process of making one), but it had a new drawbar. new (average) paintjob, chassis had been painted, new wheels and tyres and lights etc. All I thought it needed was a double bed, some paint, flooring, curtains, benchtops/tabletops, a water tank, gas bottle and off we could go. Even though the van is in pretty good condition it has taken me a long time to make any sort of progress. Its probably also due to the fact the van is in Wollongong on the inlaws driveway and we are in Sydney... What I have discovered is you need to draw a line somewhere. Some people strip their vans back to a chassis and rebuild it from the ground up. Its easy to think that way when you start tearing it apart. My wife is a perfectionist so she really should have married a caravan builder! We have had a few arguments...haha! I am mr practical. Everything still needs to look good but at the end of the day, my van is 41 years old. Its never going to look perfect! Each time I plan on tackling a job I find something else that needs attention! On another matter, I found I used to spend quite a lot of time in bunnings buying stuff I didnt know I needed, now I spend hours in there sratching my head trying to work something out in my head when I realise the size timber/bracket/joiner or whatever I need doesnt exist! On the subject of wheels, I assumed your van would have come with 14 inch HT holden wheels? I have seen a few come up on ebay and they arent that expensive for second hand ones (had my eye on one in Sydney for $10 but forgot to bid on it!!!!). However you can buy them new for about $90 I think from ebay. They appear to be much cheaper than old 13 inch holden wheels. I am in the process of trying to swap my 13 inch torana wheels over for original wheels. I have 2 original ones (with original viscount hubcaps) but one is a little bent. So I need one more so the bent one can be the spare. Keep up with the posts. btw love that nautilus!! In plan view it looks like a boat!! What a comfortable way to travel the tele track! jealous! Your van is a mirror of our van, no gas,no on board water,no table, no bed (to speak of) Your difficulty of storage & working on the van is massive compared to us. Yes we have the 14" HT . I have just ordered all new brakes after frigging around with the old ones. Those original Viscount hubs are GOLD, you never see them advertised, I'm going for trim rings (found 3 NOS) & caps when I see some at sensible prices. Bunnings....they almost know my name!! I,m in deeper than intended but its only cladding a frame & lining, cant be that much you can't do yourself. Cheers & thanks Brent |
|
|
|
Post by Mustang on Jan 23, 2015 17:51:03 GMT 10
Today the postie bought pressies, new brakes, these were only $250 delivered, with Japanese bearings. Why stuff around with old crap? 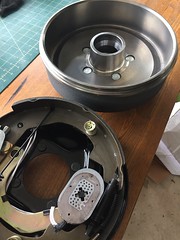 The tired ones, possibly original? cracked magnet, drums possibly out of round, pads worn. Would only work (mildly) on full boost. 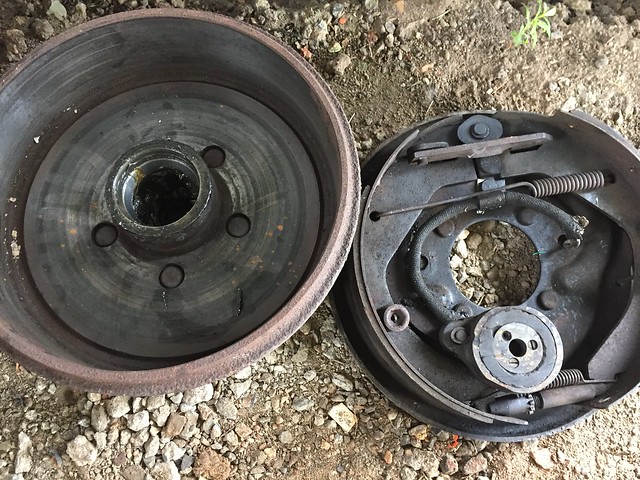 Finished my first window today, re-glazed, new wedge & weather seal, bug mesh, polished. The weather seal originally was 3mm wide, but the narrowest I can find is 4mm, this means trimming out all the crimps & widening the corners. Still would not pull through, so I opted to lay one side in the groove & push the other in with a screwdriver, slow but its in. Should have it in place tomorrow for an image. 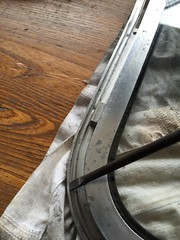 Widening the corner weather seal track 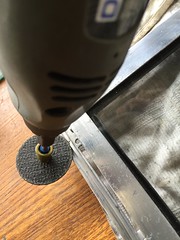 |
|
|
|
Post by Mustang on Jan 30, 2015 19:16:56 GMT 10
Glazed inside & outside our first "bay" today, pretty happy with the results. And Ooohhh so clear compared to the old. 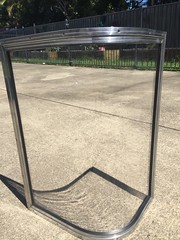 Test "sit in place", still don't know what I'm doing, just putting back what was there?   So nice & shiny compared to the old Sh**t. New wood frame goes in when I clean up the other Bay, the flat frame is done... flats are sooo easy, & hey NO SILICONE!!!!! 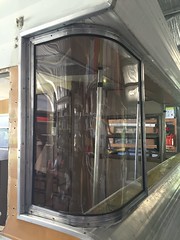 |
|
|
|
Post by Mustang on Feb 1, 2015 20:34:52 GMT 10
Cleaned up the frames of the second bay: 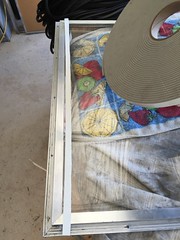 Found it easier to take all the tape backing off: 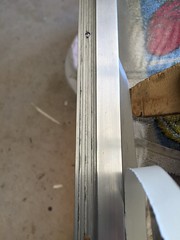 Used a small piece of ply to push the tape to the inside if the frame, & then clean up the sticky off the plexi. All appear to have gone together well, I should have all the back frame & windows in this week? |
|
|
|
Post by Mustang on Feb 6, 2015 17:25:13 GMT 10
Looking back through my thread, I've been making predictions.. well that's finished!!! Spent 4 hours today & came back to exactly where I started. While the rear frame was on the bench I decided to fit the bug mesh, 1st one went well, 2nd one I slipped & tore it, not enough slack to redo, bugger, back to bunnings for another roll. Now everything is nice & tight  I test the frame in the hole, sh@t, bugger, bum, I've pulled the frame out of shape & have to remove both lots of mesh. You can see the gun safe in the back ground...good thing its locked... I felt like doing an Elvis!! 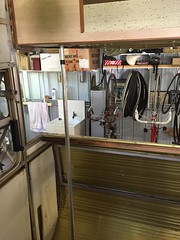 At least my plastics are in place & glazed along with the weather seals, but back to bunnings tomorrow for more mesh...Aahh well the beers good though . |
|
|
|
Post by atefooterz on Feb 6, 2015 18:33:11 GMT 10
Wow man even your pic failed & does not show. I had a win getting a door i can modify to keep original & some bits & pieces, sadly my wallet keys & multi focal glasses were stolen as i dusted down the door to put in my van 2m away, worse the dealer has no cctv & did not know the 2 fluro men, who did not buy anything, the others around were rellies or known customers so eliminated. The race is on to get new cards glasses take 2-3 weeks & i can not afford the 500$ish to replacve anyway buy a new lisene was about $35 in the 90s so gosh only knows how much now, makes the 2-$300 cash in the wallet seem cheap haha
|
|
|
|
Post by Mustang on Feb 7, 2015 7:39:26 GMT 10
Wow man even your pic failed & does not show. I had a win getting a door i can modify to keep original & some bits & pieces, sadly my wallet keys & multi focal glasses were stolen as i dusted down the door to put in my van 2m away, worse the dealer has no cctv & did not know the 2 fluro men, who did not buy anything, the others around were rellies or known customers so eliminated. The race is on to get new cards glasses take 2-3 weeks & i can not afford the 500$ish to replacve anyway buy a new lisene was about $35 in the 90s so gosh only knows how much now, makes the 2-$300 cash in the wallet seem cheap haha Sorry to hear ate, amazing how brazen some thieves can be. |
|
|
|
Post by atefooterz on Feb 7, 2015 9:01:43 GMT 10
Fool moon syndrome... and drive/ in fly in non local meth heads!
|
|
|
|
Post by Mustang on Feb 9, 2015 18:01:25 GMT 10
Not finished, but a tad closer, the rear bays, rear centre & LH rear are glazed, bug meshed (6x times) sealed & fitted. 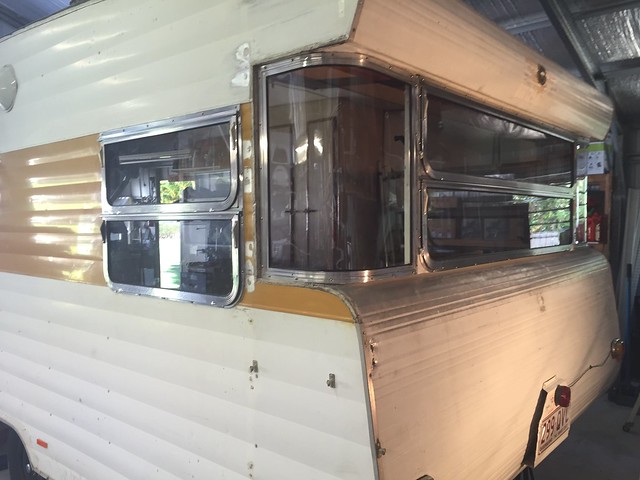 After much deliberation I decided to go with Caravans Plus advice & not use silicone, instead caulking tape. Now if I need to (heaven forbid) I can extract any window without destroying anything. Found the product good to use, cleans up with soapy water. 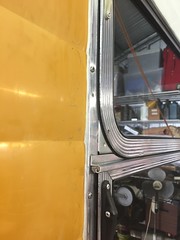 The log cabin cladding is well sealed with the tape: The inside weather seals sit nicely proud, I will hold the wind-outs closed with turn buttons, (on order) This image shows the condition of front, the back was worse: One would wonder how incompetent, people with a sealer gun can be, look at the bay?? 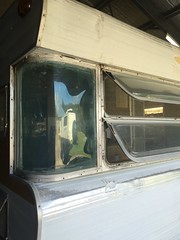 End result: Glad I decided to use plastic & not glass, the winders now work so easily, once synchronised 110 hours to date!!!!  |
|
|
|
Post by atefooterz on Feb 10, 2015 9:14:45 GMT 10
I have spent more than 110 hours just pondering about my windows! Great job Mustang!
|
|
|
|
Post by Mustang on Feb 11, 2015 19:11:22 GMT 10
I have spent more than 110 hours just pondering about my windows! Great job Mustang!    |
|
|
|
Post by Mustang on Feb 15, 2015 6:11:28 GMT 10
My repaint hub cap effort: link |
|
|
|
Post by Mustang on Feb 15, 2015 6:23:49 GMT 10
When buying an old van I guess the worst scenario would be a buggered chassis, so I was more than pleased with this end result. The chassis was garnet blasted & spray primed. 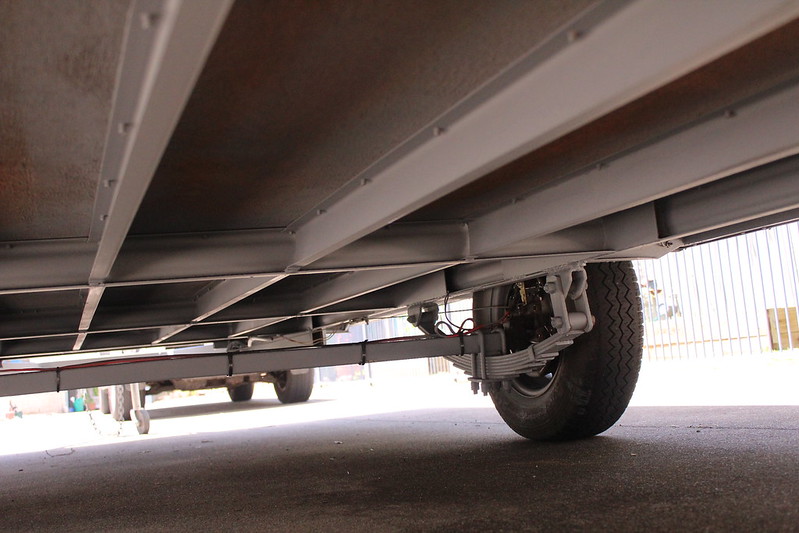 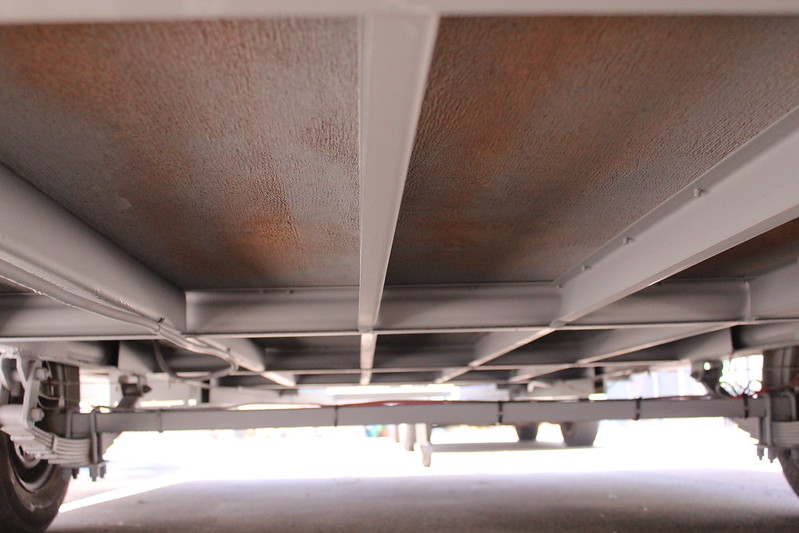 The blasting cost was $450.00 & the spray primer $300.00, I think it was a fair price. I couldn't face being under there with a wire brush making a token effort that would only last a year. Now for the water tank and plumbing. |
|
Deleted
Deleted Member
Posts: 0
|
Post by Deleted on Feb 15, 2015 10:16:04 GMT 10
I took to my chassis with a wire brush. Maybe more than a token effort because it's lasted 3 years, I do however have keep an eye on it. No doubt the best way to go is blasting, looks great!
|
|
|
|
Post by Mustang on Feb 15, 2015 16:19:08 GMT 10
Removed the front hatch today, its pressed tin, the rear is in the same condition, absolute Sh*t , How could something get in this condition?  There are over 20 holes, some rust, mostly drill holes, apart from the 8 holes that attach to saddles to raise the hatch. The inner side had a masonite liner. 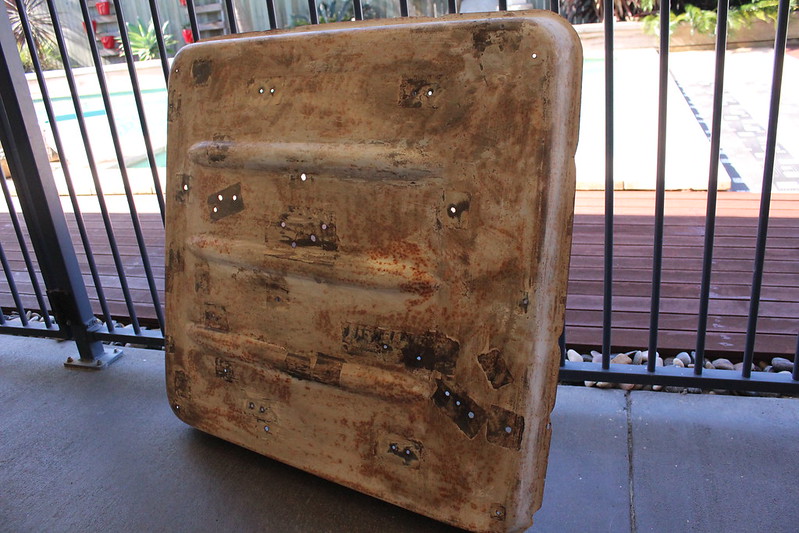 Now my dilemma, tomorrow I will price a fiberglass or plastic replica using this as a mould OR at worst preserve this rusty icon, if all else fails, mainly on price, I will take it to a powder coater to be stripped & primed. |
|
|
|
Post by awbeattie381 on Feb 16, 2015 12:07:17 GMT 10
I have spent more than 110 hours just pondering about my windows! Great job Mustang! ditto!!! but learning alot from people like mustang...I have glazing wedges and dust seals on order. First window to commence this weekend (after a pink slip). Thanks for the continuing updates, gives more encouragement to people like us to wait 110 hours before they do anything! |
|
|
|
Post by atefooterz on Feb 16, 2015 14:05:48 GMT 10
I have spent more than 110 hours just pondering about my windows! Great job Mustang! ditto!!! but learning alot from people like mustang...I have glazing wedges and dust seals on order. First window to commence this weekend (after a pink slip). Thanks for the continuing updates, gives more encouragement to people like us to wait 110 hours before they do anything! Well said Andrew! I love this place for exactly this reason. To rework an old saying... Read thread twice- repair once!  |
|
|
|
Post by Mustang on Feb 16, 2015 17:27:06 GMT 10
Removed the front hatch today, its pressed tin, the rear is in the same condition, absolute Sh*t , How could something get in this condition?  There are over 20 holes, some rust, mostly drill holes, apart from the 8 holes that attach to saddles to raise the hatch. The inner side had a masonite liner. Now my dilemma, tomorrow I will price a fiberglass or plastic replica using this as a mould OR at worst preserve this rusty icon, if all else fails, mainly on price, I will take it to a powder coater to be stripped & primed.  I would go for one of the fibreglass directions besides not going rusty you will not have to put up with as much condensation on the inside of the new cover. If you use one as a mould then it will look the same as the Original Rattles You are on the money Rattles. No trades people were interested , so I went to a fiberglass shop & bought enough supplies to repair both hatches, the lady gave me a lesson "how to do it", I used to make y own kayaks in Tassy, so it should all come back. I will lay glass matt both sides & then line the inside with marine ply to hide the mess. "Stand By" if this old piece of tin can be saved, anything can  . |
|
|
|
Post by Hatch Openings on Feb 17, 2015 17:31:44 GMT 10
These two images are before & after cleaning, the hatch tops. Amazes me how these items have just sat for 37 years & then come back to life  This image flatters the product: 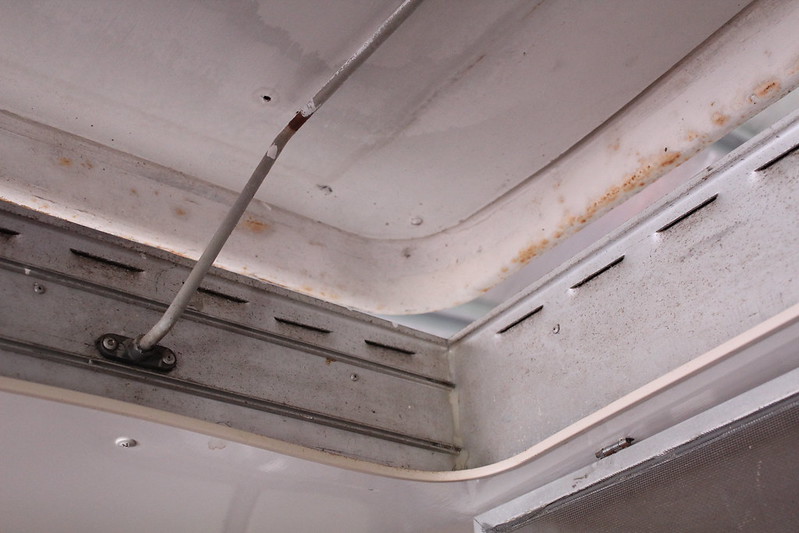 This image after cleaning with steel wool (medium) & Autosol, most of the vents were mud wasp trapped: 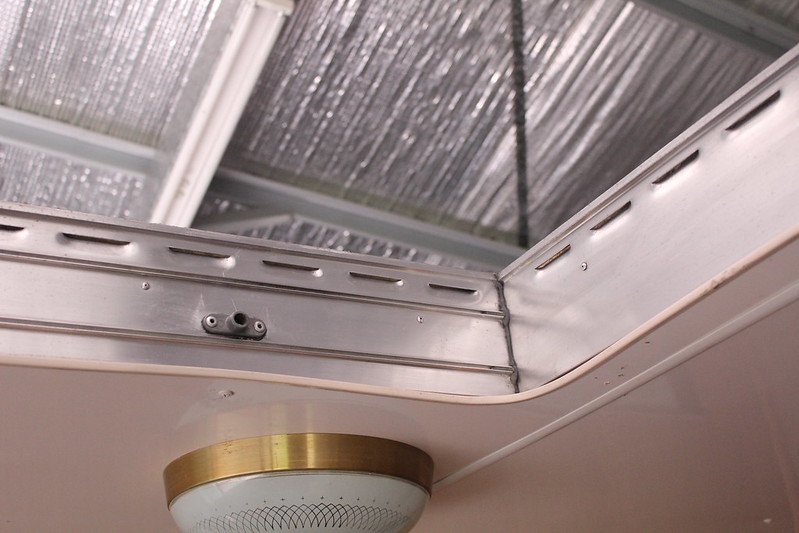 |
|
|
|
Post by Mustang on Feb 18, 2015 18:41:36 GMT 10
Bracing for some cyclonic weather here in SE Qld, so I think I'll leave the fiberglassing until next week, gee what job will I do now?
I know I'll move job #340 forward!!
|
|
|
|
Post by Mustang on Feb 23, 2015 17:02:37 GMT 10
Well the cyclone is past & things are drying out. The Nautilus stood the storm no worries, don't think Vincent would have been as dry? Finally finished the back shelf, images before & after, cant work out why Viscount used layers of ply instead of solid timber in their frames, in 1977 timber would not have been expensive, I found a "Made in Korea" stamp on the inside of some ply, so I suppose it would have been purchased for next to nothing 38 years ago. BEFORE: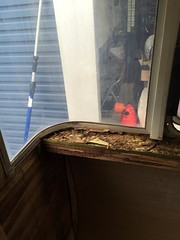 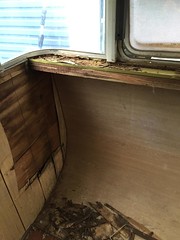 AFTER: AFTER: So much work for such a simple looking result  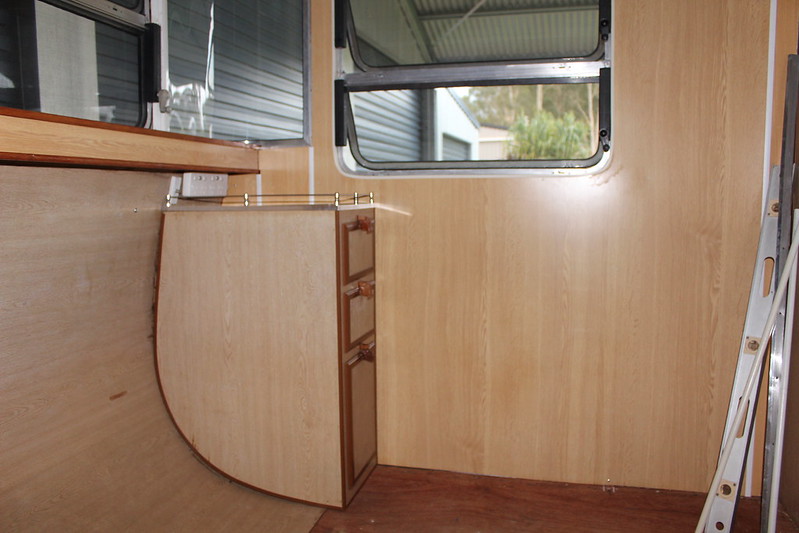 The next image shows a mystery vent. Its on the drivers side, with a mesh cutout in the floor, a plastic vent in the seat facing outwards to the inside of the van. The vent area inside the storage area was built in with the usual weetbix! Any ideas fellow restorers? IMAGE LOST |
|
|
|
Post by Mustang on Feb 23, 2015 17:14:19 GMT 10
While the internal linings are off and If the Tail , numberplate and Clearance lights do not have two wires running to each light then add the -ve return wire and not rely on the Skin/Frame for the return path. Rattles Done, thank you for the heads up!!!  |
|
|
|
Post by atefooterz on Feb 23, 2015 20:53:06 GMT 10
Vent for wet cell batteries? I have finally seen a Nautilus close up at the Adelaide show & went on board, inspired much.  |
|
leeron
In Training
  1966 Duralvan
Posts: 46 
|
Post by leeron on Feb 23, 2015 21:39:26 GMT 10
The floor vents were usually for trying to comply with ventilation rules for vans with gas appliances fitted. LPG gas is heavier than air and escape vents were required to be lower than bed level to prevent gassing ones self in their sleep.
A vent on the bottom of the entrance door is one example.
Rules changed again sometime in the 90's again with more requirements regarding low and high vents for this purpose.(inlet and outlet)
New thermal cut out appliances have made things alot safer nowadays but the vents help with excessive consumption of baked beans and the like. (As lethal now as was back in the day)
|
|