|
|
Post by Mustang on Jan 7, 2015 8:20:45 GMT 10
Before I retired my friend told me "best thing about retirement, you don't have to pack the tools up on Sunday night" he was right
|
|
|
|
Post by atefooterz on Jan 7, 2015 10:31:09 GMT 10
I am sure one of our helpful mods can rename & move this to the area, and a few newish others, around the place in a cleanup sometime soon.  |
|
|
|
Post by viscount6116 on Jan 7, 2015 10:50:15 GMT 10
Hi Andy, The Nautilus is certainly an amazing piece of kit, we waited two years for our order, but they are up to speed now. Check out this link
Howdy Mustang Very nice mate ,I can see why they have 2 year back orders (Hmmm I've got a term deposit coming out in Feb ....maybe centrelink will pay me for a while   ,nah couldn't deal with the paperwork or the bulls#*t !!!  ) Gday Tim Hope that you have a good holiday mate (lifes too short for unnecessary stress hey   ) Cheers Andy  |
|
|
|
Post by supreme78 on Jan 7, 2015 20:41:26 GMT 10
Hey. Mustang that's a neat old van y ou have. I have a 1987 supreme s81091 in the hall of fame section and it's prety much a detailed story of what your about to do. I did not replace the interior walls as it was a big deal. I did however do the kitchen wall as it was stuffed. And I just cut out the damaged peice and cut the new peice to fit the same cutout. Used joining strips to fit the new piece in place and plenty of liquid nails. The ceiling was a different story. I cut the old buggered paneling out of the ceiling and left a 40mm section of the old ply sticking out of the cupboards and the edges. I then put strips of ply on the roof beams to lower the entire ceiling the thickness of one sheet of ply then glued and stapled the new sheets in place.i then glued small plastic quad to all the outer edges and used joining strips where possible. It came up prety neat. Word of warning don't use gloss white sheeting as it shows every curve and the staples stick out like dogs .$@@&. I removed the gloss as it looked terrible and got some that looks like vinyl and satin not gloss. Looks tons better.
I ended up painting the walls inside my van as they had lost their timber color due to water and sun damage so painted in capuchino color and it looks very neat and moderns it up just a little. My van was a full renovation in the end as its taking me on a trip around oz when I get my nuts together. New appliances chassis upgrades lengthened the drawbar and much more. Loved every minute of it. I think it owes me $10000 but it's a cheep van knowing everything is new. I used the Ian guest plumbing components to re plumb my van it's awesome stuff and easier and lighter than copper and brass. Cost about $1500 to re plumb the van with all new taps and fittings. New 12v pump new water tanks 2x95L. It's a great outcome as the water always tastes nice no horrible after taste. I have been carefull when purchasing products and learned a few lessons along the way.
I would love to tackle the 22 footer but I don't have the room and it is a little big for just me and the dog.
|
|
|
|
Post by Mustang on Jan 8, 2015 8:27:17 GMT 10
Hi Supreme 78,
Just read your lengthy reno. Thank you for posting, some ideas there for sure.
Did you sell it?
Cheers
Brent
|
|
|
|
Post by supreme78 on Jan 8, 2015 17:44:15 GMT 10
No I decided to keep it. I am using it to go travel the country later this year. It's got all I need and with a couple jobs to do. Solar extra battery suspension axle wheel tyre upgrades it's ready to go. Just can't wait to get going.
|
|
|
|
Post by Mustang on Jan 10, 2015 16:35:36 GMT 10
Hi Mustang, Just to let you know before you start tearing your hair out and wasting money,the windows on your van are not the normal wind outs. Parts are not available any more ,and you will have to devise a locking method to keep them closed while travelling. Sorry to be the bearer of bad tidings,but it might save you a lot of angst in the future! Cheers hughdeani Not sure what "normal" wind outs are but, Hugdeani you are correct some one removed every window lock, so I have no idea what the earlier ones looked like. Combed the net for hours to prove you wrong, nothing.  LOL |
|
|
|
Post by Mustang on Jan 10, 2015 16:42:07 GMT 10
Original post altered due to Photobucket original image not available
|
|
|
|
Post by Mustang on Jan 10, 2015 17:22:13 GMT 10
I am sure one of our helpful mods can rename & move this to the area, and a few newish others, around the place in a cleanup sometime soon.  Apologies if I should be in the hall of fame, initially I thought that was for finished items. |
|
|
|
Post by Rattles on Jan 10, 2015 18:06:53 GMT 10
|
|
|
|
Post by Mustang on Jan 10, 2015 19:13:51 GMT 10
I would like to see them in situ with the older skinny frame, as I have no idea how they work. Mine are ALL missing. Sellers offer limited info? Does the metal plate attach to the sash & the black knob turn against the frame once closed ? Our windows are windout, not pushout. |
|
|
|
Post by atefooterz on Jan 10, 2015 19:27:28 GMT 10
Yay as another owner with no locks, tabs or slots, on my wind out windows, i have been curious as to how it all works.
|
|
|
|
Post by atefooterz on Jan 10, 2015 19:30:58 GMT 10
I am sure one of our helpful mods can rename & move this to the area, and a few newish others, around the place in a cleanup sometime soon.  Apologies if I should be in the hall of fame, initially I thought that was for finished items. Haha no applogies required, do believe, i spent ages myself pondering if i would be sociable and start a thread, then where? .. spent a while looking then figured, knowing the Mod/Admin board controls tis a simple 2-3 click mission to move a thread anywhere.  |
|
|
|
Post by Rattles on Jan 11, 2015 8:48:43 GMT 10
Mustang - yes as you described in you last post.
These were used on windows without wind out mechanisms (circa 1971). The metal plate is attached to the bottom of the window sash on the inside (2 of) and the lever rotates to the down position and wedges against the inside of the window Frame pulling the sash and seal against the outside of the Window Frame.
If they will fit re spacing between the Plate and the lever they should work, you may be able to attach using existing holes in the movable sash.
Buy a couple and see the Postage probably will be more expensive than the items.
PM me if you want more info afraid I cannot be more helpful but it was the late 70,s when I last worked on windows with those locks.
Rattles
|
|
|
|
Post by Mustang on Jan 12, 2015 6:23:09 GMT 10
Mustang - yes as you described in you last post. These were used on windows without wind out mechanisms (circa 1971). The metal plate is attached to the bottom of the window sash on the inside (2 of) and the lever rotates to the down position and wedges against the inside of the window Frame pulling the sash and seal against the outside of the Window Frame. If they will fit re spacing between the Plate and the lever they should work, you may be able to attach using existing holes in the movable sash. Buy a couple and see the Postage probably will be more expensive than the items. PM me if you want more info afraid I cannot be more helpful but it was the late 70,s when I last worked on windows with those locks. Rattles I think they would work, in my case, if we didn't have a flyscreen. I hate flies, so will have to have a screen. Would love to see a photo of the old screens with these in place. |
|
|
|
Post by Rattles on Jan 12, 2015 6:57:45 GMT 10
May be cut a hole in the screen with a hot blade to fuse the ends of the mesh thus to allow the lock to pass through, then attach a small oversized flap of screen on the inside of the fly screen to cover the hole when the window is open, if attached along the top of the flap with silicone it would push out of the way when the window closes.
In my old 1965 Ambassador the screens were narrow framed Aluminium screens mounted on the inside and hinged at the top and the turn clips at the bottom, when closed the frame extended to below the locks, of course the windows did not have winders only slide stays with knurled knobs.
Rattles
|
|
|
|
Post by Mustang on Jan 16, 2015 19:43:23 GMT 10
This week "some good things happened" in readiness for a chassis blast & paint we went to the welder first. A spare wheel carrier (as we have no rear bumper,) a gas bottle cradle (that was welded next to the cladding & could not fit the gas bottle in.) Aaahhhhhh how do the stay in business. 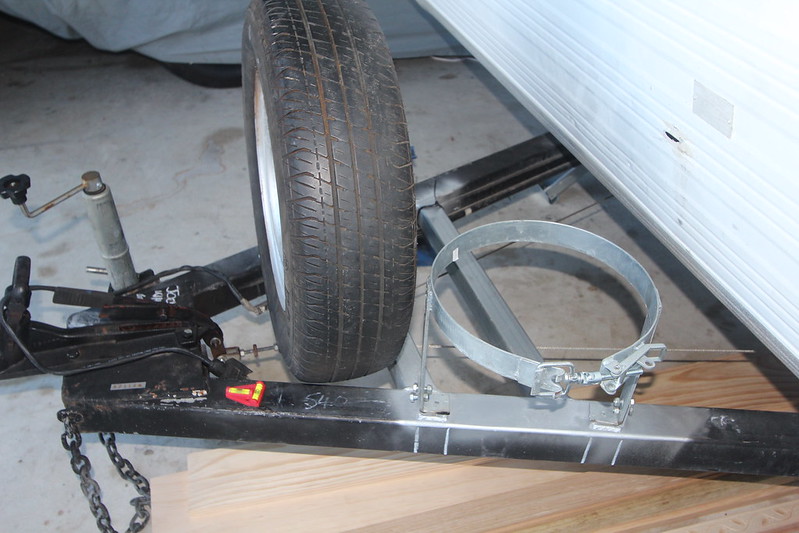 Had to grind off the mounts & have them re-welded, also ground off the jockey wheel to be re-positioned to the front, two support bars for the wheel, gas & a future tool box. Temps over 32 degrees for the week, I'm over grinding for a while. 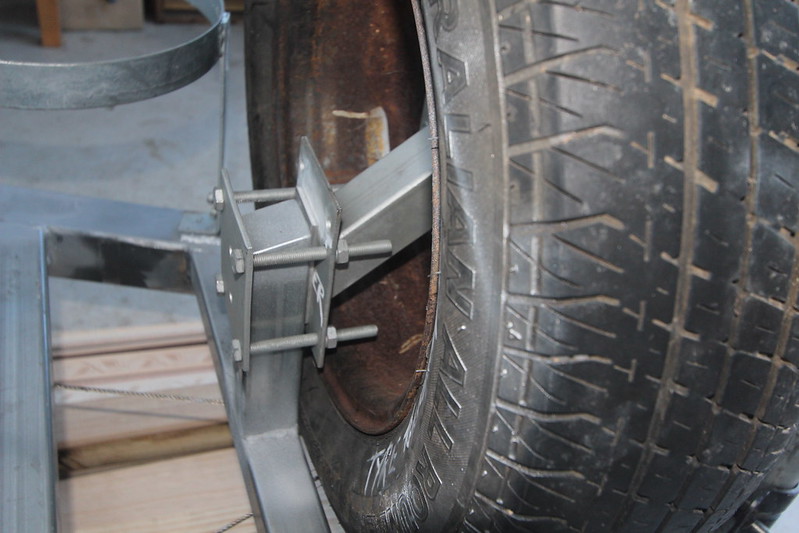 Now my chassis guy has been called up north & we are two weeks away before any further dismantling can be done, but there's lots to do. 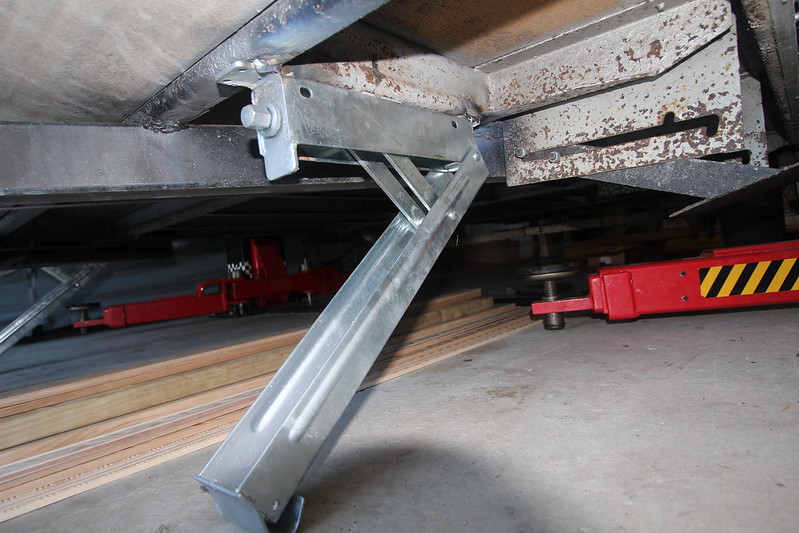 Welded two new stabilizers in the front, discovered the original rear's work fine they are spring loaded & no winding, brilliant. The previous owner said to grind them off as they were seized, a bit of love & they work perfect now. The original rear stabilizers: 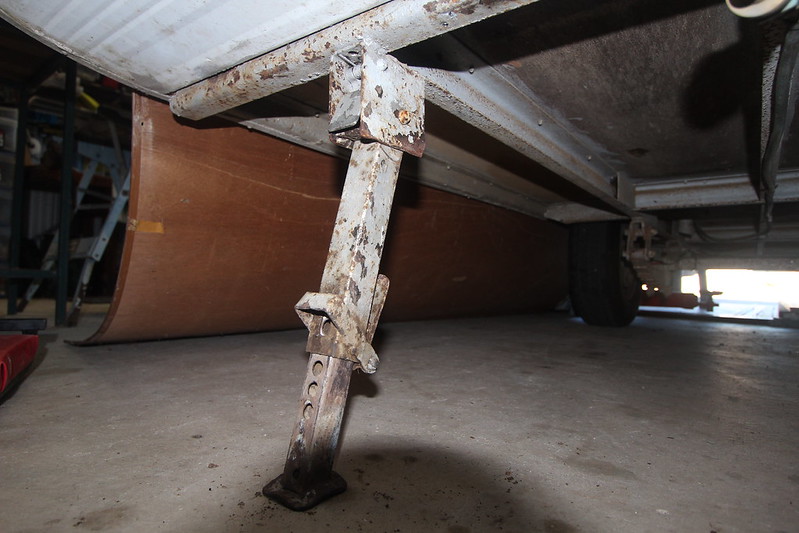 Also removed the rear curved ply & the side ply, now the "dog can see the rabbit" A clean floor!!!!!!!!! Now I can knock out a troublesome dent & add to the wiring. 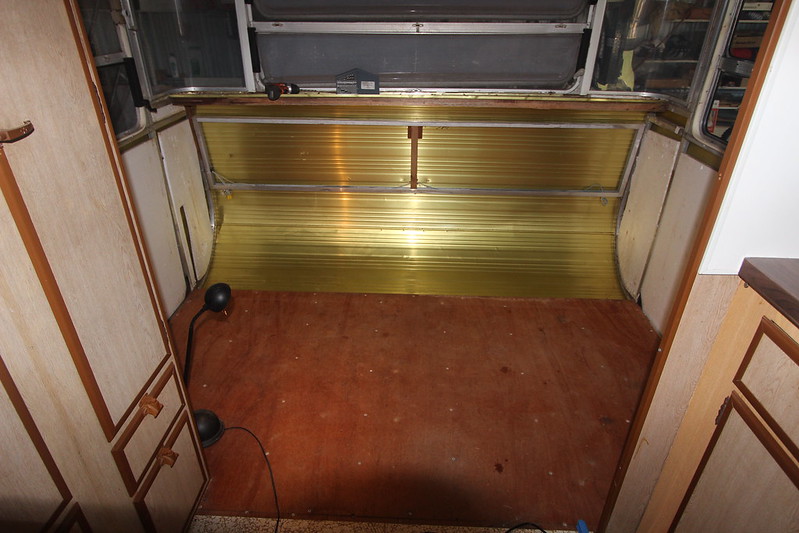 |
|
|
|
Post by Mustang on Jan 16, 2015 19:59:13 GMT 10
The upholstery has been recovered, some of it in a leaf pattern ( a bit boring, but its done) . While in Bunny's I discovered a leaf pattern trim which I will be using as a shelf edge. 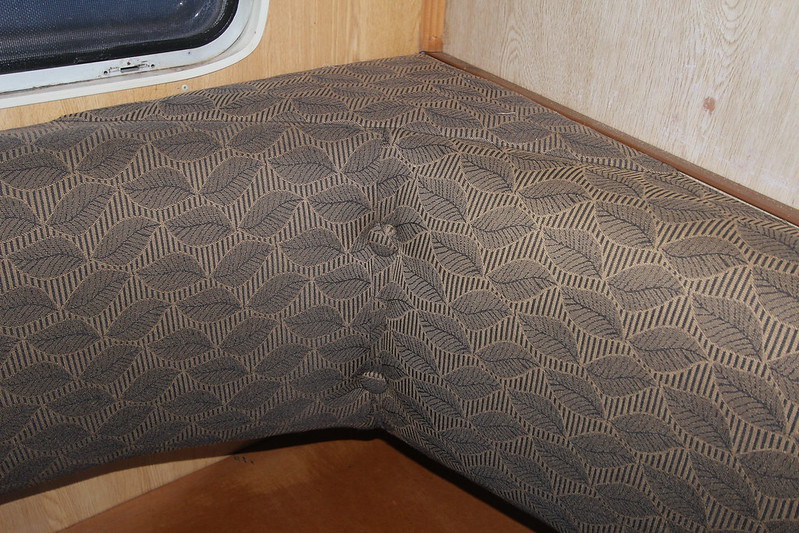 The pine trim to match: & lots of other hardwood & pine. The hardwood will be used for a new rear window frame, while the pine will become a shelf between the bays. 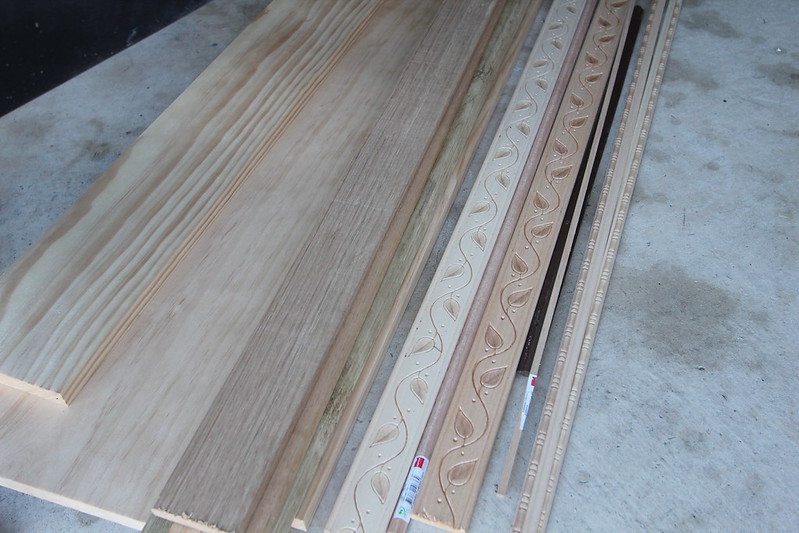 Now to get the rear windows & bays out rebuild the frame, polished & back in in two weeks?  ? Guess its got to be done sometime. While the Nautilus is outside , I'm not wracking up many points in that department.  I looked on the net for some Holden hubcaps & trim rings, WOW the prices are insane   I really dont want to go the Supercheap wheel trim but at these prices!! If you are at a swap meet & see hubcaps in original condition, & they are under $50 each buy them. Four EH caps in good condition on ebay are selling for $220, with a bid. |
|
|
|
Post by atefooterz on Jan 16, 2015 22:06:18 GMT 10
In 1977 i paid a wrecker about $30 for one good condition hubcap for my EH179 waggon to replace the hubcap i lost!, average wage then was less than $200 a week so if the average wage now is supposedly above $1000 a week then $220 for four hubcaps is ok haha!
|
|
|
|
Post by Mustang on Jan 17, 2015 10:23:46 GMT 10
In 1977 i paid a wrecker about $30 for one good condition hubcap for my EH179 waggon to replace the hubcap i lost!, average wage then was less than $200 a week so if the average wage now is supposedly above $1000 a week then $220 for four hubcaps is ok haha! Now thats another way of looking at it.  |
|
|
|
Post by atefooterz on Jan 17, 2015 16:18:28 GMT 10
In 1977 i paid a wrecker about $30 for one good condition hubcap for my EH179 waggon to replace the hubcap i lost!, average wage then was less than $200 a week so if the average wage now is supposedly above $1000 a week then $220 for four hubcaps is ok haha! Now thats another way of looking at it.  In reality it is the only way, i run a 1985 L300 van & from 2005 onwards no wreckers had any, crusher steel price high plus not many still being registered. The local kids kept smashing my side mirror 1st one in 2004 was $25 for rreasonable one, next in 2006 had to drive the other side of Sydney (130klm approx) & $30 for sun rotted thing. Next one in 2007 nothing in Sydney try Newcastle or Brisbane & 20-$30 for freight plus mirror cost! Now with the joys of online i ended up buying 2 brand new ones from Indonesia for $25 including postage (3 days) = stoked. |
|
|
|
Post by Mustang on Jan 18, 2015 18:33:44 GMT 10
Big step today: The back windows removed, actually came out quite easily, going back?? don't hold me to this quote!!!  Window frames ( gunk & staples). I've actually cleaned some of these. Note: the humidity in SE Qld is very trying to do this work 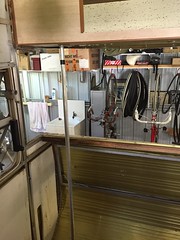 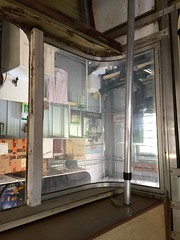 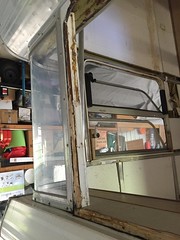
Guess I,m going ahead??? She says, " When will you be done, so we can park the Nautilus back in the shed"...soon dear? 
|
|
|
|
Post by Mustang on Jan 19, 2015 19:50:27 GMT 10
Actually got to make something today, that was new & not rotten, its the 12mmx 110mm base for the rear frame. 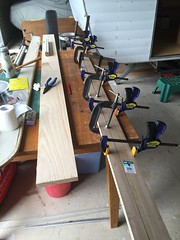 You get to buy a few toys with a reno, This $65.00 investment was great for its first job. 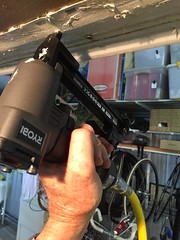 Now the upper cladding is back in place after removing the rotten board underneath. Cant work out why the upper cupboards are so good, water must have come through the windows & not the roof? 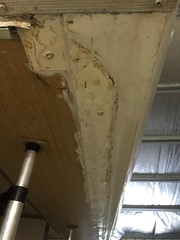 Looks tacky but the upper board frame will hide this. I will make the frame with the upper & lower frames in place & try them before any sealer....sealer what to use?   ? I have read the thread on sealers...absolutely confused?  ?? |
|
Deleted
Deleted Member
Posts: 0
|
Post by Deleted on Jan 20, 2015 7:34:32 GMT 10
Everyone has their favorite sealer. Mines sikaflex.
|
|
|
|
Post by awbeattie381 on Jan 20, 2015 12:59:45 GMT 10
wow amazing progress so far! I go away for a few weeks OS and in catching up I find a 2 page post of your reno in progress. You sound like I did when I first brought our van home. On paper and after the first viewing I had a short list of what needed doing. After spending a good weekend assessing every little component inside and out I had a 2 page list of what needed doing. Mine didnt have water, gas, 12v, a double bed (in the process of making one), but it had a new drawbar. new (average) paintjob, chassis had been painted, new wheels and tyres and lights etc. All I thought it needed was a double bed, some paint, flooring, curtains, benchtops/tabletops, a water tank, gas bottle and off we could go. Even though the van is in pretty good condition it has taken me a long time to make any sort of progress. Its probably also due to the fact the van is in Wollongong on the inlaws driveway and we are in Sydney...
What I have discovered is you need to draw a line somewhere. Some people strip their vans back to a chassis and rebuild it from the ground up. Its easy to think that way when you start tearing it apart. My wife is a perfectionist so she really should have married a caravan builder! We have had a few arguments...haha! I am mr practical. Everything still needs to look good but at the end of the day, my van is 41 years old. Its never going to look perfect! Each time I plan on tackling a job I find something else that needs attention! On another matter, I found I used to spend quite a lot of time in bunnings buying stuff I didnt know I needed, now I spend hours in there sratching my head trying to work something out in my head when I realise the size timber/bracket/joiner or whatever I need doesnt exist!
On the subject of wheels, I assumed your van would have come with 14 inch HT holden wheels? I have seen a few come up on ebay and they arent that expensive for second hand ones (had my eye on one in Sydney for $10 but forgot to bid on it!!!!). However you can buy them new for about $90 I think from ebay. They appear to be much cheaper than old 13 inch holden wheels. I am in the process of trying to swap my 13 inch torana wheels over for original wheels. I have 2 original ones (with original viscount hubcaps) but one is a little bent. So I need one more so the bent one can be the spare.
Keep up with the posts.
btw love that nautilus!! In plan view it looks like a boat!! What a comfortable way to travel the tele track! jealous!
|
|