|
|
Post by supreme78 on Jul 27, 2013 16:49:45 GMT 10
Hi all i have been digging around in this forum for a little while as a guest and now I have my second van it's time to say hi to you all. I had a 1970 viscount royal that I restored and sold it as it was a little small for my needs. You see I want to travel this great land and a small 13 ft van was a little small. i have now purchased another viscount after having a wooden framed van for a month and realising that wooden frames are a lot of work. Anyway my new viscount is a 1978 supreme 16 1/2' single axle it's a pretty neat van and needs some work but it's quite tidy once I threw out all the old curtains and mattresses. I believe it's a optioned up van as its got lager size fridge a Junkers HWS and 12 v water pump. It also has a shower in the back LH corner. It's not common for a van this small to have a shower is it? It's a different configuration than I have seen on vans of this era and so I was excited to have one that's a little different to the norm. Attached are some pics of the van. Regards Paul 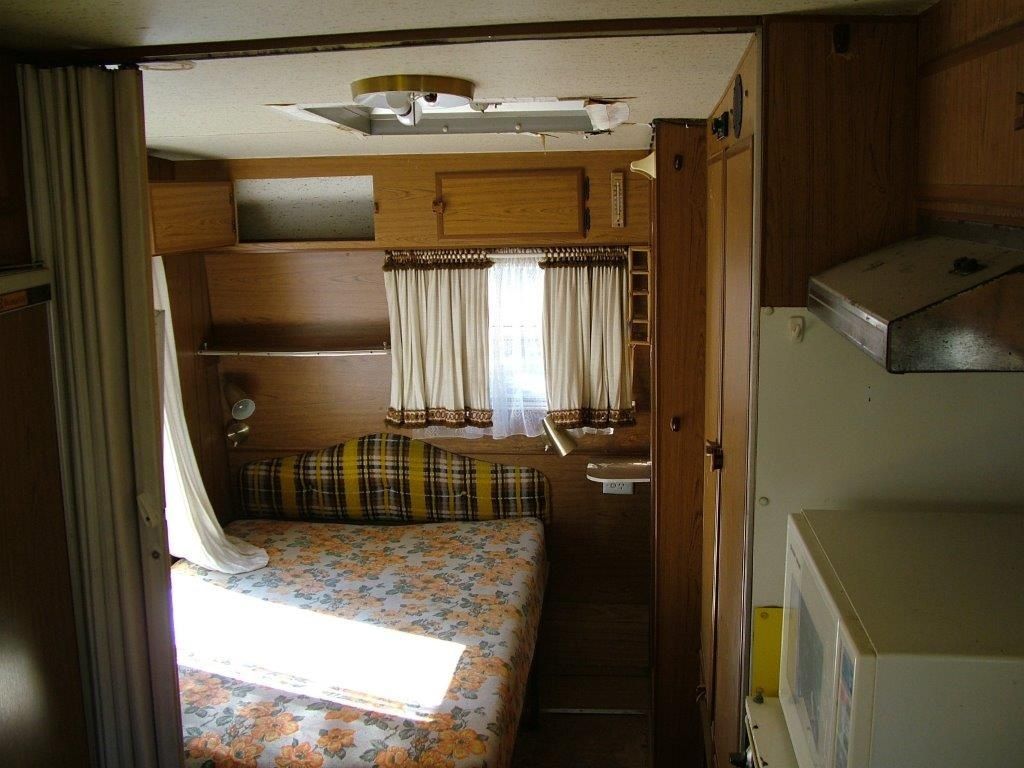 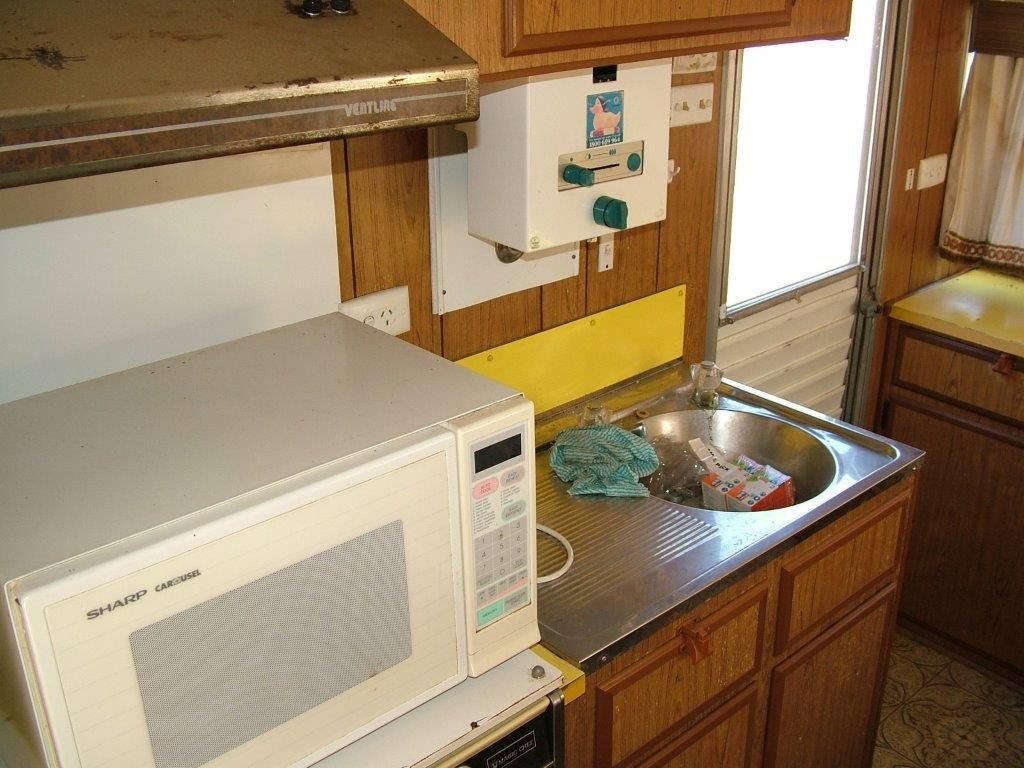 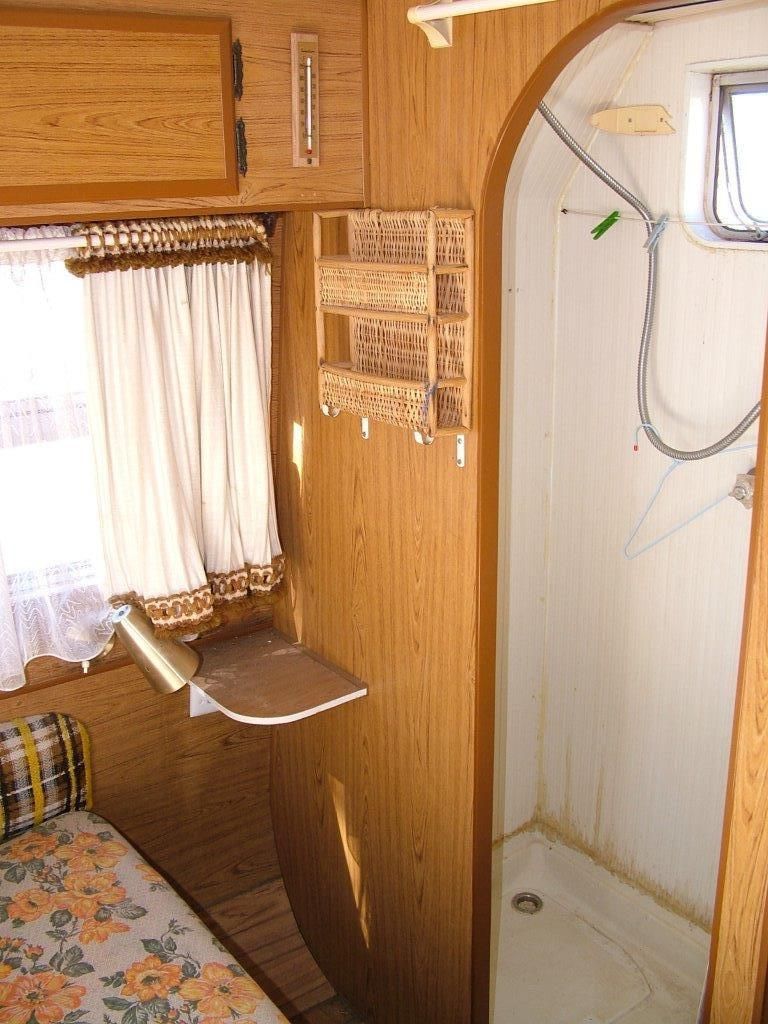 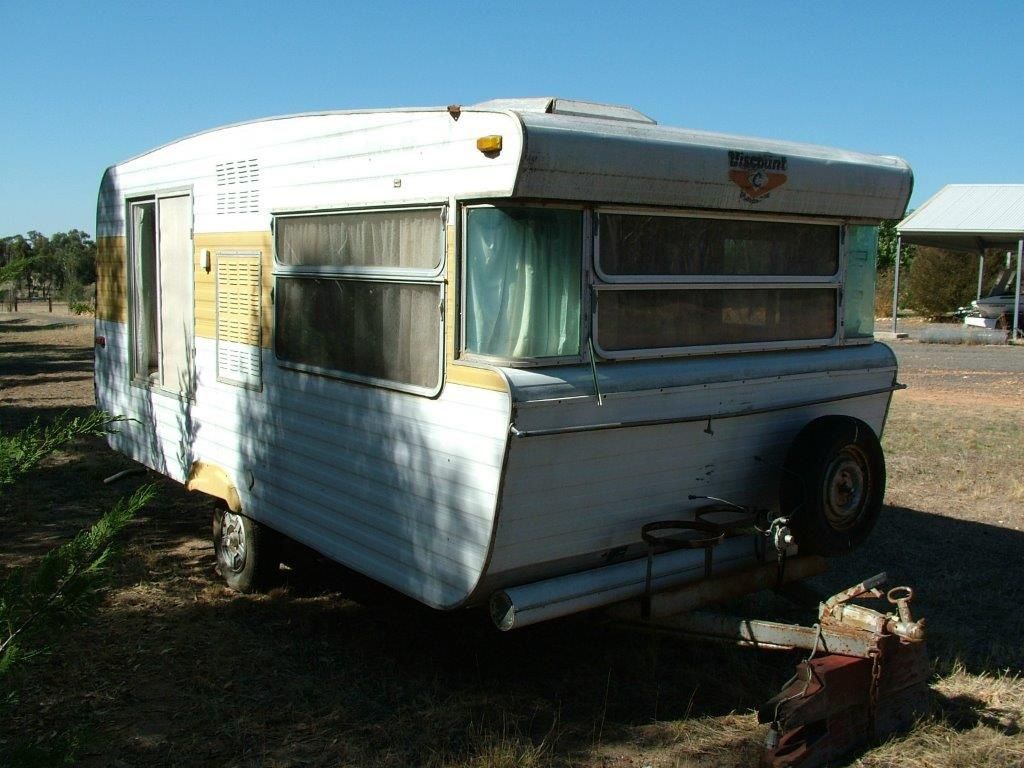 |
|
|
|
Post by supreme78 on Jul 27, 2013 17:26:16 GMT 10
Just to add to the story. I have purchased this van from eBay and was not the original winning bidder as it had reached higher figures than I was interested in paying. I was sad I had missed out but I moved on looking for others on the net. I was surprised to get a message from the owner that I had a second chance offer as it turns out the winning bidder was from north QLD and thought that the place was near him but it was in fact in country VIC and so he pulled out. Thank you to whoever you are as now the van is mine.
I drove to the place to pick up the van and realised once inspecting the van that it was much better than I had expected. It's had the axle put under the springs lifting the van quite a bit and its got electric brakes and good tyres for the journey home. It's even got the original Viscount hub caps.
I will be changing the wheels and tyres as part of the restoration and so if you are after some original hubcaps and 14" rims I am happy to part with them.
The rear hatch has been leaking but it's nice to see that the four seasons hatches are fitted and not those old wind up types like my old van had. I can reveal the hatches and get them waterproof along the way.
My plans are to take it for some long trips to top of QLD and WA for some trips using free camping where possible. I have a nice 1997 landcruiser 80 series so it will tow it ok as the test showed on picking it up.
I will add a battery and charger setup with a solar panel so I can use it away from mains power for extended time. It's got 2 water tanks and I will replace them with 95l ones in the same place for more storage. I will also add waste tank for shower water. The fridge does not seem to get cold and gurgles and from what I have read here that does not look good for the old fridge. I am in 2 minds as to what type to replace it with. Another 3 way fridge or 12v and 240v compressor type. I think the gas side of the fridge is a little hard to deal with and I have an ARB 78L compressor fridge and it works great with minimal power usage. I will replace the carpet and Lino and I am fitting a new Smev sink for better capacity as well as a flick mixer tap and new water pump with pressure switch. Has anyone had anything to do with the old Junkers HWS? It looks in good condition but it looks like it has no thermostat or switching mechanism to control temp. I guess I will try it first and see how it works.
I am not quite a grey nomad yet at 47 yo but I intend retiring from the hum drum of working full time and hitting the road on a working holiday for a year and see how I enjoy it.
I hope you all like my van and I will post up some more pics as "Veronica" the Viscount progresses.
Regards
Paul
|
|
|
|
Post by murray on Jul 27, 2013 20:58:52 GMT 10
nice van,paul.
the shower is a REAL bonus !!!
You just need a port-a-potti in there to use
wonderful
|
|
Deleted
Deleted Member
Posts: 0
|
Post by Deleted on Jul 27, 2013 21:21:47 GMT 10
Hi Paul
nice van you have there ,the shower is a real bonus alright,it looks very original .if you are taking out the lino be careful there aspestos tiles
|
|
|
|
Post by supreme78 on Jul 28, 2013 18:21:57 GMT 10
Well fellow caravan nuts I am getting stuck Into my new acquisition. I have removed the old shag pile carpet and also the rear ceiling as it was water damaged. That old sealant is not much over time it just becomes chalky and the water just comes through. I will get some more ply from gunnersons this week to replace the ceiling. I am putting new Lino throughout as carpet is not user friendly and hard to keep clean. It was also a problem next to the shower as it would be getting wet all the time. I have also replaced the old water pump under the sink with a auto pressure type unit. I will also be fitting a 12v battery system with solar panel and charger system. It's amazing ow quick you can spend money n a caravan. I guess that's the price you pay to get out and relax in this great country. The fridge does not seem to work. I have tried it on 240v and it's getting hot at the rear where it should but its not changing temp inside. It's sad because its a good size fridge and I did not want to spend lots of money on a new fridge. I was looking into a kit to convert it to a compressor fridge but its more than a new fridge costs and I still have an old fridge casing. Attached are a couple more pics. 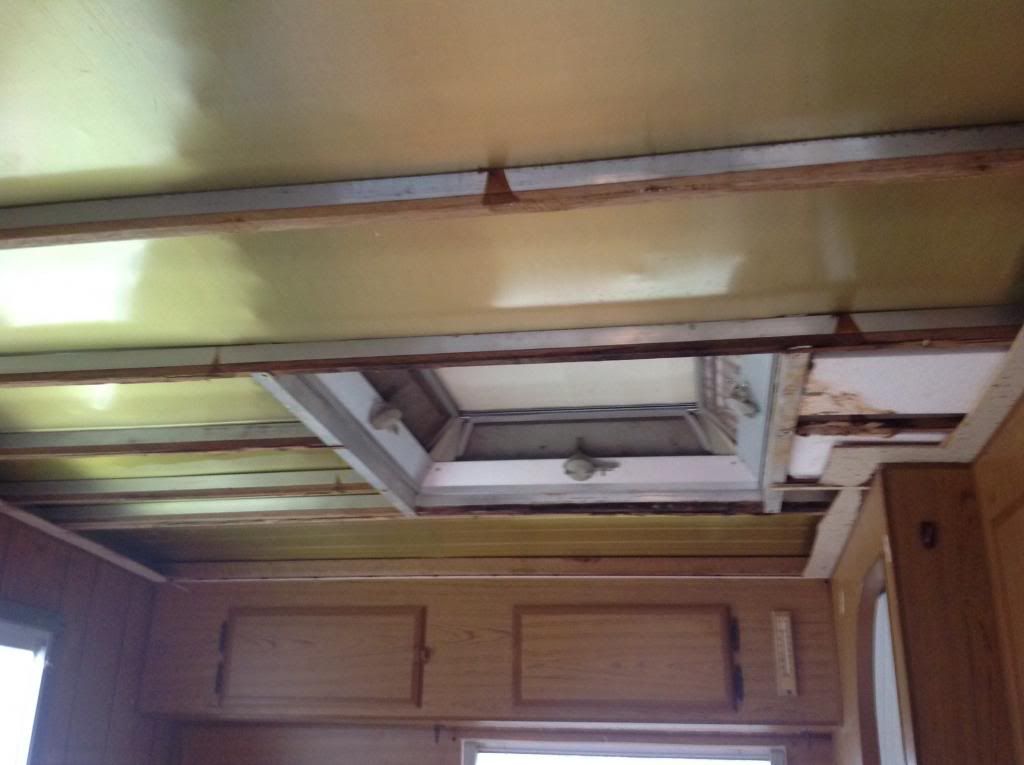 [/URL] 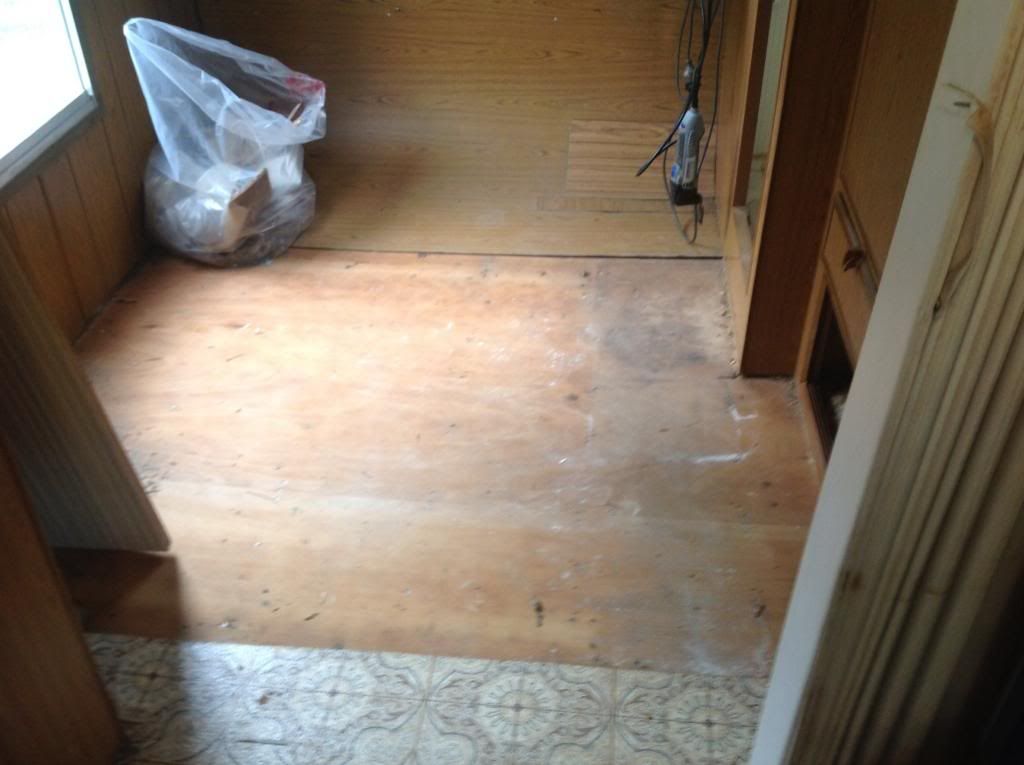 [/URL] |
|
Deleted
Deleted Member
Posts: 0
|
Post by Deleted on Jul 28, 2013 20:19:40 GMT 10
Hi Paul,
nice van you have there,all original spec!thats how you bought them new with shower ,pump and hws.
Bigger frig was standard too.
if you take frig out and turn it upside down for a couple of days then turn it back and switch on it may work.
if not why not get a it checked out by a caravan frig repair mob.Mine did the same and cost me $1oo to fix and now good as new.
Good luck with your restoration.
Cheers
hughdeani
|
|
|
|
Post by supreme78 on Jul 31, 2013 21:20:04 GMT 10
Hi all
I did what was suggested and turned the fridge upside down and then reinstalled it and levelled it up and hey presto it worked. I am very happy that it works. I will install a fridge fan. I picked up a 12 electronic thermostat and a large computer fan that's 180mm Ida. I will install them behind the fridge to help cool the system. I have made new shelves one under the fridge as it was chip board and was really out of shape. Then I cut out above the fridge and installed a new shelf to take a microwave its just enough room at 270mm and I need 260 high to fit. It will have room on both sides to vent so it should be fine.
I have worked out the water pump wiring and will install the 12v battery setup tomorrow.
I replaced the sheeting on the ceiling. It was not a difficult job but it still takes some thought to get it done right.
I will build a frame to put the bed on that allows the bed to lift up on struts and storage underneath. I need to find a mattress that's 1880mm long and 1200 wide as was original as a std dbl bed is to wide and you can't get into the shower room. If you know of anyone who has or makes them I am very interested.
Will post some more pics as more jobs get completed.
|
|
|
|
Post by supreme78 on Aug 25, 2013 15:34:50 GMT 10
Well the van has been getting the treatment over the past few months. New sink is in and small bench top. I have cleaned the stove and tested it and the fridge and they are working well. The ceiling is in the bedroom and came up ok. I fitted new vinyl to the whole caravan to replace the carpet and vinyl. Repaired the seat base is it was all cracked and coming apart. The lights have been upgraded to led in the 240 and the 12v.
My mattress was ordered made and picked up from beds direct in Epping Vic. The mattress is a back support with 10 year warranty and was a mere $300. It was made to my measurements and I am stoked with the quality. The manufacturer was great to deal with and makes a lot of mattresses for the rv industry.
I was trying to repair the front window leaks and replace the rotted woodland ended up removing the whole window as the timber is part of the frame and the whole setup needs to be removed to be repaired.
I will add pics when I remember how to do it.
|
|
|
|
Post by supreme78 on Aug 25, 2013 16:18:09 GMT 10
Seat after rebuild... 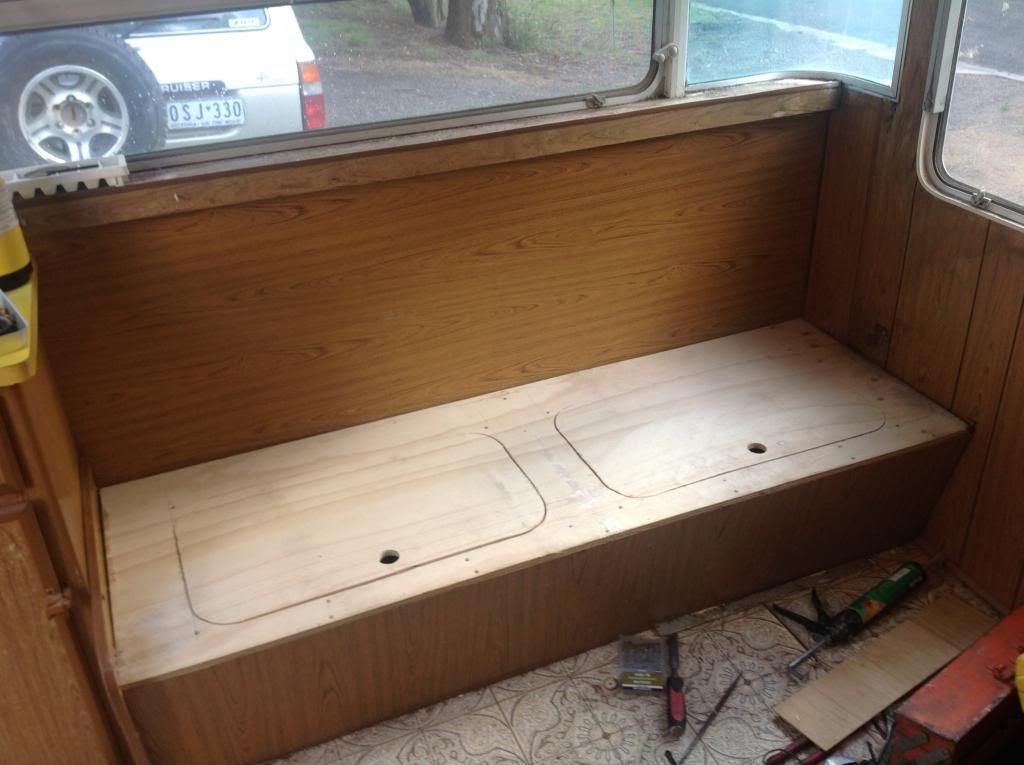 New sink and bench... 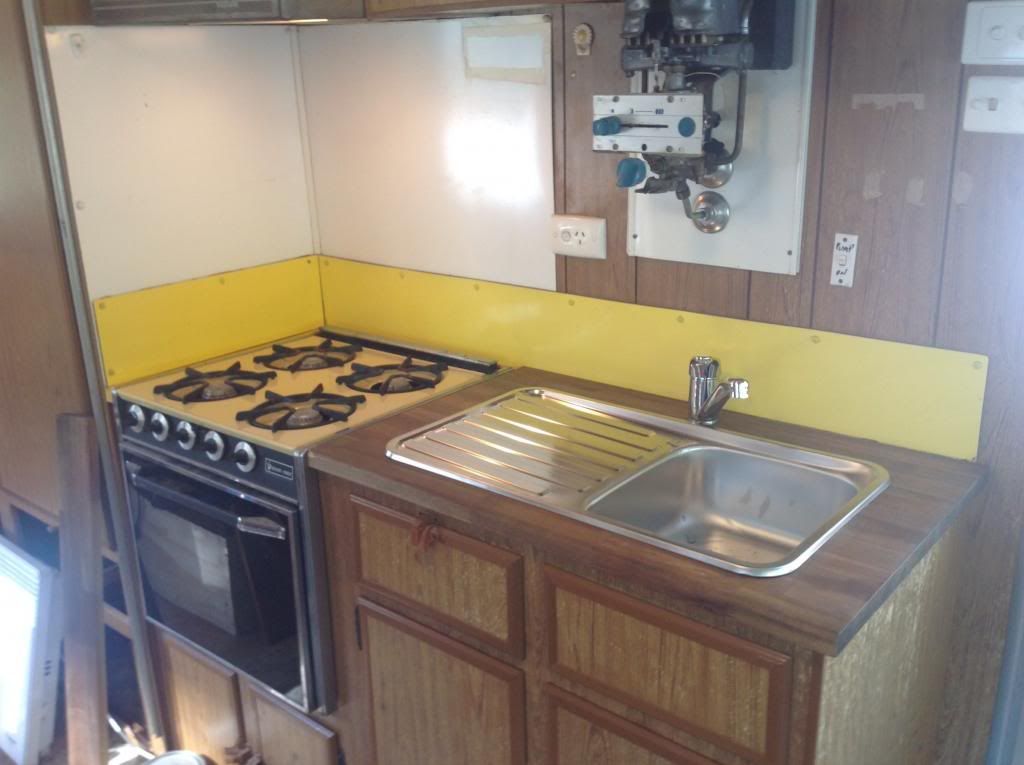 New ceiling completed... 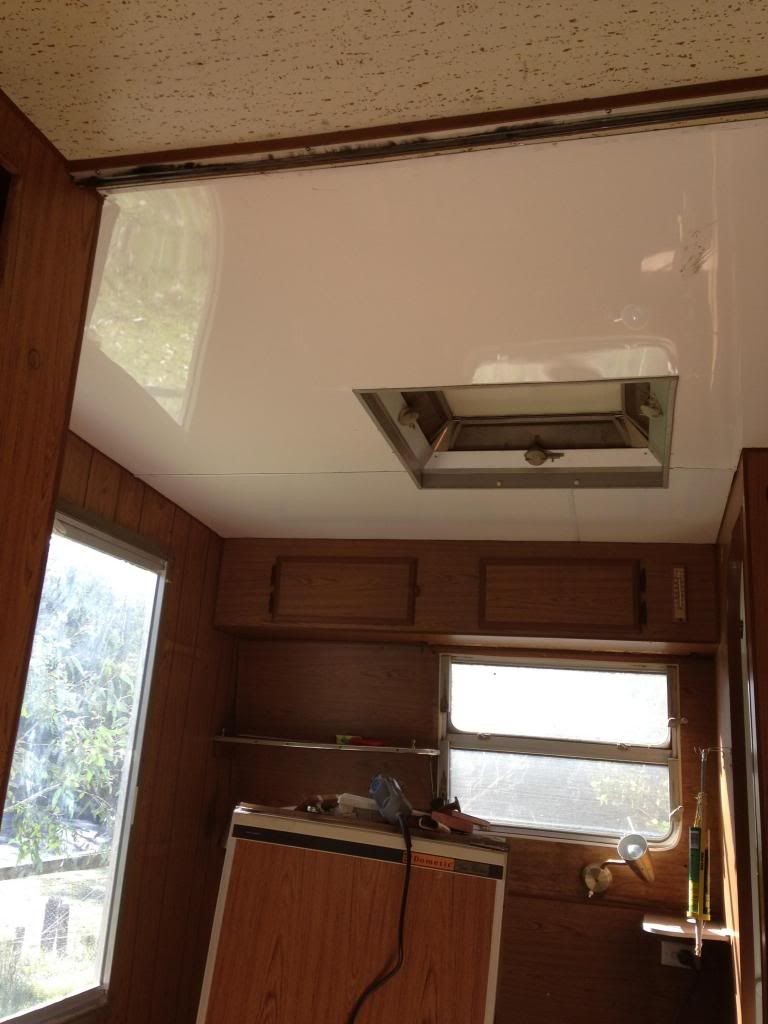 Microwave oven installed... 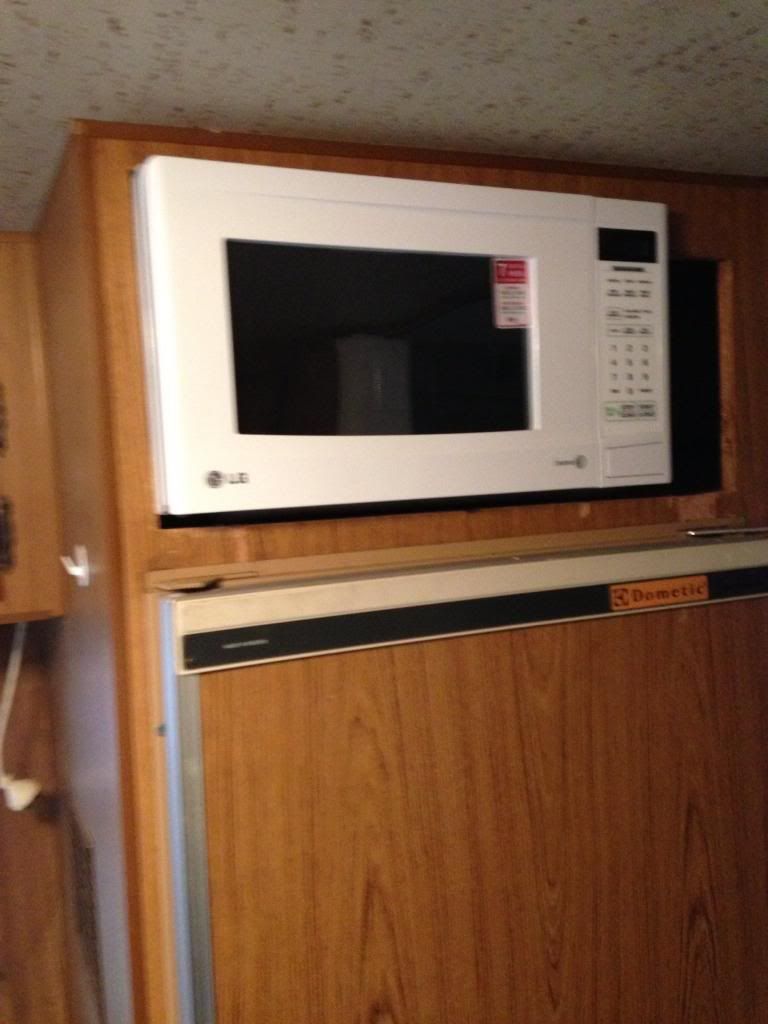 |
|
|
|
Post by ForumMod on Aug 25, 2013 19:30:15 GMT 10
G'day Paul, I edited your post above to reorganise the photos so the captions matched the photos.  You've sure done some excellent changes to the van. That new roofing is heaps glossier than the original stuff, ay?! Keep plugging away...it's looking really nice thus far.   cheers, Al. |
|
|
|
Post by supreme78 on Aug 27, 2013 23:13:36 GMT 10
I am thinking of repainting the yellow flash on the side to reduce the wow factor.
A van the same as mine in restored condition has just sold on eBay for $10000
It had the flash painted in burgundy and looked ok. I would like to paint it dark blue or green.
Any ideas received with thanks.
|
|
|
|
Post by ForumMod on Aug 28, 2013 10:59:28 GMT 10
What do you mean "reduce" the wow factor?? I don't think the yellow is overpowering, and it blends in with the colour scheme inside the van (as was intended, so I believe).
Still, there's no law that says you can't redo the colour to something you prefer. Burgundy might be a stretch, with the interior colours clashing, but a shade of green should work well.
cheers,
Al.
|
|
|
|
Post by supreme78 on Sept 17, 2013 21:24:09 GMT 10
Ok all A bit of an update on my van work. I have removed the front windows and remade the wooden top and bottom shelves. What a job this setup is with ply panels and alloy covers. It was a big job and very frustrating to fix. i can see so many reasons that these windows leak so much. The sealant is just powder now and just like having baby powder sealing windows. I have resealed using sikaflex. It don't want it to leak again and if I need to remove a window again I will suffer the consequences. I forgot to take some pics as I was trying to get it done between showers so I was under the pump. 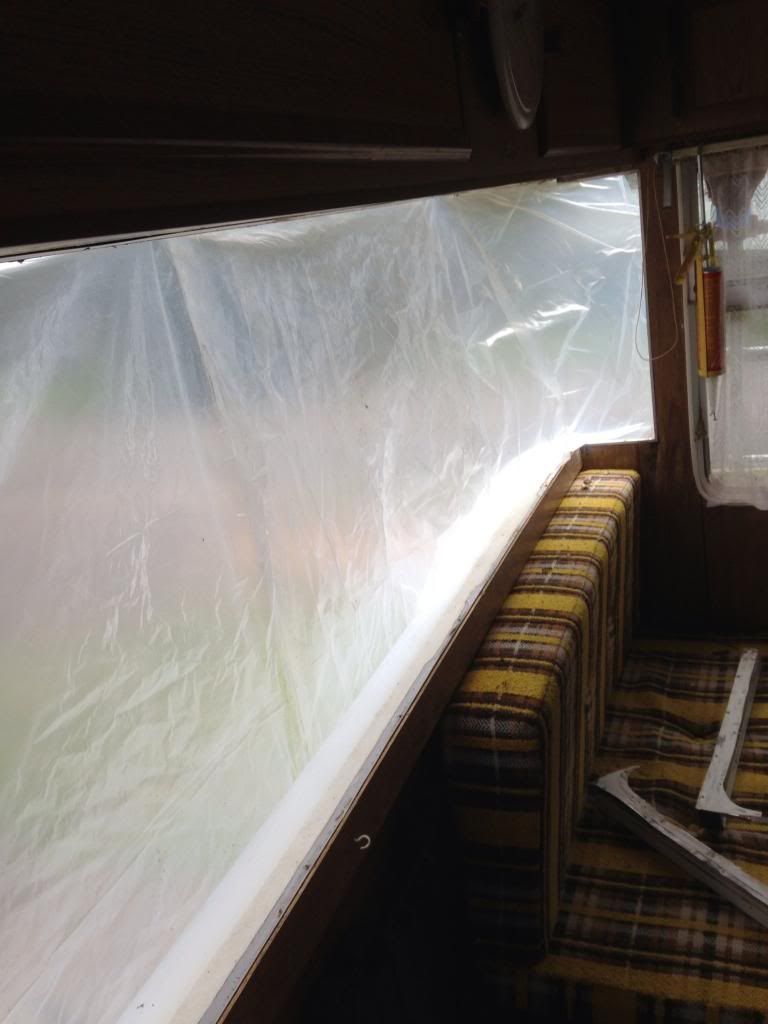 This is a picture of the window removed. I have also removed the rear window and replaced the inner panel and resealed the window. 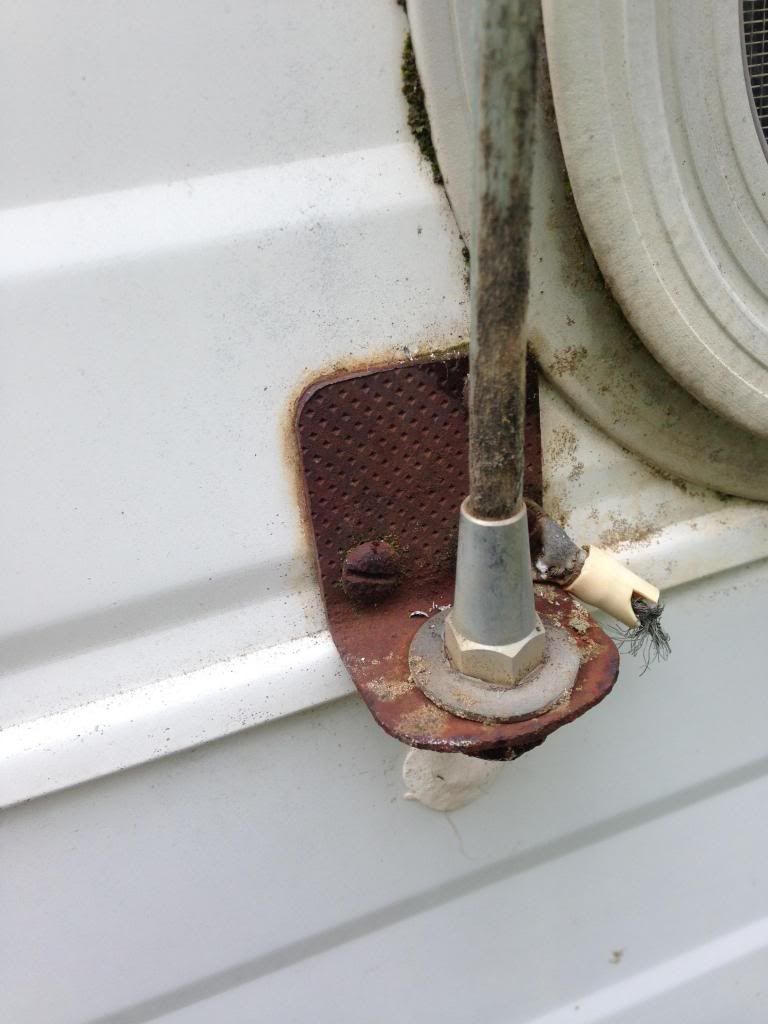 This is a picture of something that makes me angry. People add things to the van using flat blade steel screws and mild steel brackets and this is the result. GRRRRR. 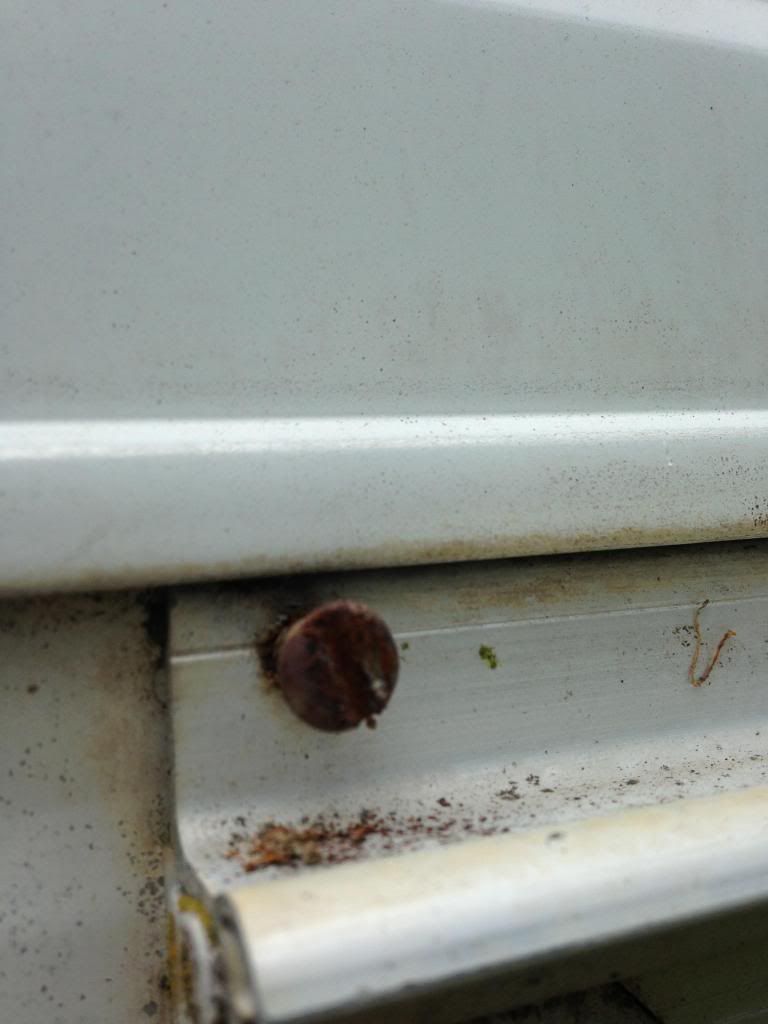 This is another one. This screw was put into the window frame and was almost impossible to remove. 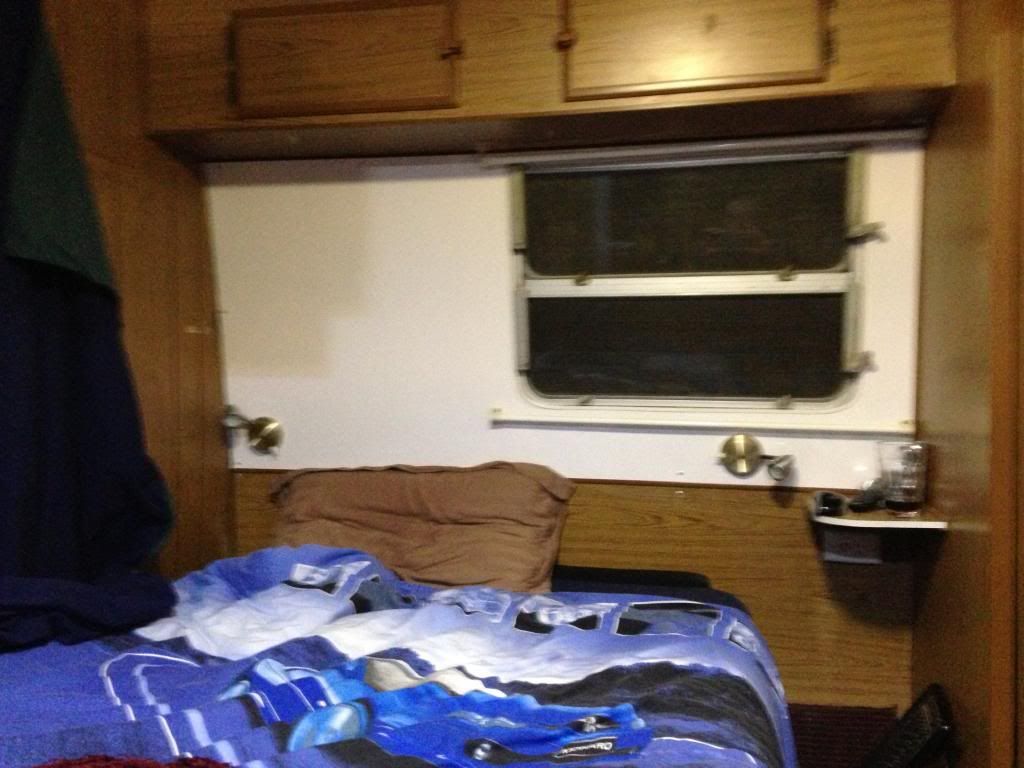 This is a pic of the replaced rear panel. It looks a bit funny being white but I can't buy the same panel as was original so used this panel as I had some. I can paint it another colour if I change my mind. 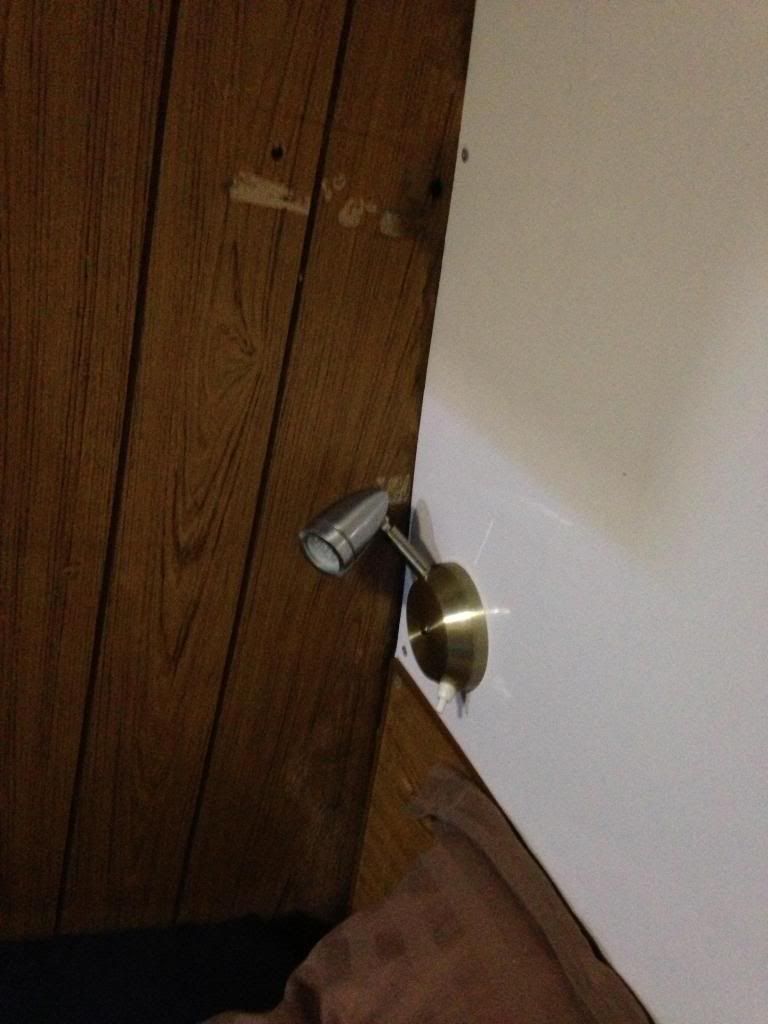 This is a pic of the upgraded lights in the rear. I purchased a couple of 12v garden lights and grafted them into the original base. Looks and works ok and cost $18 each. I removed all the 240v side of the lights. |
|
|
|
Post by supreme78 on Sept 17, 2013 21:38:53 GMT 10
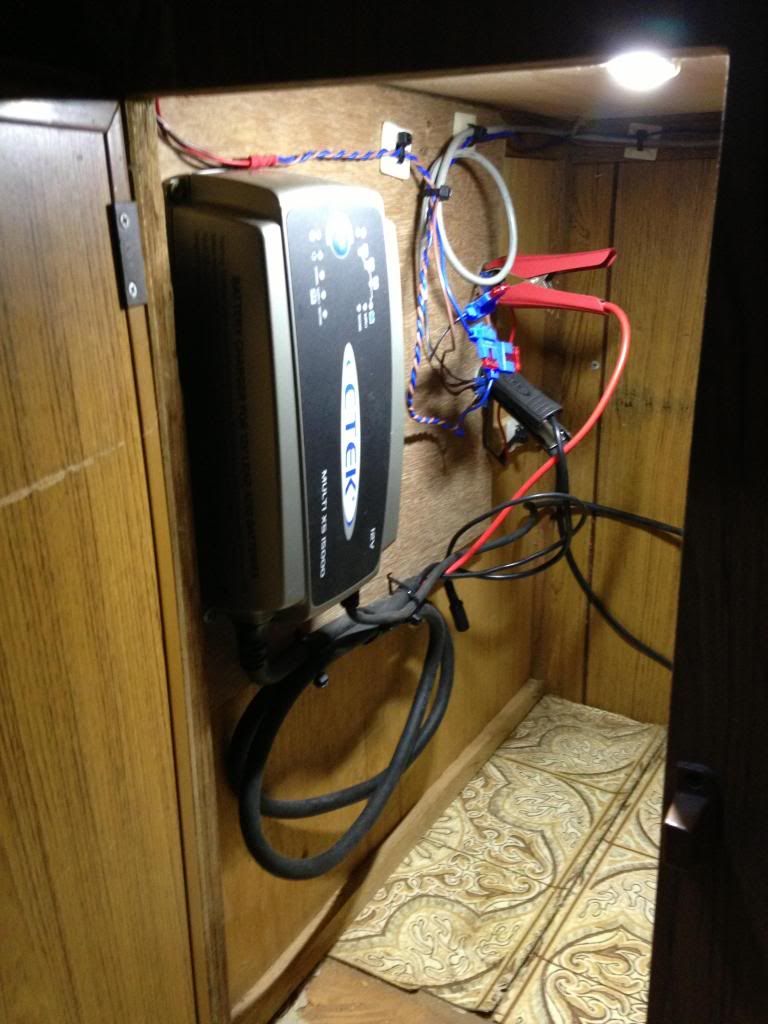 This is a pic inside the battery room under the fridge. I have to add the battery yet and currently using supply of my charger at the moment. And yes it has a light in there for convenience. 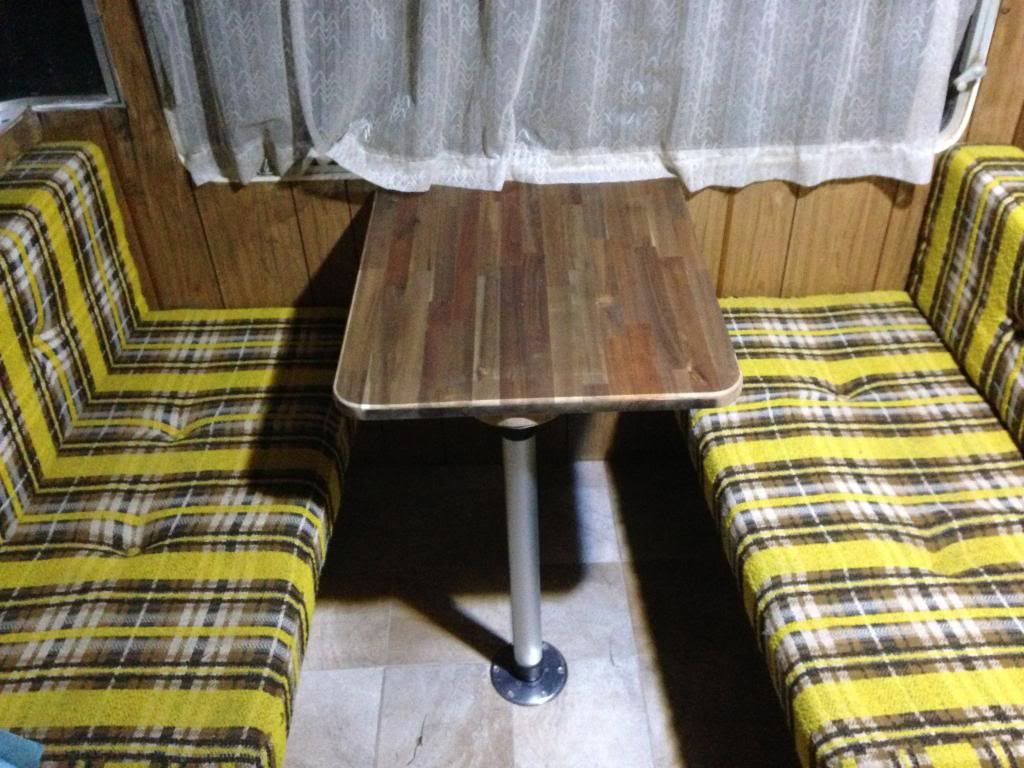 This is my new fold down table I have added to the van. It's the same timber I used on the kitchen bench and the bar pictured below. 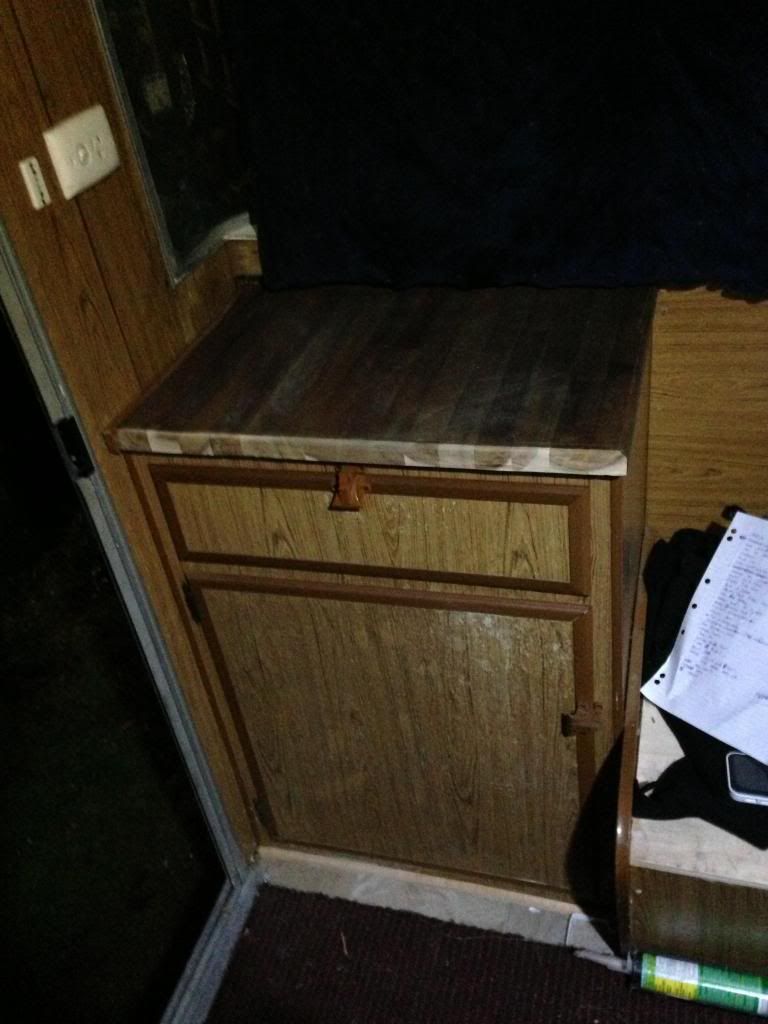 i am getting there and keen for the finer weather so I can get her out for a run somewhere. i have cleaned the huge amount of silicone from the shower recess and nicely resealed it with silicone sealer in white for bathrooms. 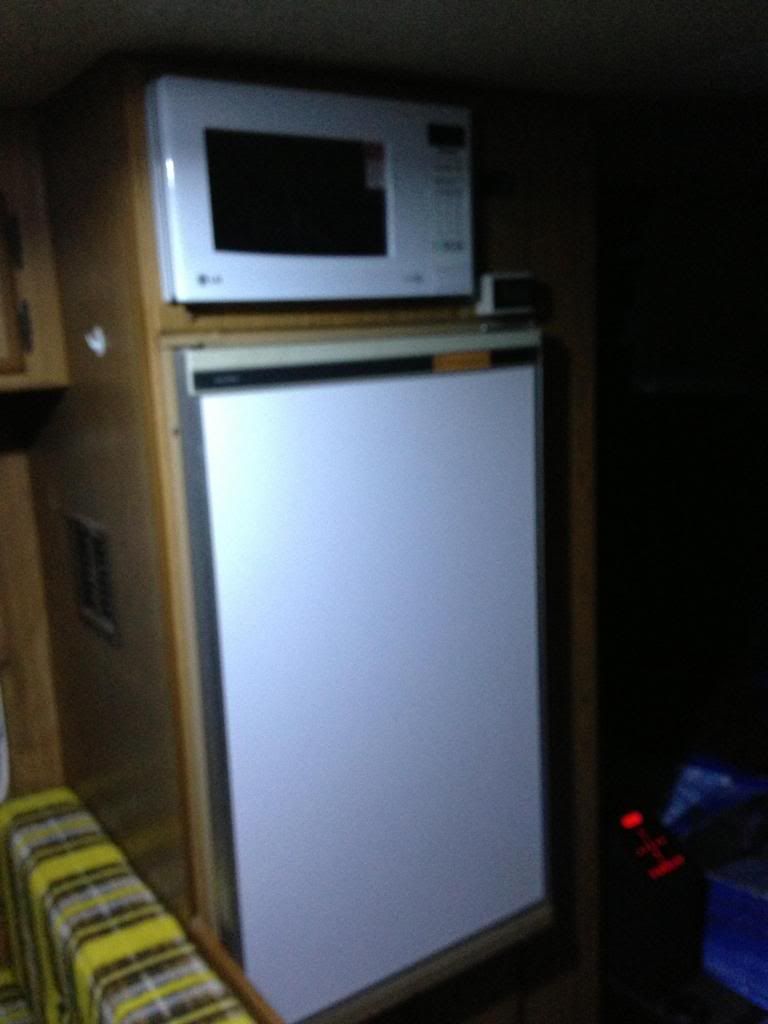 I have also removed the panel from the fridge to cover a rotten panel near the doorway. I put in a white panel and it looks quite good. Anyway that's enough for now. Keep up the great work everyone. Paul |
|
|
|
Post by supreme78 on Nov 8, 2013 21:55:33 GMT 10
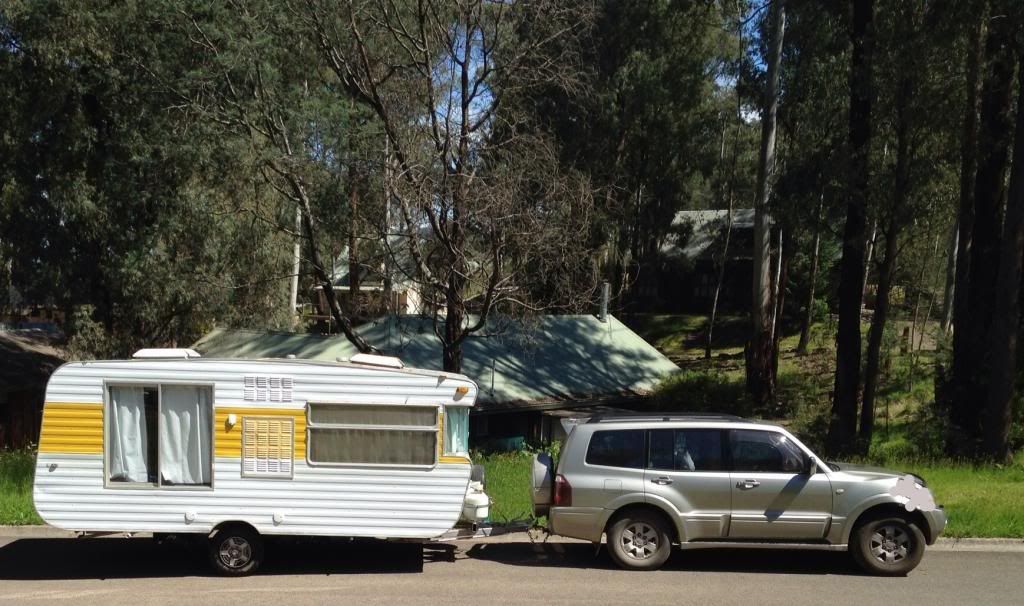 The viscount ready for its maiden voyage after the refurbishment. The old van worked well and traveled to frys hut near sheepyard flat in the high country of Victoria just a 40km drive from home. The only thing I am not happy with is the HWS as it won't heat the water enough to have a shower. I will remove it for a full service and see if I find anything otherwise I might upgrade it to a new model. 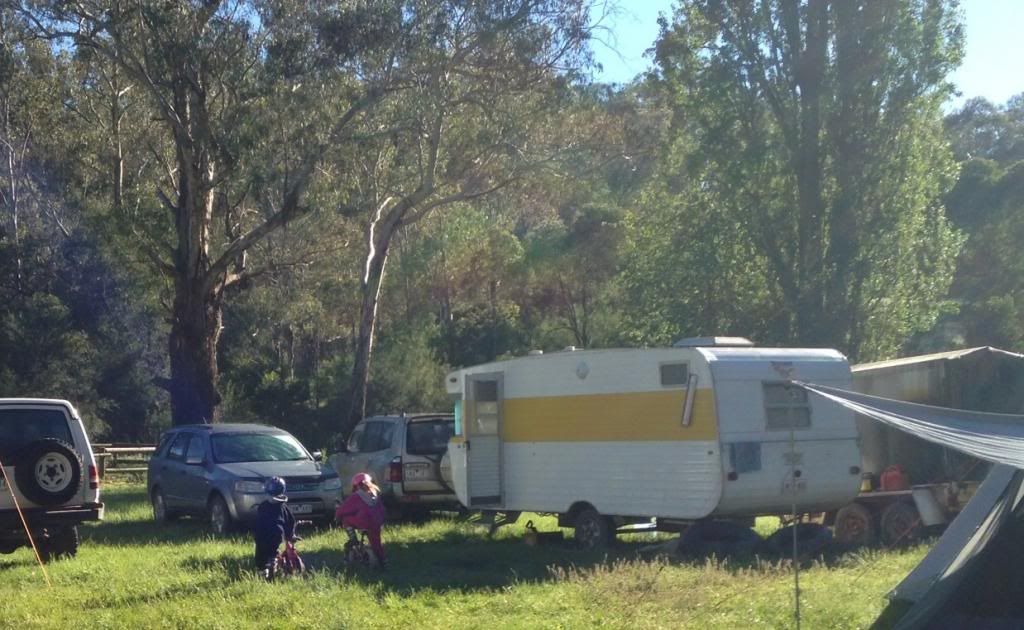 Set up for a few days camping in the high country. |
|
|
|
Post by ForumMod on Nov 9, 2013 12:11:23 GMT 10
G'day Paul, Well, you'd have to be happy with how the van has turned out!   I've had a fondness for this particular shape of Viscount for a few years now...one with the rounded rear end that doesn't have the typical window set-up back there. Congratulations on what you've achieved with the van. It's a real credit to your hard work and determination. Now the pay-off comes where you get to enjoy the fruits of your labour. Gotta be happy with that!!   ps. Did we ever get the chassis number off your van? I'd like to include it in the heading for this thread, if possible. cheers, Al. |
|
|
|
Post by supreme78 on Nov 9, 2013 19:46:13 GMT 10
Well as you know a person with caravan restoration syndrome will never finish there van as there is always something that need to be made better. The Chassis number is S81091.
I have yet to change the springs and axle as well as the brakes to make it safer for long trips.
I am also going to build a new draw bar that's a foot or more longer as it's almost hitting the spare wheel on my pajero and it's just way to short. I would also like to add a front box for storage.
I am also going to lash out on a new rv air conditioning mounted under the bed with separate outlets. That will be later on when funds persist. I will also change to water heater to a truma storage type to mount on the cupboard. I serviced the old instant unit and it's working very well now but it's never going to melt my skin off so I need to do an upgrade. Also the setup is now not to current standards as it uses oxygen from inside the van so can remove all the oxygen from the van causing problems as you can imagine.
I am also going to change the dining setup as it's not functional and it's very uncomfortable. It also is very lightly made and all the framing is cracked and busted. Still n the design phase but will update as I work it out.
Happy vanin
|
|
|
|
Post by supreme78 on Dec 17, 2013 1:03:59 GMT 10
Well all it's time for an update on the caravan renovation. I call it a renovation as it's more a Reno than a resto.
The van is going well and after I took it for a trip to frys flat camping I had a few issues to resolve. Firstly the HWS was not getting hot I serviced it and it's working much better but I can't seem to get it to get any warmer that 35 deg. Summer showers are ok but the winter ones will be very chilly. I have converted the dining setup to a L shape type just by removing the short bench and grafting it to the side of the other bench. With some creativity it all came together quite nicely. Will post a pic shortly.
I decided to use the van to live in for the summer. The reason is that I have been off work for 7 months now after hurting my neck and money is starting to get tight. My son has a house around the corner with plenty of space in the backyard so I have made a home in the yard for a while. This will allow me to test the van for its shortcomings and save me some rent money on the house I was renting. Did I mention that he needs heaps of things done around the house so guess who is the bunny to do them for him. It's a pity I can't lift very much hehe.
This made me realise I needed to add some things to the van to give me more storage and more comfortable seating.
I have made a small set of drawers beside the bed and another bench on top to give more storage in the bed area. It's worked out well and a pic will follow.
i will also add some shelving to one of the clothes cupboards to use as a pantry and the like. I have swapped the door around so it opens away from the kitchen to aid getting things out of thereThe other one will have some pigeon holes added to stack shirts socks and jocks ect.
in the space where some of the dining seat was I have added a double drawer set that I use for the pantry and then on top of that I have a 240v bar fridge. I use this for everyday use and the old absorption fridge is used as a pantry come second fridge. Pics to come soon.
i had to move the window winder handles to the other side as they were behind the fridge. I did not realise they were that easy until I look closely to see they just pull out and there is a filler plug in the other side.
I picked up a dometic toilet from flea bay for 1/3 retail price to complete the ensuite setup.
Next job is the A frame and the axle suspension upgrade. Also going to bigger wheels so they are the same as my pajero.
I have been looking at portable A/C units and I might try one of those for a while. I can't understand why a caravan ac unit is so expensive. Yes I know it's greed that set the prices.
Pics to come but meanwhile enjoy your projects.
regards
|
|
|
|
Post by supreme78 on Dec 27, 2013 13:33:42 GMT 10
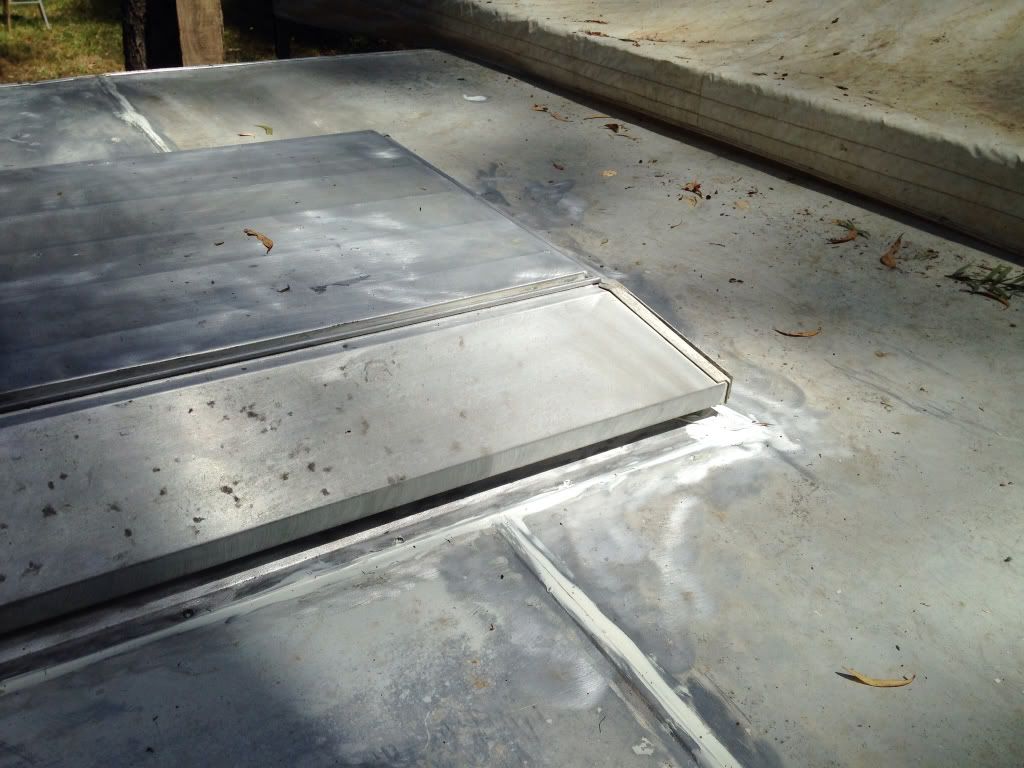
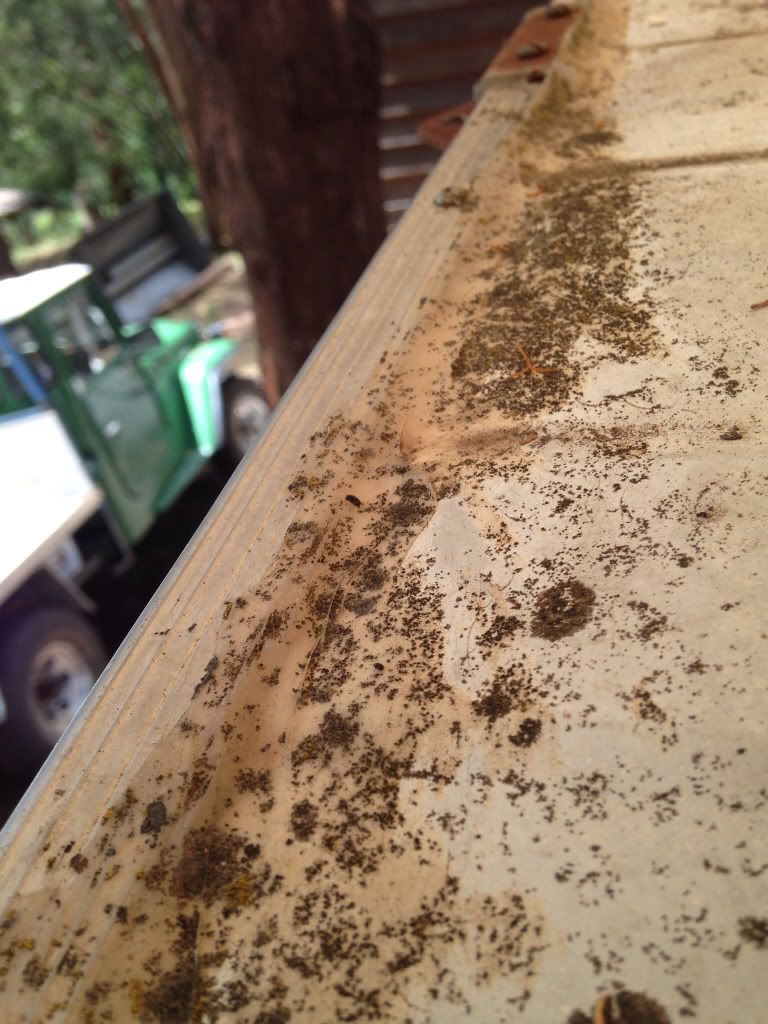 This is how it started out about 20kg of silicone on the roof of the caravan and it's been bugging me for ages. Time to scratch it all off and fix it. 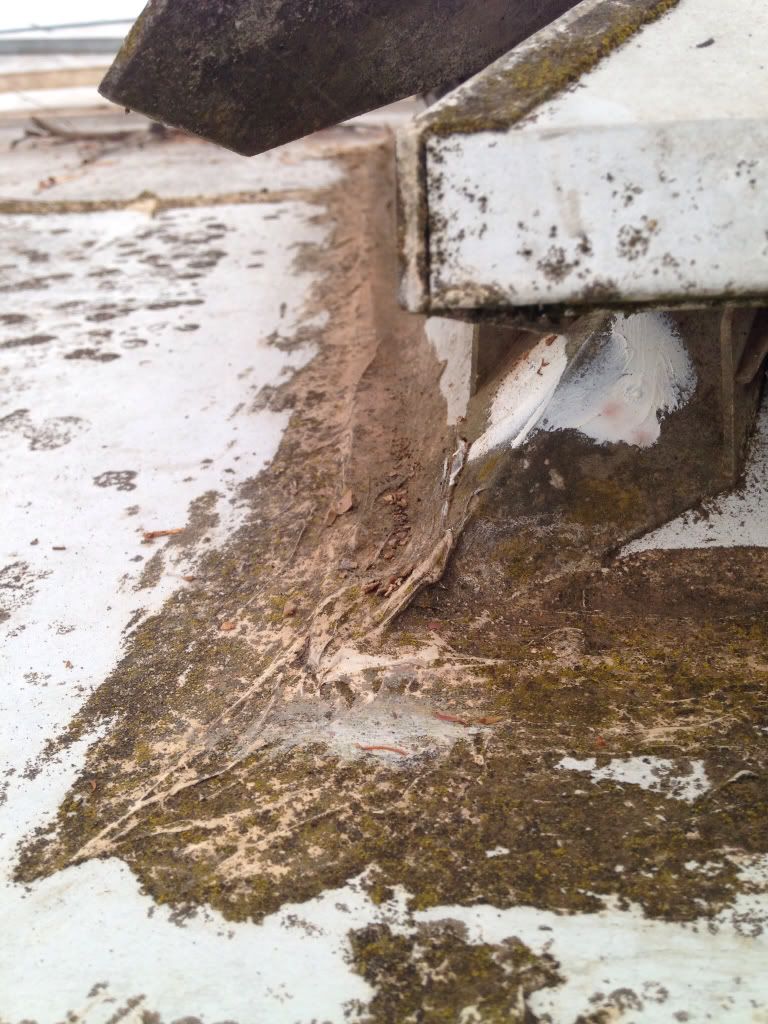 this is the four seasons hatch looking a real mess. I will remove it and resealed it. I have already done the rear one and it took me all day to wire brush the sealer off and reseal. I am using sikaflex I know some people worry it's too good and you can never remove it. Well I never expect to remove it and I would rather fix a leak forever than worry about removing it later. It's amazing once all the sealant was removed and the screws were removed it came out so easy and all the old sealant was just a powder. |
|
|
|
Post by ForumMod on Dec 27, 2013 18:42:39 GMT 10
G'day supreme78, Looks like you're getting stuck into some serious activities there!  If you are spending time removing and resealing the hatch, you might be interested in the following thread about refurbishing the control dial: Four Seasons hatch - repair and maintain Obviously whether you bother doing anything about them depends on how good or bad the operation of your control dials are at the moment. The one and only dial I refurbished 18 months ago still operates nice and smoothly, whereas the other 7 (two hatches all up) are still gunked up with crud because I never got around to doing anything with those ones. If I ever get the opportunity to remove both hatches and work on them on a workbench, I'd spend the time getting the other 7 flaps sorted out. cheers, Al. |
|
|
|
Post by supreme78 on Dec 28, 2013 10:29:43 GMT 10
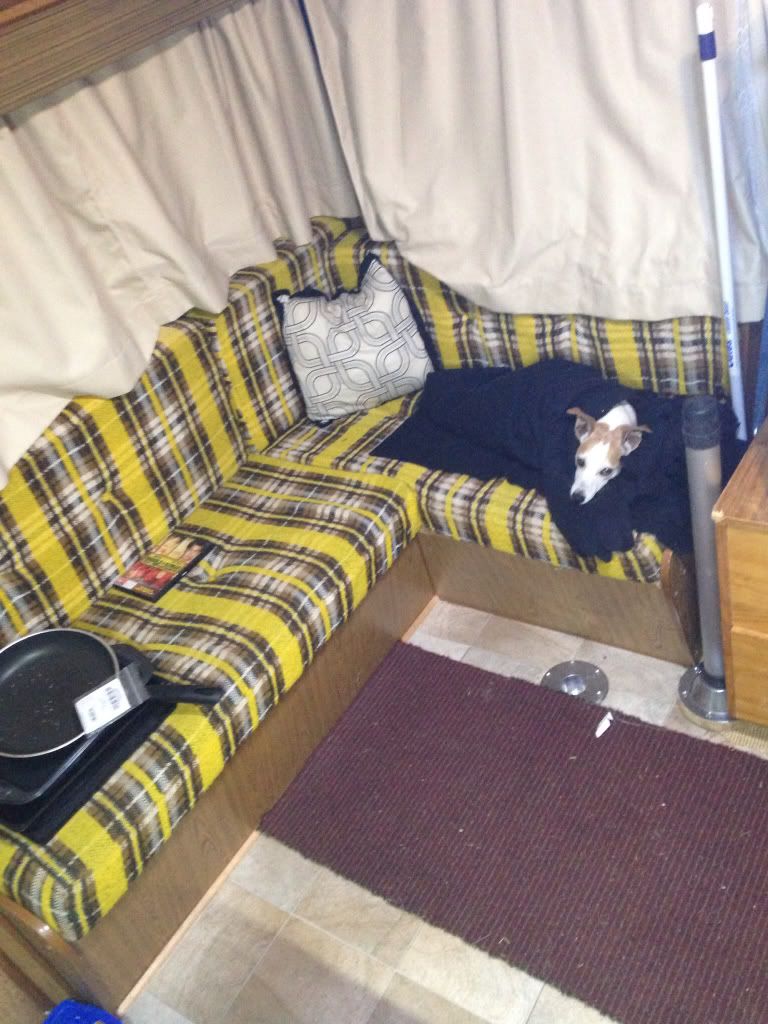 i have changed the arrangement of the seating in the van to free up space and make room for a second fridge. I am living in the van until I have an operation on the disk in my neck and then I can go back to work. My son is nice enough to let me have it at his house in the country. 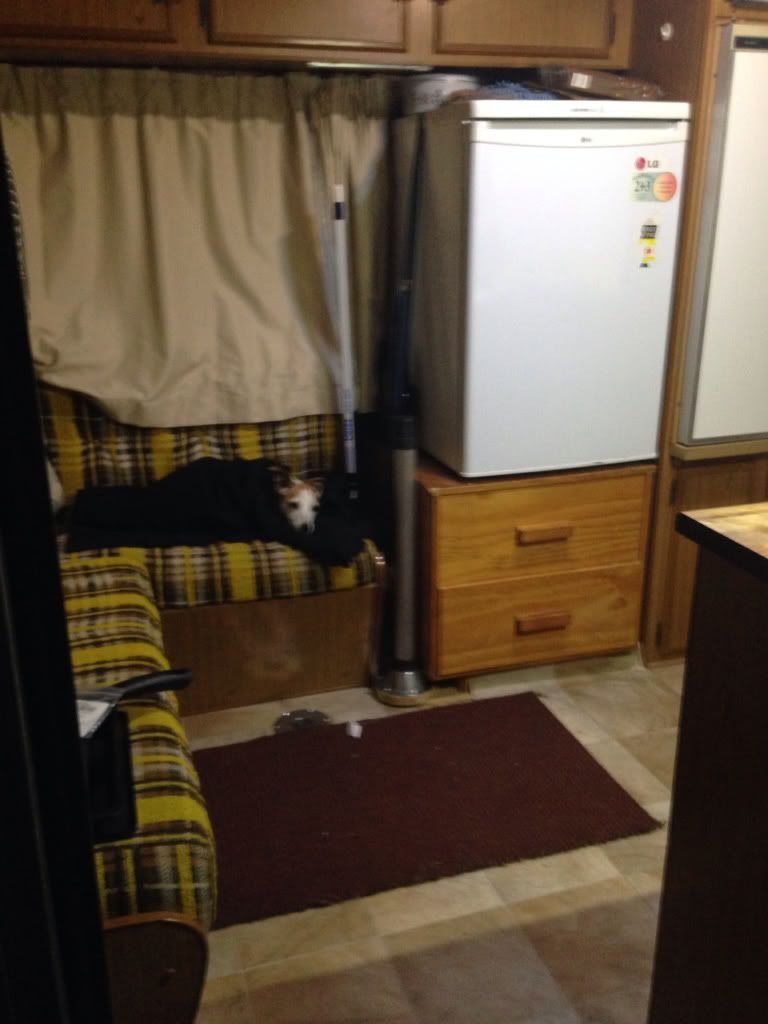 Here is another shot of the new seating arrangements. It was quite easy to do I removed the old seating from the the booth type seating I had and grafted the old section out at right angles from the original seating. The cushion size was considered during this as to allow to use them once the base was complete. I really want to change the seating cushions in time as they are not comfy at all really. The second fridge is just a bar fridge that I use while living in the van and the drawers below are the pantry for more space. I am in the process of putting drawers into one of the closets to give more room for storage. |
|
|
|
Post by supreme78 on Dec 28, 2013 10:50:25 GMT 10
 Well this is the rear hatch completed. What a job that was. Took all day to do. 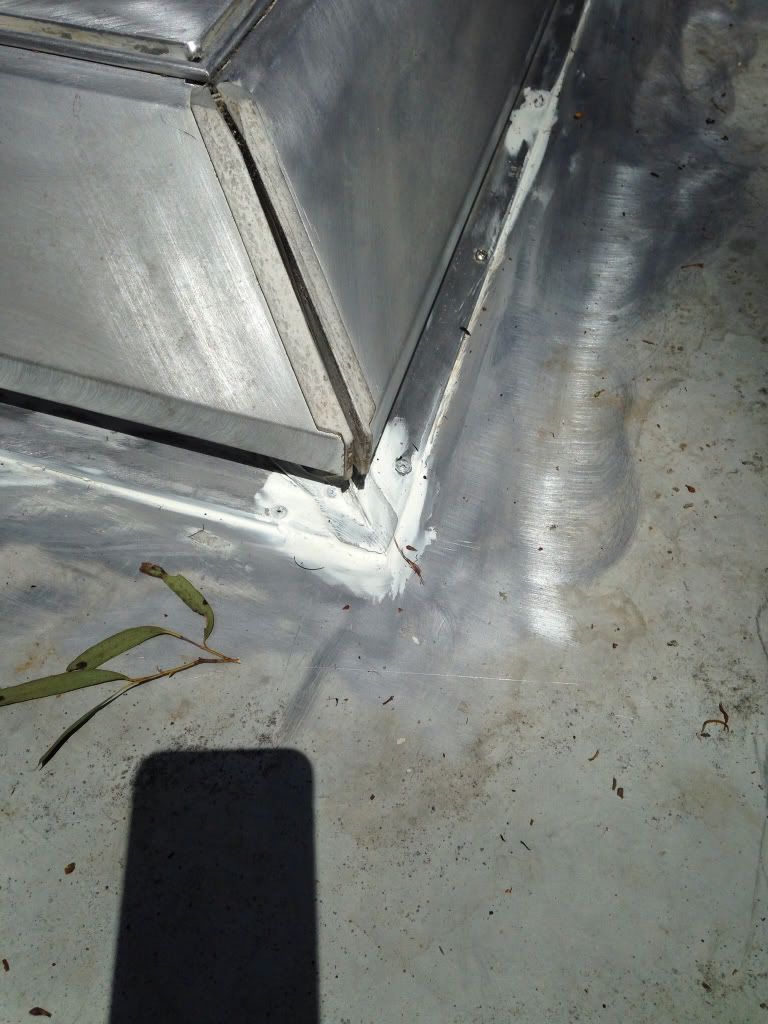 Another shot after all the hard work is done. I am happy with the result and I feel confident using sika to ensure it won't leak any time soon. I am going to repainting the roof with an additive added to the paint called insuladd I got it at the local paint shop for $35 for enough to add to 4 litrs of paint. I comes from a guy in qld so the paint shop guy said. I need to to paint he roof anyway so I hope this helps to reduce the heat and cold inside the van. While I had the rear hatch out I added some more insulation into the roof as there was bugger all in there at all. Just a few pieces 1/2 thick in places. So I cut some more 30mm thick and slid it into the roof from where the hatch was. So between the new added insulation and the painted roof I hope the van is a little more comfy.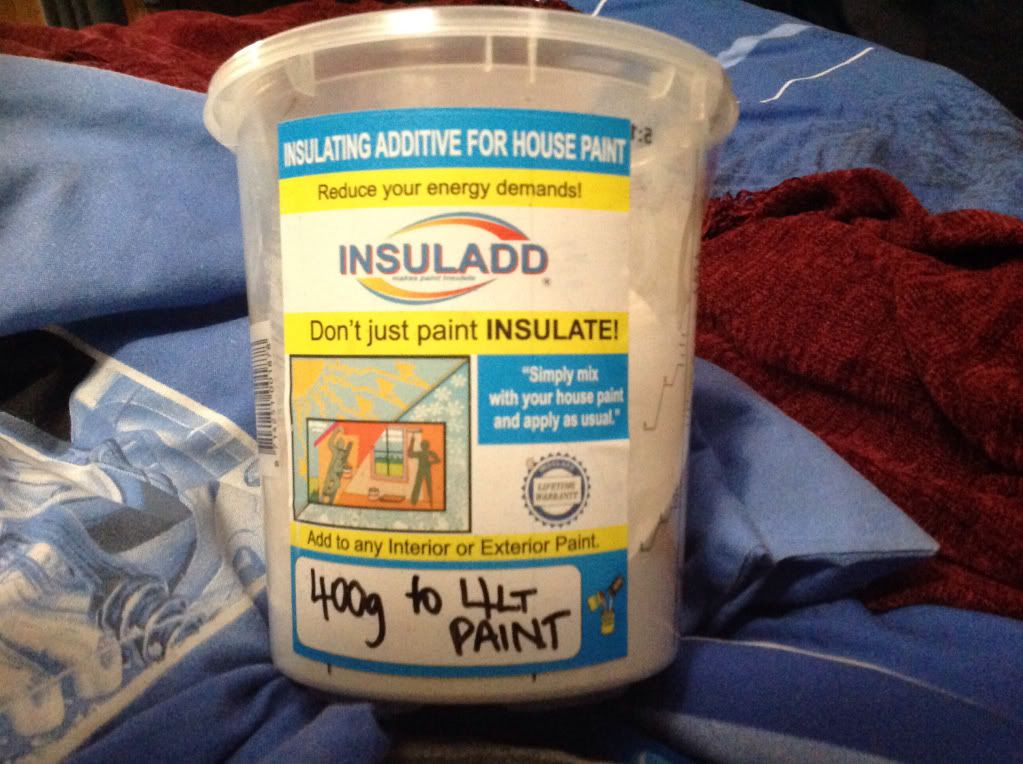 |
|
|
|
Post by supreme78 on Dec 28, 2013 17:08:50 GMT 10
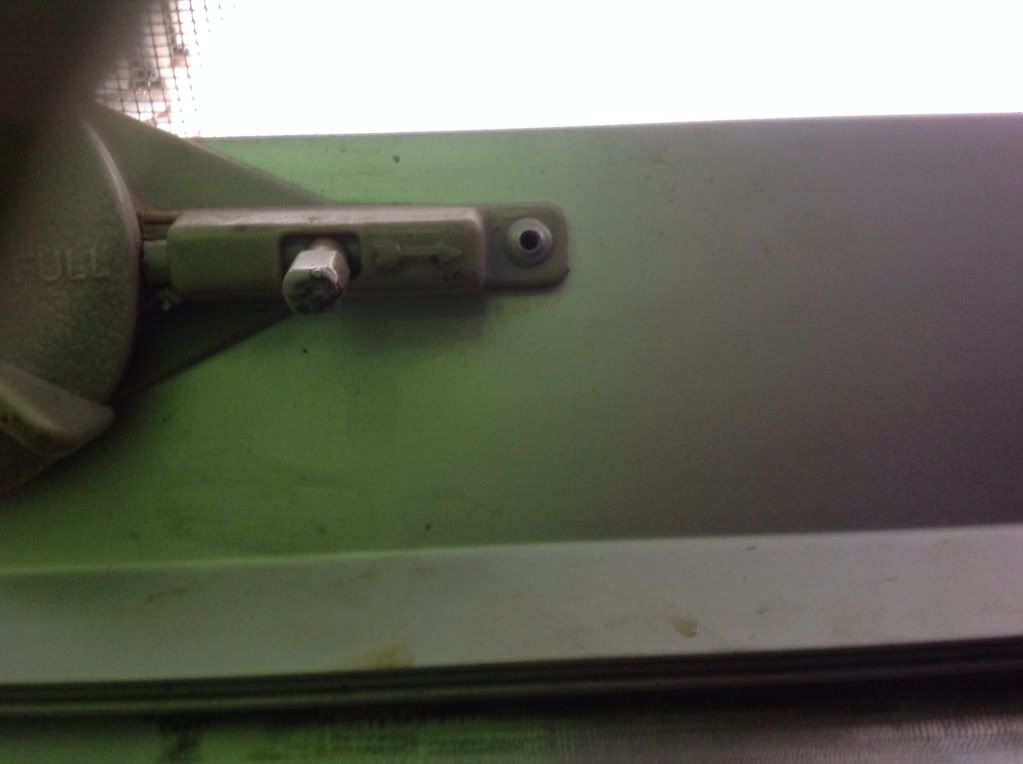 While working on my hatch opening dials I made a discovery by accident as most discoveries are made. You see the small tab you pull over to turn the dial does not quite move out enough for the dial to spin freely so I removed the tab lock and filed out the hole another 3 mm to allow the tab lock to come out more and hey presto from pain in the $@&e to quite easy. pic above show std setup. 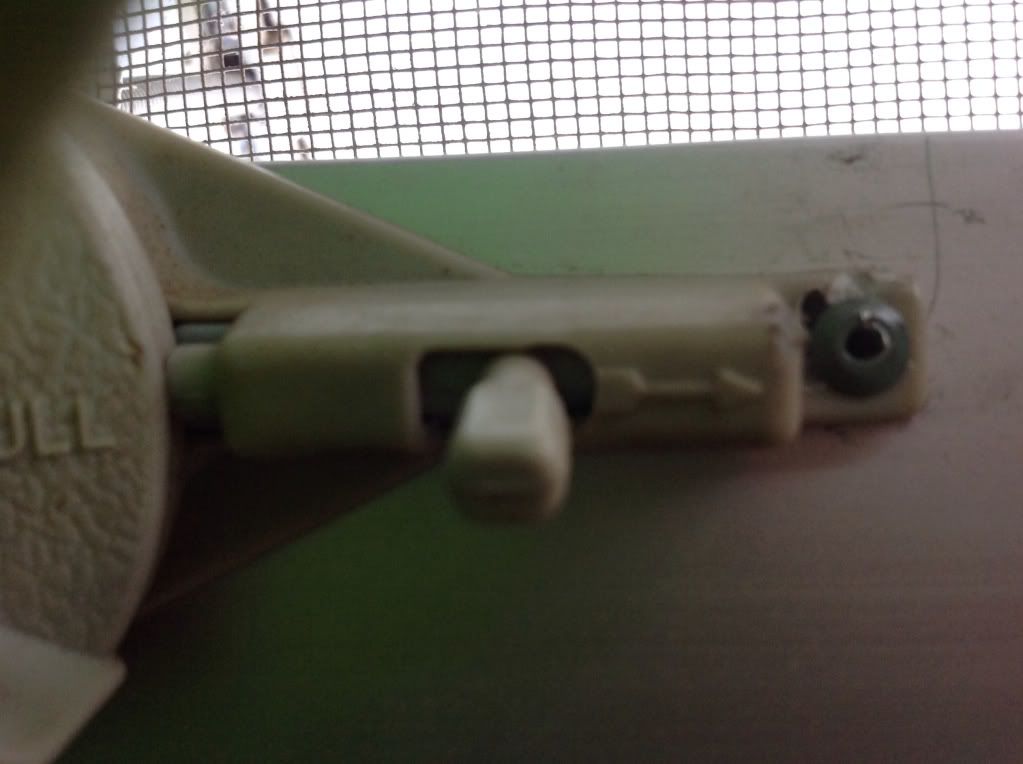 this one shows the filed out slot to allow the tab to slide out more. It's amazing the difference it made. I also cut a bit off the spring to make it easier to slide the tab. There is an easier way or a lazy way whatever you would like to call it. Set the dial to full open get your mulititool (renovator tool)or a hacksaw blade and cut the end of the locking pin off by the thickness of the blade. This will allow more clearance to the dial and assist opening. Its up to you what way yo ump want to go but one involves removing the Assam and the other doesn't. i also ramped the notch into the dial where you set it to rain I can now go into rain and out without sliding the locking tab. the reason I have done this is because one of my hatches is over the bed and a fool to get at the locking tabs. i hope you can all understand my long drawn out post. regards supreme78 |
|
|
|
Post by supreme78 on Feb 9, 2014 16:41:31 GMT 10
Well the weather is heating up down here in Vic and living in the van is not so easy until I get an air conditioner installed. I still can't decide what to fit in my van ac wise and still keep it looking original. I like the under bed units but at $1800 I don't think my budget can stretch that far. I was thinking of buying a window type unit and making it fit under the fridge in a cupboard or something or under the seating facing out the front of the van? Any ideas on this welcome. I don't realy want a unit on my roof as I would knock it off on something. 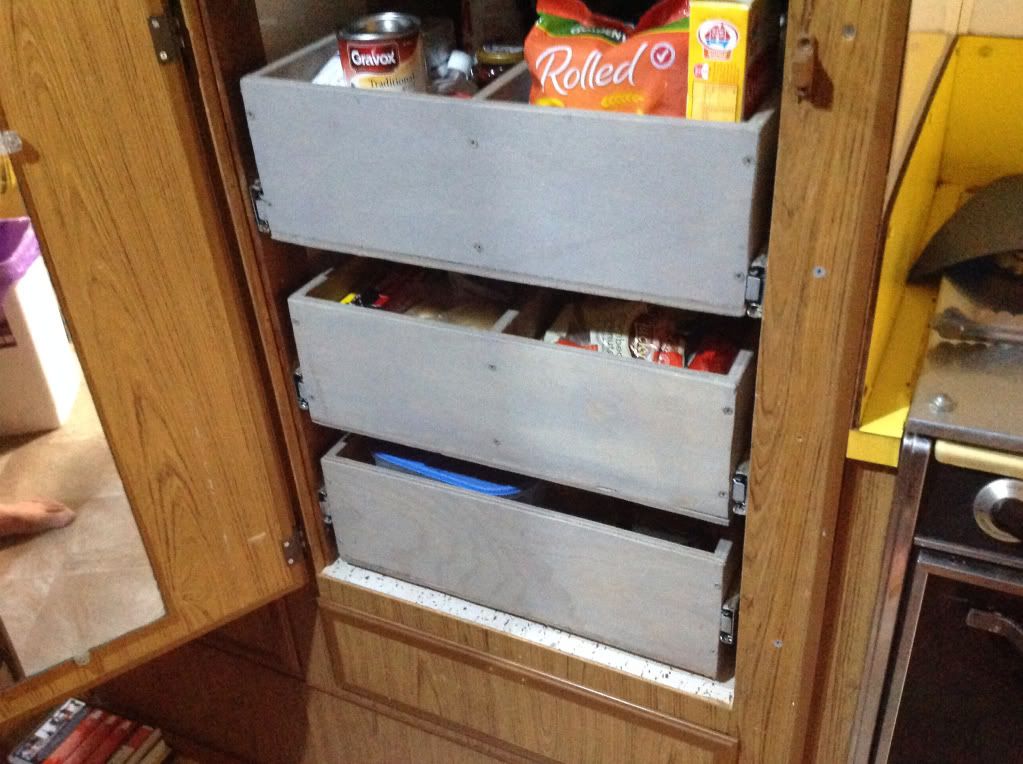 I have been working on drawers for the pantry. I got the sliders from bunnings and made the drawers up to suit the wardrobe as I wasn't using all the space for clothes. . 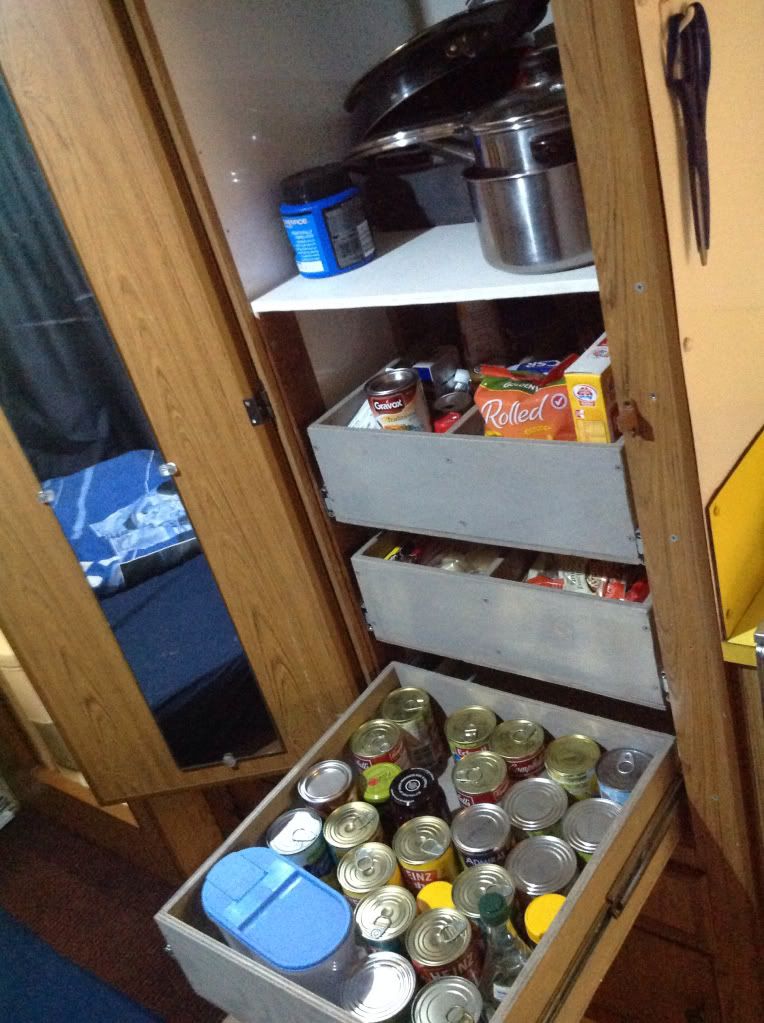 i have gained some useful space for keeping food stored. 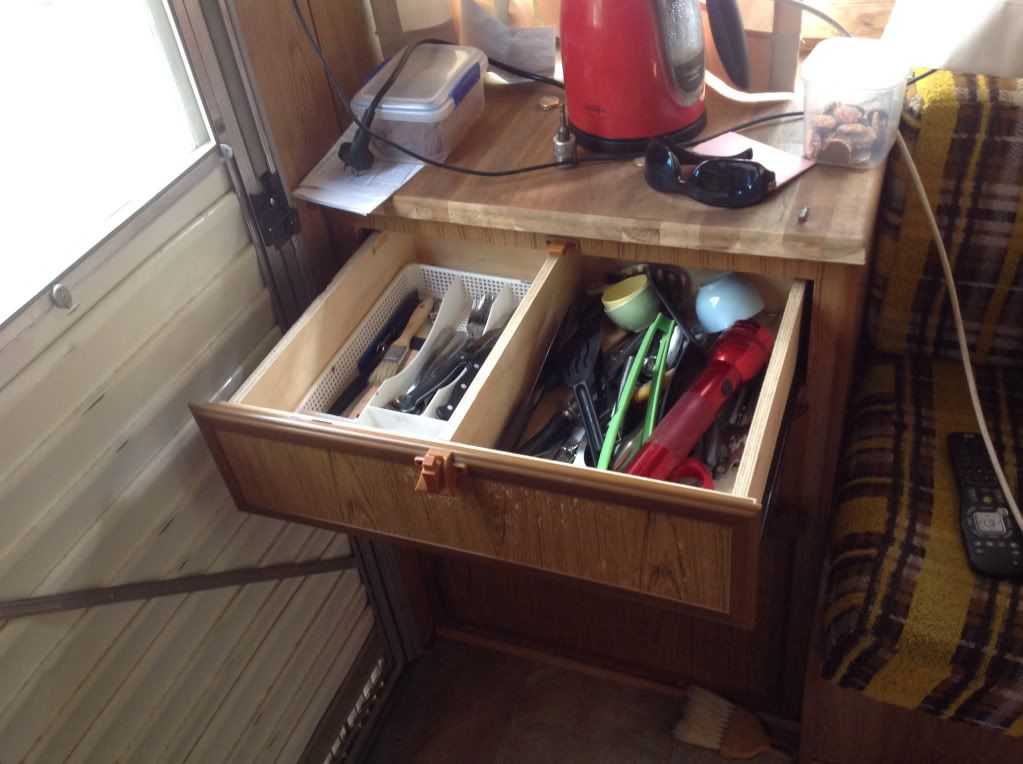 i also remade the front drawer as the original one was 180 mm to short from going all the way in and the extra depth has allowed me to put my cutlery the other direction to fit more in. I also extended the shelves below the same amount for more storage. I removes the inner panel lining and lined the alloy skin with carpet for more storage also. i will do the same to the drawers under the waldrobe as I can add 200mm to the depth and also get rid of the chipboard drawers at the same time. I will also make some pull out drawers under the bed for ease of acess to stored items. I am looking to take the old girl on a trip in May or June this year for 3 months up north to qld. My son lives at yepoon and I would like to have a look around up there. I have much to do before then like springs and new axle with cruiser wheels and new electric brakes. Rebuild and extend the draw bar add some storage up the front and remount the gas bottles. There is a long list and with my decreased capacity due to an injured neck some things might not get done before I go. I have acquired a nice old landcruiser I might use for the trip and sell off my pajero. Still thinking about that one. |
|
|
|
Post by supreme78 on Feb 9, 2014 16:51:44 GMT 10
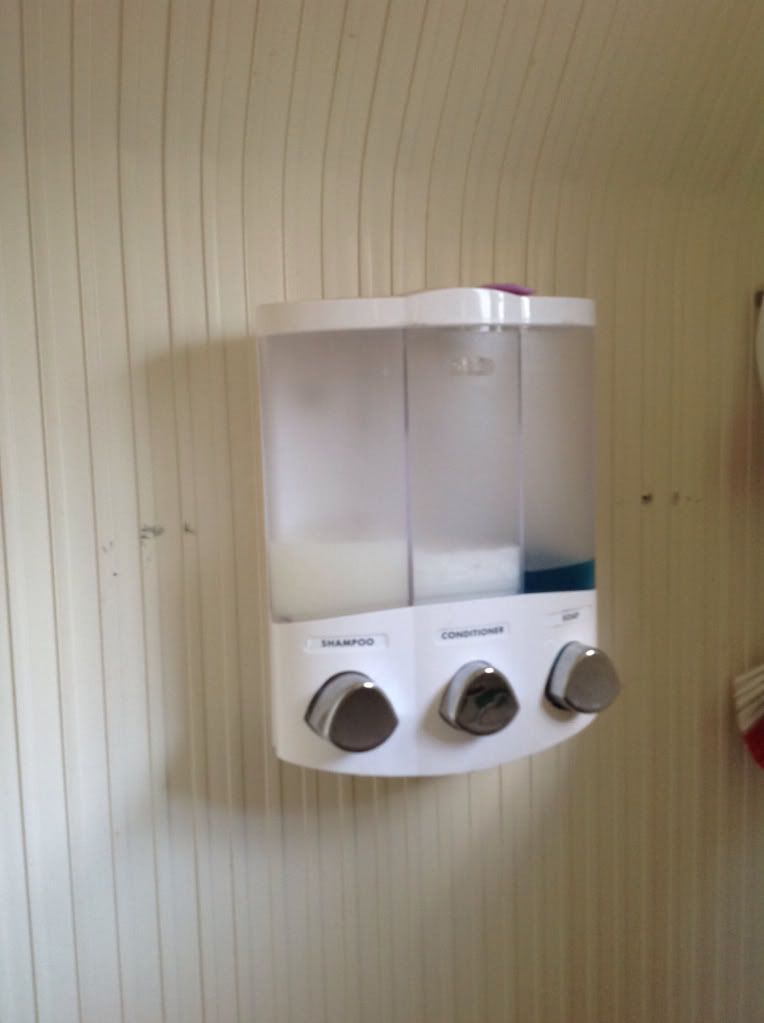 hi all I also wanted show this nifty idea I got online for $20. It's so handy. You never drop the soap and it is very frugal with its use of the soaps inside. I have been living in my van for 2 1/2 months and shower daily and used 2 inches out of the shampoo and conditioner. |
|