|
|
Post by millard1399 on Jul 10, 2012 15:22:42 GMT 10
G'day All, I have two Four Seasons hatches in my van. That means there are eight individual flaps in total. When I close the control knob on all eight flaps, the knob is very easy to get it to a point half-way between "Rain" and "Lock"... 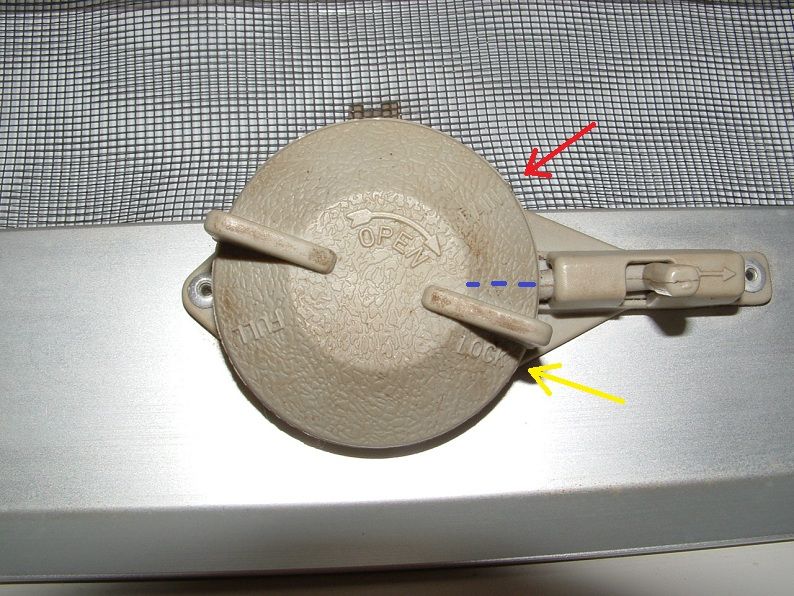 It then takes a considerable amount of force to turn the knob from that mid-point position to the "Lock" position, so the spring-loaded latch will fit into the notch in the control housing (the yellow arrow in the photo). So my question to all you knowledgeable Four Seasons hatch owners out there is this: Do you find it 1) Really easy, or 2) Really difficult, to turn your control knobs to the "Lock" position? Thanks for any help.   cheers, Al. |
|
Deleted
Deleted Member
Posts: 0
|
Post by Deleted on Jul 10, 2012 16:32:11 GMT 10
When I had a van with 4 Seasons hatches I had no trouble in closing them
les
|
|
|
|
Post by viscount6116 on Jul 10, 2012 17:17:42 GMT 10
Howdy Al The ones that I have in my present Viscount are fairly easy to close(they still put up some resistence to get to Lock)however my previous bus had 3 four seasons hatches and they were complete mongrels to open and close as they had seen a lot of dirt roads in WA and I think that the fine dust had infiltrated the locks Cheers Andy  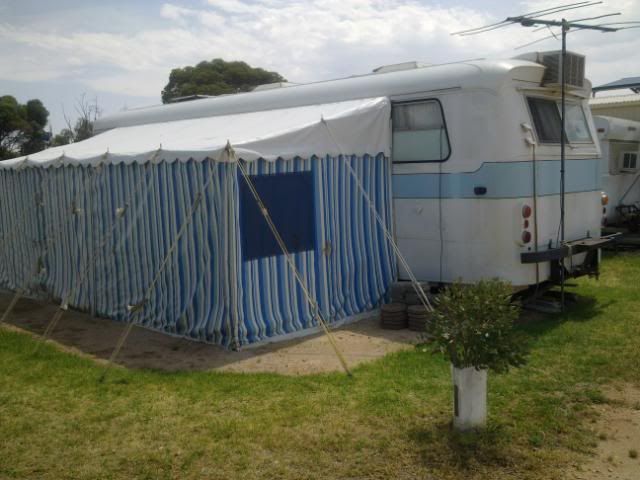 |
|
Deleted
Deleted Member
Posts: 0
|
Post by Deleted on Jul 11, 2012 8:16:39 GMT 10
G'day Al Ours gets to the same point and has a little bit of resistance, but I wouldn't say it was "hard" to close to the lock position. Being inside, Tracy normally operates the hatch      and has no trouble with it. I always thought it was a "design feature" so that you knew that the latch was locked by the click ... Hope this helps |
|
|
|
Post by millard1399 on Jul 11, 2012 9:21:05 GMT 10
Thanks guys. Sounds like mine should operate a bit more freely than they do. The extra effort required to turn the knob and lock the pin into the Lock notch is causing my muscles a lot of angst. I can force the knob and pin into the Lock position, but as soon as I pull the spring latch back, the knob swivels around to that mid-point position very quickly. I don't think the high level of tension in the knob is very good for it, and is certainly not good for my aching hands. I might take one of the control knobs off and see if I can understand what's causing the problem. All in the interests of caravan science, of course.  A replacement control knob is $23 from CaravansPlus, so if I can fix all mine it will save some dollars.   I see in the CaravansPlus hatch listings that there is now a plastic equivalent for the Four Seasons hatch. Same size as the aluminium model, but totally made of plastic. Cost for a complete unit is $464.75 !!   cheers, Al. |
|
|
|
Post by penny61 on Jul 11, 2012 21:08:49 GMT 10
We had two of those hatches on our 84 Millard.... I was about 7 yhears old and could open and close them fine.... if I had a stool to stand on ;D ;D
I seem to remember a little bit of resistance before the click into place... But I don't remember having to go get Mum or Dad, or anything like that...
Vanessa
|
|
|
|
Post by annieoakley on Jul 12, 2012 1:40:17 GMT 10
Mine are the same as yours Al. It's a relief to finally feel it click into place while worrying I'm going to break it. Sometimes I have to leave a couple of them almost closed. I'm looking forward to seeing what you find out.
|
|
|
|
Post by millard1399 on Jul 13, 2012 22:18:24 GMT 10
Ok, I had a go at "refurbishing" one of these control knobs today. What an absolute bugger of a job! It's gotta be the worst way to spend a day on a caravan!! The end result is that I reckon there are a couple of options for hatch controllers that don't close easily... Option 1: Do nothing. It's the cheapest and probably the smartest thing to do. Don't try and force the controller around to the LOCK position. Live with where it ends up when you normally turn it. Too much tension on the controller may lead to a problem with a strand of wire inside the main spring. Option 2: Drill a new hole for the locking pin at the point where you can easily close the control knob to... 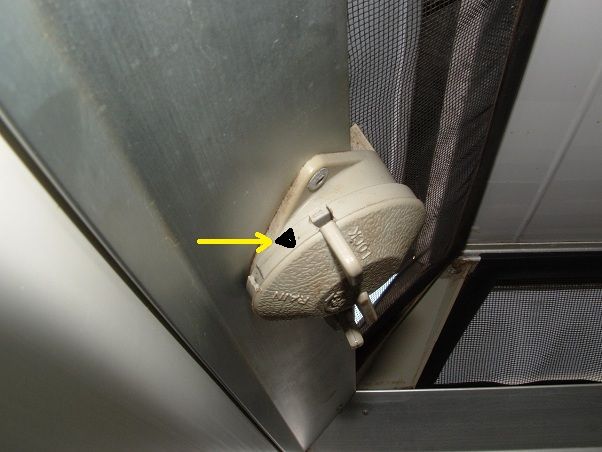 ...But before doing this, consider Option 1 carefully!  -------------------------------------------------------------- If you are a masochist, and are determined to refurbish these controllers, read on... Yes, they can be made to work. No, you shouldn't try doing it while they are attached to the roof of your van. If the hatch is out of the van and on your workbench, great! If it's in the roof, you'll need to grow an extra pair of hands, and you'll need a tool belt strapped around your body, just under your armpits. Plus you'll need a good vocabulary of swear words. Why don't they work properly?Andy hit the nail on the head in his post above...too much dirt inside the controller which stops the spring from freely retracting into the housing. The other problem could be that a single strand of wire is bent out of position (more on that later). How to dismantle the controller:1. Drill out the rivets... 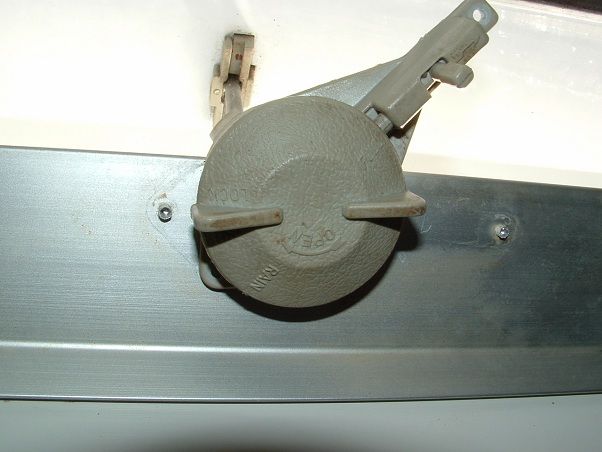 2. Pinch the tabs together at the back, with a pair of pliers, and pull the front housing off... 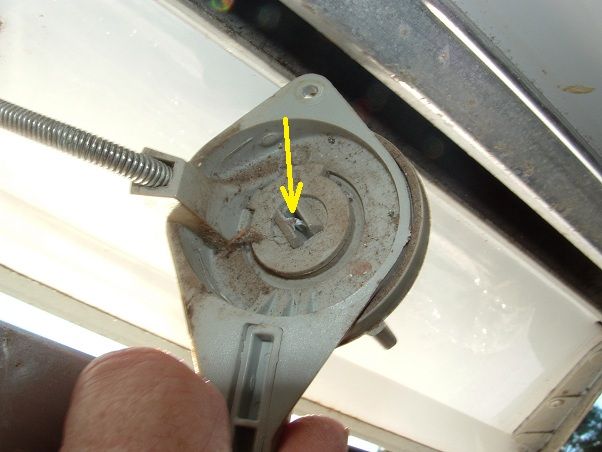 3. Lift the spring eye off the plastic pin at the back of the controller... 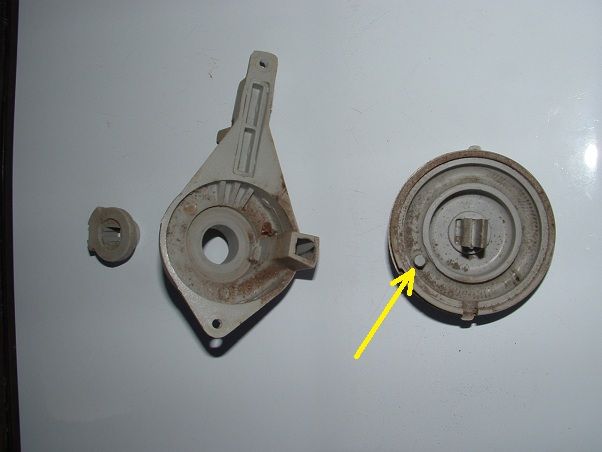 4. You'll have three pieces of plastic so far... 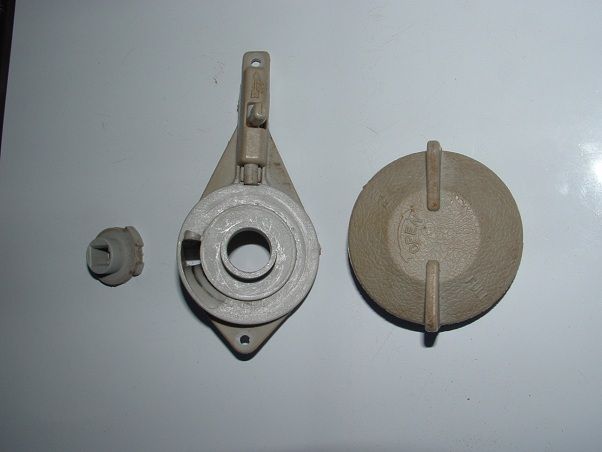 5. Remove the locking pin by pushing down on the pin from the top... 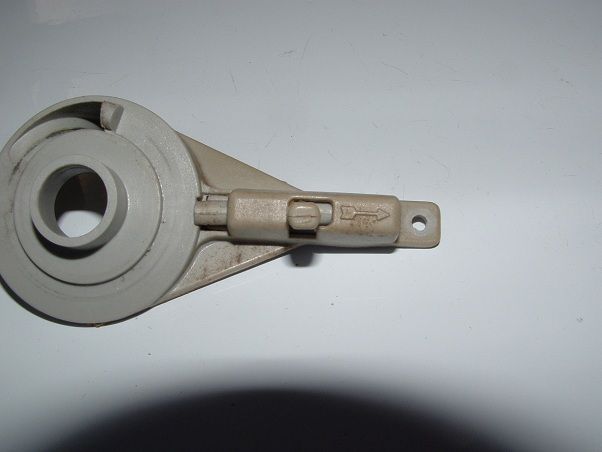 6. The cover underneath with be pushed out, revealing the pin and spring inside the housing... 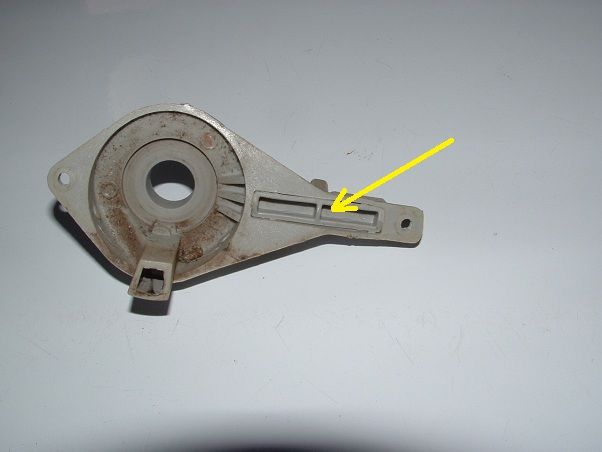 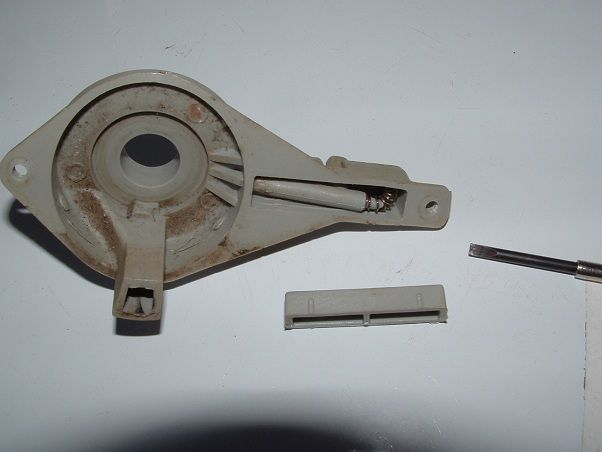 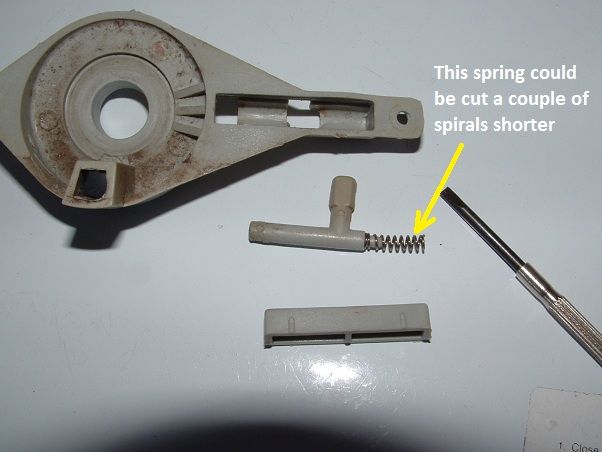 7. Clean all the individual parts with soap and water... 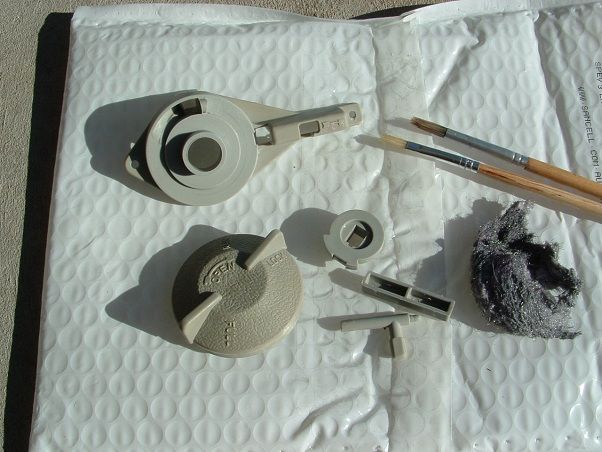 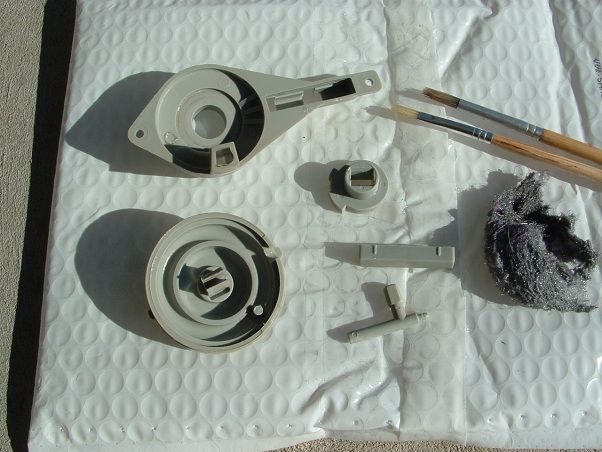 8. Apply a smear of grease wherever parts move over each other, and particularly where the spring is retracted into the housing. I use the grease that is used in the plumbing industry... 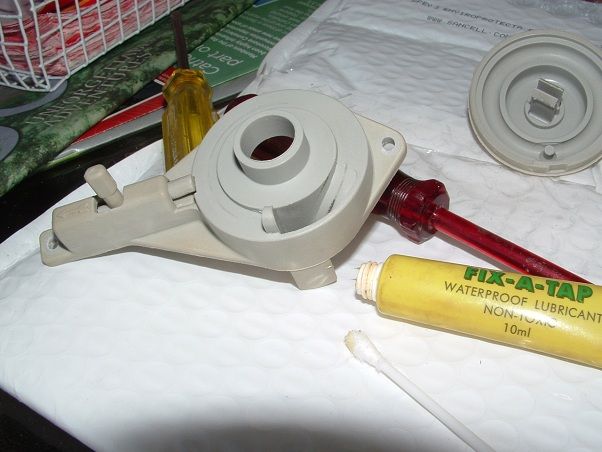 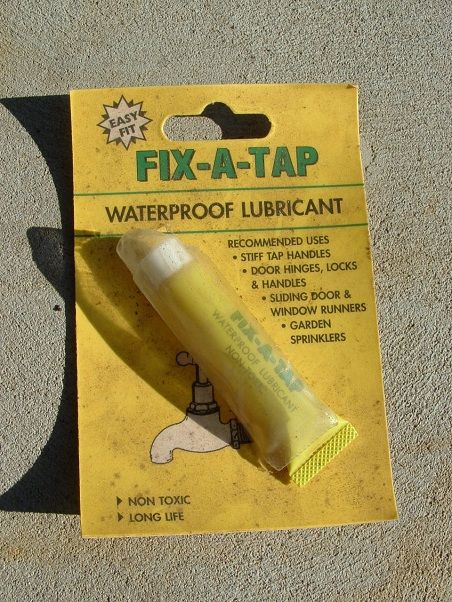 Reassembling: Reassembling: This is where you need those extra hands and copious swear words. There are two crucial requirements: 1) The plastic insert at the back of the housing has to be in the right position relative to the lug... 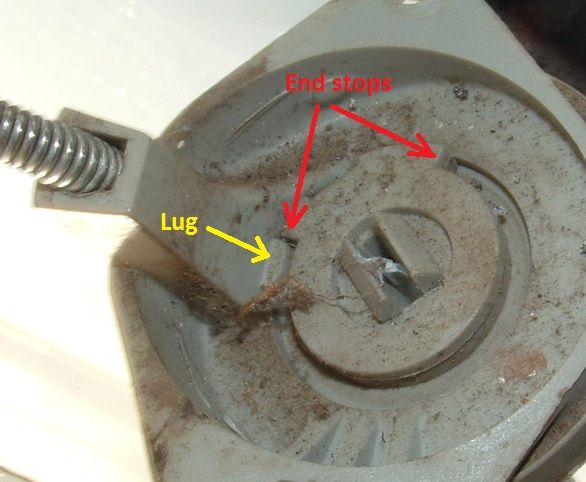 2) The spring has to be put back onto the plastic pin in a certain way. There is a single strand of spring wire running through the centre of the main spring, and which is bent at both ends. The "loops" at both ends hook over the eyes of the main spring and stop the main spring from being stretched too far. The strand of wire looks like this... 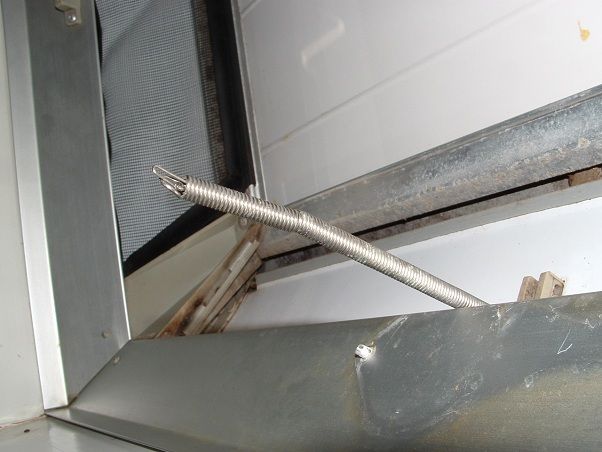 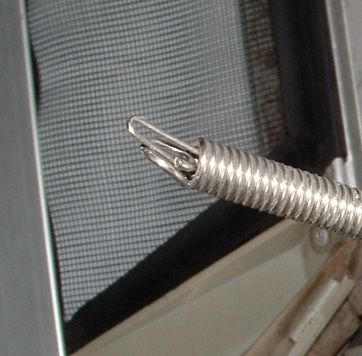 If you don't get that end loop fitting properly back into the spring, you can end up with this sort of thing... 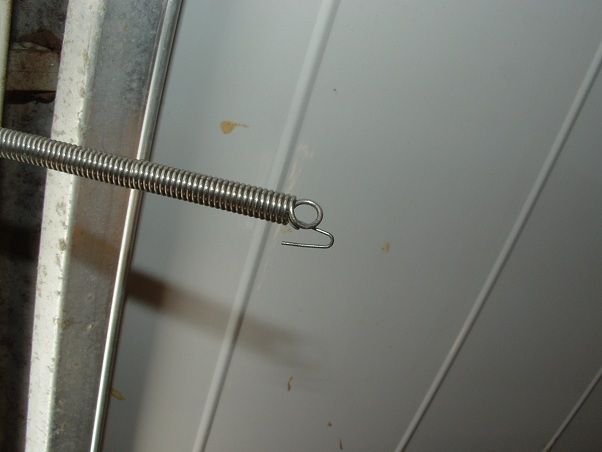 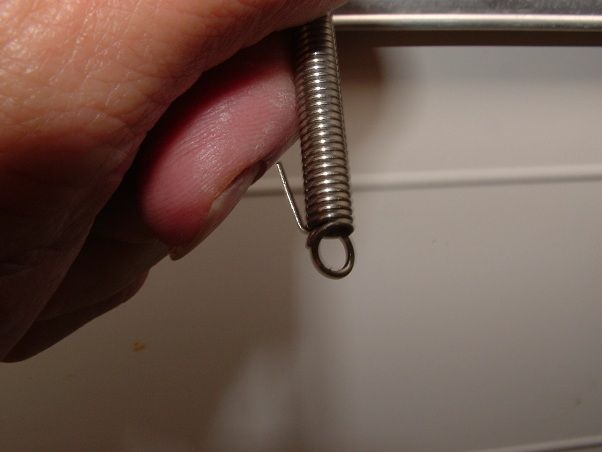 An incorrectly fitted loop will foul up the movement in the control knob, and may be one of the contributing factors in your currently poor-performing controller. The rivet size you'll require to re-rivet the controller back into position... 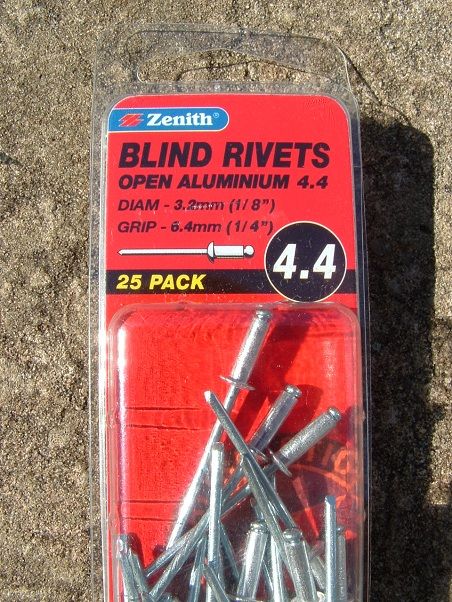 Good luck!   I got just the one controller refurbished today... 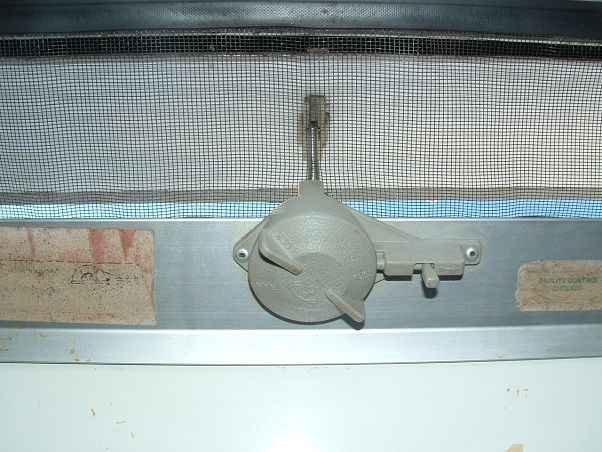 I think I'm gonna learn to live with the other seven controllers staying the way they are.    cheers, Al. |
|
|
|
Post by Rattles on Jul 14, 2012 8:53:40 GMT 10
Excellent Post any chance of a PDF document for future reference
Rattles
|
|
|
|
Post by Caprinut on Jul 14, 2012 16:49:43 GMT 10
Al,
Ive learnt one lesson when rebuilding .WALK AWAY !
When you feel like modifying something with a four pound hammer WALK AWAY else you will pound it to death and once youve calmed down the next day you have to find a replacement and you still have to solve the problem. Persistence is a renovators best trait. But anger at an inanimate object does not work-- and do not look for the wife because you will say something you will regret later He He
|
|
|
|
Post by millard1399 on Jul 14, 2012 20:59:20 GMT 10
G'day rattles, I don't have the level of software that allows me to create pdf's. I can only suggest you copy and paste the thread details into a document-producing software program (eg. Microsoft Word), if you have such a program. I've done that before with other threads on these forums. caprinut, the big problem with this job was the re-assembly. Pulling it all apart was the easy bit. It's not until you go to put it all back together that you realise what a pain it is. At that point you have a choice of "walking away" from a controller dangling in mid-air, or working out how to hold two separate parts in each hand, while holding a pair of pliers in your teeth, while straining your neck muscles to get everything lined up properly.   The kindest thing anybody can do for their partner and children is to give them a set of earplugs to use until the job's done. Otherwise, it'll be, "Ooo-wah! Did you just hear Mum swear?!!"   cheers, Al. |
|
|
|
Post by philouise on Jul 17, 2012 13:01:26 GMT 10
G'day Al. Thanks for the photos. But, the photo showing the end stops against the lug, is that in the open or close position. Reason for asking is that the "already repaired once by someone else" wire replacement broke and i was going to replace it with a piece i was going to create and couldn't remember which way round it went. No - forget it - i will buy one to-morrow ($27).  Cheers. Phil. And P.S. That was a most excellent presentation on "how to fix a hatch winder". Knowing the difficulty impossibilty in placing that wire correctly, i was very impressed.  |
|
|
|
Post by Rattles on Jul 17, 2012 15:30:24 GMT 10
Al I did this using Microsoft Word 2007 PM me If you want any changes, a copy of the word file so you do it yourself and I will let you in on the secret. Thanks again for the great effort in compiling the presentation. Rattles Attachments:
|
|
|
|
Post by peter92 on Apr 30, 2014 11:35:12 GMT 10
i Guys, and Al, great write up mate Ive taken my hatch back off because i had water coming in from the corners, im thinking of taking the controllers off with the top and taking off the grey plastic corners and cleaning them up and resealing them and put them back on using the rivits that Al posted the pics of Ive got pics here so if any one could help, would be great and im open to suggestions Looks like rain coming so help SOON would be good Regards peter      |
|
Deleted
Deleted Member
Posts: 0
|
Post by Deleted on Apr 30, 2014 16:44:36 GMT 10
Hi Peter. Unfortunately you really have to remove all the rivets and put sealant under each corner before riveting back together, it gets tricky because you may need an extra pair of hands to hold it all while you put the rivets in. You also may find the rivet holes wont line up again, and have to drill new holes. One tip would be to clean all the mastic/silicone off before you disassemble the hatch, I used a wire brush on the end of a drill to clean the goop out of the sealing channel and the roof edge which the hatch sits on. Just watch you dont run the wire brush onto the anodised aluminium outside. WIRE BRUSH  SHINY NEW ROOF METAL AFTER MASTIC CLEAN UP.  Scotty |
|
|
|
Post by peter92 on Apr 30, 2014 18:05:35 GMT 10
hi scotty, yeah did all that and i was carefull, got the foam tape from the caravan place and putting the tape on the hatch 1/2 way on and then putting the mastic on between the hatch and the tape and screw it to the roof
is this all correct
Regards Peter
|
|
Deleted
Deleted Member
Posts: 0
|
Post by Deleted on Apr 30, 2014 18:45:38 GMT 10
Sounds about right, use plenty of mastic, should ooze out inside hatch opening when screwed down.
Good luck Scotty
|
|
|
|
Post by peter92 on Apr 30, 2014 19:39:49 GMT 10
Yeah, thanks Scotty,, it oosed out alright inside the van, but at least its now done properly
And with that its starting to spit with rain
Will take a pic tomoro of it in
What the best way to tidy up the hatch now from all the exess mastic, was thinking petrol
Regards Peter
PS i put down the wrong s/n when i first started the post its now V3110 any ideas on how old my van it
|
|
|
|
Post by peter92 on Apr 30, 2014 19:56:05 GMT 10
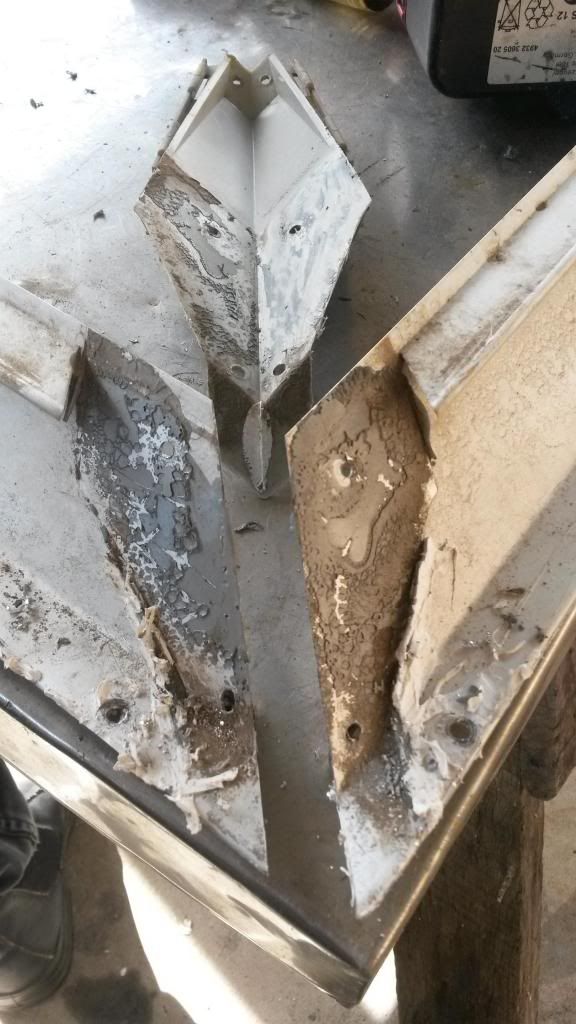 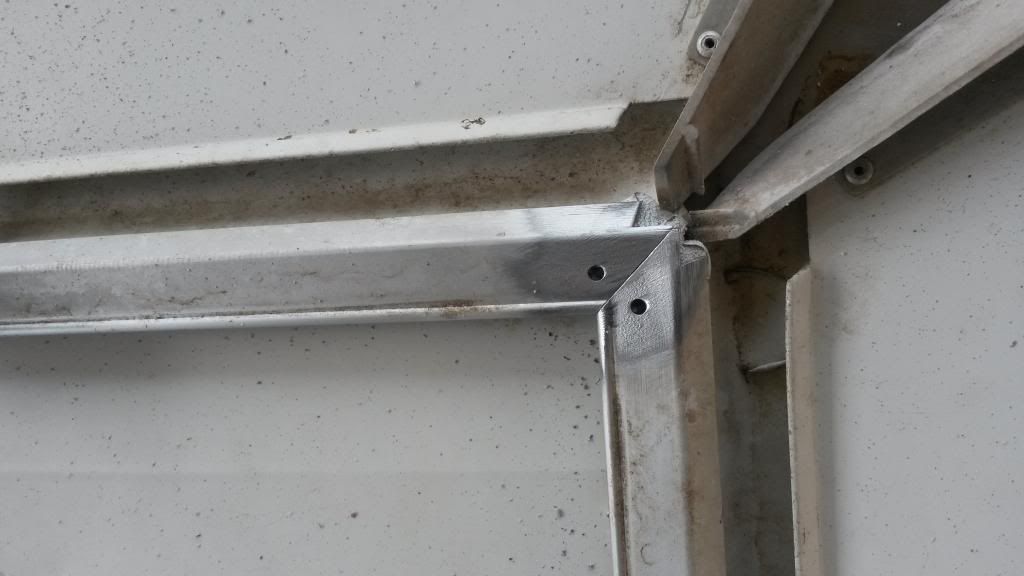 A couple more pics of stripping and cleaning Regards Peter |
|
|
|
Post by scotty on Apr 30, 2014 19:56:10 GMT 10
Hey Peter good to see you got it back in, just in the nic of time. May get rain for a few days.
Use turps for clean up of mastic, will still be messy, but should clean up fine.
Any mastic exposed to the weather should have a more durable sealant over it as it does dry out and crack over time if exposed to the weather, may be a sealant that can be painted over. Remember to put dap of silicone on the rivets to prevent leaks there.
I think the V on the rego would make your van around 1975, mine has a W and is 1976.
Scotty
|
|
|
|
Post by peter92 on Apr 30, 2014 20:11:29 GMT 10
Scotty, i never gave turps a thought, would it still be ok to clean all that crap up in the morning, and i should just have to cover the join on the hatch, is that right
Oh yeah and put mastic on the screws in the moening, would i still have to put mastic around the outside egde of the hatch or will the tape stop the rain getting in
As far as year goes, i was told that it was a 76 but cant find info on it
Its hard to find a franklin Statesman in my size with the front kitchen, wonder if it was a special order ?
You have been a great help and i app it, thanks
I can see us have good chats on here until i get the van finished
Regards Peter
|
|
Deleted
Deleted Member
Posts: 0
|
Post by Deleted on Apr 30, 2014 20:51:04 GMT 10
Clean up the morning no problem, the mastic will take for ever to dry out. so a few hrs wont matter.
No mastic on the screws, use silicone. Remember mastic can dry out and crack again when exposed to air for a while. Dont want it to leak again at the screw holes.
Dont use mastic around the outside of the hatch edge, you can leave the tape exposed if you want, it will be fine, as long as you have been careful with applying the tape, leaving no gaps for water to enter under the hatch edge.
Or you can use a paintable silicone just around the outside to cover the tape only to make it totally waterproof.
You may have to put a dap of silicone on the hatch corners where it meets the roof just to be sure it wont leak.
Cheers Scotty
|
|
|
|
Post by peter92 on Apr 30, 2014 21:00:39 GMT 10
Thanks Scotty, yeah ive got marine sika here so will use that on the screws and on the joins
may even put the sprikler on the roof to make sure it dont leak, fingers crossed
or leak any where else, gives me a chance to sit down and have a cuppa
got any pics of your van
Regards Peter
|
|
Deleted
Deleted Member
Posts: 0
|
Post by Deleted on Apr 30, 2014 21:38:13 GMT 10
|
|
|
|
Post by peter92 on Apr 30, 2014 21:49:51 GMT 10
No worries Scotty, will check it out now
Regards Peter
|
|