|
|
Post by bobt on Nov 9, 2009 21:46:51 GMT 10
GEEEEEEEEEEEEEZZZZZZZEEEE   millard1399 now if ya told me saturday afternoooon I woulda jumped in da car and scooted up to your place to celebrate... nahh.. ya left it to sunday arvo when I had no hope..... [glow=red,2,300]HOPE YA GET SUN BURN OFF THE REFLECTION [/glow] ;D ;D They look mighty nice. Caint wait to see em fitted bobt  |
|
|
|
Post by millard1399 on Nov 10, 2009 9:53:55 GMT 10
And just so you don't think I've been bludgin' since the windows were finished, here's the "Acme Wonda-Spray" spraybooth in action this morning...  You can see the deluxe insect repellant newspaper lying on the ground to the left.   Hopefully the final coats go on the three pieces tomorrow. I get a two-hour window of opportunity on calm mornings to spray paint before the breeze starts to come up. With the lightweight aluminium panels, it doesn't take much to topple them over in the breeze. I've already had a few "disasters" previously where I've put a panel aside to dry, only to come out and find it blown over, with the newly painted surface lying face down in the grass. Fortunately, that's occurred during the primer/undercoat stages so it hasn't been a big deal. But when it comes to the final topcoat, I have to be REAL careful and get it done quickly and EARLY! Anyway, now that I've shown you how hard I've been working this morning, I can go and have a bludge!   cheers, Al. |
|
|
|
Post by millard1399 on Nov 13, 2009 17:00:39 GMT 10
Back again! ;D I spent yesterday morning plotting and planning for a little bit of framework to anchor the mains power inlet fitting when it gets installed. The big problem with this fitting is that the power terminals are angled to the face of the fitting... 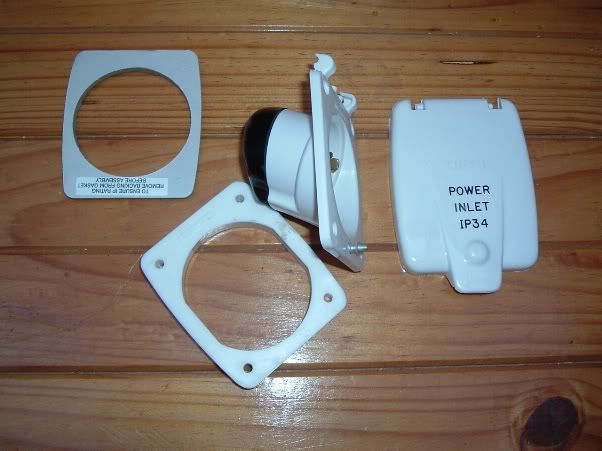 So you can't just drill a neat round hole for it to fit into. I ended up cutting bits and pieces of timber and glueing them into position, until I was confident I had something that would work. But then I temporarily fitted the cladding onto the side...and stood back and looked...and there was no timber where the top screw holes go!   So I spent yesterday afternoon chiselling all the bits of timber back off, and starting the job from scratch.   By late yesterday, I finally got it RIGHT! ;D ;D ... 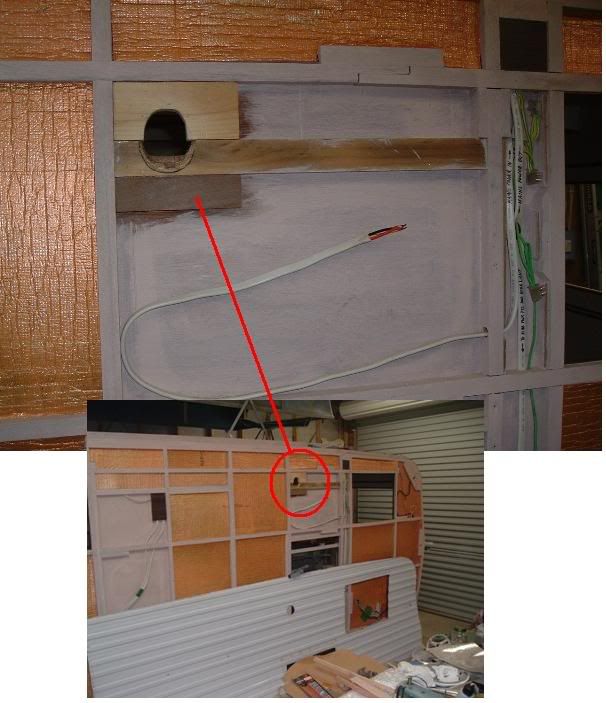 D@mn tricky bit of work that turned out to be!   Today was a better result. Had a go at fitting the first two windows back into the van. Here's the "before" shot of the rear... 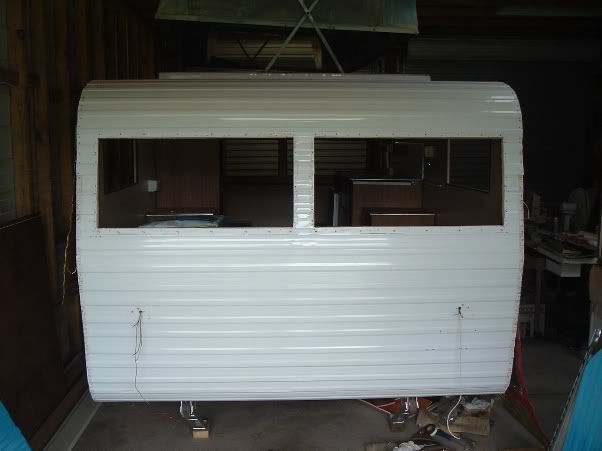 Once again I'm searching in the dark here about how much sealant to pump onto the window frame. Have to put enough there to make sure all the valleys in the cladding are nicely filled. But then don't want to pump too much on it, because all the excess has to be cleaned up. So a lot of guesswork goes into the job... 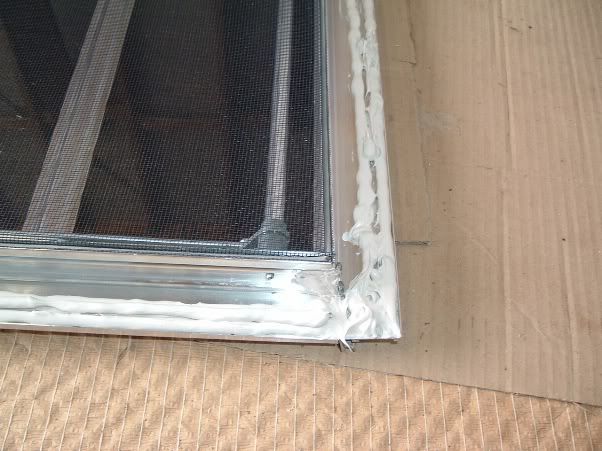 The Sika sealant I'm using is real fussy stuff to work with. Sticks to anything that gets in the road, and I'm forever using tissues and turps to clean up any blobs that accidentally go in the wrong place. Turned out that the amount I pumped onto the framework was pretty close to ideal. Cleaned the excess off with a plastic scraper, and then lots of tissues and turps to get the remaining residue off the cladding. Ended up with a rear end that looks pretty spiffy... 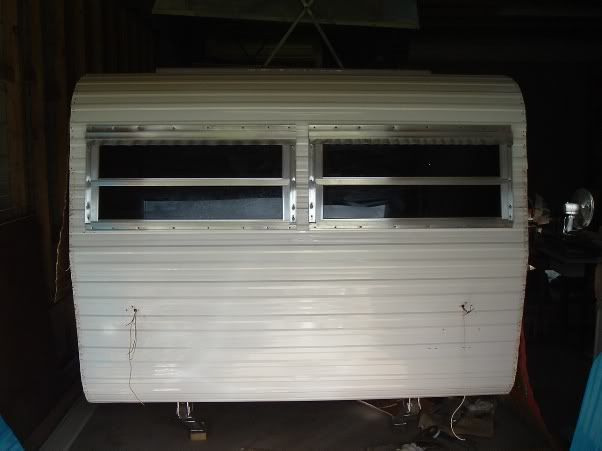 Got a fair few days of "fun" ahead putting the rest of the cladding back on the van and then installing all the other windows. Till next time, cheers, Al. |
|
|
|
Post by kiwijim on Nov 13, 2009 21:35:15 GMT 10
Howdy Al, I had just finished spending 1/2 hr writing about your Millard......... Then "PUFF" someone pulled the plug in the Bigpond.... all gone, Anyone wanna hear a mad tempered kiwi on Friday 13th    As I was saying ( Starting again ) good to see you have managed to fit the external power inlet but, where is the Circuit Breaker going ? Have you checked the depth of the power inlet when fitted ? a number of vans have to have a box fitted inside, because this inlet is to thick when the black cap on the rear is attached. This box on the inside is an ideal place to fit the Circuit Breaker, as they should be as close as possible to the inlet. "ARRR" that lovely window sealing goo, Just a hint to keep you Pinkies clean........ Don't stick the goo on the window frame, grab a mastic gun and run a generous strip around the window hole edge, stick the window into place and hold with a couple of screws ( Stainless ? ) next use the mastic gun with a fine tip to run the goo around the inside edge of the window frame, replace all the screws, then the excess goo can be removed using a beveled piece of perspex, this won't scratch the paint. And look    Your Pinkies are still clean ;D ;D ;D Finally dunk a paint brush in turps and paint the goo into the frame, this will seal any small holes and give the goo a smooth finish. Now to check this and get it posted before that "Sod" does his stuff again.    Cheers kiwijim |
|
|
|
Post by bobt on Nov 13, 2009 22:03:37 GMT 10
hey millard 1399 Those shiny rear windows fitted in place look real great..   Ya must be feeling real good about now....  I read a tip somewhere...think it was on VV. use masking tape on the van wall around the edge of where the window will go to prevent that gooey stuf getting on the paint work..  |
|
|
|
Post by millard1399 on Nov 14, 2009 20:48:44 GMT 10
kiwijim, yep there is a double pole rcd-mcb fitted in the van. If you go back up to the photo above showing the mains inlet hole, then just to the right you'll see a heap of cables running up and down. There's a dark square at the top (...that's a piece of laminex covering the wiring). The rcd-mcb is fixed to the inside wall right there... 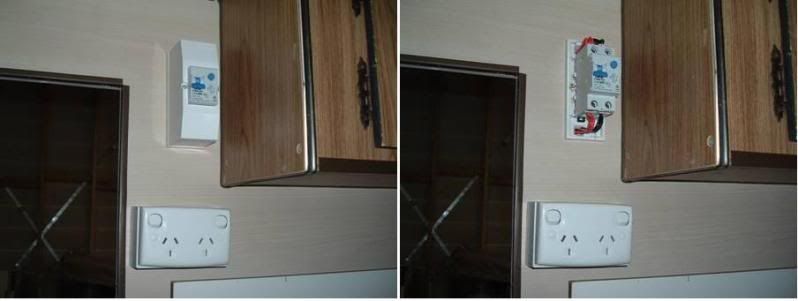 Where the mains inlet fitting pokes through into the overhead cupboard, there is a plastic box-lid cover that screws into position. That cover was in the van originally, so I'll be putting that back. I'm also using a spacer on the outside of the fitting to stop it protruding into the van too far (the spacer is shown in the bottom left of the photo of the mains fitting above). As far as sealing the windows goes, I'll try a couple of different methods and report back on which one I think is the easiest (least messy) option. I've got some 50mm wide masking tape, so I'll give that a go, and I'll also try pumping the sealant onto the window opening, rather than on the frame itself. Thanks for the good ideas. ;D cheers, Al. |
|
|
|
Post by bobt on Nov 15, 2009 21:05:12 GMT 10
Hi millard1399 Its all looking good...  |
|
|
|
Post by millard1399 on Nov 22, 2009 21:22:38 GMT 10
Another update on progress... Have fitted the top half of the cladding, and the windows, to the sides of the van. Fitted the windows into the opening 'dry', and taped around the perimeter with masking tape. Took the windows back out and pumped the sealant onto the window frames. I found it was easier/better to pump sealant directly onto the window frame itself rather than the window opening. It just seemed easier to lay the window flat on the floor and pump sealant around the edges, rather than trying to pump the sealant around the vertical window opening. Horses for courses, I guess. Here's the window openings after taping up... 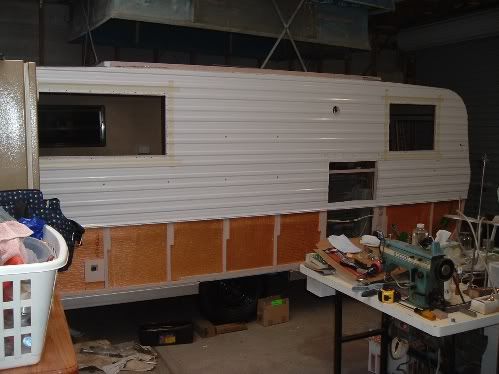 Here's the window with sealant put into position... 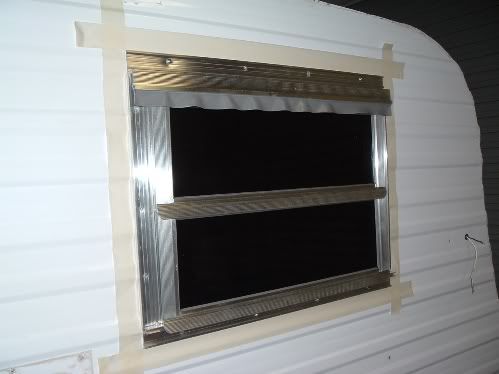 Next, I put the tip of a paddle-pop stick between the edge of the window frame and the ridge of the cladding, near where each screw hole is. I put the screw into the frame, and tightened it until the paddle-pop stick was lightly held in position. This made sure the sealant was not excessively squeezed out from behind the frame. The thicker the sealant bed, the better the long term sealing, I reckon (that's my amateur theory anyway   )... 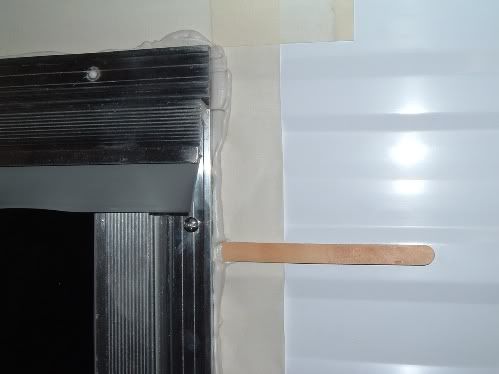 Once all the screws are in position, the plastic scraper knife is run around the edges, forcing surplus sealant onto the masking tape. This surplus can be used in other spots where you might not have put enough sealant... 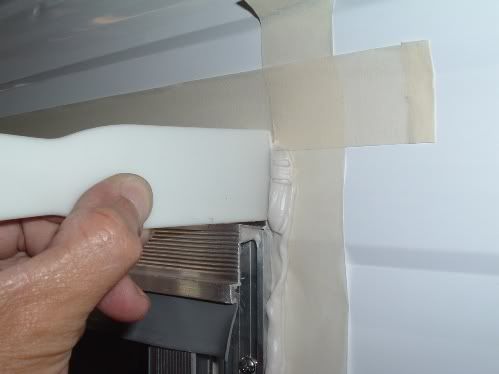  After all the surplus sealant is scraped out of the way, the masking tape is taken off, and the remaining sealant mess is cleaned up with lots and lots and lots and lots of tissues soaked in mineral turps... 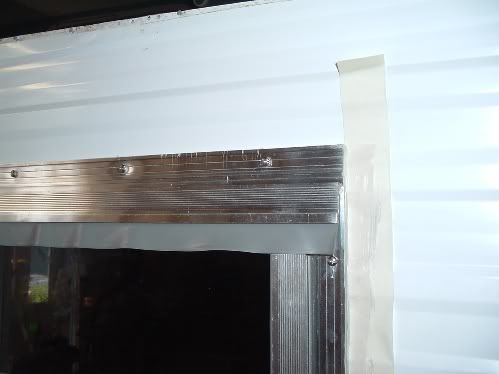 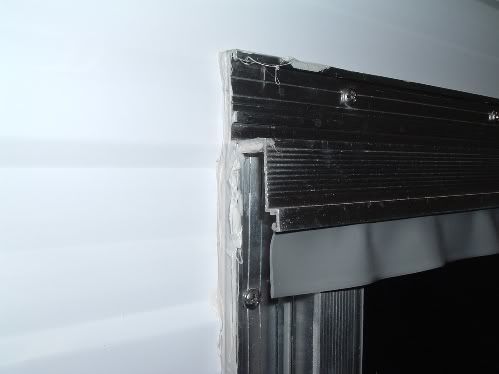 After a few hours of mucking around, you end up with something that looks like this... 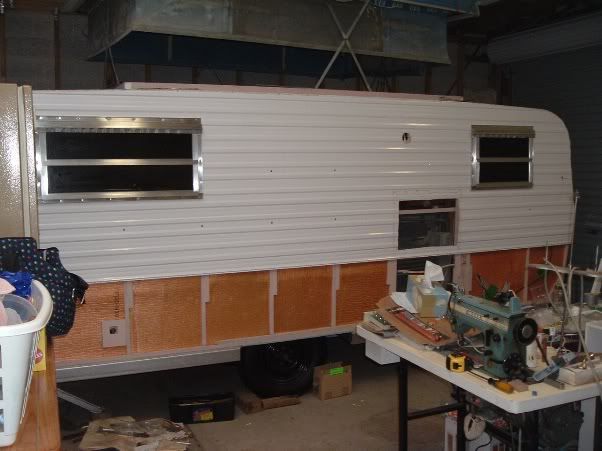 Easy peasy...heh heh heh   cheers, Al. |
|
|
|
Post by millard1399 on Nov 24, 2009 6:33:17 GMT 10
And here's another little job I'm doing in the background while I muck around with putting the cladding and windows back on... The edge cover strips are covered in crud/mud/paint, particularly on the sections that run along the underside of the van. There are also a few scuffs and gouges in areas where some "accidents" have happened in the past. I'm giving the strips a good clean-up, using a rotary wire brush in the drill. I'm being ruthless with the wire brush, because I won't make the strips look any worse than what they did originally. They don't look too bad once all the surface crud is cleaned off... 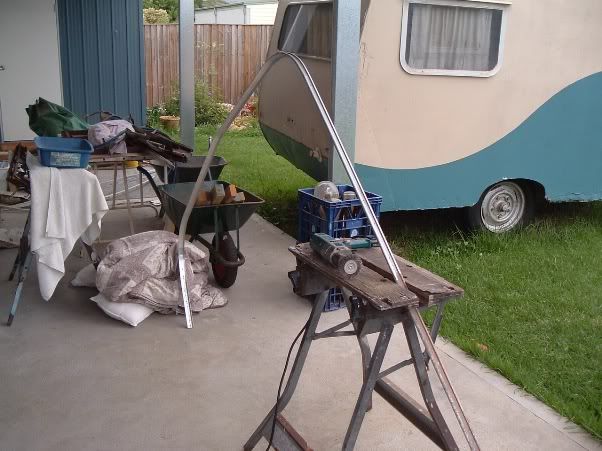 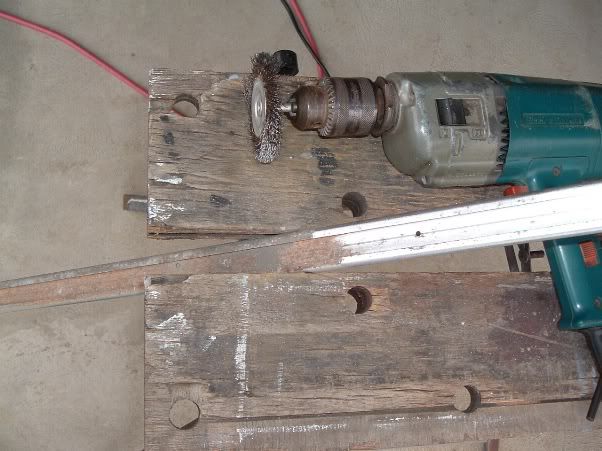 It's all happening...  cheers, Al. |
|
|
|
Post by bobt on Nov 25, 2009 19:44:50 GMT 10
Hi millard1399 Glad to see the masking tape theory actually works.  Actually it worked for me once too. You must be feeling real good at the moment. Putting it back together certainly would give you a good feel for all the effort you have done in the past.  Must confess when I read you were using the wire brush thingie on the edge strips I shuddered. Have had night mares of my father doing this once to some bits for a car of mine.  Great intentions. but........ Now seeing what state the strips are in I can understand why you are doing it.... looking good...  bobt |
|
|
|
Post by millard1399 on Nov 28, 2009 21:28:04 GMT 10
Stop the presses! Hold the front page!! Major disaster developing...Spray paint failure!!!!!!! Well, there I was merrily putting the front cladding back on the van. Got one window fixed in, using the same method as was done on the sides. Masking tape...sealant...lots of turps to clean up the sealant residue... 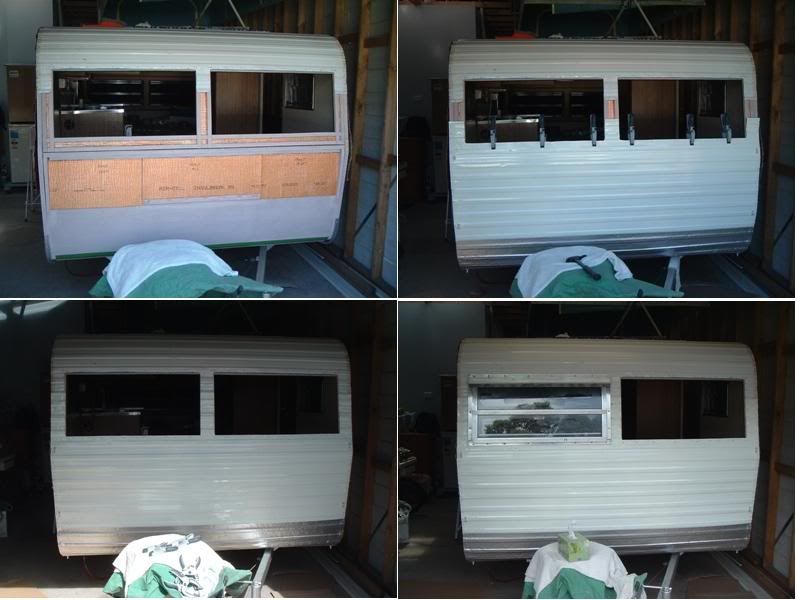 Rub, rub, rub with the tissue soaked in turps, and...Errrk! What's happening to the paint coating??... 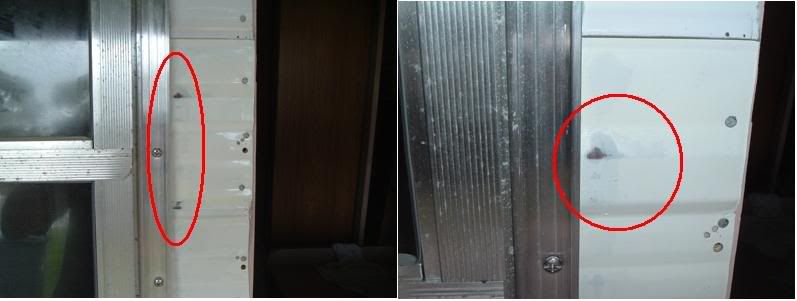 I knew I'd find out eventually why the spray paint was so cheap, but I didn't think it would be THIS soon!   What to do??  Dunno yet...have to think about it for a bit. Got lots more spray painted panels to fit, and lots more sealant to clean off, so need to do something different. Will have to experiment with some ideas. Might have to repaint all the panels with a decent enamel paint. Not looking forward to that, after all the time and effort spent so far...   In the meantime, forget all previous talk about these cans of spray paint. Most sealants require turps to clean them up before they cure, so if this quality of paint can't stand up to a bit of rubbing, then it ain't worth a cracker! I'll update the other thread in the Techo section about spray painting, and add a WARNING to readers. Gees, just when ya think ya making some worthwhile progress...    cheers, Al. |
|
|
|
Post by kiwijim on Nov 29, 2009 3:27:37 GMT 10
G'day Al,
I can sympathize with you on the paint failure,
I had the same thing happen to me some time back while still on the job.
In my case it turned out not to be the paint,
it was a residue of turps left to dry on the aluminum,
The paint I was using was top quality stuff at around $80.00 a tin (trade price),
I asked the car painter next door what was going on,
his first question was what did I use to clean the Aluminum,
apparently I should have used a cleaning/grease release agent ( Prepsol) instead of turps,
His explanation was that Turps can soak into aluminum and will release when in contact with paint, there-bye causing the paint to bubble or appear that thin that it won't cover.
I went back and did as he suggested after washing off all the paint, tried the Prepsol.......problem solved.
|
|
|
|
Post by millard1399 on Nov 30, 2009 10:24:57 GMT 10
Hey kiwijim, thanks for the info about the cleaning methods. Luckily, that wasn't the issue here for me. When I prepped the panels for painting, all I did was clean them back with soapy steel wool and water. Then I rinsed them in fresh water and put out to dry. No initial cleaning with any turps or other chemicals. Most of the original acrylic paint coating on the aluminium was left in place. Just rubbed back to provide a 'key' for subsequent paint coats. ------------------------------------------------- Well, I mulled over the paint problem yesterday. Did some scientific testing of the blue panels I've painted ready for refitting. I've got a small piece that goes under the door. Gave it the "tissue soaked in turps rub test", and it seemed to be able to withstand the treatment a lot better than the white paint on the front of the van. Not sure what's going on here. Maybe a dud batch of white paint. Maybe not enough hardener put in it?? Here's the blue paint test, showing a relatively lesser amount of paint coming off... 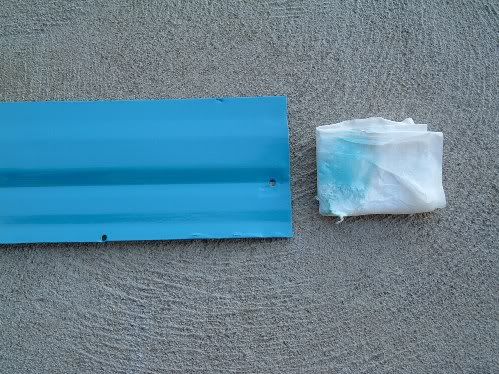 I decided to repaint the front cladding, using some other Taubmans gloss enamel I have in the shed. This morning I rubbed the spray paint back and hand brushed the new white coat on it. Will give it a second coat tomorrow... 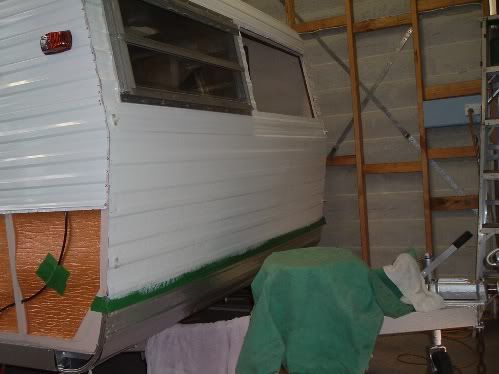 If I poke you in the eyes before you get too close to scrutinise the paint job, it doesn't look too bad.      Note the new clearance light in the top left corner of the photo! New ones been fitted all round.   I'm going to risk using the blue painted panels as they are. Can't be bothered repainting them 'just in case'. I'll use additional masking tape (maybe duct tape??) to prevent too much turps getting on to them when I clean the sealant residue off. Will keep my fingers crossed anyway. Otherwise..."Aaaaaaaaarrrrrgggghhhh!!"       You'll hear it from your place ;D cheers, Al. |
|
|
|
Post by philouise on Nov 30, 2009 11:33:42 GMT 10
g,day Al. Can you tell me if you had any problems with the paint finish when you removed the masking tape. If not, why not. (not left on too long or good tape or good paint etc  ) Also, exactly what brand and type etc of sealant did you use behind the windows ( i thought i would be clever and use a crystal clear paintable silicone but it has remained tacky - maybe i should paint it - see if that dries it) great job your doing phil. |
|
|
|
Post by millard1399 on Nov 30, 2009 14:07:32 GMT 10
G'day Phil, nup, no problems with the masking tape. It was cheap stuff from the el-cheapo discount store too. It's not on there long enough for the adhesive to cause any problems. From the time I tape up the window opening to the time removing the masking tape is about an hour. I do one window at a time from start to finish. Just can't quite put my finger on why the white spray paint is rubbing off so easily. No indication of the masking tape wanting to pull the paint layer off. About an hour earlier when I was preparing to put the cladding back on, I went around with the drill and drilled out some holes to take larger rivets later on. I accidentally dragged the drill bit across a section of the paint and put a scratch there. But the paint seemed to cope with that scratching action better than I expected at the time (as soon as I did it I went "Aaaarh, NO!!" but when I looked I thought "Hmmm...not as bad as I thought it would be".) So, the paint seems to have a bit of 'toughness' about it, but just no 'wear resistance'. The sealant I'm using is SikaLastomer 511 (see Reply #23 in this thread: Silicone and other sealants[/color] ). It doesn't harden, but forms a very thin non-sticky surface after 24 hours or so. Scratch the surface and it is tacky as @#$%. When I dismantled the Millard, there were two types of sealant used - a blue mastic that had stayed soft and pliable after 30 years, and a cream sealant that had dried out. It was where the cream sealant had dried out that all the water ingress problems stemmed from. In my restoration, I went looking for a sealant that would always stay soft and not 'cure' like most of them do. The SikaLastomer 511 was the only Sika product I found that fitted the bill. Selleys make a couple of butyl mastic products that don't dry out, but the cartridge says they only have a lifespan of about 8-10 years. I'm sort of hoping the Sika 511 will go somewhat longer than that. No guarantees I guess, but fingers crossed. cheers, Al. |
|
|
|
Post by kiwijim on Nov 30, 2009 15:46:16 GMT 10
Howdy Al,
I'm still scratching my noodle of your paint problem,
In your last reply, you mentioned that your van had Acrylic paint ?
Are you sure ?
I suppose you do know that you can't paint Acrylic over Enamel paint or it will have a dramatic effect, as the two will not mix.
Your problem may well be, that the new paint only requires time to harden.
As I have said, I used that "EL CHEAPO" paint on the Viscount I had with very pleasing results,
But that was painted out-side in hot sun-light and stayed in the sun for years with-out any problems.
I like the new side lights on the Millard, it sure will look good when on the road, Night or Day,
Keep at it mate,.......... the worst is well behind you,
Just have it finished when the Thomson rolls up for a Side- be- Side photo ;D ;D ;D
|
|
|
|
Post by millard1399 on Nov 30, 2009 17:13:04 GMT 10
Hey kiwijim, I only used the term "acrylic" because that's what these vans were marketed as when they first started to use the painted cladding back in the late 1960s. It's not the same acrylic paint as we know today (ie. the water-based paints). Back when our vans were made, the paint was coated on the aluminium sheeting in the factory, and then passed through a drying oven to "bake" the paint coating onto the aluminium surface. You can bet your life the paint had a high level of solvents that would evaporate readily through the drying oven. So no, nothing like what we know today as acrylic paints.
The white spray paint I'm having problems with was sprayed back in August, so it should have had plenty of time to cure properly by now. By comparison, the blue panels were sprayed only about a month ago, and they seem to be more resistant to the 'rub test'. Maybe the white paint just missed out on getting the 'mystery ingredient' added to it in the factory??
cheers,
Al.
|
|
|
|
Post by bobt on Nov 30, 2009 21:21:36 GMT 10
Hi Al
bugga is the first thing that came to mind. perhaps you got a dodgy can.
Mate I would be very reluctant to use duct tape for masking. My experience with that stuff is if the paint is half dodgy it will come off when you peel the tape away. stick with the masking tape. and the routine your doing.
The idea of the masking tape was to avoid having to clean up any over flow.... Just pull the tape off and the job is done....
|
|
|
|
Post by kcountrychic on Dec 1, 2009 19:49:50 GMT 10
I hate masking tape, the same thing happened to me when I painted our van with the roller...I used acrylic house paint, like a solar guard paint..............I was that made when the masking tape took off some of the paint..............I cursed and cursed............ha ha.............just touch up the bad spot and you won't even tell the difference...............honestly and you are doing a TOP JOB on restoring your caravan.............its a credit to you.........cheers.......we will all have to have a beer one day soon together..........after all the hard work we have all been doing.........
|
|
|
|
Post by millard1399 on Dec 18, 2009 21:07:51 GMT 10
Well here we are back again with the latest update. In amongst all the other Christmassy things that have to be done this time of year, I managed to find time to finish off the electrical side of the van. 240 Volt system:I doctored up a temporary 3-pin plug onto the end of the inlet power cable. Hooked up an extension lead to the garage power and tested all the 240V lights ok... 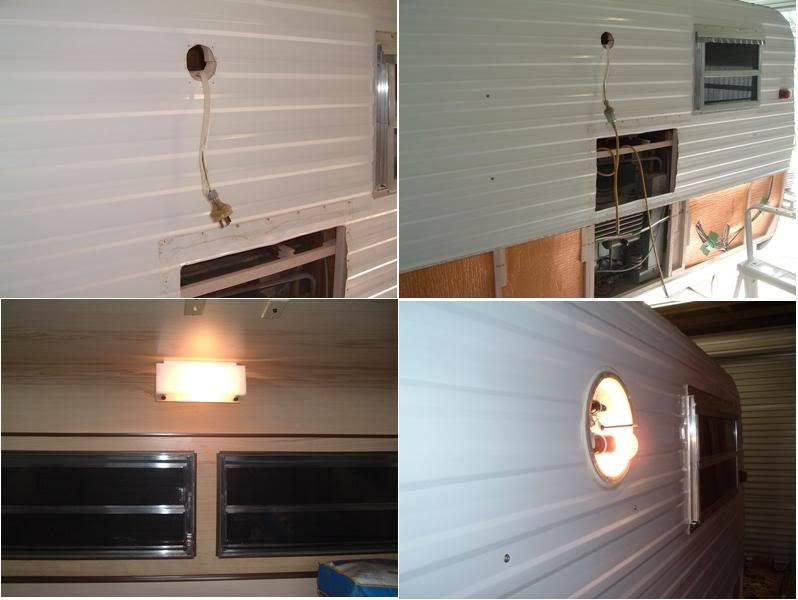 To test the power points, I used one of those "Power point and earth leakage testers" that were talked about previously in the following thread in the Techo section: Safe 240v practice in Caravans - A Tutorial. All the right lights glowed on the tester, and the safety switch in the van was triggered at 30 milliAmps. The final step was to disconnect the temporary plug and put the new power inlet plug in place... 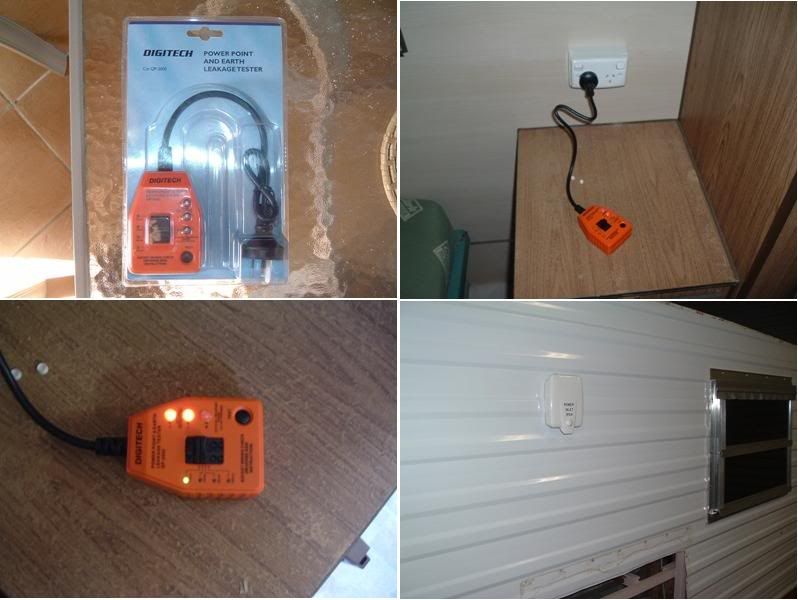 12 Volt system: 12 Volt system:When I bought the van, the wires at the tow coupling were a bit of a "rats nest", and had some flexible conduit covering them. When I took the conduit off, I discovered all the wires had been joined and lengthened just near the tow coupling. So to tidy it all up, I cut them all at the joints, and added a length of heavy duty trailer cable. A fair bit of mucking around to solder all the new joints (...bloody hard when you need four hands to hold all the bits   ) but eventually got there with a lot of cursing and swearing. Now the cable at the tow coupling looks a lot neater... 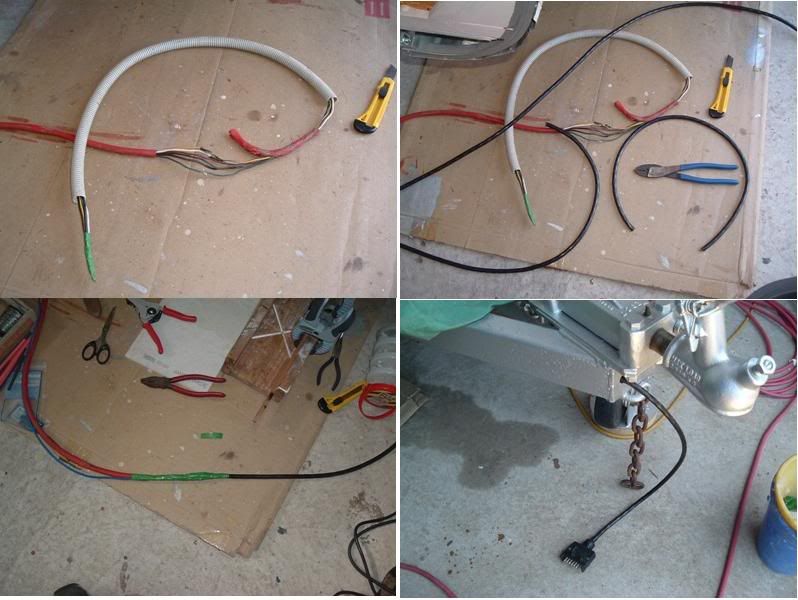 Prior to fitting the cable plug, I tested each wire circuit. I made up a cable with a cigarette plug at one end, and a couple of clamps at the other. This allowed me to reach the van wires from the back of the 4WD parked outside the garage...  No problems with any of the circuits, so all lights are now checked 'A-okay'... 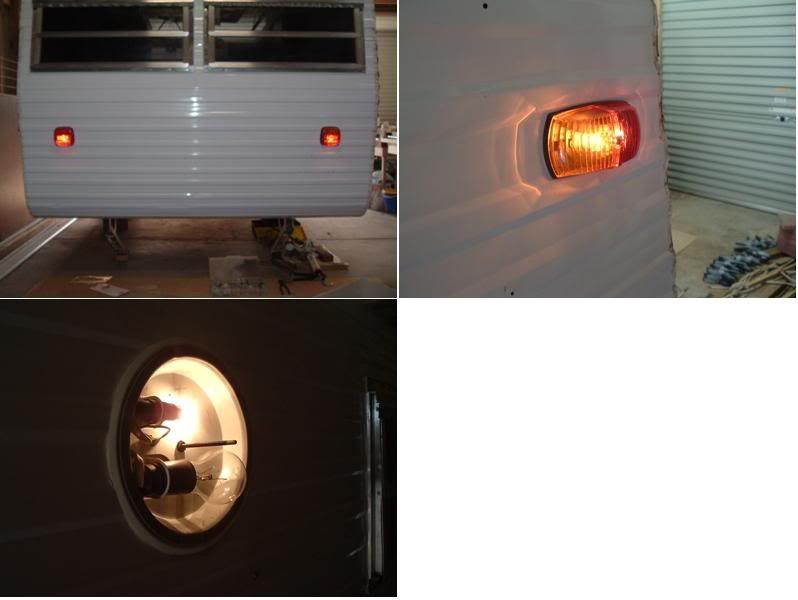 Don't need any Xmas lights at our house...Got a Millard christmas tree instead!! ;D ;D   cheers, Al. |
|
Deleted
Deleted Member
Posts: 0
|
Post by Deleted on Dec 19, 2009 7:45:50 GMT 10
Hi Al, Those renovated lights came out rather nice. Glad you found the tester handy. At least you know it's safe.  |
|
Deleted
Deleted Member
Posts: 0
|
Post by Deleted on Dec 19, 2009 9:16:07 GMT 10
Gidday Al, Love your work - the old girl sure is lookin' real sharp and comin' up a treat, do ya wanna come and do some work on mine over christmas  . Cant wait to see some shots of your van at the beach or bush in the near future. Carl    |
|
|
|
Post by bobt on Dec 23, 2009 21:43:12 GMT 10
Hi millard1399 Just love it when you can get it to light up so nicely. Sure is shaping up nice after all the effort you have put into it. Look forward to seeing the outside complete... Yep will be even better when ya on the road.  bobt |
|
|
|
Post by kezzbot on Dec 24, 2009 22:17:41 GMT 10
Good job on the cabling job Al.
So i take it you are getting your 12v from the car battery?
I'm just getting into cabling side of things on my van, got 4 100ah gel batteries that i need to use. Time to read up on that tutorial in the Techo section, thanks for the link.
Merry xmas ;D
|
|
|
|
Post by millard1399 on Dec 26, 2009 12:50:29 GMT 10
Thanks to all for your friendly compliments! ;D They sure give me more "enthusiasm" to carry on with this monster!!     Went to the garage yesterday morning, and Santa didn't replace the Millard with a fully restored Thomson, so it looks like I have to keep going and get the Millard finished myself!     kezzbot kezzbot, yep the 12V system will feed off the car initially. Prior to retirement, I was a "career techo" in the local steel industry. But even all that experience hasn't equipped me with the smarts to hook up gel batteries, etc., in the van. All I've done so far is to loop the accessory wire and the earth wire into one of the seat boxes in the van. Maybe down the track I can think about adding some of that other fancy 12V stuff that will substitute for the towcar battery. So far, I've got 240v elect; 12v car battery; 6v torch battery; a 3v-12v solar power kit; and gas lighting equipment; so I'm kinda hoping that will give me enough options without having to go the whole hog with caravan batteries/inverters/etc. Time will tell...  And so onto this week's update... The last of the eight windows was installed in the front of the van, after the debacle with the paint rubbing off. Two further coats of Taubmans gloss enamel were hand painted on the front cladding. Then it was given a couple of weeks to cure and it was ready to be rub-rub-rubbed without any problems...  Next, it was time for the top cover for the fridge to be fitted. Same situation...two coats of Taubmans gloss over the dodgy spray paint... 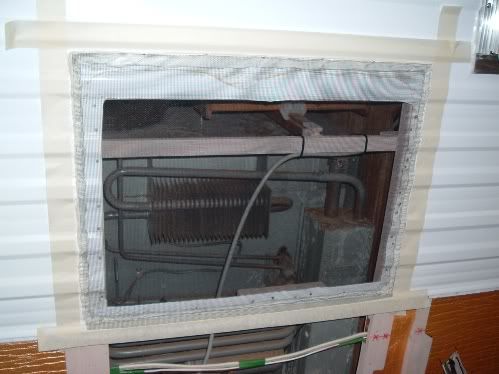 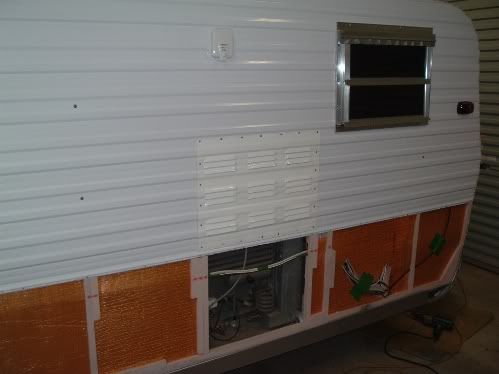 Moving to the other side of the van, the screen door was completely refurbished. A bit tricky at times, but I got there in the end. First I took both halves of the door lock off, and stripped the flyscreen wire out. Cleaned up the aluminium frame with soapy steel wool. Dismantled and cleaned all the lock parts, and then reassembled with new grease. There was an end bracket missing from the centre rail in the door, so off I went to the local Charity shop to get an aluminium baking dish to cut up. Paid my dollar, and back home to the shed. Cut the dish up and fashioned a new bracket up and pop-rivetted it into position. Good as new! ;D ... 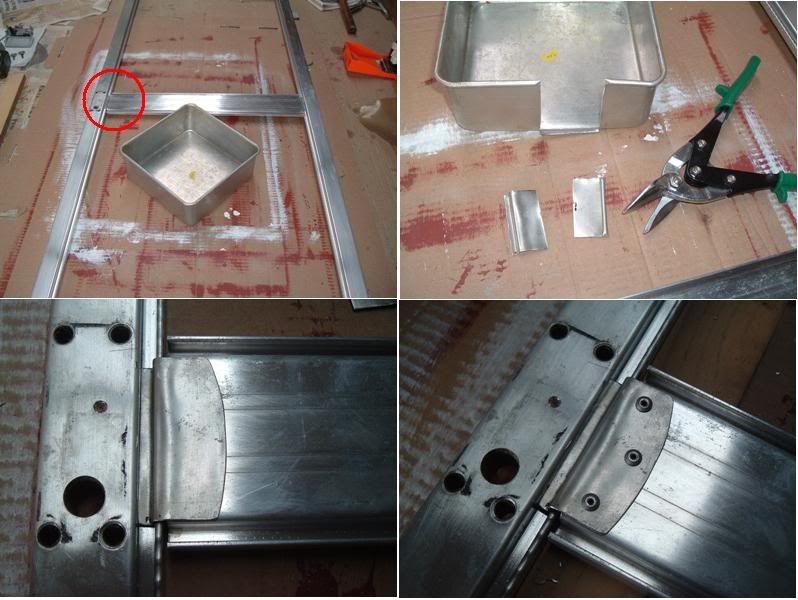 There were no keys for the lock when I bought the van. They'd been lost. So I dismantled the lock side, and cleaned up all the bits. Took the lock barrel to my local locksmith and paid $18 for him to make two new keys from scratch. Took him all of 5 minutes! Darn sight quicker than it would have taken me to try and make a key from a blank!!... 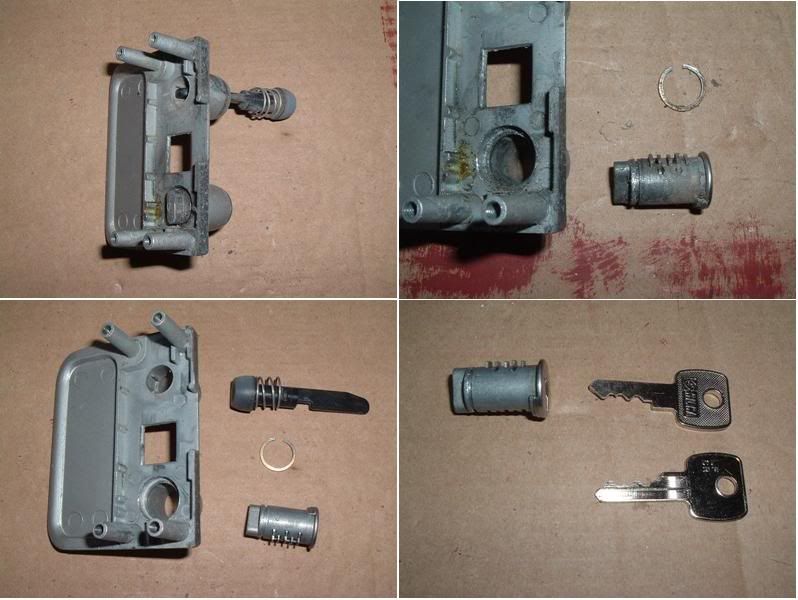 Here's the lock all cleaned, regreased, and reassembled... 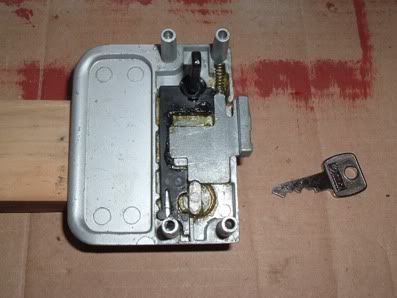 And then it was the back half of the lock's turn to be dismantled, cleaned, greased and reassembled... 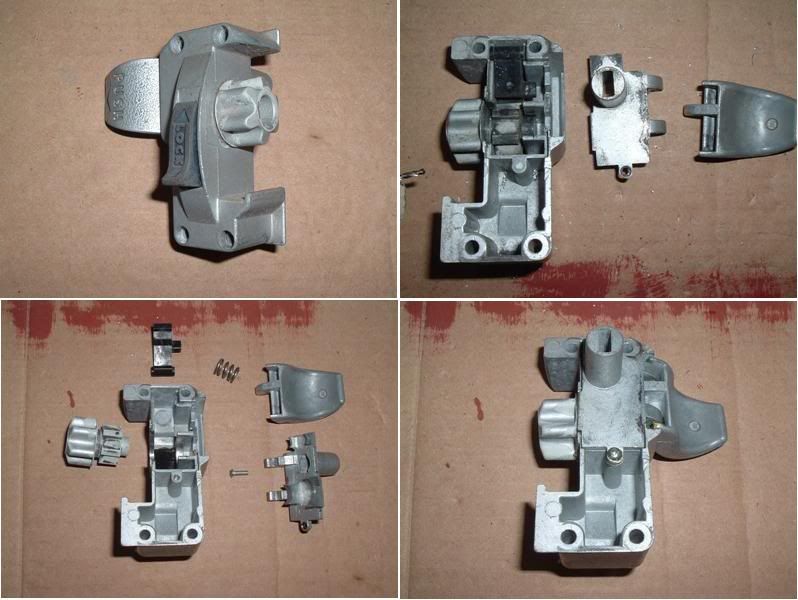 And finally, new aluminium mesh in the door frame; trim off the excess; put the locks back on...and one "brand new" screen door ready for installation   ... 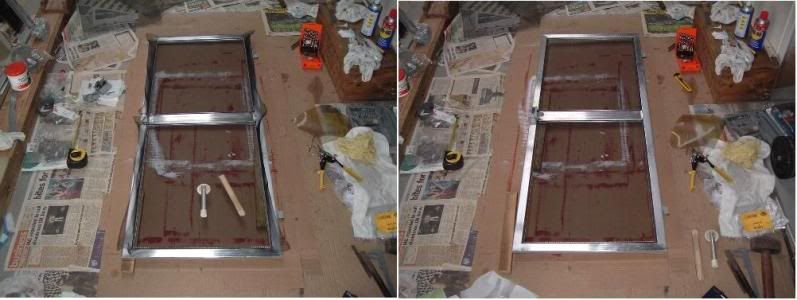 Now I can enjoy the Christmas break!! cheers, Al. |
|