|
|
Post by bobt on Sept 2, 2009 23:00:00 GMT 10
now there ya go... I would never have given that paint a second thought.  I would have gone off and bought a litre of white.. used the spray gun to squirt it and then spent the rest of the day cleaning the gun......  I like the tips thank you...................  Now to save up and buy some of the export stuff. Hey Millard1399 You sure are making up for that lost time. its looking good..  bobt |
|
|
|
Post by philouise on Sept 3, 2009 15:37:39 GMT 10
great job Al.
just a couple of comments. i removed stickers with the heat gun then either wd40 or eucalyptus oil to remove the glue. i also used steel wool on the aluminium and although i thoroughly cleaned off afterwards,i now have rust spots in the shape of steelwool bits coming through my finished paint. i also found that i could paint better with a cheap spray can than with the compressor and gun i hired.
nice job on the house too - you have certainly been busy.
phil.
|
|
|
|
Post by millard1399 on Sept 3, 2009 21:01:27 GMT 10
G'day All, Following Phil's comments above, I thought I'd give a quick update... Stickers: having spent a considerable amount of time previously on removing the adhesive from the small size stickers at the rear and beside the door, I thought I should "work smarter, not harder" on the glue residue left from the big Millard sticker at the front. So I put on the white labcoat and the black framed spectacles, and pretended I was a scientist. Tried everything available in the house. I didn't have paint thinners, but I did try the WD40, eucalyptus oil, tea-tree oil, mould remover, window cleaner, turps, kero, etc, and NONE of them would remove it anywhere near as quickly as...unleaded petrol from the mower can!   Had to dab the petrol on twice to make sure the adhesive was softened enough, and then easily scraped the sludge off with the end of a piece of 19mm x 19mm square timber. The timber doesn't mark the painted surface underneath, and provided the timber has been cut with a sharp saw, it will have 'sharp' edges on all four sides. Just needed to work on a small area at a time (maybe 20mm wide x 50mm long) otherwise the petrol vaporises before the glue can absorb it. Biggest problem is that the adhesive sludge is VERY sticky and you can't just flick it off the stick. So you have to have a cloth there to keep wiping it on. The job took about half an hour, as opposed to around two hours for the other small stickers. Obviously, safety and health considerations are paramount here, but when all else becomes too tedious...try a dab of petrol. Spray painting: I started working on the blue panels today for the nearside of the van. I struck a 'dud' can during the grey primer coat...every so often it would spatter the paint rather than spray it. Must have been a faulty spray nozzle, so I'll have to be careful of that when I do the undercoat and top coats. Can't expect too much from a two-dollar can, ay?! 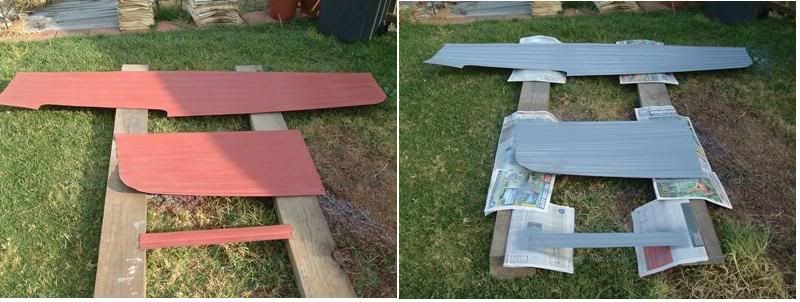 Phil, I hear what you're saying about the steel wool particles. Quite a bit of steel wool 'dust' is created during the process. I've been carefully brushing the panels down afterwards, so I'll have to be doubly vigilant to make sure there's nothing left behind. The main problem I've struck is the little flying bugs that want to land on the paint before it's dry. Then they flip-flop around trying to get back off again, leaving a trail in the paint.  That's the joy of spray painting out in the backyard, eh?? cheers, Al. |
|
|
|
Post by millard1399 on Sept 7, 2009 21:33:44 GMT 10
We had a showery day here today, so no spray painting in the backyard.  So I adjourned to the shed, and worked on putting the door back together. The substitute angles I made out of aluminium went really well in the framework. I also got to test out the Sika Lastomer sealant I bought, for the first time...  I used almost a full cartridge just filling the door side channels, so it looks like I'll be going back to Bunnings to get a few more cartridges to use on the rest of the van. The three I bought won't be anywhere near enough.  After getting the door back to 'brand new', it was on to the next job. And here's a sneak preview of what that next job is... 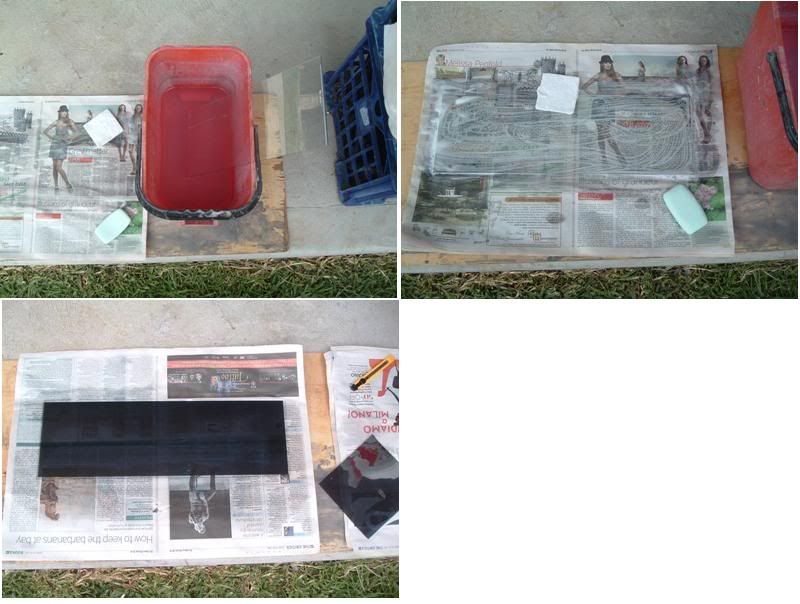   Till next time, cheers, Al. |
|
|
|
Post by atouchofglass on Sept 8, 2009 5:33:05 GMT 10
Gidday Al Mate isn't that a nicer job than those lousy plastic bits of   that they had originally!!!!      Great bit of ingenuity .... well done Slight problem with your next job..... You'll need to put some sort of marking on your van Maybe big letters "Al's Van" or similar Why? Cause with the new sunnies on the van You won't recognise her ;D ;D ;D ;D  Cheers Atog |
|
|
|
Post by bobt on Sept 8, 2009 21:20:19 GMT 10
aaaah ............ I turned my head left, I turned my head right, I was not going to go upside down for fear of falling off the chair.... I could not for the life of me work out what it was that was on the make for the millard... "Sunnies" Kool  thanks for the tip atog lets see what al calls em thanks for the tip atog lets see what al calls em |
|
|
|
Post by millard1399 on Sept 10, 2009 19:01:58 GMT 10
Ahhh, the joys of caravan restoration...   Started with a window in bits... 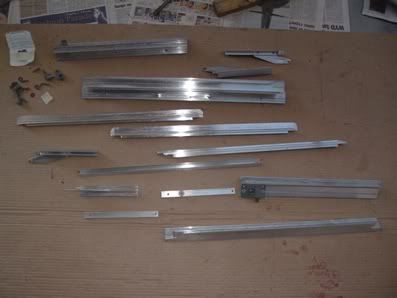 ...and then proceeded to try and put it all back together again. The 'smart fella' in me had previously made the decision to keep one of each size window intact, and dismantle the others. The plan was I could look at the intact one, and put the others back together quick smart! But...ha ha ha...not so! I discovered there's a specific SEQUENCE to assembling these things. But, did I realise that at the start?? NOOOOOOO!! I spent the whole day yesterday rivetting pieces together, and then discovering I shouldn't have joined those two bits before I connected that OTHER thingy over there FIRST!   So I would drill the rivets back out and have another go. Carry on merrily until "Ahhhhh CRAP!!!" again, drill 'em back out, go back a few steps, start again. Went to Bunnings at 7:00pm last night to stock back up on rivets.   Persevered, and persevered, and persev kept going at it, until I finally got it RIGHT!! ;D ;D ;D... 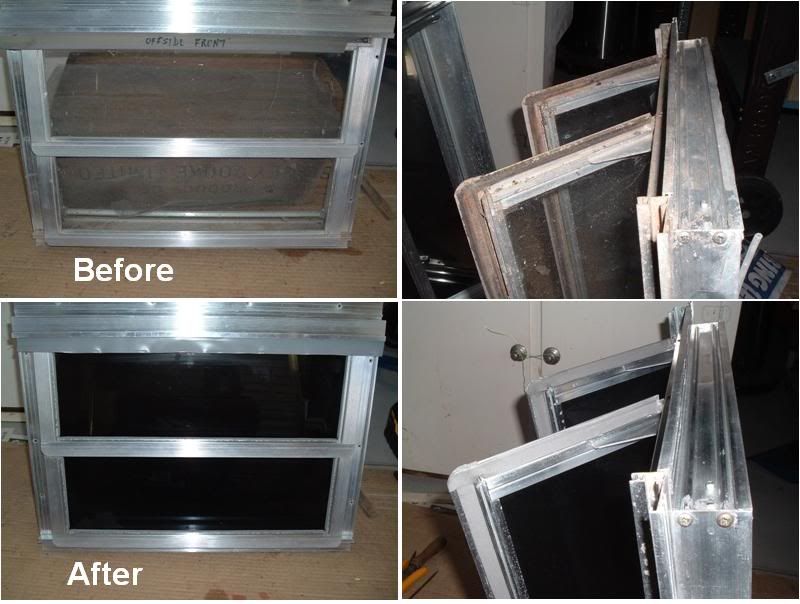 All new foam weather strips, new window glass rubbers, new rubber weather strip at the top of the frame, TINTED glass ;D ;D , and shiny aluminium...!! ;D One down and seven to go...     Many thanks to kiwijim for his 'tip' on the forum somewhere about using WD40 to lubricate the window rubbers before pushing them into the gap...  That ended up being the quickest and easiest part of the job! ;D ;D However, the fun continues... I started on the second window frame, and was half way round the first glass putting the rubber in, and the glass cracked.   It was one of the original old glass window panes and they've all got chips around the edges, so I wasn't surprised I'd get a failure or two. The thing that peeved me was that I'd tinted the blasted thing! So now I'm off to the glaziers tomorrow to stock up on some new panes. cheers, Al. |
|
|
|
Post by kiwijim on Sept 11, 2009 0:33:23 GMT 10
Hey Al, Those windows are lookin ready great, Now, you are having a little trouble putting a two pane window together, Wait until you try a four pane one, from an earlier model. "Gotta love" those %$#@$#**windows. Are you using Aluminum rivets on the hinges ? ........hope so. when you come to sliding the new weather seal rubber in the channel at the top of the window, make sure you spray the channel with that W D 40 all the way along, also if you bevel the rubber at the end it will slide along the inside Grove a lot easier, One last thing, when cutting the weather seal make sure you allow an extre 10mm over each end, this stuff shrinks like mad. Keep at it Mate,..... almost there ;D ;D ;D ;D cheers kiwijim  |
|
|
|
Post by kiwijim on Sept 11, 2009 0:39:38 GMT 10
Just had another look at your picture of the window, I see the weather seal is in place, That makes the previous post of mine a bit of a waste of time, not to worry I see plenty of over-hang on the window rubber........."good boy" cheers kiwijim   |
|
|
|
Post by atouchofglass on Sept 11, 2009 5:36:58 GMT 10
Hey Al What a pane !!!!     Must admit though after all the pane .... the end results are just fantastic. Keep at it mate it's all worth it Cheers Atog |
|
Deleted
Deleted Member
Posts: 0
|
Post by Deleted on Sept 13, 2009 10:35:22 GMT 10
Gidday Al, Geez mate she will be lookin' pretty swish now with a set of polaroids on we probably wont recognize her now   Mate you put me to shame, I should be pulling my windows out and making them all work properly as well, but I will possibly get the guilts and do it later  . once again beaut job. Carl |
|
|
|
Post by millard1399 on Sept 15, 2009 23:07:31 GMT 10
Nothing like a weekend away to recharge the batteries. Too much food (and drink) and too little sleep at a relative's 50th birthday bash. Needed a day at home to get over the 'jet-lag'. Back into the workshop today. Put a second window together. Funny how it went together without any of the hassles of the first window. Must be a quick learner...  Made up the new flyscreens for the two windows. Had previously bought one of those cheap grommet sets... 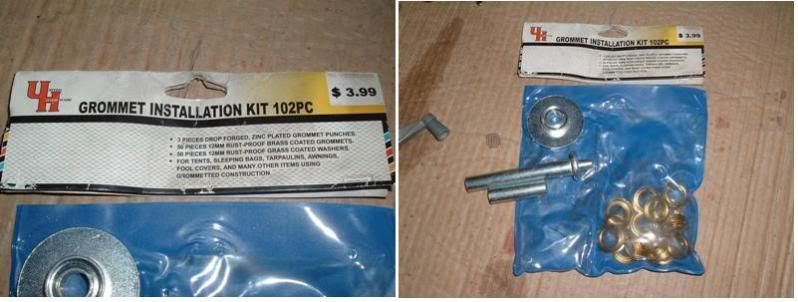 ...which allowed me to put a grommet where the gearbox shaft pokes through...  And here's a tip for all the little kiddies watching at home: "Always cut your flyscreen with a generous amount of extra around the edges. That way when you stuff up the position of the grommet, you'll still have enough space to put the stupid thing where it was SUPPOSED to go!"    ... 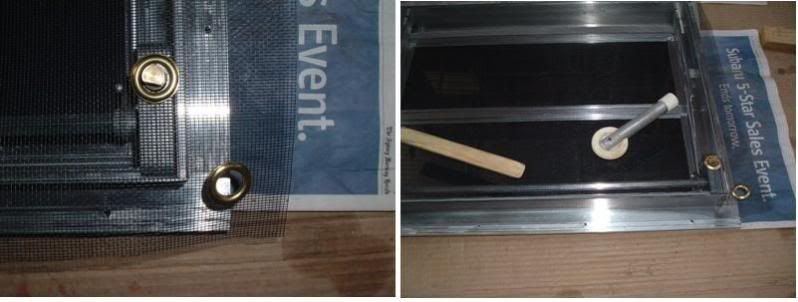 Now we have TWO windows, complete with new flyscreens...  ;D ;D ;D cheers, Al. |
|
|
|
Post by bobt on Oct 26, 2009 21:16:23 GMT 10
now that is what I call good planning.. allowing a little bit of fly wire each way to allow for minor adjustments.  how is it all going. You must be real close to having all the windows finishe and in by now  |
|
|
|
Post by millard1399 on Oct 27, 2009 9:16:24 GMT 10
Ha Ha Ha, bobt, you're a real kidder!!   I'm about to start putting window No.6 back together, after our week away last week left me all refreshed and ready to go again. Then I have to dismantle windows No.7 and 8, clean them up with the soapy steel wool, and fit all the new bits and pieces to them. It'll probably be another couple of weeks before they are all done. It's a long hard slog to get through them all, but certainly worth it in the end. The ones I've finished look almost brand new. ;D cheers, Al. |
|
|
|
Post by bobt on Nov 3, 2009 20:15:09 GMT 10
hey millard 1399 you had been quiet for so long I figured you were getting stuck into the windows or you had escaped.. I guess it was the later.............  So how is ti going now?  |
|
|
|
Post by millard1399 on Nov 4, 2009 12:00:40 GMT 10
Hey there, bobt... Not a lot to report at the moment. Still plodding through the stack of windows. No7 has been completed, and No8 is about to be started. The bar will be shouted when this 8th, and last, one is done. Shoulda done the last one first, and I'd be finished by now   I'm also juggling another job at the same time as the windows. A few months back I had a very expensive spray painting booth installed in my backyard. It is the latest high-tech model available...  I can spray paint the lower panels from the van in any sort of weather now, as long as it's sunny and very calm.  I've finished painting the panels from one side of the van, and am currently working on the panels from the other side. I'm up to the undercoat stage at the moment. Here's a photo of some of the panels stacked around the shed, waiting for the next warm, sunny, calm day... 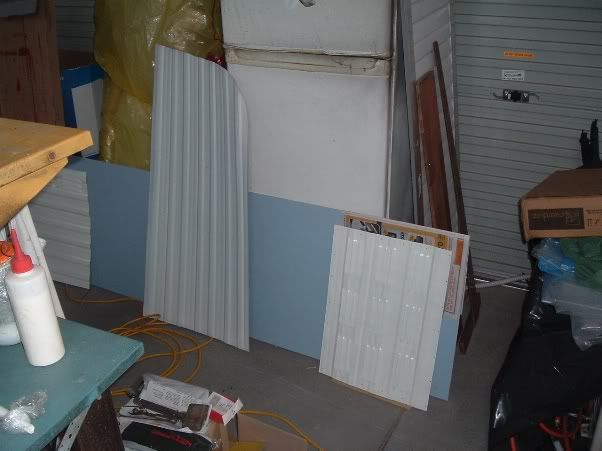 So that's where I'm up to. Plod...plod...plod... Get dishpan hands from scrubbing the window parts with soapy steel wool. And when my hands ache after doing that for a few hours, I go sit down and bludge for a bit. If it's a calm morning, I spraypaint. If not, I get dishpan hands again doing a bit more of the windows. Sort of a bit like the round-the-world sailor who gets stuck in the doldrums for a while. No excitement here at the moment... But come back in a week or so...free beers for all at the bar!! ;D ;D cheers, Al. |
|
Deleted
Deleted Member
Posts: 0
|
Post by Deleted on Nov 4, 2009 12:14:38 GMT 10
I can spray paint the lower panels from the van in any sort of weather now, as long as it's sunny and very calm. 
cheers,
Al. Love it.  |
|
|
|
Post by kiwijim on Nov 4, 2009 14:52:02 GMT 10
Hey there Al, Just wondering if you bought that out-door spray booth from Bunnings when you got the B.B.Q. ;D ;D ;D I think I may have got the same model as yours,    Yep.... The limitations are the same, requires a calm and fine/warm day, mine has one extra bonus chucked in for free.........it has a Hugh attraction for flies and lawn insects of every description,    One other feature I just discovered today is that it even has an invisible target on the top for any passing birds.    Happy painting. kiwijim |
|
|
|
Post by bobt on Nov 5, 2009 22:05:42 GMT 10
hi millard1399
fueled up the car... packed the ice and stubby holder.. will take me 8 1/2 hours to be there............. ;D ;D
just say the word..................... ;D ;D
|
|
|
|
Post by atouchofglass on Nov 8, 2009 8:08:55 GMT 10
Don't we all have a version of that spray booth Mine is definitely low tech Use spray cans as I don't have a compressor    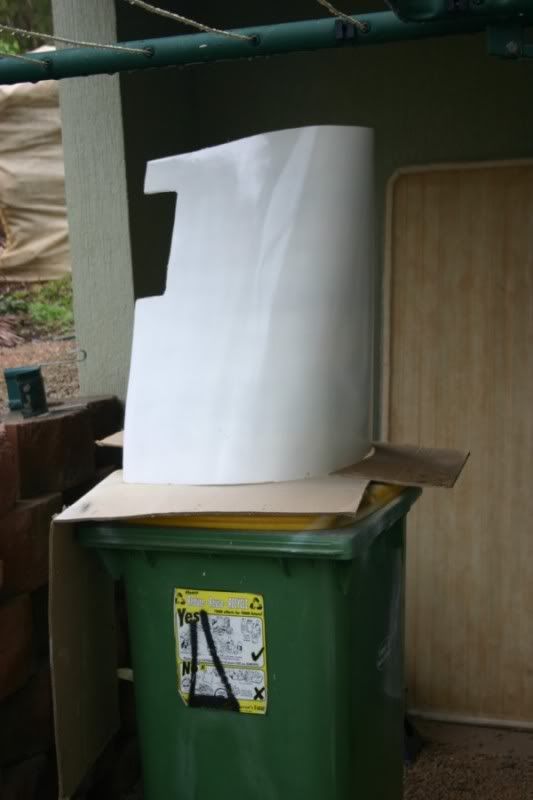 I see you have used the Wheelie bin option as well ;D ;D ;D ;D Cheers Atog |
|
|
|
Post by millard1399 on Nov 8, 2009 17:34:52 GMT 10
Ta-daaaa!! OK folks, line up at the bar...it's MY SHOUT!! Eight windows DONE!!!! Finished! Completed! Done and dusted! All over Red Rover!     A total of 192 window parts scrubbed clean with soapy steel wool! My hands will never be the same. If I never have to restore another Millard window in my lifetime, it will be too soon!   But by gee they look a thousand percent better than they did before, if I do say so myself. Every one of them works as smooth as silk now. All new window rubbers, weather seals, regreased winder gearboxes...you name it, they got it done to them.   Boy, am I glad that is over!! ;D ;D ------------------------------------------------- I see some of you fellas have bought a similar spraypainting booth to the one I got. You must go to the same sort of "markets" that I go to.   Kiwijim, I bought the deluxe model that came with a free insect repellant...a folded up newspaper. Fan it around in the air with one hand while you hold the spray can with the other hand. A bit of air turbulence seems to cause havoc with those flying critters and their auto pilot systems, heh heh.  cheers, Al. |
|
Deleted
Deleted Member
Posts: 0
|
Post by Deleted on Nov 8, 2009 19:47:14 GMT 10
Gidday Al,
Geez mate they did come up a treat didn't they, you wouldn't fancy takin' a wee trip to the west to give mine a scrub up too would ya. ;D ;D ;D
but seriously mate a job well done. Go and have a well deserved beer.
Carl
|
|
|
|
Post by kiwijim on Nov 8, 2009 22:03:10 GMT 10
Howdy Al, Now doesn't it make you feel proud when, at the end of the job, You can stand back and admire the job, knowing that you and only you did all that. ;D ;D ;D The windows look great, fantastic job, now you watch, they will fly back into the frames in no time at all. ;D ;D ;D That Flamin back yard spray booth..............#*$@+^$#% I got the cheaper model because they had sent all the repellent off for recycling, Had no worries using it, but had a bit of a dummy spit an hour later after a Beer Er... Coffee break, reckon the flies were waiting for me to disappear then pounced. cheers kiwijim  |
|
|
|
Post by atouchofglass on Nov 9, 2009 6:23:39 GMT 10
Hey Al Remember to use ya sunnies when fitting them to the van Or you might go blind That or fit em at night         Nice job ......... finished As an added bonus you get to see the bones in your fingers        Looking forward to seeiong them in As are you I'm sure The van will look better than new when you've finished Cheers Atog |
|
|
|
Post by kcountrychic on Nov 9, 2009 19:43:22 GMT 10
my goodness....you are doing well........I washed our van with steel wool and truck wash and this got ride of all the flakey paint etc.....then I painted it with a roller and solaguard high gloss acyrilic paint......its come up fantastic............(will be doing more pics soon).........as for the silicone and blackjack....I found a paint scraper, razor blade, turps, all helped but the best for disolving the rest of the silicone was some stuff that was a vinyl grease remover....used before you paint vinyl...(my daughter painted the inside of her ute purple)......put this stuff on with a brush and it just disolves before your eyes....magic.................goodluck with your project....
|
|