|
|
Post by atouchofglass on Jan 2, 2009 21:02:12 GMT 10
I've said it before and I'll say it again Excellent job mate Keep up the great work Photos of the completed task don't show the skinned knuckles, bleeding hands from cuts etc, abraded elbows and knees, not to mention the unnumbered bumps and extra bulges on the noggin from lifting your head at the wrong time..... But they are a gorgeous thing to see..... especially by the bloke that put all the hard work in.... ;D ;D ;D ;D     Thanks again Al Cheers Atog |
|
Deleted
Deleted Member
Posts: 0
|
Post by Deleted on Jan 3, 2009 7:24:39 GMT 10
....Who's a happy boy NOW!!?? ;D ;D It's soooo nice it'll just be a show van. You'll need a trailer to tow it to site  |
|
|
|
Post by millard1399 on Jan 3, 2009 21:44:34 GMT 10
I know what you're saying, wahroonga, and I agree with you wholeheartedly! This is overkill to the MAX!!   It's the downside of having a brain that keeps nagging me to 'do this'...'do that'...'fix that up over there', etc. etc. Every day I keep saying, "But it's only a Millard!  " But that has no effect...the brain always says, "You do a proper job on that, lad, or you'll be doing it over AGAIN!!" [Yes Boss]The consolation from all the effort put into this van is that it should last for another 30 years, so there'll be many more years of use to come (...although I'll be 88 by then, and more interested in kicking up a storm in the Retirement village! ;D ;D) I'm also secretly hoping I can swap it for a classier Classic van one day...but don't tell my brain that...   cheers, Al. |
|
|
|
Post by keelz on Jan 4, 2009 8:08:22 GMT 10
Ah it's good to see someone else has a left and right brain fighting it out..
"C'mon you don't need to open that up, she'll be right mate, should last you a few more years".........
"What are you thinking man, you've come this far and opened it up to this point, what's it gonna hurt by just taking those last two screws out and checking on the condition of the sub-frame behind that angle trim there, should only be a 5 minute job to tidy it all up and put it back together"
Ah the joys of classic vans.
Keelz
|
|
|
|
Post by millard1399 on Jan 18, 2009 14:49:26 GMT 10
G'day All, back again...progress has slowed considerably on the Millard due to some other household projects requiring attention   However, I do try to get at least a little bit done every day! ;D Since I last updated this thread, I've completed the water tank installation. Originally the tank had a piece of conveyor belt rubber under it to act as a stone guard. I threw that away because it had become perished, so I'll see if I can find some replacement rubber somewhere. Without the rubber sheeting, the tank moved around in the original two holding brackets, so I decided to make a third bracket out of some scrap metal to stop the sideways movement of the tank. Measured everything up and made up the bracket. Did a 'check fit' under the van...and discovered I'd made the bracket ends 40mm too short!!    (...don't ask...it's too embarrassing!) Didn't have enough metal strip to remake the bracket, so I had to cut and weld some extension pieces into the dud bracket to make it good (which was a challenge, considering my welding skills really suck!)... 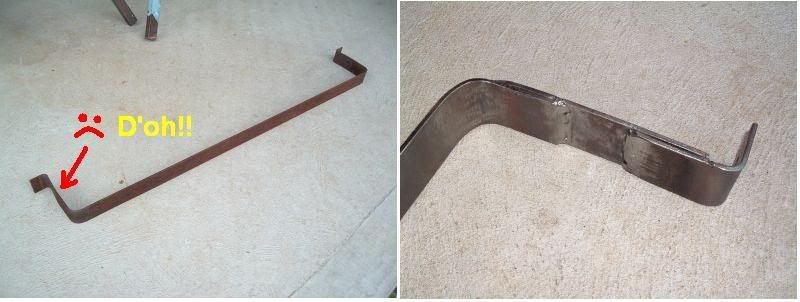 Once I'd painted the bracket up, the tank and brackets were all re-installed, along with the new hoses and stainless steel hose clamps... 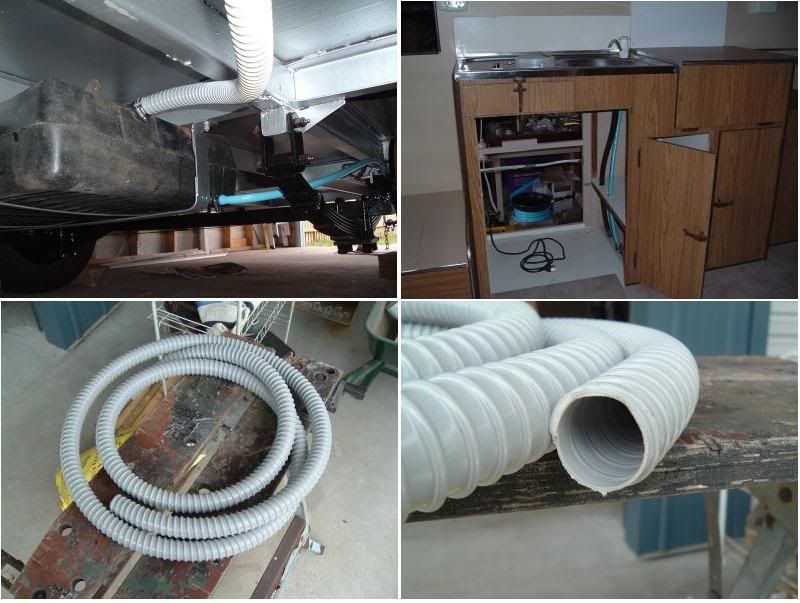 The blue hose is the 'Pope' brand drinking water hose, about $16 for a 10m length, from the gardening section at Bunnings. The inlet filler hose is the 'Boston SuperFlex' brand, 25mm dia, about $5 per metre, from the plumbing spares section at Bunnings. The SuperFlex has the spiral outside, with the smooth wall inside, and is a grey colour. Lastly, I've painted some grease on all the moving parts of the rear jacks, and they now operate with a silky smooth action ;D ;D But just to show how 'sick' a person can become during the restoration of an old van, I also cleaned back and painted the rusty old winder handle, and sprayed 'tyre shine' on the tyres... 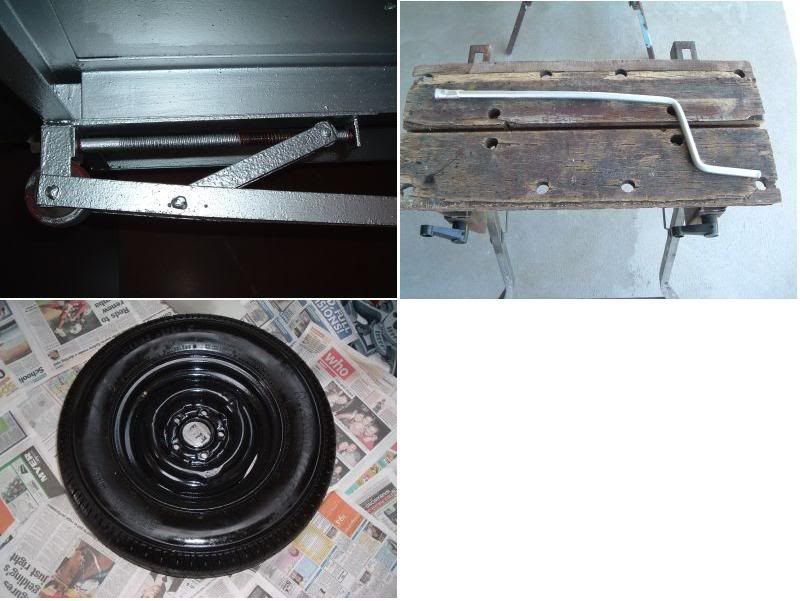 Where's wahroonga? I think I need some serious help!!...    cheers, Al. |
|
|
|
Post by bobt on Jan 18, 2009 22:11:36 GMT 10
Al
Excellent work. Well done. That underside of your van would certainly give you top marks in a concourse. ;D
bobt
|
|
|
|
Post by keelz on Jan 20, 2009 18:33:18 GMT 10
Greetings Al Progress pics are looking good!  Quick question - how did you find the fit of the boston 25 flex as the filler pipe? My reason for asking is i'm currently about to embark on re-installing my tank and bracket and connect all the hoses back up on my van. The old hoses are shot and perished so it's time to renew. I've already got some spare black 25mm flex with the smooth internal bore but its too tight a fit, even with a bit of the ol' hot water in a bucket before doing a test fit. That grey flex from bunnies might just be the trick. My tank looks identical to the one on your Millard. Cheers Keelz |
|
|
|
Post by millard1399 on Jan 20, 2009 22:12:55 GMT 10
Hi Keelz, the grey flex hose was relatively easy to get onto the tank inlet fitting. Just don't do what I first did, which was to thread the hose through the floor hole and then tried to fit the end on the tank. I then discovered the only way to get the hose over the inlet fitting was to "screw" it on. Had to pull the hose back out, and lay it out across the floor to allow it to screw properly. Once the first spiral got over the hump, the rest of it screwed on ok. Bear in mind the wall thickness between the spirals is not the thickest stuff you'll come across, so it will buckle if you try to go at the job too quickly. Should take less than 5 minutes, with no hot water softening required.
cheers,
Al.
|
|
|
|
Post by millard1399 on Feb 5, 2009 22:00:55 GMT 10
G'day All, plodding has continued with the van, although you wouldn't know it looking at this thread lately   I've taken a step back with the chassis, thanks to my wonderful brain that insists things are "done properly". There were weld breaks on both side of the chassis where the back of the A-frame connects to the outside rails (see top left photo). I decided to strip the paint in this section and weld a short length of angle iron into position to lock the chassis parts back together again. Don't focus too much on my welds  My welding skills are "pretty ordinary" and I only attempt jobs that don't have a critical end-use... 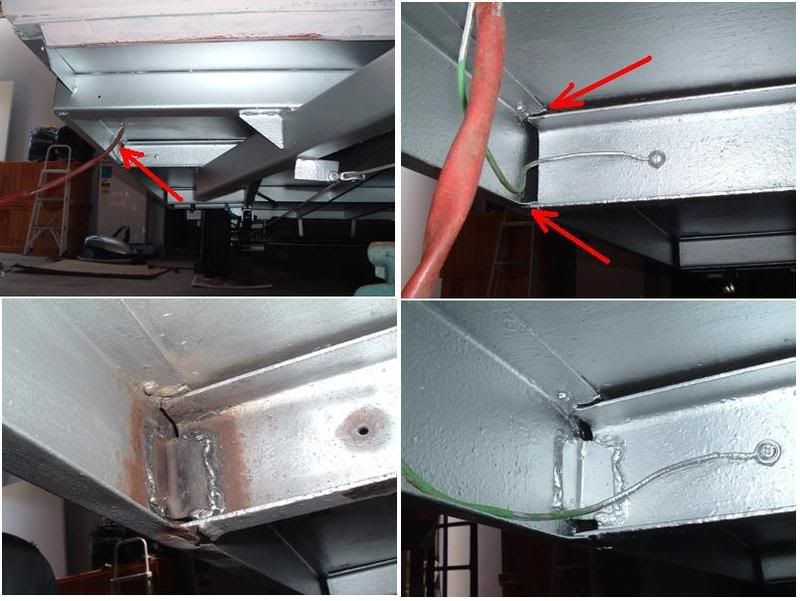 The other job I've been working on is to refurbish the jockey wheel. This photo group shows the jockey wheel in parts and primed, along with the drawbar clamp. The bottom right photo shows the adjusting screw thread piece. There is supposed to be a ball-bearing race between two washers on the top of the screw thread (where the red arrow is pointed). When I dismantled the jockey wheel, there was only the two washers [It's official!!...Millard's got no balls!] ... 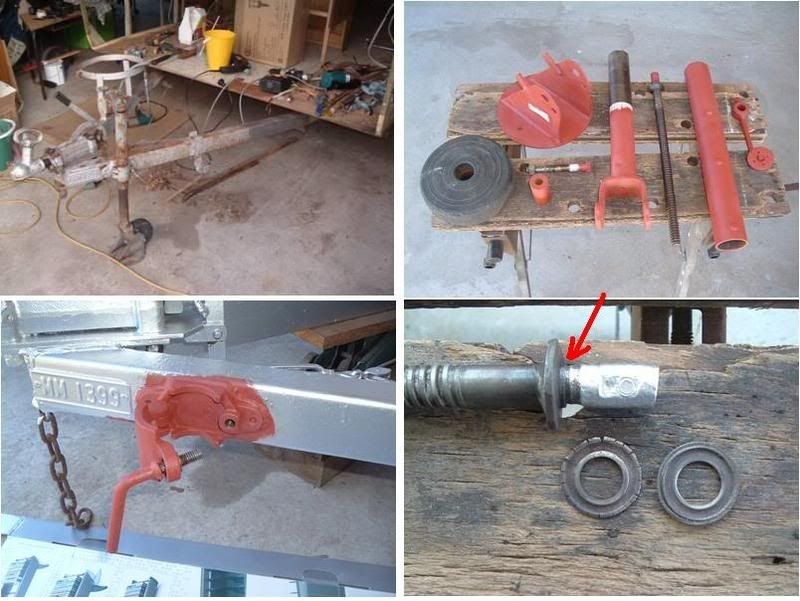 I had to go to the specialist bearing shop today to see if I could get a replacement bearing. Had to get it ordered in...hopefully coming tomorrow. Cost for one bearing including the two cover washers is $23.50! Luckily I had my portable "Packer Whacker" with me to start my heart again at the counter, otherwise this thread would have to be completed by a Ghost writer   The guy at the counter did suggest I look around to see if there was a cheaper option, but hey...it's only money. I could get one of those cheap imported jockey wheels that are on the market these days for the same price as the bearing, but would it still be operating in another 30 years?? At least I know the Millard jockey wheel has stood the test of time. Till tomorrow... cheers, Al. |
|
|
|
Post by millard1399 on Feb 6, 2009 16:57:04 GMT 10
G'day All, back again quickly... Here is the new bearing for the jockey wheel... 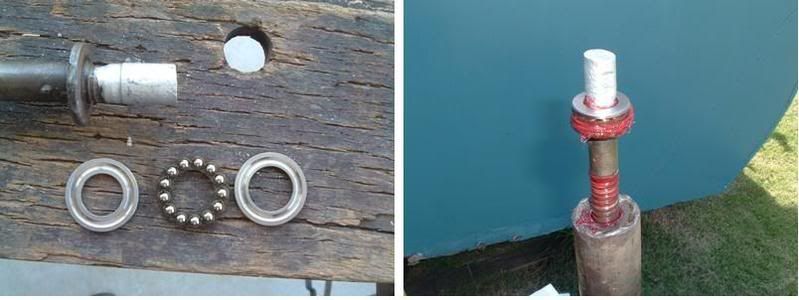 That's all you get for $23.10!  ---------------------------------------------------- There is a retractable "jockey foot" on this jockey wheel. The bottom of the baseplate had considerable pitting on it from being in contact with the ground over the years. I cut out a timber circle and screwed it onto the base to provide some protection. This timber can be easily renewed when it gets knocked around... 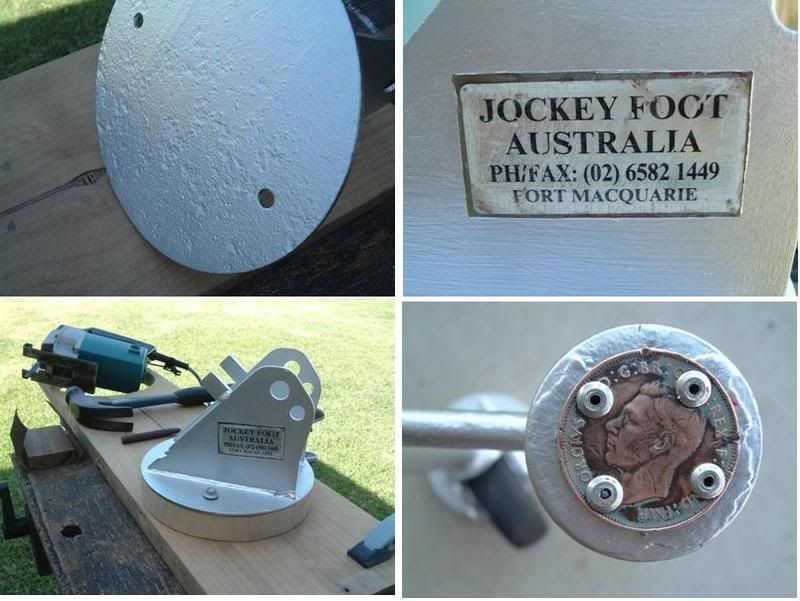 Note the lucky 1948 penny pop-riveted to the handle. The original top of the handle must have come adrift at some stage, and an old penny was brought into service. I gave it a bit of a polish and riveted it back into position after the repainting. Works a treat! ;D And here is the refurbished jockey wheel back in position on the drawbar... 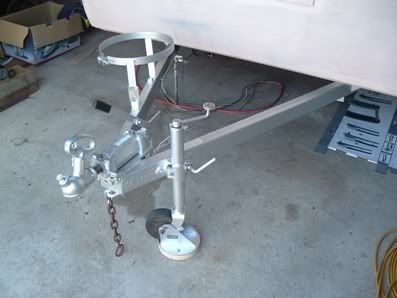 The drawbar looks a lot different to the photo in the reply above showing how it was when I first bought the van. I'm very happy with the outcome. It's amazing what a cleanup, repaint, and regrease can do to the whole operation of the chassis parts! ;D ;D Onward and upward! cheers, Al. |
|
Deleted
Deleted Member
Posts: 0
|
Post by Deleted on Feb 6, 2009 17:09:41 GMT 10
Love the jockey foot. Where can I buy one?
|
|
|
|
Post by millard1399 on Feb 6, 2009 17:24:49 GMT 10
Yeah, neat idea huh?! I'd never seen one before. Don't know whether they're still available these days. I can send some close-up photos if anyone wants to have a go at making one from scratch (or knows someone who could).
Al.
|
|
Deleted
Deleted Member
Posts: 0
|
Post by Deleted on Feb 6, 2009 20:53:43 GMT 10
Hi Guys,
I have seen these probably 3 or 4 years ago in a magazine or catalogue. Al, doesn't the foot flip over the rubber wheel part so you can still move the van with it on. Maytow in SA is probably worth a look. I will have a scout around.
Regards, techron
|
|
|
|
Post by atouchofglass on Feb 7, 2009 8:13:23 GMT 10
Definitely a great idea
Especially if the van is being used in the one spot for an extended time
Well done Al
;D ;D ;D ;D ;D ;D ;D
Atog
|
|
|
|
Post by millard1399 on Feb 7, 2009 12:13:52 GMT 10
Yes techron, the jockey foot is swivelled out of the way when you want to move the van around on the jockey wheel. Not sure how easy it is to grunt and groan while you lift the front of the van, and then stand on one foot while you reach out with your other foot to swivel the jockey foot back down. ["Get down in position, ya mongrel!!"] Perhaps it is the sort of item that is used when the van is parked on a more permanent basis, rather than day-to-day setting up.   ------------------------------------------- Meanwhile, there's been a further flurry of activity today, with the fridge put back in... 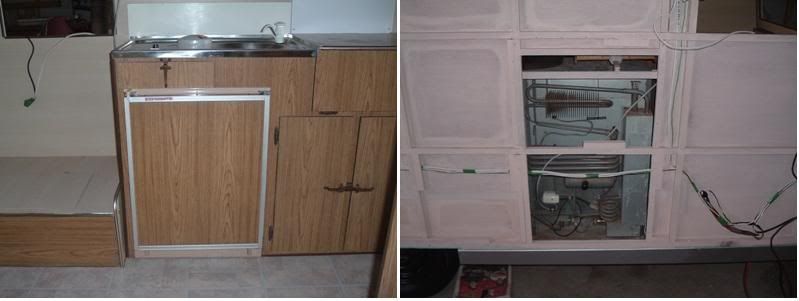 I can now have a think about all the info you guys have posted about computer fans/inverters/etc., and decide what I'll do about it all. [Here's a thought...if I installed an old computer memory chip in the fridge, would it restock itself when the beer is getting low??   ] ]Also, the floor vent, cargo barrier, bed spring and mattress have all been reinstalled, and all the new bolts given a lick of paint underneath... 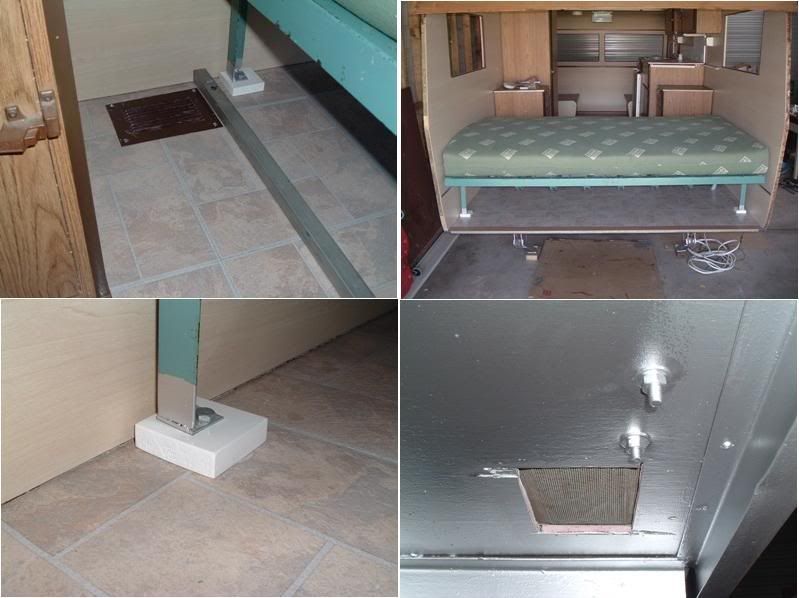 I made those white square blocks up to go under the bed legs. Originally the bed legs had pressed pretty hard down into the previous vinyl tiles. These blocks will spread the load a bit more and reduce the wear on the floor. ...And you all thought I'd been bludgin' eh??!...   cheers, Al. |
|
|
|
Post by millard1399 on Feb 8, 2009 15:44:14 GMT 10
But wait...there's more!! Today the rear window frame and the lower rear panelling were fixed and glued into position... 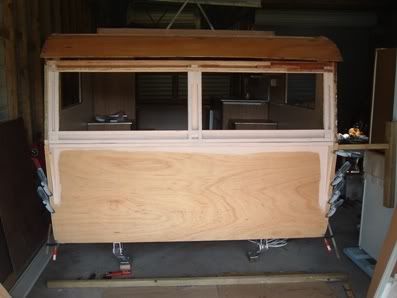 Tomorrow the ceiling panelling gets glued to the top of the window frame, and then some trimming and priming of the timberwork to finish it off. ...I'm on a bit of a roll now! That d@mn chassis was holding up real progress elsewhere on the van!!   ... cheers, Al. |
|
|
|
Post by atouchofglass on Feb 8, 2009 17:36:29 GMT 10
Maaaaatte Here I am fiddling with tiny bits of metal thinking I'm doing well When down the road a bit You're working miracles on the Millard !!!!!!        Are you sure this is the same van? ;D ;D ;D   Keep at it mate it's gunna be a beauty Cheers Atog |
|
Deleted
Deleted Member
Posts: 0
|
Post by Deleted on Feb 9, 2009 8:54:20 GMT 10
Yup. Read that fridge post about ventilation and do the best you can with passive cooling.  Where the b hell is that beaut post on fridge installation and ventilation?!! |
|
|
|
Post by keelz on Feb 9, 2009 22:16:36 GMT 10
Looking good Al, looks like the black hose of self-motivation has been giving you a whippin'  Wahroonga - i hear ya loud & clear!  check out the techo stuff section, started a new thread for it. Keelz |
|
|
|
Post by millard1399 on Feb 15, 2009 9:57:13 GMT 10
G'day All, I've completed the rear panelling, including pink primer painting, and fixed the 240v and 12v wiring into position... 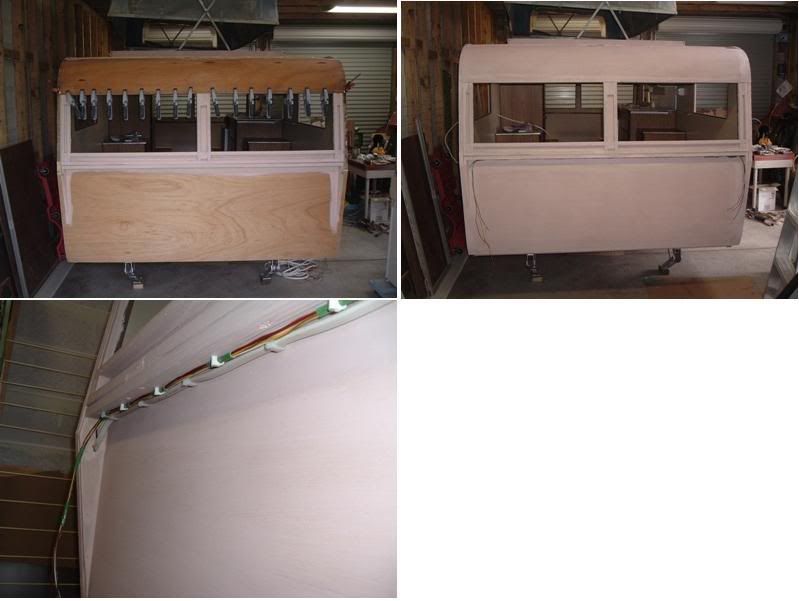 ...and look at the quality of that wiring job! Now fixed in position, rather than just being drooped across the back like it was originally ;D ;D Now I'm working on preparing to put the rear cladding back on. At the bottom of all four corners, there is an aluminium moulding in place to make the bottom curve happen. In all four cases when I dismantled the van, the corner moulding had corroded and was broken where it was pop-rivetted to the chassis (see red arrows in photo). Poorly designed, it now needed to be modified so I could refit the mouldings. I ended up cutting up some aluminium angle and making some brackets to fit at the end of the chassis. After cutting back the remains of the original mouldings, I can pop rivet the mouldings to the new brackets... 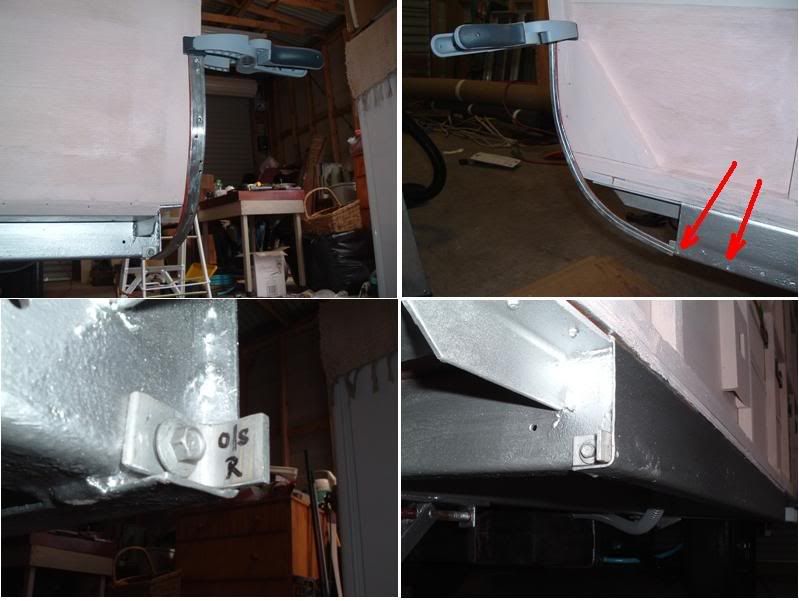 The tricky bit here is to try and position the curved moulding so that the holes in it will eventually line back up with the holes in the cladding and the external mouldings when they are all put back on top of each other. I'll probably end up getting frustrated trying to get all that perfect, and just drill some new holes for the screws. Sometimes my "do-it-right" brain will just have to concede defeat...   cheers, Al. |
|
|
|
Post by millard1399 on Feb 19, 2009 21:03:17 GMT 10
G'day All, I have fixed and painted all four bottom corner mouldings in position... 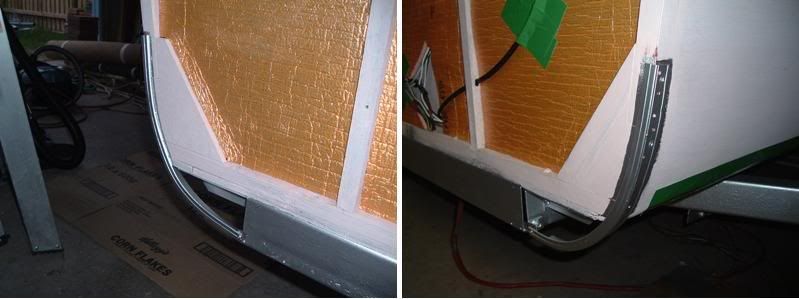 ...and today I spent a lot of time painstakingly cutting and fixing squares of insulation into the framework... 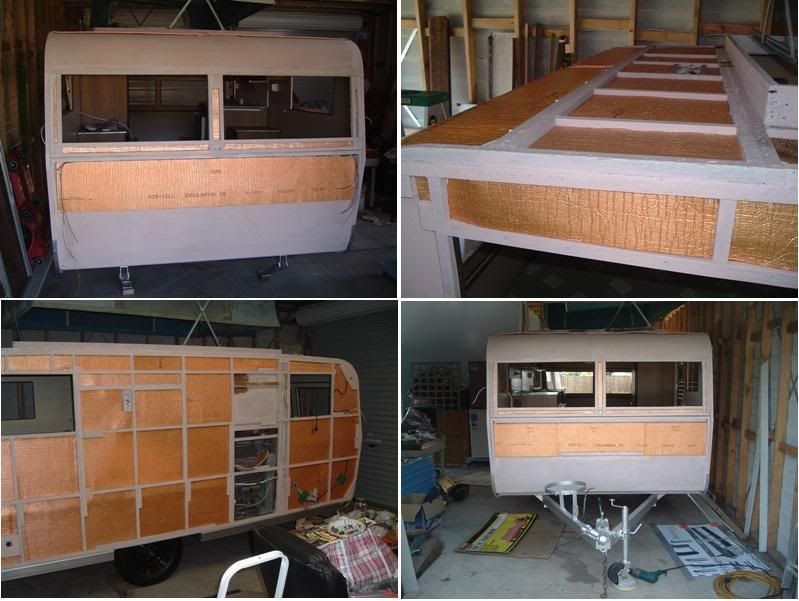 Insulation went into just about every nook and cranny I could find. The front and rear roof curves, and the lower front and rear panelling, could not have any insulation applied because the aluminium cladding sits flat on the panelling at these points. I'm going to place some of that thin builder's insulation sheeting (eg. sisalation) over these areas. It won't have much effect on insulating the van, however every little bit helps, and it will also act as a water barrier if the dreaded water leaks occur again in the future. Should be as snug as a bug in a rug in this van now!   cheers, Al. |
|
|
|
Post by atouchofglass on Feb 20, 2009 7:20:20 GMT 10
Hey Al
She's starting to look goooooood
Got that spaceship/ satellite look going on with all the gold insulation
"Huston we have lift off"
Operation Millard has been launched.......
Ground control to Major Al
Your looooking very goooood
And they all want to know the type of clothes you wear?
Sorry lost it there for a moment
Glad to see you painted all the timber
Just incase there is a leak it won't immediately start going mouldy or worse rotting
Keep at it Al
She'll be launched onto the highways and bi-ways in not time
Cheers
Atog
|
|
Deleted
Deleted Member
Posts: 0
|
Post by Deleted on Feb 20, 2009 8:00:55 GMT 10
Hi,
What are the details on the insulation?
|
|
|
|
Post by millard1399 on Feb 20, 2009 9:01:25 GMT 10
Hi wahroonga, if you go back to Page 7 of my Millard thread... ditzygypsy.proboards107.com/index.cgi?board=photos&action=display&thread=119&page=7...you'll see some detail about the insulation in the first few posts. But as an update to that information, I recently saw the same product in a Bunnings catalogue, priced at (from memory) $278 a roll, significantly cheaper than the $330 a roll I paid to the shed kit man.  I reckon you could go close to doing a whole van with one roll, or at least do the significant majority of a van with it. It's very light, and very easy to cut with a sharp 'Stanley knife'. Where I've put the squares of insulation into the framework 'boxes', I just cut each square slightly larger and pressed it into position. It holds itself in there ok. Up on the roof curve and below the front and rear windows, I stuck it in position using dollops of construction adhesive (eg. 'No More Nails'). Manufacturer's website: www.air-cell.com.au/pages/insulbreak.htmand click on the link at the bottom of the page to download the brochure on Insulbreak 65 (a one-page pdf from memory). cheers, Al. |
|
|
|
Post by bobt on Feb 20, 2009 22:25:21 GMT 10
Al Its looking good  Much better with the rear wall in place. Painting the frame was a real good move. Pity the world wll not see the gold touches.. Don't ya hate it when ya buy some thing and discover it at a cheaper price elsewhere later on.............  bobt |
|