|
|
Post by millard1399 on Feb 15, 2010 20:27:47 GMT 10
Hi techron, back in June last year I bought an industrial Singer sewing machine from the Salvos for the bargain price of $60. Always had a hankering to get one of these to do heavy duty sewing. But, it's been sitting in the garage waiting...waiting...for me to get to the stage of using it. We've just had a wet weekend here (surprise, surprise  ), so it was a good time to give the machine the "once over" and see if it worked properly or not. I folded up a fleecy pillowcase into three layers and loaded up the machine with thread, and hit the foot pedal. I now appreciate why the ladies in clothing manufacturing plants can make a pair of undies in 37 seconds!   This thing goes like a ROCKET! And I do mean at the speed of a rocket!! It frightened the bejeezus out of me. I'm a sewing plodder...much more tortoise than hare.., so this machine is gonna have to be toned down considerably. Plus I discovered the needle in it is the wrong size, and of course it takes a special shaped needle, so I'll be going to the local sewing centre to get the right ones. What I like about these industrial machines is the longer "throat" between the needle and the right hand housing. You can bunch more stuff up in there if necessary. But a bit more "planning and development" is required before I'm ready to go ahead with using it. Here's a photo of the machine... 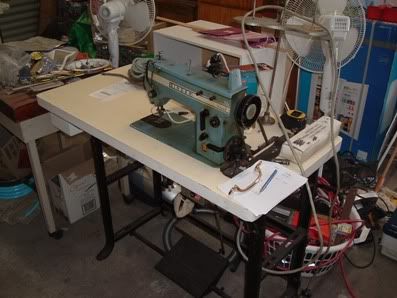 Since I couldn't make any progress with the BIG Singer machine, I amused myself by starting to make the repairs on the front seat cushions. The original fabric was well and truly "cactus", so I'd previously bought replacement fabric. It was time to bring out the trusty old home Singer machine and get stuck into it. This machine is probably 25 years old now, and still going strong! (only been used about half a dozen times in the last 20 years, so it should still be going strong. Who uses sewing machines these days anyway??!  ) This old Singer can punch through four layers of vinyl plus one layer of fabric without blinking an eye, using a No.16 needle. So, this is what I've been doing last couple of days... 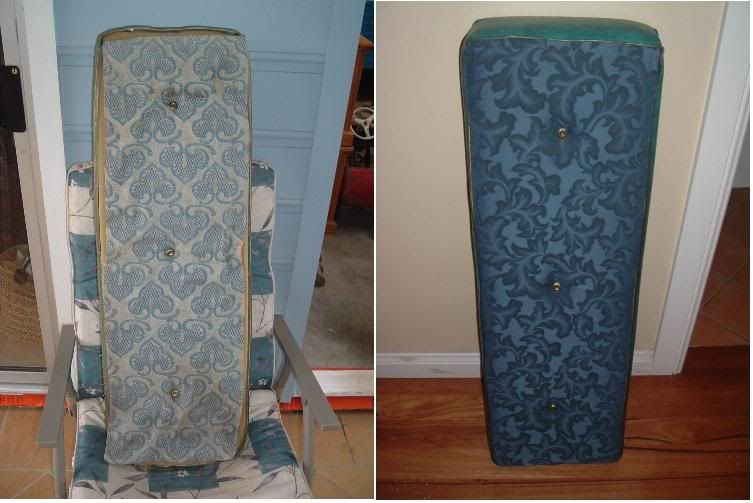 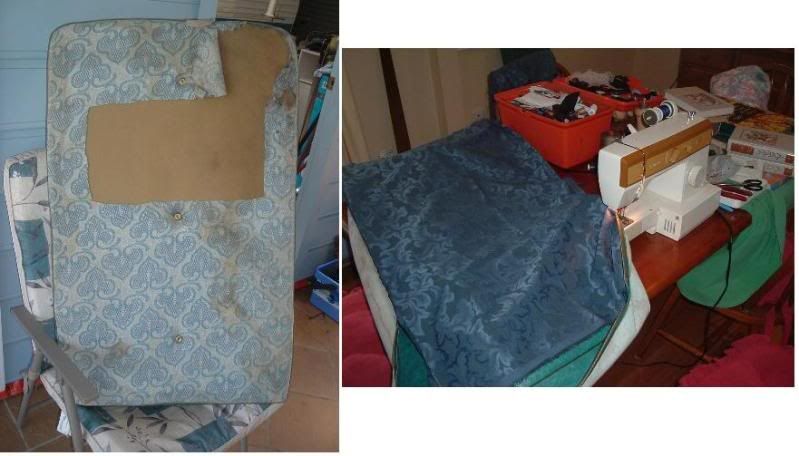 Like I said above, I'm a slow old plodder when it comes to using a sewing machine, but eventually I get there. cheers, Al. |
|
|
|
Post by bobt on Feb 15, 2010 20:44:40 GMT 10
Hey millard 1399 Well done with the sewing. Not to many fellas will tackle such a dangerous weapon....  Must confess that I would love that heavy duty one you have, was jealous when you first showed it off. Thanks for rekindling the jealous.. arr well back to the therapy again... ;D ;D |
|
|
|
Post by atouchofglass on Feb 16, 2010 7:13:46 GMT 10
Hi Al Mate the cushioning looks fantastic!!!!    Please put a thread on how you make your cushioning in the technical section. Cause I would love to have a go at the same sort of work. Not that I need it at the moment but later there is always a chance. Plodder or not the work that is finished looks just the ticket. Keep at it mate your getting closer every day ;D ;D ;D ;D ;D ;D ;D Cheers Atog |
|
|
|
Post by millard1399 on Feb 16, 2010 20:45:10 GMT 10
|
|
Deleted
Deleted Member
Posts: 0
|
Post by Deleted on Feb 16, 2010 21:01:30 GMT 10
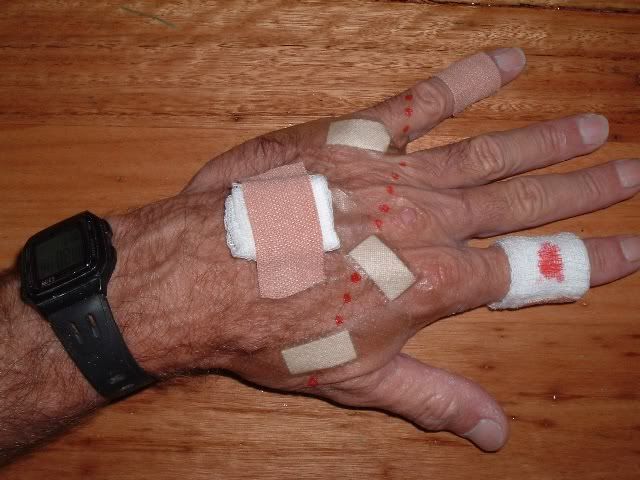
Crikey Al, you need that hand.  |
|
|
|
Post by atouchofglass on Feb 17, 2010 14:46:15 GMT 10
Would I take notice of someone who's hands look like that? Of Course I would So I know what not to do ;D ;D ;D ;D ;D Serves yourself right for trying to stitch up your watchband while it's still on your wrist      ;D ;D ;D ;D ;D ;D ;D ;D ;D Think I'll take up shares in a band-aid factory in your area Cheers Atongueincheek |
|
|
|
Post by millard1399 on Feb 19, 2010 20:19:25 GMT 10
All DONE!! ;D ;D ;D 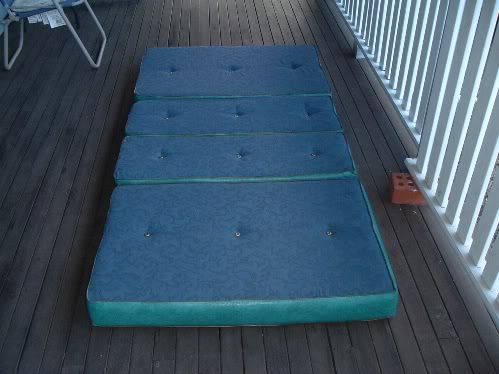 |
|
|
|
Post by libstar on Feb 19, 2010 20:46:36 GMT 10
WOW! Very impressed Al, Could have got you to whip up my curtains for me..  |
|
|
|
Post by millard1399 on Feb 22, 2010 22:06:12 GMT 10
Curtains, Libby??? Did you say curtains?? Gees, I'd forgotten I had to make those for the Millard too!! Another job to add to the list!   But, I did get the Millard out into the backyard today. First time I've been able to walk around it from a bit of a distance and have a good look at it. Hasn't come up too bad, if I do say so myself   ...  This is what it looked like originally...  [ok,ok, who's the smart-a*se down the back who just yelled out, "What's the difference?!"? [ok,ok, who's the smart-a*se down the back who just yelled out, "What's the difference?!"?   ] ]Built the temporary roof on top and covered it with a tarpaulin for the next month or so. cheers, Al. |
|
Deleted
Deleted Member
Posts: 0
|
Post by Deleted on Feb 24, 2010 9:04:52 GMT 10
Lookin' good Al - real good.
Not to long and she'll be all done mate.
Carl
|
|
|
|
Post by millard1399 on Feb 26, 2010 22:07:12 GMT 10
G'day All, The poptop roof has been lowered down from the rafters, and is in the process of being dismantled. I have this overwhelming sense of "deja vu" as I chip away the dreaded silicone virus, chisel away the crusty old sealant, and remove a hundred staples. I thought I was way past all that, but not so. Here's a photo group showing the silicone sealant and crusty old mastic sealant...  And here's what the roof looked like as I progressively dismantled it... 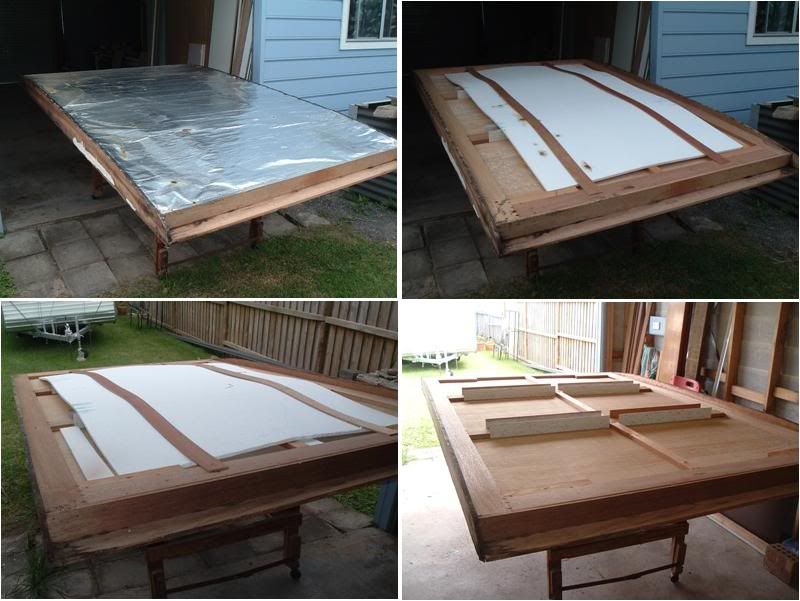 I think there's an opportunity here for me to do a bit of redesign work on the timber structure. Certainly doesn't look like it was designed by a leading draughtsman. I also think my van must have been a "Deluxe" model, because there were a couple of small offcuts of foam insulation thrown into the roof cavity. The 'Standard' model didn't get these, heh heh.  Note also in the top left photo above, the white patch/strip on the left hand side timber. This is the dried remnants of a fungus, which has chewed into the wood underneath. When I chiselled the fungus layer away, a fair bit of the timber underneath came away with it. So, what have I got ahead of me? Both sides of the framework need replacing along the bottom. Both ends of the framework need replacing. These photos show the worst of it... 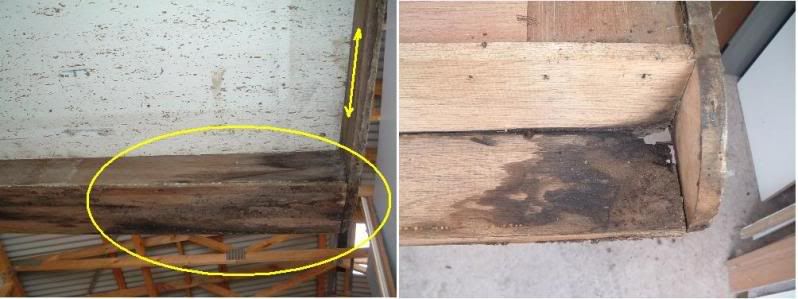 Tomorrow I start to pull the framework apart, and cut and glue and screw bits of timber all over the place!     See you soon, cheers, Al. |
|
|
|
Post by libstar on Feb 26, 2010 22:57:27 GMT 10
No hope of getting the insulation rebate now  |
|
|
|
Post by atouchofglass on Feb 27, 2010 6:35:06 GMT 10
Looks like a mighty big sandwich you have there Al
Hope working on it doesn't leave a bad taste in you mouth
;D ;D ;D ;D ;D ;D
So you really have done from the ground up restoration.....
Does that mean you are at the end of the restoration when the roof is finished?
Keep at it mate, won't be long now.
Cheers
Atouchofglass
|
|
|
|
Post by kylarama on Feb 27, 2010 20:30:15 GMT 10
Wow! That 'sealant' job looks identical to my Millard.
Either A: Thats how it's done in the Millard factory. B: Our vans have had the same owner. C: Our vans have been to the same caravan repairer. Or D: Great idiots (former owners) think alike!
With the end now in sight, I guess your already searching Ebay and the Trading Post looking for your next project?
Looking good.
|
|
|
|
Post by millard1399 on Feb 27, 2010 23:25:59 GMT 10
Let me answer the above three members in reverse order... kylarama, Ha Ha Ha, kylarama, you are an absolute crack-up!     Would I put myself through all this again?? Well, actually I will be!   I've got a dismantled 1956 Franklin in the shed that was put on hold because of the Millard, and I'll be going back to working on that, although not necessarily "full time" like the Millard was. After the Franklin, there's a 1957 Castle caravan waiting in line, although I'm under extreme pressure from SWMBO to reduce the three to two (she can't see the garden...too many bloody caravans scattered around  ). So, no, my life insurance policy won't cover accidental death due to buying another van off ebay.     ------------------------------------------- atog, Well, sort of...maybe...possibly. I have to complete the roof, and make the new canvas skirt for the poptop. And then I guess you could say the van is finished. But I'm also going to take it and have the brake system checked in the wheels. Who knows what might be involved there. I also bought enough canvas off ebay to make a narrow awning for the van (narrow means 1.8 metres wide - the width of the canvas), so I was going to have a go at doing that. But I guess technically speaking, we could say the van was finished once the roof was done. It's hard to know when is the 'right time' to smash the bottle over the bow.  ----------------------------------------------- Libby, thanks to your reminder about curtains above, I'm now $82 lighter in my wallet today from buying material, curtain rods and brackets. My wallet is coming over to your caravan to infest it with moths!    I went to that place today that you sometimes need a 'spotlight' to find  , and bought some fabric off the Clearance table for $6 per metre. But when I checked out their prices for curtain rods and brackets, I needed to breathe carefully into a brown paper bag. Went to Bunnings to compare, and their prices are a lot cheaper, so that's where I donated my money. Now all I have to do is work out how the heck you make curtains! Do I use a circular saw, or a belt sander, or a router??  cheers,   Al. |
|
|
|
Post by libstar on Feb 27, 2010 23:36:29 GMT 10
Ha! Take the curtain rods back and invest in $8 of curtain wire - You know the stretchy vinyl coated stuff, heaps cheaper, heaps easy to install too  But don't get it from Bunnings as the extra hooks they sell DO NOT fit the wire kits despite being the same brand.. d'oh There are enough moths floating about from me constantly stretching husbands wallet between the S Series and Van..So don't need to fight anymore thank you very much for the kind offer though  I'd go the router you will get a straighter edge  |
|
|
|
Post by kylarama on Feb 28, 2010 8:12:30 GMT 10
Now all I have to do is work out how the heck you make curtains! Do I use a circular saw, or a belt sander, or a router??  cheers,   Al. I find that a 9 inch grinder fitted with a ripping blade from a circular saw works much better for doing thing such as pleats. But remember to remove the guard so you can see what your doing. Eye glasses, ear muffs, Kevlar body suit and common sense are also optional. |
|
|
|
Post by millard1399 on Mar 4, 2010 22:38:30 GMT 10
Hey Libby, are you still out there?? A marathon four-day effort has just been completed, and guess what? We have CURTAINS!! ;D ;D...  After a lot of trialling and testing, I discovered that an electric chainsaw and a sledgehammer were the ideal tools to complete the job!   And here's the "doofus male" story that goes with it... Never made curtains before. Never knew that patterned material has a pattern spacing. Measured up the windows, drew up the design for the curtain style, and calculated how many metres needed. Off to the shop and ask for six metres. As she's about to cut I says, "Wait! Better make it seven metres 'just in case'". Home to the garage and discover the repeating pattern markers on the side. No big deal, just make the curtains 20mm longer and that will equal one pattern length. Down to business...measure, measure...cut, cut...sew, sew...remove stitches from finger...cut all points off pins with sidecutters to stop them continuously stabbing my hand...     Make first curtain...hmmm, not too bad for first timer. Make second curtain...improving as we go. Mark curtains 1 and 2 to make first pair. Repeat for next pair, marking 3 and 4. Starting to sew freehand now...getting real cocky...pins?? Hah, who needs 'em! ...Oops, fix that up. By day three I'm making curtains with a double blind hem complete with a full twist and a half pike [gees I love that sewing talk  ] ]End of Day 3 and down to the second last curtain. A difficult one-and-a-half panel width. Look at the remaining material length, and we ain't gonna make it. Short one panel. How can this be??! "We got an extra metre!!" No time to work out what's happened. Race off to the shop and search high and low for the roll. Finally find it, and off to the counter for "One pattern panel, plus you'd better give me another 3 panels 'just in case', please." Home again, and make the final curtain (applause all round, two encores   ). Sort through all curtains, matching 1 with 2, 3 with 4, etc. "What's this one with no number?? Hmmm...musta forgot to put a number on it." Keep sorting...yep, 5 and 6 there, 7 and 8 there, 9-10-11-12 all there. AND this unmarked one left over. Guess where the missing panel went?  But, at least I now have a spare curtain for one half of one of the windows! We men are ALWAYS thinking ahead!! ;D ;D cheers, Al. ----------------------------------------------------- atog, I'm offline for the next three days. New kitchen coming, just over a week from now. Floor in older half of the house is being sanded and polished tomorrow and next day. Can't get back into the house for two nights while laquer/polish dries. All phones and internet connections removed. But...guess what?? We're sleeping in the VAN for those two nights! ;D Temporary roof tarpaulin and all! Got a porta-loo. Showers at friend's places. Everything else is crammed into the garage. Makeshift kitchen set up in outdoor undercover area. I tell ya...this is back to BASICS! Aaaand...loving it!! See y'all in a few days! ;D ;D ;D |
|
|
|
Post by atouchofglass on Mar 5, 2010 6:43:01 GMT 10
Hey Al Almost convinced me to do curtains for our van Almost    All the best for the renovations to the house Cheers Atog |
|
|
|
Post by libstar on Mar 5, 2010 7:27:25 GMT 10
I have had no internet or phone (cable) for most of the week and finally sorted and got Optus to admit it was an area outage... On the upside I can almost speak fluent Indian now ;D  Thats is sooooo funny Al.. So Proud of you.. Moving over to the darkside of soft furnishings is such a big step, If only Atog could see the light  Hopefully going to start building the bed in the next few days.. and have some piccies... Been lazy all week..  |
|
|
|
Post by millard1399 on Mar 11, 2010 21:46:40 GMT 10
G'day All, I've spent the last few days having a most enjoyable time (NOT!) scrubbing 30 years of built-up grime off the pop-top roof, as well as scraping all the residual silicone sealant off. My fingers are aching!! Here's a couple of photos showing the roof as it was to begin with... 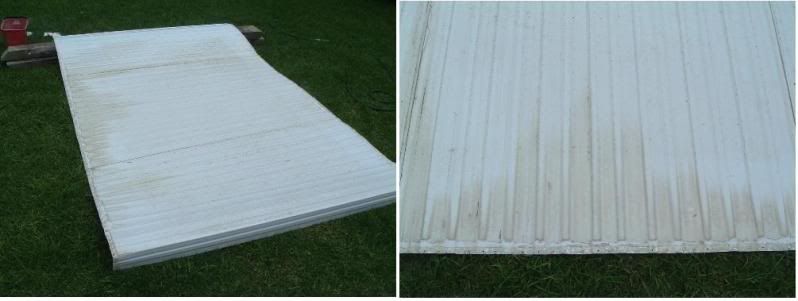 And here we are half-way through, and then completed! ;D... 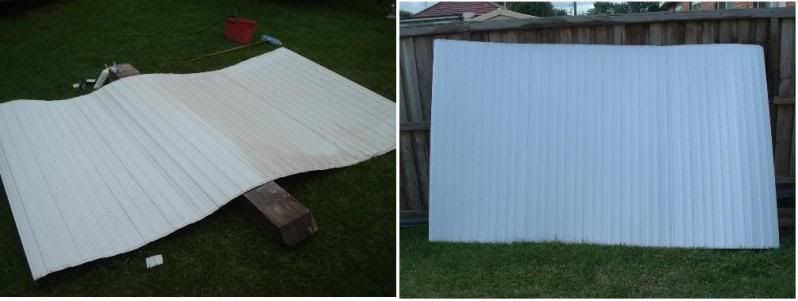 Now all I gotta do is spraypaint it. Hope the white paint I get this time is the right stuff.   And here's an astonishing bit of engineering design work. The roof is made of 3 sections of cladding, with two interlocking seams joining the panels together. But some bright spark decided the interlocking joint openings should face towards any water running off the roof.  Which means that any fine atmospheric dust/dirt that falls on the roof is washed into the seam joint, rather than over it. Go figure! And to make matters worse, both the joints face each other, so it doesn't matter which end of the roof the water runs towards, it will head for the seam opening rather than over it. (My diagram is not exactly accurate. The seam is actually pressed flat to the cladding, not at an angle)... 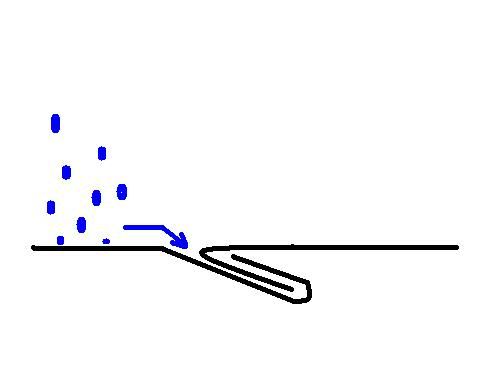 If you have similar seam joints on your roof, you might check one day if you have the same problem. When I cleaned the roof and then washed it down with a high pressure hose, a noticeable amount of dirt/grit was forced out of the seam joints. So goodness knows what sort of corrosion is going on inside the joint with all the muddy crap in there.   All they needed to do was reverse the way the overlap seam was made, and it would have been much better. Unbelievable!!   cheers, Al. |
|
|
|
Post by millard1399 on Mar 13, 2010 22:02:27 GMT 10
All fingers were extracted yesterday, and a marathon spraypainting day was held. One coat of primer, one coat of undercoat, and two topcoats on both the white roof cladding and the blue side bits. 17 cans of spraypaint used! By the end of the day, my poor little index finger was bruised from holding down the spray buttons. But, here's the end result... 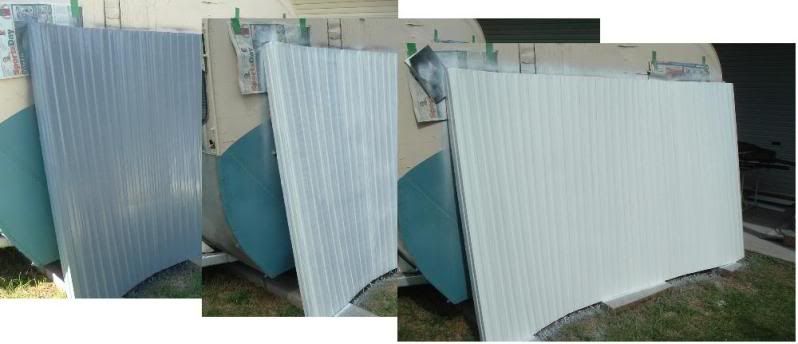 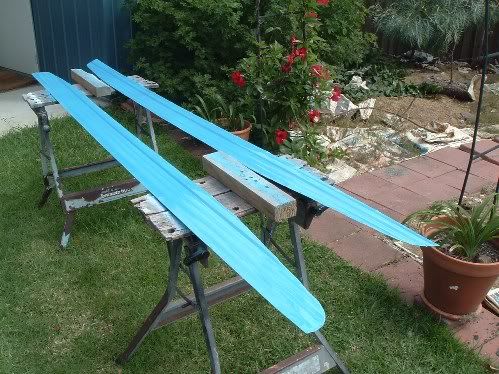 Over the last couple of weeks or so, I've been plodding through the refurbishment of the spring-loaded poptop canopy lifters, as well as the spring-loaded roof clamps that hold the roof down. All rust was rotary brushed off, and the lifters got two coats of Cold Gal plus two coats of silver chassis paint... 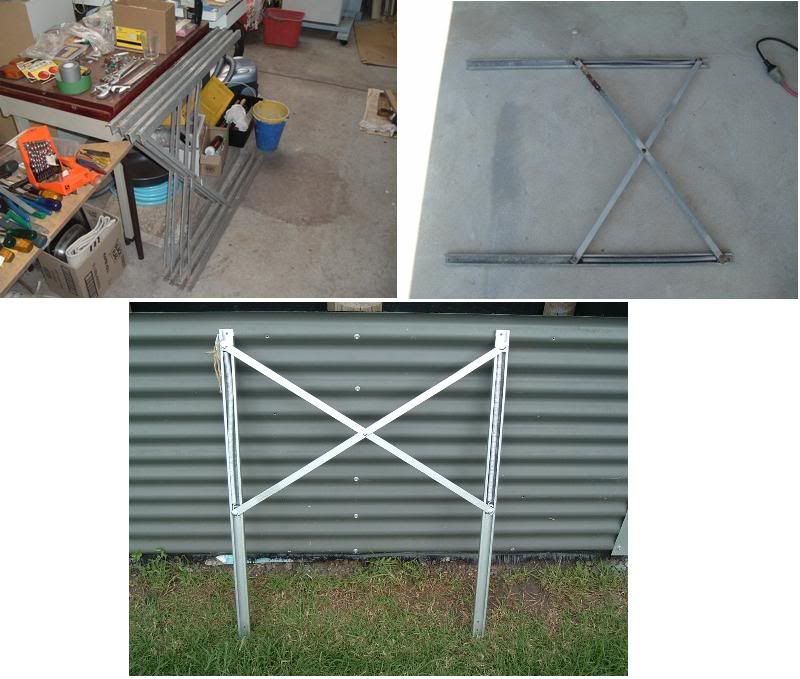 The roof clamps were cleaned up and given a couple of coats of silver chassis paint... 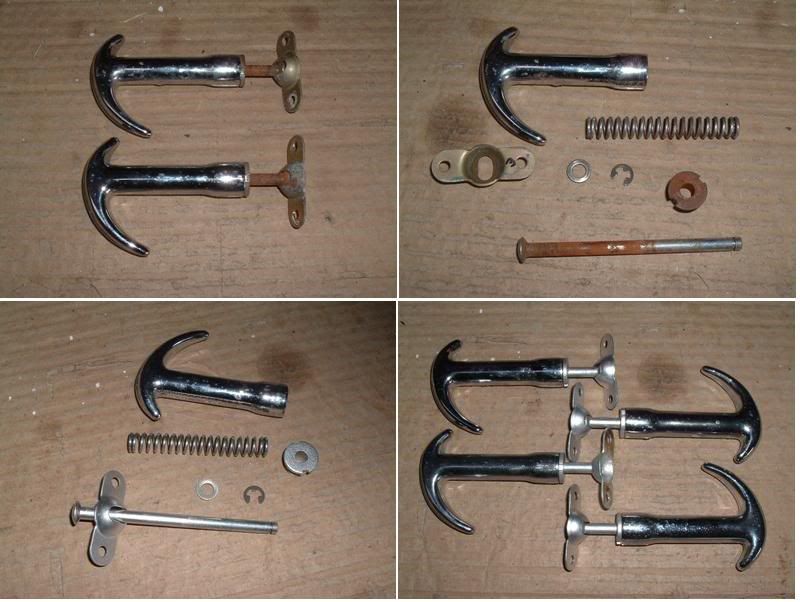 Today I got stuck into starting the timber repairs on the poptop roof frame. I recycled a couple of lengths of skirting board that were salvaged from the house demolition last year. These photos show how the repairs were done to the sides of the frame... 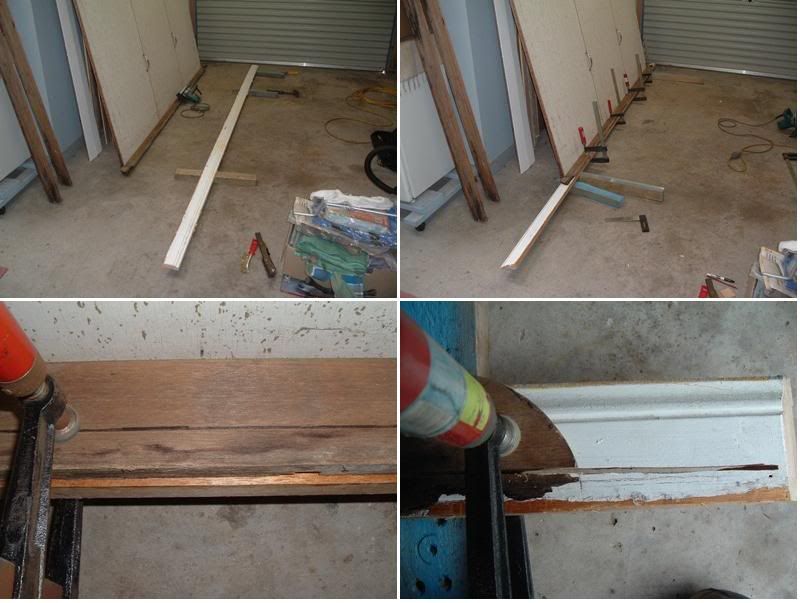 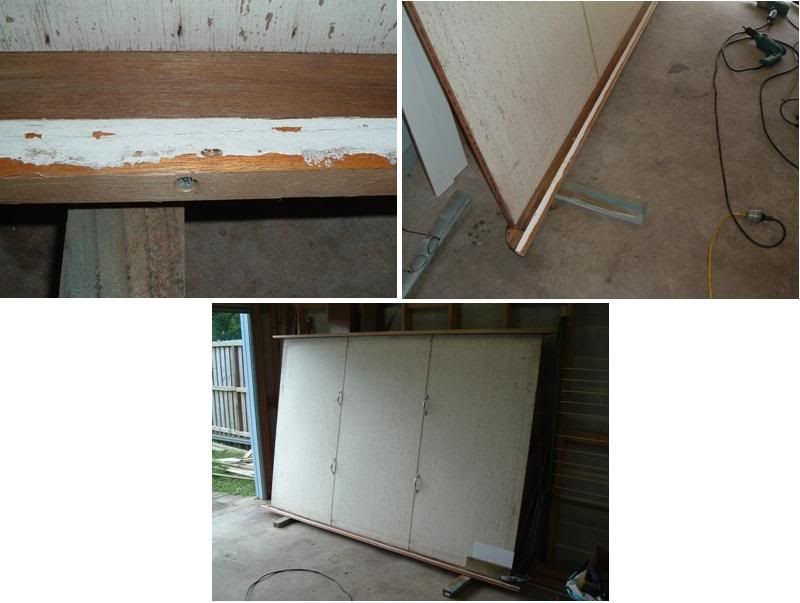 Tomorrow I have to trim these repairs up a bit, and then sand all the old paint off the added timber strip. Then I can get stuck into repairing the ends of the frame. cheers, Al. |
|
|
|
Post by atouchofglass on Mar 14, 2010 7:31:03 GMT 10
Who's been a busy boy then?        Next we will have a budding graffitti artist on our hands But they tend to use their thumb to hold the button down over long periods of spraying..... EErrrr so I'm told. Looking good mate The end is in sight And it's only been ...... how long?  This renovation caper takes forever don't it? At least now when you go somewhere you will have the confidence of knowing the van will stand up to what ever you dish out. Keep the photos coming mate Cheers Atog |
|
|
|
Post by bobt on Mar 15, 2010 21:05:27 GMT 10
Hi Atog
We cannot accuse millard 1399 of being a hardened graffiti artist. His index finger is not tough enough yet. ;D
Hey Millard 1399
Looking good. You may wish to know that they still apply equal quantities of the clear stuff on the roofs of modern vans...
bobt
|
|
|
|
Post by millard1399 on Mar 17, 2010 13:07:48 GMT 10
G'day atog, bobt, and others, I'm ALREADY a graffiti artist! ;D Have been for many years!! There wouldn't be a shed or garage floor that doesn't have my "artwork" on it from various painting jobs.    I've completed the carpentry work on the pop-top roof frame. You might remember the photo a few posts above showing the residual white mark on the side of the frame from a fungus that had eaten the timber? Well, I had to get stuck into that area and try and make it good again. I guess there are a few different ways of repairing wood rot that hasn't chewed completely through the timber. On one of the wood rot areas, I simply took to it aggressively with a rotary wire brush in the drill, and gouged out all the rotted timber until it seemed like only good stuff was left. Much like a dentist would do when preparing for a tooth filling... 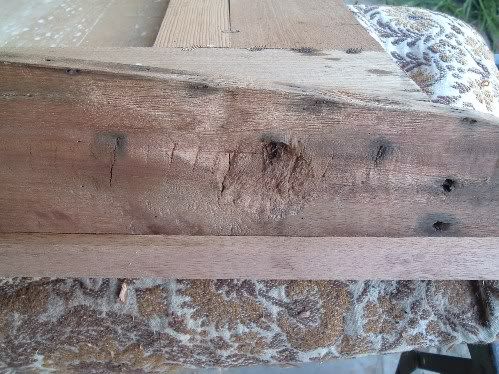 I think I can get away with just painting this section with pink primer paint to seal it against any future attack. This section was too big to bog with something, but also in an awkward position to allow for a timber "patch". Which brings me to another alternative method for repairs...the timber patch. On the larger section where the white fungus was, I again hit it with the wire brush to remove the rot and see how far it extended. Some of the woodrot had been cut off when the new timber strip was put along the bottom. But for the remainder of the wood rot area, I marked around the area and then chiselled the timber deep enough to allow an 8mm thick timber patch to be fitted. Going 8mm deep meant that all traces of the rot were removed, and the patch was then glued into position... 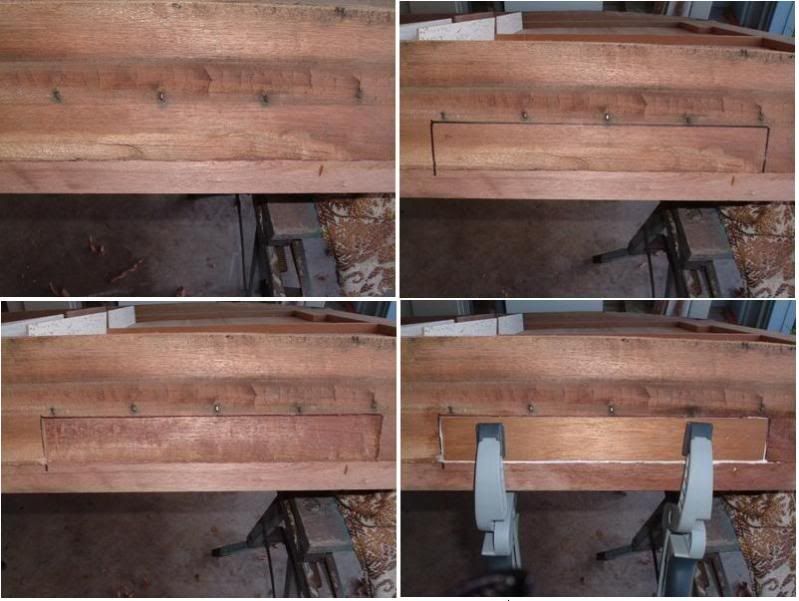 I redesigned the framework on top of the roof so I could dispense with the original foam insulation, and install the better quality insulation I'd used on the walls of the van. These photos show the 'before' and 'after' framework... 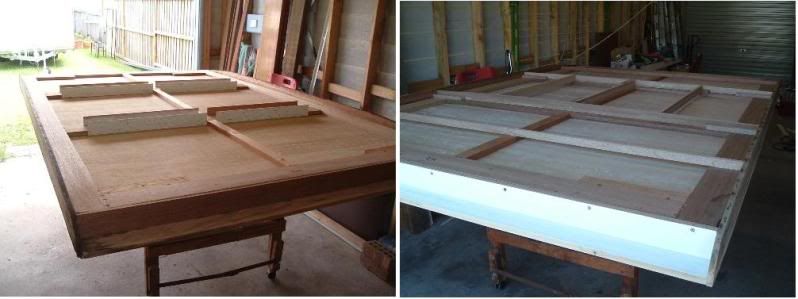 Next job is to paint all the timberwork with pink enamel primer, to give it extra protection against any future leaks. cheers, Al. |
|
 ), so it was a good time to give the machine the "once over" and see if it worked properly or not. I folded up a fleecy pillowcase into three layers and loaded up the machine with thread, and hit the foot pedal.
 This thing goes like a ROCKET! And I do mean at the speed of a rocket!! It frightened the bejeezus out of me. I'm a sewing plodder...much more tortoise than hare.., so this machine is gonna have to be toned down considerably. Plus I discovered the needle in it is the wrong size, and of course it takes a special shaped needle, so I'll be going to the local sewing centre to get the right ones.
 ) This old Singer can punch through four layers of vinyl plus one layer of fabric without blinking an eye, using a No.16 needle.

 ), so it was a good time to give the machine the "once over" and see if it worked properly or not. I folded up a fleecy pillowcase into three layers and loaded up the machine with thread, and hit the foot pedal.
 This thing goes like a ROCKET! And I do mean at the speed of a rocket!! It frightened the bejeezus out of me. I'm a sewing plodder...much more tortoise than hare.., so this machine is gonna have to be toned down considerably. Plus I discovered the needle in it is the wrong size, and of course it takes a special shaped needle, so I'll be going to the local sewing centre to get the right ones.
 ) This old Singer can punch through four layers of vinyl plus one layer of fabric without blinking an eye, using a No.16 needle.


