|
|
Post by brettm357 on May 21, 2017 1:37:37 GMT 10
Some Windows Removed 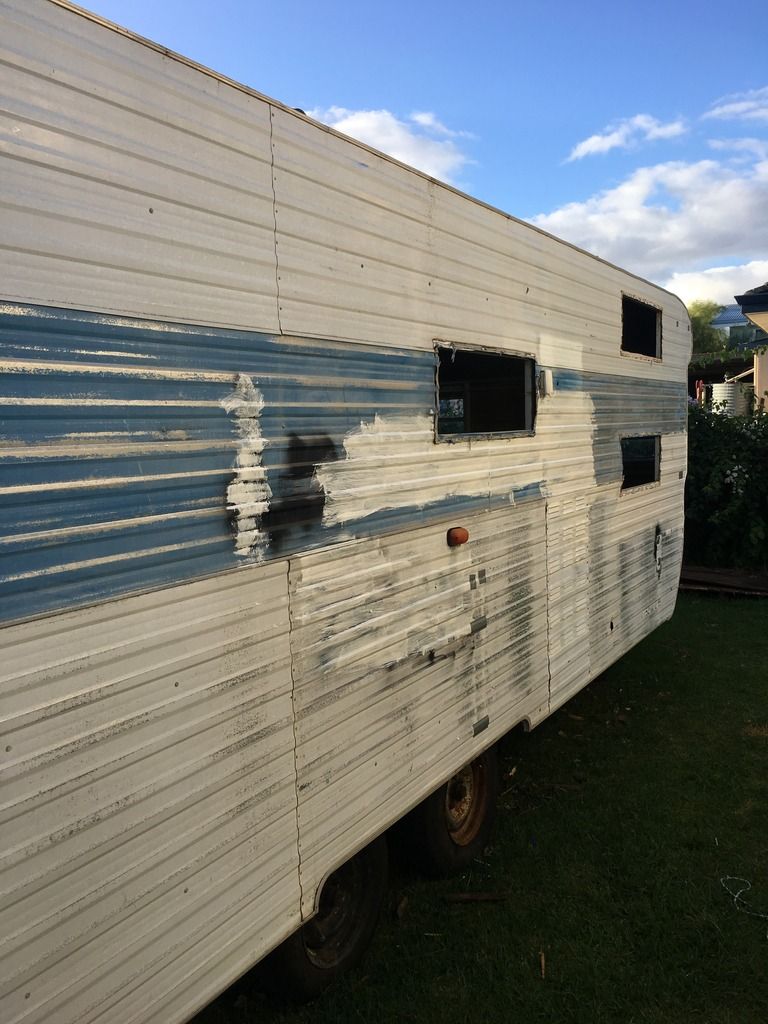 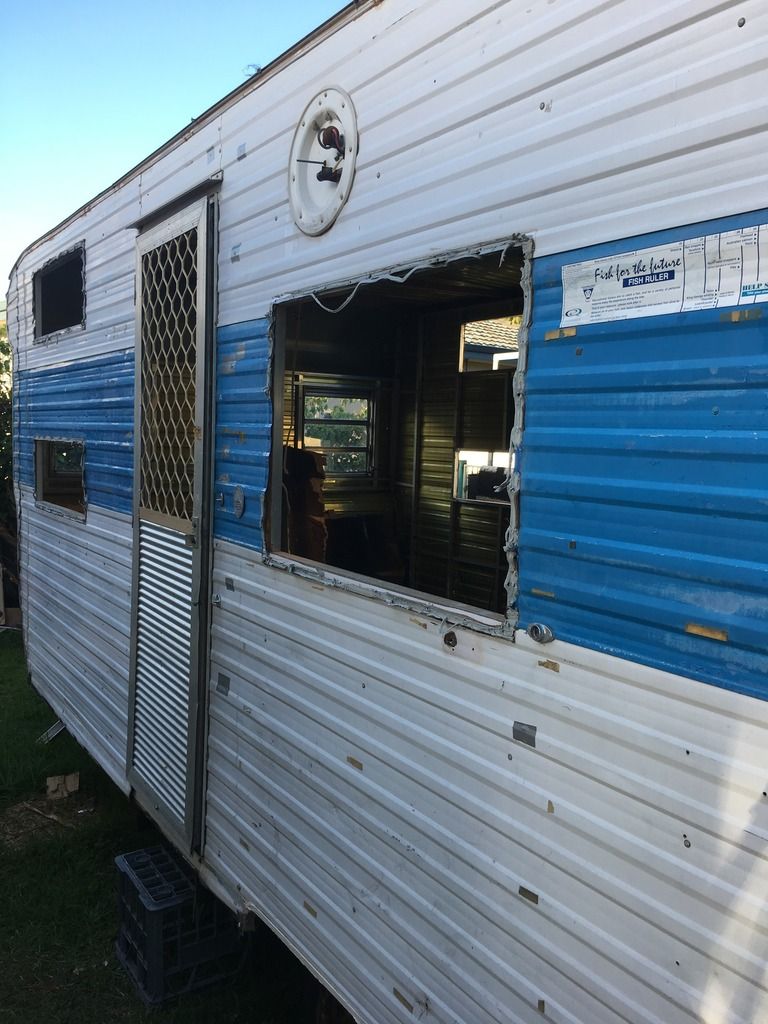 |
|
|
|
Post by Mustang on May 21, 2017 13:03:52 GMT 10
Progress with a PLUS, must have been a tall guy to place a fish rule sticker at the top of the window?  |
|
|
|
Post by brettm357 on May 21, 2017 14:58:46 GMT 10
Found the door key screwed under the floor 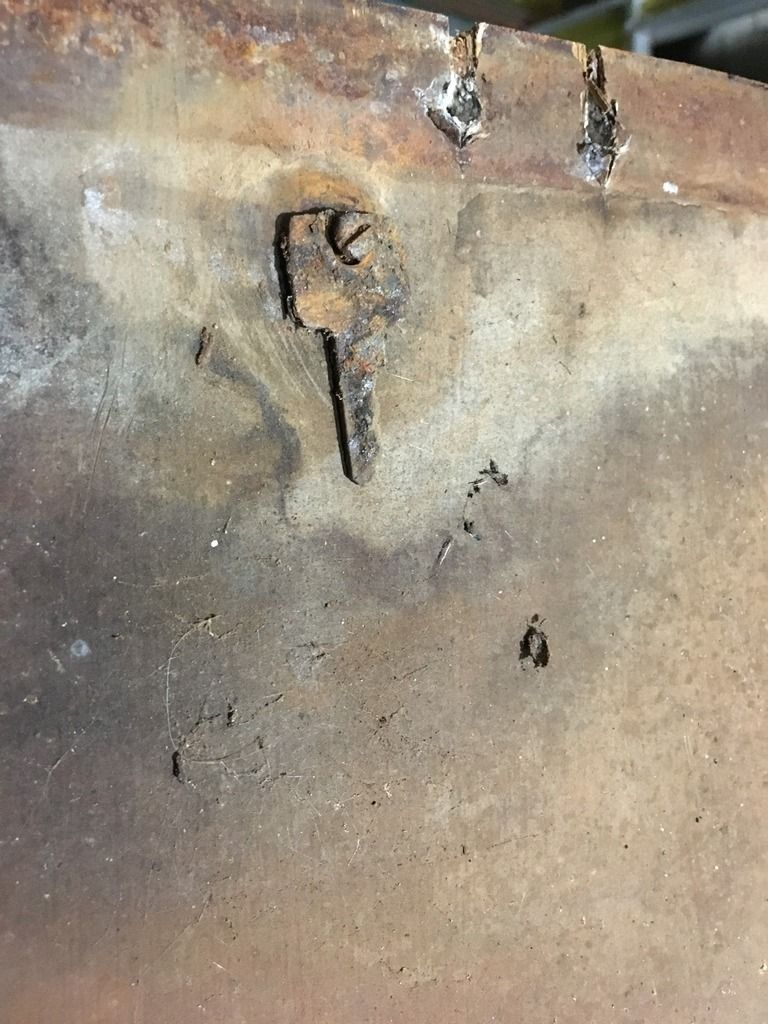 |
|
|
|
Post by 78466noM on May 23, 2017 17:13:41 GMT 10
A big plus is your chassis looks to be in good condition no major rust showing in photo's.
|
|
|
|
Post by brettm357 on May 24, 2017 20:59:15 GMT 10
Had 12mm floor originally would 18mm Marine Ply be too thick and heavy as a replacement
|
|
|
|
Post by pisces51 on May 24, 2017 22:45:47 GMT 10
G'day brett, Remember that the original 12mm floor has lasted for 50 years, so unless you have oodles of money to spend, I would go with 12mm ply as the replacement. Looking at your photos of the chassis after you removed the flooring, your chassis runners (the long lengths of channel running from front to back) seem to have a spacing of 400mm, so 12mm ply will be more than adequate. If you want to save yourself a few dollars, just buy the "exterior grade" plywood with the "B-grade" facing on it. The exterior grade has the same glue in the layers as in the marine ply, but will have a few voids/gaps around the edges of the (sheet) ply layers that marine grade doesn't have. All you do is pump some waterproof builder's adhesive into the gaps and let it set, and you've created your own version of "marine ply". Note to Moderators: Brett has the information about his van spread throughout 5 different threads so far (see here ). You guys have the ability to merge threads into one, so could you have a go at merging all five threads into one, please? It will put all posts in date order, which sometimes makes the conversation in the final thread a little out of whack, but it's better than having to jump from thread to thread to understand the complete story of brett's van. Then whack him over the head and tell him to just keep adding any posts about his van into that one final thread.   Pick this thread as his main thread: 1976 Millard Renovation - M49631cheers, Al.
|
|
|
|
Post by Mustang on May 25, 2017 19:15:48 GMT 10
Note to Moderators: Brett has the information about his van spread throughout 5 different threads so far (see here ). You guys have the ability to merge threads into one, so could you have a go at merging all five threads into one, please? It will put all posts in date order, which sometimes makes the conversation in the final thread a little out of whack, but it's better than having to jump from thread to thread to understand the complete story of brett's van. Then whack him over the head and tell him to just keep adding any posts about his van into that one final thread.   Pick this thread as his main thread: 1976 Millard Renovation - M49631cheers, Al. Thanks Al, now merged, we need to concentrate a little more  |
|
|
|
Post by 78466noM on May 27, 2017 1:55:06 GMT 10
maybe weight with the 18mm but that should be minimal and it will be strong also if you run it on the inside of the frame you may have to run some aluminum flat bar around bottom of frame to attach the bottom of interior walls. I found when I pop riveted frame to chassis after I did the roof that it didn't want to go in square yours is much longer so it will be best if you fasten frame to chassis make sure it is square then do roof I spent three days undoing what I had done then starting at the bottom and working up to get it right yours being so long will show up any mistakes mine did but it was after I started to fit door and windows that I found out all good now, when you pop rivet or bolt frame back on make sure it runs even both sides front and back. when you do roof rafters make sure you measure all the way along that it is the same distance as very thing relies on it being square. have fun  |
|
|
|
Post by brettm357 on May 27, 2017 13:27:03 GMT 10
Have been trying to work out next step - thinking ill remove complete frame from chassis, clean up chassis and get new A frame fit floor then put frame back on top then sort out resealing and the cladding.
|
|
|
|
Post by atefooterz on May 27, 2017 14:57:36 GMT 10
A point about marine grade is not only the pretty face it can also be up to 25% lighter per sheet! Depending on where you buy it and who has been through the available stock before you.  |
|
|
|
Post by brettm357 on May 27, 2017 22:35:31 GMT 10
Took one side bottom walls sheets off today found rust holes through chassis near both doors - is it better to replace with steel channel or duragal channel
|
|
|
|
Post by atefooterz on May 28, 2017 19:41:54 GMT 10
Any visible signs of why those areas rusted?
|
|
|
|
Post by brettm357 on May 28, 2017 20:10:51 GMT 10
As far as i can tell a build up of dirt and water between the cladding and the chassis there is a lot of red dirt in the channel at the bottom of the frames
|
|
|
|
Post by 78466noM on May 29, 2017 2:19:17 GMT 10
A good steel merchant can bend a c section in 3mm plate to the size you want I had to replace the whole drivers side not much left of it and a-frame it was fair but its life span would have been short and I replaced the front beam because a-frame is welded to it I used 3mm thick RHS.
|
|
|
|
Post by brettm357 on May 29, 2017 14:38:24 GMT 10
Wall sheeting coming off 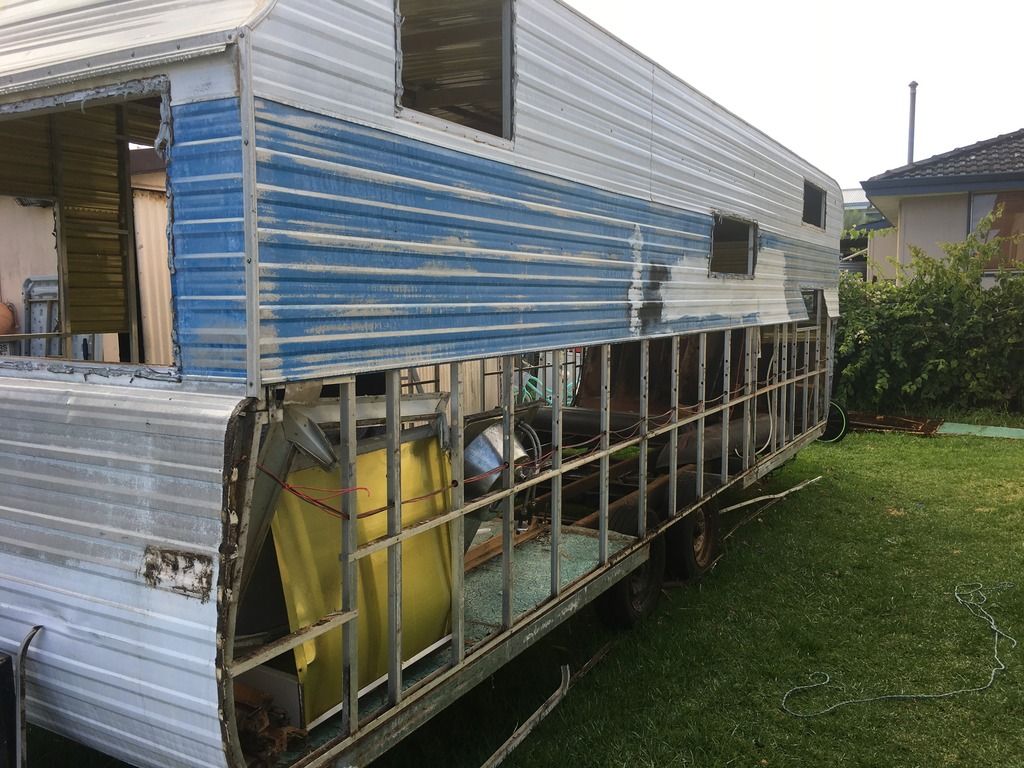 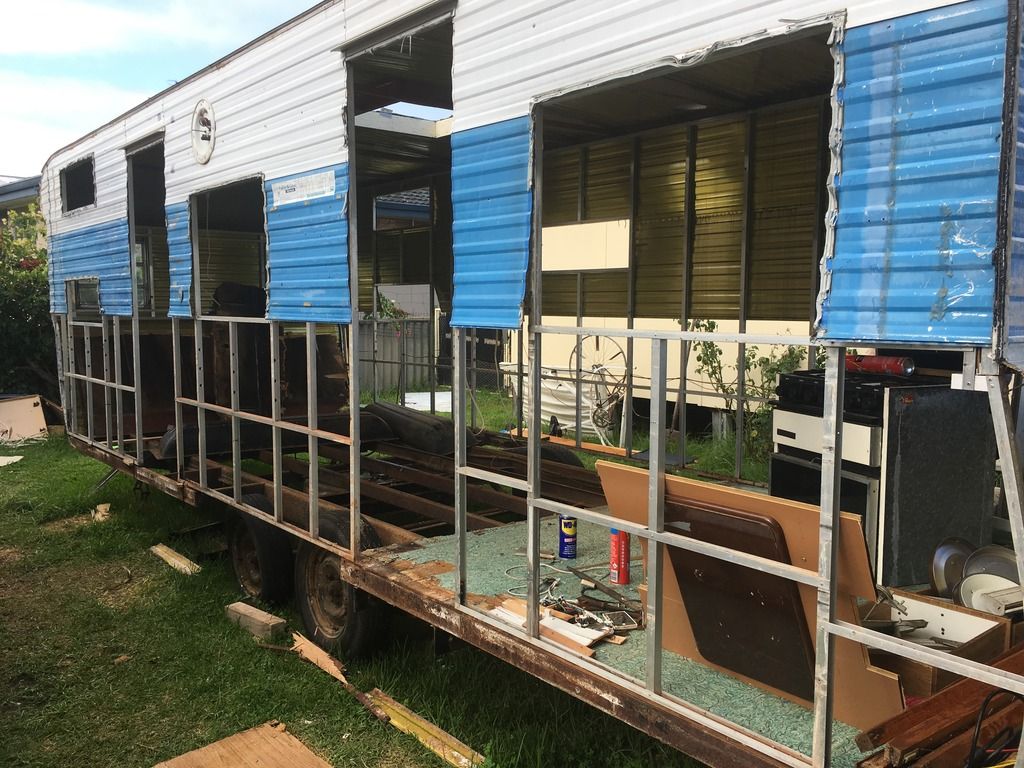 |
|
|
|
Post by brettm357 on May 29, 2017 14:39:44 GMT 10
Chassis rust on one side other side been repaired previously 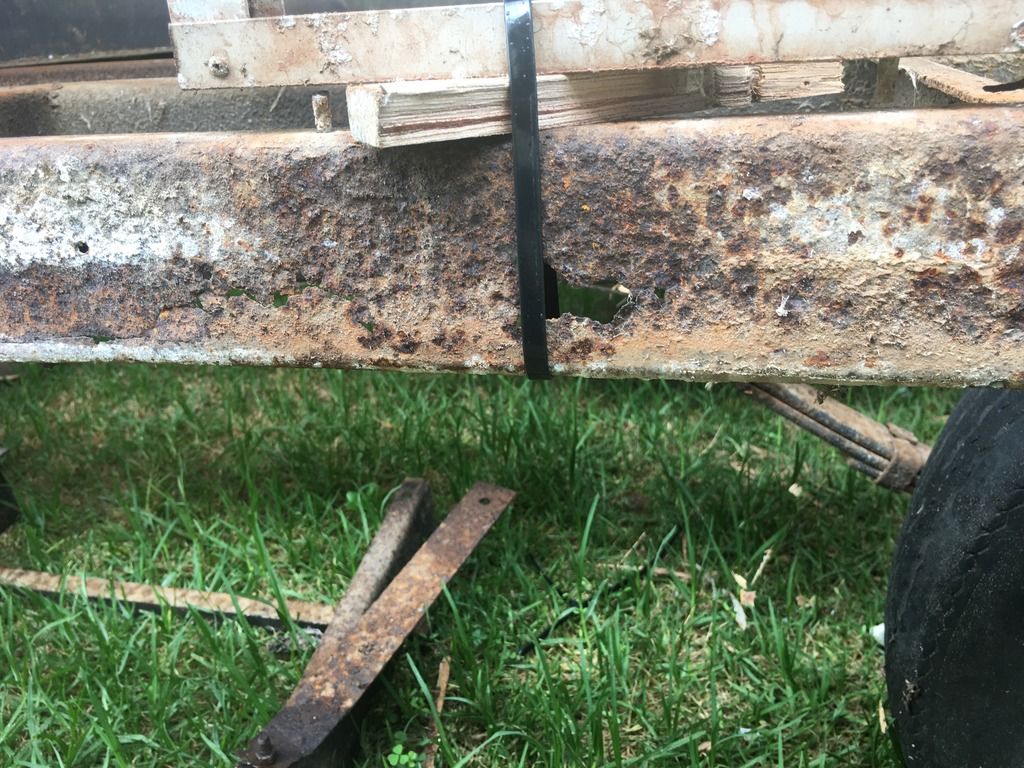 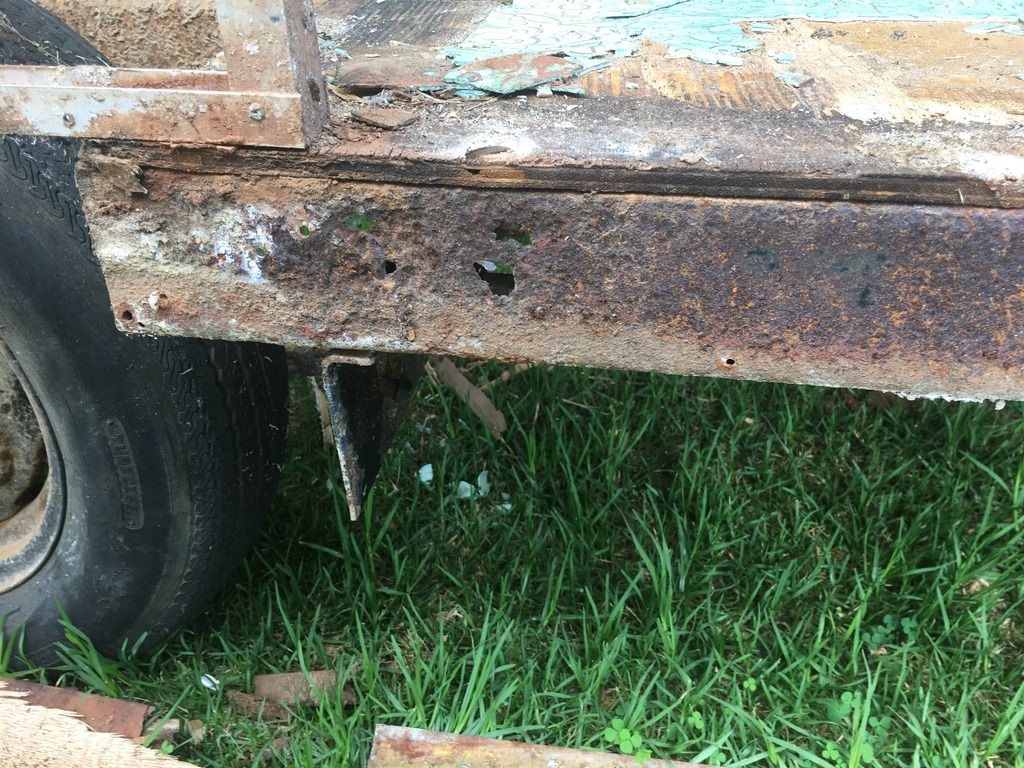 |
|
|
|
Post by brettm357 on May 29, 2017 14:40:57 GMT 10
Floor gone 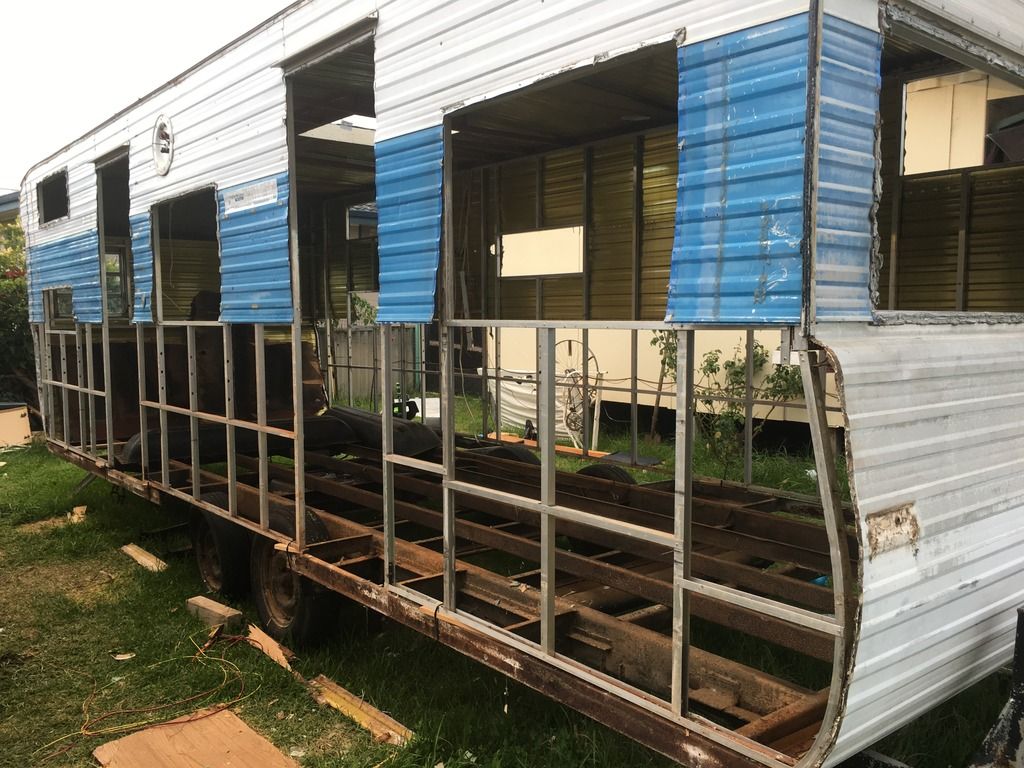 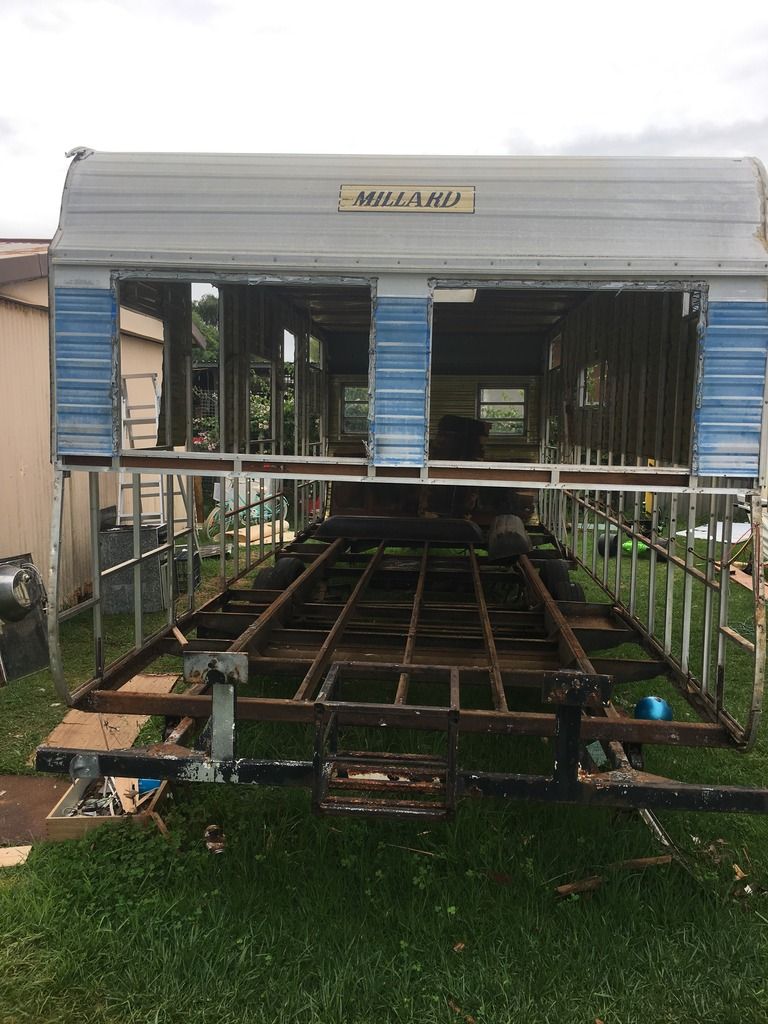 |
|
|
|
Post by Mustang on May 30, 2017 7:35:20 GMT 10
Well Done on going the extra mile, now you have no worries to whats actually there, & can be repaired.
Sure is a Big Girl without the clothing!
I would be tempted to remove the rear dual wheel carrier for safer towing.
|
|
|
|
Post by 78466noM on May 30, 2017 9:45:37 GMT 10
That is looking good much easier to do chassis repairs than what I had to do. your rust seems to be just the outside c-section mine the c-section that jpins to the outside c-section also suffered badly. I would have to be with mustang with your wheel carrier it is heavy on its own put two spares and it looks like it carries two Jerry cans that is a lot of weight on the very rear,eightfooterz set his spare under a-frame which is what I am thinking of doing and a second one in a carrier at rear to balance it out and to make sure I hopefully don't get caught out with out a spare.Not a good place for 50L of petrol just takes one driver not paying attention rear end you then a big chance of large bonfire. hope all is going the way you want it with van it won't have any hidden surprises when you finish with what you have done. when making furniture remember light mdf and chipboard are heavy and like to soak up moister. As you read around the different builds on here you will find lots of different ways to build light I did and settled on the bits that suited what I wanted and they are also good reading.  |
|
|
|
Post by atefooterz on May 30, 2017 15:06:40 GMT 10
I would hook up the unit to your tug then measure the height from road to under chassis, with my transit van i have 45mm clearence on the inflated spare tyre width, so i can remove it while the Arrow is hooked up. Last thing you would want is needing to un hitch then jack up the a frame, as the naysayers pointed put when i first wanted to do it.
|
|
|
|
Post by 78466noM on May 30, 2017 15:54:08 GMT 10
sorry so steal your image atefooterz but I think your Idea would work in most cases tyre sitting up between chassis way off the road and if you did have to unhook with a flat it would only be unhook coupling lift van with jockey wheel pull out spare lower van back onto tow ball. I think a spare would come out from between my a-frame without disconnecting from the tow ball even with the falcon.Though I am thinking of a one tonner winch to lift it and for the rear a carrier like a territory. ditzygypsy.proboards.com/attachment/download/1487 think safe out of the way and not applying weight at rear of van that could cause sway problems. |
|
|
|
Post by atefooterz on May 30, 2017 20:44:03 GMT 10
I just know on a really rain swept night at 1:30am, when i was tired and got my first and hopefully last flat tyre, it was an easy swap over with my trolley jack under the arrow on the flat side.
No chocking or winch handle jockey wheel, temporary stands required.
Turned out the valve split so an easy fix later.
If i was building a big van and needed 2 spares i would incorporate the weight distribution to have rear mounted! The real issue is overkill with metal hanger structures that could support a small car off them.
If you are going from scratch then even going troppo using ally cladding, a suitable lightweight box frame could have the sheer strength to hang luggs to hold each tire, fitted individually internally and supported via a bottom rail & rear window rail.
The trade off is less storage weight in the rear area to compensate... not shuffling things forward to ballance it.
|
|
|
|
Post by brettm357 on Jun 4, 2017 22:31:31 GMT 10
Removed roof first sliding it off in one piece then lifted frame off Chassis - only broke couple of rivets 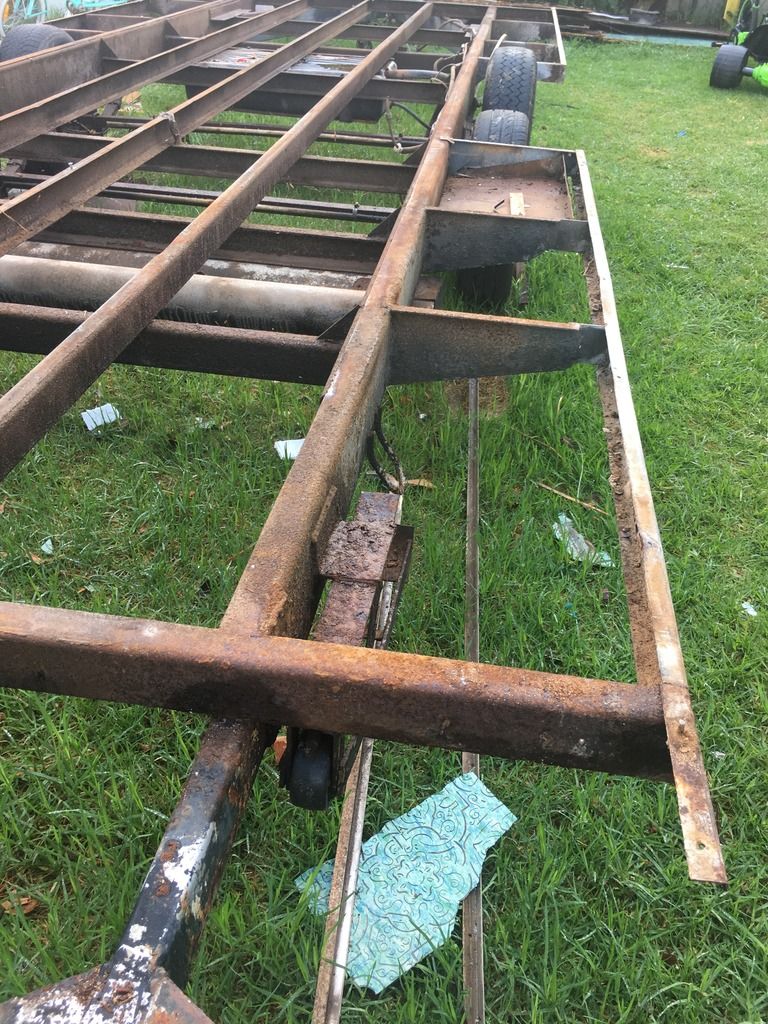 |
|
|
|
Post by 78466noM on Jun 5, 2017 10:54:27 GMT 10
Much easier to repair and paint the way you have done it pop rivets are easy to replace check as many as you can find and replace any suspect ones. Your new floor should be easy to replace you have the option of original frame on top or frame on chassis floor in between lap and glue boards together or as rattles suggested should be no problem just use a water proof glue. If you are going to have a shower inside you are in the perfect position to put a waterproof floor under and sealed away from wooden floor.
have fun
|
|
|
|
Post by tasmillard on Jun 9, 2017 7:42:24 GMT 10
Wowsers, impressive amount of work and progress. To me this is the best approach to a build if you have the time and space. Look forward to me pics.
|
|