|
|
Post by Husky on Apr 17, 2018 19:32:20 GMT 10
Thanks Mustang and 78466.
Just thinking if i replace the main rails only, i would still have to remount the torque suspension to the new bits. also the electronic brake hubs have seen better days the inside walls are like corrugated iron. my hip pocket is really feeling the pinch on this one. if everyone could keep their eyes open for a chassis close to the sizes might be easier to modify one a bit smaller than the rail idea.
|
|
|
|
Post by snoops on Apr 18, 2018 6:35:38 GMT 10
Buggar... Chances of finding a chassis woukd be slim IMO - rebuilding the main rails may be the only option, but it will eatinto your time. ☹️
|
|
|
|
Post by 78466noM on Apr 18, 2018 8:52:36 GMT 10
maybe look for second hand rocker springs and axles much easier to come by and and a pair of rhs 4mm thick look into it but I think from memory they are 200x75 ( snoops has that set up ask him if he could measure it for you ) I know it will be about 14hrs (If all goes right no problems ) work to get it perfect but you are right the chassis you have isn't safe.
|
|
|
|
Post by Husky on Apr 18, 2018 19:45:48 GMT 10
Current main chassis rails are really suss. They are 160mm x 40mm C channel with 5 MM plate welded over the open part of the C Section.
Called my Steel bloke today unfortunately he was out for the avo but full price I'm Looking at $154 GST inclusive per length and they come in 8 metre lengths
Looking at ordering the crate steel and the chassis rails at the same time to save on delivery. Spoke to another mate of mine who is an accredited chassis modifier and he suggested slicing the rails where they are joined fish plating the inside and plug welding it ( drill large holes on external pieces and weld through to fish plates) then plate over the join with 5 MM plates the same height as the C section.
To me this is just a patch over a patch and I hate patch jobs to begin with. Dad always said "if it's worth doing then do it right"
still hunting another chassis but I need to get moving on it asap
|
|
|
|
Post by 78466noM on Apr 19, 2018 8:44:33 GMT 10
You are right I have seen a few truck chassis in the eighties having the chassis extended in this way end up a crippled mess not a pretty site. You are right do it properly and keep up maintenance it should outlast you .
|
|
|
|
Post by Rattles on Apr 19, 2018 12:37:25 GMT 10
Husky - "To me this is just a patch over a patch and I hate patch jobs to begin with. Dad always said "if it's worth doing then do it right"
Yes He is Correct however if you go the fish plate route the fish plates should be cut at (90 deg welds weaken the metal) 45 deg and then only strip welded (Short welds with gaps between Welds) and plug welds as well, that is assuming the rails are sound.
Personally I would take your dads advice and when constructing the draw bar where the draw bar crosses the chassis rails angle the plates also.
Best of luck.
Rattles
|
|
|
|
Post by Husky on Apr 19, 2018 22:54:19 GMT 10
So after a good look at the chassis with Snoops this morning (thanks mate really appreciate your time and advice) and still no luck finding another chassis i ordered the steel to replace the main rails. With a bit of luck it will be delivered in the morning so i got stuck into tidying up the yard ready for major surgery to start in the morning. Stacked up all the bits of the Doug onto the finished chassis and moved it out of the way as it's currently on hold. Hubs and wheels back on the Viscount and lowered to the ground for the huge 10 meter drive forward so i can drop the body in front of the workshop then roll the chassis back. Plan was to get that done this avo but decided to do designs and drawings for the morning. I'm going to pull the front skin off and the new window out too so she'll be a totally naked van.
|
|
|
|
Post by Husky on Apr 20, 2018 18:21:15 GMT 10
Make yesterdays thought, todays reality. That is the motto for today and also came up with a name for the van. "Charlie" named after my dad who made building the scenic so much easier cause now this one has turned into a ground up rebuild just like the Scenic and I'm really missing my dad. Not as much done on the van today as I hoped. Found more nasties but at least the new chassis rails arrived. 71 KG each (8 metre length) and even sweet talked the delivery driver to help me carry them down near where the Chassis will be rebuilt. I've also added bare metal each and every weld, crack test, etch and add some new supports to the todo list. Some welds wont even need testing as the cracks are clearly visible. |
|
|
|
Post by snoops on Apr 20, 2018 22:40:23 GMT 10
Geez, talk about getting stuck in! 👍
Looks very different to what it did yesterday morning when I was there!
|
|
|
|
Post by Husky on Apr 20, 2018 22:59:58 GMT 10
Geez, talk about getting stuck in! 👍 Looks very different to what it did yesterday morning when I was there! No time to waste mate 7 weeks and it has to be usable. Goal is to be skinning the walls attached to the chassis by this time next week. got everything i need just no time |
|
|
|
Post by Husky on Apr 21, 2018 18:01:27 GMT 10
Heaps of Fun today and I have muscles hurting i never knew existed, but you get that after 6 hours hanging off a 9 inch angle grinder.  One Out 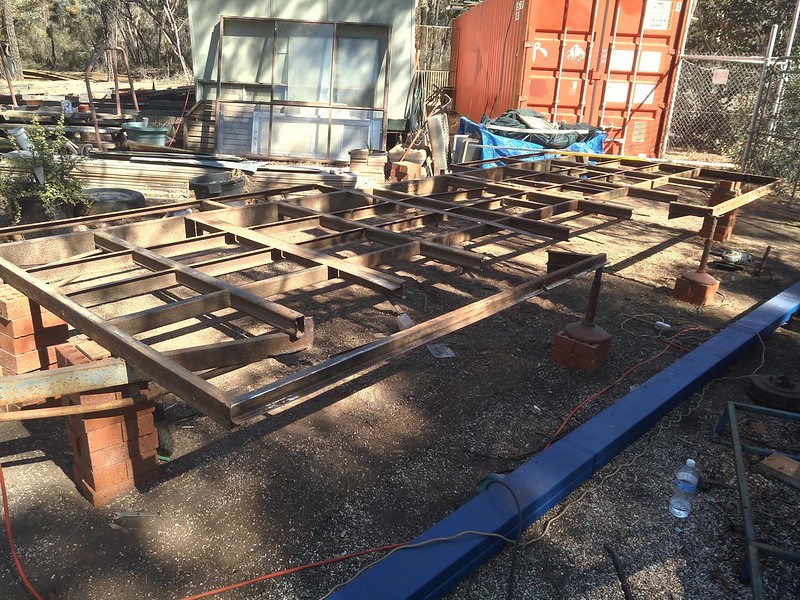 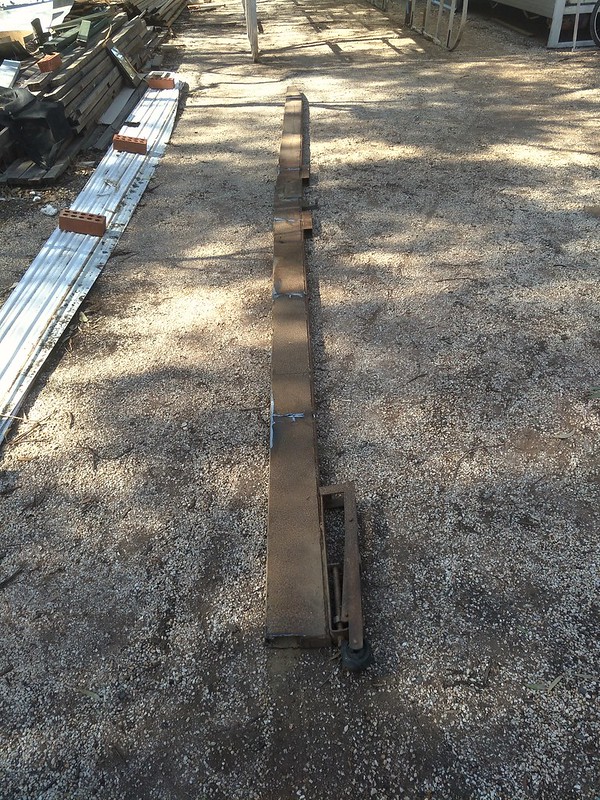 Ummmm Whopps some of those awesome welds have let go  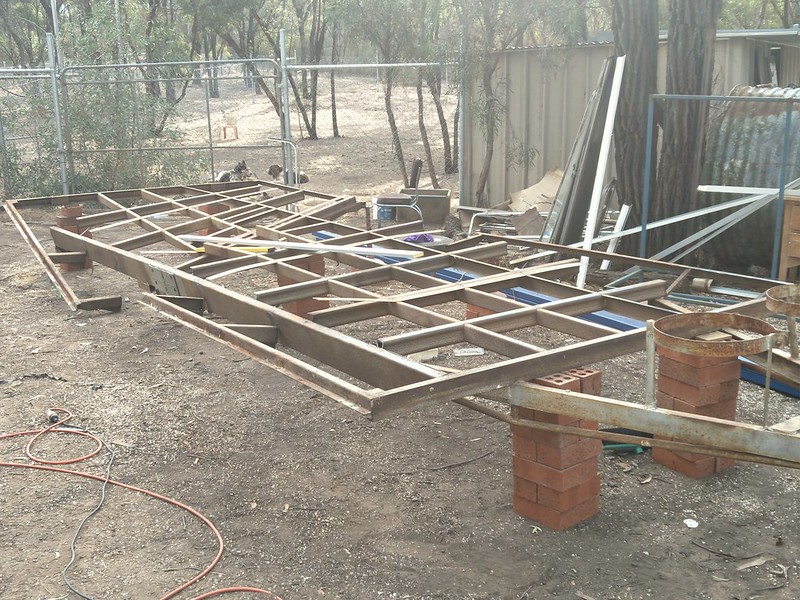 Two out 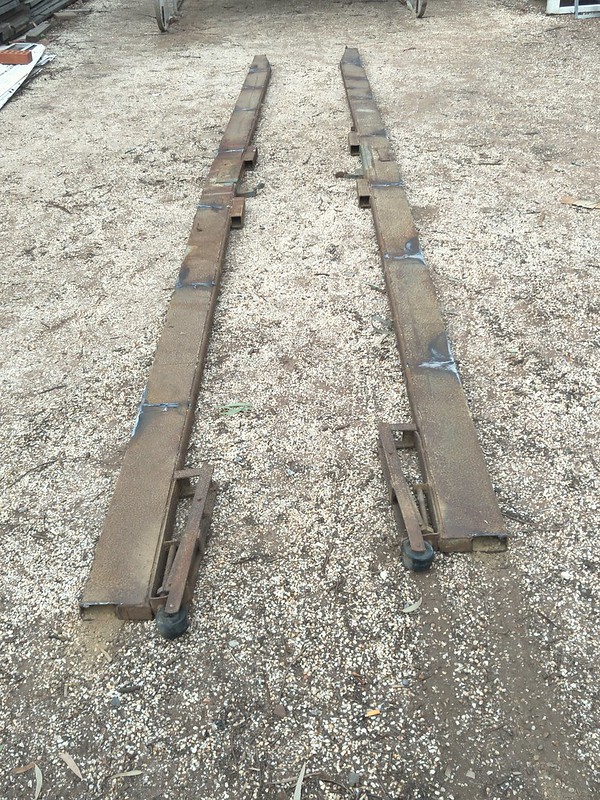 All good, ready to clean up and reassemble 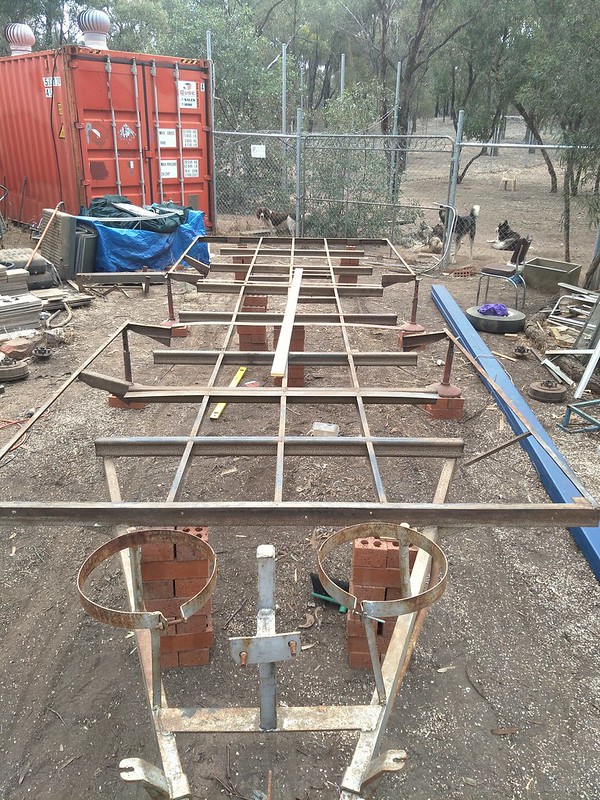 is it to early for bed??? |
|
|
|
Post by Husky on Apr 23, 2018 20:12:38 GMT 10
Days are starting to blur together..... shall we carry on? So i know i'm under a major time restraint but i just cant overlook things that are not safe and could be or should be damn well illegal especially for a van this size. i'm talking about the draw bars on this van. as i'm working away on the new rails i have snoops advice of "extending the draw bars out by half a meter will make a world of difference towing and reversing" hmmm then i'm looking at this 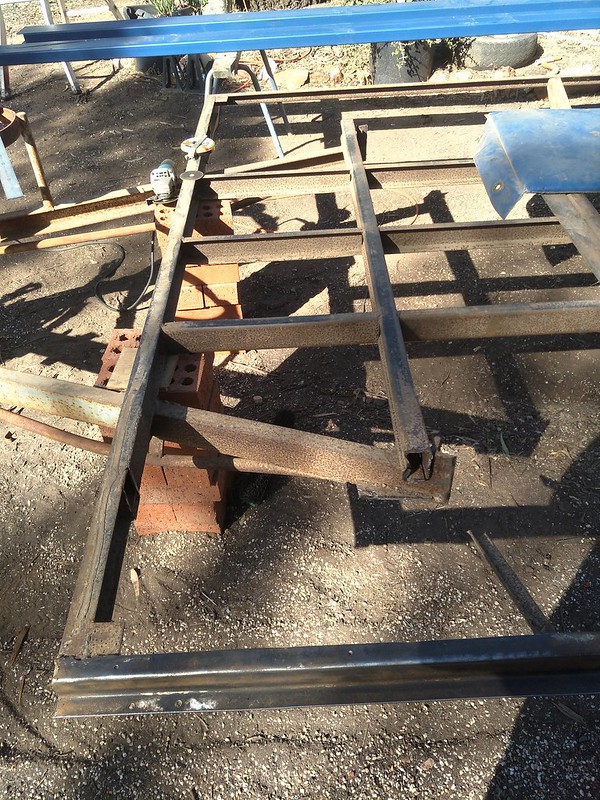 The current Draw Bars only extend just past the second latitude rail and stick out 1350mm from the chassis. Sure they were kind of welded to the old main rails via 2 welds and a piece of angle in the middle. So taking snoops advice in mind...... 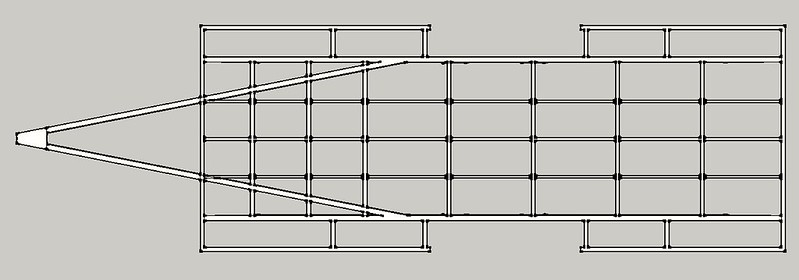 Each Draw Bar is 4 meters long and will now stick out 1850 from the chassis giving me heaps of room for a duel gas bottle set up hitch and maybe spare wheel as well as the towing benefits. 75 x 50 3mm w/s RHS arrives in the morning and yes from the picture you can also see the misses has been busy bare metaling so the chassis will also be etched and body deadened.  New Chassis rails are coming along nicely after a bit of electrical work in the morning i should have them all welded up ready to drop in to the chassis tomorrow avo. 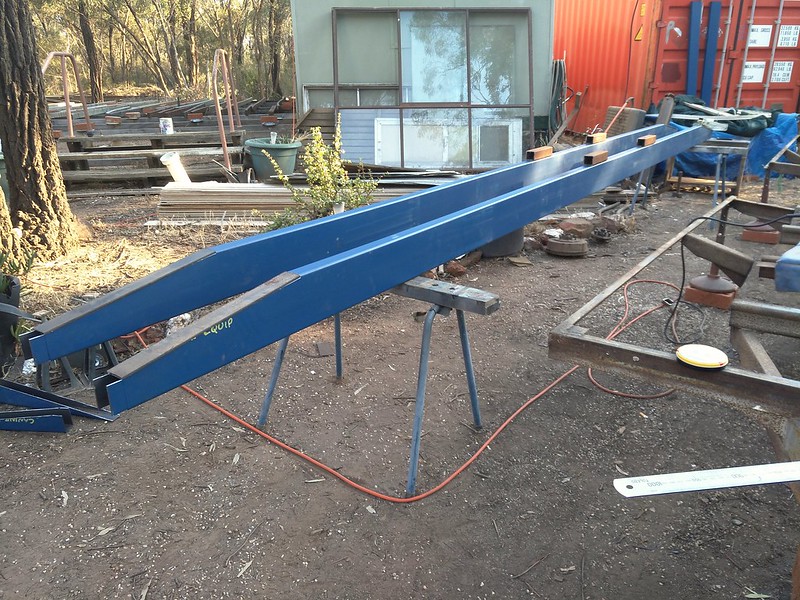 now i did some forward thinking and here is where i could really use some input from you guys. I picked up four brand new stabilizer legs.  Having a play with them and i think they will do the trick nicely however two things annoyed me about how the van was originally. The front of the main chassis rails are nicely tapered from the 150mm to the 75 mm ends but the back looked like this 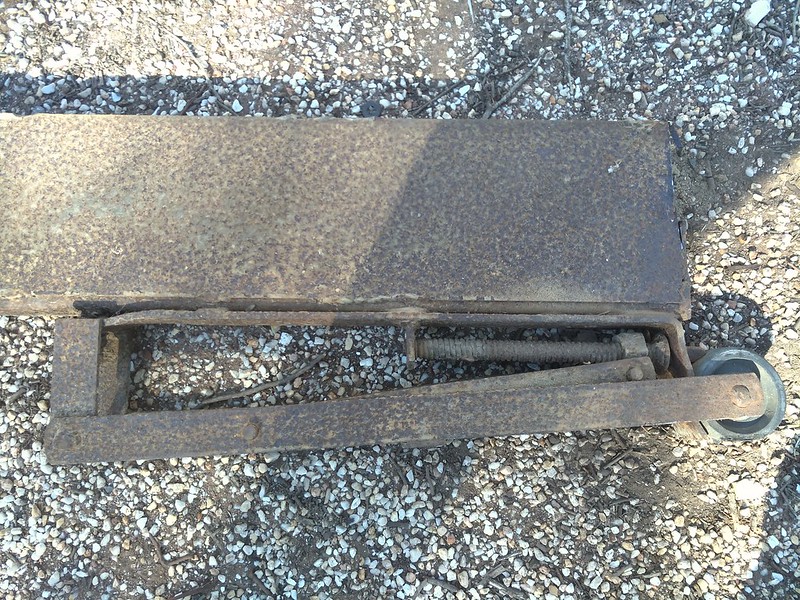 and the second thing was there were only two legs at the back which i've solved with adding two more. so i have tapered both ends of the new chassis rails the same and ill weld bits of 50 x 5 flat plate over it as in the picture above. now mounting the new legs can anyone see an issue with mounting them on the taper like below. the first pic is of the leg closed the second is opened about half way 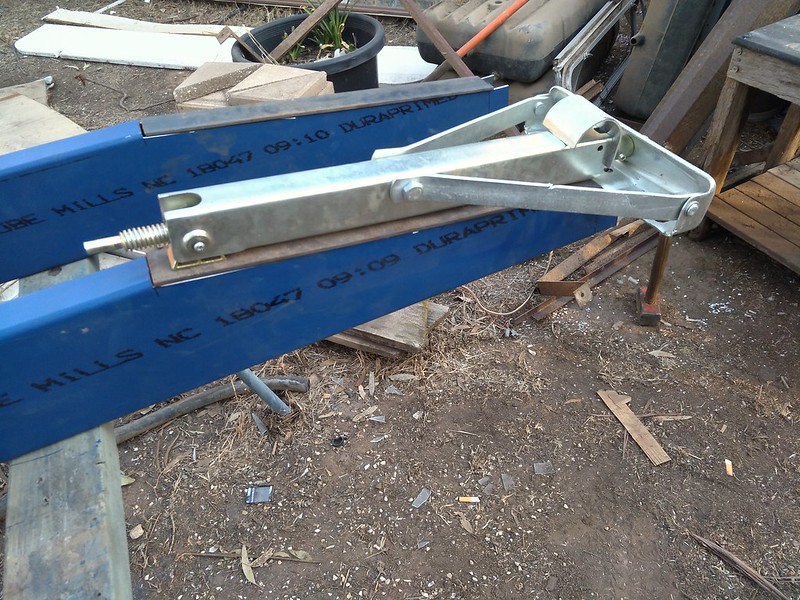 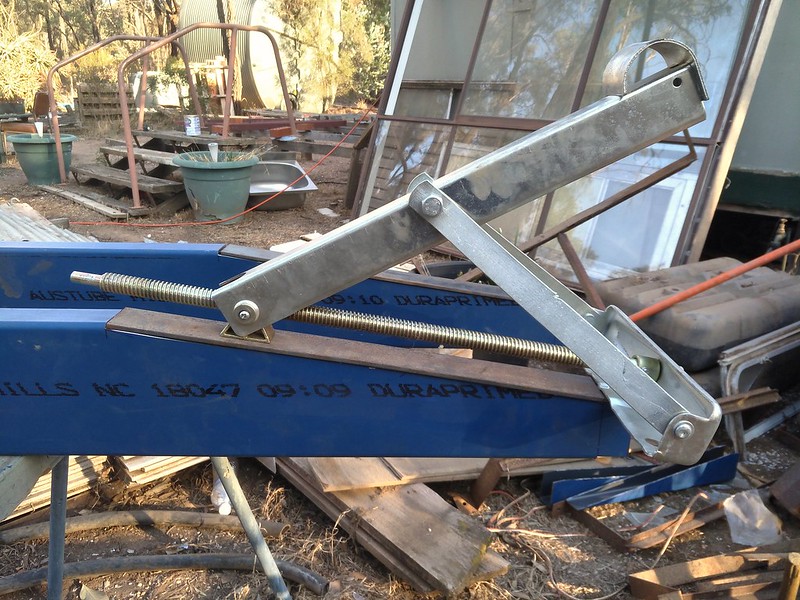 There is a bracket missing that holds the end of the acme screw thread under the van. i'll knock four up before finishing the underneath. night all |
|
|
|
Post by Rattles on Apr 24, 2018 9:18:20 GMT 10
One of my biggest bugbears (as I age Disgracefully) is accessing the jack winder nut due to the roll at the front and rear of the Caravan, if you mount yours on the angle it will make it a little more difficult still, particularly on up hill sites, Access would be improved if you faced the winders sideways access would be greatly improved, a reinforced outrigger would need to be constructed and the rear ones do not need to be at the rear extremely they can be mounted on the flat section of the Chassis thus reducing the chance of damage over lumps and hollows.
Just my thoughts, I think you are doing a great job. Keep posting the pictures.
Rattles
|
|
|
|
Post by 78466noM on Apr 24, 2018 13:58:34 GMT 10
I have the same legs on the rear of mine I just used 4mm angle 30x30 welded across the floor rail and outside frame rail drilled a hole slid pin in bolted it up they work well for the price.
|
|
|
|
Post by Husky on Apr 24, 2018 14:07:33 GMT 10
I hear what you're saying rattles and trust me it's why the young bloke gets the job of putting the legs down every race weekend.
I looked at mounting them side ways like you suggested however the problem I face is the main chassis rails are 150mm deep and the rest of the framework is only 75mm deep. There is not enough room from the side to mount them up without interfering with the main Chasis rails. I then looked at packing them down level with the bottom of the chassis rails and honestly it looked like crap, the same as packing down the end rails to mount them out the back.
|
|
|
|
Post by Husky on Apr 24, 2018 20:50:04 GMT 10
Unfortunately the sparky took longer than expected this morning but i will say he was very thorough and i now have a double 15 amp power point right next to where i'm working on the chassis. Its connected solely to a 30 amp safety switch and everything tested perfectly. Cant wait to fire up the welder in the morning, with no extension leads it should run like it has a rocket up its butt. Steel arrived for the dog crates and new draw bars. I got a call from my trailer bloke who finally found five mins to look at my axles. The news really didnt surprise me and no they are not cactus or bent as we first thought. It would seem some moron replaced or welded new e-brake mounting plates on and got them on an angle which threw the whole hub out of wack. He explained in the Torque Suspension Axle design the camber is set into the assembly before it is welded. Obviously the person who did these didnt know this and set them square to the axle not the stub axle. The same moron in question must have been blind too as he did not see the massive gap I noticed when I pulled the wheel off. (see above pic) Being so flat out himself he didnt want to do such an easy job and that i could do it. Said it may be next weekend before he can get to them. i said fine. he said it will cost (he normally does work on my stuff for free then makes it up on customer jobs), i said fine he said he didnt want the job i said NOT fine  he asked about the hubs and brakes which snoops has seen and though would be cheaper to fix them up i sweetened the deal and told him to fit up brand new complete ebrake hubs and lazy hubs, get it all running true so all i have to do it clean and paint then bolt them up. he caved and will do them  Another reason i agreed to the new hubs was the number of spacer washers i found either side of the bearings. there were three or four packing the bearings in one direction or the other. it was just all to suss so i think they can go in the scrap metal bin. |
|
|
|
Post by 78466noM on Apr 25, 2018 9:00:01 GMT 10
the bearings were probably spaced to miss the backing plates that couldn't be safe.I never have I seen that before and hope I never do any way you could have the axles sign written THE AXLES FROM HELL. But with all new and done properly you should have no problems I hope all goes as as planed or better for you from here on in.
With the leveling legs I keep them lubricated with silicon spray the only silicon on the whole van works a treat and doesn't collect and hold dust .
|
|
|
|
Post by Husky on Apr 25, 2018 20:12:24 GMT 10
the bearings were probably spaced to miss the backing plates that couldn't be safe.I never have I seen that before and hope I never do any way you could have the axles sign written THE AXLES FROM HELL. But with all new and done properly you should have no problems I hope all goes as as planed or better for you from here on in. With the leveling legs I keep them lubricated with silicon spray the only silicon on the whole van works a treat and doesn't collect and hold dust . Thanks noM i was wondering about lubricating the legs as most of our races are off the beaten track and grease is just a magnet for dirt and dust. as for sign writing the axles maybe if they were being wall mounted in the workshop but i really want this thing immaculate, or as the misses says lots of "wow factor" lol This morning i was itching to test the power and do some welding. so grabbing two bits of scrap off the main chassis rails i had some fun. really sorry people but i have not been able to weld like this in nearly three years. 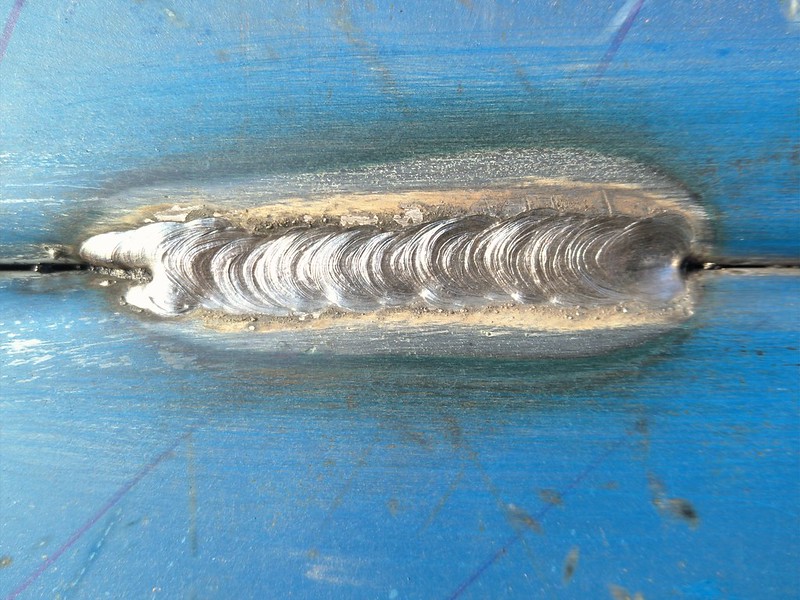 Happy Happy Joy Joy!!!!!   So anyhow now that's out of my system I discovered I am not really as bright as I thought I was. see a few days ago when i decided to make the new axle mounts i figured i needed 50mm x 50mm rhs, four bits 240mm long so about a meter would do nicely. called the steel guy to see if he had any off cuts but sadly i got a no so off i went to the scrap metal yard where i am very well known. unfortunately the only bit i could find was mostly rusted out. i can get away with it i thought and headed home with the steel. today i cut the bits to length, drilled the holes and hit it with the wire buff, the whole time thinking this steel is stuffed, no way should i be using it, today is Anzac day, steel guy is closed etc etc. well i pretty much got them to welding them to the main rail point when i was standing near my work bench and i noticed all the off cuts of 50 x 50 i got when i built the chassis for the dog trailer.  palm smack on forehead. So i made all four new ones with some minor modifications to the original design. Original Design
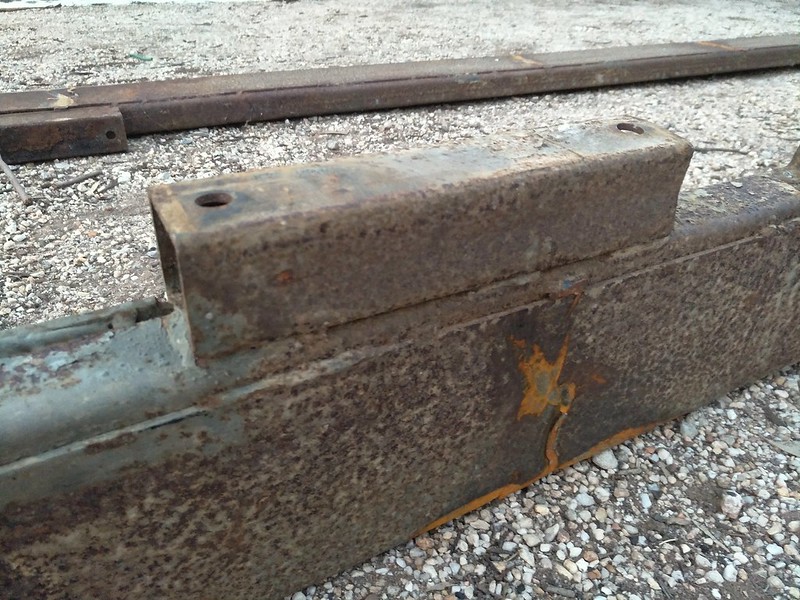 My Design 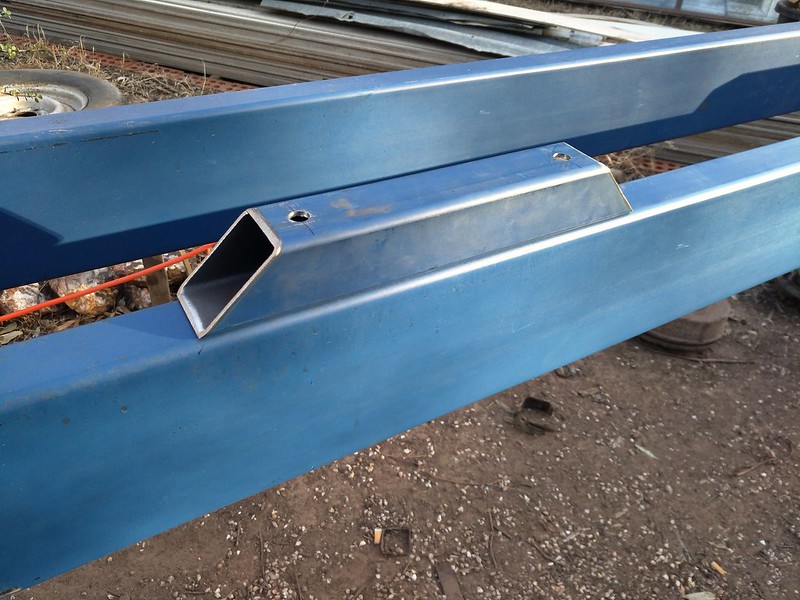 One clear advantage i have noticed that roller rocker suspension has over torque suspension, is where the suspension mounts meet the chassis and the distribution of weight and caravan length support of the van. Roller rockers have 8 points of contact spread out over roughly two meters of caravan length where Torque suspension has four points over less than a meter of van length. It means every time the van is parked i will have to lower all four legs to prevent the chassis bowing front to back. This is definitely something to keep in mind if anyone is thinking of buying a torque suspension van. It may not achieve much but it's why i added the 45 degree ends on the mounts.
|
|
|
|
Post by 78466noM on Apr 26, 2018 10:34:00 GMT 10
If you ever have to do this suspension again would two full lengths measured where holes go weld nuts inside rhs by rounding off hex putting in from above would hopefully help distribute the weight a little better the extra weight should be minimal. looking forward to more progress it is going to be well built hoping everything from here on goes better than expected.  |
|
|
|
Post by Rattles on Apr 26, 2018 12:50:55 GMT 10
" I was standing near my work bench and i noticed all the off cuts of 50 x 50 i got when i built the chassis for the dog trailer.  palm smack on forehead. So i made all four new ones with some minor modifications to the original design. " Gee and you are not 70 yet, could have been worse. The best way to clean rust from steel is to immerse in a strong solution of Citric Acid (used in the Wine/Brewing Industry to clean Pipes) for a week, comes out like new. Keep up the good work. Rattles |
|
|
|
Post by Husky on Apr 28, 2018 19:03:21 GMT 10
I always have been and more than likely always will be, my own harshest critic when building anything. When working on something i ask myself "is it good enough" as i'm sure we all do and i answer that question with a question, "Can i do better". If the answer to the second question is yes then the answer to the first is no it is not good enough and i pull it apart and start again. After my play with the welder on scrap i got stuck in and started welding up the chassis rails. Unfortunately for some reason only one out of five or so welds were what i would consider anywhere near good enough. i know after not welding for so long i'd be a little rusty but my skills had to be more corroded than rusty, full of inclusions, holes and lumpy, not to mention the welder kept over heating which then left me twiddling my thumbs for the next 10 minutes while waiting for it to cool down. I pushed on hoping i would figure it out as i went but by the end of the day i had just created a huge mess that was going to take hours to grind back and i was getting more and more pissed off and down on myself because of it. i spent four years getting my welding ticket and i'm qualified to weld pressure vessels. Snoops called in and sorry bud i know i wasn't in the best of moods. now i had a chassis in pieces and locked in my yard by the body sitting on the ground and no idea how i was going to get this done. I went home that night tired, frustrated, exhausted and ready to give up. Speaking to my misses she suggested i call another mate of mine who is also a welder fabricator to see if he had any ideas. "Yep don't structural weld using a hobby welder" hmmm right "oh and see you in the morning" So on the way to work yesterday after a good long sleep i called into his place. He pulls out a welder four times the size of the one i have but unfortunately it was 3 phase. Hang on he says and disappears into another shed bringing back another unit totally brand new, so new it still had the plastic cover things on the 15 amp plug. The lead connectors and leads were twice the size of my unit and he casually says "here give this a go we're heading over seas for the next 9 weeks so look after it for me" my eyes nearly fell out of my head i have such awesome mates. I had a bit more of a play on scrap steel and i was waiting for the common stick of the rod when its cold but this one just struck an arc formed a pool and then i almost blew a big hole in the 4mm rhs. holy crap was this powerful. backing the amps off i increased my welding speed and this new unit is unbelievable. 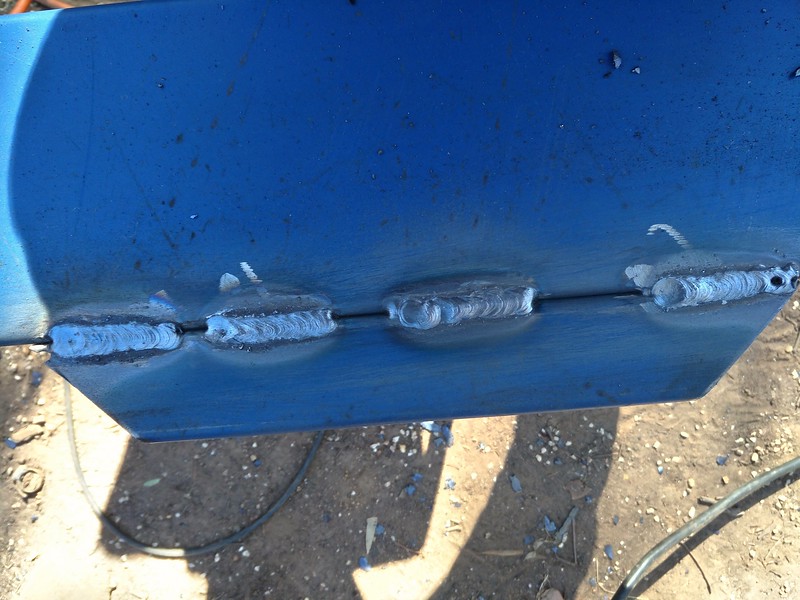 So all enthusiasm renewed i was into it. Crappy welds gone and respectable welds in their place. Turning my attention to whats left of the chassis i decided to cut the old draw bars off. i seriously do not envy you snoops when you get around to doing this from under your van. they are not held on by much but they are a nightmare to get out. 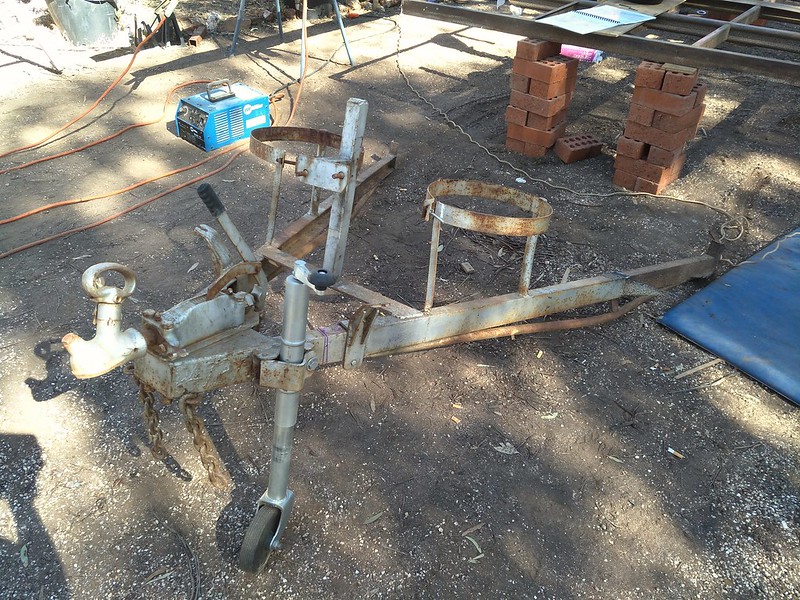 With all the banging and crashing getting them off the final weld holding whats left of the chassis broke so now the chassis is in two pieces which will make life easier when it comes to fitting the new chassis rails due to the ends fitting inside the C section ends. I flipped both halves of the chassis so its now upside down to finish cleaning up everything properly. I'm thinking of assembling the chassis upside down which will make welding everything including the new draw bars and bracing so much easier but i'm wondering if this is a good idea due to the flex of the van when its on its wheels and then once its welded together i'm gonna have to call some pretty strong blokes or get a crane to turn the thing over. i'm also throwing around the idea of bolting the new chassis rails to the axles before welding them in so i know i get the spacing 100% right. no point welding the chassis together then finding out the axles wont bolt up. What do you guys think?
|
|
|
|
Post by 78466noM on Apr 30, 2018 9:25:48 GMT 10
upside down would make your life so much easier though won't you miss the odd bit of slag landing on a soft spot all jokes aside if you leave off the axles and any thing that bolts on you will want about four people or a gantry or a small crane ( if you could find something tall you could run a thick rope each end throw over tall beam attach to car pull slowly until nearly vertical (PS make sure ropes are very long) push chassis past the center slowly move car towards chassis till it is is lowered to ground )I hope this is possible for you just keep all people away while you are doing this.
|
|
|
|
Post by Husky on May 14, 2018 20:31:18 GMT 10
Well after banging my head against a brick wall for nearly a week now it's time to get back to having fun on the viscount. Some good may come of the last week though, in that i may have a fully rebuilt and treated chassis with brand new hubs to go under the viscount. i should know for sure in the next few days. So with the body on the ground i thought what an amazing opportunity to get those four seasons hatches in. i have four of them now and thought about putting two over each hole from the original viscount hatches. Measuring it up though and seeing how much it would possible weaken the roof structure, i have decided against it and will stick with one per hole then re skin to the new frames. it was easier as expected and had everything sitting in place within a couple of hours. |
|
|
|
Post by snoops on May 14, 2018 20:40:27 GMT 10
I'd just use one of the tubes of PU I gave you, no taping over required - its actually designed to be used as a glue as well as a sealant - it will both hold and seal the joint, and it can be painted over with whatever you decide to paint the van with. Make sure you don't scimp on it - use plenty and wipe away the excess with a rag soaked in metho.
|
|
|
|
Post by tasmillard on May 21, 2018 9:43:36 GMT 10
This will be better than new, heck even newer vans!
|
|