|
|
Post by snoops on Mar 24, 2017 17:59:08 GMT 10
That's the cleverest and neatest rear wheel carrier I've ever seen on a van.  . Love it! |
|
Deleted
Deleted Member
Posts: 0
|
Post by Deleted on Mar 24, 2017 17:59:08 GMT 10
I agree that extra floor will make a big difference once you start with the inside.
Looks great, fine work!
|
|
|
|
Post by tasmillard on Mar 24, 2017 18:05:57 GMT 10
Looking good. So do you have pics of what it looks like currently?
|
|
|
|
Post by Husky on Mar 24, 2017 18:14:30 GMT 10
Thanks guys there was a bit of head scratching involved and yes Tas there is and work is still on going but patience my friend all will be reviled in due time   |
|
|
|
Post by Husky on Mar 25, 2017 22:11:58 GMT 10
Almost down to two months before the first event of the race season. 9 weeks and 2 days to be exact (i had a count down in my workshop). Now the van was solid, wired and framed i started the fitting out. I had mounting points in the framework where once the hole was transferred through the interior skin i could just bolt straight through and tighten things up. no screws, nails or glue here i am an engineer after all. As you can also probably guess by now there was no flat pack kitchen or store bought bed or even shop bought transport crates. yep custom custom and custom. i believe it's the only way to get what you want.  I picked up a second hand futon lounge frame perfect length, a bit wide and the hinges went the wrong way for my plan but very easy fixes. this was a test fit prior to building the frame and storage area underneath. 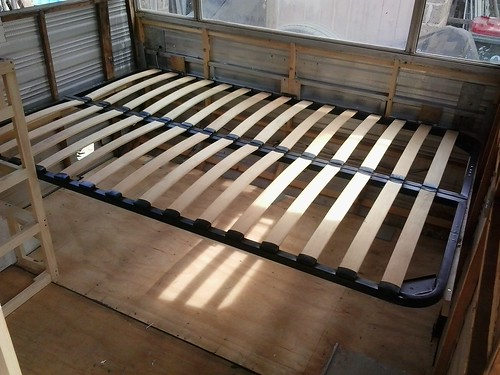
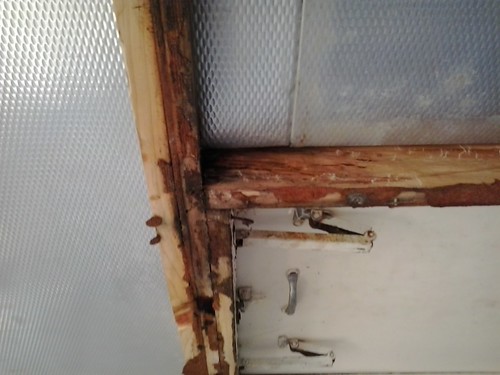 I spy WOOD ROT..... not in this van 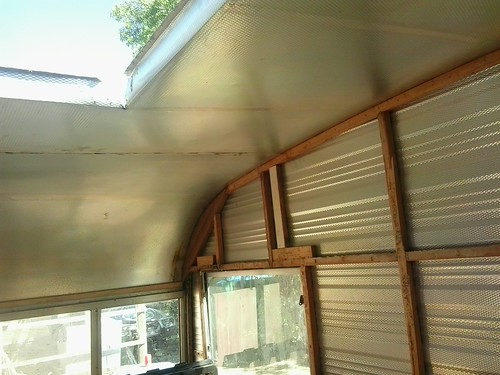
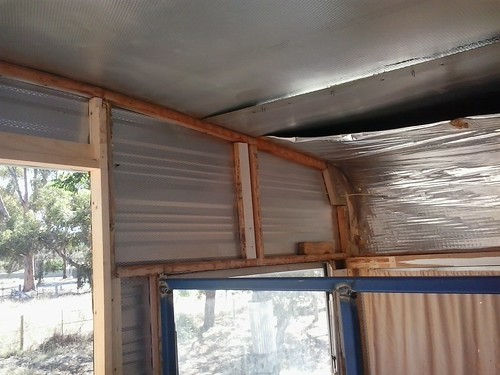 While waiting for the new roof timber to arrive i got stuck into another little job i wanted to do. Fix up the old water filler hole in the side of the van. i decided to make it a little bigger.... 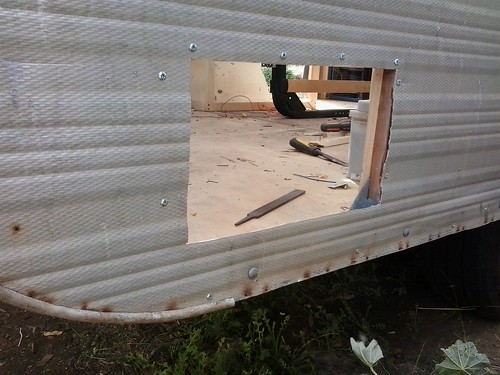
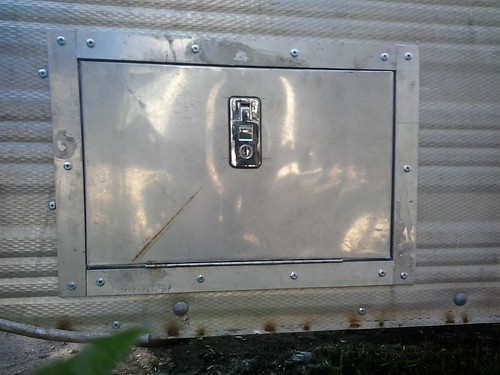 and turn it into a battery box door That done, time was wasting and i had some materials to get started insulating and lining  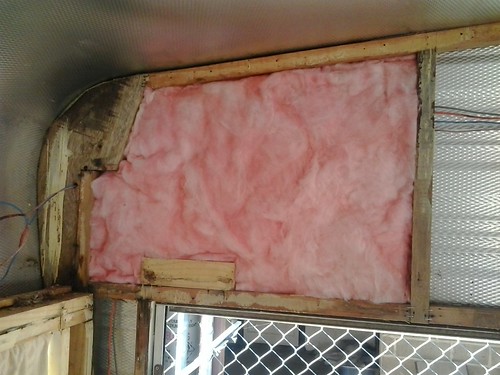 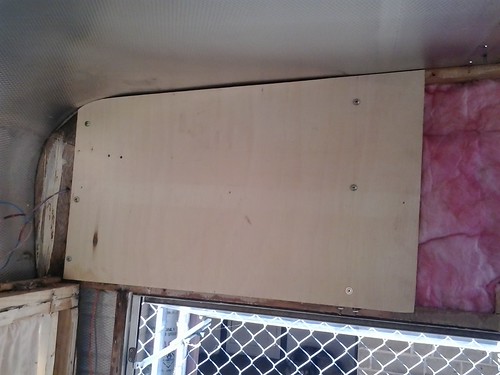 yawn, night all |
|
|
|
Post by Husky on Mar 26, 2017 22:23:40 GMT 10
I did mention dog transport crates so here is how i did them |
|
|
|
Post by liberate on Mar 27, 2017 12:48:00 GMT 10
An excellent thread Husky!
I have enjoyed seeing your very rapid progress! Some top notch work in there! Being an engineer has come in VERY handy!
|
|
|
|
Post by Husky on Mar 31, 2017 7:25:28 GMT 10
Sorry guys been flat out with business paperwork. all done now with 24 hours to spare. So where were we? oh yeah dog crates. i got the two frames bolted in and then the ply for the roof arrived so getting all excited i started insulating and getting the ply up. i made one monumental mistake though which came back to bite me in the backside later. Can anyone spot it?
Yeah kind of forgot to put the wiring and cables through the roof. Dog Frames out and Trying to hide the mistake  |
|
|
|
Post by 78466noM on Mar 31, 2017 9:30:08 GMT 10
Much worse mistakes have been made than that. I have a list but I look at it if you can cover it and not have to pull it down again it isn't a mistake just adds a little charisma.  |
|
|
|
Post by Husky on Apr 2, 2017 18:31:47 GMT 10
Ok guys and ladies if you watching too. i'm putting some feelers out there i need to find another Caravan (yes another caravan) for a mate in the dog racing scene. i've directed him to the for sale part of the forum but thought i might try my luck here as well. prefer but not mandatory, duel axle 22 ft stripped out fairly solid to get through this race season and then do more work on it in the off season. budget of around $1600
Any help would be great
|
|
|
|
Post by 78466noM on Apr 3, 2017 8:03:20 GMT 10
You could get lucky on gumtree or caravan and camping buy swap and sell on Facebook trading post etc . There are a few around at the size you want but all over the country. I have spotted a few good ones browsing about but as I have heard the interior relies on the internal walls and to a degree the furniture to help keep it in one piece for towing the most of the ones I have seen in that price range has been some ones project they have gone in with the wrecking bars ripped every thing apart stood back and gone this job is too big for me professional quotes are dearer than a brand new van same size so it ends up for sale or just sent for scrap.But there is the one every now if you are lucky you find a gem you will just have to be quick as they go real quick single axle 16fters are more prevalent but you still have to be extra quick ans maybe look at the aluminum framed vans rather than wood framed ones. For the price you may find it easier to find a usable 16fter you know what to look for as in good chassis and frame and if it hasn't been stripped brakes tyres a quick reseal should let it get though your race season. I am sure others with more knowledge will be on and give you some pointers maybe even know of a van waiting for a new owner able to be used short term then rebuilt.  |
|
|
|
Post by Mustang on Apr 3, 2017 16:43:47 GMT 10
Ok guys and ladies if you watching too. i'm putting some feelers out there i need to find another Caravan (yes another caravan) for a mate in the dog racing scene. i've directed him to the for sale part of the forum but thought i might try my luck here as well. prefer but not mandatory, duel axle 22 ft stripped out fairly solid to get through this race season and then do more work on it in the off season. budget of around $1600 Any help would be great Had a look at ebay today, most seem to be in Vic, best to run a search on ebay & gumtree & save it. I know of a mint 17' single, (not ours) its in lime green trim, also not $1600.00 |
|
|
|
Post by snoops on Apr 3, 2017 20:02:13 GMT 10
If you get around a bit in the countryside around where you live, there are heaps of old vans stuck down behind houses and properties - particularly on some back roads. I'd keep an eye out and start door knocking. There will be a lot for sale that aren't advertised. The next project I'm looking at came about that way - wasn't (and isn't) for sale but I would be allowed to buy it if I wanted to.
I'll keep an eye out in my travels.
I do know of a 22" Viscount for Sale in Northern Vic which is in good condition but they're asking $6K.
|
|
|
|
Post by Husky on Aug 29, 2017 21:06:41 GMT 10
Hi All,
Apologies for my long absence. Dad was sick as some of you may know and his health took a steep decline. My partner and I became his 24 hour carers. He eventually ended up in Hospice in Bendigo and even then the staff required extra help dealing with him and all agreed they would be quitting their jobs if i ended up in there.
Dad passed away May 24th at 11.40 am. He went out swearing just like i hoped he would. Since then My partner and i have been left to clean out his place all on our own because other family members found it to hard to be there or their lives were just to busy.
Race season is also over for another year and soon it will be time to get stuck into my next van. since i last posted i now have two 22 ft vans and a 12 berth dog float to build before next race season. also run a business make stock buy a property (one of dads final wishes) and move house. glutton for punishment or what.
I'm going to have to figure out this photo thing too cause i'm not paying for third party hosting so if anyone has any tips let me know. hopefully i'll have the next chapter of the Scenic up tonight before heading to bed if i can figure it out.
|
|
|
|
Post by Mustang on Aug 30, 2017 7:15:17 GMT 10
Our condolences for the loss of your Dad. Many of us have been down the same path with our parents, so we know your pain.
See the top of General for posting new images, there are also alternatives on the Vintage Van forum about posting images, I'm using Flickr.
Cheers
Brent
|
|
|
|
Post by tasmillard on Sept 15, 2017 9:43:08 GMT 10
Just read this, so sorry to hear about your old man. Take care and all the best with sorting things out.
Cheers,
|
|
|
|
Post by Husky on Oct 11, 2017 13:04:46 GMT 10
OK well now i have all the photo's updated and visible again.... on with the build thread. I decided to put a timber frame above the crate doors that will eventually have doors on them. this area is for business stock when going to races and markets. it came up ok still spewin i forgot to put the wiring in the roof.
So the furkids cant escape out the side or end windows i meshed them over. figured doing it now will then allow me to cover the crappy edges with the wall material.
Painted and dropper wires pulled through. went with LED Strip lighting through out.
Then a day i thought would never come...
Look out we are road legal  and only a matter of weeks till race season begins.
|
|
|
|
Post by Husky on Oct 14, 2017 10:59:51 GMT 10
now that the roof was finished i focused on the walls. Dad rocked up in his one tonne ute with a heap of plastic sheets on the back. 6mm thick easy to clean and will look mint he said. Extra 350 odd KG of weight i thought. hmmm ahh well i can always change it later.
Dog Crates being finished and installed
Dads Little Joke....
Marking out and final fitment of the bed. Time was growing very short now, a matter of Days so i forgot to take photos along the way but work continued long into the early hours of the morning a few times
|
|
|
|
Post by Husky on Oct 14, 2017 11:13:35 GMT 10
.... And before i knew it, it was time to load up and head out for the vans maiden voyage
Not long after it's maiden voyage, i suffered my first dog bite in 20 years of working with dogs. i was out of action for the rest of the season and by the next season my partner and her young bloke were keen to give dry land sledding a go. So taking into consideration her claustrophobia, i had to put a bed in for the young bloke. as i've said earlier the best part of building a van like this is you know where everything is structural so it was no problems. you can also see our bed folded up and the storage underneath
Problem is now though that little bloke is no longer so little and a fourteen foot caravan with 8 dogs two adults and a growing teenager who now brushes the roof as he rolls over is just not big enough. So a 22 ft van was sourced and here we go again....
|
|
|
|
Post by myarrow1 on Oct 24, 2017 16:21:43 GMT 10
Sensational !
|
|
|
|
Post by Husky on Mar 28, 2019 20:43:48 GMT 10
Well here is a thread i thought would never get updated again but never the less. Charlie the Viscount wont be ready in time for this years race season and over the next few months until the 27th June i need to get the Scenic ready for NSW. Some work is very necessary, some because it annoys the crap out of me and some just because i can.
The Scenic has served me faithfully now for four years. There are hundreds of rookie mistakes and my to do list in no particular order looks like this,
Get the stove working - the stove has not worked since i built the van. Many times ive tried to fix it, had other people look at it replaced regulators at least three times.
Reseal Back Window - That big beautiful window i modified nearly had the glass fall out of it on our way to South Australia in 2018.
Remove bubble sky dome - Natural light is awesome and saves battery power but also leaks like a sieve due to only being held in by good ole silly-cant. 110 up the freeway soon shakes it loose. Looking at redesigning to make it flat and water tight
Repair or replace front windows - tired of the pirate look of my van due to throwing up a stone and smashing one in 2016 race season.
Build & Install range hood and o/head cupboards - tired of no storage
Build draws - yep four years on and still no Draws in those frames
Reseal J moldings - cause i never did it the first time and now seeing water damage inside
Replace spare wheel - the one that is on there is bald, perished and the rim doesn't even fit the axle. its only on there so the cops would stop giving me tickets 2017 / 2018
Add Splash backs move power point and light switch Put a power point that close to the bench top i can only plug in horizontal plugs.
and the list will be added too i'm sure.
The work begins....
Its true you know, the stove i built into the kitchen unit has never worked. We used all brand new copper tubing, brand new double regulator, stove has been pulled apart cleaned and resealed. I've had professionals look at it, had the entire system out three or four times laying on the ground where i have gone over every inch looking for damage to the tubing or kinks. Checked the insulation over so there is no gas freezing. Replaced the brand new regulator twice, checked and double checked the stove ran on LPG and not a high pressure and nothing has worked. We put up with one of those pressure pack single camp burner things that takes half an hour to 45 minutes to boil the kettle due to the canisters freezing up. Well after four years i was done. Entire system out yet again and wasn't going back in until it worked.
I pulled the regulator off the BBQ that i knew worked and attached that to a gas tap. the other side of the gas tap i hooked up to the stove and nothing no gas at the stove. Disconnecting the stove i made sure there was gas coming out of the tap and yep loads of it made a nice whooshing sound when i cracked it open. Opening the stove again, i pulled out the copper tubing that fed the accumulator in the stove. Blowing into the accumulator it was sealed, cracked the burner tap and could hear air escaping. No blockage there. i picked up the piece of copper tubing I'd just pulled out and checked it over. No damage, no kinks so for no reason at all i decided to blow down it and guess what? BLOCKED no air getting through. Got the compressor out and jammed 120 PSI down it and still nothing. Put in a new bit of copper tubing and guess what? Stove fired right up. Mission accomplished after four bloody years  Re installed everything and lit it four or five times more just to make sure i didnt imagine it and it fired every time. Happy Days
While i had the kitchen unit apart i decided to fix a few other minor things that annoyed me. When i built the unit i made it deep enough for the original fridge to fit. this was 20mm deeper than the sink was. Rookie mistake number 1 was i fit the sink with the 20mm gap to the back which made a nice little channel that filled with water every time the dishes were done. Some basic re jigging and now the sink sits against the back wall. oh and i fixed the leaking drainage pip that was about 5mm to big and squished down with a hose clamp but has never sealed properly.

The bench top around the stove was a last minute 12mm ply top with about 30 odd screws holding it down. Over the last few years the unsealed bench top has become embedded with grease and fat from cooking so i removed it and put down fresh ply to then laminate. i remember back to watching dad laminate bench tops in kitchens we had renovated and he made it look so easy and something i thought id have no dramas doing. Simply score and snap.... hmmm right. Cutting the laminate to size was no problem, then i had a gut feeling to glue it down before cutting out the hole for the stove.... nahhh why listen to a gut feeling so i attempted to cut out the hole for the stove first. Instead of one U shaped piece of laminate i ended up with three straight pieces with jagged edges. Cursing myself for not listening to myself i then tried to glue the three pieces down while attempting to hide where it snapped. i wasn't happy but it looked almost bareable and figured in an hour or so and i could clean it up and reinstall the stove. Pottering around for an hour i then went back to it and the laminate lifted straight up like i had just put it down. Looked at the destructions on the tin and what do you know, 72hours to fully cure. WTF  So feeling like setting the van on fire and race season be damned i went back to the misses place to cool off.
On the way home i called into a salvage demolitions place and picked up an old kitchen bench top with a nice bull-nose edge on it. this time i was taking no chances i remembered every lesson dad ever taught me and followed it to the letter. Masking tape on laminate, mark out and cut with Panel saw. and what do you know? it worked
So much stuffing around for such a little bench. oh i also took the opportunity to fix another little Irk and that was to centralize the stove in the bench. it was only out 10mm but now is 100% central.
Pretty
|
|
|
|
Post by Husky on Mar 29, 2019 15:32:42 GMT 10
ok next mission... Back window As i said earlier half way to S.A we stopped for a smoko and it was a bit windy. i could hear glass chattering away like it was loose in the frame. Walking around the back of the van the main piece of glass in the back window was leaning into the van so the top and both sides of the pain of glass had slipped the frame and was flapping in the breeze. I had been wondering why i felt a strong draft every night when i lay in bed but i just cuddled up to the misses and forgot about it. As an emergency fix i found the glass seals that had fallen down the side of the bed and jammed them back in as best i could at the time with a mental note, that was quickly forgotten, to fix it properly. How the glass didnt shatter i'll never know and the amount of dust that had been let in and trapped between the window and the blinds was enough to start a couple of weeds growing. Truth be told when i first modified it i did bare minimum then just put it back together without resealing any glass or replacing rubber seals. one of the smaller windows i had even used 10 or so pieces of seal around the window obviously off cuts. now to fix it properly. I dug out as much of the old rubber seal as i could and removed the two vertical aluminum uprights of which i had only put the bottom screws in and not bothered about the top ones. This allowed the verticals to move side to side at the top about 10mm. I maneuvered all three pieces of glass out. They are a little chipped around the edges due to the chattering and i am tempted to replace all three with the same stuff i'm using in the Viscount but I'm trying not to touch the Viscount budget so i will try to reuse the glass.
After spending some time cleaning up the frame and the glass i wiped it all over with metho. New seals and packing blocks costing a total of $10 and it was all pretty straight forward putting it back together.
I also went through my spare wheel collection and came up with a nice looking spare for the van that matches whats on it.
I really want to look at the roof hatch next which brings me to a question. i have the original hatch of the van that is still in pretty good nick. if i cut the center out leaving maybe 100mm around the edges, would i get away with sticking a flat piece of perspex over the hole the full size of the hatch and just gluing it down with sausage gun glue? just a bit worried about drilling and pop riveting it down as i don't want any leaks. any suggestions greatly appreciated
|
|