|
|
Post by doublechevron on Jan 9, 2017 12:59:06 GMT 10
Hi Guys,
Our caravan has about 10 under seat storage boxes. ( one under each set of bunks at the back), a huge "L" shaped lounge with 6 cushions and about 6 lift out panels and the main fold up bed has a huge box under it).
To get to the storage area under the couch, you need to strip the cushions from the seats and lift out all of the fragile chipboard panels. With the bunks, you need to remove the bottom bunks mattress and lift out the two chipboard lift out sections. With the main bed, you have to fold the bed down, unmake the bed, remove the mattress and lift the two lift out sections out from the base.
Ideal would be 1/2 dozen "doors" that allow access to these areas. I'm thinking... cut the holes, frame the holes with some lightweight pine.... Then using some framing with a recessed inside edge place the original cut out section into the timber frame as a matching door ??
Does anyone else have any ideas. She's a lovely tidy original 'van inside, so I don't won't to damage any of the furniture, I'd like to keep the added doors "matching" the ugly 1980's look.
seeya,
Shane L.
|
|
|
|
Post by Rattles on Jan 9, 2017 13:16:05 GMT 10
Shane:- It appears to be quite a do able plan, I would Make a template for the cut out, try it for size, both inside and outside where each cutout is to be made and make them all the same size, that way you can mass produce the frames before cutting, the hardest thing will be matching the Catches and maybe the Hinges, I would consider replacing the chipboard access panels for Ply, that way you may even with the extra framing actually reduce weight.
Rattles
|
|
|
|
Post by doublechevron on Jan 9, 2017 13:31:55 GMT 10
I'm still trying to sort out an easy way to do it in my head  .... That's not expensive! 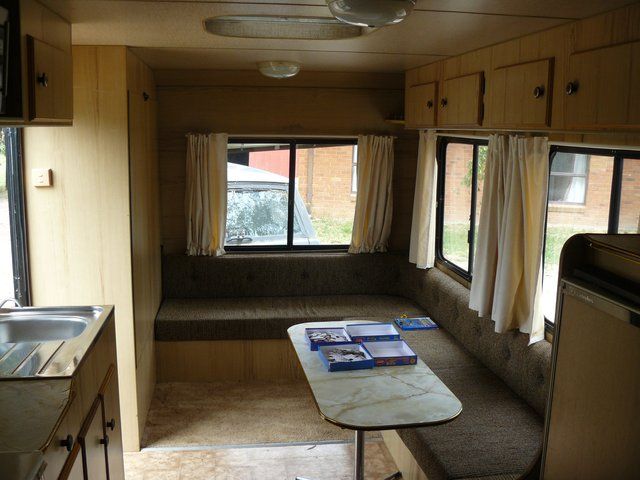 I'm thinking 2 doors down the long couch. None in the front couch (I could keep the annex and all it's bits 'n' pieces in here). I'm starting to think and outside access door for the big cupboards that is the foldout bed. You see that will allow me to slide the annex poles down the length of the front couch. 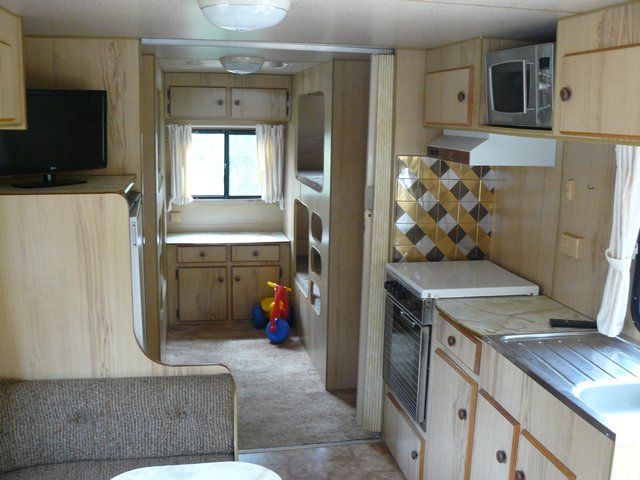 We need possibly one big access door ( or 2 small ) for each bunk. seeya, Shane L. |
|
|
|
Post by Rattles on Jan 9, 2017 14:40:29 GMT 10
Shane:- just be careful about hidden wires (240v and 12v) that may be lurking in the cavity when installing the external hatch, mifght be best to carefully cut a hole from the inside, then if wires are in the way (240v) and you need to goto plan "B" then it is only a matter of an unseen patch to cover the hole.
Post a closeup of the door handles and hinges as a member may have some, I may even have a couple of knobs that may be a close match.
Rattles
|
|
|
|
Post by doublechevron on Jan 9, 2017 14:50:52 GMT 10
That is an excellent point... I hadn't even thought of external wiring. Any uprights I'd leave there. I just want access, I don't mind if the uprights are in the way! There will be wiring there as there is reading lights and powerpoints in the "bed cupboard". I'll get a close up of the hinges  seeya Shane L. |
|
Deleted
Deleted Member
Posts: 0
|
Post by Deleted on Jan 9, 2017 15:04:40 GMT 10
Shane in our motorhome as in our previous caravan we turned the underneath storage into drawer's using the existing face timber which was carefully removed and used to face the newly made drawers In both cases we had a cabinet maker do the job but it would be do able by a home handy man . The removal of the face sheets needs to be done with care but the rest is merely a matter of making the frame , slides and drawers fixing in place then re attach the facing all looks original and very usable for storage
|
|
|
|
Post by doublechevron on Jan 9, 2017 15:26:45 GMT 10
Shane in our motorhome as in our previous caravan we turned the underneath storage into drawer's using the existing face timber which was carefully removed and used to face the newly made drawers In both cases we had a cabinet maker do the job but it would be do able by a home handy man . The removal of the face sheets needs to be done with care but the rest is merely a matter of making the frame , slides and drawers fixing in place then re attach the facing all looks original and very usable for storage These caravans made in the 1980's ... are stapled together plywood crap ............. That somehow amazingly has lasted if it doesn't get physically damaged or wet (they all leaked). You wouldn't be able to remove the ply as you'd break it around all the staples. If (bloody big "if") you can cut a clean hole into the plywood with a jigsaw, I'm sure it could be framed, and your "cutout" section used in the door so it matches  .... maybe  I'm not very good at this sort of stuff! I've just been searching the bunnings website for something like skirting boards with a recessed back edge. The idea being you make a "frame" then staple the removed section into the middle of it from behind. You see you would need to recess your cuttout piece of ply to the back (no the front like the existing doors) as it is highly likely the "edge" will be rough, ugly, splintered and nowhere near pretty enough to have visible. By the way, has anyone tried that cheap $400 bunnings split system... I probably should throw one of them into the 'van while I'm at it. seeya, Shane L. |
|
|
|
Post by pisces51 on Jan 10, 2017 23:11:09 GMT 10
G'day Shane, the way you are describing the doors in your last post is exactly how they were made in a 1992 Windsor van I owned. If you have a mate with a router you can cut a rebate into some suitable timber strips and then cut the strips to make the door surround frame (mitre joints in each corner). If that's seems like "too much work", you have another option of buying picture framing timber which already has the rebate cut into the back of it. You still have to cut the mitre joints for the corners though. See these picture frame timber profiles from Bunnings to get an idea of what's available... www.bunnings.com.au/our-range/building-hardware/timber/mouldings/hardwoodFrom memory, the doors in the Windsor had timber surrounds similar in shape to this "single bevel architrave" profile... www.bunnings.com.au/tasmanian-oak-single-bevel-architrave-42-x-12mm-x-3-0m-select-grade_p0070549The 3 or 4mm deep rebate was cut on the backside of the bevelled edge, and the ply stapled into the rebate. The timber surround was then finished with a lacquer of some sort (estapol? polyurethane?) that gave the surround a darker appearance to the paper-faced ply insert. cheers, Al. |
|
|
|
Post by doublechevron on Jan 11, 2017 9:17:26 GMT 10
That is genius!! Picture framing ... I would never have thought of that! Thanks, I'll pull a door off one of the cupboards and take upto bunnings and pick one that matches the best.
seeya,
Shane L.
|
|
|
|
Post by Rattles on Jan 11, 2017 11:20:37 GMT 10
Shane:- A mate of mine from Parkes NSW is using one of the $unnings $399 in a Room built inside a Tin Shed which measures 3M x 4M and he is so pleased with it he is getting another 2 for the Bedrooms in his house, He has been using it for 12 Months, Just remember they are Not Inverter, but the do have Dry Mode, however they are distributed by Tempo the same distributer as Aldi Sterling and Bunnings Akai, and when the Akai User Manual was downloaded it was identical in content as the Nexair from $unnings.
Rattles
|
|
|
|
Post by doublechevron on Jan 24, 2017 9:21:54 GMT 10
|
|
|
|
Post by tasmillard on Jan 24, 2017 10:27:42 GMT 10
Shane - love the large roomy layout of your van, just sayin'  An idea, when I build the bed, I will make it so that the top can be lifted using gas struts, much the same way modern vans are except mine will lift from the side as opposed to the front. Perhaps you can modify your bed to do same? |
|
|
|
Post by doublechevron on Jan 24, 2017 10:43:12 GMT 10
Oh, this should give a better idea of how the bed works 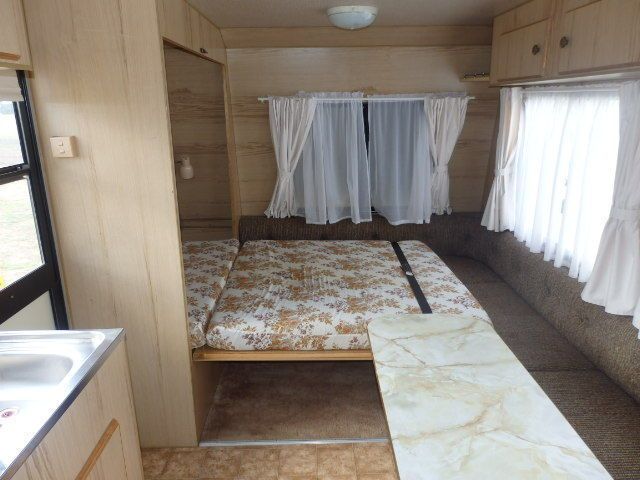 So to access the "big box" under the head of the bed, you need to fold the bend down, remove the mattress and lift the base out. If I fit an external door we will have direct access to this storage area. Same deal with the rear bunk. The other bunk unit I'll fit an internal door too. I'll post some piccies of the internal access doors I've made when I get a chance. The problem is to use the internal access doors you need to crawl around on your knees.... I'm hoping hte kids dont' break them! As there at "kids swinging/leaning on them" height. seeya, Shane L. |
|
|
|
Post by tasmillard on Jan 24, 2017 11:07:17 GMT 10
Very clever, sorry I see your point now. Not many options, but just thinking out loud I would most likely look at having the bed head bottom section swing out under the bed (imagine you have a cupboard door there) to then get access to the items. Naturally you wouldnt have a wall on this side, so using a set of server sliders to bring it out would be best (not sure if this makes sense to you). This way you can access items with the bed assembled or not.
|
|
|
|
Post by doublechevron on Jan 24, 2017 14:30:03 GMT 10
Very clever, sorry I see your point now. Not many options, but just thinking out loud I would most likely look at having the bed head bottom section swing out under the bed (imagine you have a cupboard door there) to then get access to the items. Naturally you wouldnt have a wall on this side, so using a set of server sliders to bring it out would be best (not sure if this makes sense to you). This way you can access items with the bed assembled or not. Yes ... This is what I am in the process of trying to do. Fit a big internal door in teh "bed cupboard". Inside the door I'm going to mount the split system evap unit. The idea is it'll blow out of the storage box, and the big door will guide the air down the lenght of the 'van if left open at an angle. This will save me running piping up the wall of the caravan (which was problematic to do, as if the evap unit was mounted on the front wall of the caravan .... it would end up in the arc the bed swings through as it lowers... So you make the bed unusable). The outside doors were remarkably cheap given they come with locks. I'm just hoping they don't look out of place in the old 'van. seeya, Shane L. |
|
|
|
Post by doublechevron on Jan 27, 2017 22:55:34 GMT 10
well i bravely hacked holes into the caravan with a stanley knife. 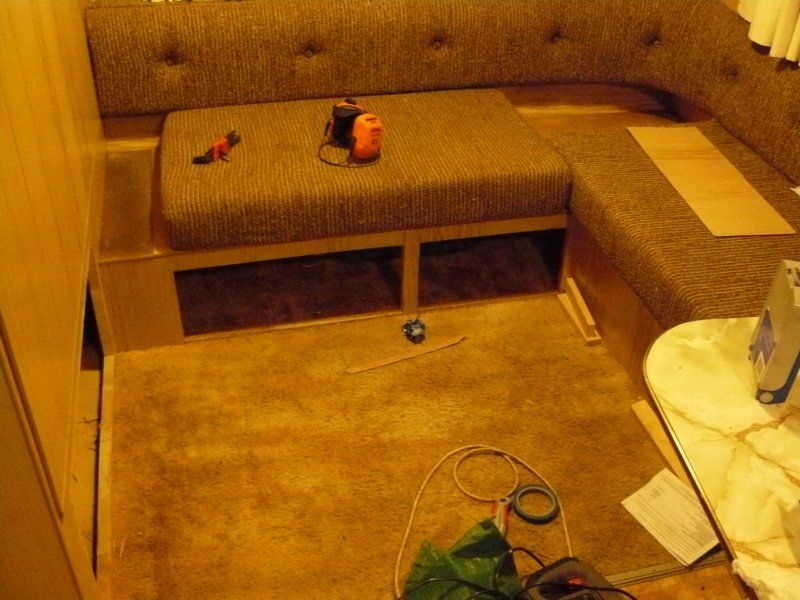 I traced around the existing frame with the knife so I didn't need to frame it. 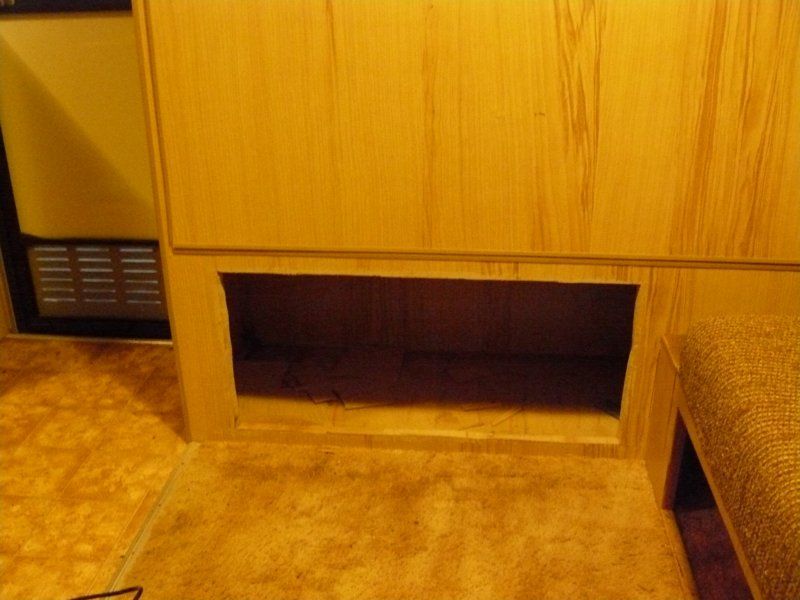 under the bed had chipboard re-enforcing, so I had to use the jigsaw ... So I'll need to put a couple of uprights in the opening to make sure it's strong enough (i'm sure it'll be fine, but why not be careful). 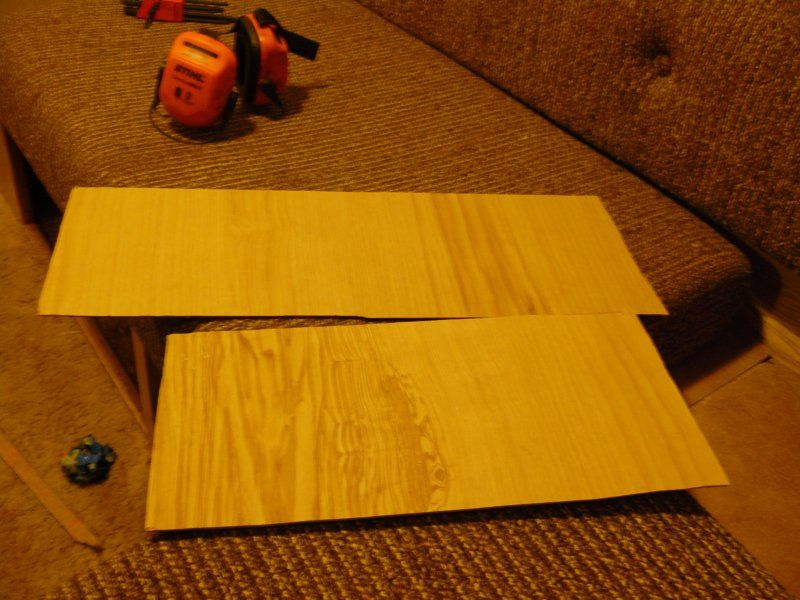 The panels just look roughly hacked out bits of ply ............ because they are! 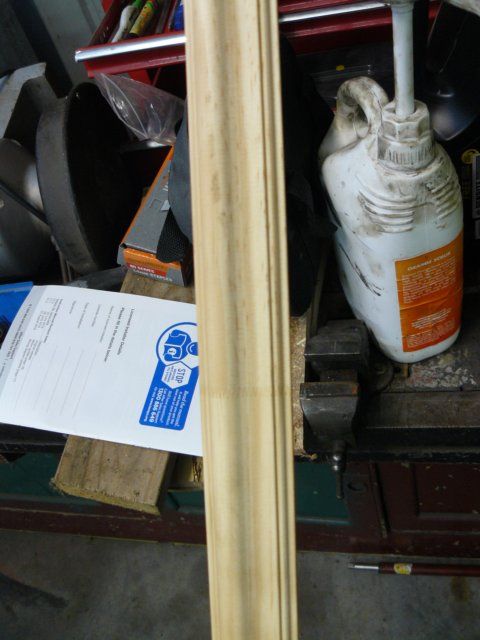 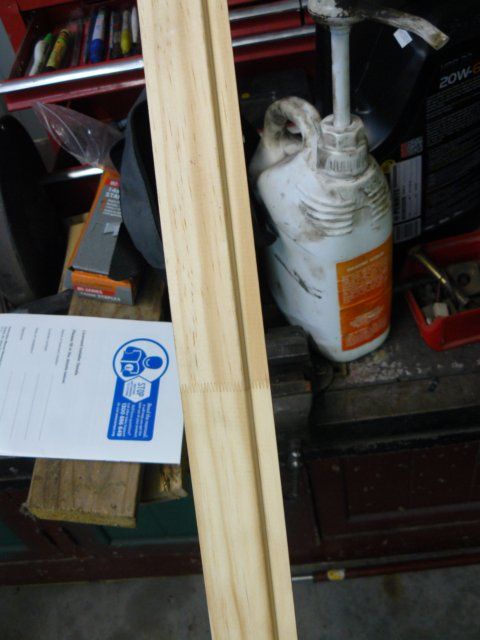 I found this timber at bunnings.... as you can see it's already rebated at the back. It's about $9.00 for 3meters. Typical bunnings nuts. You'll need 10 lengths on the shelf to find one even remotely straight. IT's also all crappy 10cm lengths glued together to form a long length. It should look ok though. 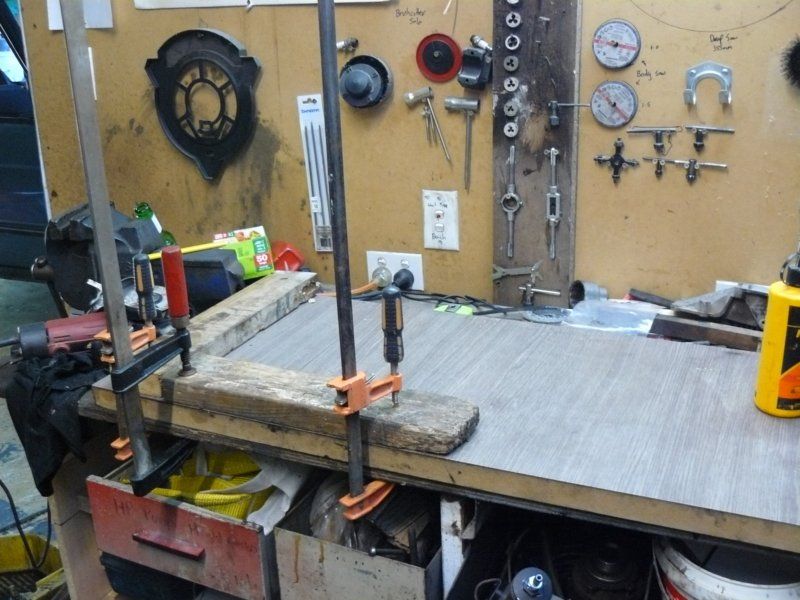 My brother saw what I was trying to do, and told me I need to make a 90 degree angle to sit the edge bits in to assemble. He also lent me his nice slide saw and staple gun. 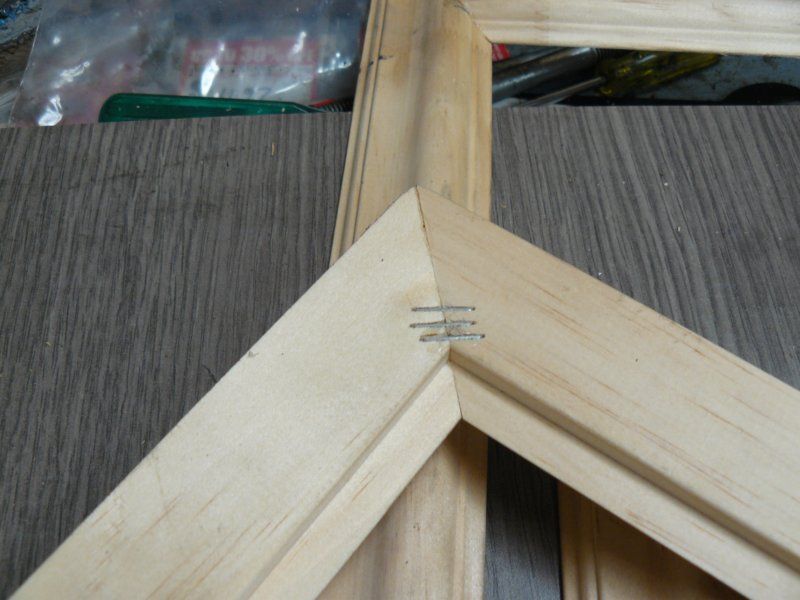 I just used his stapler to throw some staples through the thickest part after gluing it with wood glue. However I found the tension of the staples pulled the joints apart slightly. 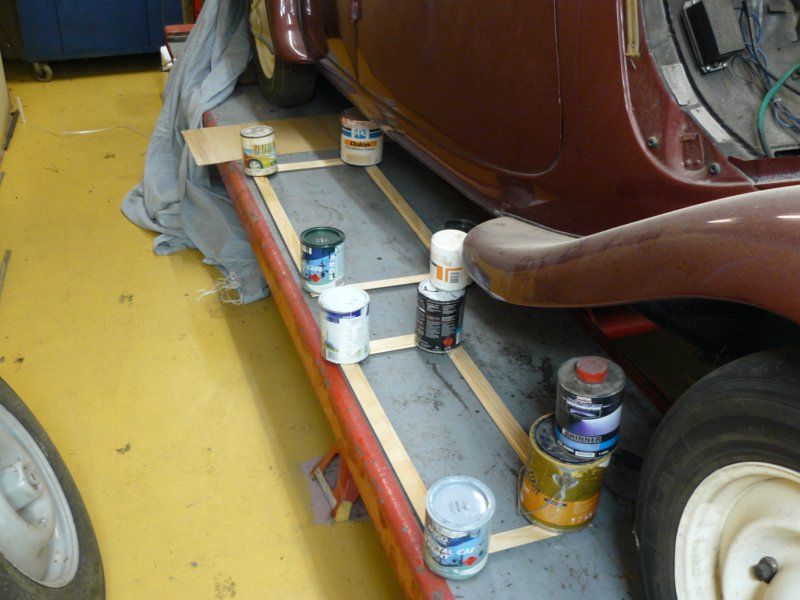 So I weighted it down and gave it overnight to dry. 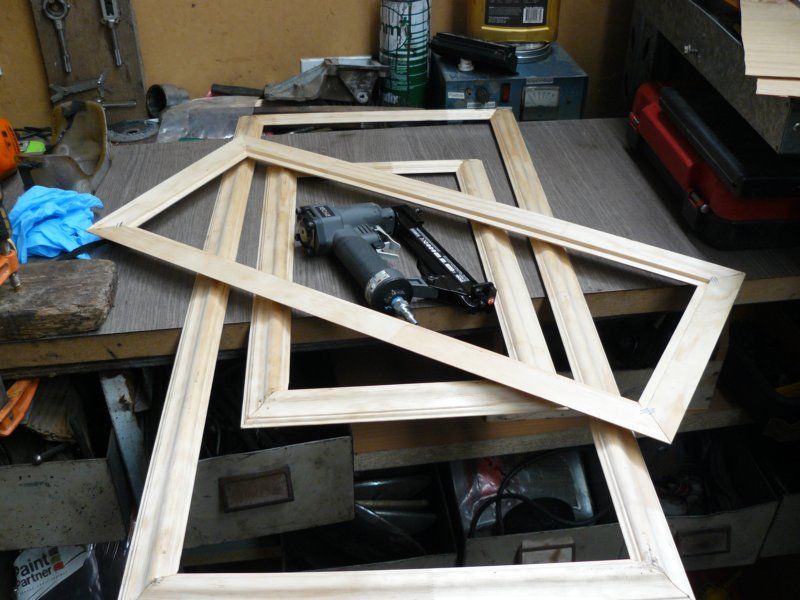 I stained them with some stain i had floating around... 'cos they were looking very grubby very quickly. 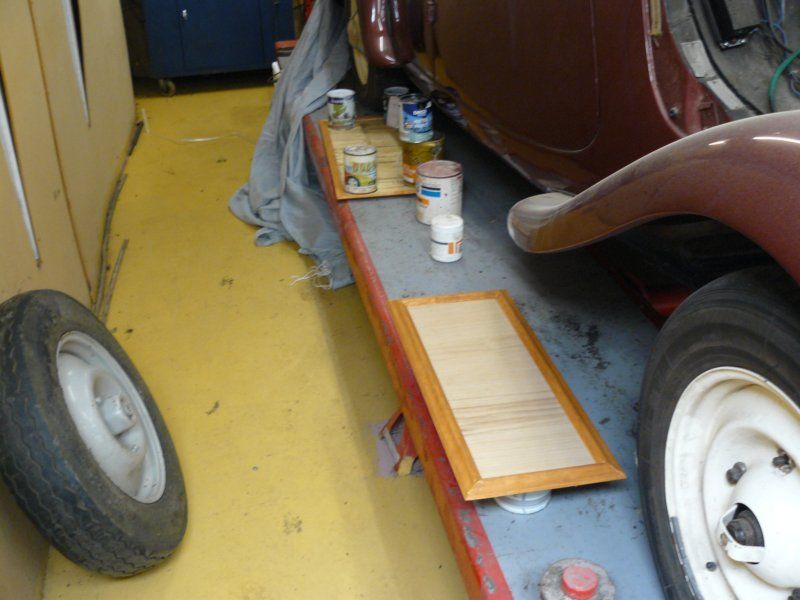 Then I glued the panels in ... and weighted htem so they'd stay clamped overnight. |
|
|
|
Post by Mustang on Jan 28, 2017 6:48:40 GMT 10
Good old quick action clamps...what would we do without them.
Your project is looking the goods.
|
|
|
|
Post by doublechevron on Jan 31, 2017 9:00:04 GMT 10
Well the exterier access doors arrived.... I really hate cutting into a nice unmarked caravan ...   I just tried to trace around the hatch (there was no cuttout template included). I've owned this nibbler for probably 20years. And never really used it. There is always a cutting tool easier or better to use. It is made for the job of cutting cladding (using a modern cordless drill). You just drill a small hole and start cutting. Here is a hint. Have a look inside the caravan and see if there is a join in the plywood on the wall. If there is, rather than cutting through a spindly little upright in the frame.... You will be cutting through 3 uprights, joined together (4 times the thickness of wood) by hand. They do this so there isn't any movement between the sheets I'm guessing.  While I had a big ugly hole hacked in the side of the caravan ... I thought I better see about adding that split system. I wanted to put it in the storage area under the bed. But the more I looked into this, the less I liked it. So finally decided I'd need to wall mount it. Which has complexities. I'm going to have to figure out a way of hiding the refrigerant lines, wiring and drain. I think I'll make a small "box" to surround the hoses with using the ply cuttout of the wall for the access hatches (so it matches hopefully). And doesn't look shithouse. We'll see I guess. This has involved me putting 4 visible screwholes into the wall of the caravan. If the A/C is ever removed you could plug them with plastic capped screws that match the caravan.  The hard bit is getting the exact positioning right. there is many holes in the mounting bracket to get the height right, but the whole mount will need to be moved to move it sideways.  This is the ONLY spot the head unit can fit without being in the arc of the bed folding up/down.  I've decided this is the best place for the outside unit. I've chopped off the gas bottle and mounted it to a new length of RHS across the drawbar. The condenser unit fits really nicely there. I just need to lift it back off and paint the new frame up before finishing the plumbing and wiring condenser end. seeya, Shane L. |
|
Deleted
Deleted Member
Posts: 0
|
Post by Deleted on Jan 31, 2017 11:57:11 GMT 10
Shane whatever you do remember to make and fit a cover to the A/C for travel the grit etc that gets thrown up destroys them quickly plus stones hitting the condenser , the ones I helped fit we had a box cover made with extra foam in the front I have even seen one made with ply that was then used as a table when stopped  |
|
|
|
Post by doublechevron on Jan 31, 2017 13:16:05 GMT 10
Shane whatever you do remember to make and fit a cover to the A/C for travel the grit etc that gets thrown up destroys them quickly plus stones hitting the condenser , the ones I helped fit we had a box cover made with extra foam in the front I have even seen one made with ply that was then used as a table when stopped  Brilliant idea.... A hard cover, and hadn't thought of that. You would just need to add screw on legs or similar. Some foam sandwich panel would probably work well (very light and pre-painted)... I'll see if I can chase some up. seeya, Shane L. |
|
|
|
Post by tasmillard on Feb 1, 2017 7:10:53 GMT 10
Good work Shane, and I LOVE workshop photos  |
|
|
|
Post by doublechevron on Feb 1, 2017 10:35:39 GMT 10
Good work Shane, and I LOVE workshop photos  I need a decent shed/workshop. I'm trying to convince SWMBO I need a "Superbarn". The 20 x 12 meter barn kit that is about $19,000. sadly she shows very little interest  Caravans only fit in the crappy shed I raised a heap that has a gravel floor. seeya, Shane L. |
|
Deleted
Deleted Member
Posts: 0
|
Post by Deleted on Feb 1, 2017 10:58:49 GMT 10
Good work Shane, and I LOVE workshop photos  I need a decent shed/workshop. I'm trying to convince SWMBO I need a "Superbarn". The 20 x 12 meter barn kit that is about $19,000. sadly she shows very little interest  Caravans only fit in the crappy shed I raised a heap that has a gravel floor. seeya, Shane L. Had a mate go through the same ##it with his other half so he bought her dream acreage block happy wife  built a big BIG shed 55mx30mx10m high fully insulated and concreted floor even has a mezzanine floor in half plus 2 hoists , happy husband  then protested not enough $$$$ to build the big house  so bought a 2br demountable and slid it in one end of the shed fully insulated and air con brand new wife loves it so very happy couple   has a 30mx4m leanto on the side with access to the house which has a deck for entertaining etc and all way under the quote for the big flash house . As we get older this is what we need more shed for us and less house for the wife to clean and store craft etc in  |
|
|
|
Post by doublechevron on Feb 1, 2017 11:06:47 GMT 10
I need a decent shed/workshop. I'm trying to convince SWMBO I need a "Superbarn". The 20 x 12 meter barn kit that is about $19,000. sadly she shows very little interest  Caravans only fit in the crappy shed I raised a heap that has a gravel floor. seeya, Shane L. Had a mate go through the same ##it with his other half so he bought her dream acreage block happy wife  built a big BIG shed 55mx30mx10m high fully insulated and concreted floor even has a mezzanine floor in half plus 2 hoists , happy husband  then protested not enough $$$$ to build the big house  so bought a 2br demountable and slid it in one end of the shed fully insulated and air con brand new wife loves it so very happy couple   has a 30mx4m leanto on the side with access to the house which has a deck for entertaining etc and all way under the quote for the big flash house . As we get older this is what we need more shed for us and less house for the wife to clean and store craft etc in  LOL... We have a tiny house and 3 growing kids. I think what we'll end up doing is buidling a modern house against the existing house (so ending up with two houses joined together) as this will no doubt be cheaper than extending the existing house ... or shifting ( we are in such a good location we don't want to shift). I do have sheds.... a small 12 x 7 meter garage with cement floor (no height .. just clears normal cars). 10 x 6meter dodgy shed with a dirt floor that just has cars parked in it.. A 6 x 6 double garage that's a piece of junk with a gravel floor that I lifted way up into the air so a caravan would fit in (and extended half of it back to make it 10meters long so the caravan fits). and a 3 car carport. the issue is there all no good for working on caravans in. Perfectly fine for parking in though. The one with a cement floor is ok for working on cars in though. it's just way to tiny. seeya, Shane L. |
|
|
|
Post by tasmillard on Feb 1, 2017 13:35:05 GMT 10
Damn guys, making me super jealous! Retired John - that is one smart friend you got  I just a lonely 9x6 (I think) double garage separate from the house. Concrete floor is good but no height. Also, the design of the property and location against the fence means I couldnt get a caravan to the garage due to the roof eave being in the way! So its got the Rangie and tools/stuff in it, so all my maintenance work (cars/vans) are done out in the elements. |
|