Deleted
Deleted Member
Posts: 0
|
Post by Deleted on Dec 6, 2015 20:38:47 GMT 10
Hi all. Newbie here from Tassie. I have a 1977 Viscount Explorer pop top. I stumbled across this site while googling about our van. I can't say that I am really a 'Classic Caravan' fan as such..... we bought our van cheap on Gumtree to use it as a spare room at our shack. It sat at the shack for 18 months and only got used once. I decided tthat we could use it for camping so I brought it home and to clean it up and get it registered. My wife was on for buying a newer van, but I'm tight, so I want to get this one neat and useable! We have had a Jayco Hawk Outback and a Cameron Canvas Camper Trailer before, but this is our first 'real' caravan! It needs a lot of little things that I will get to in time. Here's some pics; 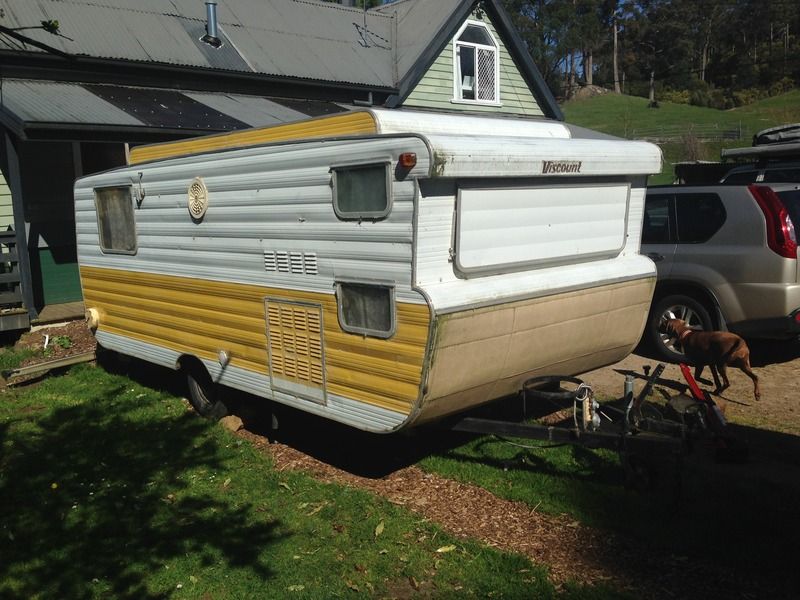 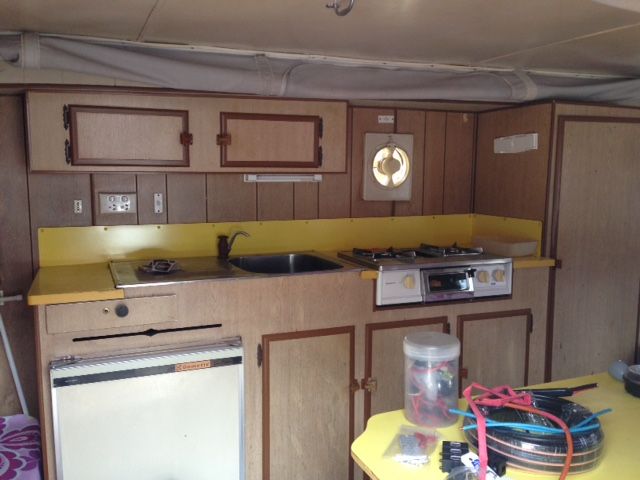 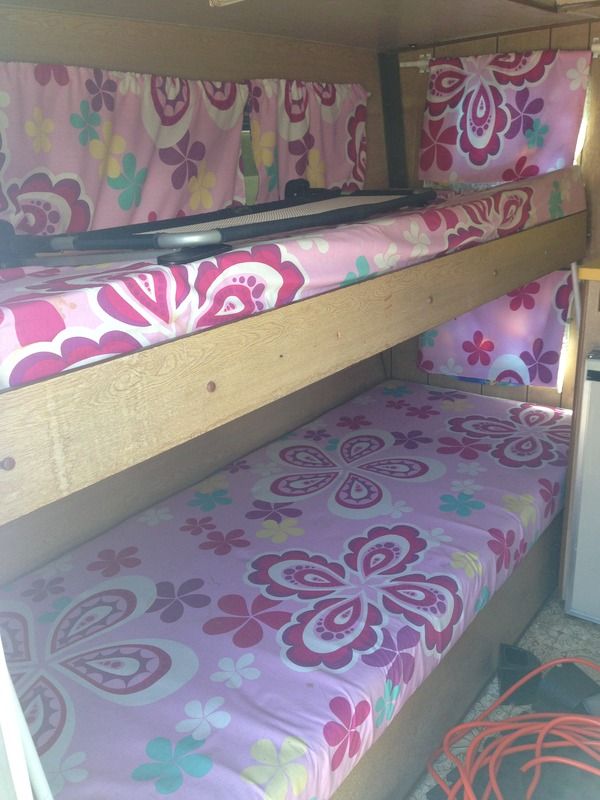 |
|
Deleted
Deleted Member
Posts: 0
|
Post by Deleted on Dec 6, 2015 21:06:25 GMT 10
|
|
Deleted
Deleted Member
Posts: 0
|
Post by Deleted on Dec 7, 2015 5:25:59 GMT 10
Hi sixtysguy
I'm a bit jealous of the interior....looks to be in pretty good shape (and not too bad a colour). I reckon your doing the right thing, it seems to be in far too good condition to be simply left as a spare room.
At some stage can you take a few more pictures of how the bunks work (fold up/down/hinge etc). I've got to put the top bunks back in my Millard Micro (which seems to be a very similar layout) soon and I am looking for inspiration.
I reckon you'll be a bit more of a classic caravan fan before too long!
Duncan
|
|
|
|
Post by tasmillard on Dec 7, 2015 5:52:04 GMT 10
Welcome fellow tasweigean... there are a few of us on here. Van looks very neat and clean inside, I agree with mm1600, too good for a spare room.
|
|
Deleted
Deleted Member
Posts: 0
|
Post by Deleted on Dec 7, 2015 7:45:05 GMT 10
Thanks guys! Yes the interior is in good nick. My wife wants all the walls painted and new cushions , but I like it the way it is! Will get some more bunk pics later today
|
|
|
|
Post by Mustang on Dec 21, 2015 7:24:52 GMT 10
Amazing how many reasonable Viscounts I have seen here in Tassy.
|
|
Deleted
Deleted Member
Posts: 0
|
Post by Deleted on Dec 21, 2015 16:48:02 GMT 10
Welcome to the forum soon we are going to have a Tasmanian branch here if more people join this fantastic place.
Your van looks very clean, is a good that you are restoring it.
|
|
Deleted
Deleted Member
Posts: 0
|
Post by Deleted on Dec 30, 2015 13:05:55 GMT 10
Thanks Gitano. I've found myself a new hobby! I'm not going as far as some others on here, just trying to make it neat and save the wife from wanting a new caravan!
Mustang, everytime I look at your avatar it reminds me of the onsite caravan we had when I was a kid. It had the saem colour orange on the side. I asked my old man on Christmas Day if our old van was a Viscount and he said it was. 22 foot he said. Used to tow it with our old Leyland P76! Then it was retired to the Caravan Park at Turners Beach. I loved our holidays there!
|
|
Deleted
Deleted Member
Posts: 0
|
Post by Deleted on Dec 30, 2015 13:50:13 GMT 10
Refurbing the WindowsWhen I had a good look at the windows I realised that some of the winder hardware was missing and what was still there didn't work. I had a look at Caravans Plus and came to the conclusion that the windows needed to be replaced. I did a quick calculation and realised that this would cost almost as much as I paid for the van. In the customer comments and reviews on the Caravans Plus website it was hinted that the Australite winders could be made to work on the old Viscount windows. I decided to buy a couple and give it a go. This is what I bought; caravansplus.com.au/catalog/product_info.php?products_id=957caravansplus.com.au/catalog/product_info.php?products_id=956caravansplus.com.au/catalog/product_info.php?products_id=75The window I was using as a test run already had these fitted (not essential, but I will replace the all of the originals with these so all the hardware is new- note top hole doesn't line up, so new hole in the frame is required); caravansplus.com.au/catalog/product_info.php?products_id=960The winder control boxes fit the original Viscount cross shafts, which is handy because I'm missing some of these too. The cross shafts had to be shortened to suit. About 20mm I think. The boxes are longer than the originals, but the top hole in the window frame lines up, I just had to drill a new hole in the frame to line up with the bottom hole of the control box. From trial and error I worked out that I had to cut 35mm of each of the aluminium arms to enable the windows to fully close. Before cutting them down, the window would stay open at the bottom by a couple of inches. This is how it worked out for my 762x565 windows, other sized windows will need more trial and error. I will work that out when I get to the other sized windows on the van. Onto the flyscreens..... some of mine are missing, the ones that are still there are toast. I bought a flyscreen off Caravans Plus with the hope that it fits. It is a perfect fit size wise, but the profile of the rubber is slightly off. I pressed it into place and it stayed there with some light pressure applied to the screen. Just to be safe I put a light bead of silcon along the top channel of the window frame and down about 1/3 each side. If I need to I can always, apply some more on the rest of the channel. Flyscreen; caravansplus.com.au/catalog/product_info.php?products_id=891When I order the gear for the next window I'm going to order a couple of these, to see if they work (again, my originals are broken or missing); caravansplus.com.au/catalog/product_info.php?products_id=963All in all I'm pretty happy with the job. I just need to get around to doing the others...... Cost of new 762x565 window = $267 (including postage) Cost of refurbed window = $90 (including postage) It still seems like a lot, but over 7 windows it's a saving of around $1200. For my budget van, I'm happy with that. Pics; The black flyscreen gives the window a tinted look. 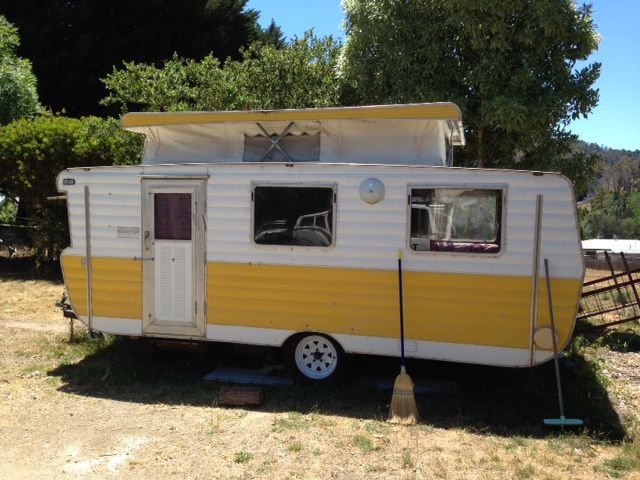 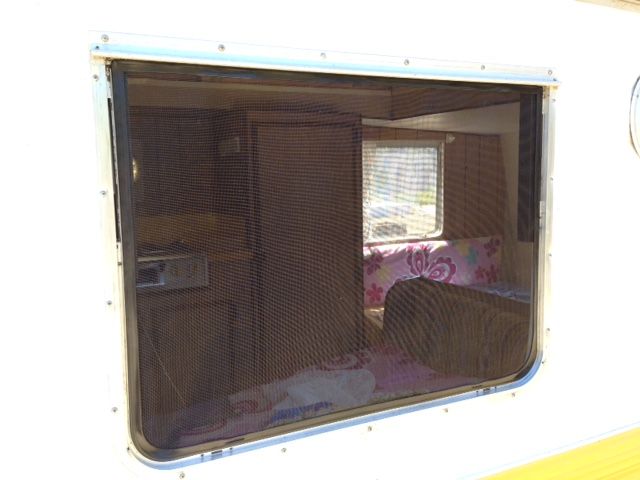 Crappy iphone pics of the winders; 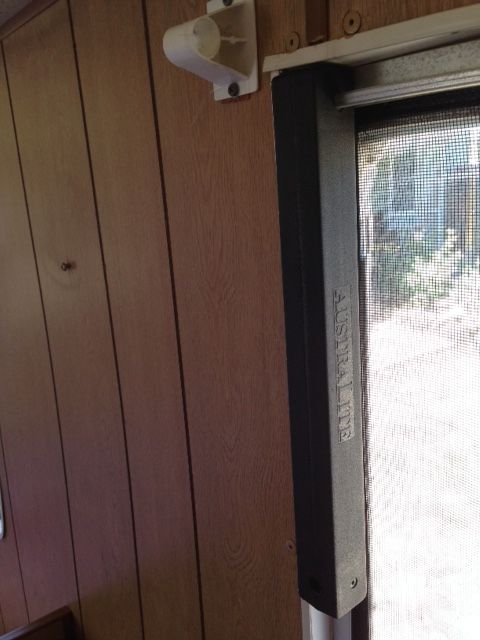 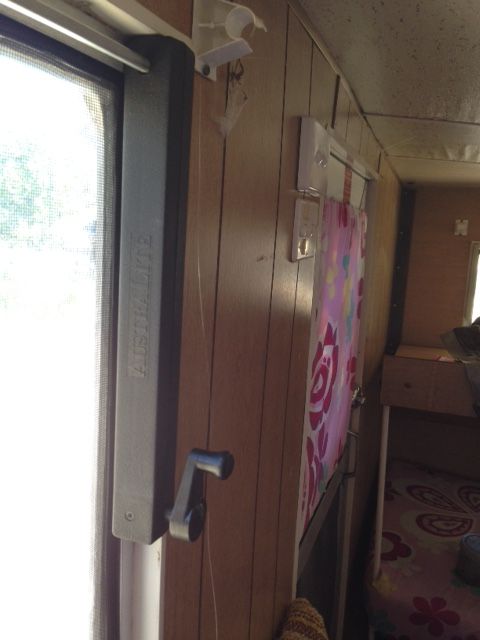 Instead of rivets, I'm using 3mm stainless stainless steel hex head bolts and nyloc nuts. Makes it easier to remove later! 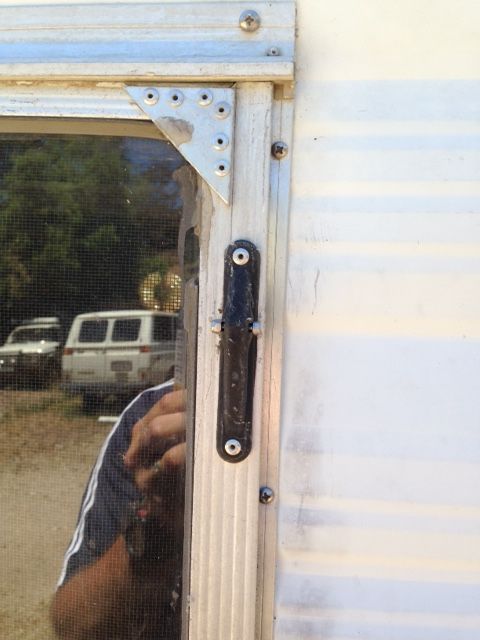 Old flyscreen; 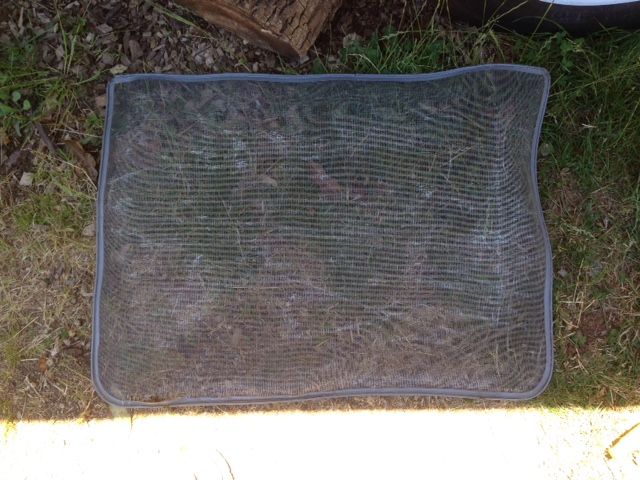
|
|
|
|
Post by tasmillard on Dec 30, 2015 14:44:42 GMT 10
Nice work there, but you know, it never ends up being a quick fix, once you start undoing things you uncover more, and by the time you know it its a full resto, or close to it  |
|
Deleted
Deleted Member
Posts: 0
|
Post by Deleted on Dec 30, 2015 15:39:14 GMT 10
LOL, I'm determined not to do that.... we bought a 96 Jayco Hawk Outback years ago. When I went to look at it I told my wife it didn't need anything doing to it. I don't want to add it up but I spent a lot of money on that, not because it needed it, but because I wanted to! I have set a budget for this van of $5K including the purchase price. I'm up to about half of that already, but I'm actually having fun keeping the budget under control!
|
|
|
|
Post by tasmillard on Dec 30, 2015 17:34:16 GMT 10
If your budget is 5k and you can do it for that or under, well sir, hats off to you (or are you an accountant??  |
|
Deleted
Deleted Member
Posts: 0
|
Post by Deleted on Dec 30, 2015 20:24:34 GMT 10
Lol, not an accountant, but it helps that we only paid $2k for it! It had been on gumtree for 6 minutes before my wife called, asked if it was ok, and then told the guy straight away that we would buy it!
|
|
|
|
Post by myarrow1 on Dec 31, 2015 13:35:53 GMT 10
Very nice. That'll do up beautifully.
|
|
Deleted
Deleted Member
Posts: 0
|
Post by Deleted on Jan 1, 2016 18:05:51 GMT 10
Thanks myarrow1! This afternoon I decided to put on the new tail lights. I had tested the old tailghts before and the only light that worked was the rhs tail light..... well it flashed when the indicator was on! After a few hours of mucking about I have come to the conclusion that I have a broken earth. Nothing works at all on 12 volt. No side lights, tail lights or interior lights. No power there at all. It didnt help that the PO had 240v globes in the 12V holders! I will weld a new earth post to the chassis and assuming the rest of the wiring is ok, it should all work. One thing that has me beat though, and I would appreciate anyone with experience in this..... I can't work out the wiring on the plug! Where the #5 blue wire for electric brakes shoul be I have a white wire. I don't even have electric brakes, so theoretically this shouldn't have a wire at all. Then why is the wire white? On a caravan the white wire should be earth. Where the #3 white earth wire should be I have two grey wires. I'm assuming these are earts, so no big deal.... but what is the white wire connected to the electric brakes for? 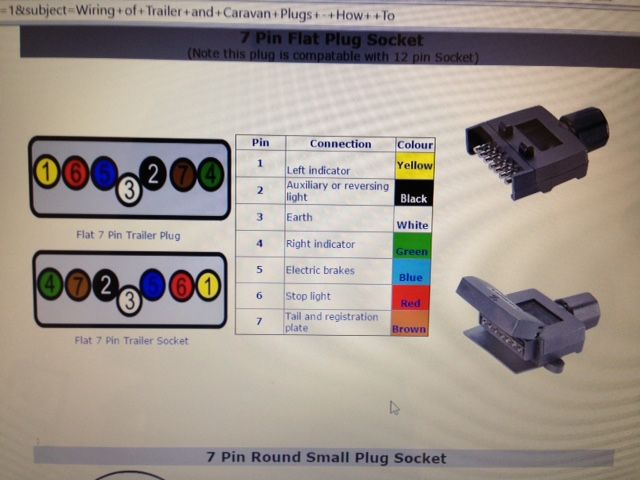 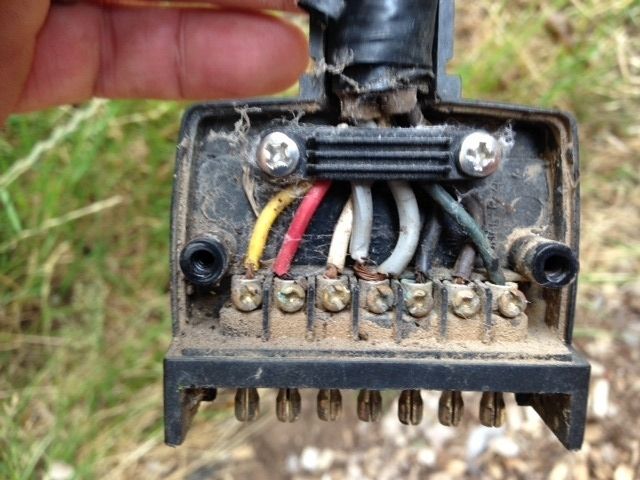 |
|
|
|
Post by Rattles on Jan 1, 2016 19:41:46 GMT 10
Sixtsguy - The best way to work out what is what is to make yourself a test lamp, use an old tail light, a lamp with wires soldered to the Contacts or even one of your new Lamps ( Not LED).
1. Connect a Wire to the Neg of a 12v Battery and connect the other end of the wire to the Chassis side of each lamp.
2. Connect the test lamp one of the wires to the 12v +ve of the same 12v Battery.
3. Disconnect the 12v +ve wire on each Lamp.
4. Using the other wire from the lamp touch it on the 12v -ve side of each lamp, lamp should Glow. if fix (if new lamps are LED , best to use old lamps for testing).
5. Reconnect the 12v +ve wire at each Lamp.
6. Connect a Wire to the Neg of a 12v Battery and connect the other end of the wire to the Chassis of the Caravan.
7. Using the other wire from the lamp touch it on the 12v -ve wire attach to the chassis and note the brilliance.
8. Then touch each of the wires, If the wire you are touching causes the lamp to glow brightly that is a wire connected to the chassis, if not as bright and if you check each of the lamps one or more will be glowing, the more lamps in parallel the brighter the test lamp will glow, that lamp/s is/are connected to the wire under test. (suggest you check the blinkers first as there will be only 1 lamp ).
9. When all sorted note the colours and label, best if rearranging use the standard colours, if not just use what is there, then install new lamps.
Hope this helps and not confuses.
Rattles
PS. Send me a message for more information.
PPS If you place your Location in the section of your profile a Forum member close to you may be able to offer help.
|
|
Deleted
Deleted Member
Posts: 0
|
Post by Deleted on Jan 1, 2016 20:10:10 GMT 10
Thanks Rattles. I actually have an electrical license, so I have electrical fault finding under control. Just not sure why I have the wires in the plug as I have. I thought someone might know of a reason why it is wired this way - like some sort of caravan quirk!
|
|
|
|
Post by Rattles on Jan 1, 2016 20:36:24 GMT 10
By 7 Core Colour code it may be the earth Wire but buzzing the wires should give you an idea there should be a joint where the & core ends and the Caravan wiring starts, There will be an Auxiliary to the 12v interior lights (probably pin 2), and the same or another to the 12v Element of the 3 way fridge i fitted ( 2 or maybe 5).
Sorry about trying to teach a grandmother to suck eggs.
Rattles
|
|