Deleted
Deleted Member
Posts: 0
|
Post by Deleted on Oct 17, 2015 22:15:54 GMT 10
|
|
|
|
Post by snoops on Oct 18, 2015 14:17:38 GMT 10
Welcome to the forum.  Looks very similar to mine - just a bit earlier. Chassis looks to be in good condition. If you reseal everything and replace the few rotten bits,meet it rolling again, and you'll have a great van. There are quite a few Arrow owners on here now.  |
|
Deleted
Deleted Member
Posts: 0
|
Post by Deleted on Oct 18, 2015 16:27:30 GMT 10
Thanks Snoops, do you know their width off hand, I though I measured it at 2200mm but maybe it's 7'6" ?
|
|
|
|
Post by snoops on Oct 18, 2015 17:20:05 GMT 10
Yep, mines 7'6" - they're a wide sucker, but easy to tow.  Your interior layout is identical to mine - and everyone else's I've seen on here. Oven is identical, except mine is a cool mustard yellow colour - they came in a pale green too - they work very well. Doors will be stuffed I'd imagine, I re made all mine, and painted them. Looks pretty original  |
|
|
|
Post by myarrow1 on Oct 18, 2015 17:58:59 GMT 10
Hi Justin. Is yours a narrow version ? Noticed no cupboard at the end of the bunks, and the bunks go all the way across, wall to wall
|
|
|
|
Post by snoops on Oct 18, 2015 18:24:14 GMT 10
Yeah, you're right - I thought the wall next to the bunks was the side of the cupboard, but it is the wall. Now I look at the pics, it does look like a narrow version, and now I do the conversion, 2200mm is just over 7' 2". Just went and measured mine and its a smidge under 7'8" so 6" wider which accounts for the cupboard inside the front door next to the bunks.
|
|
|
|
Post by myarrow1 on Oct 18, 2015 18:34:42 GMT 10
A 'Narrow Arrow'.... Not too many of those around, I would've thought ?
|
|
Deleted
Deleted Member
Posts: 0
|
Post by Deleted on Oct 18, 2015 21:02:34 GMT 10
That actually makes my day guys, when we built out house we only had 2450mm to play with. I have a big shed but we are on a 10x40 m block and you have to squeeze down the side.
|
|
Deleted
Deleted Member
Posts: 0
|
Post by Deleted on Nov 10, 2015 7:07:14 GMT 10
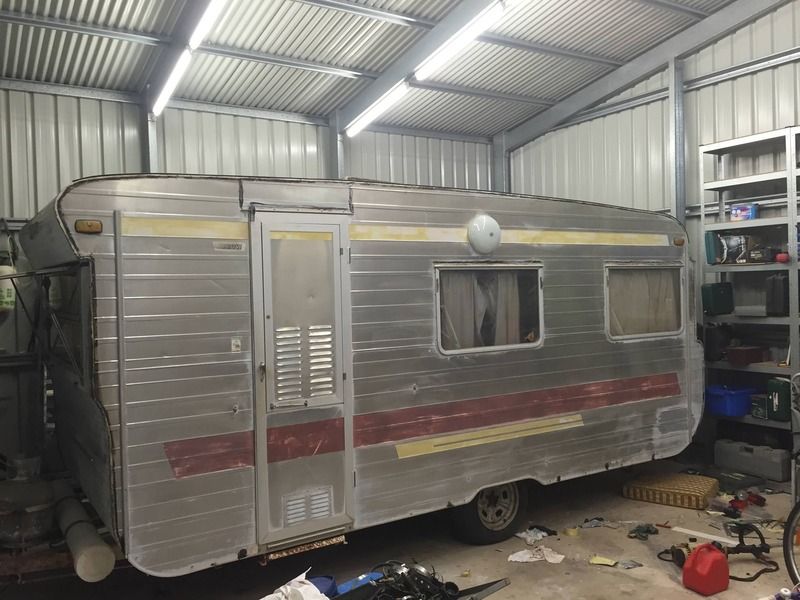
Well it took two of us to get it down the side of the house. I think it will be in the shed for a while as it's just too hard to move it the 40 meters with 50mm side clearance to store it in there on a regular basis. The sheds great so maybe someone makes a electric jokey wheel to make the job easier. I wiped some paint off and am thinking about what to do, I have just refinished my glider trailer in Northane Shipshape and gloss and it's the best paint I have ever seen. I am tempted to to leave this unpainted but the polishing would be too much. Anyway once I get the shed cleaned up I will start on the interior. It's located in Scarborough if anyone wants to have a look.  |
|
Deleted
Deleted Member
Posts: 0
|
Post by Deleted on Nov 10, 2015 7:16:14 GMT 10
Looks very nice.
What you have used to strip the paint to bare aluminium?
I used thinners on mine.
My van also is the narrow model.
Looking at your photos the interior lights in your van are damaged like in mine. Do you know where we can get spare shades?
|
|
Deleted
Deleted Member
Posts: 0
|
Post by Deleted on Nov 10, 2015 7:40:31 GMT 10
No idea Gitano. I will probably redo all of mine in LED's for neatness and room (that's assuming you can get dual 12 and 240 volt) ones. I know that's sacrilege in resto world but that's my current thoughts
|
|
|
|
Post by Mustang on Nov 10, 2015 7:52:45 GMT 10
No idea Gitano. I will probably redo all of mine in LED's for neatness and room (that's assuming you can get dual 12 and 240 volt) ones. I know that's sacrilege in resto world but that's my current thoughts LEDs can be hidden in the original covers, but be wary not all LEDs are plug & play if you have bakelite fittings. But this can be overcome. |
|
|
|
Post by planner on Nov 10, 2015 8:21:44 GMT 10
LEDs can be hidden in the original covers, but be wary not all LEDs are plug & play if you have bakelite fittings. But this can be overcome. I,ve got the LED's hidden behind the original shades and plugged into the original bakelite fittings. Working just fine. Planner |
|
|
|
Post by Mustang on Nov 10, 2015 17:01:37 GMT 10
LEDs can be hidden in the original covers, but be wary not all LEDs are plug & play if you have bakelite fittings. But this can be overcome. I,ve got the LED's hidden behind the original shades and plugged into the original bakelite fittings. Working just fine. Planner Hi Planner When we bought our 12 volt globes, there was no go, so back to the supplier. We had to disconnect the earth, use a jumper wire for double polarity, then solder an earth to the side of the globe. The 240 are just plug in. Worth the effort as they run so cool. |
|
|
|
Post by planner on Nov 12, 2015 7:49:05 GMT 10
Hi Planner When we bought our 12 volt globes, there was no go, so back to the supplier. We had to disconnect the earth, use a jumper wire for double polarity, then solder an earth to the side of the globe. The 240 are just plug in. Worth the effort as they run so cool. The 12V were simply plug in and switch on. They were a little hard to source locally, but both caravan repairers and the 4WD places in town stocked them (not SortaCheap or the green shed though.) The 240V bayonet globes were replaced with those curly flouro bayonet tubes that were all the rage about 10 years ago. |
|
Deleted
Deleted Member
Posts: 0
|
Post by Deleted on Nov 12, 2015 20:14:50 GMT 10
Awesome thanks guys
|
|
|
|
Post by atefooterz on Nov 12, 2015 23:29:49 GMT 10
I think they made skinny caravans for QLD, back in the day, i have noticed most first registered Franklins here are 5-6" skinnier. What is this wipe away the old paint thing? Raw alloy is a good look when you get used to it, the crust protects the undersurface & low sheen will not blind other motorists, when in transit.  |
|
Deleted
Deleted Member
Posts: 0
|
Post by Deleted on Nov 15, 2015 19:37:43 GMT 10
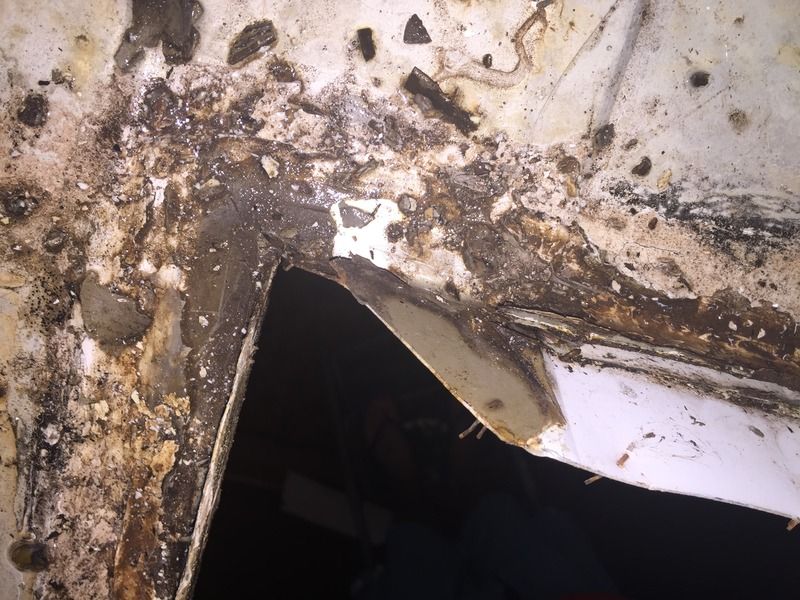
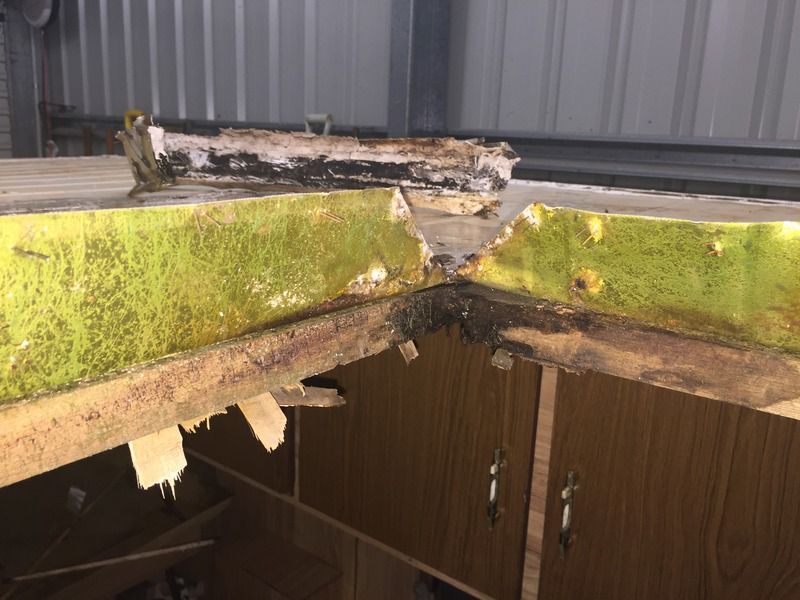
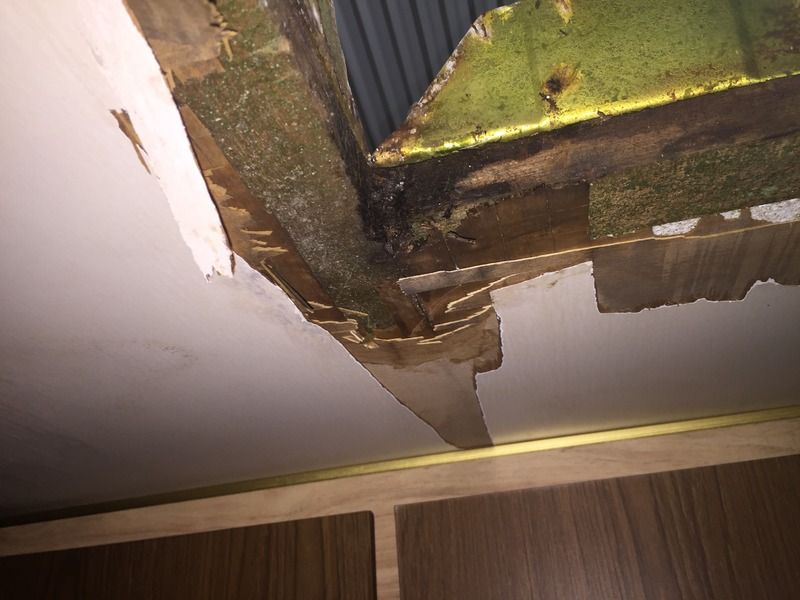
So I finished power washing the van today. i took the roof hatch off to try and find the water leak, I removed 20 years of silastic, mastic, chewing gum and string. Eventually I found a hole about the size of a 20 cent piece. It should be a easy fix with some new flashing and sikaflex. i am not sure what to do with the hatch. I am tempted to just cover the hole and put in a modern roof vent. I need to to replace a couple of the timbers and it all should be good. Does anyone know if it easier to just cover up the old roof lining or should I try and pull it out, I think it might be glued to the polystyrene     |
|
Deleted
Deleted Member
Posts: 0
|
Post by Deleted on Nov 15, 2015 19:56:35 GMT 10
Justin, I have to remove the hatch on my Arrow, how you went about?
Have you put a plank across the roof to get to the screws or removed the top of the hatch from inside to get to them?
|
|
|
|
Post by snoops on Nov 15, 2015 20:12:32 GMT 10
I made my hatch much larger than the original - see my thread about it. It allowed me to cut all the rotten bits out. I then reframed it, then flashed it internally - that covered all the grotty bits up.
|
|
Deleted
Deleted Member
Posts: 0
|
Post by Deleted on Nov 15, 2015 20:33:32 GMT 10
Gitano you can do it both ways, I got all of my nuts of bar one, my other hall just couldn't hold the screwdriver, so I just took the screws out of the screw jack. My hatch is in pretty poor condition. I will have to reglass it as it is now hydroscopic.
JJ
|
|
Deleted
Deleted Member
Posts: 0
|
Post by Deleted on Nov 16, 2015 7:48:37 GMT 10
Thank you guys. I will do the small windows today, it is a very nice day in Tasmania. if weather help we will do the hatch on the weekend.
|
|