andys
In Training
 
Posts: 11 
|
Post by andys on Apr 22, 2015 11:25:15 GMT 10
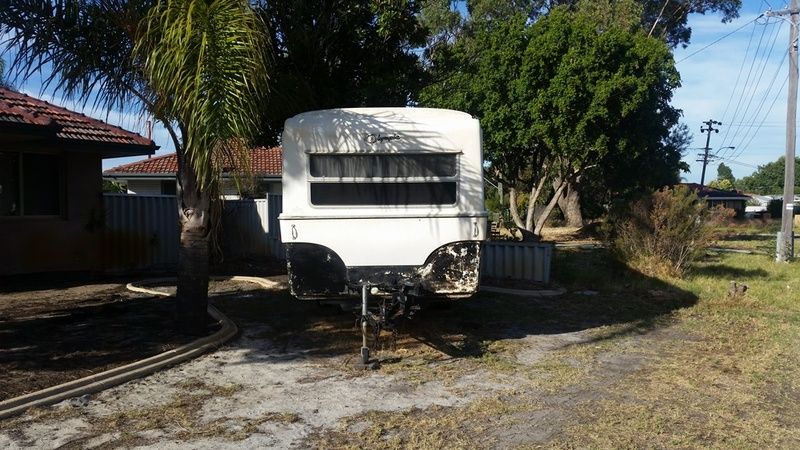
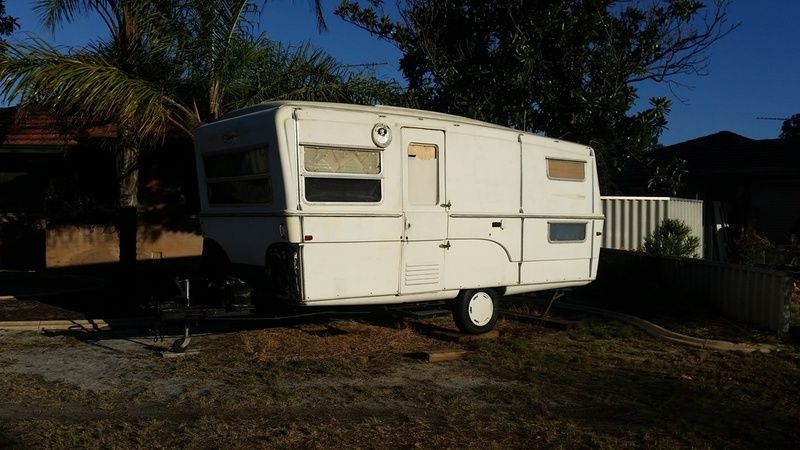
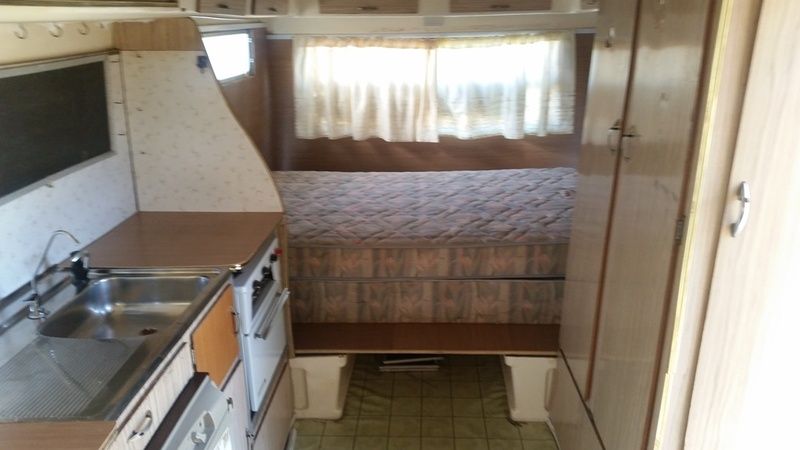
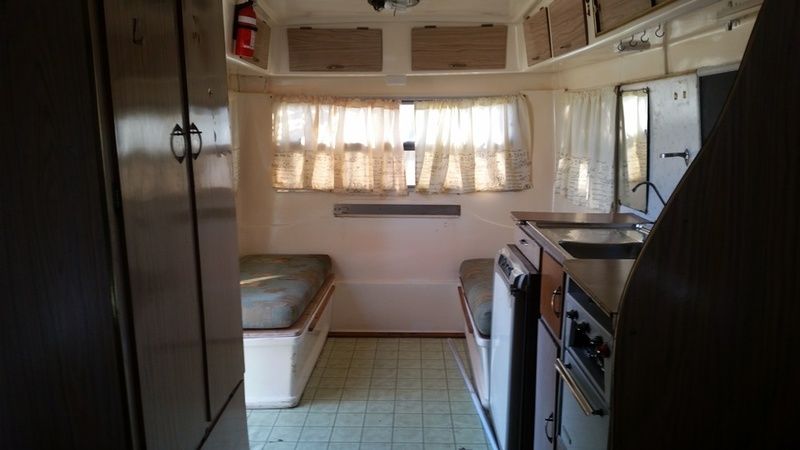
We recently bought our first vintage van, a 1970 Olympic Riviera, so I guess that puts it into both the Classic and Vintage categories !!
Its a definite barge pole van, looks great from 20 feet away, not so good as you get closer.
|
|
andys
In Training
 
Posts: 11 
|
Post by andys on Apr 22, 2015 11:29:45 GMT 10
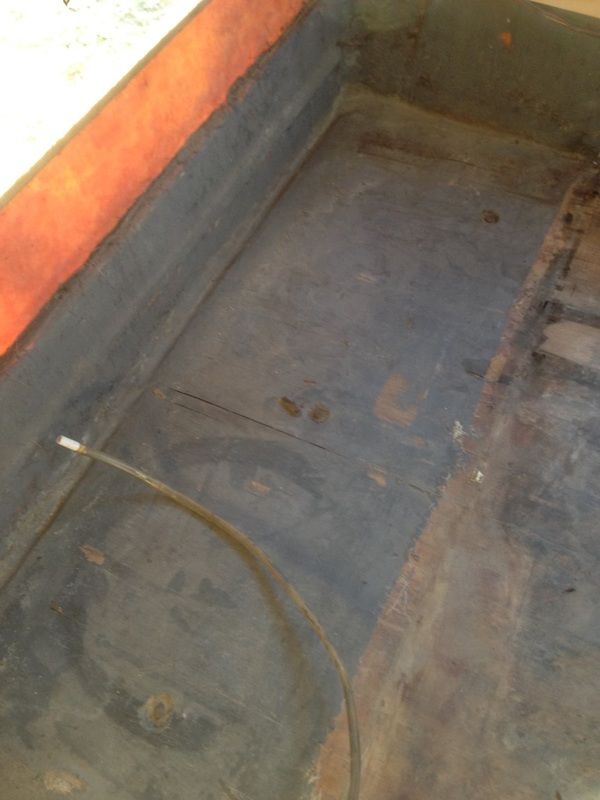
The van is originally a twin bunk bed model (bunks on both side of the van) which I have been told is quite rare. When we got the van, the van had been fitted with a queen sized bed courtesy of a piece of ply screwed over the single beds (the upper bunks are long gone !) Removing the sheet of ply and the vinyl resulted in us discovering a fair amount of rot at the back of the van.
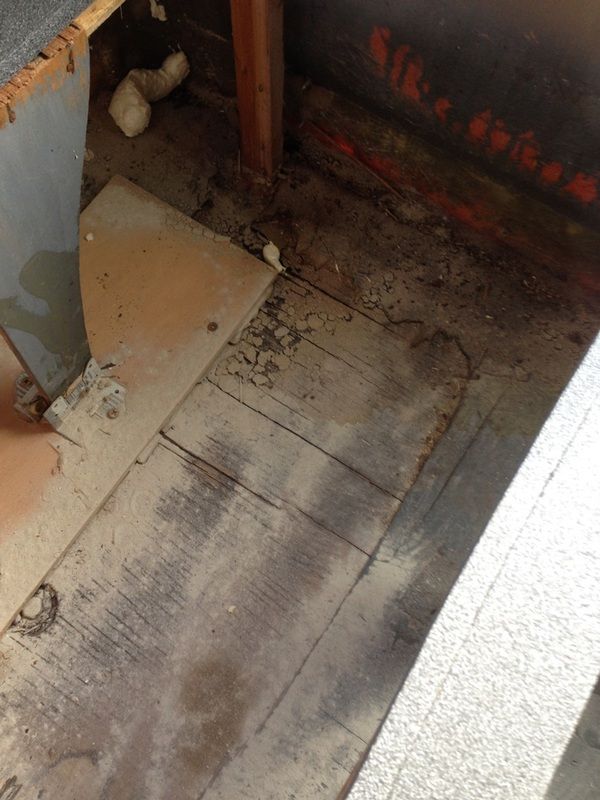
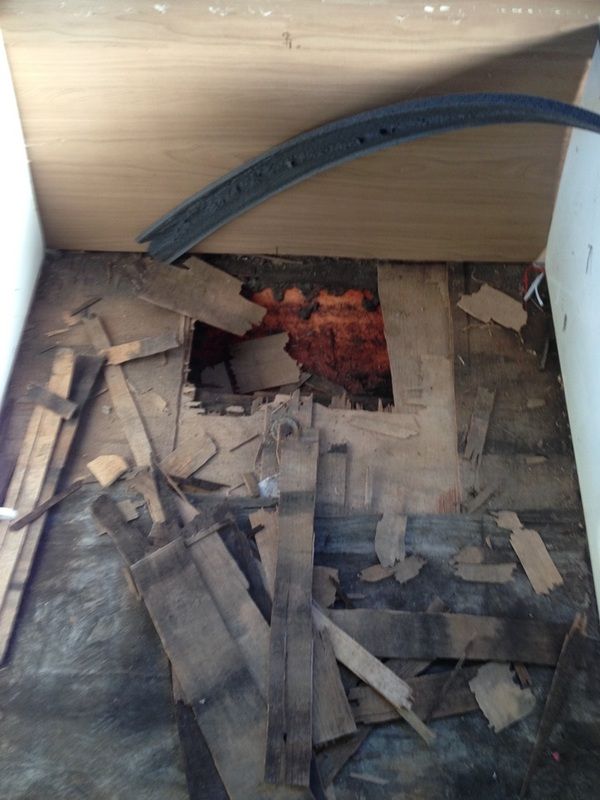
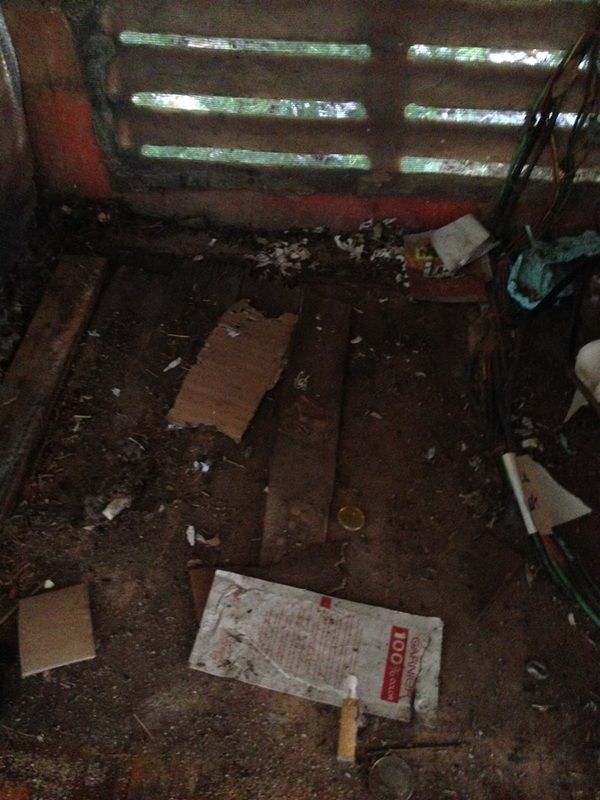
We also found rot in the doorway to the van and under the fridge (usual spots) !
|
|
andys
In Training
 
Posts: 11 
|
Post by andys on Apr 22, 2015 11:33:44 GMT 10
A good look around the van showed a range of dodgy repairs and signs of 40 years of ownership !
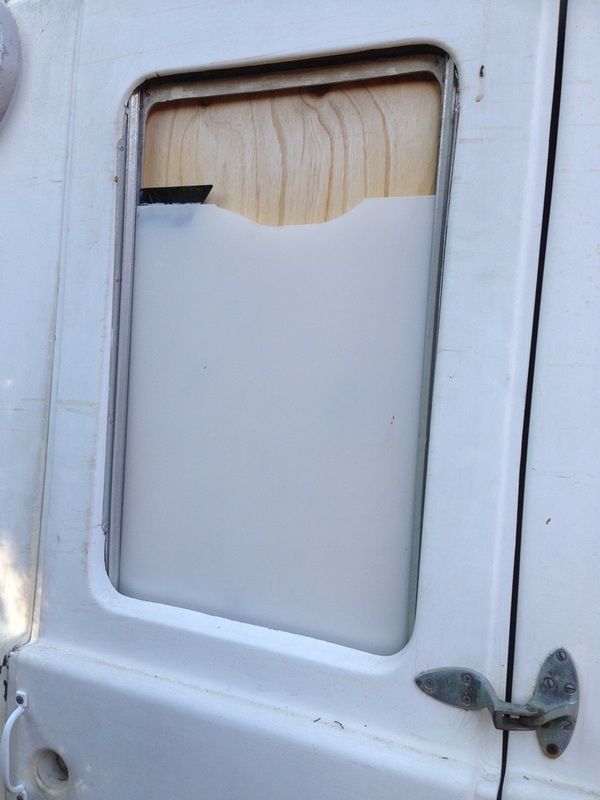
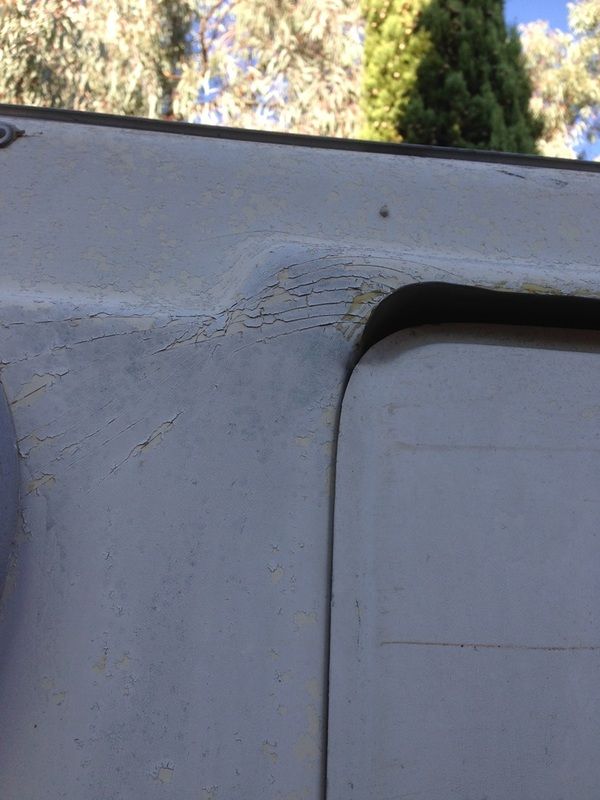
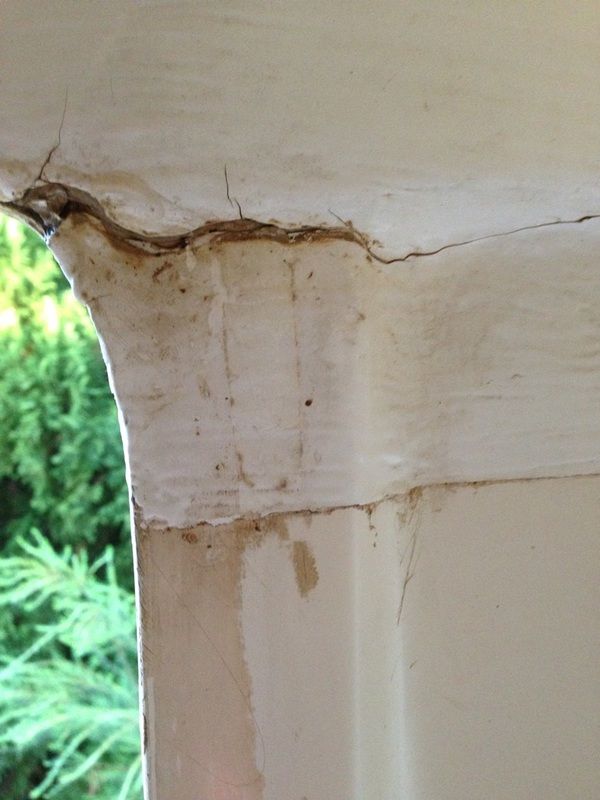
The van has been repainted at some stage, with what appears to be a water based paint, in very bad condition, so that will have to come off once everything else is done;
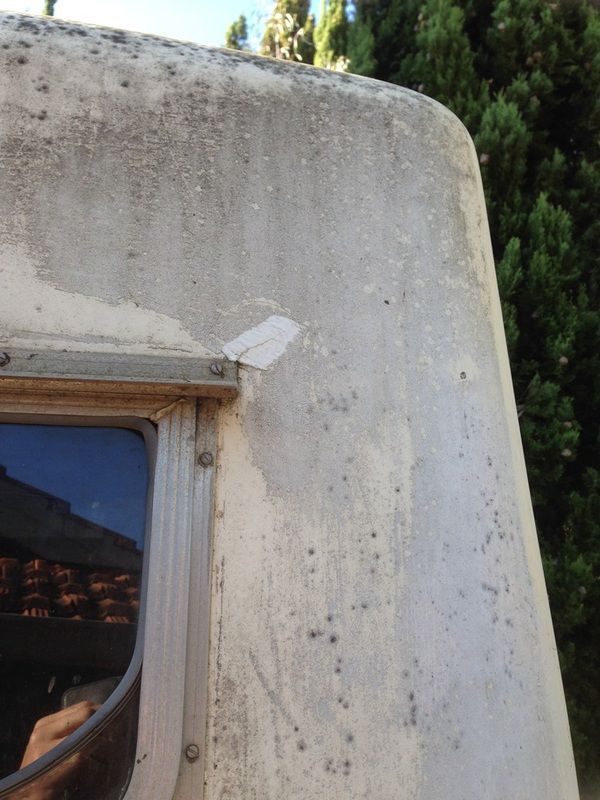
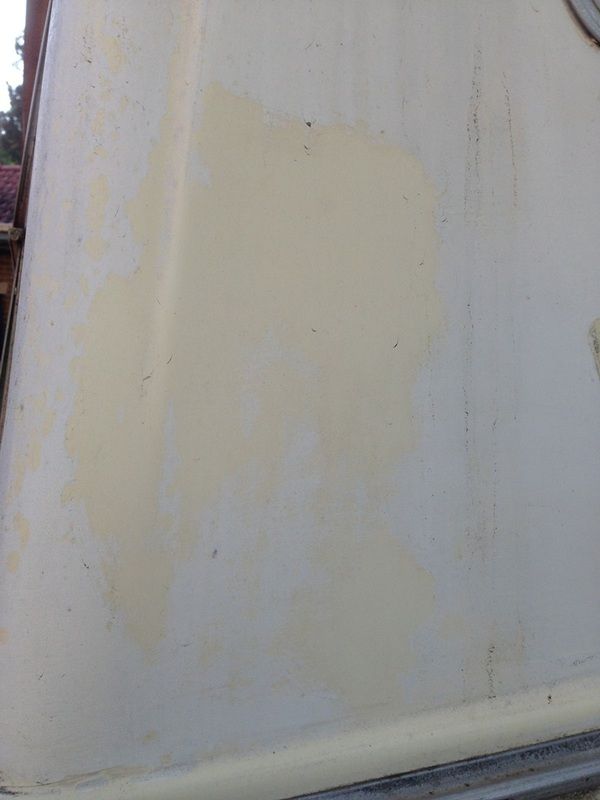
|
|
andys
In Training
 
Posts: 11 
|
Post by andys on Apr 22, 2015 11:39:32 GMT 10
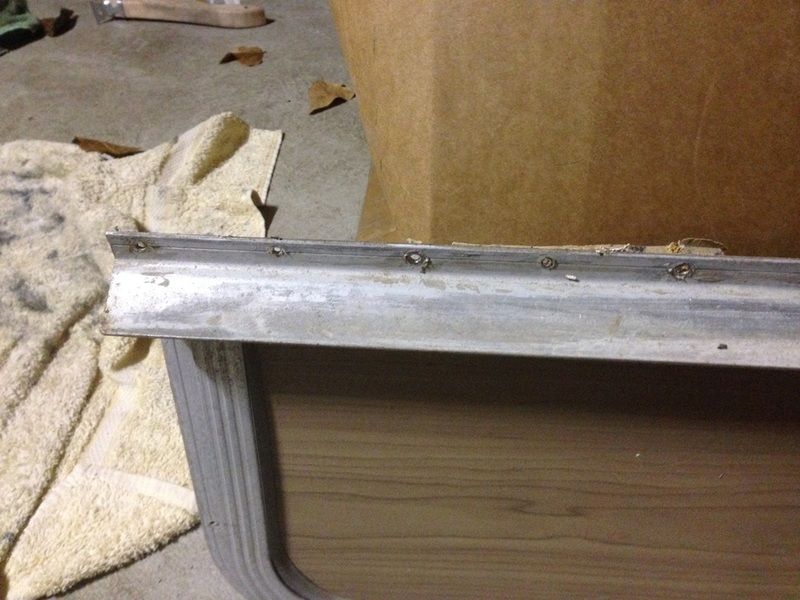
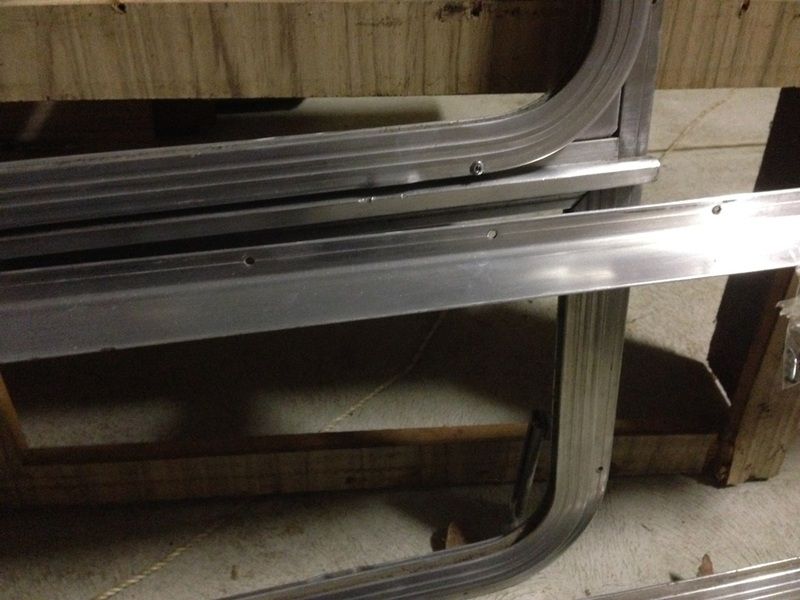
First job was to stop the leaks in the van (no sense in fixing the floor only to have the van leak like a sieve again), so I started with the windows, these literally fell out as they were removed, with all the brackets rusted out and most of the fittinsg seized. Each of the windows is then being polished, new brackets installed, new winders and clips fitted and new Perspex and window rubbers installed.
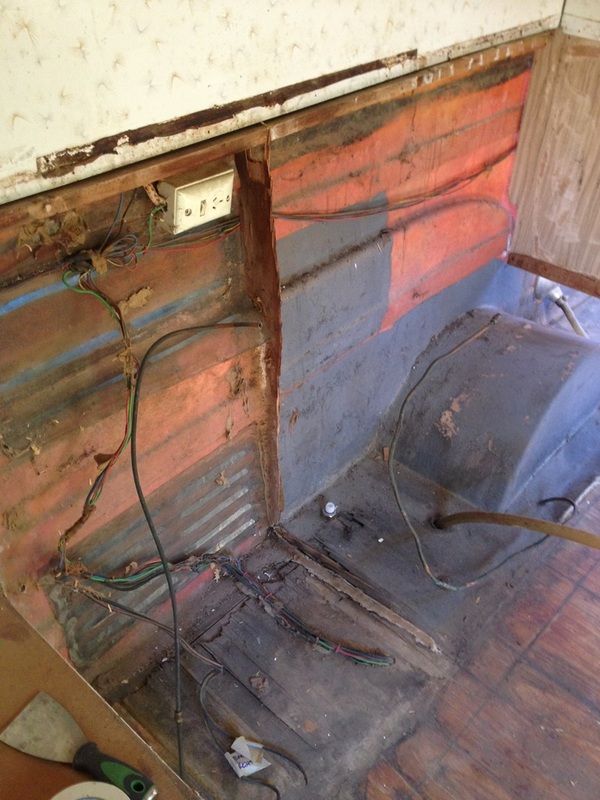
I've now removed the single beds (we'll be using a queen size) and the kitchen, so that the floor can be replaced. There's a little bit of bucking in the van sides from it dropping but only very marginal (not that hard to fix - at least I think its not that hard to fix !!)
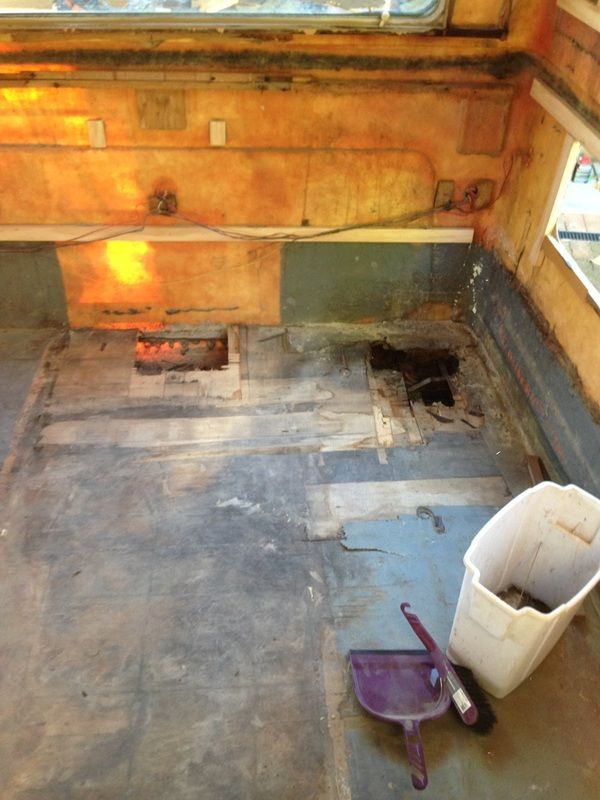
I'll post some more pictures as the work progresses  |
|
andys
In Training
 
Posts: 11 
|
Post by andys on Apr 22, 2015 11:42:16 GMT 10
The kitchen fell apart as it was removed, so that will be replaced, and with the next week's weather looking good I invested in a really good quality van cover (I don't have a garage space big enough to store the van) so that I can do some work on the floor even if we get rain and before the windows go back in.
|
|
|
|
Post by tasmillard on Apr 22, 2015 18:32:33 GMT 10
Look forward to the progress and pics.
|
|
|
|
Post by Mustang on Apr 22, 2015 19:09:41 GMT 10
Thanks for that pre-resto intro Andy, I feel much better looking at ours now, but we came from where you are. Once you get all the rot out it dosn't look that bad.  This is a good forum for discussion & advice. Cheers |
|
|
|
Post by atouchofglass on Apr 24, 2015 13:21:10 GMT 10
Welcome and don't forget to post lots of photos as you overcome problems.
Cause sure as eggs, there will be someone out there with a similar issue looking for ideas.
Cheers
Atog
|
|
andys
In Training
 
Posts: 11 
|
Post by andys on Dec 31, 2015 13:58:23 GMT 10
Its been a while since I last posted or recorded any forward momentum with the Olympic.
The lack of somewhere to store (and work on) the van in wetter months means that I am limited to getting as much done as possible once the rain disappears.
Over the last couple of weeks I have concentrated on the body of the van.
The whole of the van was painted at some stage with household paint, every attempt to use paint stripper, heat gun or other form of paint removal failed miserably, so the only option is sanding the whole van back using a combination of hand sander and elbow grease.
Panel by panel piece by piece we are getting the van from something like this:
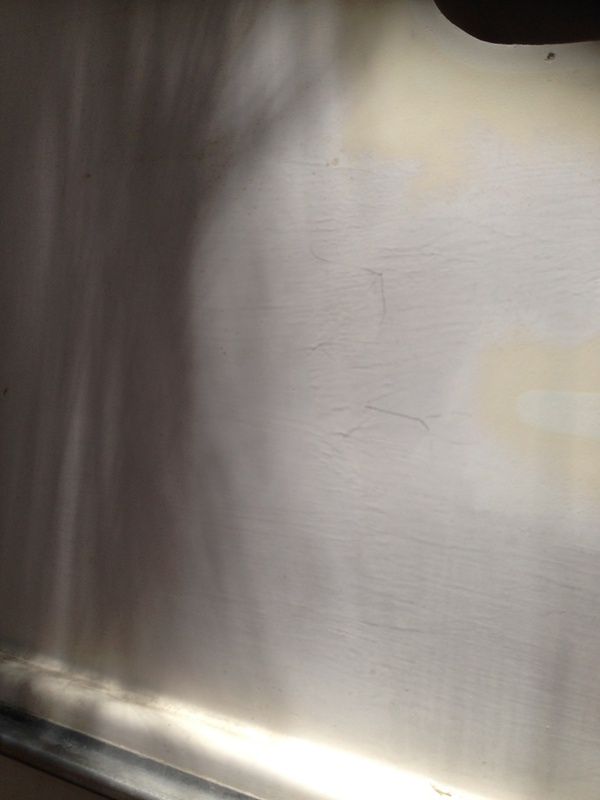
To something like this;
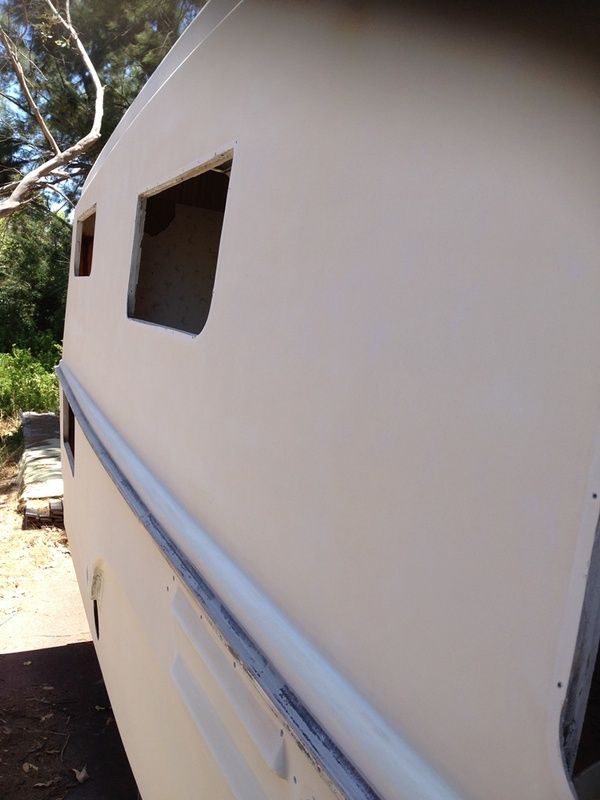
The stripping of the van has also revealed several areas of previous damage, and evidence of some 'interesting' additions to the van over the years !!
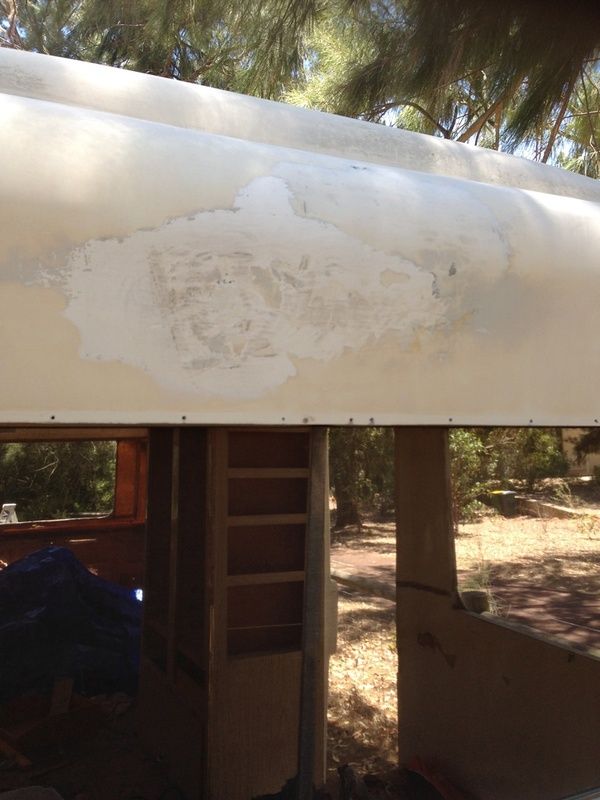
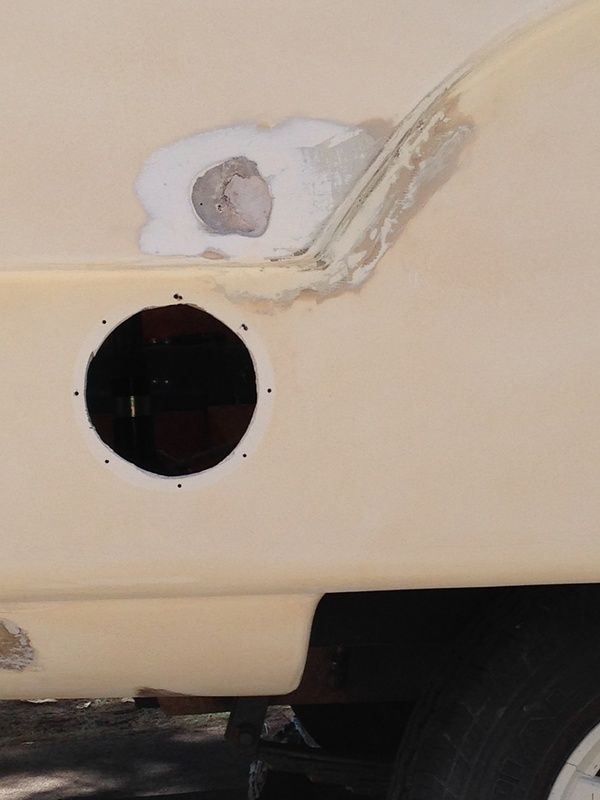
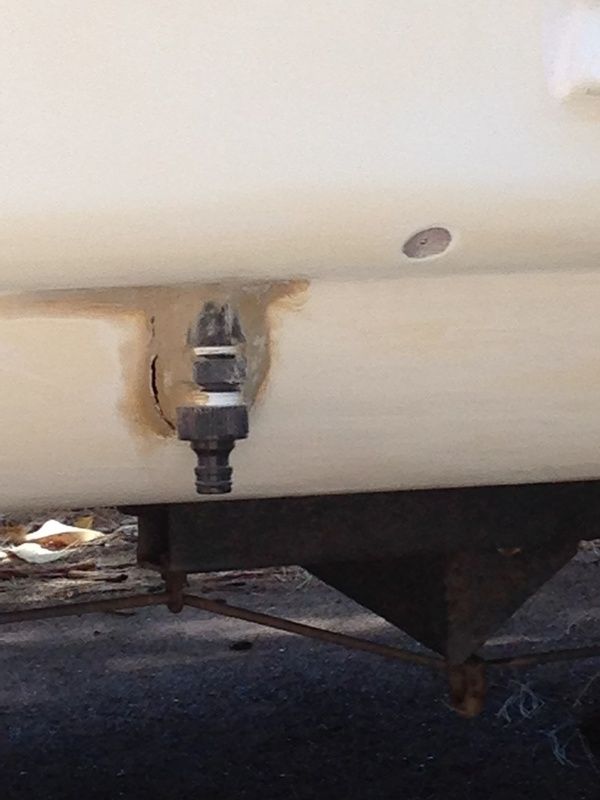
The rest of the sanding will take another 4-5 days I guess, and then I can get onto removal of the rotten floor, filling the dozens of screw holes in the body and repairs to the damaged fibreglass sections. All sounds like a chore, but to be honest I am enjoying it immensely and its great to see the old van taking a step every day towards her new lease on life.
|
|
Deleted
Deleted Member
Posts: 0
|
Post by Deleted on Dec 31, 2015 16:13:27 GMT 10
|
|
|
|
Post by snoops on Dec 31, 2015 16:52:00 GMT 10
Great work - that looks like a lot of hours have gone into that - the result should be spectacular. Keep up the good work.  |
|
|
|
Post by myarrow1 on Dec 31, 2015 17:16:41 GMT 10
Slowly but surely... nice work  ? |
|
|
|
Post by atouchofglass on Dec 31, 2015 18:25:36 GMT 10
Looking good Andy
slow and steady wins the race.
Cheers
Atog
|
|
|
|
Post by tasmillard on Jan 2, 2016 16:58:36 GMT 10
Fantastic work, looking the biz!
|
|
|
|
Post by atefooterz on Jan 6, 2016 1:38:08 GMT 10
Andy did you dig out the old plastibond & misc car filler and replace with something you can trust (is structural)and sand fair? (like a bit of glass & poly then talc or spheres/ resin mix)
|
|
|
|
Post by doublechevron on Jan 6, 2016 9:45:51 GMT 10
My brother repainted the front "V" of his boat with gelcoat. Can you re-gelcoat it ? That would be a WAY tougher coating than paint! It seemed to self level quite nicely too given it's applied with a putty gun  seeya, Shane L. |
|
andys
In Training
 
Posts: 11 
|
Post by andys on Jan 6, 2016 19:22:17 GMT 10
So despite the 36C day today, work continued on the Riviera.
Finally finished sanding the last of the panels on the van, and after yesterdays shopping expedition I have the filler, glass, cloth, resin, hardener and tools, plus two types of primer.
So after the floor is replaced, work can begin on the holes and repairs.
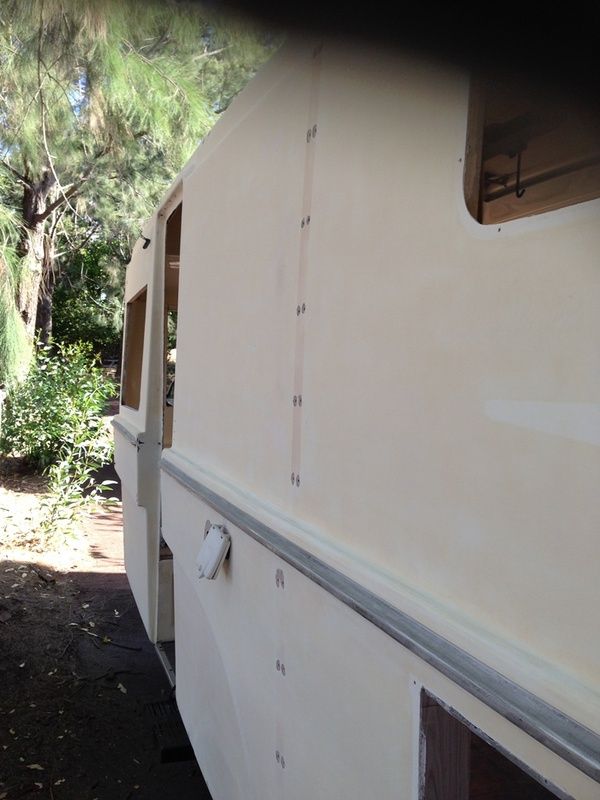
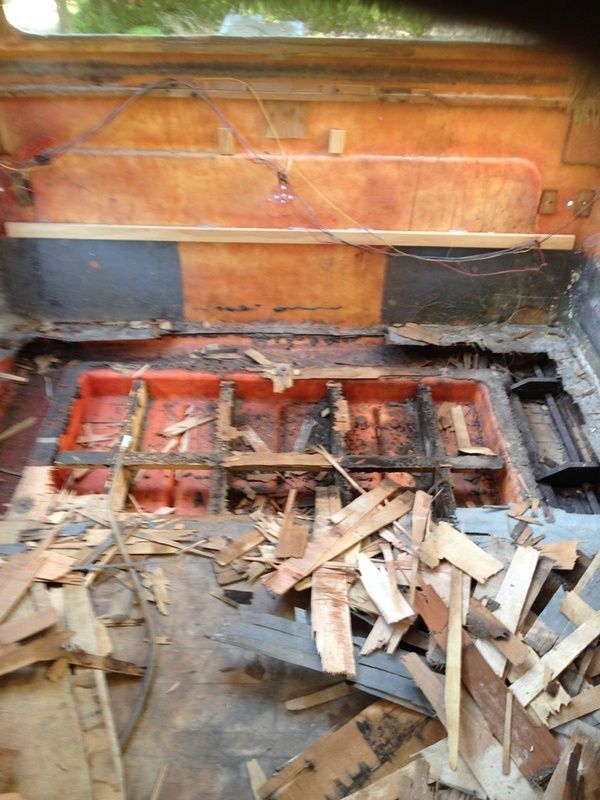
Late in the day, dead on my feet, I thought what better way to finish than to start tearing up the rotten floor - quite a therapeutic exercise, I highly recommend it.
With 39C forecast for the next 2 days, I've decided to have a day or two of rest
|
|
andys
In Training
 
Posts: 11 
|
Post by andys on Jan 6, 2016 19:25:13 GMT 10
Andy did you dig out the old plastibond & misc car filler and replace with something you can trust (is structural)and sand fair? (like a bit of glass & poly then talc or spheres/ resin mix) Most of the fibreglass repairs that were done before, will need to be done again, and everywhere that was filled will also be re-done. There's very little previous workmanship that you would rely on when you look at it close up, so better to start afresh I think.
|
|
andys
In Training
 
Posts: 11 
|
Post by andys on Jan 6, 2016 19:27:43 GMT 10
My brother repainted the front "V" of his boat with gelcoat. Can you re-gelcoat it ? That would be a WAY tougher coating than paint! It seemed to self level quite nicely too given it's applied with a putty gun  seeya, Shane L. I'm genuinely not sure Shane, perhaps William (A Touch of Glass) can confirm ? As long as we get a van where all the repairs are done properly, the windows are rebuilt (so don't leak) and the rotten floor is replaced, then it will all be very stable and with a repaint should last 10plus years. Painting again after 10 plus years doesn't phase me too much, considering how much work will need to be done to get this van back on the road
|
|
|
|
Post by boblor on Jan 7, 2016 10:36:14 GMT 10
Hi andys
I would recommend before you fit a new floor, you suspend the van in a frame at the waist line and allow the chassis weight pull the floor 'down' to line. That is, place a straight edge across the floor supports/ chassis to line up with the original plywood line around the walls. This should bring your wheel arches into a horizontal position. I would also suggest you use 5 x ply floor of 10 or 12 m m.
I painted a 1963 Riviera with 2 x pk automotive paint ( DeBeer) and it was an excellent finish. ( see the turquoise Van on the forum).
Cheers boblor
|
|
andys
In Training
 
Posts: 11 
|
Post by andys on Jan 7, 2016 12:16:03 GMT 10
Hi andys I would recommend before you fit a new floor, you suspend the van in a frame at the waist line and allow the chassis weight pull the floor 'down' to line. That is, place a straight edge across the floor supports/ chassis to line up with the original plywood line around the walls. This should bring your wheel arches into a horizontal position. I would also suggest you use 5 x ply floor of 10 or 12 m m. I painted a 1963 Riviera with 2 x pk automotive paint ( DeBeer) and it was an excellent finish. ( see the turquoise Van on the forum). Cheers boblor Hi Bob I'll definitely have to suspend the van, we have a small amount of bowing on one side. I'm yet to run a straight edge to see how far she has dropped, but that'll be high on the agenda. Thanks for the measurements on ply, I need to check what is already in the van, as not all will be replaced.
In terms of paint I'm using Norglass, it better suits my application (given the household paint on the van initially) and I like the two part primer system that they use. Great to hear from you, hope are doing OK Andy
|
|
|
|
Post by awbeattie381 on Jan 8, 2016 18:08:44 GMT 10
Great progress! I feel your pain with not having good storage...makes you really productive when you do have an opportunity to work on it though!
|
|
|
|
Post by Mustang on Jan 20, 2016 7:49:18 GMT 10
Great progress! I feel your pain with not having good storage...makes you really productive when you do have an opportunity to work on it though! I take my hat off to you guys who renovate in the open air  |
|