Deleted
Deleted Member
Posts: 0
|
Post by Deleted on Jul 24, 2014 10:27:37 GMT 10
Hi everyone,
We are currently on our way to look at a 17ft Viscount. The chassis number is R83365 which from the history thread leads me to believe its a 78 Royal? It's unregistered and advertised as an 89 model but we know it's definitely not from that late in the 80's.
We currently own a 2006 Jayco Swan camper which we will be selling when we give this old girl a spruce up. We are travelling full time and just want more room and don't want to fork out $40000 for a family caravan! The classics and vintage have so much character. We will be adding triple bunks for our kids but hopefully it's in good enough condition to leave most of the interior as is.
Fingers crossed this one is in ok shape! We don't mind doing some clean/repair work as long as the chassis etc is solid.
Thanks for all the great info it's helped know what to look for. Got our UVP and cash and hopefully in a few hrs will be towing it home!
|
|
|
|
Post by awbeattie381 on Jul 24, 2014 13:39:55 GMT 10
Good luck! I am also hoping to tow home a 1974 Viscount (15 ft) this afternoon. Already been to see it once - just needed to go away and think about it first before negotiations can begin!
|
|
Deleted
Deleted Member
Posts: 0
|
Post by Deleted on Jul 24, 2014 16:21:03 GMT 10
Well we did it! She needs a lot of work due to water damage, but hubby is up to the challenge so looks like we are renovating her! I would have preferred something in slightly better condition but she will be loved and with some tlc should be a wonderful home for continuing our Aussie travels  |
|
|
|
Post by awbeattie381 on Jul 25, 2014 13:50:56 GMT 10
congrats! We bought ours home too. You will need to post a few photos in the show and tell thread.
|
|
Deleted
Deleted Member
Posts: 0
|
Post by Deleted on Jul 25, 2014 20:34:15 GMT 10
Thanks Andrew,
Congrats on your purchase. I'm going through the stages of overwhelm, nervousness and excitement haha, but I am confident the finished product will make us happy. I will figure out the photo thing and get some pics up for sure.
Loreena
|
|
Deleted
Deleted Member
Posts: 0
|
Post by Deleted on Jul 25, 2014 22:23:46 GMT 10
Hi everyone, Yesterday we picked up "Claire". She's a 1978 Viscount Royal, chassis number R83365. She's in ok shape, looks fairly tidy on the outside, other than a couple of dents that we'll fix up. We'll also give the chassis a good clean up and repair if necessary. We weren't looking for a van that needed this much work, but hubby said he was up for the challenge, so it looks like we have a nice reno project on our hands  She's been modified inside at some point, but we'll be ripping most of it out and re-skinning her. We'll need to repair the roof hatch, as it's obviously been leaking for quite some time. We were planning on working around the cupboards etc, but I think that might just make things an even bigger pain, so a full strip is probably on the cards  We are travelling Australia full time, and until now have had a Jayco Swan pop-up camper style van, but we really wanted a solid van. We looked at newer ones, but just got our hearts set on getting an older van and tidying it up (or renovating in this case), so we're stopped with family for a few months, and will sell the camper and give "Claire" a new lease on life! The thing I like about buying a van that hasn't been touched and isn't in the best shape is that we can really peel her all back, seal her properly and know what we're dealing/working with, and if we do the job right, she'll take us around Australia for the next 40 years of her life hopefully  Even with the expense of the reno, we'll still be looking at spending much, much less than a modern bunk van would have cost us! Enough of the chatter, here's some photos  Bringing her home. 
Emergency stop on the way home to do the wheel bearings. Lucky super cheap auto was open and the bearings lasted until then :/ You can see the dent on the top in this photo too.  Her rather ugly insides, which have been modified in the past, we'll be putting bunks back along the front where they once would have been, only we'll be fitting a triple bunk in.  She's got water damage on almost every panel, so we're in for a bit of work stripping her, but I guess that gives us easy access to check wiring/modify anything like that.  I have no idea what we're in for, but I figure time, patience and effort will get us far. We've built a stud wall and fit out our old business, so surely we can manage to do a van?! I have no idea where to start when it comes to trying to get the cupboards and the linings off, but I'm sure I'll find that sort of information tucked away in here  Thanks for having us, to share "Claire's" reno journey. Loreena |
|
|
|
Post by ForumMod on Jul 25, 2014 22:51:29 GMT 10
G'day Loreena, and welcome to the forum!  Looks like you've got a pretty reasonable starting point there, so hopefully it won't take you too long to get it all ship-shape the way you want it. And already you've got some new wheel bearings, so the restoration work has already begun!  I'm sure you'll do a much better paint job on the walls than what is showing there at the moment.  Somebody is not too fussy about staying inside the borders, hey?!  Oh, and I think you might need another fridge or two...four should be the minimum in any van these days, ha ha.  Good luck with the job. Ask as many "dumb questions" as you like if you need to, as you come up against any problems. Just keep posting in this thread, and it will keep your whole story together. cheers, Al. |
|
Deleted
Deleted Member
Posts: 0
|
Post by Deleted on Jul 25, 2014 22:55:44 GMT 10
Haha Al, I almost spat my coffee out laughing at your post! Thanks for the welcome. Yes the paint job is horrific, and we thought the fridges were a wise investment, I'm sure we can get 20 bucks a pop on the local buy swap sell facebook  Unfortunately, there are much worse spots in the van, where water damage has really affected the walls, but I'm confident we'll get her there  I'm sure I'll be back asking for advice, it does feel nice to be part of a board full of other people who see the beauty in something older. |
|
|
|
Post by supreme78 on Jul 27, 2014 9:05:47 GMT 10
Hi there welcome.
Nice looking van in the making.
Looks like the kitchen was in the front from the factory or has it been added?
Try not to pull the insides to far out as these vans were built from the inside out and everything is stapled with a million staples and I don't exaggerate with that statement. My viscount had water damage to the ceiling and I just cut it out to the cupboards and glued sections of ply inside the ceiling. Cut the new panel the same and glued it to the ply sections I put in. Not easy to explain but to do the roof of the cupboards was a HUGE job.
My previous van was a 1970 viscount and I replaced the whole ceiling it's took ages and the end result was not that attractive as all the plastic surrounds were now out of shape and looked crappy.
A scouring pad will remove the old paint the past owner put everywhere. If you are like me you really just want to get using the van.
I have just completely rebuilt my kitchen cupboard using a sheet of ply instead of meranti frame and ply covering. I will post a pic today on my vans progress viscount supreme s81091
Regards
Paul
|
|
Deleted
Deleted Member
Posts: 0
|
Post by Deleted on Jul 27, 2014 14:31:10 GMT 10
Hi Paul,
Thanks for the tips.
I'm about to put up some photos of what we accomplished yesterday.
The kitchen at the front was a later addition, made out of aluminium angle and very, very rough!
We pulled the old lounge out yesterday, and yes, a thousand staples!
We removed the back double bed as we'll build a new bed, higher so we have storage underneath.
We will leave the factory kitchen and cupboards in place, and where the additional kitchen had been built, we're putting triple bunks in there.
We're going to put a new L-shape lounge back in, as the old one wasn't in the best condition.
Thanks for the tips on the roof lining. Yes, I figured just replacing the roof and working around the cupboards will be the best bet, so that's what we will try and do.
I'll take a look at your photos. We are really enjoying ourselves and are happy we took on the challenge now!
|
|
Deleted
Deleted Member
Posts: 0
|
Post by Deleted on Jul 27, 2014 15:06:22 GMT 10
Our first day of progress  So it begins: Fridges out and cupboard doors off for the ones that were coming out. (they had been a later edition to the van and were really bad!) All the other kitchen cabinets and the roof top cabinets will remain in place  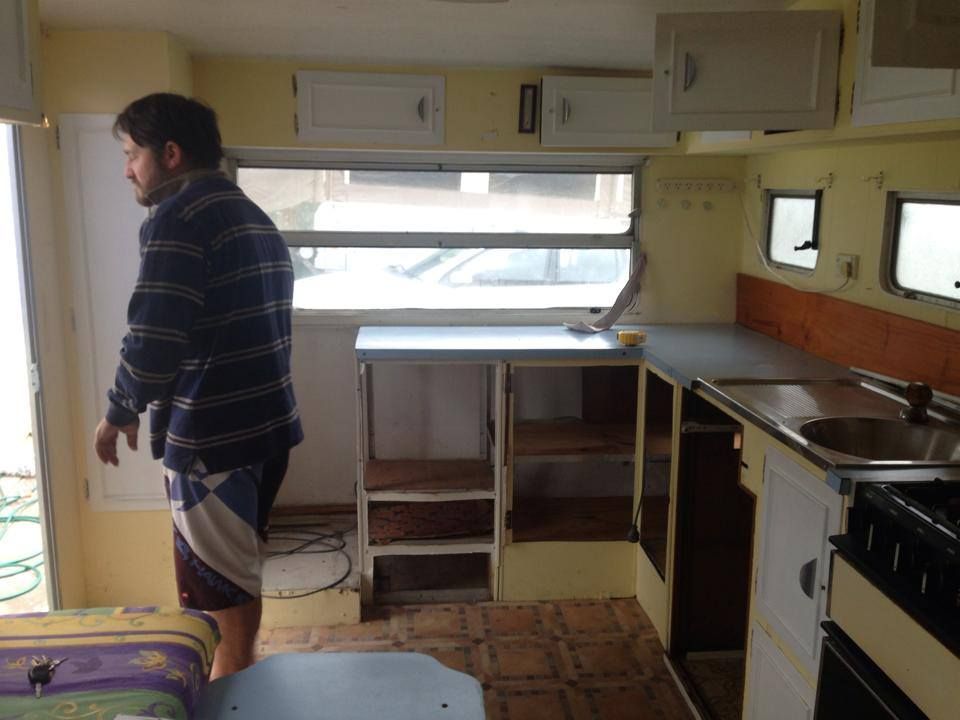 The lounge: We could have left it, but the chipboard wasn't in great condition and we're going to replace it with a new one built to include extra storage space the way we want it  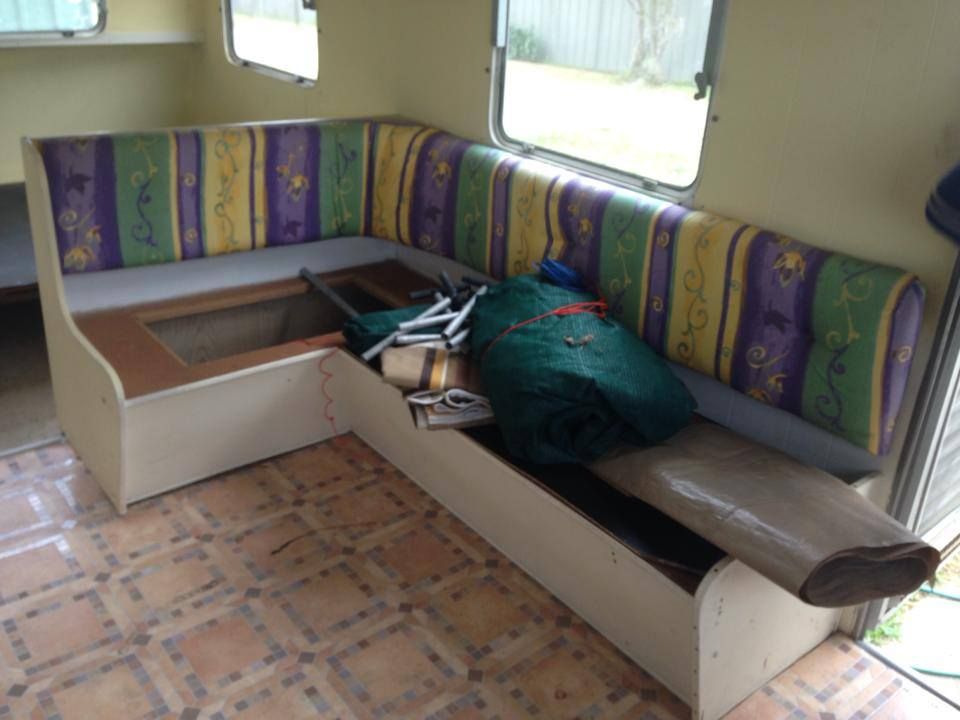 Going: 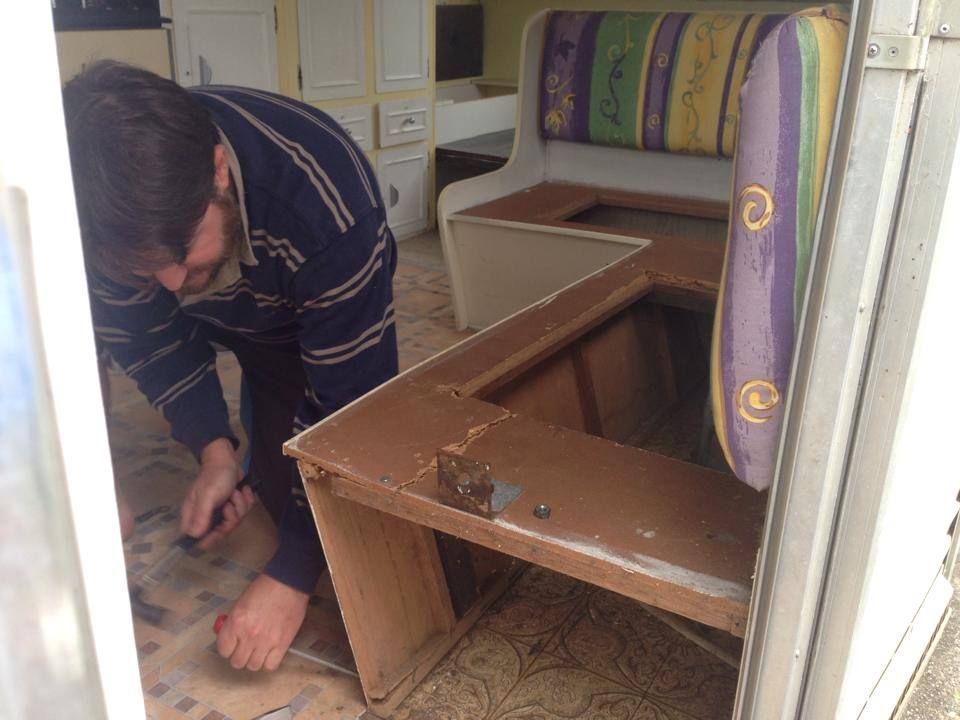 Going some more, oh boy the staples were fun to deal with! 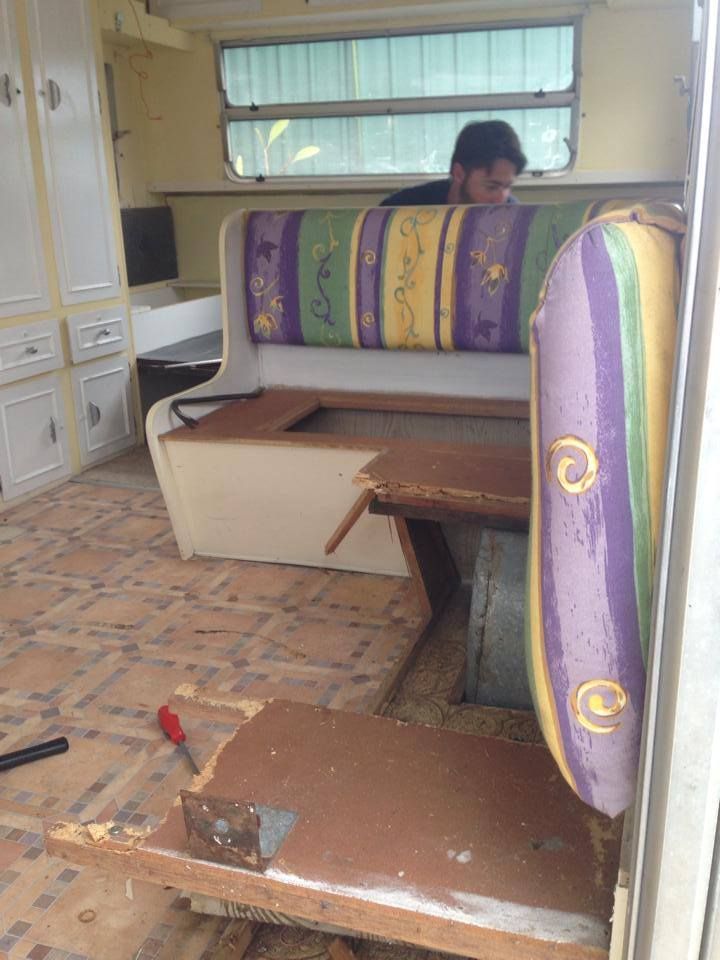 Gone! Some of the floor has lifted slightly in this area so removing the lounge will also help us attend to that - Triple bunks are going into the front area, where double bunks would once have been as there's 2 windows on the side. 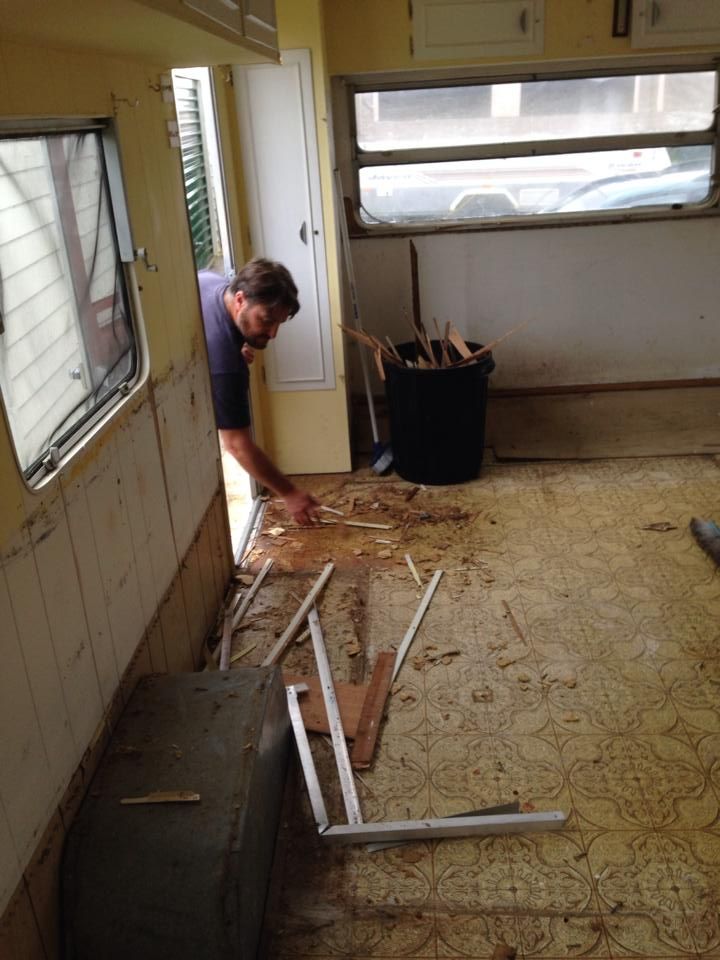 There's gonna be a bonfire  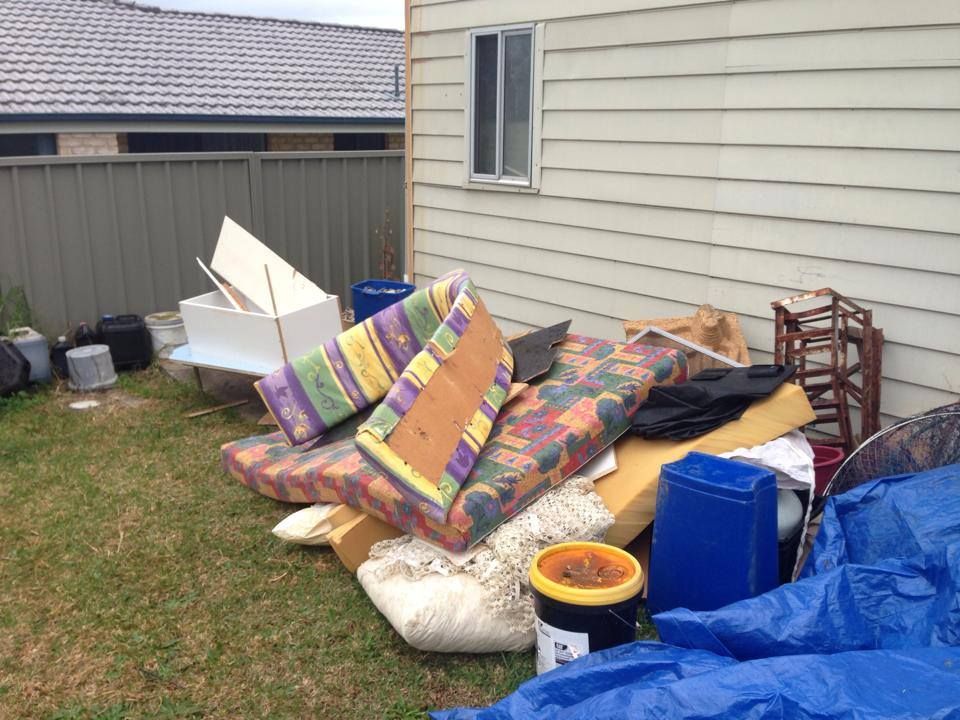 Next to remove the old bed frame, which Matt had to grind the screws out of to remove from the floor, as they wouldn't budge. 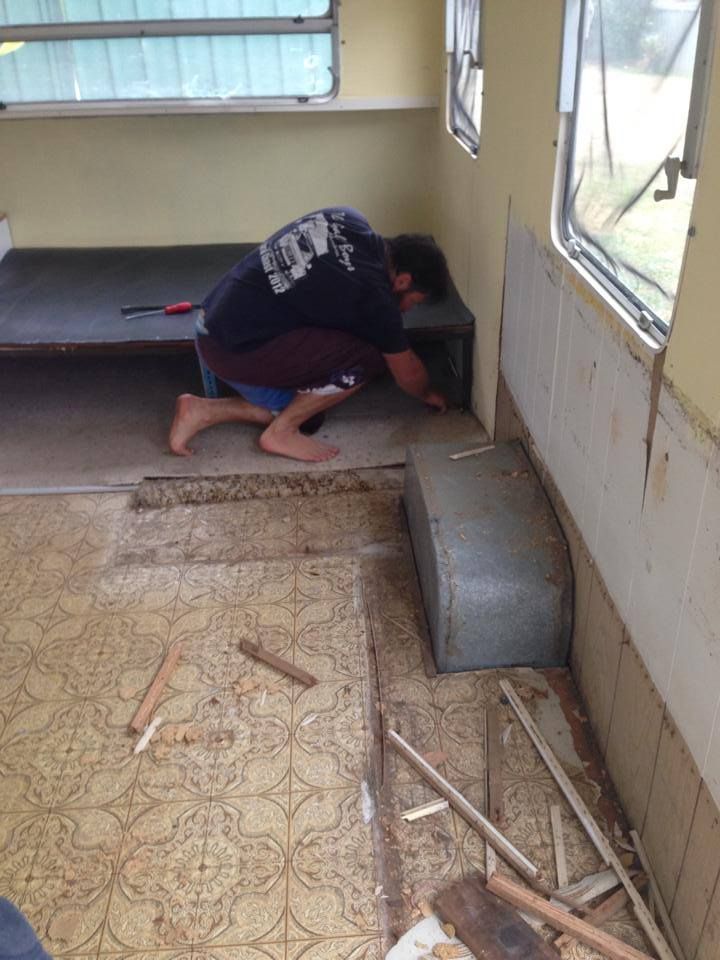 Progress! You can see some pretty bad water damage up on the left corner behind the bed, all that will come out. 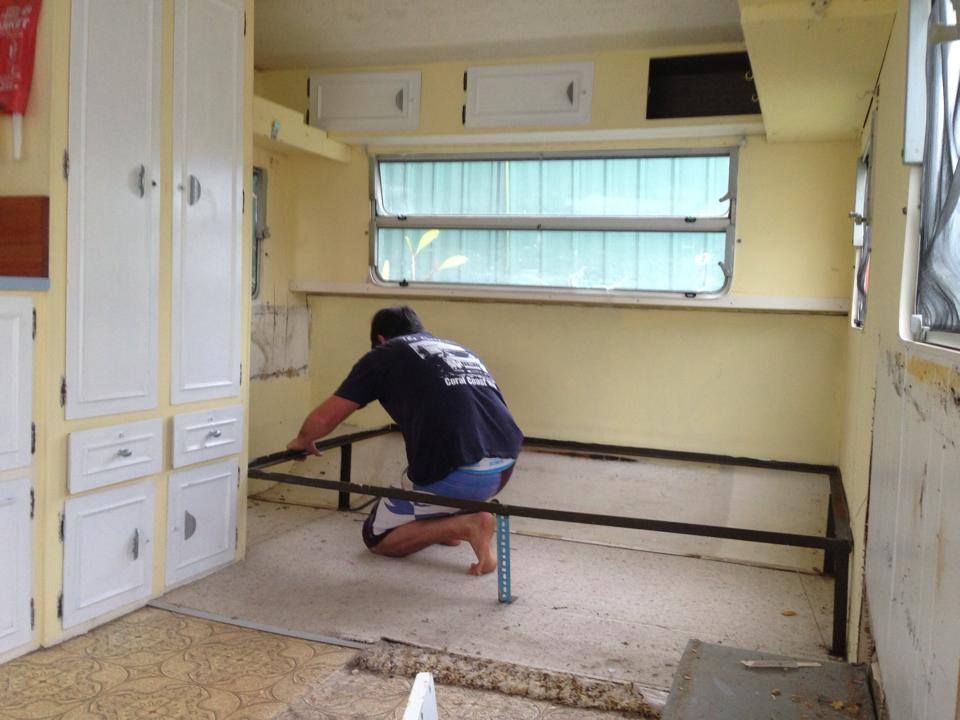 Carpet gone, and the back panel needs to come off....  Wall sheet off! The back piece of the flooring was a bit spongy. Most of it is fine, but we figured while we had this area stripped down, we might as well replace that floor sheet as well, and so we set about removing it.  Pushing the floor up from underneath as some of the pop rivets were stuck. This gives us a chance to check out the rear chassis properly too, as it needs a bit of a clean up, and I was particularly worried about where water might have been pooling. It looks better than I thought, and so should clean up well. I can't believe how flimsy these chassis seem to be, especially compared to our outback model jayco camper!  I'm really glad we stripped this out now, as it was a bit gross in there! There was a bit of a dent in the rear too, so we just popped that out nicely.  Well, that was day 1! I'm happy with the progress and really excited about it all, I can see my vision unfolding even though we're at the pull apart stage. It's great to get the years of neglect out of her so we can give her a new lease of life! I'm not sure I would have been so keen to tackle it without forums like this one being available and showing me what's possible. Loreena  |
|
|
|
Post by supreme78 on Jul 28, 2014 18:35:59 GMT 10
Good work Loreena and partner.
I must say that you are not wasting time but then again you need to get back onto your big lap trip. You will be glad that you bought a viscount. They are one of the small amount of manufacturers that used an alloy frame. Imagine the damage if you had wooden frame and water damage. The whole van is more solid and little movement at the joins. I had another brand van and the whole thing was a nightmare as everything was loose and moving and no real way to joining worn wooden joints. I decided to sell it and buy another viscount.
That rear ply panel is easy to replace and it's a good idea to add some insulation wherever possible as this will assist keeping it cool or warm whatever the weather. Mine had about 2 pieces of polystyrene in the whole van and a sticker to say how it's the new insulated type van hehe.
Just get 25mm styrene foam and fit it in any gap you find.
Regards
Paul
|
|
|
|
Post by ForumMod on Jul 28, 2014 20:19:52 GMT 10
Nice going so far, Loreena!  Who's that dodgy-looking bloke peering through the jail bars in your second last photo??  The other suggestion I'd like to add for your consideration, is to put a polyethylene barrier between the bottom of the rear cladding and the timber it's fixed to. That barrier stops water running down the back of the van and going underneath to react with the steel chassis. This photo shows how I did it on my Windsor van... 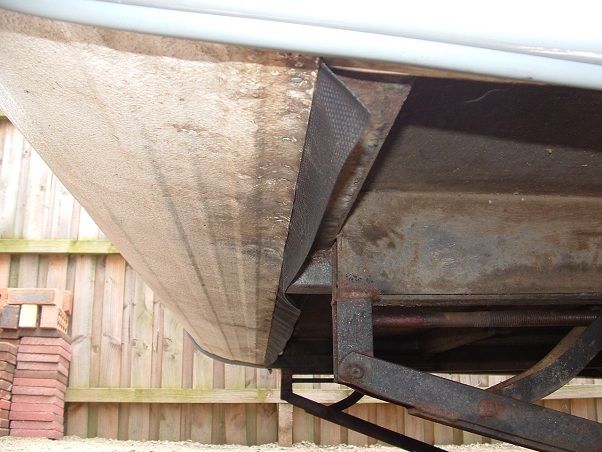 It's the same polyethylene flashing that's used at the bottom of aluminium windows before they are fitted into houses... 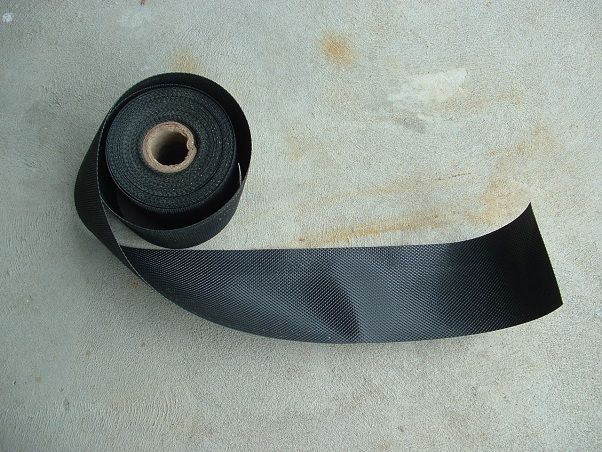 If I ever dismantle another aluminium van completely, I would also put that flashing along the sides of the chassis, to act as a barrier between the aluminium side cladding and the chassis sides. That would stop corrosion between those two metals if water ever got down there again. I've done a similar thing on my current vintage caravan project... 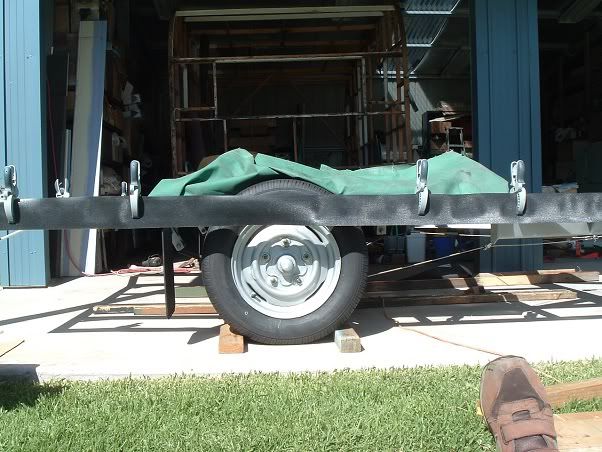 ...because the original chassis was seriously rusted due to water getting inside the plywood walls, and sitting between the plywood and the chassis edges... 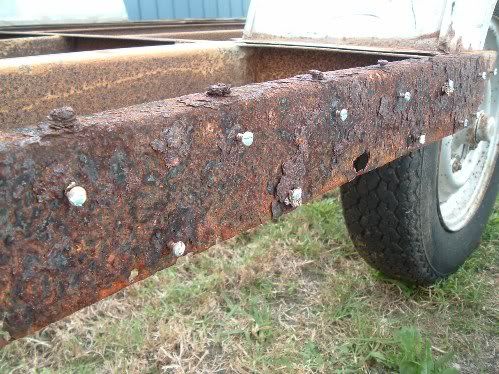  In the '77 Millard poptop I restored, there was mud trapped down between the cladding and the chassis, which ended up causing pin-hole corrosion along the bottom of the cladding. I didn't realise it was that bad until I took the cladding off the sides of the van. For that project, I used the tape that's used on polycarbonate roofing to keep the cladding and the chassis apart (this was before I later decided to use the flashing product)... 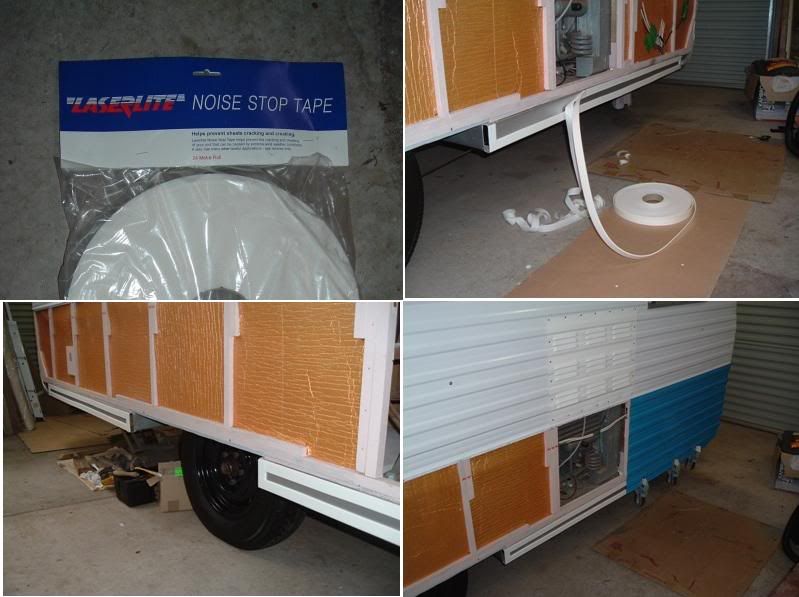 The edge of the chassis rail looked like this originally, before I cleaned up all the corrosion... 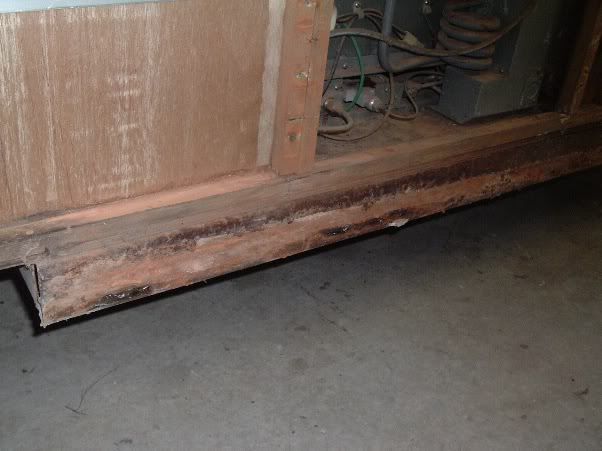 Anything you can do to prevent the aluminium cladding making contact with the steel chassis helps stop corrosion if water gets in between them. cheers, Al. |
|
Deleted
Deleted Member
Posts: 0
|
Post by Deleted on Aug 1, 2014 10:59:57 GMT 10
Thanks for the tip Al, have shown hubby AKA the dodgy looking bloke in the previous photos haha. We've been busy wire brushing, or I should be fair and say Matt and the kids have been busy wire brushing (I have photos to come) , and there's only one spot where the rust was of any concern, which is where the water tank was sitting and won't be too hard to patch up. We haven't rust converted it yet, but expecting she'll come up tops. Next is to buy some RHS, which Matt is doing today, and we'll be running some across the back, then 2 pieces near the axle which will then hold the new springs etc to give her a bit of a lift just like spacer blocks would but to strengthen across the whole centre area at the same time, and then across the front as well. Then, we'll be getting an upgraded axle and springs and new electric brake set up, Matt's pricing up new kits that come complete, on Ebay I think, at this stage we'll probably aim for the 1600kg setup as I'm not sure she'd ever pass for 2 tonne at Blue slip no matter what we do underneath. New drop down jacks will be welded on and then a re-paint underneath..... Then the fun begins with re-sealing her. We've been told to use Sikaflex 11FC for the outside edging when we lift the aluminum strip, so I'll do a little more research on that. We could have not done so much underneath, she's not in bad condition but the way we look at it, if we put in the time and bit of extra money now, she should last us for years to come, so hopefully we're on the right track  |
|
|
|
Post by supreme78 on Sept 25, 2014 9:00:24 GMT 10
Hey there
How's the viscount renovation going?
|
|
Deleted
Deleted Member
Posts: 0
|
Post by Deleted on Sept 29, 2014 10:47:04 GMT 10
Hi everyone, Still plodding away, more slowly than we anticipated, but isn't that always the way  We've fitted a side access hatch into the back area for under bed storage that's accessible from the outside so that we can carry our porta-loo and generator. We're still in the process of removing the old corner stripping and sealant along the outside edging and cleaning it out ready to re-seal. We don't have an undercover area, so have almost done all the sides and bottom so I'll have to start the roof soon, just gotta aim for good weather. This bit has been my job, some parts are really easy and some not so much, but between wire brushing and scraping it's getting there. Matt's painting the chassis, the first coat is done, and about 3 coats on the A-frame so far. We've welded on a new gas bottle holder, and new water bottle holder to the A-frame, and welded 4 new Alko drop jacks onto the corners as the old ones weren't in good condition. We've also installed a new lockable water filler into the side, and we have a new water tank with metal shield that's going on today. We've got the insulation and the wall and roof lining ordered. We went with an insulation called foil board, which is styrene with a foil coating for better insulation properties. For the internal lining we've gone with a product called Nema Board, which is a composite plastic-like product. It can be treated just like wood, but won't need to be painted, and it means if we do ever spring a leak for whatever reason there won't be water damage to the panels, it also is easier to deal with mould etc. All that should arrive this week. We've run new wiring for the trailer plug and tail lights, and started running the 12v wiring for the LED lighting etc. We ordered our LED light casing and light strip, and all that is also waiting here to go in, and we've got the paint sitting here for the inside parts that will need to be re-painted. We havent started on the windows yet, but we'll be replacing the front ones with Acrylic as the kids bunks will go there, and the front windows won't be used anyway, and it will prevent the old glass shattering. It seems like so much when I put it here, and yep HUGE job, and costing way more than we first planned for, but, it's going to be our full time home, so although we'll not ever likely get the money back we'll end up spending, at least we'll have everything we want  |
|
Deleted
Deleted Member
Posts: 0
|
Post by Deleted on Sept 29, 2014 10:52:06 GMT 10
A question for the axle: We have the old one out, and the measurement we have is 2040 from hub face to hub face, and 2140 overall length, we haven't been able to find anyone with ready made ones in that measurement, so I guess we'll need to get in touch to get one made. For those who've replaced axles, did you just get it done locally and what size did you go with? If we go a 45mm square with 10' hub it says it's only rated to 1400kg, but I'd really like to have at least a 1600kg rated axle. Maybe we should just go to a 50mm with 12' hub and bigger bearings and that would give us an overkill of 2T? We're aiming for 14inch wheels so we can put light truck tyres on. Any axle advice is appreciated. I'll post some photos when I get a chance  |
|
Deleted
Deleted Member
Posts: 0
|
Post by Deleted on Sept 29, 2014 12:48:55 GMT 10
Ok, so I'm thinking out loud here (again) haha
Just talked to Matt again, we've been a little stuck on the axle, and I think we've decided to upgrade to a 2T axle.
My thought process is that, if the max rating is 1400 of the axle and the van, then being a family of 5, travelling full time, we're likely to push the limits of that, and I'd rather upgrade the axle and give ourselves the peace of mind that the axle is rated well above whatever the van may ultimately be registered for (it's never been registered in NSW before so it will all be re-calculated for the blue-slip.
So in saying that it looks like upgraded hubs, bearings and axle, has anyone else done this for their van? Or does anyone think it may just be overkill?
|
|
|
|
Post by supreme78 on Sept 30, 2014 20:43:59 GMT 10
I always think better to be to strong than just strong enough. Parallel bearing seem to take a lot extra stress on the long road trips. If you were only using it for weekend getaways I would say just use a 45 mm axle and brakes but your doing a big trip so I would say go the big axle. Brakes will do it easier and it will give you piece of mind knowing you have extra strength under your van. Springs are also a big thing in the weight capacity.
I was keen for a setup for my van of 1600kg but you dan have 1400kg or 2000kg not much between the 2.
And the step up from 45mm to 50mm axle and brakes is not a cheep one.
I was keen on a set of performance Tx1 rims as they have the capacity of 1400kg per rim and that would suggest they are a very well made rim.
They are on my wish list for the future.
Does anyone know what the std axle capacity of a viscount van with a 60mm round axle that my 16 ft 6in van has Std?
|
|
Deleted
Deleted Member
Posts: 0
|
Post by Deleted on Oct 14, 2014 12:40:21 GMT 10
I wondered about the capacity of the standard round axles too, but we've definitely decided to upgrade to 2T, the axle weighs about 120kgs so increases the van's overall weight but hopefully due to the increased capabilities they are willing to account for that and give us plenty of payload when it's blueslipped. Have paid out a few thousand in the last couple of weeks. Our insulation and lining arrived,that was just over $1000 I've just ordered the new fridge (wow that's not cheap!) and new stove/oven combo that was $2300, along with range hood, new wiring, TV aerial, and a few other extras which was another $1000. Still haven't made a choice on where we're getting the axle from, going to talk to a couple of local engineering places and a local trailer place next week and if not will probably get it from huntsman products online. Supreme28, huntsman have a 1600kg axle which is the 50mm solid with the 10' brake setup which they have on ebay, I figured with the weight of the actual axle taking up most of that extra allowance between the 1400 & 1600 we'd just go the 2T and be done with it. So that's going to cost about $1000 if we need to order it in from somewhere and have it delivered, but that's complete. Then we still need to get new solar panels, we're going ultra thin semi-flexible ones for the roof so they are light. A 100w at the front and one at the rear, as well as a 120w portable. 2 deep cycle batteries (again these are heavy at around 32kgs each!) hooked into a redarc battery management system, so that's not far off another couple of grand there. Now I just have to choose my sink, which I think will be one with a glass lid although more expensive offers extra bench space seeing as we don't have a lot, so another couple of hundred there. The bench top is $100, and the aluminium framing to build the bunks, double bed and lounge I guess will be somewhere around $500. We'll probably need a little bit of hardware for the windows, but that shouldn't be too expensive. Phew! I'm sure there's more, and we may have the most over capitalised old Viscount on the road, but seeing as it's our full time home I'm confident the investment will be worth it to us, and still come out less than a newer van would have been, and we'll know every inch of her bones  |
|
|
|
Post by supreme78 on Oct 14, 2014 22:58:47 GMT 10
Sounds like some serious cash outlay in Claire. It will interesting to see the final costings and the fit out to show others interested in doing something simular that it still comes out a lot cheeper than a new van but with lots more class and built to last another 35 plus years. I never did the final cost on mine but it's under 10k and will be a great van when I get my shot together and go traveling full time.
I have to add solar and better batteries and an axle upgrade but they can come later as it's very usable at the moment and I will only be doing some smaller trips so won't need to carry to much with me.
Your van is going to a very nice old/new girl when finished. Keep up the great work.
|
|
Deleted
Deleted Member
Posts: 0
|
Post by Deleted on Oct 23, 2014 13:06:18 GMT 10
Yes, some serious cash outlay, but it will definitely be worth it. We sold our Jayco Swan for $15000 so we had that to play with. I'm not the best record keeper, but I think it will come in around the 10k mark which we'll be happy with. I need to try and upload some photos of our progress, we started cutting some lining to see how it will go today, but in typical novice style, we forgot to mirror image it and it came out back to front hahahahahaha! No wastage though, we'll just use the pieces somewhere else to fill some little spots that have small lining areas.
|
|
Deleted
Deleted Member
Posts: 0
|
Post by Deleted on Oct 23, 2014 15:44:51 GMT 10
So I've got lots of photos in between that I realise I've skipped, such as doing our side access hatch, but you can see that in one of these pictures, but here's an update of some things: Here's where we put the new piece of floor in: 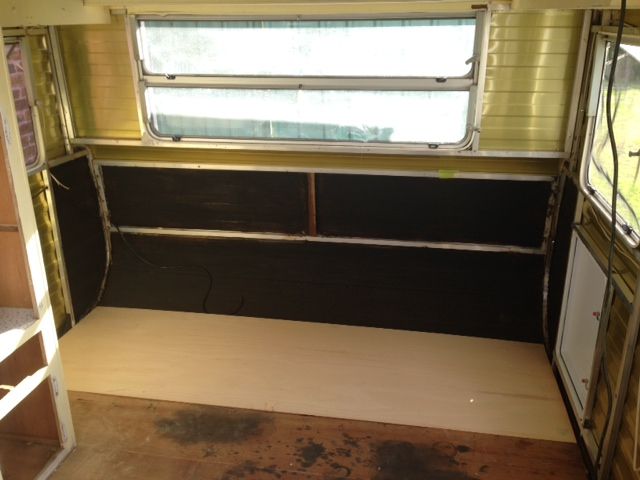 We decided to shorten the roof cupboard where the triple bunks will go to give the top bunk some more space. We have taken the face off it and will build a new face that is at an angle and put pigeon holes in the front so the kids can store toys etc up there without it being too in the way or for the little man to hit his head on when he rolls over in bed. 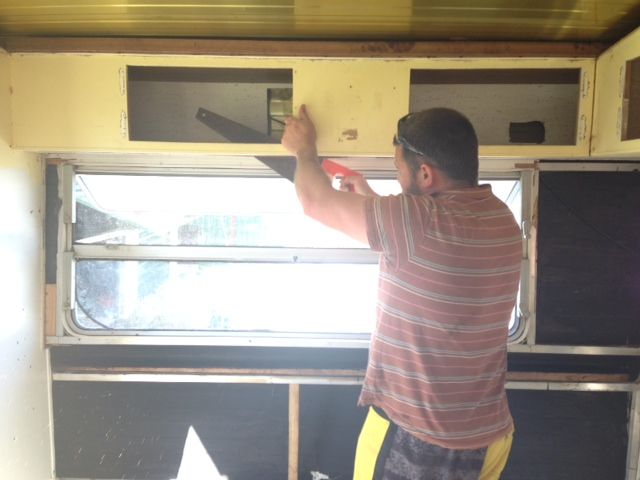 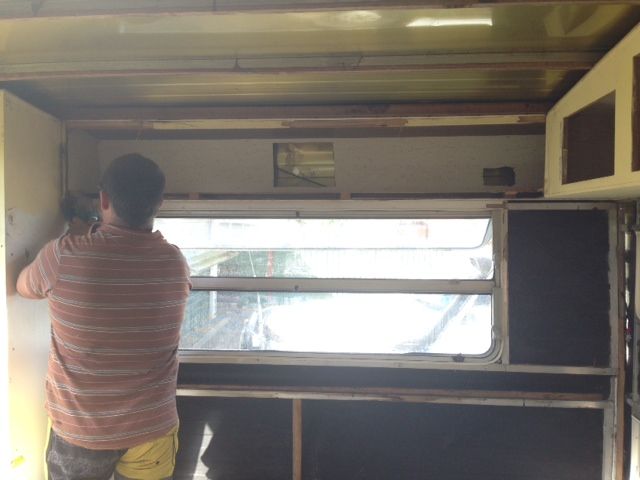 Here's our workspace, which isn't ideal, but we're making good with what we have and doing our best  After I took this photo we put the pallet up on milk crates to give it a bit of height, much more sophisticated haha. That's our first piece of nema board we're cutting into. We made a new lining to go inside that modified cupboard I posted above, figured if we buggered it up it wasn't too visible lol You can see the side access hatch we put in here, it will provide access to under bed storage, as we're building our double bed up high so our generator and porta potti will fit under there along with a lot of other gear. 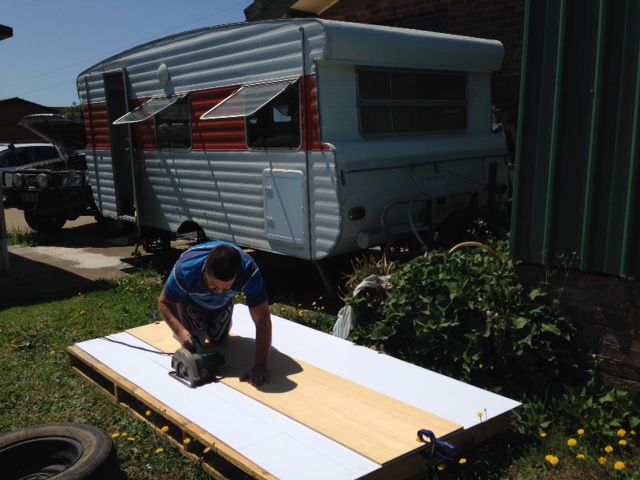 This pic didn't work very well, I was trying to take a panorama, I should have done a before and after, but I am SO SO SO glad the ugly old yellow sloppy paint job is gone now, we've done 3 coats of white on all the cupboards.  |
|
|
|
Post by Pj on Mar 31, 2015 23:47:19 GMT 10
Just wondering how the progress on Claire is going? Did you finish her??
|
|
|
|
Post by Mustang on Apr 2, 2015 17:45:31 GMT 10
Holy Dooley that hubby of yours is not shy to have a go!!!!!
|
|