|
|
Post by peter92 on Apr 25, 2014 17:44:36 GMT 10
If anyone has any info on my van please let me know, it has wind out windows and the number on the chassis is V3110, and a 1 owner It has been in a shed since 1994 and very dirty on the out side, so what would be the best thing to wash it with, to get it cleaned The rubbers around the windows have shrunk so can they be replaced, there will be other questions as i put up more pics so if any one wants to add any thing, please do Regards Peter      |
|
|
|
Post by peter92 on Apr 25, 2014 17:47:18 GMT 10
|
|
Deleted
Deleted Member
Posts: 0
|
Post by Deleted on Apr 25, 2014 20:15:58 GMT 10
Nice looking van. Glad to hear it's been undercover for many years  As for the rubbers try Caravans Plus website. They have all the replacement bits for the old windows. I have just pulled all my windows to pieces ready to replace all the seals and rubbers.  |
|
|
|
Post by peter92 on Apr 25, 2014 21:32:55 GMT 10
Thanks Dede, i will check the site out may even find some other parts i need
Regards Peter
|
|
|
|
Post by peter92 on Apr 25, 2014 22:04:36 GMT 10
|
|
|
|
Post by peter92 on Apr 25, 2014 22:07:05 GMT 10
|
|
|
|
Post by peter92 on Apr 28, 2014 17:56:56 GMT 10
HI EVERY ONE Ive got an alumimium 4 season hatch which i have put on the top of my franklin van, with the help from my brother inlaw Now i have put it in and put sealer under the outside edge and screwed it down but now its raining, it leaks in the corners inside the van Looking from inside the van, there is the inside lip of the hatch, is it supose to be sealer on that edge If any one could help me in this it would be real great I will take it off tomoro ready for the job to be done right, with help from here  Its leaking from the edge you can see in the pic Regards Peter |
|
Deleted
Deleted Member
Posts: 0
|
Post by Deleted on Apr 28, 2014 19:50:28 GMT 10
Hi peter, Check out this thread caravanersforum.com/viewtopic.php?f=2&t=237&p=1375&hilit=leaking+hatch#p1375Make sure you follow the info from Cabcar, his advise on sealants is invaluable. My hatch was leaking when I bought it and the ceiling was damaged and rotting. It had been resealed many times before me, but still leaked, after following Cabcars instructions has not leaked in over a year since fixed. I did have to take the rivets out as they are usually the source of the leak, and apply mastic and drill new holes. Also make sure you use the tape to form a dam for the sealant as instructed. Went from this  and this  to this   Sorry no pictures of the tape or hatch repair, I also made it so I could take off the Tassie Oak edgw to check if it gets damp or is still leaking Scotty |
|
|
|
Post by peter92 on Apr 28, 2014 20:07:33 GMT 10
Thanks Scotty,
it sucks when there is a leak and its on every corner
i will check out that link and hopefully i get it right
Regards Peter
|
|
|
|
Post by peter92 on Apr 28, 2014 20:11:33 GMT 10
Heah Scotty, love the finish on the hatch with the tassie oak, mine has to be about 125mm wide so im hoping it looks good when ive finished it
Regards Peter
|
|
Deleted
Deleted Member
Posts: 0
|
Post by Deleted on Apr 28, 2014 20:19:54 GMT 10
Forgot to add, the plastic ends on the hatch need to have mastic under them before assembly
Scotty
|
|
|
|
Post by peter92 on Apr 28, 2014 20:30:37 GMT 10
Just read that thread and its great info, now i know where i went wrong, i didnt put enough sika in there, or i hope thats what it is, so look forwards to taking it off soon but just looked at the weather map and tomoro its RAIN, oh no
Regards Peter
|
|
Deleted
Deleted Member
Posts: 0
|
Post by Deleted on Apr 28, 2014 20:54:17 GMT 10
Peter if you go the sticky foam tape method.
The tape goes on the outside hatch edge to form a dam between the tape and the inside edge.
Then fill the dam with the mastic so when you screw the hatch down to the roof the mastic will ooze from the inside of the hatch, but will leave a nice clean edge on the outside edge with the compressed tape visable.
You can then use a paintable sealant on that outside edge or just leave it as is...
P.S its easier to not have the roof on the hatch so you can work from the center of the open hatch when you stick it down.
Regards Scotty
|
|
|
|
Post by peter92 on Apr 28, 2014 21:02:32 GMT 10
Thanks Scotty
So do i take out the rivits in the corners where the plastic is
And also, when i put the tape on the bottom of the hatch do i then put the sika on the bottom of the hatch as well or on the roof
Regards Peter
PS thanks for taking the time to help me out
|
|
Deleted
Deleted Member
Posts: 0
|
Post by Deleted on Apr 28, 2014 21:50:12 GMT 10
Peter I took the rivets out because some were actually completely detached from the aluminium, the plastic on shrinking had snapped the rivet clean off. So yes take out rivets, sorry its going to make job a little longer.
Had to redrill new holes as the holes didnt line up anymore and put in new rivets, make sure you put a dab of sealant on the rivet tops.
The tape you use should cover only around half the width of the sealing surface of the hatch, so to allow you to fill the gap from the tapes inside edge to hatchs inside edge with sealant.
You can put sealant on the roof if you want, if fact I found if you use mastic its not a bad idea to key the surface first to help the mastic to stick.
Scotty
|
|
|
|
Post by peter92 on Apr 28, 2014 22:00:17 GMT 10
Ok Thanks Scotty, youve been a great help, will let you know how it all goes when done
Hopefully to say, no more leaks
Regards Peter
|
|
|
|
Post by peter92 on Apr 29, 2014 11:27:59 GMT 10
just bort the selleys butyl mastic to seal the hatch this afternoon
cost $20.00 per tube
Regards Peter
|
|
|
|
Post by peter92 on Apr 29, 2014 19:13:23 GMT 10
Hi Guys Well after trying to find some ply that is the same as the walls on the van, with no luck, which is a bummer, ive decided to put 3mm pine ply on the cupboards to cover the carcass and then use 12mm hardwood ply for the cupboard doors Then using a satan estopol to go over the finished wood Was thinking that seeing i couldnt get the right ply, i would make all the new cupboards a feature The hardwood ply isnt really dark,its more of a pink colour Would like to know what you think of the finished look, do you recon it will go with the rest of the inside van  Regards Peter |
|
|
|
Post by peter92 on May 1, 2014 16:44:31 GMT 10
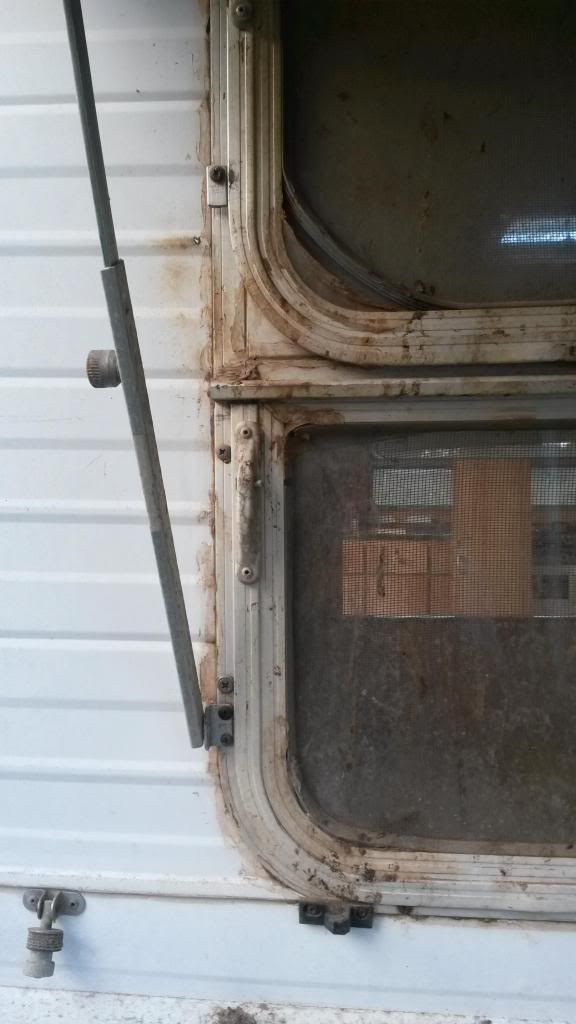
 Well got my hatch pulled apart and put back in, no leakd thanks Scotty Here is a pic of my rear windows that are leaking in side and by the way it looks no need to ask why Question is, i need to take the windows out to reseal them and should i use MASTIC or the tape i used on the hatch Question 2 The rubber seal that holds the window in, on the pic, needs replacing, can that be done after the window frame has been sealed or take it out before i put the window frame back in Regards Peter |
|
|
|
Post by peter92 on May 1, 2014 16:46:54 GMT 10
|
|
|
|
Post by peter92 on May 1, 2014 18:50:27 GMT 10
HI EVERY ONE I have to replace the bench top on my van and just wondering if any one has replaced theres I dont want to damage the walls or the rest of the cupboards Any help and advice app Regards Peter  |
|
|
|
Post by peter92 on May 3, 2014 18:11:56 GMT 10
Took the rear window out today and cleaned it all up and resealed with MASTIC
Took about 1 1/2 hrs to do, easy job
Regards Peter
|
|
|
|
Post by peter92 on May 5, 2014 19:08:25 GMT 10
Took the fridge out today so the gas guy can check it out and found some wet rot at the back of the fridge on the frame work at the bottom by the chassis, so cut it all out and putting marine ply at the back of the fridge where the old ply was, cutting out the vent area for the fridge
will put up pics tomoro
Regards Peter
|
|
|
|
Post by peter92 on May 7, 2014 19:19:54 GMT 10
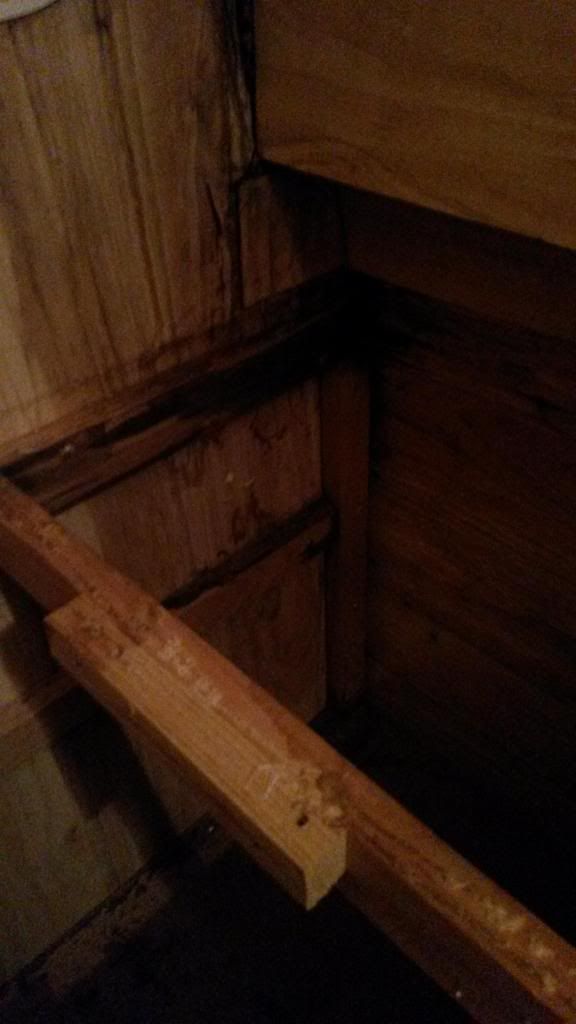
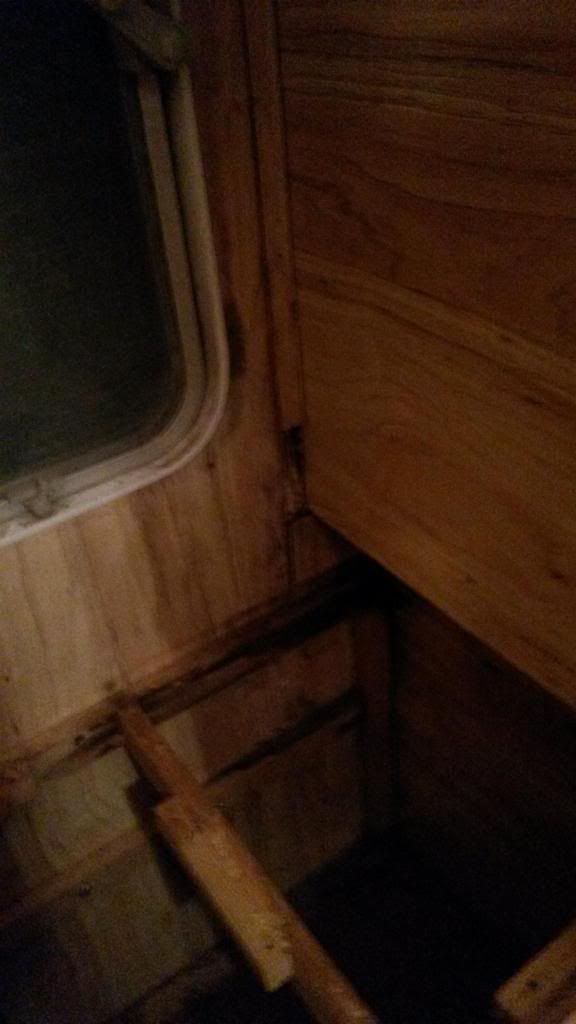
Hi Guys Ive got this problem and not sure what to do about it, so your help and advise would be great The rot goes all the way down to the floor and i cant buy the ply colour to match   Replies quickly would be good to please as im stuck Regards Peter |
|
Deleted
Deleted Member
Posts: 0
|
Post by Deleted on May 7, 2014 21:26:28 GMT 10
Color matching ply is a nightmare. I'm completely rebuilding my caravan so I am changing the color all the way through. The only thing I can think of for you is to replace the damaged ply with raw ply and stain it a color as close as possible to the old ply. Not idea but if you can't match it then makes it really hard.
|
|