Deleted
Deleted Member
Posts: 0
|
Post by Deleted on Jan 21, 2013 19:30:01 GMT 10
Hello all, first post. Mum and Dad have not used their van for many years, and it has sat in their backyard unloved and uncovered since the late nineties. I had not been inside the van for years and it was quite a shock to smell the moisture and see the water damage. Started researching and found this incredible forum. So I present to you our Regent Sundowner. 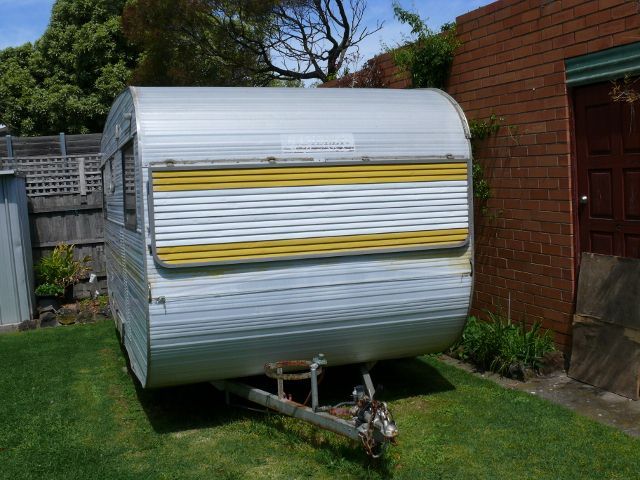 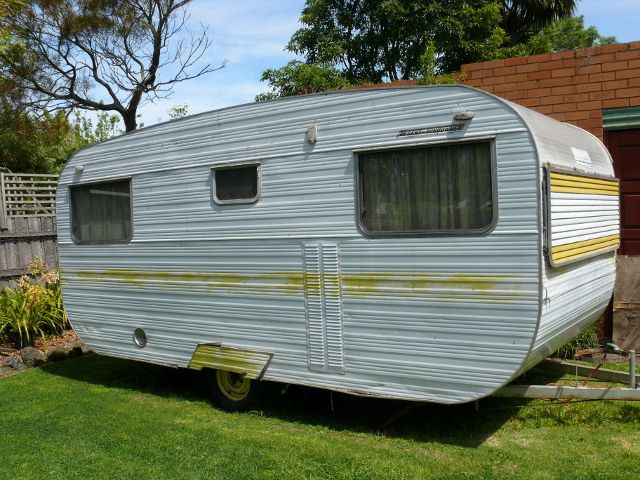  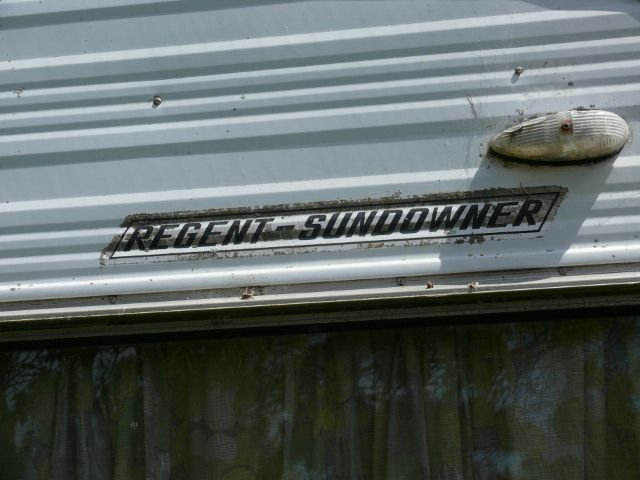 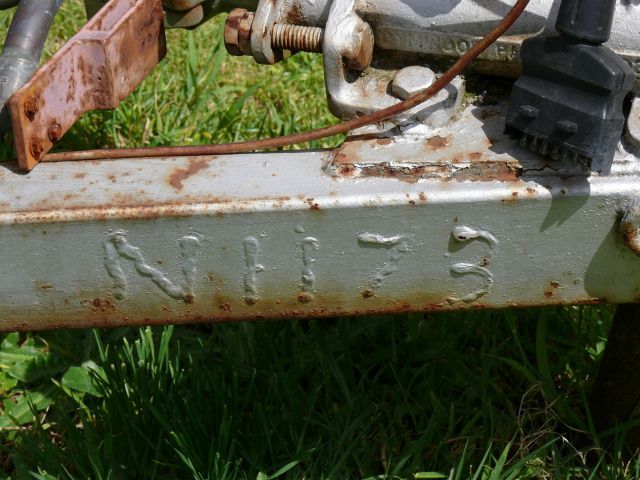 The chassis number is N1173. The front and rear decals say Rambler Melbourne, however written on the ply inside the wardrobe is Newlands N1173. The warranty tag on the fridge says Franklins Ballarat (Delivery date is missing as this tag was attached to the back of the fridge – found it when I took off the vent panel).  What make is this Van? Could Rambler have been just a Retailer? This van kinda looks like other Newlands in other posts. How does Franklin fit in? Ma & Pa say it was 3 years old when they purchased it in 1976. The interior is clean and the furniture is in good condition. 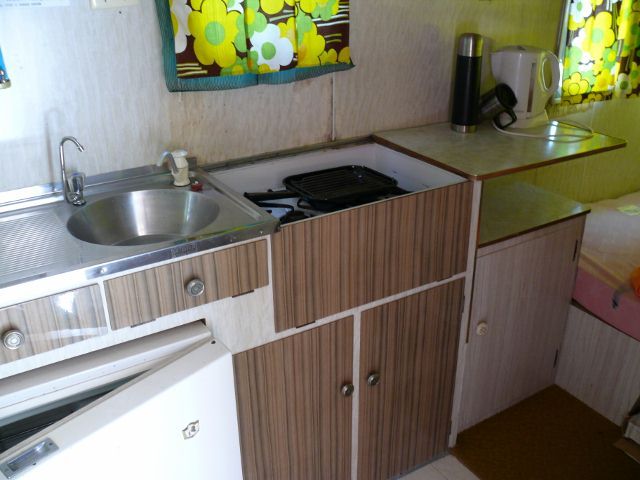 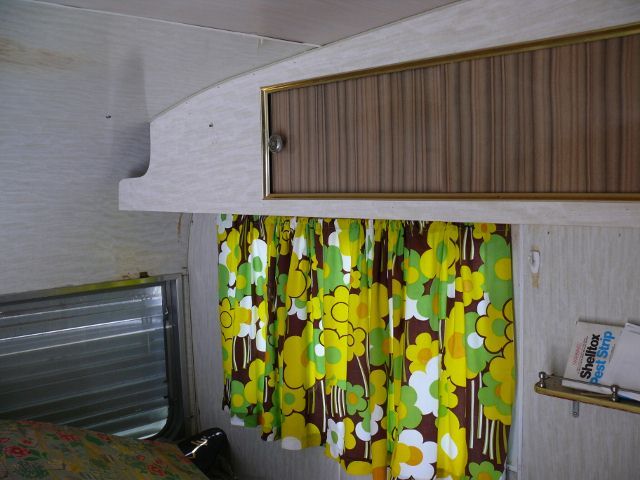 It has a Hallstroms HJ2 L.P.E. 240/Gas fridge and a Gas stove (no identity info). 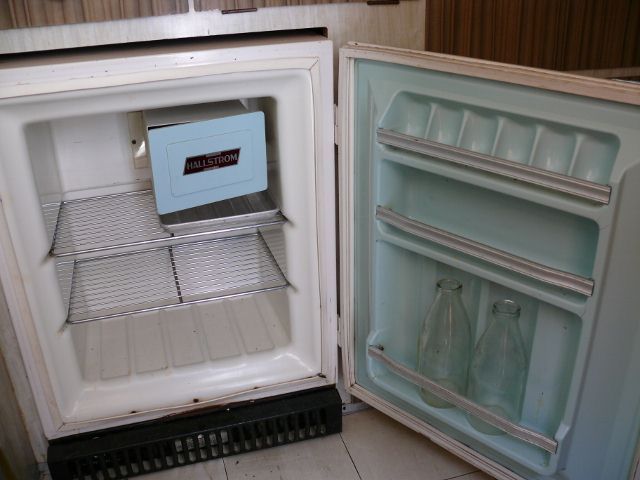 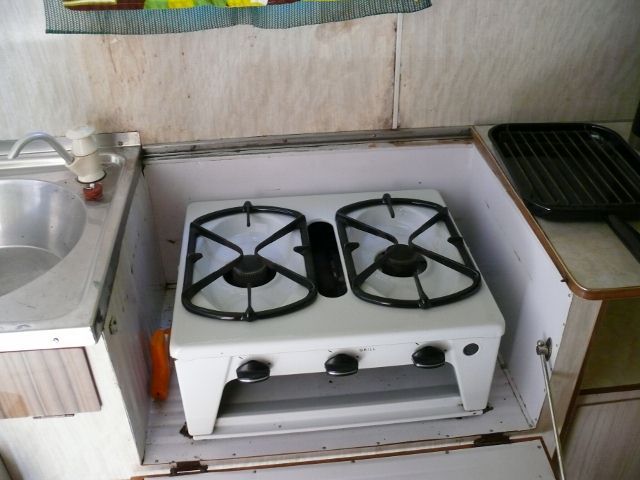 There is however water damage around and under every window and some roof areas. 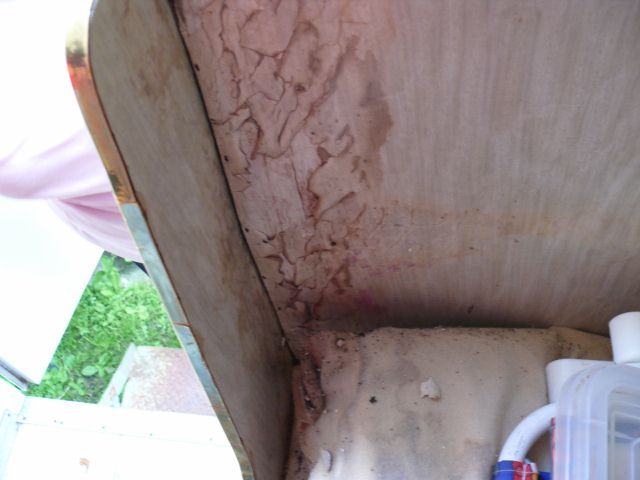 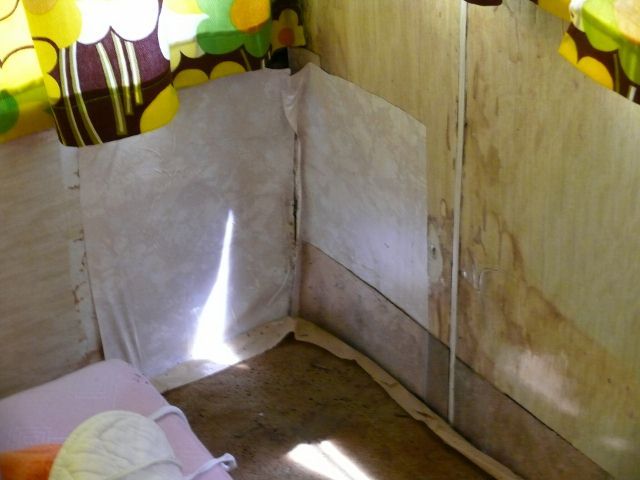 You can even see the moss growing out from the rear windows in pic 3 above. The external cladding is attached to the frame by SS screws (no sealant around these). When I press on some of the screws, there is no frame left. When I press on the rear external cladding below the number plate, the sound of pieces sliding down the aluminium can be heard. The chassis looks to only have surface rust. The floor is square vinyl tiles stuck to the ply which I feel flexing under foot. Wheels are 13” 4 stud (Datsun I think). Hydraulic brakes (never worked from memory). There are white switches for mains power and black switches for 12volt (no battery, just the car). Light fittings have 2 globes (240 & 12). The small window on the drivers side is not original. The intention is to repair the van so that I can use it for the next stage of my camping life (been a tent then camper trailer man). I do not want to make any (many) structural changes, preferring to keep its character. After reading many posts and replies from you wonderful people, I have a loose plan. I’m sure it will change as I go. Will start by removing the furniture for re use. In the meantime I need some help identifying this van. Thanks, Peter Mac |
|
|
|
Post by ForumMod on Jan 21, 2013 21:30:49 GMT 10
G'day Peter Mac, and welcome to the forum! ;D Forum member hughdeani has previously posted this tidbit of information on our sister forum for Vintage Caravans: "Rambler were also made by Newlands,dont know if it was a yard name or brand name that was "badge engineered"".Your van has push-out windows, which means it was most likely built before 1973 when wind-out windows were introduced into the industry. In a 1975 caravan magazine I have, Newlands is listed as: Newlands; Reservoir Vic.
Vans and accessories in a range of colour and design with accent on three regular models, Campmaster, Deluxe, and Premier. Optional shower, airconditioning etc and frames in either aluminium or timber. Heavy duty electrically welded chassis.Here is an advertisement from a Sydney newspaper in December 1970, showing a photo of a Newlands caravan... 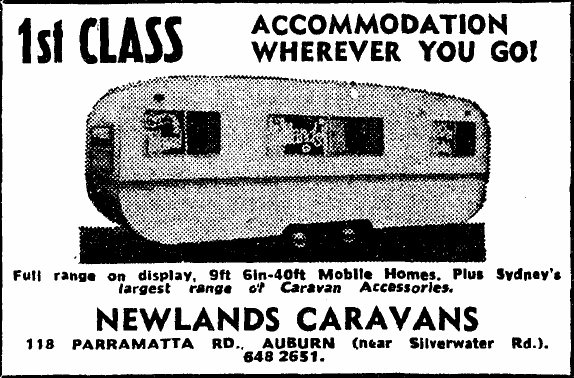 In late 1977, Newlands were taken over by Coronet, who themselves closed down a year later when the caravan industry collapsed. It would appear the fridge was distributed by Franklin Caravans, who were in the Top 3 manufacturers at the start of the 1970s. They must have purchased significant numbers of fridges and on-sold them to the smaller manufacturers. Here's a link to another thread for a Newlands caravan from around 1973/74. It's a different shape to yours, but it'll show you some pictures of the interior which might give some clues as to the age of your van. cheers, Al. |
|
Deleted
Deleted Member
Posts: 0
|
Post by Deleted on Jan 21, 2013 21:35:58 GMT 10
Hi Peter,
You're van is indeed a Newlands.A Newlands Sundowner to be exact.
Started out as a Regent Sundowner,but as Franklin had a Regent they couldnt usw that name,so stuck with Sundowner.
This van was an entry level aimed at families,with minimum fixtures and fittings.
As you say ,kitchen window is a later addition,as are the wheel spats,even though they are Newlands ones.
Rambler was a distributor for different brands of vans,a form of "badge engineering"
The frig mystery probably means Franklin bought in huge bulk lots and on sold to other manufacturers when stock was required.
Hope this is of some help to you.
Cheers
hughdeani
|
|
Deleted
Deleted Member
Posts: 0
|
Post by Deleted on Jan 21, 2013 21:38:21 GMT 10
Sorry Al,just saw your post after I wrote mine!
|
|
|
|
Post by ForumMod on Jan 21, 2013 21:41:35 GMT 10
At least we're telling the same sort of story, Dean. ;D ;D
|
|
Deleted
Deleted Member
Posts: 0
|
Post by Deleted on Jan 21, 2013 22:18:23 GMT 10
Thanks guys, much appreciated. I thought it was a Newlands, just that the Franklin bit threw me and it is registered as a Rambler. Mum cant find any of the paperwork, which is annoying her! Have started pulling out the furniture, will post soon.
Peter Mac
|
|
Deleted
Deleted Member
Posts: 0
|
Post by Deleted on Jan 28, 2013 18:59:47 GMT 10
Thought I would start with the cabinet next to the stove as this was an aftermarket addition. Removed 13 flat head screws which I thought would have been enough to hold the cabinet in place, then found 10 nails from the inside of the main cupboard. Move on to the other cabinet opposite which was the original vanity between the single beds, more flat head screws and nails. Both these cabinets are attached to the double bed which was made out of the original 2 single beds. Removed the ply, removed 8 flat head screws to the floor and more nails. There were also bolts through the floor with rusted square nuts. So that’s screws, nails and nuts & bolts. Strong. 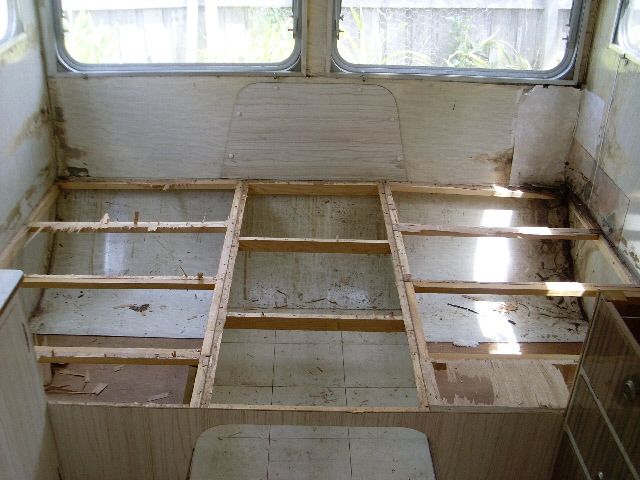 Part of the frame has rotted so I decided to destroy the bed and will install a new one with better storage access. 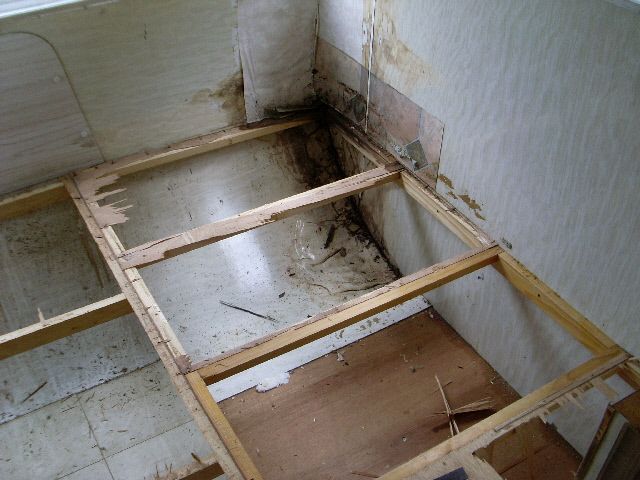 I am too scared just yet to remove the ply and the attempted repairs in the dark corner! 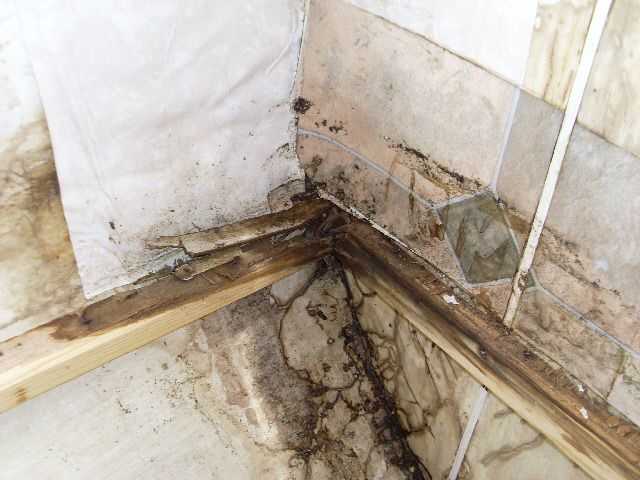 Happy with day one! 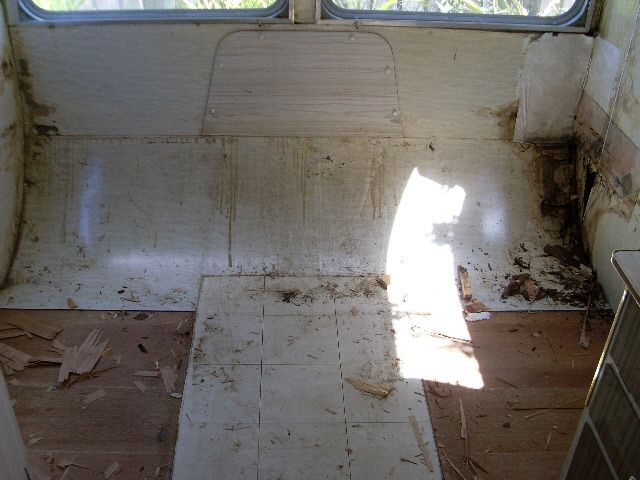 Before I started, Mum had not fully emptied out the cupboards so I gave her a hand. Found some toys from my childhood. Nice. Found some pet vitamin tablets, use by 9/92. Peter Mac |
|
|
|
Post by ForumMod on Jan 28, 2013 20:26:03 GMT 10
G'day Peter Mac, Ahh, the joys of demolition!  That dark corner looks like it might be hiding a few bogie men.  Hopefully it's not as bad as it looks, when you eventually take the wall lining away. Bolt, nuts, screws, nails...yep, sounds like they were trying to build a Fort Knox! ;D cheers, Al. |
|
Deleted
Deleted Member
Posts: 0
|
Post by Deleted on Feb 12, 2013 20:33:00 GMT 10
Reckon it might be a tough one Al, but we shall press on. Changed the thread to show that its a Newlands. Back to it again, a late start so only couple hours available. Tried to gingerly remove the wardrobe as a complete unit, so it can go back in easily. I like the path of least resistance. This was not going to happen as it was not built as a complete unit. It was built inside the van. The main facia with the doors and drawer was secured in place with a nut & bolt through the floor (flat head screw of course) and lots of staples through the roof ply to the facia timber. 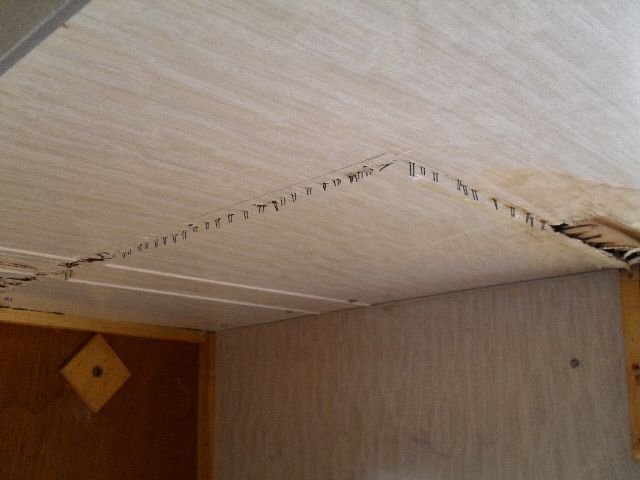 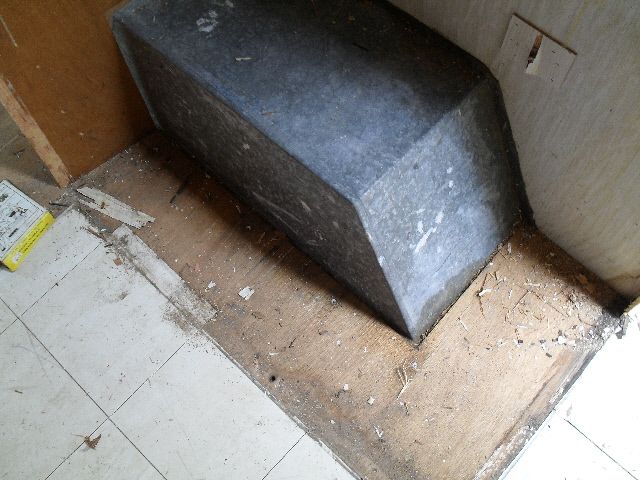 Some timber strips were screwed to the wall frame with the wardrobe walls then stapled to these and the wardrobe facia. 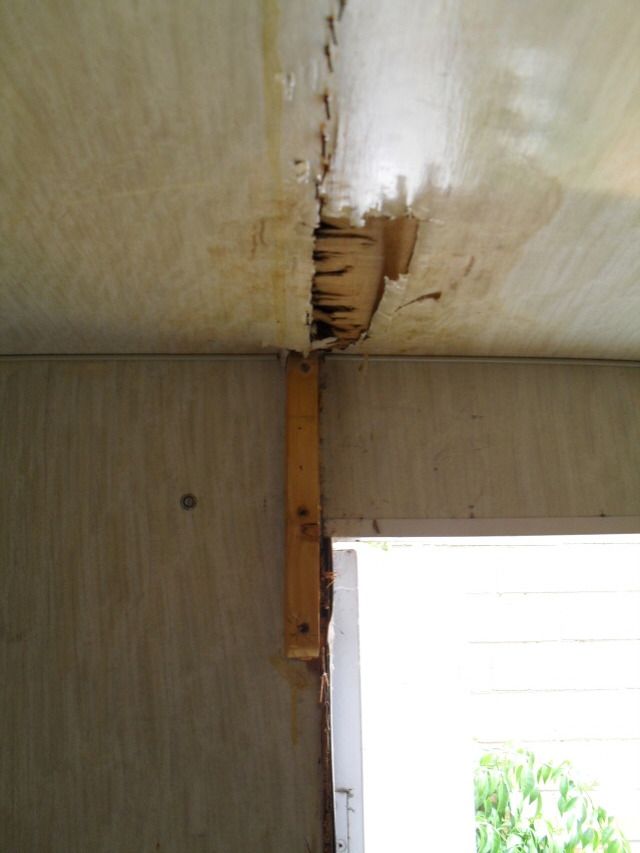 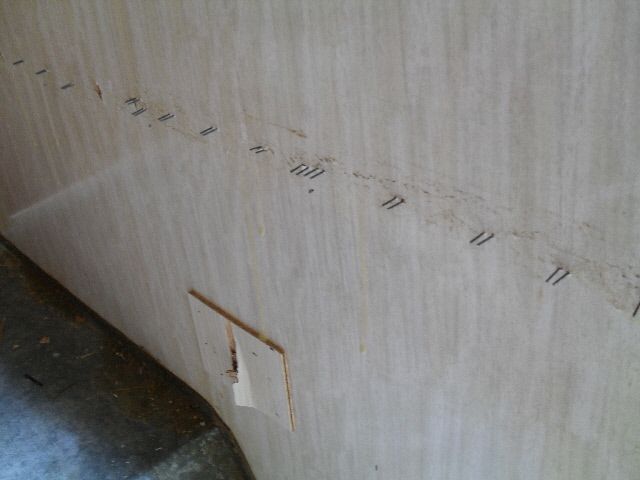 So had to be a bit more aggressive today. Next job is the pantry/fridge/stove furniture. Looks to be a complete unit screwed to the wall frame and I would imagine secured by staples as well. Following that will be the removal of the overhead cupboards. Happy with day two. Peter Mac |
|
Deleted
Deleted Member
Posts: 0
|
Post by Deleted on Nov 14, 2016 8:47:57 GMT 10
Hi Peter
I am interested in your renovation progress so far... I am about to start on a Newlands Rambler (15') - my first project.
Cheers
Kirstin
|
|
|
|
Post by 78466noM on Nov 15, 2016 1:18:47 GMT 10
van looks very good on the outside hope what looks nasty is not as bad as it looks
|
|
|
|
Post by Mustang on Nov 15, 2016 6:22:16 GMT 10
Hi Peter I am interested in your renovation progress so far... I am about to start on a Newlands Rambler (15') - my first project. Cheers Kirstin Hi Kirstin, Welcome to the forum. The thread you are replying to is inactive. (2013) You are welcome to start your own thread in "Hall of Fame", there you can post your images & ask advice on your project. How to post images link |
|
|
|
Post by atefooterz on Dec 7, 2016 3:15:49 GMT 10
Do we know if Petermac finished or sold the Newlands?
|
|
|
|
Post by shelley on Aug 22, 2020 19:35:24 GMT 10
Hi there. I just purchased a 1967 Newlands Sundowner, the interior is the spitting image of yours so thought to tell you it may be earlier than 70s
|
|
|
|
Post by hughdeany on Aug 22, 2020 21:12:14 GMT 10
Hi Shelley,
Meant to tell you on the fb post,your van is about 1972,in 1967 they were using silver aluminium.
Cheers
hughdeany
|
|
|
|
Post by petermac1173 on Jan 1, 2023 22:49:23 GMT 10
Ummm, Peter Mac here, the Original Poster. A 9+ year older Peter Mac. Obviously, my login was deleted through lack of use, fair enough. Amazes me that I started it almost 10 years ago. Life just got busy and totally in the way of this project. Life then just stayed busy, late 40’s, teenage kids, busy job, holidays in the camper trailer………….. just life. The van became a low priority. Revisited this forum recently, over 4,500 views of my story, what the? How? For somebody who rarely uses social media, this does my head in. Even further outside my comfort zone, writing this. So, my apologies to all who have read my story and been left hanging. My apologies to Kirsten and Shelley for not replying to their posts above. I have not finished the restoration, in fact not really progressed all that much, nor have I sold it, and yes, the interior looked, and is, quite nasty. Photo below is a tease of more to come and to make sure flickr works as it was photobucket back in my time.  P1060986 P1060986 Is it possible to link my new login to this Hall of Fame album? Sorry I tried to find a way to contact admins, however could not figure that out. I had a post from 2013 almost completed so I would like to post that and then bring the rest of the project up to date. Peter Mac |
|
|
|
Post by petermac1173 on Jan 8, 2023 22:46:14 GMT 10
January 2023 - So this post was mostly written in March 2013. Trying to catch up on some posts. Tough finding time to do everything at the moment, so I’m probably behind where I thought I would be. My brother in law helped recently. He is fascinated about what I am doing. He wants me to hurry up so he can spray paint the Van. Removed the fridge, sink and hoses, gas lines and power lead and cupboard doors. Sink & doors will be reused, other items replaced.  N1173 033 N1173 033Again there were many flathead screws fixed to the wall frame and many, many staples. The fridge was secured by way of two bolts (flathead & square nuts) through the floor. The timber furniture was also secured with similar bolts through the floor. Flathead screwdriver up top, WD40 and spanner under the van, bolts removed. I can be a little more aggressive with the staples as I will be replacing all the wall and furniture ply. Furniture successfully removed to be used as a template.  N1173 034 N1173 034Moved on to the front seats and dining table. Getting sick of flat head screws and staples. Came out fairly easily really.  N1173 038 N1173 038Moved on to the overhead cupboards. Thought they could be removed as a complete unit. Was easier to remove the cupboard ply from the cupboard frame then remove the frame from the walls. Flat head screws and staples of course. Items kept for a template.  N1173 039 N1173 039Can now see electrical wiring at the back of the external input plug. Not sure if it meets current standards. Wiring and electrical system will be replaced with current products later on.  N1173 040 N1173 040The floor is only 10mm 5 ply. It looked ok, perhaps a little thin, however it will be replaced. Peeled off the vinyl tiles from the floor and drilled out the floor rivets. Had a filter mask on to do this, just in case of asbestos. The floor is actually one whole piece and this stumped my non engineering brain for a while as to how I get it out of the van. I was very proud of myself to think of setting the circular saw at 9mm, cut sections that were then lifted and snapped off. Worked a treat except I missed one rivet.  N1173 042 N1173 042So now that the chassis is exposed I can commence treating it. It looks to be in pretty good condition. January 2023 - And that was the last post I had prepared back then. Next post will be to bring y’all up to date on the chassis and the rest of the van. Peter Mac |
|
|
|
Post by petermac1173 on Jan 18, 2023 21:48:59 GMT 10
So lets see if I can bring this project up to date for y’all over the next few posts. In December 2013, one side of the van collapsed. The water damage to the Z channel on the chassis and the timber wall frame was too much.
P1060986 by Peter McDonald, on Flickr 
P1060990 by Peter McDonald, on Flickr Got the boys around, lifted up the van body, pulled the chassis out, wrapped up the van body. 
IMG_0124 by Peter McDonald, on Flickr The chassis was brought over to my place back in 2014. I hit it with a wire brush and wire wheel on the drill. Minimal surface rust which is encouraging. 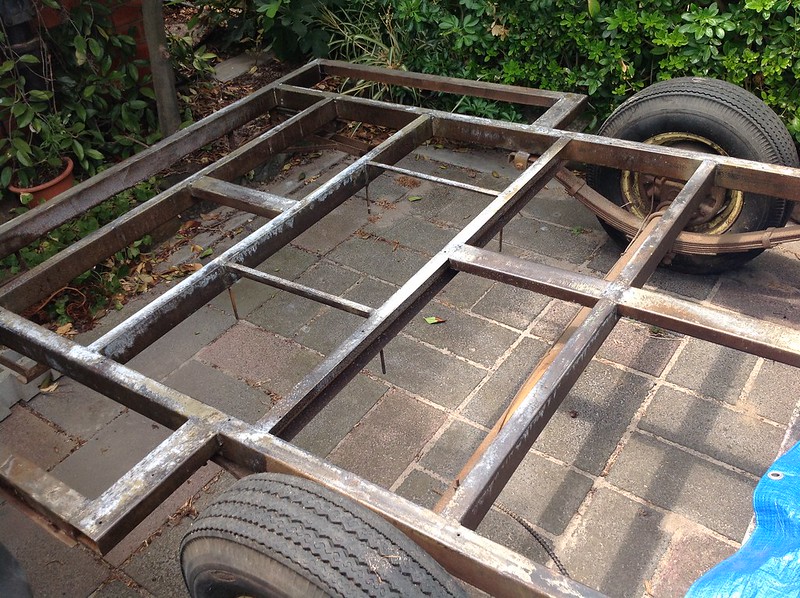
IMG_0125 by Peter McDonald, on Flickr 
IMAG0423 by Peter McDonald, on Flickr At least my son helped. 
IMG_0902 by Peter McDonald, on Flickr I took the opportunity to replace the 4 chassis sections that hold up the walls as they were partly (mostly) rusted out. I gave a small section to Westy’s in Ferntree Gully (Melbourne) who made the new sections. I had the ledge extended to 25mm so that the ply/frame/cladding would sit better on the chassis. My brother welded it in place. 
P1090521 by Peter McDonald, on Flickr 
P1090520 by Peter McDonald, on Flickr 
P1090519 by Peter McDonald, on Flickr Treated the chassis with Sepatone rust converter, then a coat of Aussie made Norglass metal primer (used on ships!). The 3 wheels were rusty and had dents around the edges. 
IMAG0044 by Peter McDonald, on Flickr I dropped them into Shepparton Wheel Works while working up there a few years ago, Les repaired them nicely. My brother in law then painted them up. Guess this sets the colour of the yellow stripe down the side of the van when that time comes. 
N1173 Painted Wheel by Peter McDonald, on Flickr The Registration details show 850kg Tare, so this is my target re-build weight. There is no ATM however. As a kid we used to go away for 4 weeks at a time always near the beach, so we piled so much stuff into the van. This included a full canvas annexe with 9 steel poles, seagrass matting, steel folding beds, clothes, stuff, etc. This pushed the trailer weight surely up to 1300kg. That weight was ok for a standard tow bar back then on smaller cars with low power/torque output, no ABS, no traction or stability control. My Dad had company cars so this van was originally towed by a 6cyl HJ Kingswood, a 6cyl XD Falcon, 6cyl VH Commodore, a 6cyl VL Commodore and a 6cyl VR Commodore all without any issues. I decided to stick with the hydraulic brakes. An ex work mate from the brake industry got the master and wheel cylinders and bundy tubing and fitted it all up one Saturday morning. Everything was moving along slowly into 2015. Peter Mac |
|


 Hopefully it's not as bad as it looks, when you eventually take the wall lining away.


