|
|
Post by peter92 on Oct 1, 2011 7:40:05 GMT 10
thanks for clearing that up for me, your a very smart man
again thanks for all the info Al
regards peter
|
|
|
|
Post by millard1399 on Oct 1, 2011 20:57:32 GMT 10
G'day Peter,
I've collected all the other questions you've posted on the forum about your van, and transferred them all to this thread. It's made the thread read like a book that's had all the pages changed around, but at least it's all together. If you want to ask any other questions about your van, just keep adding them to this thread. That will keep all the information about your van together, and make it easier for people to keep track of what you are doing with your van. Hope that makes sense.
cheers,
Al.
|
|
|
|
Post by peter92 on Oct 2, 2011 8:13:33 GMT 10
yeah, it does al. thanks
regards peter
|
|
|
|
Post by peter92 on Oct 5, 2011 17:35:44 GMT 10
hi all, just wondering if some one knows what the atm weights were for my van when it was made. just to give me an idea of weight while i do the refit of everything
regards peter
|
|
|
|
Post by peter92 on Oct 6, 2011 12:29:17 GMT 10
hi all , i have to replace the timber in my hatch that the winder attaches to.
could some one tell me what is the best timber to put back up there
it is 36x75x547
any help would be great, thanks in advance
regards peter
|
|
|
|
Post by millard1399 on Oct 6, 2011 13:26:22 GMT 10
G'day Peter,
You've asked for the atm of your van, but I think you mean the "tare weight". ATM is the fully loaded weight of the van when it is not coupled to the tow vehicle.
I don't have specific information about the tare weight for a 13' Viscount, but an approximate tare weight would be about 750kgs. My 14ft Millard poptop has a tare weight of 820kgs.
For the replacement timber for the hatch winder, you'll have to have a think about a few options...
Take a tape measure to your nearest Bunnings or timber outlet, and have a look at their pine timber. You can get 70 x 35mm plain pine timber that's used for house frames. It'll have a screeded surface with rounded edges. You can also get 75 x 35mm pine that's rough sawn, with square edges. You can get treated pine in the same sizes (treated pine would be good if you thought the hatch might leak again one day).
You can use meranti timber. That's what most caravan frames are made from these days. The big challenge will be to find the size you need. 36mm x 75mm is not a standard meranti timber size, so you'll have to work out a way of gluing pieces together to make the 36mm thickness, and cutting a wider piece down to make the 75mm. Bunnings sell meranti timber in 18mm thick x 91mm wide. Cost is $13.34 for a 2.1 metre length. You could cut the 2.1m length in half, and glue the two halves together to give you 2 x 18mm thickness = 36mm. Then you'd have to cut the 91mm down to 75mm.
Depends what's easiest and cheapest for you. All the above timbers can be painted.
cheers,
Al.
|
|
|
|
Post by peter92 on Oct 6, 2011 14:01:50 GMT 10
thanks for that info Al, very app. would it be best also to use maranti for all my framing inside the van or what else is best
regards peter
|
|
|
|
Post by millard1399 on Oct 6, 2011 15:19:14 GMT 10
Yep, meranti would be fine for all the framing, but radiata pine would be cheaper IF you could cut the 42mm width in half.
Meranti is available from Bunnings in the following sizes:
18mm x 18mm
30 x 18
41 x 18
66 x 18
91 x 18
Plus all the same widths above but in 12mm thickness.
Radiata pine is usually sold in 42mm x 19mm smallest size. If you could cut the 42mm down to 2 x 21mm it would end up a pretty cheap framework timber.
Bottom line is that meranti 18 x18 with a ply facing glued on it would be a pretty lightweight and strong cupboard.
cheers,
Al.
|
|
|
|
Post by peter92 on Oct 7, 2011 9:28:59 GMT 10
hi Al, got a quick question for you
im thinking of putting the poly resin ply in the van which is 3.6mm thick, will it bend that much to go in the front and rear of my van under the window area. hope you no what im talking about
regards peter
|
|
|
|
Post by millard1399 on Oct 7, 2011 10:00:27 GMT 10
G'day Peter,
I don't think you'll have any problem. The radius of the bend in both those areas is pretty generous. I've just bought 4mm plain ply for my current project, and I need to bend it around a 500mm radius above the front windows. I've flexed it by hand to see how much it would bend, and it looks like it will bend to a tight 500mm radius ok.
So I would think your 3.6mm ply would be even more flexible. Keep in mind that this sort of ply was used when the van was originally built, so there's no reason why it wouldn't work now. You could always do what I did and see how flexible it is on the garage floor before you go cutting and fitting it to the van.
cheers,
Al.
|
|
|
|
Post by peter92 on Oct 7, 2011 16:22:19 GMT 10
thanks for that Al, now im prity happy. i was a bit worried that is wouldnt bend that far. whats the project your working on now
regards peter
|
|
|
|
Post by millard1399 on Oct 7, 2011 17:44:59 GMT 10
G'day Peter, It's a 1960 plywood caravan, which I'm rebuilding from the ground up. I bought it back in 2006, and it's been sitting in the yard waiting for me to get around to doing something with it. It looked like this a couple of years ago... 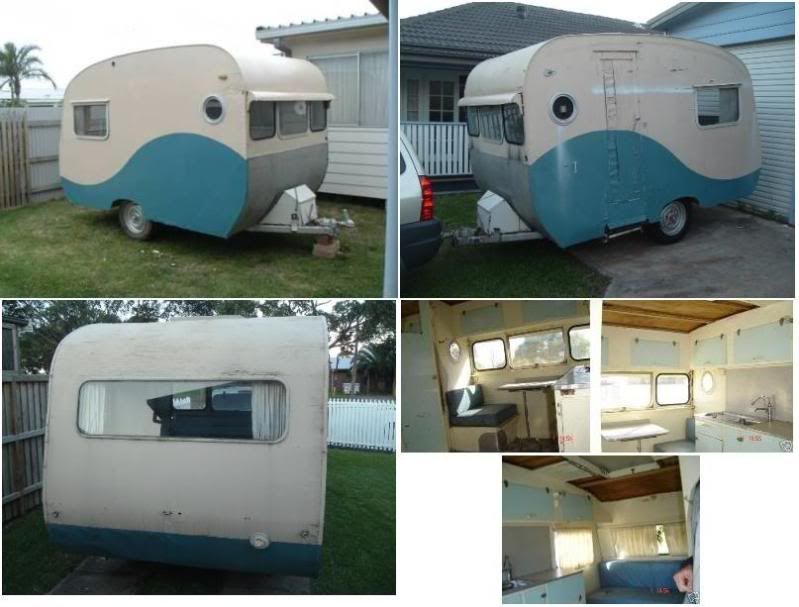 But because it was full of woodrot, there wasn't much choice but to demolish it and start from scratch. This is when it was being demolished... 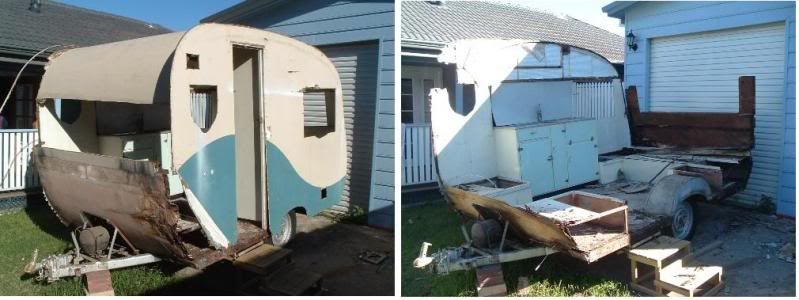 And this is where it is up to now, on the way back... 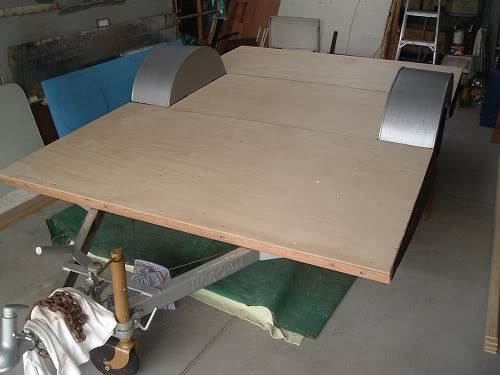 That's how come I know so much about meranti timber and bending ply. I've been learning all about it over the last few weeks in readiness to do the walls and framework on this van. (...and you thought I was normally this smart...ha!    ) cheers, Al. |
|
|
|
Post by peter92 on Oct 7, 2011 18:14:39 GMT 10
that looks like a nice little van, cant wait to see updates of it
any tips on doing things. what do you think will be the hardest thing to do
regards peter
|
|
|
|
Post by millard1399 on Oct 7, 2011 18:46:35 GMT 10
The hardest part? Joining three sheets of ply together to make a wall on each side! There's no framework holding the walls up like there is in aluminium vans. It's the thickness of the ply itself that gives the wall it's strength. Back when these vans were built, you could get ply in the one sheet for the whole wall. Now you can't, so you have to work out a way of doing it with multiple sheets. It'll be the same when I get to re-doing the roof. That will require 7 sheets of ply joined together somehow. The project is certainly keeping my old brain matter active!   cheers, Al. |
|
|
|
Post by peter92 on Oct 7, 2011 19:14:06 GMT 10
dl==dy hell, and i thought i had probs trying to sort mine out
but its all worth it when you see it finished
what did you use on the floor, i still cant wait to see what you do
regards peter
ps. what type of wire do i buy for my power and lights so i can get the sparky to wire it up and save a bit of cash
|
|
|
|
Post by millard1399 on Oct 7, 2011 22:23:09 GMT 10
I used exterior grade plywood for the floor (12mm thick). I painted the underside (the road side) with exterior Weathershield paint to protect it a bit against stone chips and water splashes. Exterior grade ply is half the price of marine grade ply, and you still get the same glue bond rating in the layers, but you get a lesser quality in the veneers (but still quite acceptable when painted). But, enough about my van clogging up your thread!  The full story of my project is being posted on the Vintage Caravan forum (where it belongs), so if you ever want to catch up with what I've been doing, click on this link. (I have the username of "Franklin1" over there.) ------------------------------------------------------- Electrical wiring for your van... Normally in a house, there are two sizes of wiring used...one for power points, and a smaller size wiring for lights. In a caravan it's easier to just use the same size for everything, and it MUST be the new 2.5mm size, and it MUST be the multi-stranded type, not the single core type. In Bunnings you can buy it by the metre, or you can buy a whole 100 metre spool of it. Today when I was in Bunnings checking the wiring situation, I noticed they now have pre-packs of the 2.5mm multi-strand wiring in either 10 metre or 25 metre lengths. Trouble is, the pricing is out of whack with buying it by the metre. Cost per metre off the spool is $2.10, therefore 10 metres = $21.00 Cost of a 10 metre pre-pack is $25.00 or thereabouts. Why pay $4 more for a pre-pack??!  Don't forget to buy grommets for where the cable passes through the aluminium frame. I have no idea where you buy these from, so hopefully someone else on the forum knows more about them. cheers, Al. |
|
|
|
Post by kiwijim on Oct 7, 2011 22:52:33 GMT 10
|
|
|
|
Post by peter92 on Oct 10, 2011 21:10:05 GMT 10
hi all, could some one tell me where i can get a four seanso hatch for my van please
size is 913 x 547 or close to it
also has any one put one in there van and if so, how did you do it
regards peter
|
|
|
|
Post by peter92 on Oct 12, 2011 10:13:40 GMT 10
hi all, am going to put new cladding on our van ,so could some one tell me how much it would cost to buy the cladding and do it myself
also how much would it cost to get done
any info on this would be great
regards peter
|
|
|
|
Post by millard1399 on Oct 12, 2011 12:13:28 GMT 10
G'day Peter, Four seasons hatches pop up on ebay from time to time. There's a seller near Newcastle NSW who seems to list them when they become available to him. Most of the ones he sells have hail damage on them (maybe minor), so I'm guessing he must be a caravan repairer and replaces them under insurance claims. These hatches sell on ebay for around $100 versus a new one for up around $380. They have a standard size of 660mm x 660mm, so you'd need to work out a way of adapting them to the current hatch size on your van. There's a whole heap of information on this forum about what people have done with these hatches. Start reading all these threads, and you'll soon be an expert!  4SH Are they any good?Four Seasons hatch - reseal, getting up thereKerry and Ray's 1976 Viscount reno!1979 Viscount Supreme 4SH Are they any good?Four Seasons hatch - reseal, getting up thereKerry and Ray's 1976 Viscount reno!1979 Viscount Supreme-------------------------------------------------- For the aluminium cladding, I only know of two people on the forum who managed to find some. One was in Adelaide, and got some old stock from Dario's, and the other was rocketrod, who found some in Brisbane somewhere. You could read through rocketrod's thread and see if he mentions where he got his from. Rocketrod put his Viscount up on ebay a month or so back, because he was "going overseas", so he mightn't be around anymore. cheers, Al. |
|
|
|
Post by peter92 on Oct 13, 2011 6:54:21 GMT 10
thanks guy,s for all that info, will see what i can do
regards peter
|
|
|
|
Post by peter92 on Oct 13, 2011 23:41:03 GMT 10
hi all, well just made a choice to sell our van and get a bigger one
$250.00 i think is reasonable
regards peter
|
|
|
|
Post by peter92 on Oct 23, 2011 17:52:00 GMT 10
hi all, well came to a good decision today and have decided to keep our van. after a lot of thinking . we like it and have now got all the floor ripped up. chassi looks great, looks like its been rust proved at some stage, but dont know if it was done at the factory or not
now to get to a question
i have some of the wall paneling on the floor which seems to be wedged in, does any one know how to get it all out and clean it all ready for the new walls to go back in after the floor goes back.
the chassi,
should i wire brush all of the chassi back to bear metal and cold gal it or what should i do
any help on these matters would be app
photos to come
regards peter
|
|
|
|
Post by peter92 on Oct 23, 2011 18:34:13 GMT 10
|
|
|
|
Post by millard1399 on Oct 23, 2011 20:03:47 GMT 10
G'day Peter, I'm sure you won't regret hanging on to the van. Even if you decide to get another van down the track, this one will provide a heap of experience during its restoration. I've found that there's nothing better than actually working on an old caravan to find out where the problem areas are, and what you would look for the next time you were looking at another van. As far as the chassis cleaning goes, my thoughts are these: The most critical area of the chassis is the perimeter where the aluminium sides make contact with the steel chassis. Any moisture that gets in this region will set up a "corrosion cell" between the aluminium and the steel. One or both will eventually corrode away. Therefore, the most valuable work you can do on the chassis is to prevent this happening. There are probably a heap of things you can try. On the Millard, I used the tape that is used to seal polycarbonate roofing... 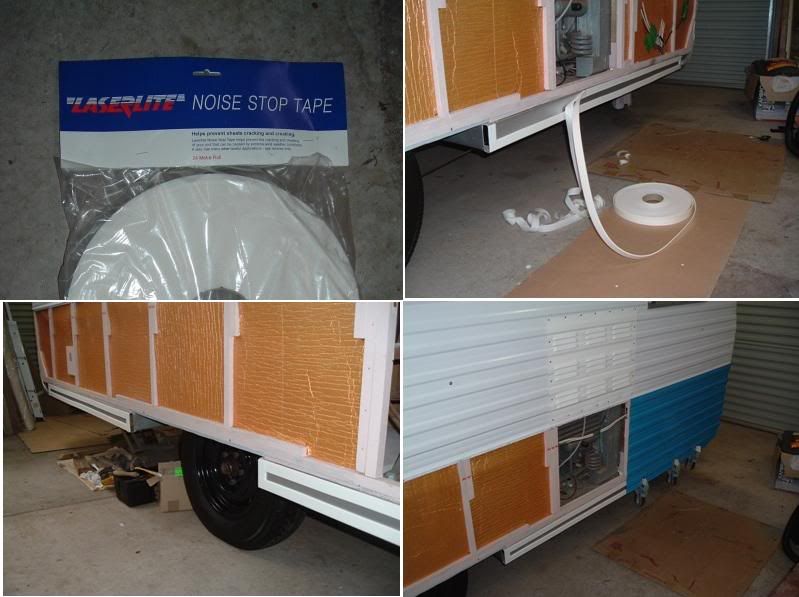 And on the current bondwood project, I've used polyethylene flashing that is used under window frames in houses... 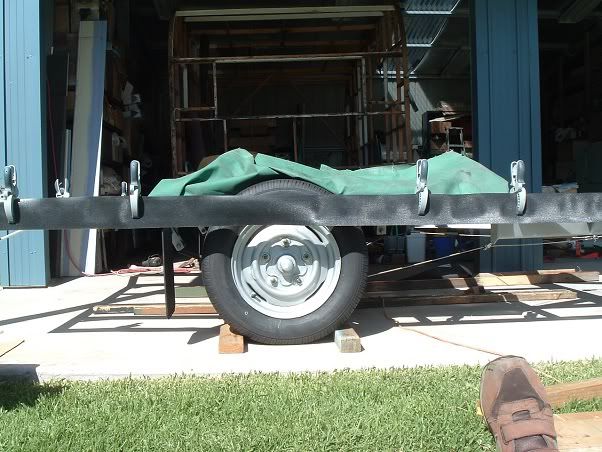 Your main aim is to provide a barrier between any moisture and the steel chassis, and I really don't think painting it will give sufficient protection. Sure, you can paint it, but I think you also need some other layer in there as well. The rest of the chassis section seems to be able to cope without the need for any protection. You can paint the rest, but my experience is that it will look good for about 12 months, and then you'll start to see small rust spots showing through the paint. These rust spots are usually not a problem (unless they are signs of severe rusting), but it means you've done a lot of hard work for very little gain. I'd be focussing all my effort towards getting the perimeter of the chassis sorted out properly, and then leave the rest to survive how it is now. For the wall cladding, I seem to remember that Viscount made the complete walls on the table, and then lifted them up and fitted them to the sides of the van. So my understanding was that the chassis was made, then the floor was placed on top, and then the walls were fitted into position. That to me means you'd have to take the walls away to get the internal cladding off the side frame, OR you have to take the floor up and then chisel the cladding away from the aluminium frame along the bottom. I think you'll find it will be one or the other. Let us know how you go. cheers, Al. |
|