|
|
Post by millard1399 on Aug 16, 2011 12:52:49 GMT 10
The Millard clock is now completed, and fixed into position... 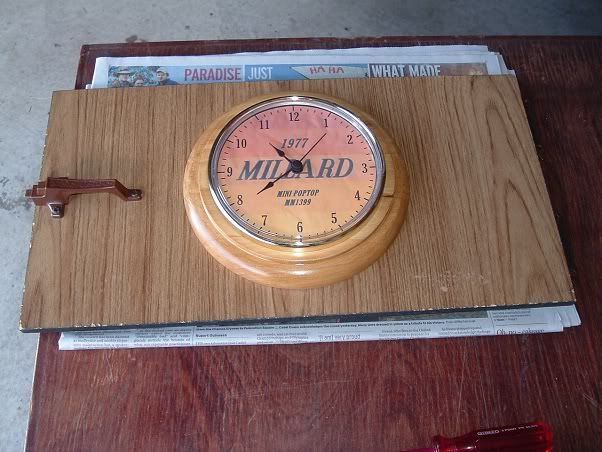 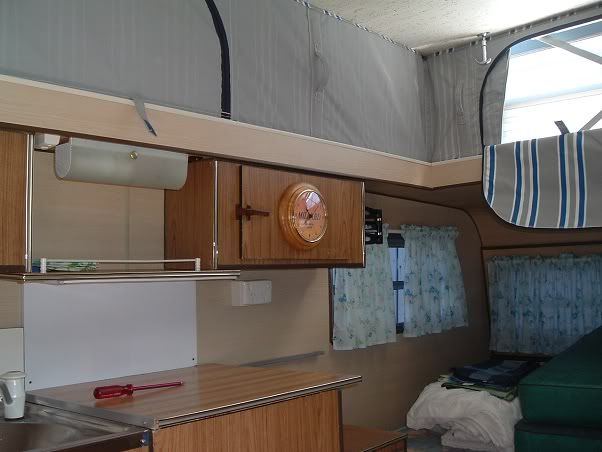 No excuse for being late for "Fivesies" now...   I see somebody on the Vintage forum has found a genuine Olympic clock in a van they recently bought. It would be easy to scan the face of that clock into a computer and customise the face for the individual Olympic vans. Atog, maybe you could plead with them and I could do up a clock for your van?   cheers, Al. |
|
|
|
Post by kylarama on Oct 8, 2011 19:47:35 GMT 10
Hey Al, I saw your cries for help about Botecote on the VV site. Try the boat building section of the woodwork forums. Tons of threads on Botecote and other epoxys. www.woodworkforums.com/f29/ |
|
|
|
Post by millard1399 on Oct 8, 2011 22:13:00 GMT 10
G'day kylarama, Thanks for the tip.   I've spent a fair bit of time over the last week looking at various websites about Bote-Cote. I just thought there might have been a "boatie" on the Vintage forum who was also doing up a van, and who might have been able to talk from a van point of view. But yeah, those woodworking forums really have some good info on them ay? I'll probably end up putting some questions to them in the coming weeks. Thanks again, cheers, Al. |
|
Deleted
Deleted Member
Posts: 0
|
Post by Deleted on Jan 30, 2012 13:05:43 GMT 10
Wheres the latest update?? It has been a while and I am getting withdrawals
|
|
|
|
Post by millard1399 on Jan 30, 2012 13:48:35 GMT 10
G'day outbackjack, The latest update on what??  The Millard hasn't gone anywhere since July last year, so there's nothing "new" to report.  We're aiming to go to Cowra NSW in April/May for the 2012 Vintage Caravan Nationals, so that will likely be the next trip. cheers, Al. |
|
Deleted
Deleted Member
Posts: 0
|
Post by Deleted on Jan 31, 2012 16:24:34 GMT 10
OK. well it must be feeling a little unloved, given all the lovin it had before.
So is pretty much complete now? Did you manage to find the water leak at the front?
|
|
Deleted
Deleted Member
Posts: 0
|
Post by Deleted on Feb 2, 2012 16:14:23 GMT 10
Hi millard1399,
Was very inspiring to see the work that went into your van...I have just started on our smaller 1977 poptop - great to get some hints before I go too far!!!
|
|
|
|
Post by maxx on Mar 22, 2012 23:08:29 GMT 10
i have a van, it looks the same as yours. but its tag is just "mm 133" any ideas , anyone?
thanks a lot for your rebuild log tho. the vans are so much the same that i havent been able to spot a single difference. you don't happen to know what the stud pattern is for those hubs do you?
mine isnt a restore tho its a . tearup repurpose into something other.
|
|
Deleted
Deleted Member
Posts: 0
|
Post by Deleted on Mar 28, 2012 22:48:46 GMT 10
that last post was from me, decided to register. the project i have is prolly less long term as yours but woth any advice i can get.
the floor of that van. was it a single peice or a few. im considering jacking up the caravan body and taking the trailer body out from underneath to sandblast and respray. but i cant see any joins from underneath. it mainly makes a difference to how im going to jack it up after i cut all the rivets etc.
|
|
|
|
Post by millard1399 on Mar 28, 2012 23:10:49 GMT 10
G'day xxameht, maxx, or themaxx, and welcome to the forum! ;D Sorry mate, I didn't realise you'd posted in this thread a week ago. Must have missed it somehow.  I think you'll find the floor in these vans is one piece. Plywood was manufactured in sheets up to 7ft wide by 25ft long in those days, so a floor for these smaller caravans would have been a doddle to make in one piece. The easiest way to check is to crawl under the van and look at the lines of rivets (or pull up the vinyl flooring if you're doing that anyway). If there's a join somewhere, the rivets will be staggered to fix both sides of the joint. I've just had a quick look at my photos of when I redid the floor tiles, and no there were no joins in the floor. cheers, Al. |
|
|
|
Post by millard1399 on Apr 3, 2012 20:56:41 GMT 10
G'day All, Back home again after our extended weekend away in Canberra and nearby Yass. We lobbed into the Exhibition Park In Canberra (EPIC) which is a large sort of showground area with a camping area over on one side. It's the only pet-friendly camping place in Canberra. Fronted up to the desk and asked for a spot for the weekend. She could only give us one night. Huh? "Why's that??"The next day the Committee for the Canberra Folk Festival was taking over the whole complex to start setting up for the Festival over the Easter weekend. They take control of the whole shebang, including the camping area. We ended up staying that one night, and then moved 60kms away to Yass for the remainder of the weekend. And just as an aside...if you volunteer to help out during the Festival, you get free entry each day, you get to see most of the performances, and you get free camping in the grounds. Apparently, they can never get enough volunteers. One couple we chatted with had come down from the central coast north of Sydney. An annual pilgrimage for them. Anyhoo... here's a couple of shots of the "tent city" being set up in one part of the showground, for some of the volunteers who don't have their own accommodation: 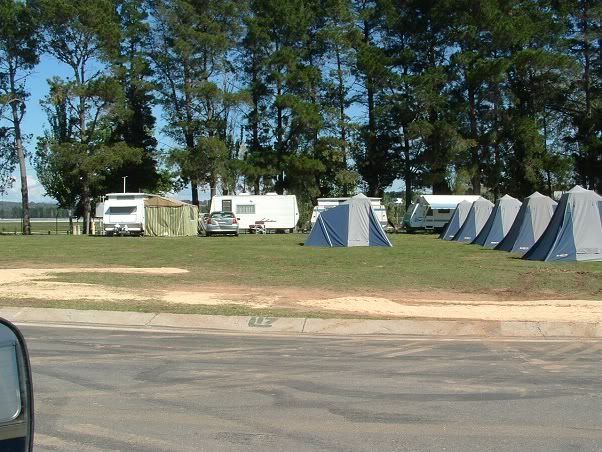 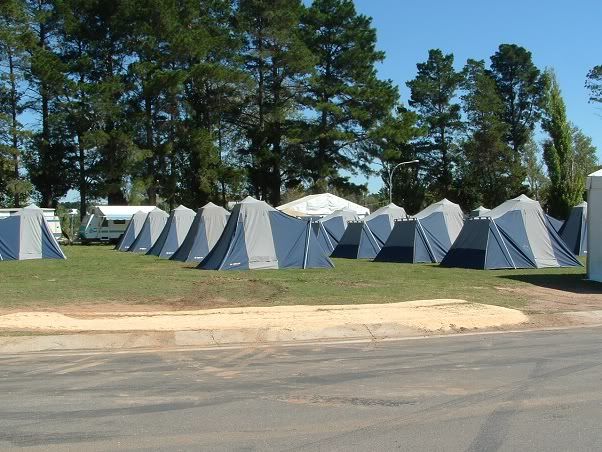 Here's a couple of 1970s vans that were in the camping ground: A 1970 Franklin Regent... 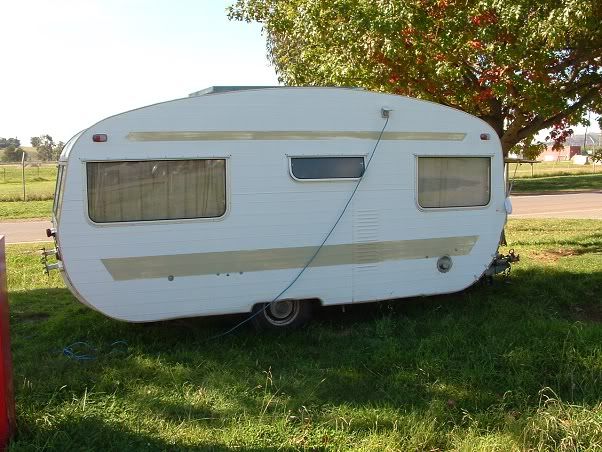 And a nice looking 1978 Viscount Supreme after its makeover... 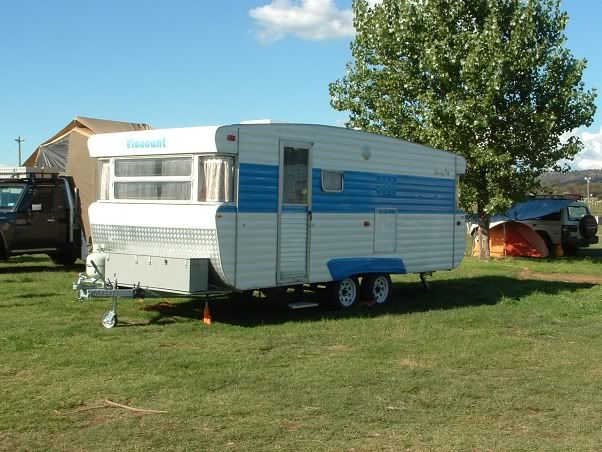 We came across kiwijim's cousin... 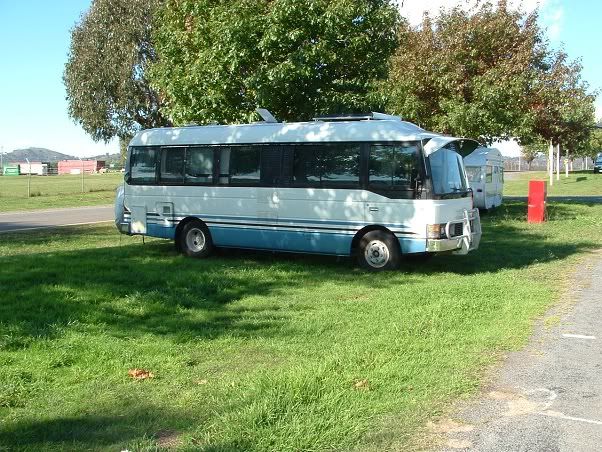 ...and kiwijim's cousin's uncle...   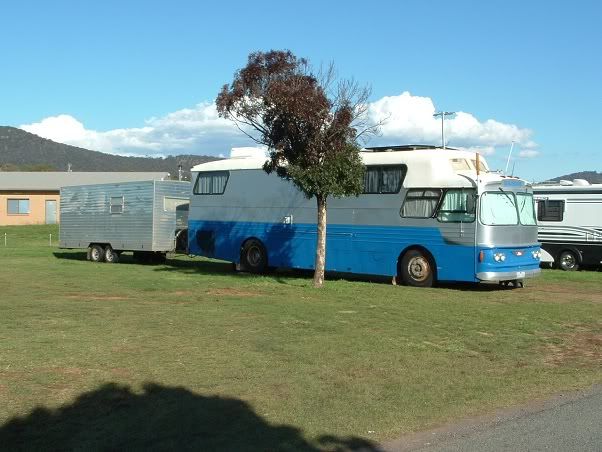 The trailer had signwriting on the back to say he was a solar panel installer. I reckon he must follow the sun in that rig, and find work wherever the opportunity arises.  The caravan park we stayed in at Yass is one of those parks that are really designed for one-night stopovers, rather than longer term stayers. Consequently, it's a caravan-spotters paradise, because every night a whole new batch of caravans comes in for the night. Boy it was interesting to see how many different types of accommodation on wheels there are out there. From the smallest camper, to the big white boxes, and everything in between. Some people carry the lot with them, "including the kitchen sink"! I saw six foot stepladders tied to rear brackets, as well as bikes, etc. I'm blowed if I know how the caravan chassis copes with some of the loads I saw.   Don't have any other photos to show you. Too busy soaking up the autumn sun and going to markets and having a look around the local area. Haven't worked out how to drive and hold a camera at the same time yet.  Another side story... Checked the Millard over before we set off. Noticed the tyres are now showing hairline cracks in the rubber next to the rims... This is one tyre:  And the other:  Both tyres are 8 years old this year. Even though the tread is still good on both tyres... 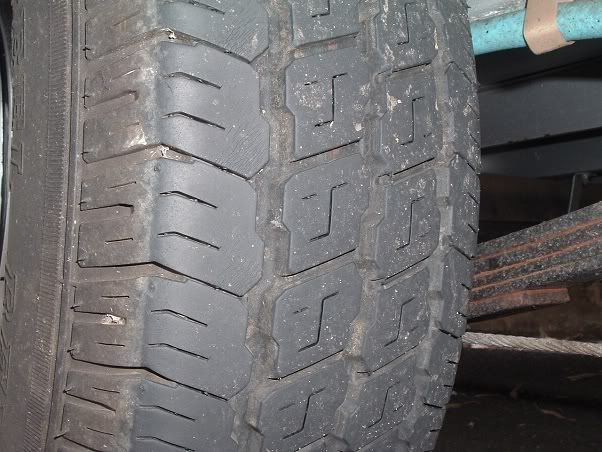 ...the walls are now highlighting the need for replacement tyres. We covered the 500kms of this trip without incident (maybe 'good luck' rather than good management), but I started sorting out new tyres today. cheers, Al. |
|
Deleted
Deleted Member
Posts: 0
|
Post by Deleted on Apr 4, 2012 7:04:53 GMT 10
Those first couple of photos look like a tent version of housing commission, lol  Kiwijim's cousin's uncle has a hell of a rig, but bigger isn't necessarily better. |
|
|
|
Post by millard1399 on Oct 7, 2012 17:58:21 GMT 10
G'day All, The Millard poptop left our front yard today, to make its way to its new home in South Australia. If you happen to see it out-and-about during your travels, give the new owners a wave.  cheers, Al. |
|
Deleted
Deleted Member
Posts: 0
|
Post by Deleted on Oct 7, 2012 20:27:17 GMT 10
Hi Al, Was it a sad moment when you saw her going out the driveway and down the road   . ( shedding a tear ) Or was it, " Ok that's gone, what other project can I start to fill up the vacant space. ;D ;D ha ha Regards Steve |
|
|
|
Post by kiwijim on Oct 8, 2012 3:28:55 GMT 10
I wonder if Al asked for all the new owners credentials before he handed over the keys for the Millard. I know I did, when I sold the Thomson, after spending years on rebuilds and not to mention the thousands of Bucks spent, you just can't have any one stepping into your pride and joy. Congratulations on the Sale Al,Now Teflon, Don't give Al any more bad ideas, You know we are trying to get him on the road for a bit of R & R.  Best thing you can do Al, is to fence off the area where the Millard sat, then shove a couple of sheep in there, fatten them up for your trip and the freezer will be full. ;D ;D ;D |
|
|
|
Post by millard1399 on Oct 8, 2012 7:06:40 GMT 10
G'day guys, My partner was sad to see it go because it's given her many happy memories of travelling around the country over the last couple of years. I had a mixture of sad and relieved feelings. Sad to see it go, but relieved to know it's gone to a good home. The new owners want it for use at car rallies, towing it behind their 1956 american car they restored. When they first contacted me a couple of weeks ago, just after I'd listed it on Gumtree, I directed them to this thread and told them they'd find the whole story about the van and its restoration here. The wife ended up printing out this whole thread...and it took 217 pages of A4 paper, as it turned out!   And no, there won't be another van taking its place. The Windsor van will do us for a while (...at least until we decide something else might be "better"   ). I've got the old bondwood caravan project in the shed that I haven't touched for six months, and I'd like to get back to doing some more on that. The Mazda Tribute is also on the market, and once that is gone it will free up a fair bit of space in our front yard. Two caravans and three cars were making it pretty crowded, so it's good that one caravan has finally gone. cheers, Al. |
|
|
|
Post by bobt on Oct 9, 2012 22:32:24 GMT 10
Well done Al
End of one era beginning of another..
Them there South Aussies are getting a good deal.. Lets hope we hear about some of the trips they do with it.
bobt
|
|
Deleted
Deleted Member
Posts: 0
|
Post by Deleted on Mar 13, 2013 20:39:25 GMT 10
Hi I have recently purchased a great little van which seems to be the same as yours. Mine has a number of MM258 on it. I am in Perth and the guy that had it before me has done some work to it. I was hoping you might be able to shed some more light. Thanks Attachments:
|
|
|
|
Post by ForumMod on Mar 13, 2013 21:02:53 GMT 10
G'day ozturners, and welcome to the forum! ;D What information are you actually looking for? The MM258 chassis number will place the van very early near the start of their release in mid-1976. I presume you have the 12ft version since that was the size they started building them in. That's quite a large box on the front drawbar!  Looks like you could put everything including the "kitchen sink" in there!  cheers, Al. |
|
Deleted
Deleted Member
Posts: 0
|
Post by Deleted on Mar 14, 2013 20:22:16 GMT 10
I just went and measured it and you are on the money.
It was advertised as a 14ft 1981 Millard so just looking for what it actually is. The 12 ft measurement is the actual van size not the chassis so i hope i'm doing that right.
From what i can tell she seems to be relatively stock inside Couch/bed one end and dinette/bed the other.
The guy i bought it off did a lot of work painting the outside and a minor resto inside. Adding the front box and one at the back with tool boxes attached.
We upgraded from a jayco campertrailer as we wanted something ready to go at moments notice. We haven't taken her out yet but hope it won't be too long.
Any info or websites (for parts/upgrades etc) i can look at will keep me busy for a while.
Thanks
|
|
|
|
Post by ForumMod on Mar 14, 2013 21:07:51 GMT 10
G'day ozturners, Yep, you've measured correctly by just measuring the cabin length.  And yes, your description of the interior layout sounds like the standard one. Parts for these old Millards are getting harder and harder to come by as the years roll on. Some of the things that I bought for my poptop restoration four years ago are no longer available.  For the latest list of Millard parts, click hereYou'll find other internet sellers have these sorts of Millard parts as well, but CaravansPlus seems to be able to sell at lower prices than the others. cheers, Al. |
|
|
|
Post by glennv on May 28, 2013 8:31:32 GMT 10
... the best for disolving the rest of the silicone was some stuff that was a vinyl grease remover....used before you paint vinyl...(my daughter painted the inside of her ute purple)......put this stuff on with a brush and it just disolves before your eyes....magic.................goodluck with your project.... Can anyone advise where to purchase this vinyl grease remover ? Glennv |
|
|
|
Post by atefooterz on Apr 29, 2015 2:53:14 GMT 10
G'day All, I've been studying the Atog timber joinery techniques over the last few days so I could repair a little bit of woodrot in one corner of the rear window timber frame. I'm not sure I've got it perfected yet, but the end result seemed to be ok... 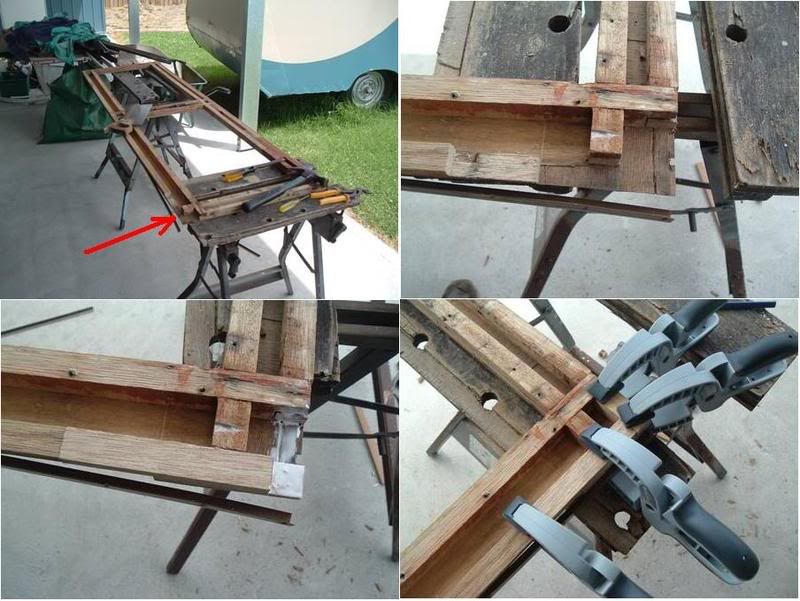 Luckily, this side of the frame is covered by the aluminium cladding, so any poor workmanship will be well out of sight!  ;D The other thing I've been doing is to dismantle the first aluminium window. Don't ask me why...for some weird reason my brain decided we should pull the window completely apart and clean all the parts up with steel wool. If you're reading this, don't try it at home...better you should just get a hammer and keep hitting your thumb with it...that's much less painful than trying to refurbish an aluminium window!!   I had to carefully remove all the phillips head screws, some of which were stubbornly stuck in from corrosion. Then I had to drill out four rivets to allow the frame to be separated. And finally I had to drill out four rivets to allow the winder gearbox to be opened up... 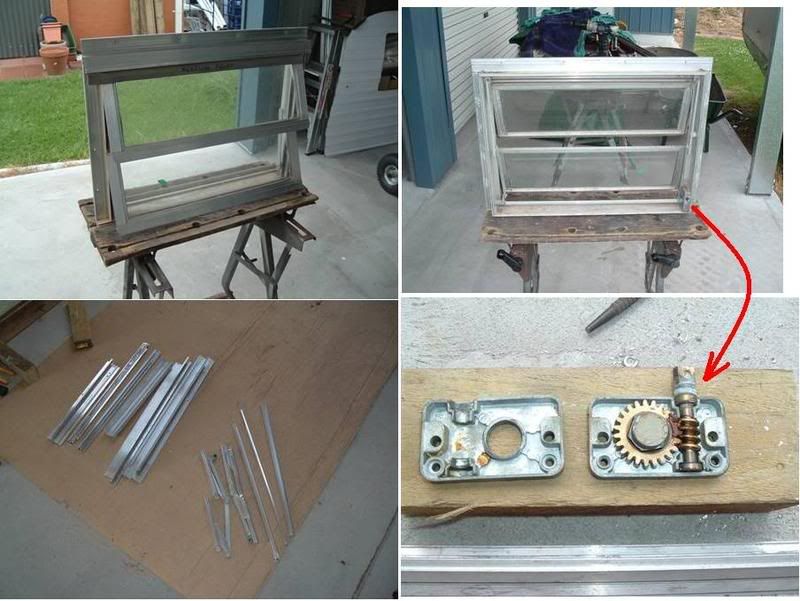 The tricky bit was trying to get new rivets that fitted back into the old holes. I could get two of the three sizes from Bunnings, but a longer length one had to come from a specialist shop. I had to drill a couple of the holes in the gearbox case a bit larger to take the rivets sizes that are sold today (...you can't get exactly the same size as the original  ). I also had to file the diameter of the rivet head down on a couple of them, because the head sits in a recess (...and guess what, you can't get small diameter head rivets anymore either   ) But I've now mucked around with the first window frame, and I'm starting to feel confident it will come up looking in reasonably good condition. Rubbing with the steel wool won't remove the pitted corrosion (I think only sanding the metal back would do that), but generally the rest of the aluminium looks considerably brighter. I'm also greasing all the components of the winder gearbox, and spraying a little WD40 on to all the pivot points in the framework to loosen them up. So far it's looking promising, and all the movable bits in the framework are working much freer than they were. And finally...I spent just under $300 on the Caravansplus website the other day, buying bits and pieces for the van. My estimate of $3505 finished cost for the van mentioned in another thread has now been blown out of the water. Looks like $4005 might be closer to the mark. I didn't realise how expensive the bits for the aluminium windows would be (eg. $85 for 30 metres of new glazing rubber for all the windows). But I now have the new kitchen sink pump, the new water filler inlet, the new 240v power inlet, some new cupboard handles, etc etc. Gotta give full credit to the Caravansplus people for prompt, courteous service!! Ordered Monday night on the internet...delivered Thursday morning to my door. Gotta be happy with that! ;D ;D Enough waffle...time for a cuppa! cheers, Al. G`Day Al, a link was posted to here about window winders & reading this post, i wonder if you discovered "Number Drills & Letter Drills"? These specialised bits are tight for rivets to pop perfectly.  Letter Drill size chart Letter Drill size chart |
|
|
|
Post by pisces51 on May 1, 2015 21:47:46 GMT 10
G'day atefooterz, I'm not picking up on what you are trying to tell me??  What do these specialised bits actually do? cheers, Al. |
|
|
|
Post by atefooterz on May 2, 2015 0:33:12 GMT 10
G'day atefooterz, I'm not picking up on what you are trying to tell me??  What do these specialised bits actually do? cheers, Al. Heya Al, These drill sets fill in the gap in a workshop between metric & imperial bits, so standards like a 1/8th pop will use a number drill that falls between metric 0 & 0.05 sized bits. This explains why metric 0 & 0.5 pop rivets from bunware do not fit the holes, if the old rivet is removed without distorting the hole.  |
|