|
|
Post by millard1399 on Jul 17, 2010 22:23:27 GMT 10
G'day All, The Millard is hitting the road again early Monday morning. We are heading off to meet up with the Vintage/Classic group having a "Xmas in July" get-together in Crows Nest in southern Qld next weekend. We'll be taking our time getting up there (a whole 5 days to do 1000kms...pressure!), spending the first night at Bathurst (should be FREEZING!) and then up through Dubbo, etc. While we're at Bathurst catching up with an old friend, I'll also be picking up a Millard sink+tap, and a set of Millard hubcaps, that I recently won on ebay. Would you believe I was the only bidder for both items, and got the sink/tap for $5 and the hubcaps for $10!   Millard stuff is too cheap!    The sink/tap is for a project on the drawing board, and the hubcaps can be a spare set for the poptop. Anyway, off we go again to give the Millard another road test. Dunno whether I'll have internet contact while I'm away, so I'll leave the forum in the capable hands of atog. There are 14 vans booked in for the Qld weekend - about 9 Vintage vans and 5 Classic vans (including bobandjacqui and philou from this forum) - so it will be great to catch up with people I normally only know through a computer screen.  Will be in touch... cheers, Al. |
|
|
|
Post by atouchofglass on Jul 18, 2010 6:56:30 GMT 10
Sounds like a good time will be had by Al ..... eerr all ;D ;D ;D
Don't forget to take lots of photos to make the rest of us jealous
Cheers
Atog
|
|
|
|
Post by millard1399 on Aug 2, 2010 15:01:38 GMT 10
G'day All, We are back home again after our two-week journey to southern Qld and back. Another 2400kms added to the Millard trip-meter. It wasn't totally trouble-free this time, although the things that happened were minor. One of the louvre window panes developed a couple of cracks in the cold temps in inland NSW over the first couple of nights. Of course, it had to be the one with the Classic Caravans sticker on it.  We had another incident coming back down the east coast, when the poptop roof lifted at the front for some reason. When we stopped and checked it after being alerted by an oncoming motorist (bless him), I found the spring-loaded clamps for the roof were not locked in position. Dunno how it's happened. Maybe we hit a heavy bump in the road and they bounced out of the sockets. Fortunately, it hasn't happened again, so hopefully it was a one-off incident. When we set off for this trip, we decided to check out the Showground camping option wherever possible. This was because, One, they are pet-friendly; Two, they have powered sites; and Three, they are cheaper than the commercial caravan parks. Cheaper doesn't necessarily mean they are ok, as we found out on a couple of occasions. Contrary to what kiwijim found up the Top End of Australia during his travels, we again found that there are very few caravans travelling away from the main highways in the southern half of Oz at this time of year. Our first night was spent at Bathurst showground, and apart from one 'permanent' unhabited van there, we had the place to ourselves... 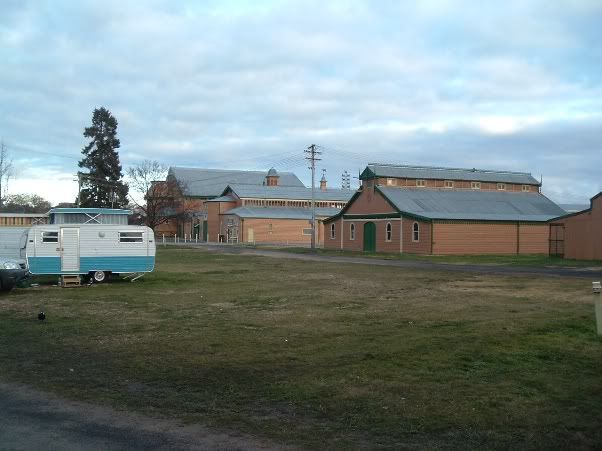 The amenities were only a 'half-star' above digging your own toilet  , however at least we got all the hot water in the crappy showers. There is only one commercial van park in Bathurst, which doesn't allow dogs, so the Showground is the only other option in town. It cost us $22 for the night versus the $30 the Big4 in town would have charged. Next night we stayed at Wellington Caves Caravan Park, just south of Dubbo, and for $23 there was no comparison with Bathurst. For just $1 more we got to stay in a 3-star park. Here's the "artwork" at the turnoff to the caravan park... 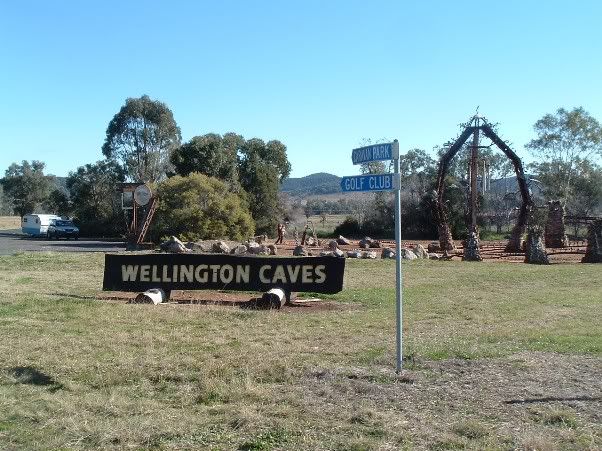 And here's the frost on the car when we woke up the next morning. Brrrr... 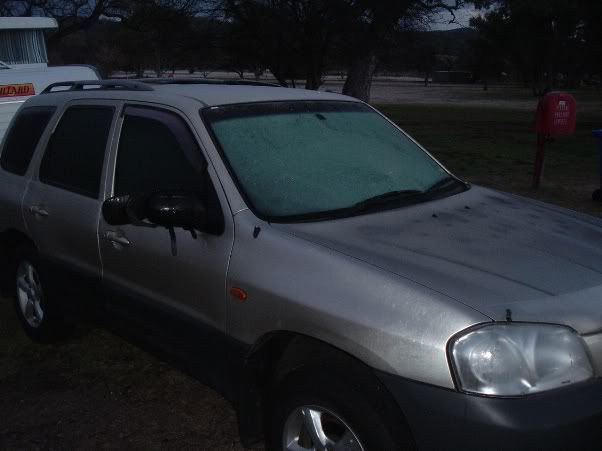 Onward further north we went, staying at Narrabri Showgrounds ($18 for a powered site. There were just six vans there, when the place can take about 100 with power.  ). Then up to Millmerran, west of Towoomba, where we stayed in a park that in the NRMA book said they didn't allow dogs. But when I fronted at the door and made an "innocent" enquiry, she said the dog would be no problem. Another lesson learned: perhaps in the off-season, rules and regulations about pets are "relaxed" a bit. After 5 days of meandering, we ended up at Crows Nest, Qld for the Vintage Van get-together. We spent the weekend parked beside philou from this forum, and there were a couple of other Classic vans in attendance as well. It was great to catch up with a number of people from both this forum and the Vintage forum. ;D ;D [Phil is a lot taller in real life than he looks on the computer!     ] ]We spent an extra night at Crows Nest after all the other vans had left, just to spend a bit of time relaxing and having a look around the area. We discovered a very important road just south of Crows Nest, so we set up an appropriate photo... 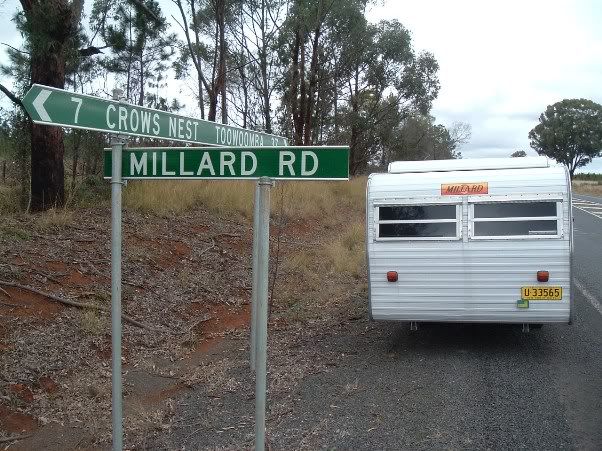 Funnily enough, we looked down that road but couldn't see any Millards   ...but then we didn't see any crows at Crows Nest either. I think the Queenslanders in this area like to pull the leg of each other.   After we left Crows Nest heading for home, our first night was at Boonah Showgrounds in southern Qld. There are two camping areas, one filled with long-termers and 'permanents' and a couple of overnighter slabs; and another huge infield area with powered sites that could hold heaps of caravans. Here's a photo showing us fighting for space in the infield area (eat your heart out kiwijim!)... 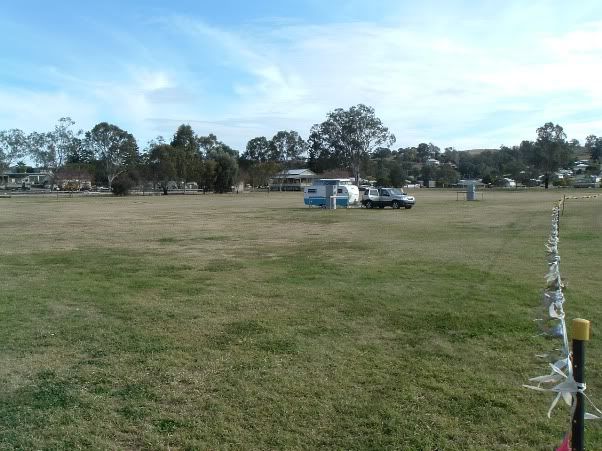 And another photo taken from the opposite direction showing the first camping area beyond our van in the left foreground... 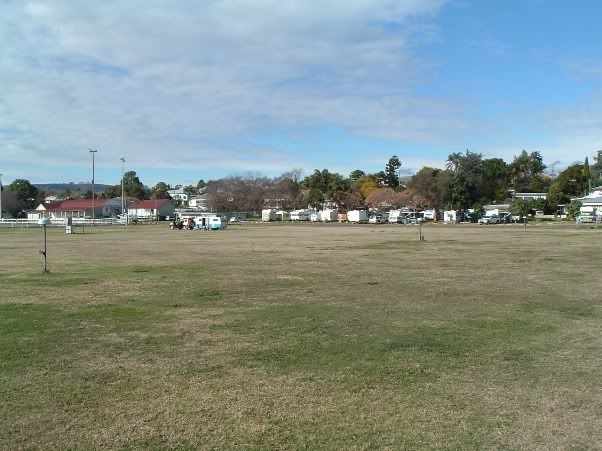 Travelling further south, a lunch stop at Rathdowney near the Qld/NSW border... 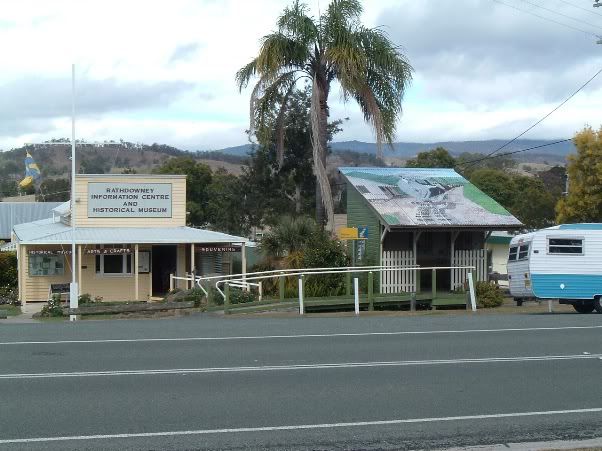 And onward, and onward, towards home. Once we hit the east coast, the wet weather set in again. We'd had pretty good weather up to this point, so we couldn't complain. Before we left home, I'd modified a heavy duty tarpaulin sheet to use as a wet-weather awning. I'd cut one edge off it, and sewed a rope into a hem along that edge with the jumbo Singer. Now I could thread it through the sail track on the van. This tarpaulin came in real handy down the east coast, as the wet weather continued... 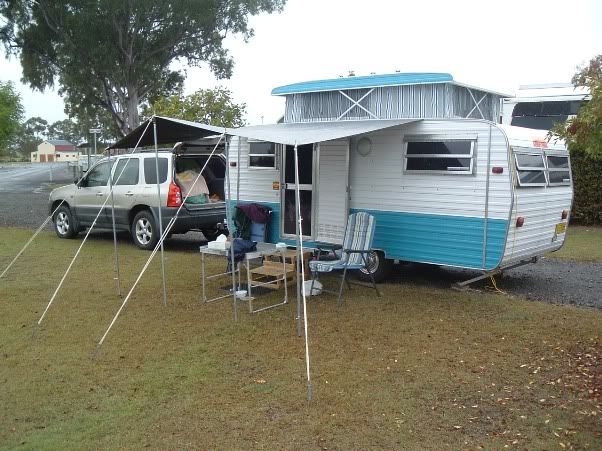 I also had the canvas awning in the van, but canvas is a pain in the butt when it's wet, and is more prone to mildew if you can't get it dry during travelling. So, the tarpaulin option is less frustrating when you want some cover and are staying for short overnighters. Anyway, that's it for this trip. Great to be home again so we can sit down for a rest!     cheers, Al. |
|
|
|
Post by kiwijim on Aug 2, 2010 21:48:40 GMT 10
Howdy Al, "Yep" I know what you mean when you say, It's great to be home !! I don't know if you have a Lazy-Boy arm chair, but I have, and that's where I've been spending a lot of time since our return last week. It's great to see you out and enjoying the fruits of your labors, The Millard looks really good (sitting out in that large area all on your own) # @ ^ * lucky devil ;D  How did the Millard tow at speed ? Did you use Stabilizer Bars ? or were you as lucky as me to find that they weren't required. Now that the Millard's on the road, I suppose we will hear that you are off again pretty shortly to new (empty) pastures. I know what you mean when you said there are some rather rough camps around, "Boy" did we find some rippers, not fit to house hogs in. kiwijim  |
|
|
|
Post by philouise on Aug 3, 2010 9:33:04 GMT 10
and here is a photo not included in millard1399's journey. a classic millard & franklin at the vintage van xmas in july at Crows Nest. 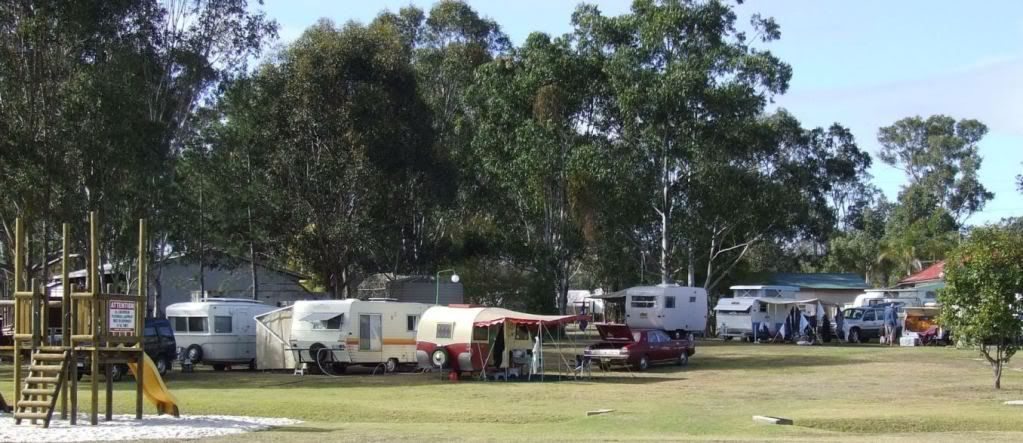 Cheers. Phil. |
|
|
|
Post by millard1399 on Sept 27, 2010 21:48:16 GMT 10
G'day All, I finally got around to doing a couple of fix-up jobs on the Millard. When we went away in July, one of the rear window louvres cracked in two places in the cold weather. I'd gone and bought a couple of new pieces of glass not long after we got back, but they'd been sitting in the shed waiting for me to get off my    and do something with them. Last week I finally got a "round tuit" and put the window tint on them. One to use, and the other for a spare. Then it was a matter of undoing the bottom rail of the window frame, out with the old and in with the new glass, and reassembling it. A member on the Vintage Caravan forum recently mentioned he'd used olive oil as the lubricant for inserting the window rubbers in position. I'd used WD40 when I refurbished all the Millard windows, but I was curious to see how olive oil went in this repair. And I have to tell you it's a piece of cake! ;D Much less messier than the WD40, and much less is used to lubricate the rubbers. I used a small artist's brush to smear some olive oil between the window glass and the aluminium frame, and then was able to push the window rubber back in position with my fingers easily... 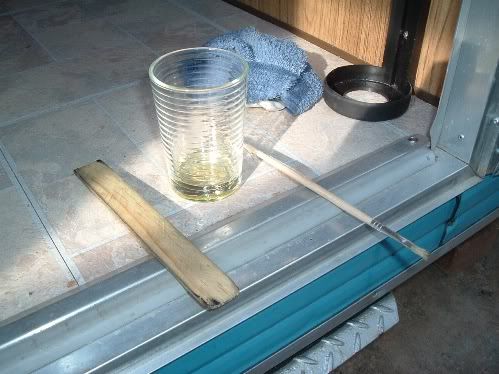 The window has now been repaired, and I just need to put another Classic Caravans sticker on it... 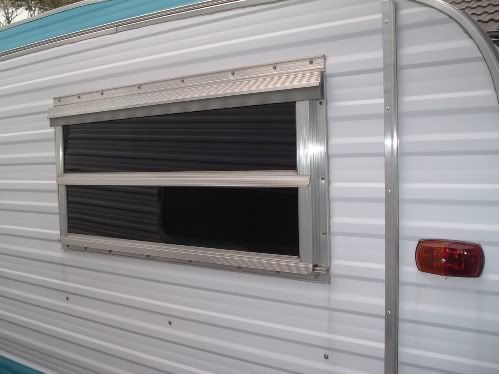 The other job I did was to replace the white decorative plywood around the cabin opening for the poptop roof. This strip of ply was stained by water leaks in the past, and showed lots of surface cracks from ageing... 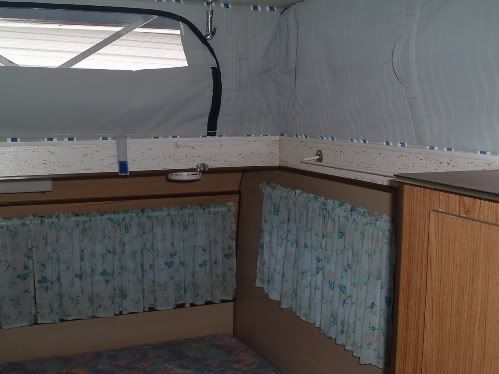 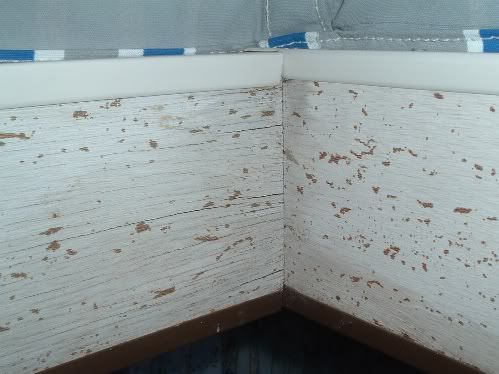 It never quite matched the "new appearance" of the rest of the internal restoration. I decided to cut some strips of ply out of the leftover wall cladding that I used in the interior, and then fitted them in position. Now it looks a lot more like the whole interior has been restored... 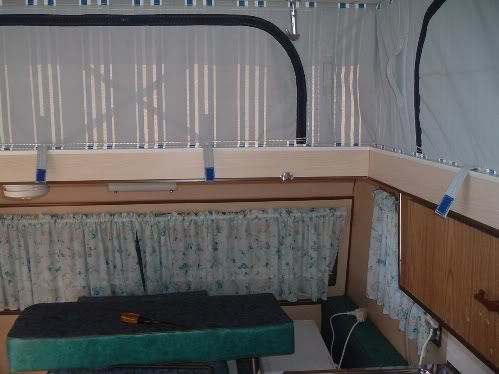 ---------------------------- kiwijim, sorry mate, I never did answer your questions above...until now  The Millard tows really well. I sat on 110kph for quite some distance between Narrabri and Moree, and elsewhere on good roads (eg. the Newcastle to Sydney freeway). Where the roads are a bit so-so, it bucks and weaves a bit, so down around 90kph is more comfortable. I don't use any levellers, or sway bars, or anything else. The rig sits nice and level from front to back, so I just go with that. And just as an aside...the tyres on the Millard are May 2004 manufacture, and should by rights be replaced by now (over 6 years old). My brother (my mechanic) checked them out back in May and thought they still seemed in reasonable condition. So I risked it and used them for both our trips away. Total of 5200kms on them, and no problems yet (touch wood  ). No guarantees...they could blow tomorrow. The spare I put together in May has a brand new L/T tyre fitted, so at least I've got one "good" wheel. cheers, Al. |
|
|
|
Post by kylarama on Oct 17, 2010 21:44:31 GMT 10
And onward, and onward, towards home. Once we hit the east coast, the wet weather set in again. We'd had pretty good weather up to this point, so we couldn't complain. Before we left home, I'd modified a heavy duty tarpaulin sheet to use as a wet-weather awning. I'd cut one edge off it, and sewed a rope into a hem along that edge with the jumbo Singer. Now I could thread it through the sail track on the van. This tarpaulin came in real handy down the east coast, as the wet weather continued...  I also had the canvas awning in the van, but canvas is a pain in the butt when it's wet, and is more prone to mildew if you can't get it dry during travelling. So, the tarpaulin option is less frustrating when you want some cover and are staying for short overnighters. I like this idea Al. What size rope do you need to fit into the sail track? I was going to try and pick out one line of stitching on the seam and slide in some rope. Do you reckon this would work, or am I better off doing it your way? Wonder if a run of the mill sewing machine would be strong enough? |
|
|
|
Post by millard1399 on Oct 18, 2010 7:56:47 GMT 10
G'day kylarama, Rope for the sailtrack should be 6mm diameter. The bore diameter of the sailtrack is 9mm, so anything you thread through it has the be, say, 8mm diameter or less in total. The width of the slot in the sailtrack is 4mm, so you don't want anything to pull through the slot in high winds, etc. Using rope of 6mm diameter, plus the thickness of the plastic (twice the thickness because it's wrapped around the rope) will give less than 8mm total. The normal home sewing machine will do this job - piece of cake. Before starting the job, you need to check if there's an accessory with the machine called an "upholstery foot". Usually it comes in the accessory box, and fits down where the needle goes to hold the 'fabric' down. Allows you to stitch right up close to the side of the rope. Buy good quality upholstery thread for the sewing job. Gestettner Gutermann brand costs about $6 for a 100 metres spool. (You can double this stuff over and use it as a tow rope.  ) Set the sewing machine to stitch the least number of stitches per inch (usually means setting it on the highest stitch length setting on the dial). Buy a No.14 size needle for the sewing machine. Needles have a groove to allow the thread to sit in the groove as the needle passes through the fabric. A No.14 needle (or a higher number if you already have it) accommodates the upholstery thread diameter. I found I had to cut the manufacturer's seam off one side. The eyelets wouldn't allow me to feed rope through the edge. Once I cut the edge away, I peeled back the seam at either end corner to cut back the little edge rope the manufacturer puts around the edges. Just peel back about 100mm and snip the rope. Otherwise you'll wrap that around the 6mm rope and have a diameter of well over 9mm - too thick for the sailtrack. Have a go, and if you have any more questions, feel free to ask. Heaps easier for me to make this than it was to make the canvas awning.   cheers, Al. |
|
|
|
Post by murray on Oct 18, 2010 9:34:21 GMT 10
Seems like a wonderful idea. the canvas awning on mine is far to bulky to assemble for the short term Will have to sneak out the wifes sewing machine  and do some work Cheers |
|
|
|
Post by kylarama on Oct 18, 2010 12:17:33 GMT 10
Thanks Al, As always your a wealth of knowledge! I might pull the Singer out next week and give it a shot. Another idea a friend told me today is to use 'sail slugs'  www.whitworths.com.au/main_itemdetail.asp?item=75226&search123=slug&intAbsolutePage=1 www.whitworths.com.au/main_itemdetail.asp?item=75226&search123=slug&intAbsolutePage=1These are used on main sheets of small sail boats. Just zip tie them to the eyelets on the tarp and feed the slugs into the sail track. Only problem is that it would leave a 20mm gap between the vans track and the tarp. |
|
|
|
Post by millard1399 on Oct 18, 2010 13:05:16 GMT 10
Yep, the 'sail slugs' idea is certainly an option. I see on the Whitworths website that the sail slugs are 9mm diameter, so I hope they slide easily through a 9mm sail track. (I suppose they must, otherwise what would be the point of them?  ) Usually on tarps the manufacturer puts an eyelet about every metre, so you would maybe have to put more eyelets into the edge of the tarp to tie more sail slugs on. Otherwise you'd have a metre length of tarp between the slugs that wasn't supported (or pulled tight against the van). Maybe heavy rain would flow back towards the van on the unsupported tarp section, rather than flow away from the van. Still, it's certainly another idea to file away in the "Options and Possibilities" file. ;D ;D Thanks for passing it on!   cheers, Al. |
|
|
|
Post by millard1399 on Oct 22, 2010 14:13:19 GMT 10
Sorry folks, I need to make an amendment about the brand of upholstery thread mentioned in my post above. The brand is Gutermann. Gestetner is the name for the brand of duplicating machines that were used in days of old. Dunno why that name popped into my head when I was typing information about sewing.  Would be very hard to make an awning using a duplicating machine. Although once you've made one awning, a Gestetner duplicator might come in handy for making copies.     Old age and good memory? Not here, it seems.   cheers, Al. |
|
|
|
Post by millard1399 on Oct 29, 2010 7:30:56 GMT 10
G'day All, When I recently finished making some shade cloth "curtains" for the windows on the back of our house... 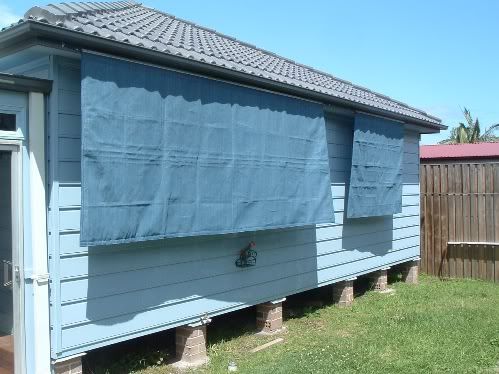 ...I had a short length of sail track left over, along with a piece of shade cloth, and a bit of rope. What to do with them? Too good to chuck it all in the bin, so I put my thinking cap on... 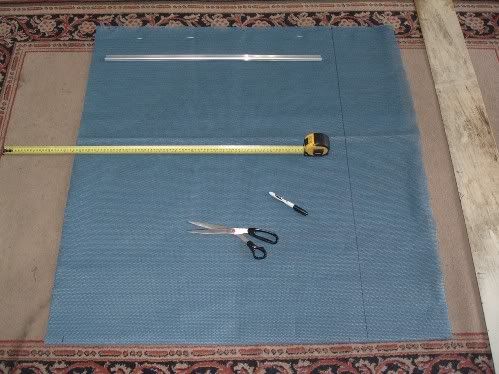 ...and decided to make a shade cover for the fridge vents on the van. I'd read somewhere that shading the fridge area of the van can help with the cooling efficiency of the fridge in hot weather, so I fixed the short length of sail track to the top of the fridge cover... 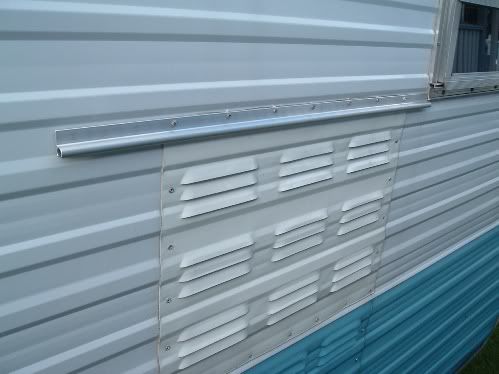 ...and then got the jumbo Singer sewing maching up and running on the shadecloth. The end result was this... 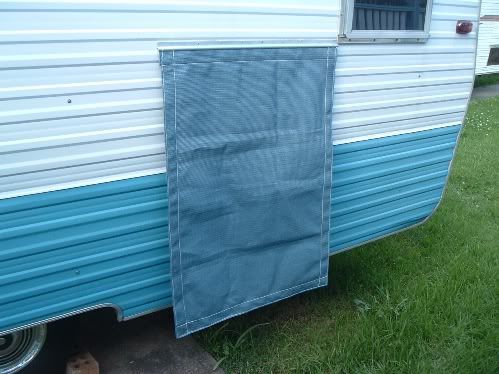 I'll put a couple of eyelets down in the bottom corners and thread a bit of rope through them. Then I can peg the shadecloth out from the bottom of the van to keep the hot sun off, and allow air to circulate around the vents. When it's time to pack the van up, the shade cloth slides back out of the sail track and is stored away. For all I know the shade cloth mightn't make an ounce of difference, but it sure makes the house windows a lot cooler. We'll see how it goes on the van. cheers, Al. |
|
|
|
Post by bobt on Oct 31, 2010 19:40:01 GMT 10
gidday millard1399
you sure are getting your dollars worth out of that sewing machine. guess you never figured it would get such a work out. ;D
shading the fridge vents... I have seen others do the same. Has to be a good idea in the summer. be interested to hear if you pick up a difference in the fridges performance.
bobt
|
|
|
|
Post by millard1399 on Apr 17, 2011 10:50:07 GMT 10
G'day All, I've spent the past week making a larger awning for the Millard. This was the original awning, which was a metre less in length than the van. It was the only size canvas I could get off ebay at the time. I made the scalloped fringe on this awning too short, and it never hung down the way I was hoping it would... 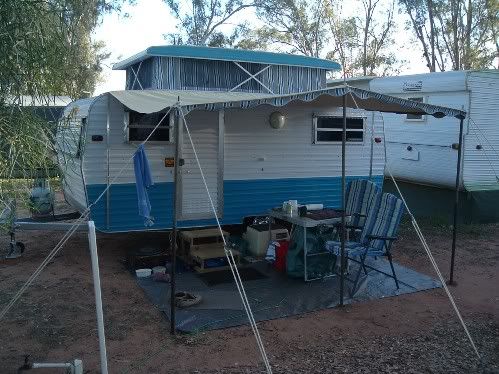 A couple of months ago the ebay seller listed a larger piece of canvas which would allow me to make an awning for the full length of the van. I also bought another piece of canvas at the same time, to make a longer scalloped fringe... 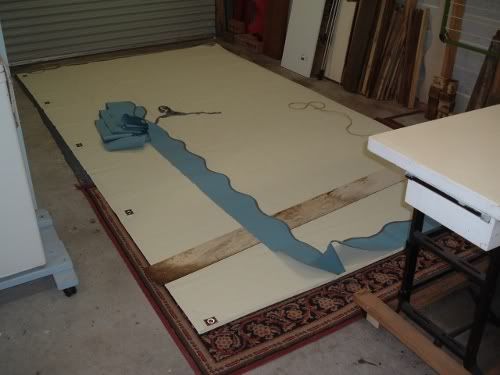 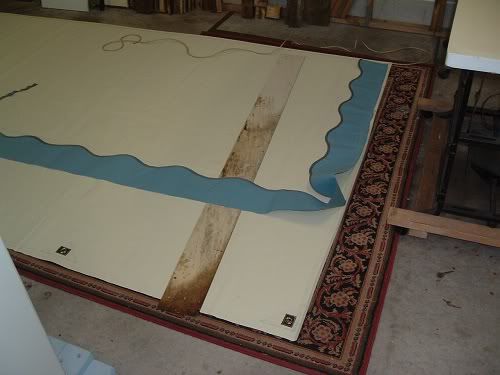 Did a test fit this morning, and am very happy with the result... 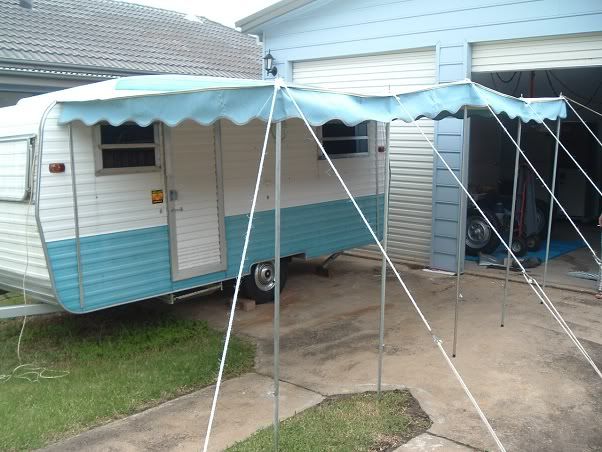 Now we'll have another metre of undercover area to keep the rain off. ;D ;D cheers, Al. |
|
|
|
Post by kiwijim on Apr 17, 2011 13:58:15 GMT 10
Howdy Al, That new Awning really looks great, It's amazing what a little extra width will do in the way of extra shade. Looks like I could park the Thomson under it with out any problem now. ;D ;D ;D kiwijim  |
|
|
|
Post by drylander on Apr 17, 2011 22:22:11 GMT 10
just for info but I bought a good quilting sewing machine at a garage sale for $5 today and its in ecellent condition with extras as well. The lady just bought a new computerised one and when I asked if it would do shadecloth and plastic tarps she said no problem and will even do canvas. ;D ;D
Pete
|
|
|
|
Post by bobt on Apr 17, 2011 22:22:55 GMT 10
hey millard1399
I like the new awning. Most impressed with your scolloping work. I would never try it, I don't think I would be able to get a consistent shape..
Yep the extra width makes a lot of difference. Now it looks like a great spot for the clan to gather for fivies... ;D
bobt
|
|
|
|
Post by millard1399 on Apr 19, 2011 10:23:39 GMT 10
G'day bobt, Nah, that part is the EASY part! ;D I just cut a template out of plywood, and then cut along the scallop curve with a sharp knife blade. This photo shows how I did the original awning... 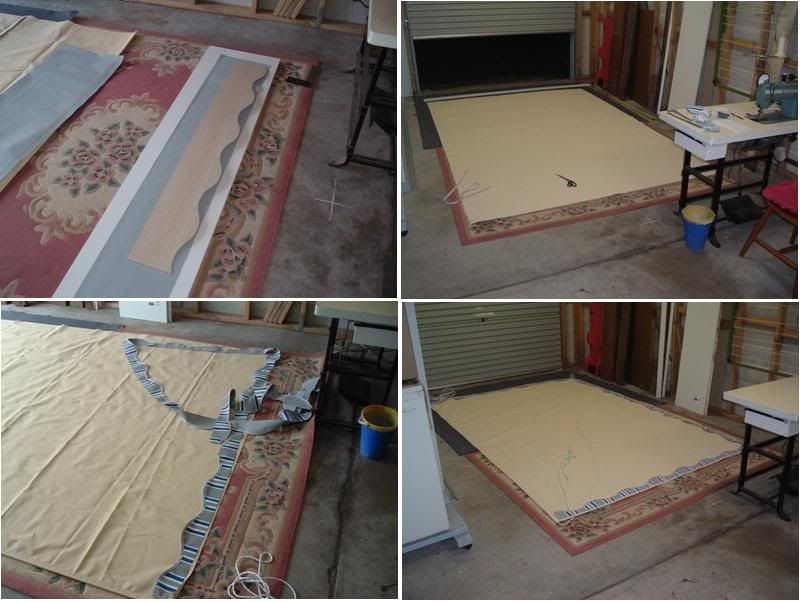 Any mug can do this! ;D ;D --------------------------------------------------------- drylander (Pete) - nice score with the $5 sewing machine!   The real test for a sewing machine and canvas is if it can sew five layers of canvas at once. The Singer dressmaking machine I've got can do five layers under it's own steam. From six to nine layers I have to help the needle punch through the canvas, by turning the drive wheel by hand as well. At ten layers the cotton snaps trying to punch it through. When would you get five layers or more? Have a look at the corners of the roof of any awning.   ----------------------------------------------------------- The Millard poptop celebrates its first anniversary since the restoration was completed. I've been keeping a wary eye on how it's surviving, considering it is parked outside in the weather all the time. One disappointment is the rusting on the drawbar. So much for all the hard work I did wire brushing it back, and applying a primer coat before two top coats of metal protection paint. That wasn't enough to stop the serious underlying rust coming back through... 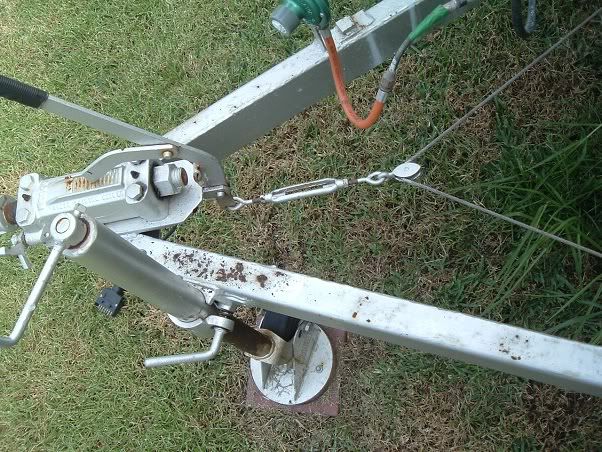 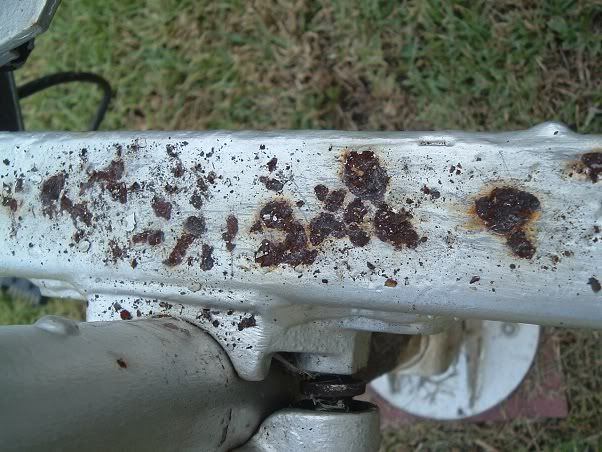 I got stuck into it a few weeks back, and dug all the major rust pieces out. Then I treated it with "Rustbuster" before giving it two coats of primer and two coats of metal epoxy paint, from the White Knight brand. The other brand I used before (QuitRust) never appealed to me when I painted it on in the first place. Always thought it was too thin and runny for a good protective paint. Now I'll be able to compare the White Knight stuff with the Dulux stuff. The other disappointment is the new Millard stickers I put on. Being made of vinyl, they tend to shrink a bit in the sun, so they've pulled away from the valleys in the cladding a bit. They also appear to have become a bit "brittle" in the sun, and have a couple of cracks in them... 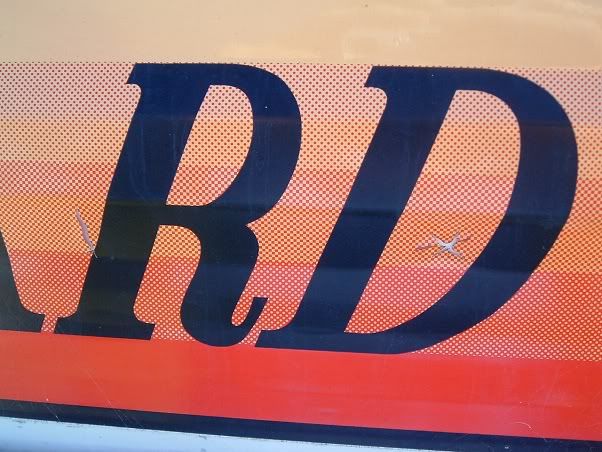 Other than those issues, the rest of the van is holding up well. No leaks that I can see anywhere. The spray paint (which I've discussed before) is absolute crap, and now shows as an absolute crap job. One day I might get the urge to respray those sections with some decent paint. Other than looking crappy, it ain't hurting the van the way it is. --------------------------------------------------------- To celebrate the anniversary of the van, I made a pole holder for the front drawbar. Found a length of pipe at the local builders tip (free) and then bought the end fittings from Bunnings. Had all the other bits in the shed that I needed. A day's worth of work and ended up with this... 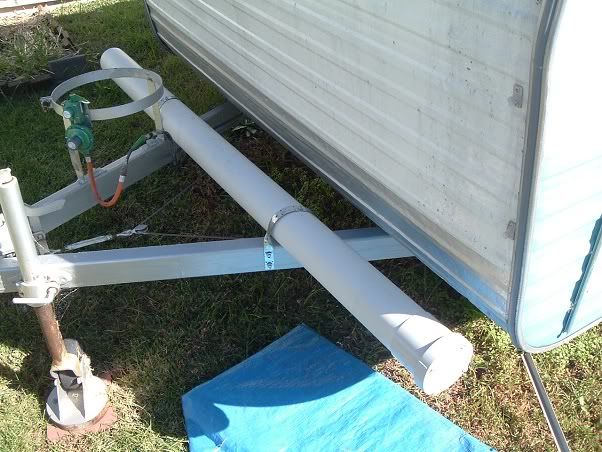 The awning poles, the pegs, and even the club hammer for the pegs, all just fit neatly into the pipe. Happy with that! ;D ;D cheers, Al. |
|
|
|
Post by bobt on Apr 19, 2011 22:14:06 GMT 10
Hey Al I thought you might have used a template. Sure is nice to have a bit of space to spread out to do the marking up. I'm afraid I am not that lucky. ;D You could compete with that fella over in the west. Your results look as good if not better then some of the commercial stuff I have seen. Must confess I don't mind playing with a sewing machine. Bit of a bugga about the draw bar, but let me tell you.. I have had caravans for years... every 12 months I use to repaint the draw bar, chips and stuff would result in rust popping its head out. But not quite like what you have.. Stickers... well my "still to grow up and mature van" has the same problem with the ones on the front. The dealers own sticker has nearly disappeared. Now that you have gotten into the enhancement thing. Added the pole carrier. One thing I added to mine was a tray to carry the sullage hose. Simple stuff, a sheet of wire mesh from bunnings, cut to shape and a couple of bits of angle to clamp it on the draw bar. Sure beats carrying a wet smell hose in the car  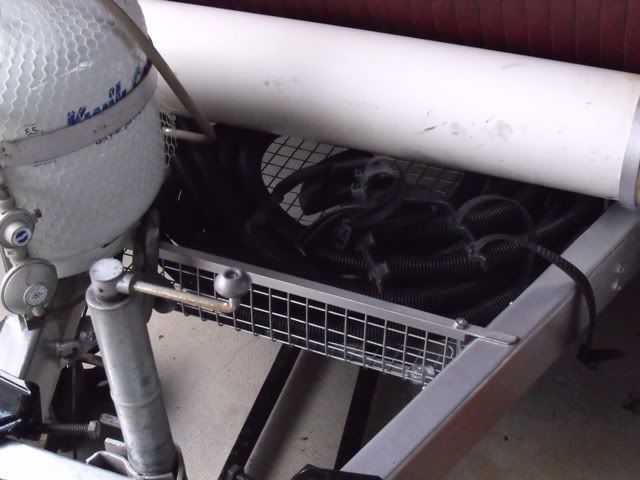 Don't worry about the outside paint. The van still looks good in the Caravan World photos. Just get out and use it.. ;D bobt |
|
|
|
Post by millard1399 on May 5, 2011 19:21:40 GMT 10
Hey bobt, I'm not ignoring you, and I did read your post above. I thought the tray in the front is a great idea! I'll have to look into designing one for the Millard.  We're heading off tomorrow with the van for the weekend. Not so much a 'holiday' but more for use as accommodation at a relative's house. We're off to celebrate my partner's mother's 80th birthday, and we'll camp in the driveway of a relo's place. I've been spending a few days getting the van ship-shape, since it hasn't been out on the road since July last year. This trip will be a bit of a road test to make sure the van will travel up to Qld in July ok. We'll be heading back up to the Christmas-in-July event again, and mingling with the Vintage caravans (or mingling with Philouise in their Classic van if they go up again as well). Anyhoo, as I said, I've been preparing the van. "Grease and oil change" sort of thing. Gave it a good wash to get all the grime off it. Wore my fingers down to the bone trying to get the chalky surface off the faded blue paint. Did I mention how crappy this paint is?? (Yes, I think I have already.   ). A bit of carwash liquid, and a lot of scrubbing, and it comes back to how I wish it would look ALL the time... 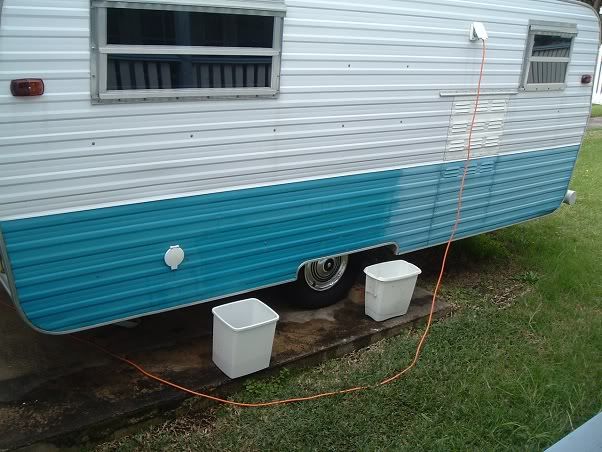 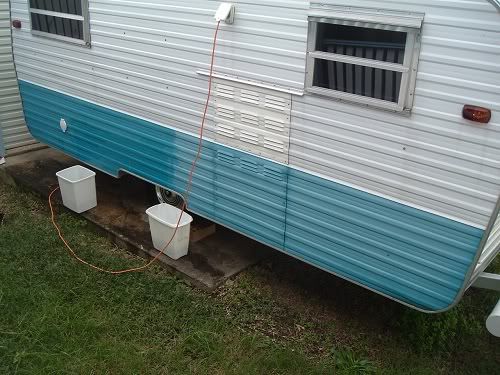 Even polishing this paint won't make it shine for very long. A few days in the sun, and the chalkiness comes back big time. At least the van looks more like a restored van now, rather than an abandoned van like it did yesterday.   See you all next week! cheers, Al. |
|
|
|
Post by millard1399 on May 15, 2011 21:08:16 GMT 10
We had an uneventful trip last weekend, with another 550 kms of trouble-free towing of the Millard. D@mn good van, this Millard poptop. Shame it's not a 16ft Viscount!  The new awning is a beauty. Amazing what another metre of cover does for enjoyment with the van. I even took one of the house window shade cloths with us, to test it out as an end cover on the awning. Lucky I did, because we had quite a chilly wind blowing in the mornings, and the shade cloth proved to be a real handy windbreak. So off I go to Bunnings during the week, and bought some more shadecloth to make a custom-made end cover, using the jumbo Singer (...What a machine! This thing's paid for itself ten times over!!   ) Here's the shade cloth being made up... 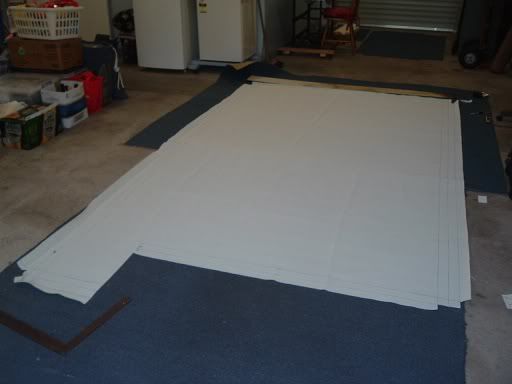 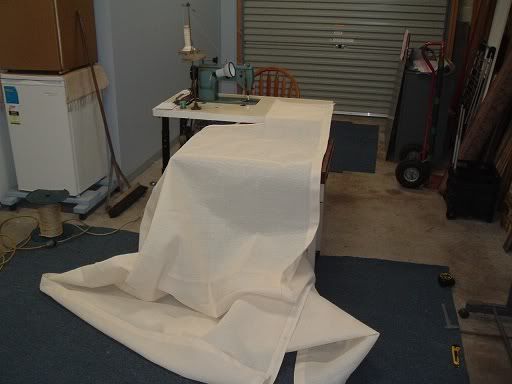 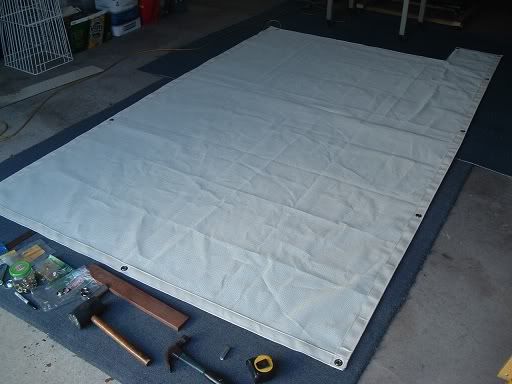 It slides into the vertical sail track at either end of the van. You can move it from one end to the other, depending on which way the wind is coming from. I haven't got a photo of it set up, but this diagram gives an idea of how it is fitted... 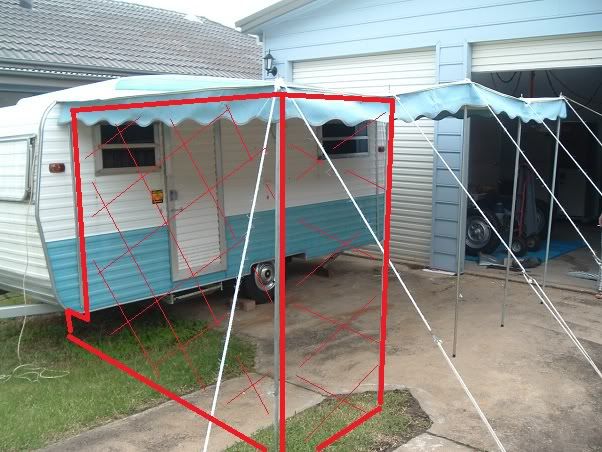 The really generous man at Bunnings cut about a metre more off the roll than I asked for. And then the really friendly person at the checkout only charged me for 2 metres worth, and not the 2.1 metres I asked for (great people those Bunnings people   ). So that left me with about a metre of shadecloth left over. What to do with it? Hmmm...I decided to make a shade cloth strip that would hang along the pole edge of the awning. I thought it might be useful one day if it was hot and sunny, and we're looking for a bit of extra shade, without cutting out the view. Here's the shade strip being made up... 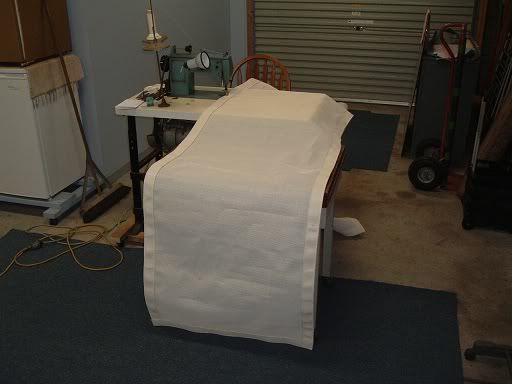 I've still gotta get some eyelets to punch into it, but when it's finished it will hang along the side of the awning like this... 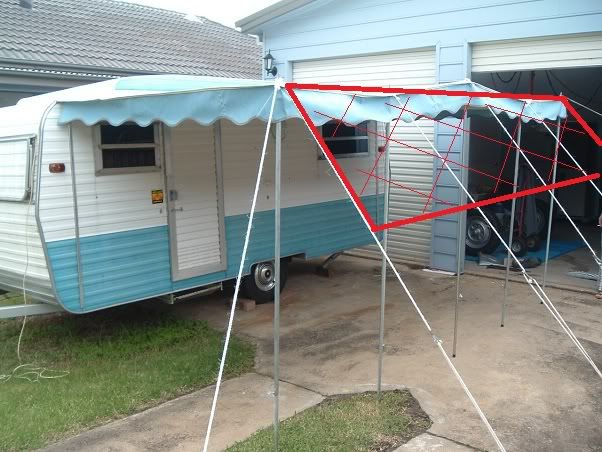 So there ya go. Big productive weekend at our house!   cheers, Al. |
|
|
|
Post by millard1399 on May 23, 2011 11:30:35 GMT 10
Following my bargain-hunting escapade on the weekend, I was able to renew three of the canopy lifters on the poptop yesterday... 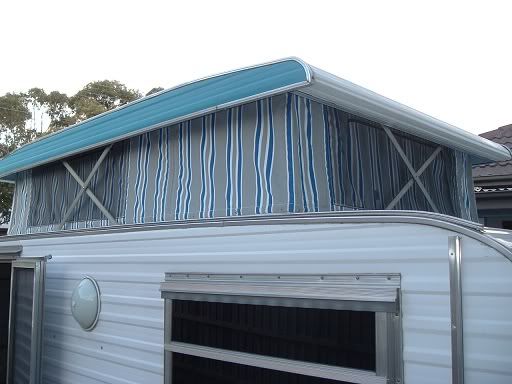 The springs in the old lifter at the rear had stretched, and the roof used to sag a bit at the end. Now she's trim, taught, and terrific! ;D Back when I did the resto, I renewed four of the cupboard handles on the four most-used cupboards. On the weekend I managed to grab 7 new handle sets at the sale, so I was able to renew the remaining six cupboard doors and have one new handle left over as a spare... 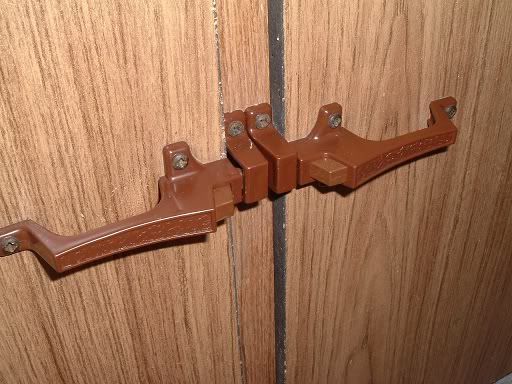 Amazing how new cupboard door handles work much more freely than the old "sticky" mechanisms.   I also renewed that rusty old steel knurled nut on the front window shade stay... 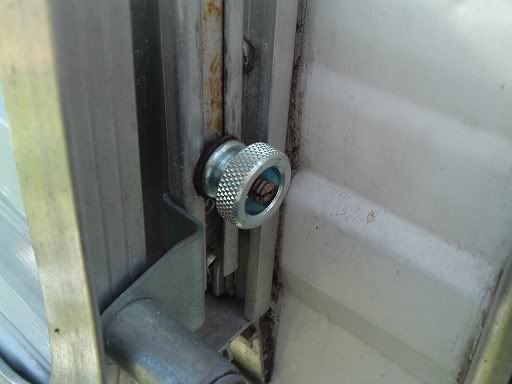 Bloody bewdy bargains!! ;D ;D ;D cheers, Al. |
|
Deleted
Deleted Member
Posts: 0
|
Post by Deleted on May 23, 2011 18:23:49 GMT 10
Ah Al - Agree your van is now taught and terrific - ask any woman with an underwire, a bit of appropriately supportive steel will do wonders for your figure.   Seeshell |
|
|
|
Post by millard1399 on May 24, 2011 9:37:29 GMT 10
Aah, seeshell...thanks for adding your uplifting comments! ;D ;D
|
|