|
|
Post by 78466noM on Dec 14, 2015 9:59:53 GMT 10
hi have been watching and reading your site for quite a while. We rebuilt a early 70's Chesney Kampa it was good when finished but didn't quite suit what we wanted it for as my wife is to use it for traveling for a photography business she is starting. i hope i am posting in the right place it took me ages to just work it all out but that was just me  . we now have a Millard assuming it is a 1978 15ft 9inch or there a bouts chassis no 78466 no M it was complied for gas 11/1978 . From what i read here it sounds about right or at least close sold to me as a 1985 model i knew from the photo it wasn't so wasn't a problem unlike a car from that era caravans have very obscure info if any at all. i work long hours so it hasn't come along very quick though am lucky it still had most of the walls and roof interior panels to use as stencils to make new panels . we have accumulated most of what we need it is going to be full electric inside with gas hot-water set up outside . there is a lot of work to do chassis has rust down driver side edge rest of chassis is minor surface rust very minor have steel bent to fit just have to weld it in not an easy job. the chassis number isn't welded on it is on a riveted plat same shape as millard ones with a m on it same number is on gas compliance plate . hope to have it up and cruising asap will post photo's soon . Bruce |
|
Deleted
Deleted Member
Posts: 0
|
Post by Deleted on Dec 14, 2015 15:29:19 GMT 10
Welcome to the group Bruce, I will do a more in depth reply later tonight first thing tomorrow with further information on your classic caravan.
cheers
|
|
Deleted
Deleted Member
Posts: 0
|
Post by Deleted on Dec 15, 2015 6:06:52 GMT 10
What would really help with the age of your caravan is some photo's of it - Please read this thread and follow the links to post photo's ditzygypsy.proboards.com/thread/3479/photos-why-problems
The date on the gas compliance will be when they first made it mandatory to have the gas systems tested/checked.
What you may have going on your chassis number, is a Millard made by Viscount  If this is the case then it would be a 79 to early 80's but the photo's will give us a better idea If this is the case then it would be a 79 to early 80's but the photo's will give us a better idea
cheers |
|
|
|
Post by 78466noM on Dec 15, 2015 11:22:11 GMT 10
 i will try to work out how to put a link to photo's also need to take more . off to work . there is a thread it was worked out i think to be a 1976 model sliding windows pale green stripe van is exactly the same as that one . have fun will be back when i can 
|
|
|
|
Post by 78466noM on Dec 18, 2015 0:42:50 GMT 10
|
|
|
|
Post by tasmillard on Dec 18, 2015 5:44:45 GMT 10
Be good to have more photos of the inside. You will quickly find out that there are some of us that like to see photos, lots of photos  |
|
|
|
Post by 78466noM on Dec 18, 2015 8:52:07 GMT 10
inside is striped at moment just most of the severely water damaged wall panels i am taking photo's of today i hope as am going to mark their position on them and use them as templates for the new ply that is going to be painted haven't been able to see the timber in roof but am assuming the worst and probably need to replace them .Floor is solid has a small wave nothing too drastic we have purchased a floating floor . Harder work lino would be easier but wife put lino in the old Chesney Kampa we rebuilt and the complaint was it marked too easy. as it comes along i will try to get photo's of progress but i am hopeless i tend to get stuck into things and forget about the camera.
Have fun every one .
Bruce
|
|
|
|
Post by 78466noM on Dec 18, 2015 21:51:20 GMT 10
 Here are some pic's i hope showing most of the bad slight water damage or shout i say small bits not water damaged but was the right price at $750 i could have paid $7500 for a good one but wouldn't be what we want inside and no guarantee it wouldn't develop a leak in the near future . the chassis has rust down drivers side under the cladding the rest is good rust wise some-one took the tank out and chiseled the straps off so have to repair that before putting in a new tank but also going to install a grey water tank just so it can go anywhere without problems as i have read is is a requirement in some national parks. heaps of self tapper screws must be stainless not rusted but a tonne of salastic to clean but all in all looks very bad but with a lot of tlc . Hopefully i have it registered and usable by about April .I don't have a lot of spare time am getting bits done here and there with Christmas here even less time but just one thing done is one thing closer to finish. may have found an electrician by then mention caravan and they loose interest i don't get to the part where i tell them i have all double pole power points and switches purchased and am going to run conduit right though so i know there are absolutely no sharp edges and easy for wire to be run with all internal walls and ceiling installed but i will find one eventually. getting ready to go to bed work for next six days strait so have fun. I am enjoying reading about other peoples vans and the informative narration of their builds. :-) |
|
|
|
Post by 78466noM on Dec 18, 2015 21:53:52 GMT 10
sorry still getting the hang of photo's maybe this time
<iframe width="480" height="360" src="http://s1075.photobucket.com/user/bruce_brown3/embed/slideshow/millard%20van"></iframe>
|
|
Deleted
Deleted Member
Posts: 0
|
Post by Deleted on Dec 19, 2015 9:44:34 GMT 10
OK the link to all the photo's works
Now I'm hoping Dean has a look as my best guess is it is a 1978 - 80's. That has been modified at some point in time and the original windows have been replaced with sliders. The interesting thing is the no "M" in the chassis number. If you haven't bought it I would have a long think about it first and maybe speak with a few members via PM about it first.
Cheers |
|
|
|
Post by 2lateagain on Dec 19, 2015 11:27:53 GMT 10
Bruce, I suggest that you have a look at my project 1978 Millard 16ft M54550. I did it a couple of years ago now and looking at your van you will most likely have a similar project on your hands, it took me just on 2 years full basically full time and a very large amount of money. The further you get into it the more you will find that has to be replaced and it is a HUGE job, there is no easy quick fix that is going to last long. Numerous others on here have undertaken similar projects and been happy with the finished results. What is your location as I still have some of the old cladding under the house. I am near Nowra NSW. Thought that used to come up with my location.
Graham
|
|
|
|
Post by 78466noM on Dec 20, 2015 0:22:30 GMT 10
lockyer
There was a thread by the youngones in about 2010 it was worked out theirs was a 1976 millard sunraider if i remember properly can't find the post but it was worked out it was a bargain basement model sliding windows cheaper than the wind-out louver windows no galvanized chassis plain doors on cupboards etc the plastic trim around windows is old but still a bugger to get off.
2lateagain
i think i read about your van a few months ago and all i can say is I love it the workmanship is A1 .as I am thinking I want it dry and safe. I have most of what i need new 9inch brakes steel for chassis and tools also a wife that likes wood work she has already made the top bunk waiting for me to make the frame with draw opening for bottom bunk :-D
I live in Western Sydney close to Penrith thanks for the offer but the damage looks worse in the photos i have some pieces of 1mm aluminum left over form the Chesney build it is going to get used quite often by my wife so will probably earn itself a few more battle scars small trees bollards are the main culprits so will bend pieces large enough to cover hole by 2 inch and put profile bend in by hand then mastic and rivet it on with the rivets with the stem that doesn't go right though.
I am going to have it solar one day and had the thought that instead of putting panels on roof being a truck driver i see quite a few on the side of the road where the glue holding them down has failed they could kill some-one my idea is to make up two window protectors even though i don't have front windows but bolting the panels onto frame means they will be solid and when van is stopped opened out to catch the sun.the rest i will leave for later of to bed another day of work tomorrow or should i say today. have fun hoping to be mobile asap .
Bruce
|
|
Deleted
Deleted Member
Posts: 0
|
Post by Deleted on Dec 24, 2015 8:51:28 GMT 10
Hi Bruce
Mate I think your 100% correct it looks to be a Millard Sunrader see HERE . It is incredible how Millard changed things on there caravans, all the time. No wonder it makes them hard to age. And with your chassis number with no "M" I would say it is a 1978 - 79.
Also Bruce to help other members - if you go to the first post in this thread and hit the edit button you will be able to change the title of the thread. To something like 1978 Millard Sunrader 15ft 9inch #####(chassis No)
That way it helps others who may have the same van as yours (if that possible with Millards ha ha)
Cheers |
|
|
|
Post by tasmillard on Dec 24, 2015 9:47:00 GMT 10
Lol lockyer - yes look at my Millard... door is behind the axle, leading into the bedroom, I cannot for the life of me find another one like it, so perhaps a custom jobbie... either way it just adds to your comment about Millards |
|
Deleted
Deleted Member
Posts: 0
|
Post by Deleted on Dec 24, 2015 11:58:02 GMT 10
Hi Bruce,
Yep it's a 1978 Sunraider,the "cheap and cheerful"Millard.
Tasmillard,if you look at a later louvre window brown stripe Millard you will see after your model they moved the kitchen along and put the door towards the front.
All the manufacturers in the 70s had your layout and door configuration,made for lots of seating areas!
Wayfarer Evan bought out a version in the 60s.
Occasionally you will see a revamped version with an en suite across the rear and a double where the bunks are.
Hope this helps
Cheers
hughdeani
|
|
|
|
Post by 78466noM on Dec 24, 2015 23:19:55 GMT 10
changed heading hope it is better but all suggestions for a easier one will be considered :-D have a little time Sunday hope to have rest of inside paneling out and inside cleaned up and some more photos of progress started life cheap and solid my aim is to have it on road cheap (this will work as the wife and I are able to do 99% of the fit-out and repairs ) and solid . thanks for a lot of inspiration. may your travels be safe and uneventful and your stops be full of wonderment  Bruce |
|
|
|
Post by 78466noM on Dec 28, 2015 8:42:49 GMT 10
I got a bit more done on Sunday all of the interior panels out ready to be traced onto the new ply.
At some stage someone put bitumen strips along the top of both sides of roof so am going to have fun with a petrol soaked rag to get that off then will have to use grease and wax remover to clean up so the mastic will stick to keep water out.
Roof timber has rotted down the drivers side and bowed from weight of roof so none of it is salvageable but not to worry i have plans to use a mixture of 30mm aluminum square tube and timber that way i can pop rivet roof on with closed rivets and cross bars will help with the weight of the roof.
So next job is the brakes and chassis then roof and finally the sides before the fit-out. i am sure i will have found more before I'm finished.
Bugger haven't finished typing this one yet and just remembered i have to do 12 volt wiring for tail and clearance lights and run conduit before ceiling and walls go in.
Any way here are the photos for so far still a long way to go , stay safe and have fun
<iframe width="480" height="360" src="http://s1075.photobucket.com/user/bruce_brown3/embed/slideshow/millard%20van"></iframe>
|
|
|
|
Post by 78466noM on Feb 26, 2016 13:12:27 GMT 10
It has been a while but with work and stuff around the house and have not gotten a lot done to van at least nothing that was noticeable just prep work.
But have had a little time off and have now replace the A-frame repaired the rust down drivers side now only have to clean surface rust off two thirds of the chassis and etch primer and kill rust paint.I have a new axle need to weld center bolt plates and brake backing plate mounting plate. Then put together and bolt up under van with new hardware .Also clean edges and put angle back on with butyl mastic under to seal edges after a new ceiling frame is in. then it should be all inside to do then though i do have a few holes and dents to fix.
here are a few photos of work i have already done and the rivets i am using are called sealed dome rivets.
<a href="http://s1075.photobucket.com/user/bruce_brown3/media/DSCN2026_zps6n9a0tvs.jpg.html" target="_blank"><img src="http://i1075.photobucket.com/albums/w437/bruce_brown3/DSCN2026_zps6n9a0tvs.jpg" border="0" alt=" photo DSCN2026_zps6n9a0tvs.jpg"/></a>
|
|
|
|
Post by 78466noM on Mar 21, 2016 8:23:53 GMT 10
<iframe width="480" height="360" src="http://s1075.photobucket.com/user/bruce_brown3/embed/slideshow/"></iframe>
this is with all roof rafters out up both sides is 32mm aluminum square tube and aluminum angle replacing the 30mm x 20mm timber that ran along top of frame for rafters and roof to join to.
rafters are now sitting in place they are 30mm square pine with 17mm ply cut to make the pitch in roof glued and screwed to it couldn't find the original type timber that wasn't going to cost a fortune and the fix is only slightly heavier less than 2kg .
so very happy now a lot of cleaning of the edges and angles then sealing. after that all should move along fairly quickly when i have time my wife will be very happy as we get to the parts she can do such as making the cupboards and bunks . then the final touches such as putting up the curtains etc .
have fun.
:-D
|
|
|
|
Post by Mustang on Mar 21, 2016 17:48:25 GMT 10
For some one that works long hours you have certainly prepared yourself a blank canvas.
To publish photos you need to go one more step, just copy the "direct" url on photobucket , then use the image button on this site.
Your project is coming along well, keep posting.
cheers
Brent
|
|
|
|
Post by 78466noM on Mar 23, 2016 7:49:38 GMT 10
Will do we wanted something that would suit us and last a long time i think we have found it once finished it should only need general maintenance and can be towed behind my falcon or the wife's territory. not sure where the image button is on this site but will look for it Bruce should have more picks up soon over week end |
|
|
|
Post by 78466noM on Apr 26, 2016 9:27:28 GMT 10
I got a bit done over the last few weeks chassis has been wire brushed and done in rust converter and i now have the new axle finished with its new brakes (nine inch override)but with the new backing plate mounts just a matter of bolting electric brakes on if in the future i decide to change them . Next jobs are painting chassis and van then sealing it and then sometime while doing inside is to throw axle under it :-D Photos to come i have misplaced cord for camera and don't have a card reader. have fun and be safe 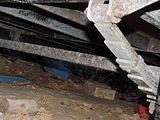 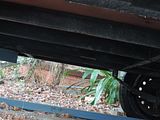 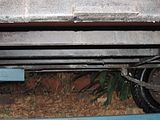 the second axle was brought in wrong size not turning it into a duel axle new axle is still 10mm each side too wide but won't cause too many problems i don't intend putting mag wheels on it . :-D  |
|
|
|
Post by 78466noM on May 3, 2016 19:32:40 GMT 10
I have a few days off so getting things done while it isn't raining fitted up rear stabilizers measured and cut and drilled a hole into some 3mm angle for the pin on rear of stabilizers to sit in. Removed and straitened step remodeling so it can't bend away from posts again i hope . also cleaned up one wheel arch trim it came up well and fairly quick to do until I get to the black bitumen on the roof sections . Painting chassis tomorrow weather permitting hope to get both etch primer and rust paint done in the one day. Hopefully photos tomorrow |
|
|
|
Post by 78466noM on May 4, 2016 15:44:42 GMT 10
|
|
|
|
Post by Mustang on May 4, 2016 19:28:34 GMT 10
Re the under floor, I was going to seal mine, the chassis blaster/painter advised against it, he suggested its easy to trap water in, by sealing, leaving it bare leaves it to dry quickly ?
Just a thought.
|
|


 .
. If this is the case then it would be a 79 to early 80's but the photo's will give us a better idea
  i will try to work out how to put a link to photo's also need to take more .


