Deleted
Deleted Member
Posts: 0
|
Post by Deleted on Jan 24, 2013 22:25:32 GMT 10
Well here she is M48180, 16 feet X 8 feet with 6 berth capacity. Built December 1976 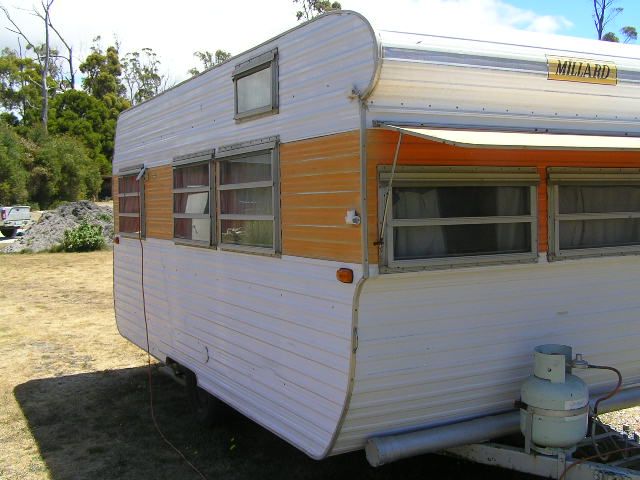 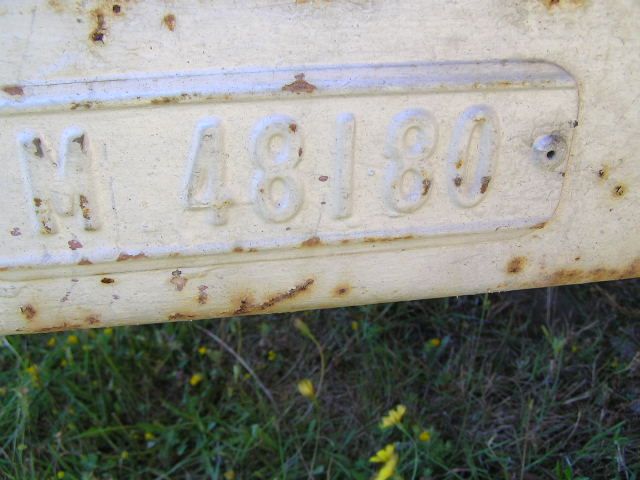  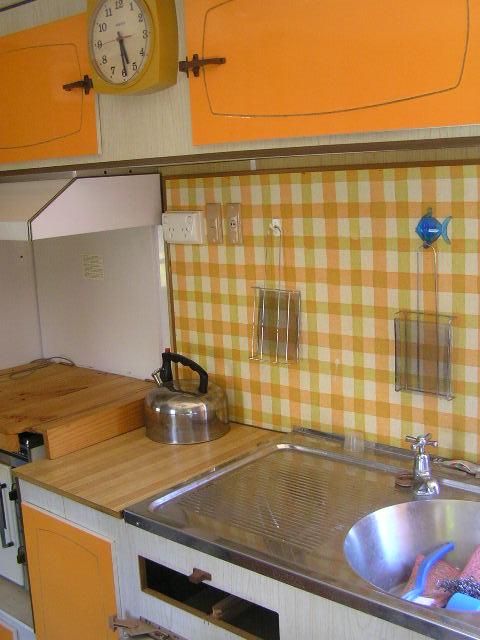 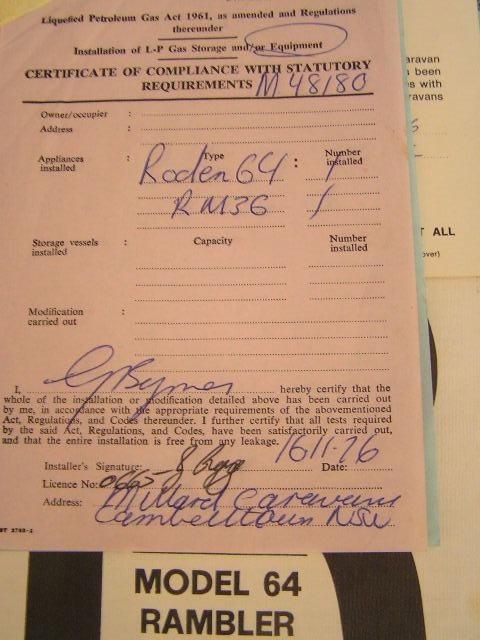 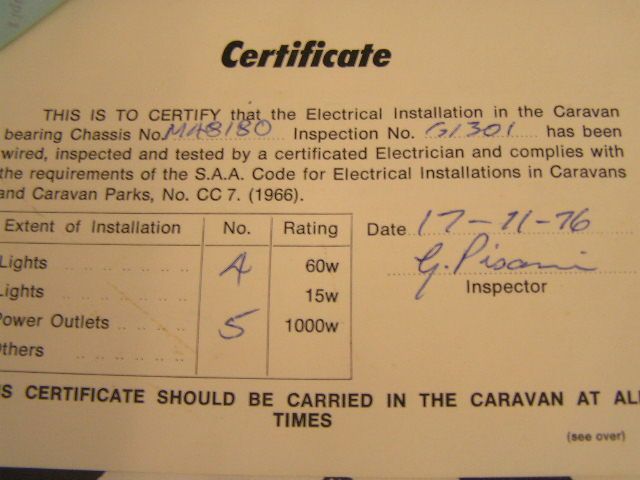 We have had M for about 8 years now and for most of that time m has been stored outside and I suspect the same for many years before that as well. She is still in her original layout and colours and looks to be in good condition at first look. Still has the original fridge, gas oven and hot plates, both in working order. This is the first time I have had anything to do with caravans so I didn’t have much idea of how to maintain one. So I was disappointed to discover a water leak and quite a lot of mould along the left hand side of the ceiling. So up on the ladder and judging by the amount of silicone it became obvious the leak has been there for a while. Not sure what I will find when I take the cladding off. I assume the weight of the annex has something to do with this.  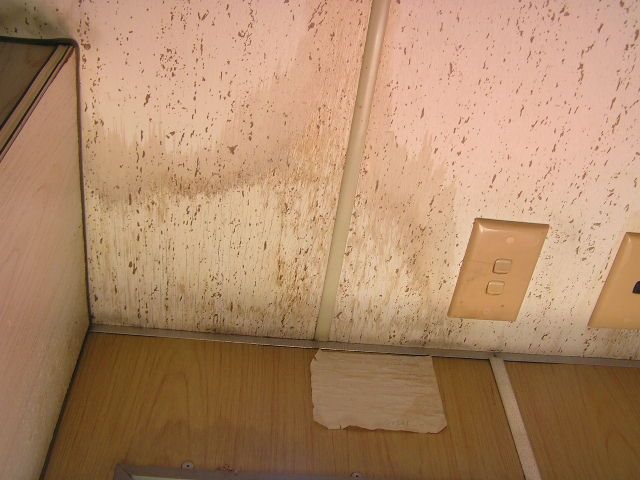 I also discovered another leak at the front right hand corner, the tell tale signs were hiding behind the front seat covers. I discovered it while under the van doing some rewiring. 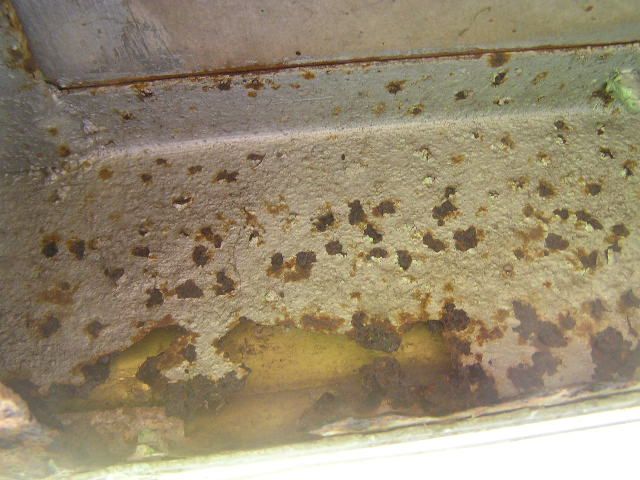 As you can see the steel eating maggots have done a good job here. It is obvious that I need to make some repairs so I started researching caravan repairs on the internet and stumbled across this site and what a wealth of information it is. So I decided time to join the forum and share my caravan restoration story. From what I have read so far this story may be spread out over quite some time. So what are my plans? Strip the inside and outside, remove the frame work, build a new sub frame and put the van back together. My wife likes the layout so the only change we will make is to put in a standard double bed which will make the kitchen bench about 200mm shorter. We do most of our living outside so this won’t matter so much. I will put in service doors so I can access storage space from the outside. I am considering putting in a kitchen draw under the bed so that we can cook and wash up outside. Will also change the lighting to 12v LED’s. The 240 electrical wiring needs to be updated to bring it up to standard. I intend to use the original gas oven/hot plates and gas/electric fridge but am concerned that they may not meet current standards. Can anyone advise me on this please. Well that is enough for now. Cheers Ron |
|
|
|
Post by ForumMod on Jan 25, 2013 22:47:07 GMT 10
G'day Ron, and welcome to the forum! ;D
I'm so pleased to have you come on here and say you've got the original paperwork to go with your van. Up until now, we've been doing our best at estimating which Millard chassis numbers lined up with which year. It's always a great thrill (for me anyway ;D ) to have somebody provide documented proof of the age of a van.
I've never heard of anybody getting knocked back because of the original gas stove or oven, particularly in Qld where gas compliance certificates are required. I believe the regulations/Standards are more to do with the regulator on the bottle(s) than the actual appliances in the van.
Good luck with the repair work. It'll stop you getting into any other mischief while you're working on the van, so always think positively about the project. ;D ;D
cheers,
Al.
|
|
Deleted
Deleted Member
Posts: 0
|
Post by Deleted on Jan 28, 2013 22:28:23 GMT 10
Hi All Well a start has been made, not at the point of no return yet but I think the water leaks and the rust in the chassis say that I have no choice. The corner trim and the windows have been removed on the right hand side    This appears to be the original sealant. It is still pliable and it is easy to remove. 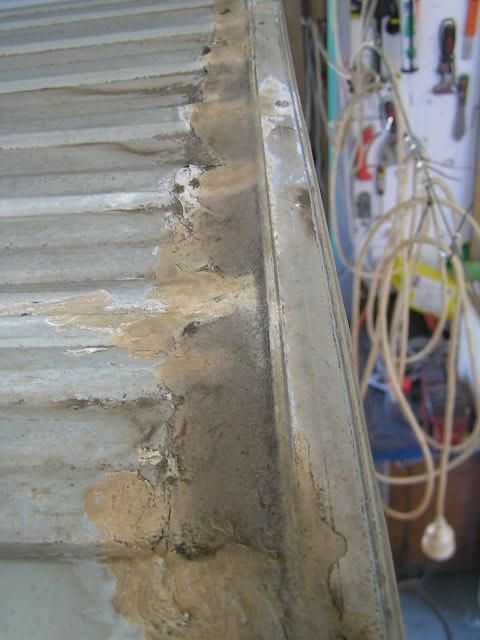 I am not looking forward to removing this lot though. The scary thought is why so much silicone and what will I find under the cladding? Cheers Ron |
|
Deleted
Deleted Member
Posts: 0
|
Post by Deleted on Jan 30, 2013 8:32:44 GMT 10
Ron, the roof looks a bit scary doesn't it! Especiallywhen you consider it didn't work ..   Maybe they misidentified the leak and just kept adding sealant to the wrong place. You have a great start to a project though, will watch with interest. Cheers Doug |
|
Deleted
Deleted Member
Posts: 0
|
Post by Deleted on Feb 1, 2013 18:41:56 GMT 10
yeah its not going to take as little time as you planned (doesnt matter what you estimate was)
i started with a simple one, millard but older than yours, i didnt even need to do the inside. but WOW, so much stuff to do . . . and learn. and learn then do. then do, stuff up, and relearn a different way.
but it is kinda cool. have fun with it.
With my project i hunted website for info. found this site and stayed. best ive found yet.
|
|
Deleted
Deleted Member
Posts: 0
|
Post by Deleted on Feb 4, 2013 20:58:10 GMT 10
Thanks for the welcome folks. I am so thankful that I stumbled across this site. I have read many of the posts and have learned a few tips already, I am guessing I will have many more to learn!  Seeing as I will be repainting the outside sanding of the old silicone seems like a good way to go, thanks for the tip Camich.  Almost have the inside gutted but I want to brace the side walls on the outside before I take the interior ply off. Hope to tackle that this weekend and then lift the frame work off the chassis, remove the floor (does anyone know if the lino tiles contain asbestos) then see what damage the chassis has suffered over the years. Photos next post |
|
|
|
Post by jacko14 on Feb 4, 2013 21:27:01 GMT 10
Hi Ron
When I sold floor tiles during the 70's, the tiles that were in my '75 Millard were known as "vinyl asbestos" tiles so you might want to be extra careful when removing them.
Cheers, Bob
|
|
Deleted
Deleted Member
Posts: 0
|
Post by Deleted on Feb 10, 2013 21:39:49 GMT 10
Hi Folks The weather was rather windy on Saturday so I decided to work on the van rather than all those odd jobs that always seem to need doing. Bob, thanks for the info on the floor tiles, there is some damage to the floor so I will ditch the whole lot and put a new one in. Managed to remove all the cupboards during the week. I have kept them intact as far as possible so that I can use them as a pattern when I build new ones. 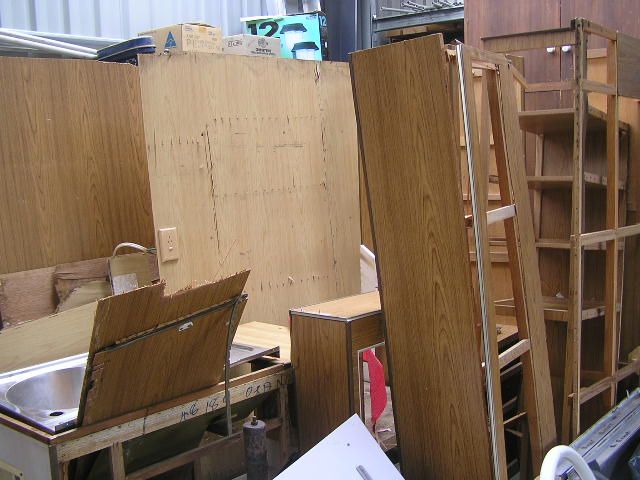 Then set about removing the ply walls, once again keeping the sheets intact as much as possible. 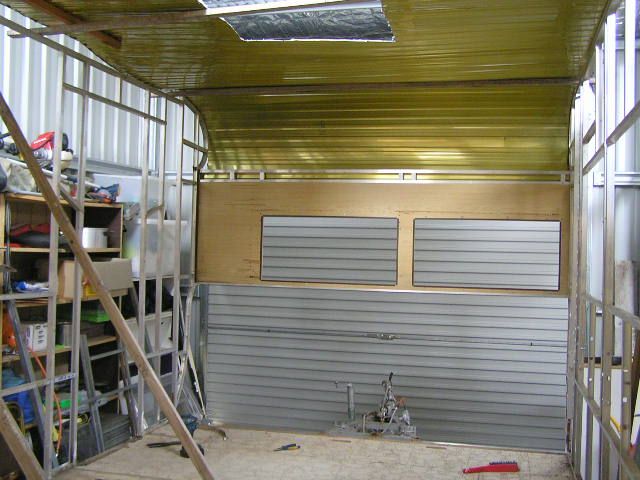 I wanted to leave the roof untouched but to get the ceiling out i had to free the roof as the ceiling is jammed between the roof and the wall. Once the roof was free I was able to slip the ceiling ply and frame work intact. 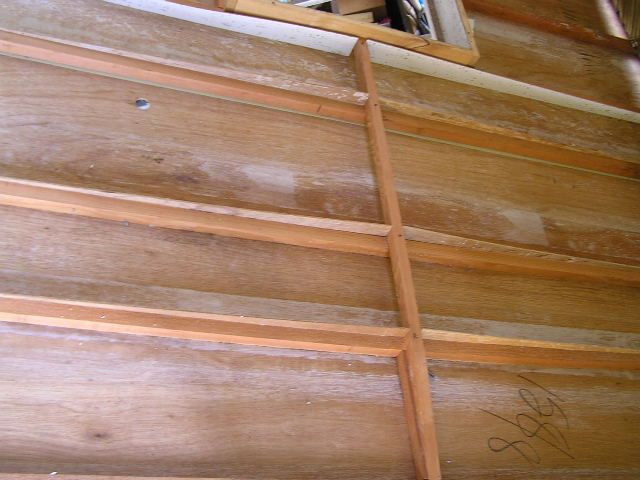 Then put up some support timbers to support the ceiling. 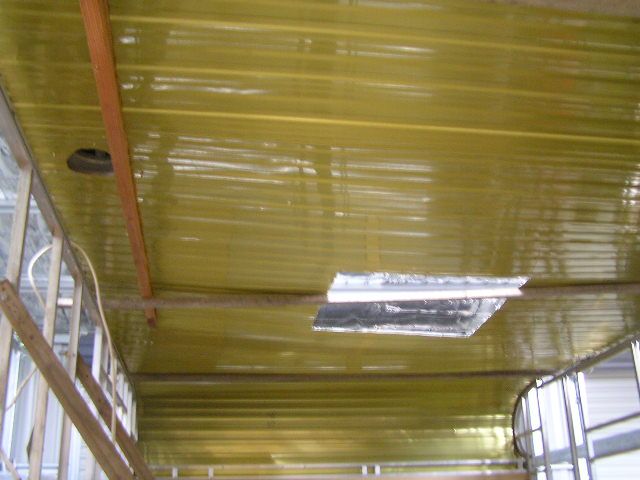 In this photo you can see the ply lining still surrounding the front window and the same is true for the back window. The only way to remove this ply is to remove the aluminium frame work and if i do that there will be nothing to hold up the side walls so I will leave this till I start the reassembly.  Next was to loosen the frame work from the chassis and lift it free. 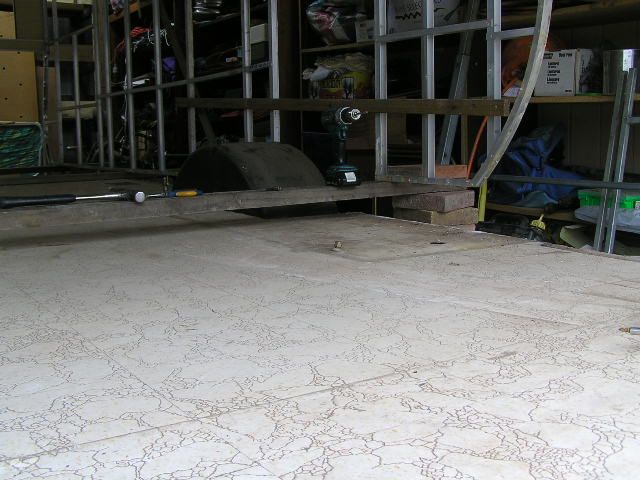 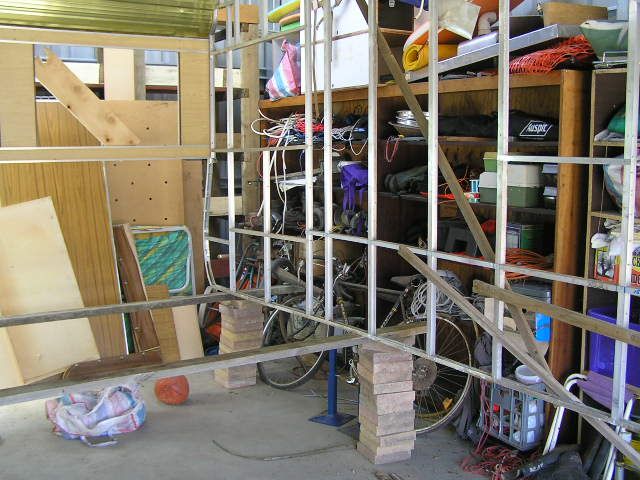 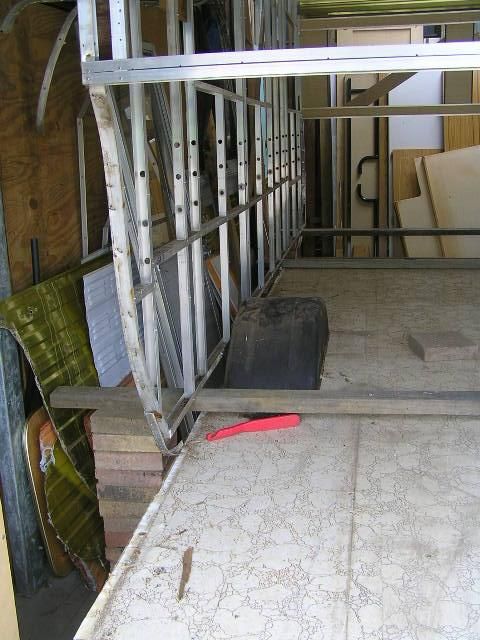 Then roll out the chassis. 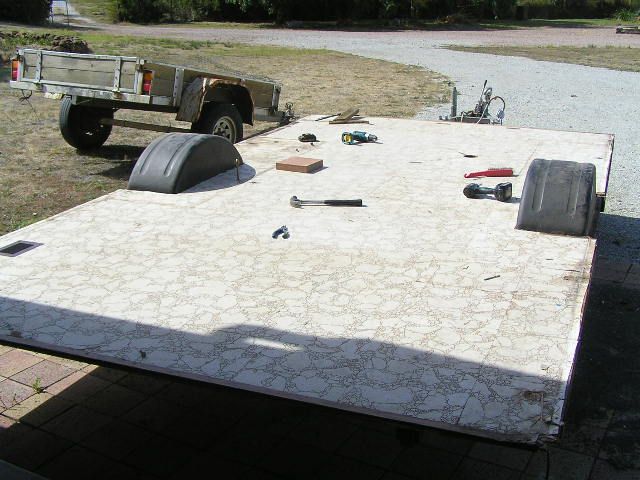 Then remove the floor  Lots of surface rust but that will clean up ok. And looks like the axel will come out for a clean up. 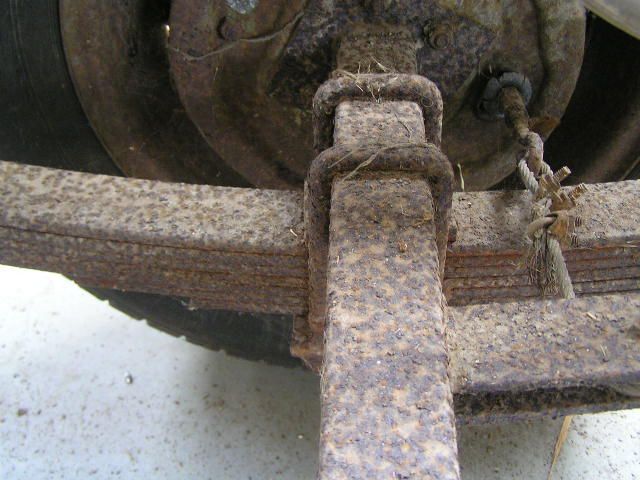 But some repair work required here!! 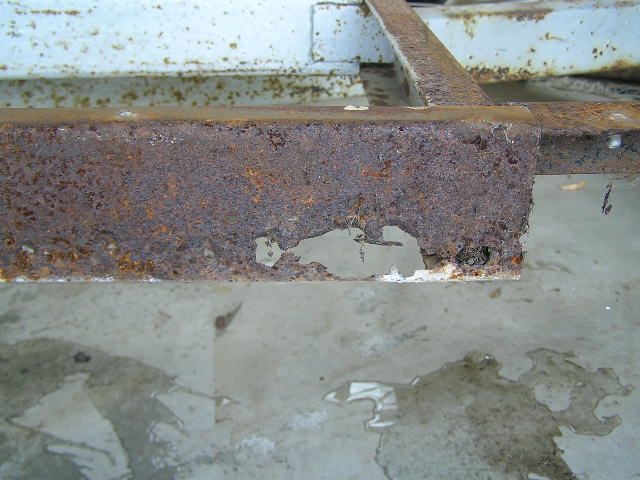 Till next time |
|
Deleted
Deleted Member
Posts: 0
|
Post by Deleted on Feb 11, 2013 22:55:39 GMT 10
|
|
|
|
Post by ForumMod on Feb 12, 2013 10:57:54 GMT 10
Gees, Ron, you certainly haven't been bludging!   Crikey that's a lot of progress in a fairly short space of time. You've certainly got a good handle on what you're doing, so it should come together very nicely when it comes time for the rebuild. Great job!!   cheers, Al. |
|
Deleted
Deleted Member
Posts: 0
|
Post by Deleted on Feb 20, 2013 20:58:05 GMT 10
Hi All With the exception of the rear corner steady’s and two rusted out chassis rails I have pulled apart or cut off as much as I can.   These will go. Now for the clean up and I guess this is when progress will slow down. Replacing chassis parts that are to rusted and start the build part of the rebuild project. I have decided to go with electric brakes and the old wind down steady’s will be replaced with the newer swing down style both front and back.  A start has been made but still a few hours to go with the flap disc on the angle grinder and wire brush in the electric drill and flat on my back. Oh Joy 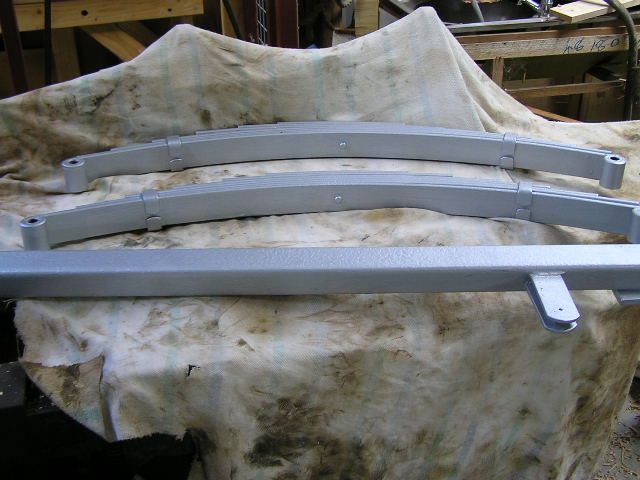 Axle and springs spruced up Al I have been reading through kalarama’s thread, what a great job has been done there, and I noticed that the chassis on that van is built differently to mine. On my chassis all the members are on the same level and on his the cross members are below the length way members. I am wondering if this could be another clue to establishing the age of the millard vans. Both the length and layout of our vans are the same. Check the post dated 25th Oct. 2009 reply 5, 12th & 13 photo, and reply 19 on Dec 6 2009, 3rd photo. Cheers Ron |
|
|
|
Post by NikkiandRob on Oct 6, 2013 22:10:29 GMT 10
Hi Ron,
We've been reading through your posts on the progress of your rebuild and would love to see the finished project. Today we bought a 1976 Millard 16ft in lime green and white and plan to fix it up. You have done so much work on yours!!
|
|
Deleted
Deleted Member
Posts: 0
|
Post by Deleted on Dec 3, 2013 19:24:39 GMT 10
Well it has been some time since I have posted and that’s because it has been some time without any activity on the van but things have moved along lately. Amazing how motivating fast approaching deadlines are. Unfortunately I haven’t taken many photos but here are a few to show where i am at... New lining bit darker than I wanted but it was half price 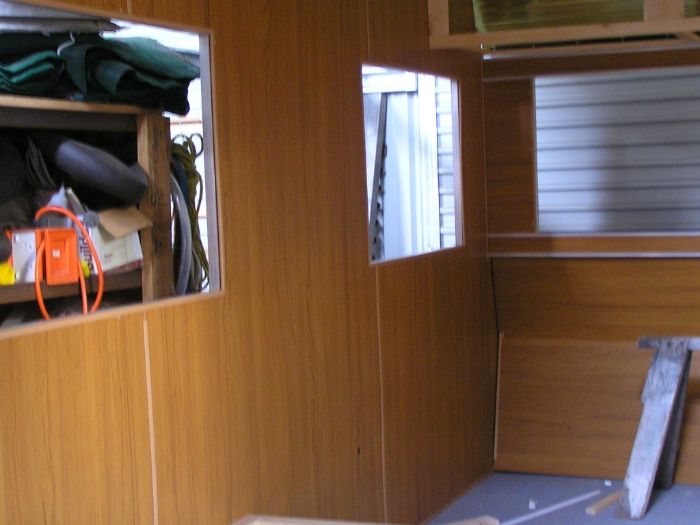 frame work for front seat and bunk  Cupboards over the bench 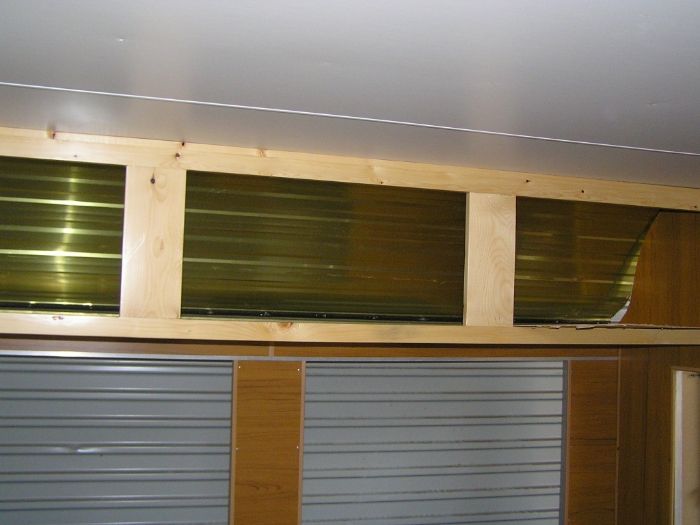 Kitchen cupboards 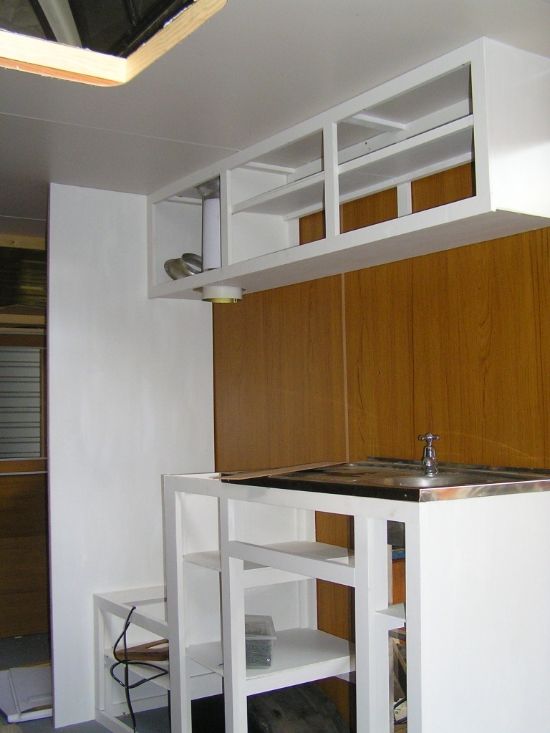 The layout is the same as the original except the bed is now a standard double necesatating a small change in the width of our wardrobe |
|
Deleted
Deleted Member
Posts: 0
|
Post by Deleted on Dec 3, 2013 19:33:43 GMT 10
Hi Nick and Rob. Have just seen your poste dated Oct 6. My one piece of advice is to take lots of photos as you take things apart. they are a great reference for putting things back together. I didn't take enough but the ones I did were invaluable! Ron
|
|
Deleted
Deleted Member
Posts: 0
|
Post by Deleted on Dec 4, 2013 18:48:55 GMT 10
Ron, I have a Millard 12ft poptop from 1976 and the chassis has rusted through in the exact same spot in mine as it has on yours. How did you fix it? Did you replace that section of chassis, or just weld a piece of steel over the hole to strengthen it? I am not very savvy when it comes to welding, so I would have to hire a tradesman to do the work. Is it a major problem, or would it be ok to just leave it and paint it to stop further rusting? Would appreciate your advice.
Thanks,
Lachlan
|
|
Deleted
Deleted Member
Posts: 0
|
Post by Deleted on Dec 4, 2013 22:50:26 GMT 10
Ron, I have a Millard 12ft poptop from 1976 and the chassis has rusted through in the exact same spot in mine as it has on yours. How did you fix it? Did you replace that section of chassis, or just weld a piece of steel over the hole to strengthen it? I am not very savvy when it comes to welding, so I would have to hire a tradesman to do the work. Is it a major problem, or would it be ok to just leave it and paint it to stop further rusting? Would appreciate your advice. Thanks, Lachlan Hi Lachlan. I cut the offending parts out and welded in new sections I had them made a sheet metal workshop. I figured that as I had taken the frame of I may as well go that bit further and replace what had rusted through but then I am lucky enough to be able to do a lot of this work myself. I didn't want to have to go through it all again just because the chassis gave out a year or so down the track. I then used a wire brush on the rest of the framework to remove surface rust and painted it with a product called hammertite. www.hammerite.com.au/ Is it a major problem - my guess is ,not knowing how badly rusted your chassis is, that even though you intend to paint it with an appropriate paint sooner or later it will be a problem. The rest of the van built on the chassis and relies on it for its strength and stability. Try asking a local metalworker for their opinion. Hope this helps. Ron |
|
Deleted
Deleted Member
Posts: 0
|
Post by Deleted on Dec 5, 2013 20:15:31 GMT 10
Thanks Ron, will probably get a professional to come and repair the rusted section. Apart from the surface rust, which is only moderate, there is only the one section that is eaten through by rust, and it is not as bad as yours appeared to be - its only a small section. Any ideas why the chassis has rusted through where it has? Dirt, road grime etc? Its not like the spot is anywhere near the wheels where splash from puddles might hit.
Interesting that your van and ours have it in the same spot. Maybe a design fault on Millard's behalf?
Secondly, am considering having the chassis sandblasted to remove the surface rust. Would you recommend this? The framework and flooring is still intact, and we don't intend to remove it. Would sandblasting be worth it, or too much hassle? We've spent an hour or four under the van with the drill and wire brush attachment, but don't seem to be getting anywhere, so we are thinking sandblasting might be the easiest and quickest way to go about it. Again, we would need to hire a professional to do the work.
Anyone else's thoughts would be appreciated too.
Regards,
Lachlan
|
|
Deleted
Deleted Member
Posts: 0
|
Post by Deleted on Dec 5, 2013 21:16:40 GMT 10
Drawer fronts completed 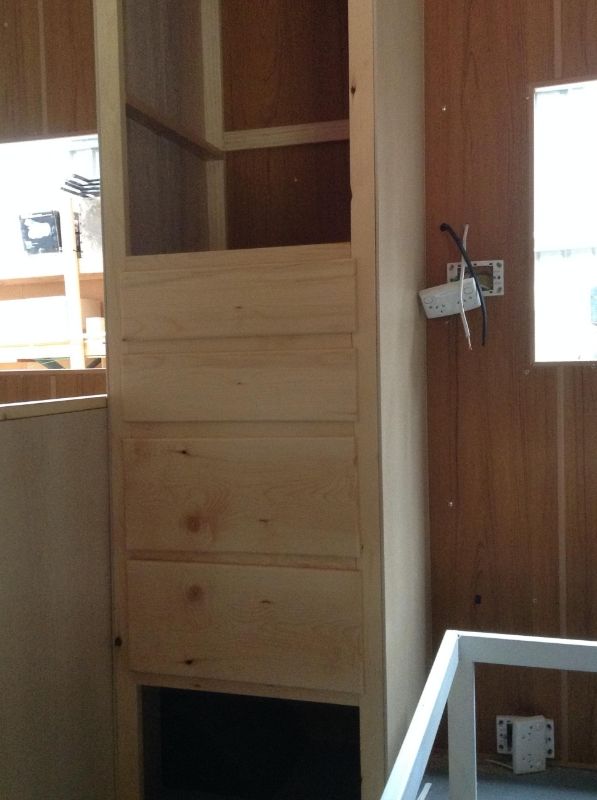 Replaced all the wiring. Only run 240 for power outlets. All lights will be 12 volts, run of a battery which will be conected to a 3 stage battery charger. Insulation going in. had to split the bats in half for the walls. 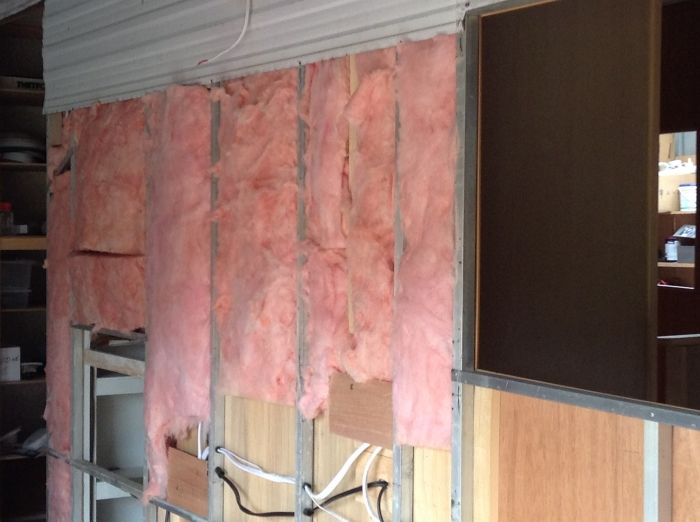 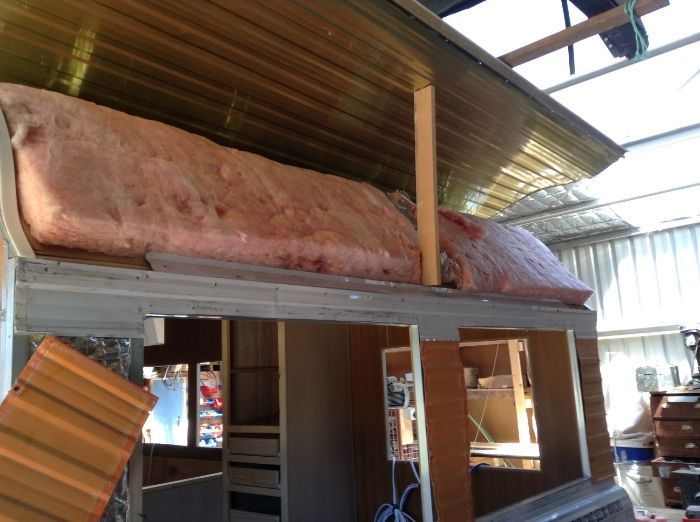 Pantry, now for the shelves and doors 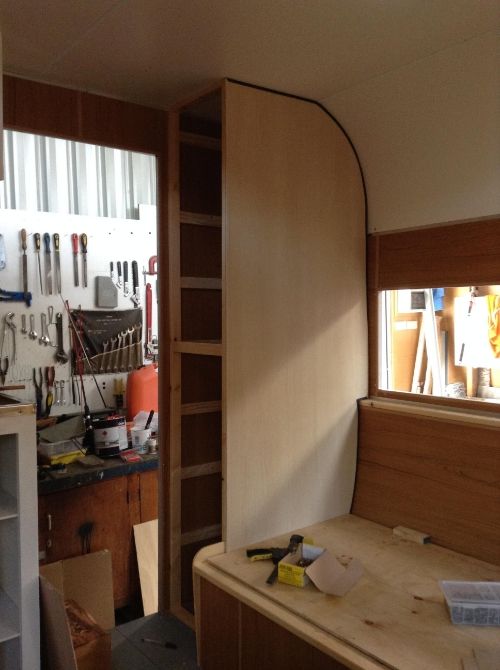 |
|
|
|
Post by ForumMod on Dec 5, 2013 21:29:54 GMT 10
G'day Ron, You should be "as snug as a bug in a rug" with that insulation.   And plenty of storage for all the necessary "stuff" means you won't ever have to go shopping again.  The job's looking great!! cheers, Al. |
|
Deleted
Deleted Member
Posts: 0
|
Post by Deleted on Dec 5, 2013 21:52:49 GMT 10
Thanks Ron, will probably get a professional to come and repair the rusted section. Apart from the surface rust, which is only moderate, there is only the one section that is eaten through by rust, and it is not as bad as yours appeared to be - its only a small section. Any ideas why the chassis has rusted through where it has? Dirt, road grime etc? Its not like the spot is anywhere near the wheels where splash from puddles might hit. Interesting that your van and ours have it in the same spot. Maybe a design fault on Millard's behalf? Secondly, am considering having the chassis sandblasted to remove the surface rust. Would you recommend this? The framework and flooring is still intact, and we don't intend to remove it. Would sandblasting be worth it, or too much hassle? We've spent an hour or four under the van with the drill and wire brush attachment, but don't seem to be getting anywhere, so we are thinking sandblasting might be the easiest and quickest way to go about it. Again, we would need to hire a professional to do the work. Anyone else's thoughts would be appreciated too. Regards, Lachlan Hi Lachlan. I assume that the rust in these spots is encouraged by all the things you mentioned. Moisture between the cladding and chassis will take longer to dry encouraging rust therefore these areas will rust more. Yes I also spent many hours with a drill and wire brush, I also used disk on the 115mm angle grinder, it looked a bit like a course scouring pad. I removed the loose and flaky rust then painted it. Ask your local paint specialist for what type of paint to use. Sand blasting will certainly be the most effective and thorough way of dealing with the rust giving the best long term result. No matter what you do short of heavy duty galvanizing the rust you wont stop the rust without regular checks and touch-ups as needed. Cheers for now Ron |
|
|
|
Post by carlo scarvaci on Jun 6, 2016 23:58:26 GMT 10
Was wonderring were did you get,for the plastic wheel arches,mudguards?
You have done a great job of your caravan.
|
|
|
|
Post by Mustang on Jun 7, 2016 5:54:32 GMT 10
Hi Carlo,
The thread you are referring to is old, 2013, also a deleted member.
Google Caravans Plus , they may be able to help you.
|
|


 Seeing as I will be repainting the outside sanding of the old silicone seems like a good way to go, thanks for the tip Camich.
  Almost have the inside gutted but I want to brace the side walls on the outside before I take the interior ply off. Hope to tackle that this weekend and then lift the frame work off the chassis, remove the floor (does anyone know if the lino tiles contain asbestos) then see what damage the chassis has suffered over the years. Photos next post


