|
|
Post by rickmcc on Aug 11, 2010 22:54:07 GMT 10
G'day fellow Classic Vanners!! I have been directed here by Franklin1 as my 71 doesnt not meet the criteria as a vintage  I wasnt sure how old she was so chucked it out there and Franklin1 was able to assist. I am the proud owner of a 1971 Franklin Regent Build# 6220. I bought her in 2007 with the intention of using her regularly, it was in pretty good nick and wanted something to be able to just hook up and take off when needed, unfortunately for me and her life circumstances changed and she sat untouched for the last 3 years. I now have her back in my possession and have started to gut the inside. I pulled up the lino on the floor and removed the rear paneling under the back window, i have found some water damage but not too bad and an easy fix. From what I can see it has been caused by the lack of mud flaps??? Im hoping that by being part of this forum that all those who have gone before can pass done much needed wisdom to a young buck new on the scene  Hopefully I can also be a help when needed  Here are some pics of the old girl, I will have to wait till the weekend for updated photos. 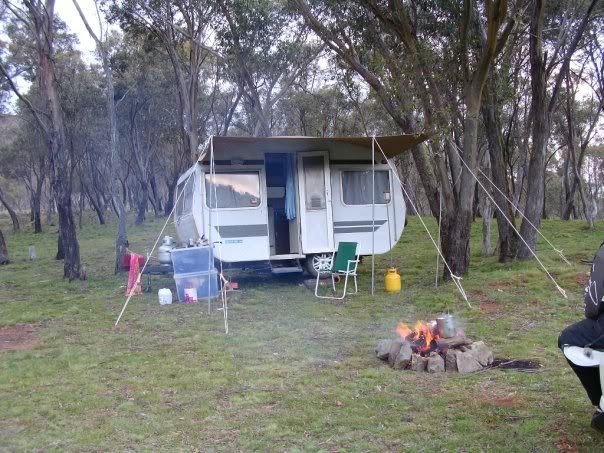 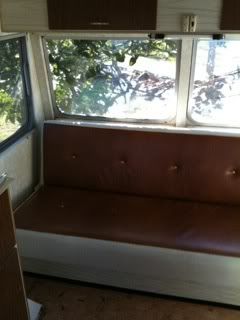 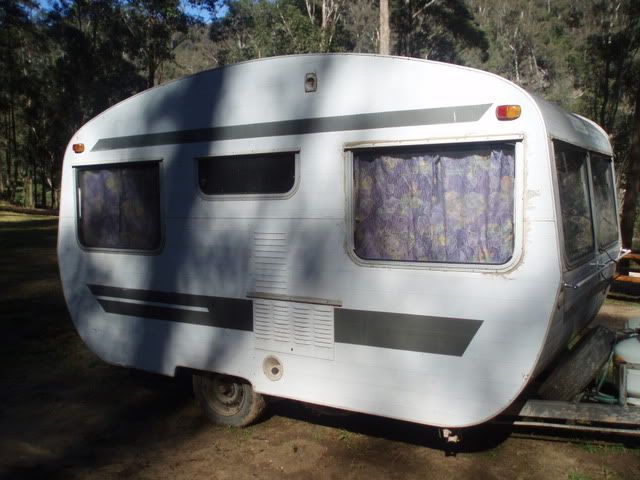 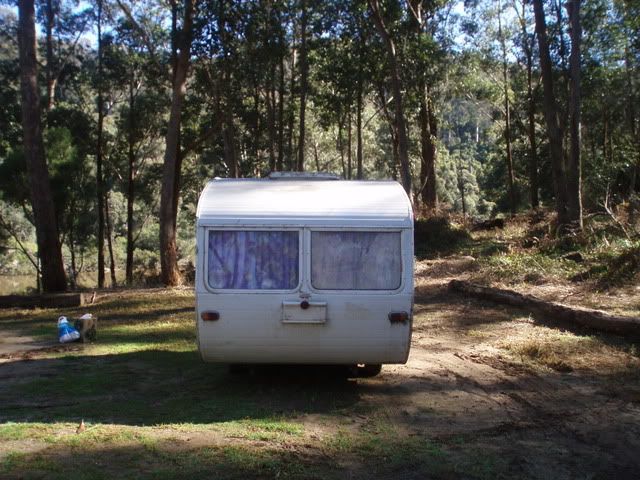 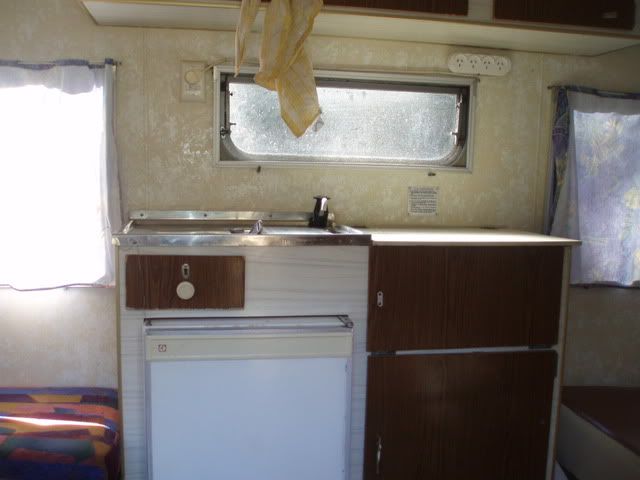 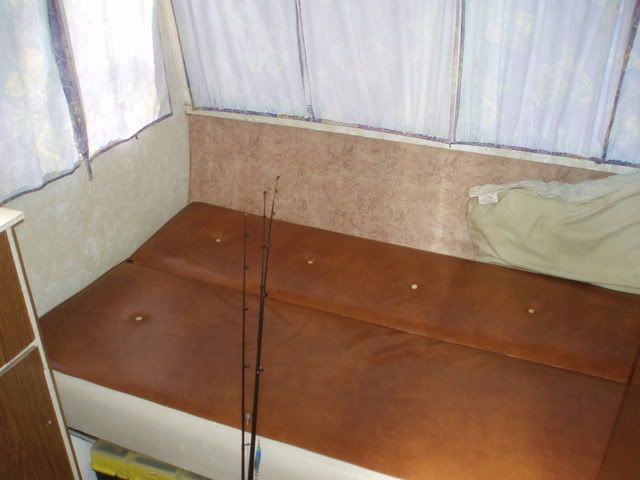 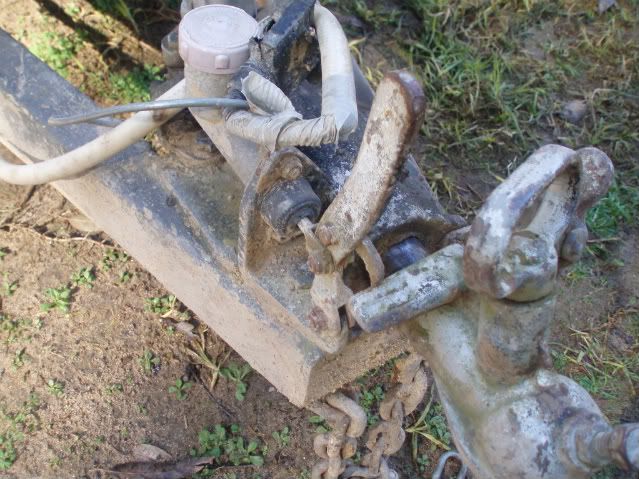 |
|
|
|
Post by atouchofglass on Aug 12, 2010 6:21:38 GMT 10
Welcome aboard RM
She looks a nice van
Always easier to take smaller vans into remote places or out bush.
Saw your post on VV and was wondering how long it would be before you discovered this little gem ;D ;D ;D ;D
Glad to have another member
Cheers
Atog
|
|
|
|
Post by tassietiger on Aug 12, 2010 16:56:09 GMT 10
Gday and welcome mickmcc  I have 74 Fankling Hunter which has the same layout as yours only differenc being the body shape and set of front and rear windows. Will be doing something similar to mine re pulling the lining off under the rear window as I have similar problems. Look forward to sharing experience both in the repair shop and on the road. Where abouts are you located? |
|
|
|
Post by kiwijim on Aug 12, 2010 19:10:41 GMT 10
Howdy R M, A big welcome from another West Aussie, It's good to see that the numbers of C.Cer's are increasing on this side of the " Sand Patch", (Nullabor) It looks like you have a real ripper of a Franklin there, it shouldn't take to long to get it ready for a C.C get-together in the near future. I am wondering where in the West, were those photos taken of your van ? It looks like a good spot for a camp-out.    Keep the pic's coming of the reno, and if you would like any advise on repairs, just give a shout on this site, some-one is bound to have the answer. Cheers kiwijim  |
|
|
|
Post by millard1399 on Aug 12, 2010 19:30:43 GMT 10
And a big "G'day" from me as well, Rick! I'm pleased to see you found your way over here from the old fuddy-duddy Vintage forum! ;D ;D Over there I masquerade as 'Franklin1', but here I'm 'millard1399', which is the chassis number of the 1977 Millard pop-top I restored. As tassietiger has already indicated, there are a few members here with early '70s Franklins, so I'm sure that between the lot of us, we should be able to give you some helpful advice along the way about repairs, etc. (...or at least cheer you on as you suffer the frustrations these vans can sometimes cause!   ;D ) I'm also pleased you included a photo showing the parking brake lock on the coupling. I've been having a hard time proving they actually existed on some of the Franklins. Great to have you with us, and look forward to seeing what you end up doing to the van. ;D ;D cheers, Al. |
|
|
|
Post by rickmcc on Aug 12, 2010 22:18:08 GMT 10
Wow, thanks for the support guys, feel a little easier heading into this project  KiwiJim not sure where i gave the impression i was from WA?? I was born in Bentleigh Hospital but havent been back since  van is located in Pakenham at the moment that camping spot was a little treat Just outside of a little eastern vic country town, if your ever over this way let me know and I will point you in the right direction, not keen on giving away too much as I plan on bagging a few Samba Deer up there in the coming months after the resto. Well after posting last night i felt the urge to start a little investigating, as it turns out with this van a little investigation turns into full blown dismantle  I started by lifting the lino and moved onto the the bed/fold up seat, once that was out i started looking for water damage, found some!!! Pics below. Im not sure how to approach this as I fear that once i start lifting floor boards im in for a full rebuild, ANY IDEAS??? After this pic tonight i did see some fresh water so i feel that the window will need to come out and be re-sealed, not a huge issue, i was thinking about taking all of them out and having them powder coated, not sure yet. But I will definitely be resealing and re-glazing them. One thing I did notice was the lack of sealant around all wiring or factory installs, it seems strange to me that Franklin would invest time into building these units but not seal the wiring holes? Has anyone came across this before or am i dealing with a shoddy after market install??? I will be stripping the cupboards back to the frame as i want to re-line with more up to date colors, i have an inkling i will be going the black on white with chrome fittings  I want to pimp it out a little but my father tells me to be conservative or it will be the center of all his jokes in years to come  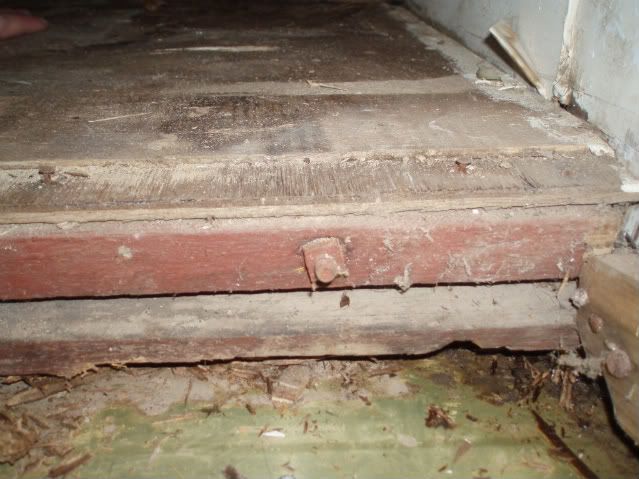 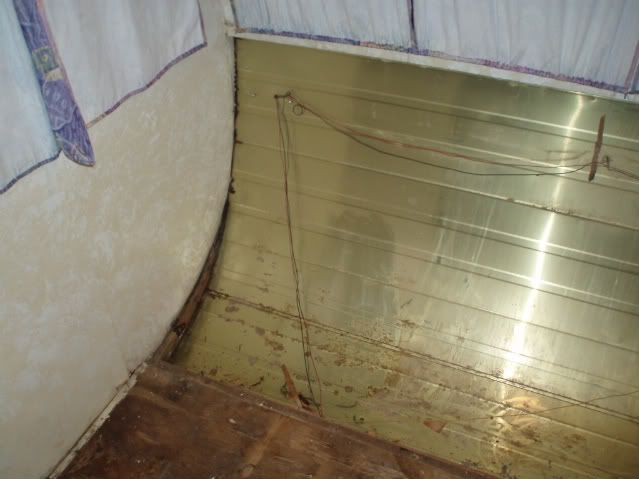 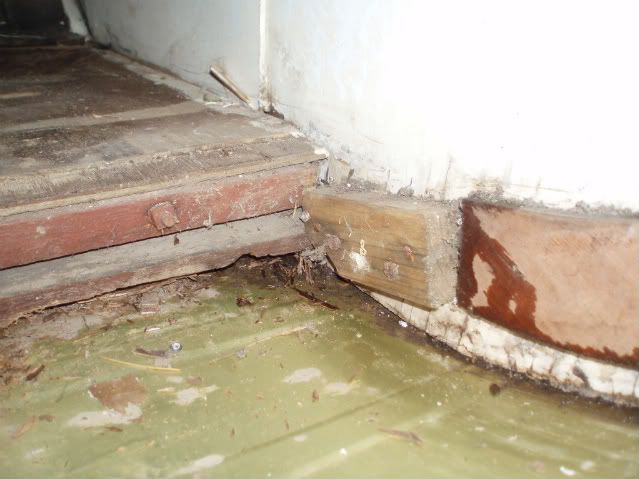 |
|
|
|
Post by kiwijim on Aug 12, 2010 22:49:33 GMT 10
Hey Rick, Now that wee bit of water damage, or shall we call it Weathering, doesn't look all that bad, after all, you can't see the ground through the floor, I suddenly realized the mistake in thinking you were in W.A. I was reading a tread from another new member and went onto your posting then replied to the wrong one.... Sorry about getting your location wrong, ( another Seniors moment ) but anyway the rest of what I said still stands................a big welcome and yell if help is required. kiwijim  |
|
|
|
Post by tassietiger on Aug 13, 2010 6:50:54 GMT 10
Morning rickmcc great photos. The issue with the floor looks similar to what I think I will find when I pull the lining under the rear window off. Re kiwijims comment about being able to see the road through the floor  I can  so I think I might find something a little worse than you seem to have  Does the Regent have styrofoam insulation in the side walls and ceiling? The Hunter does but I figured there might not be any in the end walls. Hopefully my photos of that area will look similar to yours which will make repairs just that little bit easier.  Will you be putting the divan bed back in? The Hunter didn't have the original divan bed when I got her. It had been replaced by a rather heavy steel framed double bed which I have removed and replaced with a temporary light weight single. Will be interested to see what you do with the cupboards. |
|
|
|
Post by rickmcc on Aug 13, 2010 9:24:28 GMT 10
Morning, KiwiJim all good, and WEATHERING sounds a much better word  I can run with that. tassietiger, I had a play with the rear cupboard the other night as Im going to have to remove it to get the wall panel off on either side to check for damage there and replace what I have taken out, yes it does appear to have styrafoam in the roof. Nothing under the rear wall paneling though, which I find strange. I intend to insulate before I put the paneling back. I will also seal any holes and I will be running a cabling rope if at any stage i feel the need to run wires at a later date. save me having to rip the wall off again. The Divan, I didnt know its name but I do know. Yes I will be putting her back in after a much needed re-upholster. It still has the original vinyl on it and I find it really hard sleeping on it slipping and sliding everywhere. Very comfortable otherwise and think it would be a shame not to put her back in, the folding action is priceless, Couch - Bed - Storage Area   I am going to extend the cupboards in a couple of areas, there appears to be a lot of dead space between the cupboards that seems a shame not to be able to use as storage area, so I will sort that out in due time. I intend to get to the front of the van tomorrow, remove lino and front bed supports and front wall lining, I will also try and get the cupboard off if I can. I feel that once I have the two ends open I can start working on finding the areas that allow the water in, once I am satisifed that no more WEATHERING can occur i will close her up. Look out for a detailed post tomorrow evening, more photos to come. Rick |
|
|
|
Post by rickmcc on Aug 14, 2010 10:29:54 GMT 10
Well I tore out the front bed frames and Table, removed the lino and found what looks lke Dry Rot. From what I can see the previous owner has replaced the lino BUT did not fill any holes under it that have obviously let alot of water in. From what I can see it was a slap dash reno, the lino looks as though it came out of his kitchen, it had that many joins and squares to cover the area  silly really. What I would like to know is what options I have to either stop or repair the damaged area, I plan on putting the floating floor system in there so assume that i would get some strength from that, how do I stop further deterioation, i plan on plugging the holes with dowl so that should stop the water. Also, what options do I have as far as protecting the exposed underside of the floor, a freind mentioned spraying it with the sound proofing tar but from previous expeirence that just retains water once its found its way in??? is this an option or something to steer clear of??? 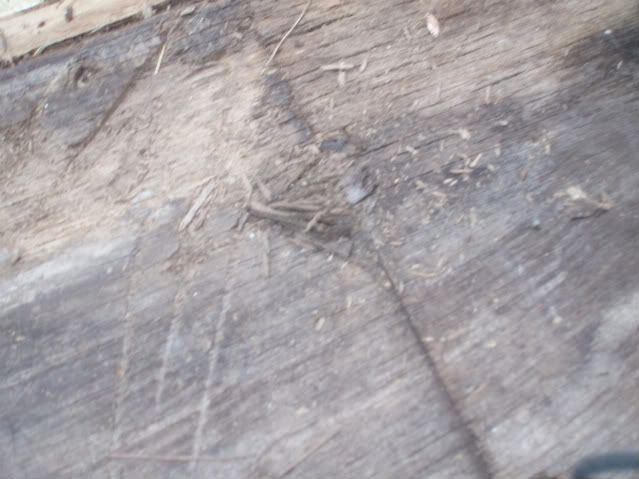 Rick Also when I get to it i will be removing the light fittings and replacing them with something more slim line, i keep hitting my head on them  also the cupboard door handles and latches, if anyone wants those, happy to pass on to a Franklin restorer.!! |
|
|
|
Post by tassietiger on Aug 14, 2010 13:43:50 GMT 10
Afternoon rickmcc. Your latest photo is a bit blurry so hard tell what the issue is. Can I also suggest you resize your photos to make them a bit smaller so they fit on the forum page without having to scroll vertically or horizontal? When I was under my van renovating the chassis I was surprised and reassured to see how sound the plywood flooring is. Depending on the size of the holes I would suggest builders bog as you might find dowels difficult to glue in place. I would fill from both top and under sides then sand smooth. The other issue to resolve is where any water/moisture might be getting it. Perhaps the previous owner drilled the holes to let the water out  I've found with the Hunter that there tends to be a fair bit of condesation build up on the cold surfaces eg, windows and plywood glossy finished walls. All that moisture will end up running to the lowest point so that might be contributing to the problem.  A good quality marine grade sealer might be the way to go before you put the floating floor down. Can't recommend any particular brands(someone on the forum will know they're a very cluey lot  ) I would also suggest coating the under side of the floor as well with the same sealer if you are concerned about further moisture penetration. All your work is starting to inspire me to get stuck into the Hunter but I think another trip away in her first just to do a bit more "onsite thinking" might be first and the weather will have warm up a bit more as well.  Cheers |
|
|
|
Post by millard1399 on Aug 14, 2010 15:40:10 GMT 10
G'day Rick,
Firstly to Photobucket...when you log into Photobucket and get the page up that has the green bar with Upload Images and Videos on it, you'll see the words (more options) just underneath that bar on the right hand end.
Before uploading any photos, click on that link and a pop-up box will appear that allows you to resize your photos to various sizes. Put a dot in the "Large 640 x 480" size, and click Save at the bottom. Then you can start uploading photos of any size, and Photobucket will automatically resize them for you. You only need to choose the size once before you upload, not for each individual photo upload.
Secondly to your van...if you don't treat the rotted timber, the woodrot will continue to chew it's way through the rest of the timber, particularly if there's a chance the timber will be continuously re-wet over a period of time. Woodrot occurs when the moisture content of the timber exceeds 20% (most hardware timber is 15% or less), so you have to ensure the moisture content is kept below 20%. If you don't want to replace the rotted timber, it would be best to treat it. Do a Google search for wood rot, and you'll come up with heaps of results with advice on what people have tried and succeeded with. I replaced all the rotted timber in my van, so I can't give you any first-hand advice on which method is the best.
cheers,
Al.
|
|
|
|
Post by rickmcc on Aug 15, 2010 5:42:33 GMT 10
I went through photobucket and re-sized the images, sorry guys hope they are better! Al after reading your post I have decided to remove the affected area all together. The rot only appears to be in the front section of the flooring so I will remove the worst and replace with a new piece of flooring. I am then going to treat the remaining wood to ensure it does not take hold of this also. Im still amazed at how easily this van has been put together, it actually inspires me to do more and more. I do not touch anything that I feel I cannot reproduce or replace and so far I have not found anything that worries me, which is great especially for someone who does not have all that much experience with building  Its also a big reassurance to be able to turn my computer on and have expeirenced people advising and cheering me on. When I tore out the front bed/table frames (i say tore because the amount of screws and liquid nails that the previous owner had used was overwhelming) I came up with many an idea to increase storage space. Even under the fridge, with just a little frame adjustment I can add a drawer, which will always allow me access to the underside of the fridge where the locking screws are. Since I have unearthed the worst of the problems and know what direction im heading in, im going to get stuck into it, hopefully the next post from me on this topic will come bearing a photo of replaced flooring and photos of the floating floor going in   until then, wish me luck  Rick |
|
|
|
Post by rickmcc on Dec 18, 2010 21:29:51 GMT 10
Ok, so i have been a little busy getting the van to this point, here are some update pics.      Tonight i put the cupboard door and benchtop in place, tomorrow i will finish the unit off and have break over xmas. next step will be the 4 cupboards that hang from the room above the sink and beds. Merry xmas everyone!!! Rick |
|
|
|
Post by rickmcc on Dec 18, 2010 21:31:44 GMT 10
Compare BEfore and after!   |
|
|
|
Post by millard1399 on Dec 19, 2010 10:25:37 GMT 10
Crikey, Rick, some really classy work's been done there since we last heard from you! ;D   Looks like you got that rear panel sorted out nicely after discovering all the wood rot. And doesn't that new floor look brilliant, along with the new cupboards!? Yep, you've done a mighty fine job so far. Should be a real good-looker once you've put the other cupboards in. Congratulations on a great job!    cheers, Al. |
|
|
|
Post by rickmcc on Apr 8, 2011 23:36:41 GMT 10
Im going to be selling this van in the very near future, any ideas on where I should start with the price???
|
|
|
|
Post by kathleen on Jun 13, 2014 10:36:30 GMT 10
hi I recently bought a franklin regret same as the one just renovated in the same condition I don't have much knowledge in the renovation thing but thought I would give it a go if I could ask to remove the sink area is it difficult and was woundering if you could tell me how you rebuilt the sink area looks great.
|
|
|
|
Post by ForumMod on Jun 13, 2014 13:35:25 GMT 10
Kathleen, I doubt very much whether you'll get a response from Rick. We haven't heard from him for a long time, and I gather he ended up selling the van anyway. By the looks of his photos for the sink cupboard, I reckon he used "tongue and groove pine lining boards" fixed to a timber frame. Coat the boards with Estapol (it looks like that's what he did), and away you go. The boards are available from Bunnings (click here. ). Removing the existing sink cupboard will not be all that hard, except for where it's attached to the walls. If you don't plan on reusing the cupboard, start dismantling from the front, and work back to the wall. You'll soon get the gist of how it was originally fitted together and locked into place. Just go steady, and it'll come to pieces fairly easily. The other option is to try and remove the existing plywood skin off the frame, and then fix the pine lining boards to that frame. That'll save you having to build a whole new frame for it. cheers, Al. |
|
Deleted
Deleted Member
Posts: 0
|
Post by Deleted on Jun 13, 2014 15:38:58 GMT 10
hi thanks for your help just bought the van and didn't realise how much work it needed my brothers said don't worry we will do it but now it is left for me I appreciate any help I can get thanks
|
|
|
|
Post by tedalley on Jun 14, 2014 17:17:57 GMT 10
hi I recently bought a franklin regret same as the one just renovated in the same condition I don't have much knowledge in the renovation thing but thought I would give it a go if I could ask to remove the sink area is it difficult and was woundering if you could tell me how you rebuilt the sink area looks great. Kathleen Hi. I have a longer Franklin Regent. When I removed the sink area cupboards it was screwed to the wall, wardrobe and floor. There were a lot of screws and you have to disconnect the gas line from stove but once removed the whole cupboard with sink and stove came out in one piece. it just left the fridge behind. I hope this helps. Ted |
|