|
|
Post by kylarama on Jul 18, 2010 18:20:03 GMT 10
See bobt's pic of ugly being pushed to the side has prompted me to post this. I thought I'd use one of the disused horse shelters to get the van out of the weather. Only problem is........  A horse is a bit smaller than a caravan! I should have enough old timber and tin lying around to whip up a bit of a 'Rustic' extension. |
|
|
|
Post by bobt on Jul 19, 2010 20:08:11 GMT 10
Hi kylarama
you being a chippie and all, it should not be hard to do that extension.
Certainly worth the effort putting the van under cover.
bot
|
|
|
|
Post by kylarama on Oct 25, 2010 22:21:30 GMT 10
Picked up the van on the weekend to get it ready for the annual Melbourne Cup long weekend trip to the Murray River. Should be fun, where we camp was 5 metres under water only a few weeks ago  I'm going to pull the fridge out and give it a good clean out and try the 'burping' method others have mentioned before. Before Xmas I'm going to try and replace the water tank with a slightly larger 85 litre unit. The original 70 litre one still has a foul taste to it, even after running 2 lots of Tank Clean through it. Also try and fit a 12 volt pressure pump to an extra tap on the sink, reckon a pump with a max flow rate of 12 litres per minute should be plenty? Like these here...  cgi.ebay.com.au/Water-Pressure-Pump-12-volt-12-5-l-min-35-PSI-Warranty-/130439214383?pt=AU_Boat_Parts_Accessories&hash=item1e5ec8752f cgi.ebay.com.au/Water-Pressure-Pump-12-volt-12-5-l-min-35-PSI-Warranty-/130439214383?pt=AU_Boat_Parts_Accessories&hash=item1e5ec8752fThe paint job on the new drawbar is not even 12 months old and rust has already come through 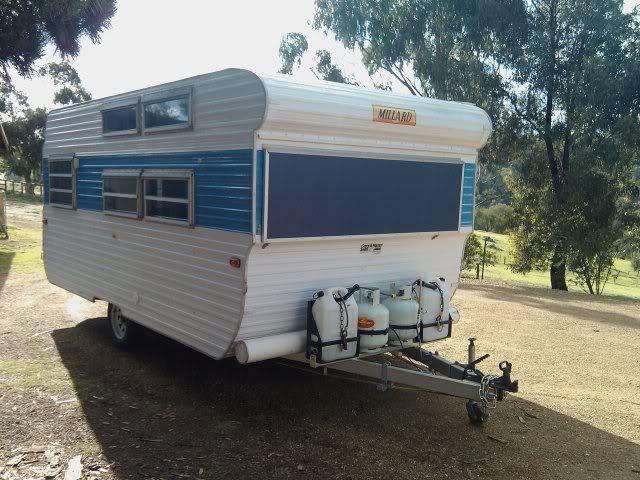 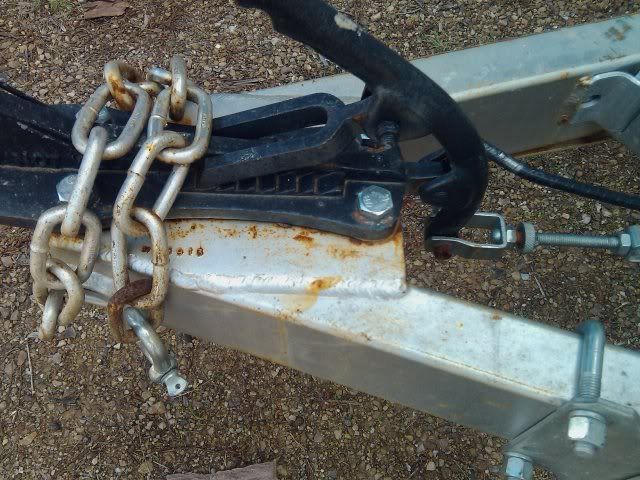 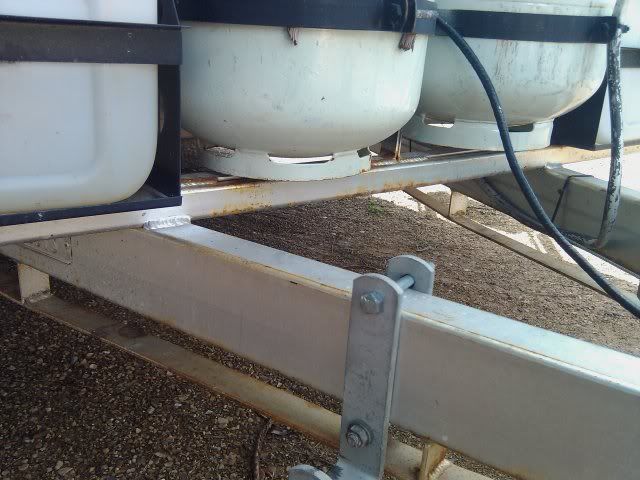 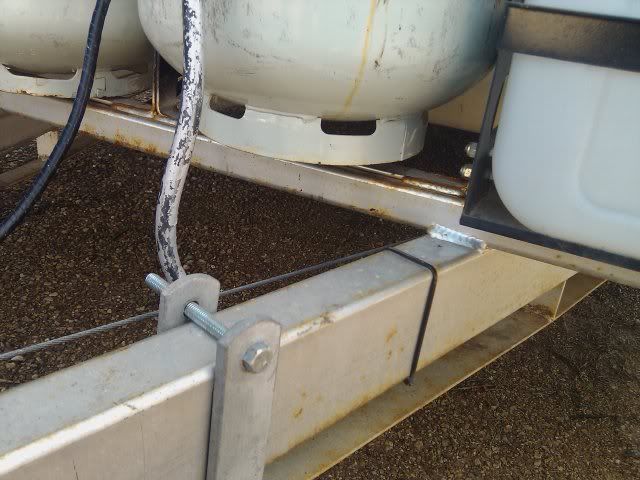 I used three Wattyl Killrust spray cans, was new steel and the whole lot was washed then wiped down with prepsol. Amazing what 3 months sitting 75 metres from salt water, then 8 months sitting out in the weather with only a tarp draped over it will do. I'll strip everything off the drawbar, treat it all with a rust converter and either put a couple of thick coats on with a brush. Or get serious and pull out the compressor and spray gun. On the other hand the rear bar still looks like new. 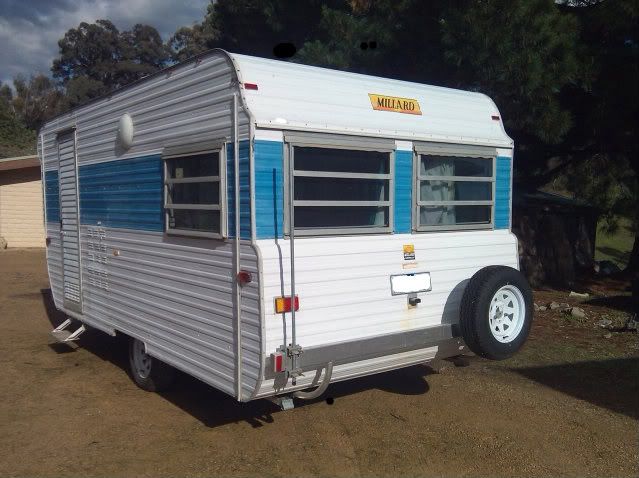 |
|
|
|
Post by millard1399 on Oct 26, 2010 9:20:27 GMT 10
G'day kylarama, At least with the water pump delivering 12 litres per minute, you'll be able to function as an honorary "fire tanker" in the bushfire season.   I've struck the same problem with rust showing through on the drawbar. I used a coat of red oxide primer, and then two coats of Dulux "Quit Rust", all applied with a brush. I found the Dulux paint to be quite thin and runny, and didn't feel sure that it would give the required protection. The label on the tin says "No primer required on new or lightly rusted metal", so I reckoned that putting a coat of primer on first would only help the situation. Not so, it seems. After six months, the drawbar on my Millard has noticeable rust marks showing through. By contrast, I'm currently working on the chassis of a vintage caravan. I've cut all the "dead" steel off the chassis, and am waiting for my boilermaker brother to come and weld new bits into position... 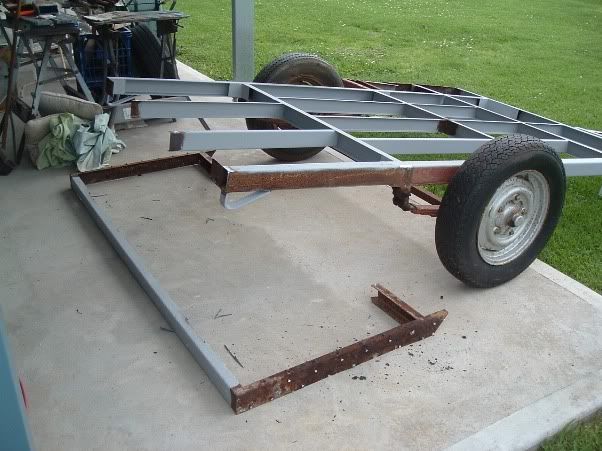 While I'm waiting, I've given a fair bit of the chassis TWO coats of White Knight "Rust Guard" metal primer, to help protect it until I can get to the topcoat stage. I found that putting only one coat of primer on didn't give much protection, and surface rust was starting to show after only a few days (it's been a bit wet of late in my area). So, I decided to give it a second coat of primer, and that seems to be giving quite good protection so far (now a couple of weeks later). When the welding repairs have finally been completed, I'll be applying two coats of primer to all of the steel, before putting a couple of coats of some other brand of thicker paint on as the topcoat. Haven't been real enthused with the Dulux stuff. cheers, Al. |
|
|
|
Post by kylarama on Oct 26, 2010 10:06:50 GMT 10
Yeah I don't know if a 12 litre max flow will be too much. A mate reckons your better off with a low flow pump so you use less water, due to a limited water supply when bush camping. The next pump down is a 3.7 litre per minute, but that could be a bit painful when trying to fill a kettle. No more painful than the existing hand pump though. I'm not to enthused with the Dulux rust paint either, although I thought Wattyl Killrust was okay too. I did put two coats of black killrust on the chassis with a brush which is still okay, but I coated it first with a rust converter which seems to act as an etch primer and made the paint really easy to apply. As you don't see the chassis I loaded it on real thick with heaps of runs  Got your work cut out with that van! Full chassis up rebuild, kind of makes your Millard resto look like a walk in the park ;D |
|
|
|
Post by kylarama on Oct 28, 2010 22:57:19 GMT 10
A few weeks ago I decided to remove the old 2 way fridge and replace it with a 240 volt compressor fridge, as the old 2 way didn't work very well. I ended up giving the old Tuomatic a reprieve and set about improving it's ventilation. After reading Keelz's thread ditzygypsy.proboards.com/index.cgi?board=techno&action=display&thread=312 and this page from Fridge and Solar www.fridge-and-solar.net/fridge_vent.htm I set about blocking up all the gaps around the fridge inside the cupboard. Including boxing the top on an angle to deflect the hot air out the top vent. 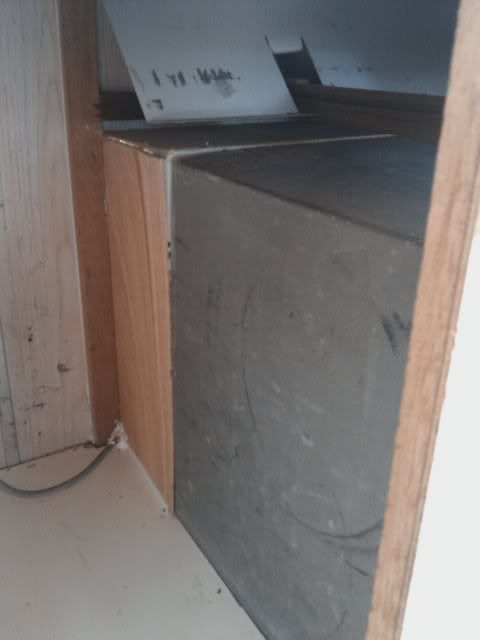 This was my first attempt before I remembered that the top had to be on an angle. 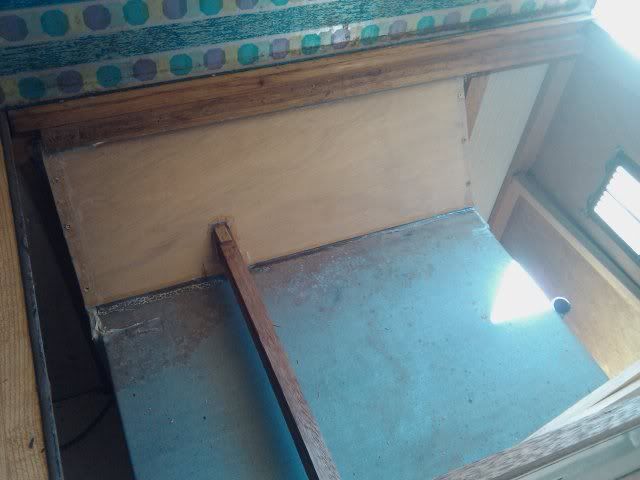 The top piece had to be checked around the drawer runner. 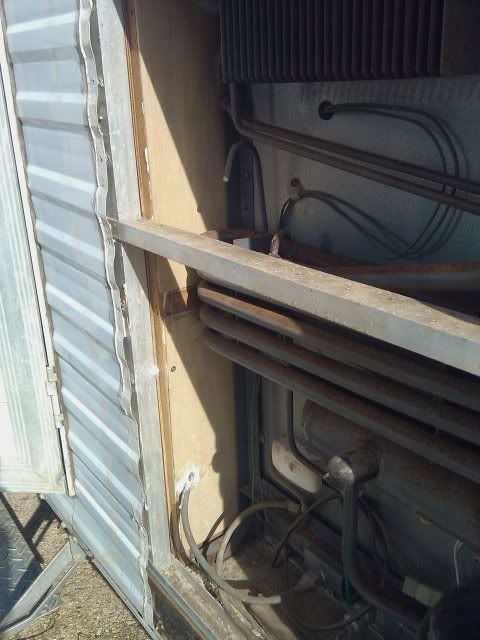 From the outside. Everything I used was scrap 3mm plywood. The glue I used is for gluing acrylic shower paneling, it's flexible so it doesn't set hard, giving me half a chance at removing it when I need too. Any gaps were caulked with 'No More Gaps' or silicon. 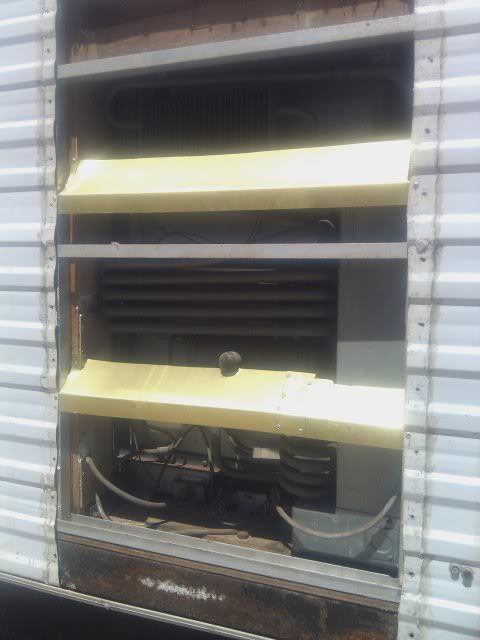 I pulled out a piece of ali sheet that was fitted as a deflector on top of the fridge, you can see it in the first pic. I cut and bent this up into 2 baffles to deflect the air around the coils. 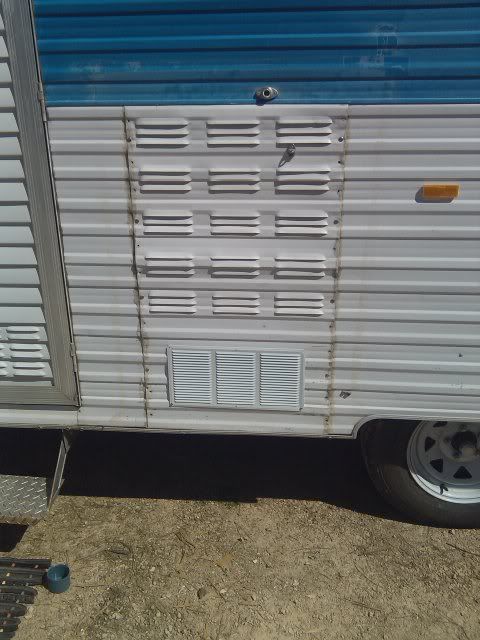 Picked up 2 aluminium vent for $14. Cut one into the bottom and blocked up all but the top row of Louvre's with the old '100 mile an hour tape'. You can't see it in the 2nd last pic, but the top has been boxed in and completely sealed around the edges so the hot air is forced out and eliminate any dead air spaces. The difference is amazing. The inside of the caravan no longer turns into a sauna when you open the cupboard and you can feel the air being sucked into the bottom vent and the hot air pouring out of the top. An extremely helpful bloke at Northern Caravan Spares in Thomastown sugested I fit a solar fan kit to improve the ventilation even more to help with the 35deg plus days. Worth about $70  Next job will be to replace the louvered panel as it's pretty dinged up and the previous owner went nuts with the mastic which has now set like concrete. 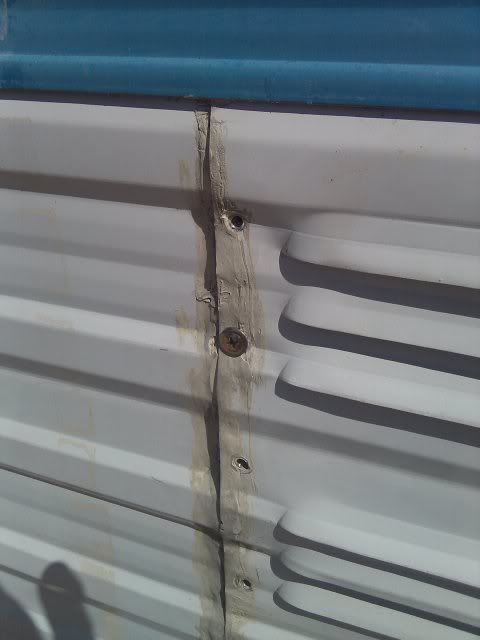 I'm thinking a piece of flat colourbond sheet or aluminium diamond plate with a aluminium flat bar frame to hide the ugly mastic edge. Will also fit the other vent for the top. Also ordered one of these 3 volt fans which help circulate the cool air around the cabinet.  |
|
|
|
Post by millard1399 on Oct 29, 2010 6:43:06 GMT 10
G'day kylarama, Great job you've done there.   So you didn't have to worry about "burping" the fridge? The fridge in my poptop seems to still work very well, although we haven't tested it out in extreme summer temperatures. I remember reading all that stuff on the forum about increasing the efficiency of the fridge, when I was at the stage of putting the Millard back together. But then I thought "Nah, too complicated for my head", so I just put everything back the way it was. Maybe I should have given it a little more thought, based on your efforts.  cheers, Al. |
|
Deleted
Deleted Member
Posts: 0
|
Post by Deleted on Oct 29, 2010 12:05:56 GMT 10
Good job. Improved passive cooling through better ventilation and sealing will always result in a dramatic gain in cooling efficiency. The standard fridge installation is guaranteed to be hopeless (by definition).  As we all know there are many corners cut in this industry and this is a particularly nasty one. |
|
|
|
Post by jacko14 on Oct 29, 2010 17:07:22 GMT 10
Hi all
I have done the same as Kylarama and enclosed the rear of the frig. I used zinc dampcourse, 300mm wide and very flexible, cut with scissors and fitted snugly into cracks and corners. I also fitted polystyrene pieces between the cupboard and the frig walls as insulation. Also did much the same with the outside cover to improve the airflow. Replaced the rivets holding the cover on with screws for easier access. All works a treat at present. Should be better in the hot weather too.
Cheers
Bob
|
|
|
|
Post by kylarama on Oct 29, 2010 22:15:50 GMT 10
So you didn't have to worry about "burping" the fridge? If by 'didn't have to worry' you mean the bolts on the fridge frame were badly rusted and it looked like alot of work to pull the fridge out of the van? Then Yes, I didn't have to worry about burping the fridge ;D Sealing the fridge and baffling the back is definitely worth the effort Al. All the heat is now dissipating out of the van and not inside the cupboard. |
|
|
|
Post by millard1399 on Oct 30, 2010 9:27:04 GMT 10
Yep, I know what you mean. I've worked on two vans so far that had the fridge bolts seized up. It's not pleasant being under the van with an angle grinder trying to carefully cut the bolts. Needed lots of safety planning as well as a keen eye so I didn't actually slip and cut the chassis, or put the blade through the ply flooring. (or through myself   ) For the reinstallation of the fridge, I used good quality galvanised nuts and bolts in a larger size, to ensure nobody else would have to do the same thing again in the future. I'll give some more thought to the sort of thing you've done with enclosing the fridge. (Or I might just avoid travelling to hot places.    ) Thanks for posting the detail. Will see how I go. cheers, Al. |
|
|
|
Post by kylarama on Oct 2, 2011 22:54:48 GMT 10
Well, not much has changed with the ole girl. It still sits in an old horse stable half its size with a pile of timber and roof iron sitting beside it for an extension. One day... The killrust applied to the new drawbar over 18 months ago didn't last too long, so in the next week or 2 it will get stripped back again, wire wheeled, rust converter and some real THICK coats of paint applied this time. Anyhoo, after replacing the globes inside with LED's like these www.ebay.com.au/itm/1156-68-SMD-LED-White-Tail-Brake-Car-Light-Lamp-12V-/280675451400?pt=AU_Car_Parts_Accessories&hash=item41598f8208I needed some brighter ones for the annexe. Some cheap led flexible strips off ebay (4 720mm & 2 960mm), 20 X 20mm aluminum channel, bicycle hand grips, table leg stoppers, bedlamp switches and some ciggie plugs from old phone chargers along with some left over wire.   Two led strips sit perfectly side by side fixed in with 3M double sided tape and the hooks are just fencing wire bent to suit the annexe spreader bars. All three put out a ton of light while only drawing 0.6amps each. I'm also going to sell my old 4WD Hilux, so I stripped out the dual battery system for our Pajero. The battery has gone to the caravan as it was too big for the Paj, but I almost died when I found out a dual battery tray was almost $200! So here's what I did this arvo. 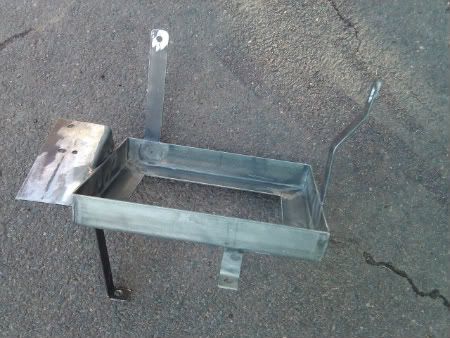 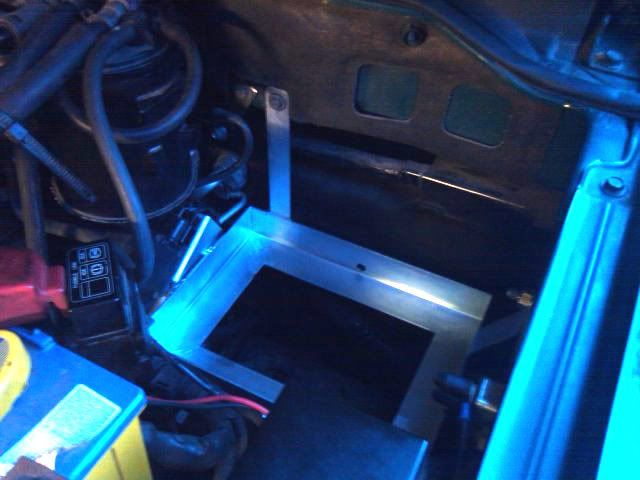 A pile of scrap steel, alot of cutting & welding, a bit of grinding & re-welding, a quick coat of cold gal and wallah! Had to relocate the cruise control module and charcoal canister, but it all looks factory fit and best of all it's cost zero $$$'s ;D Now it just needs a battery. |
|
|
|
Post by millard1399 on Oct 3, 2011 9:46:18 GMT 10
G'day kylarama, Who's a clever little inventor then?!  You've obviously got the knack of being able to think through a problem, and scrounge around the shed for bits and pieces to come up with a solution. Great stuff, and the end result is a real credit to your ingenuity. ;D I can see the Sunday markets in your area benefitting from a stall of "kylarama's homebuilt remedies"   The drawbar paintwork is a bit of a worry. I would have thought the Killrust option would be good for more than just 18 months. I'm currently "testing" the White Knight option, but it's only 6 months since the repaint. The Dulux only lasted 12 months. Hopefully we'll find a decent paint that gives some good years of sevice. cheers, Al. |
|
|
|
Post by kylarama on Nov 6, 2011 21:07:29 GMT 10
after a nice little break on the Melbourne Cup weekend I thought it was time to finally repaint the drawbar. Two 3 month stints on the beach and the other 9 months exposed to the weather had taken its toll on my pressure pack killrust paint job. What started off as an easy/quick job turned into a bit of a nightmare. Gave the real rusty areas a run over with a wire wheel in the grinder and then sprayed the entire drawbar with a rust converter. Pulled out the air compressor and spray gun to do it properly, only to find the paint was drying as it came out of the gun due to it being 30+ degrees! but my biggest drama was not letting the rust converter dry properly, which meant it reacted with the paint and fryed up like it was paint stripper. So today was spent stripping it all back, washing the lot down with thinners and then applying the paint the old fashioned way. 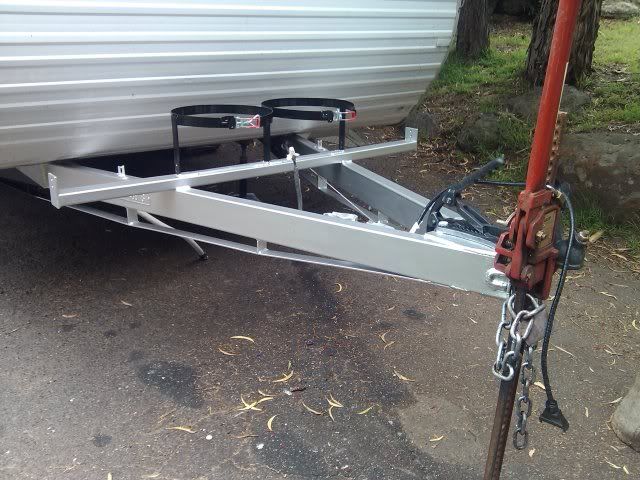 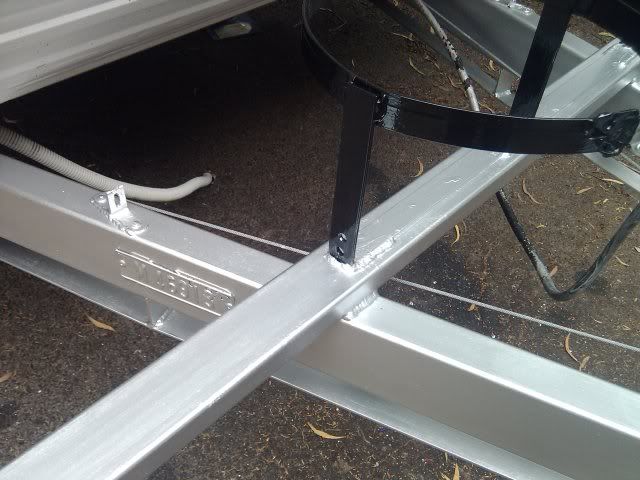 Came up pretty good, one coat so far, with another 2 to be applied during the week. Before the painting episode I cut the bolts off the gas bottle rings used to tighten them and welded these quick release latches on. As the bottles are also used at home it was a pain in backside to remove and refit them. 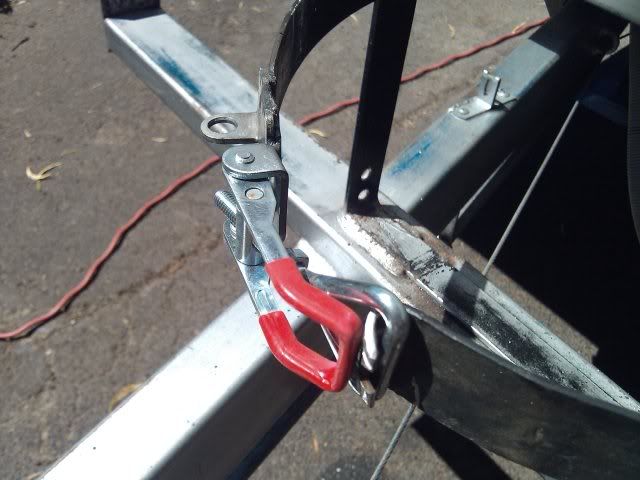 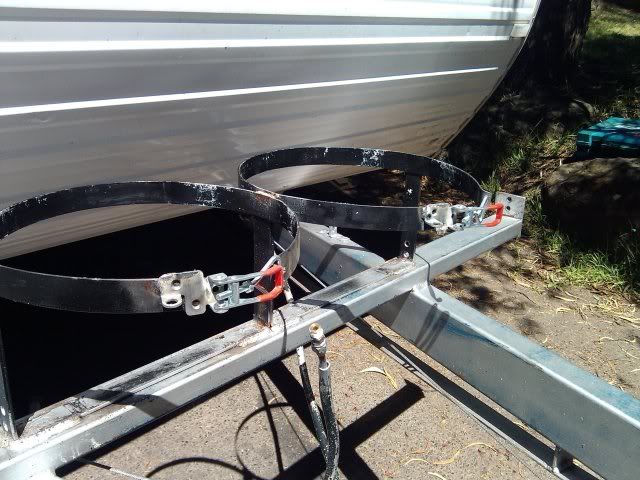 Then the swing up jockey wheel got a makeover. The bracket is welded about a 1/3 way up the post like this one.  Problem was on uneven ground I couldn't swing the wheel down. So I cut the bracket off and re welded it right down the bottom, giving me about another 3 inches clearance. 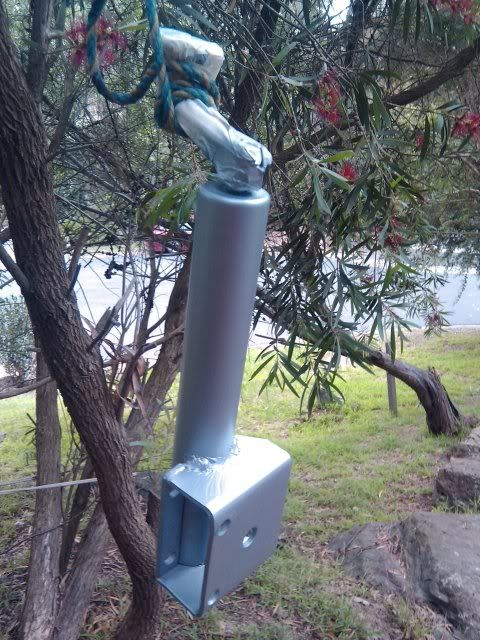 |
|
|
|
Post by millard1399 on Nov 8, 2011 7:08:32 GMT 10
G'day kylarama, Nice paint job on the drawbar!  Should keep you going for another few months, ay?! The repaint job I did on mine back in May seems to be holding up better than the previous paint job I did in the restoration. Amazing how a different brand of paint can give such a different performance. I like that idea of the clamp on the gas bottle bracket. Might have to copy that onto mine. Seems a lot easier than mucking around with the ol' shifting spanner. cheers, Al. |
|
|
|
Post by kylarama on Nov 12, 2011 5:18:02 GMT 10
Thanks Al,
I think the biggest problem with my original paint job, is that it was a rush job to begin with. The new steel was given a quick wipe down with thinners and then 2 rattle cans of Dulux Quitrust applied, which would have only been thin coats.
This time the steel has been properly treated and a couple of thick coats applied with a brush.
As for the gas bottle rings, the downside is it's now far more convenient for thieves. Have to remember to run a cable lock through them when unattended at the beach.
|
|
|
|
Post by kylarama on Nov 20, 2011 20:56:34 GMT 10
I thought a set of more period correct wheels might be more suitable on the van than the white sunraysias. Picked up a set of round 12 slot Falcon wheels earlier in the year for $5, then a few chrome dress rings and Falcon centre caps at a swap meet a few weeks later. Although their off a mid 90's Ford ute, this style wheel first came out in 1979 on XD Falcon S packs. So its close the vans vintage. 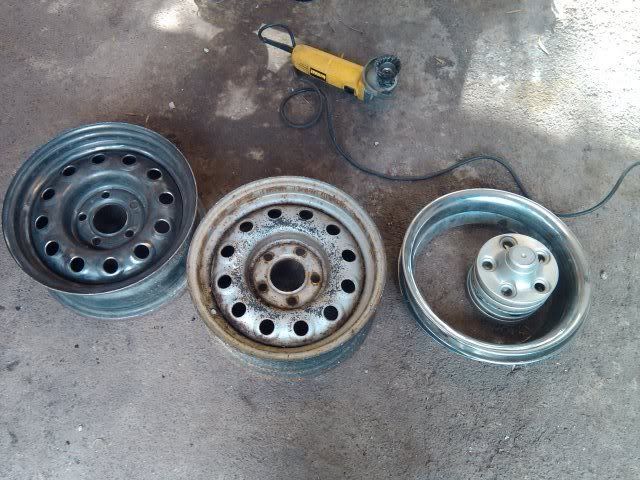 The wheel on the left has been stripped using the grinder with a wire wheel. 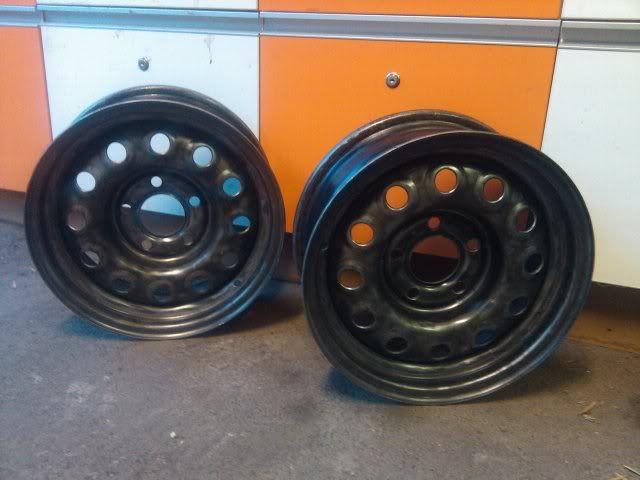 All stripped and given a coat of rust converter. Now just needs a coat of primer and some silver steel wheel paint. I do have a 3rd for a spare which is currently serving duty on the 6X4. |
|
|
|
Post by ROB on Apr 17, 2012 21:27:45 GMT 10
well done mate, this looks fantastic!!!!!!
i have a dual axle 18 foot millard, which i am re building. be great to talk and swap some tips. i still need to sandblast the subframe and replace the a-frame. already installed external shower/hot water/kitchette/tanks/wind up antenna/fold up bed etc, lot of work, guess it'll be a few more years to finish.....have a 9 month old...so now no time..lol
|
|
Deleted
Deleted Member
Posts: 0
|
Post by Deleted on Apr 17, 2012 21:33:48 GMT 10
well done mate, this looks fantastic!!!!!!
i have a dual axle 18 foot millard, which i am re building. be great to talk and swap some tips. i still need to sandblast the subframe and replace the a-frame. already installed external shower/hot water/kitchette/tanks/wind up antenna/fold up bed etc, lot of work, guess it'll be a few more years to finish.....have a 9 month old...so now no time..lol
|
|
Deleted
Deleted Member
Posts: 0
|
Post by Deleted on Apr 17, 2012 21:45:17 GMT 10
the new lifting bed, and storage underneath. Attachments:
|
|
|
|
Post by kylarama on Jan 5, 2017 18:00:48 GMT 10
Time flies! Over 5 years since I last posted anything. We got a Jayco Outback Eagle back in mid 2012 to serve as our touring camper and has kept me busy with plenty of mods over the past 4 years. Still got the van and next month for the 8th time in a row, it heads off to the beach for another 3 month stint. 3 months in the salt air and 9 months sitting uncovered in a paddock has taken its toll a bit. Cladding is in dire need of a clean/paint, 2 of the outer C channels on the chassis are rusted and need replacing, a few water leaks have developed around a few windows and the canvas roof on the annex is completely shot to pieces. Not a great deal has been done to it. Got those 12 slot wheels painted a few months after last posting. Took about another 12 months before they got fitted and then only last year I got the correct wheel nuts to fit the centre caps. Last year also had it rewired with circuit breakers, RCD, new double pole GPO's and an outdoor GPO. I've been tempted to offload recently and but something else a little retro requiring less work, but the better half has a real soft spot for this old girl. So a tidy up is in order. A lot of the louvre windows have cracked glass or broken / stiff winder mechs and stuffed seals. Got 10 metres of new gasket, 4 metres of weather strip and a bit of foam seal to commence. I'm not going to Al's level on rebuilding the windows though, just make them sealed and usable. Pulled out 3 of the 10 windows from the van, which was pretty easy, thanks to the mastic still being very pliable. With a fair amount of CRC, small blow torch and a decent blade screw driver I managed to partially disassemble the frames to get the old glass out and get to the broken pivots, which are only pop rivets. 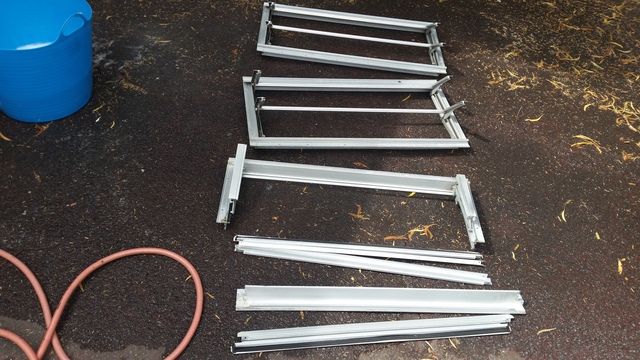 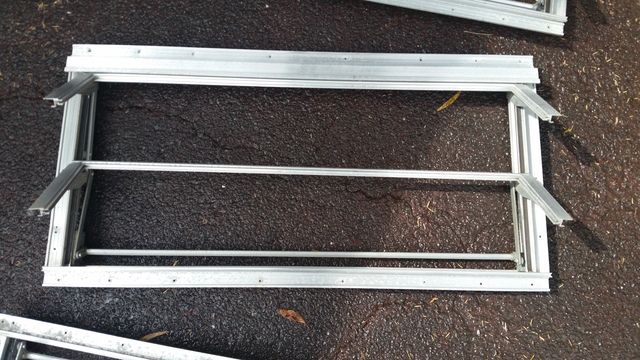 A quick scrub in soapy water with a combination of scrubbing brush, soft wire brush and steel wool got them reasonably clean bar the corrosion. Replaced all of the broken pop rivets and with a combination of new and old 3mm glass, reassembled the frames with phillips head screws. Plenty of soapy water and a rubber scrapper the new gaskets were easy to push in. It was pretty hot today, so I've left them a bit long to shrink back before I trim them. 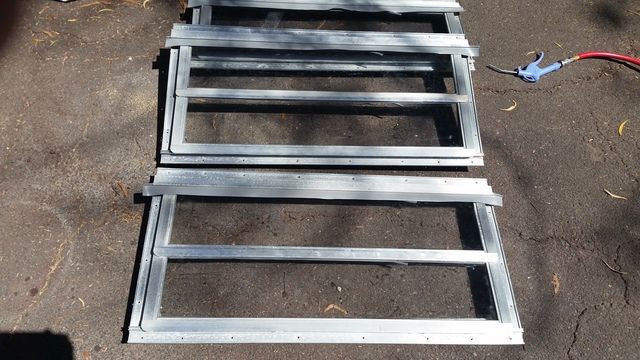 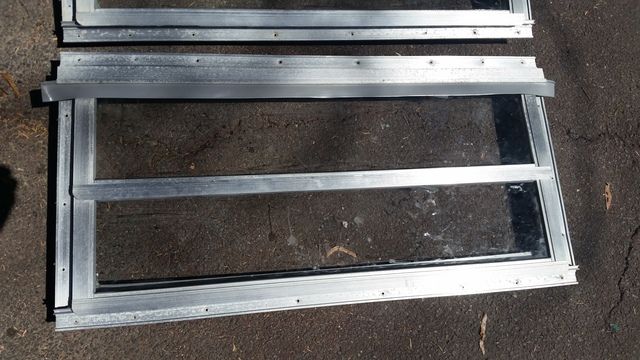 Just used some cheap adhesive foam tape to seal around the windows. 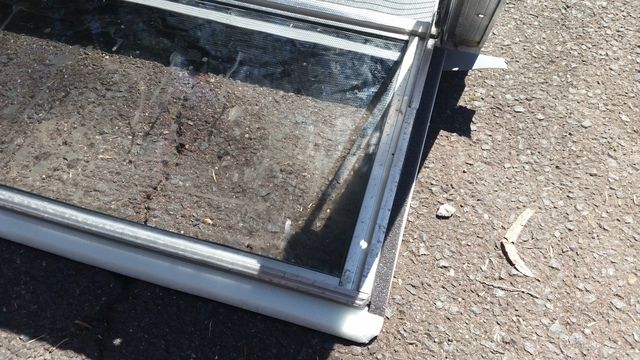 So 3 down 7 to go. Spent $120 so far on materials to do 2 double and 2 single windows. There's still 2 double and 4 triples to go! Might be another 5 years before they get done......... Annex heads off tomorrow for a new roof and all going to plan a quick respray mid year once the windows are done. |
|
|
|
Post by tasmillard on Jan 5, 2017 18:42:00 GMT 10
Good read through this thread of yours, Good to see you come back and post up the current status of the van. All the best.
|
|
|
|
Post by carolyn on Feb 22, 2017 10:30:13 GMT 10
Good read through this thread of yours, Good to see you come back and post up the current status of the van. All the best. Thanks so much for posting your journey fixings the Millard. I am working on a 1970 Wayfarer with many of the same issues so it has been great to ready how you did it all. I am about to cut out the wall today to put in a vent so your decision making process ending up with the grinder was very helpful! thanks |
|