Deleted
Deleted Member
Posts: 0
|
Post by Deleted on Jan 9, 2015 20:49:31 GMT 10
First off, what an excellent forum, this and the vintage vans. I've grown up around caravans in the family from a toddler. After some years in the civil construction industry, I moved onto the automotive industry as an accessory and electronic technician. Building show cars and then restoring and building classic cars. But then I took a career change and started working in the caravan industry. Fitting electronic and electric systems to vans, motorhomes, 4wds etc. So going from classic cars, we headed towards touring. Last year we kicked it off with a cub supamatic hardfloor camper. I went through and kitted it out as you do. We loved the park life and the touring. But how easy is it just to open the door to a van that's already standing! So, it was sold and I was on the hunt for anything within the budget, with hopefully, change to mod.
Enter one 13ft Viscount Ambassador. New tyres, no leaks, ok body, ok chassis, annex with sides, working bar fridge, the owner had done some of the inside up, but all it needed was some attention to detail. I won't tell you a price, but it was a steal, especially when I waved a wad of cash in his face and said this much, now. Deal was done. Off home with the new rig... 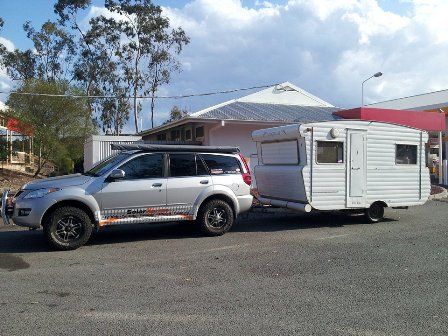
Back at the shop, ready to get the RWC. I went through it and found it to be very original. few dints, but I can deal with those. 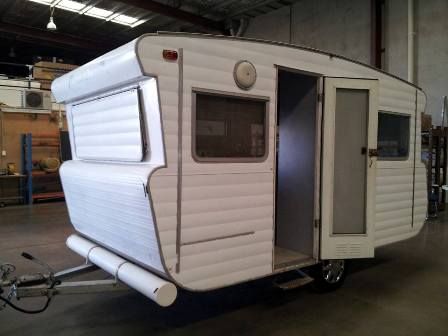
It did get pinned for a few rust holes in the draw bar. So, after discussing and weighing up whether to do it myself, I spoke to the guys at Mongrel Trailers a few doors down. $400 bucks to take the old one off, and put a new, bigger, longer, thicker wall, braced, draw bar on. It actually starts right back at the spring hanger and runs right the way through, stiffening up the chassis and making it handle totally different. I also opted to get a new hitch, and brake cables etc. at the same time. With the job done, all I needed to do was do my wiring, put my new brake cable and hangers on, and splash a bit of paint around. 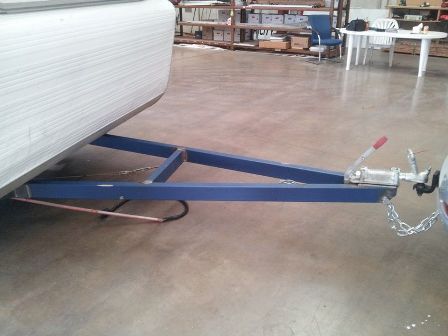
Now I had to get the transfer done, which is where all the doubt began on this caravan. The rego label was for an 86 viscount, with an atm of 820! The transport lady was great, she pointed out to me, that there's a glitch in the details. So off to the weighbridge for conformation, which was good to know my weight and ball weight. I then had to get the correct numbers stamped onto the draw bar. atm, date of manufacture, and tare. Once this was done, she was all done. Happy, back home!
Now I was going to mount a small tool box and push bikes on the draw bar, however a deal came up for an alloy tool box I couldn't refuse. 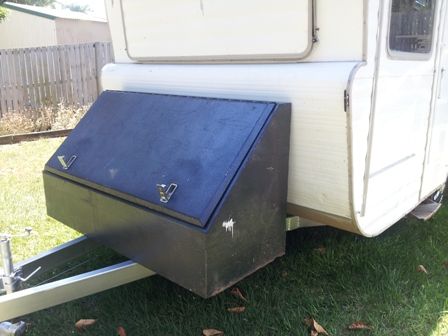
Where was my spare wheel to go now? plenty of room in that tool box now!
So, the chassis was sorted, the rego was sorted, the numbers, well they were sorted but after looking through magazines and forums, something isn't right, I'll get to that soon.
Inside, all I was going to do was a bit of a freshen up: 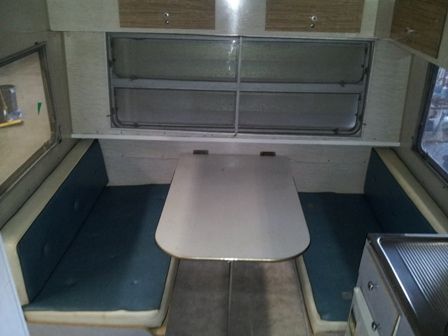
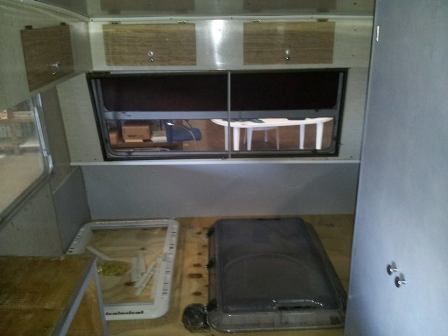
I have now pulled everything off the walls and roof and patched and cleaned it all up, and will get a coat of paint to freshen it all up and make it one colour. The doors are already off and have been painted. FYI, the walls will be a dusky pinkie colour, a colour the inside of our house is, a combo our 8yr old came up with. 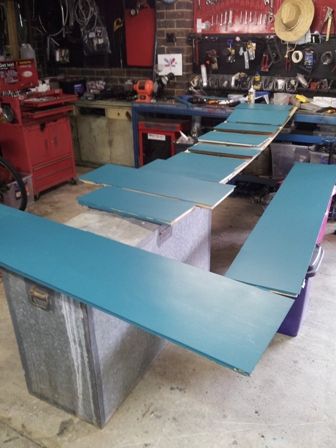
Our aims at the moment will be to be in van parks or places with amenities, to basically sleep and be in the van only if the weather is poor, all cooking and living would be outside in the annex. However there was something we were all (wife, 8yr old daughter and myself) pretty adamant on. The dislike of the idea of setting the dinette up and down every time it is time to go to bed or in the morning.
While the dinette is a great size, especially when it comes to games and meals and computers.
We wanted a more permanent solution, but I didn't want to have to strip the whole inside and remodel the whole thing again. In the end, we felt we could sacrifice the kitchen area, taking out the small bench space, leaving the sink in place, and put a bunk across the end of the main bed. Our feet would be under the girls bunk. The stripping has begun. 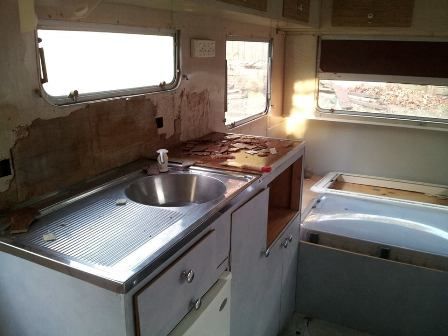
The modification almost done. 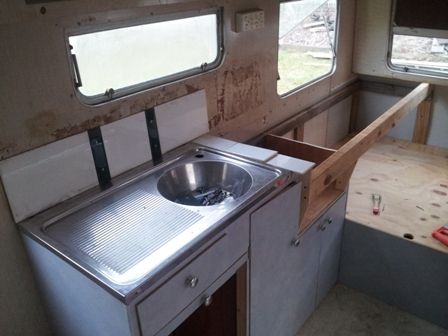
With this being done, all beds will be ready to go. Heaps of storage under the main bed. cloths in cupboard, nick nacks under the seats, and still room under the sink and bunk. Lets not forget the above head storage. The final mod, for now, which I'll be doing is removing the wind up hatch. 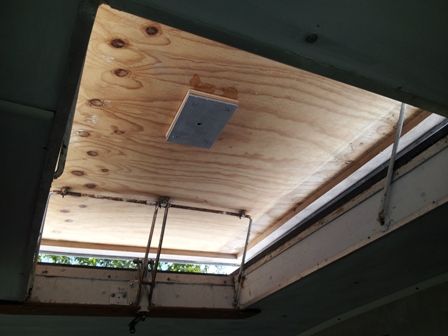
and fit the clear hatch style: 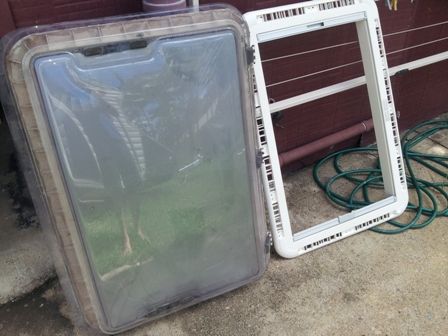
After spending time in the classic cars, it's probably similar in the classic caravans, modifying the poor van beyond recognition  . It has been in the back my mind don't you worry. But I think my aim will be, although modifying the van, keep everything that classic style. I've refrained from fitting extra bar work, led tail lights and later model gear. I've seen examples of air cons fitted without standing out or taking away from the classic lines and style. So I hope to stick with that plan some what, even though the layout inside has changed slightly. I do want to fit solar to it also, but I may negate the hard panel I've already got and fit a flexi panel which will go straight onto the roof, be low and hardly seen. . It has been in the back my mind don't you worry. But I think my aim will be, although modifying the van, keep everything that classic style. I've refrained from fitting extra bar work, led tail lights and later model gear. I've seen examples of air cons fitted without standing out or taking away from the classic lines and style. So I hope to stick with that plan some what, even though the layout inside has changed slightly. I do want to fit solar to it also, but I may negate the hard panel I've already got and fit a flexi panel which will go straight onto the roof, be low and hardly seen.
Now getting back to those numbers. It has been registered, before I even got it, as a 1986 model viscount. A lot of you can pick straight away that it's not an 86. From my research in the chassis numbers, and 2 recent forum members putting my number right in the middle of theirs, I would say it's a 69-70 model ambassador. Can anyone verify this? If it is of that vintage, do I get that changed with qld transport, therefor changing my insurance, which RACQ has been fine with thus far? Or do I leave it?
Anyway, I think I've rabbited on for long enough. I'll keep it up dated as I go through everything. Couple other ideas have been upgrading the axle, brakes and wheels, but really for what reason, will the current setup be capable? There's the external stripe idea:here's a rendering.... ![]()
After digging through this forum, I might steer towards doing the original stripes. 
Cheers Dan
|
|
|
|
Post by awbeattie381 on Jan 12, 2015 12:54:14 GMT 10
G'day Dan,
Looks litle a top little project you have there. We are also new to the van scene and after unsucessfully looking for 13ft vans we settled on a 15ft van. Doing pretty much what you are doing. Giving it a bit of an update without fiddling around too much with the originality of it. I plan on repainting our side stripe back to a pastel colour, replacing the LED exterior lights with normal ones (interior i can live with LED as we plan on free camping too), replacing the torana rims with the original 14 inch wheels and viscount hubcaps etc etc. Repainting the original strip on yours will make it look a million dollars. plastic chrome hubcaps are also a little average - I turfed mine on their first outing (personal taste haha).
Look forward to seeing the progress, especially the solar setup. Its amazing how much longer everything takes once you get stuck in. I thought I would be using our van by now (had it since August) but I cant see us using it until spring - we are barely at interior paint phase!
Not sure what I would do re the rego details of it not being an 86 model...depends on how desperate to have all your paperwork 99.9% accurate!
btw is that a rexton tow rig? Looks pretty tough if it is!
|
|
Deleted
Deleted Member
Posts: 0
|
Post by Deleted on Jan 13, 2015 9:54:25 GMT 10
HI mate
I'm at the interior painting stage, and it failed due to the spray guns, paint, weather all didn't want me to have a go. So I'll do a quick sand and start again, no big deal, just painful.
I am going to stick with the original light fittings, but retro fit them with leds inside. you can buy bulbs and what not, but I've got ways of making them a bit better. I've also got led strips planned, in such a way you won't notice them till they are on. I'll be fitting it with the 12V system as well, which it already has the wires there for the battery, but like our Cub, it'll have copious amounts of sockets for both 12v and 240v cause my girls like their gadgets and what not. Just makes it easier if it's there.
I wouldn't mind getting hold of some mags for it, kind of like a hot rod style van. But I've also got to consider the travel too. Don't want anything breaking.
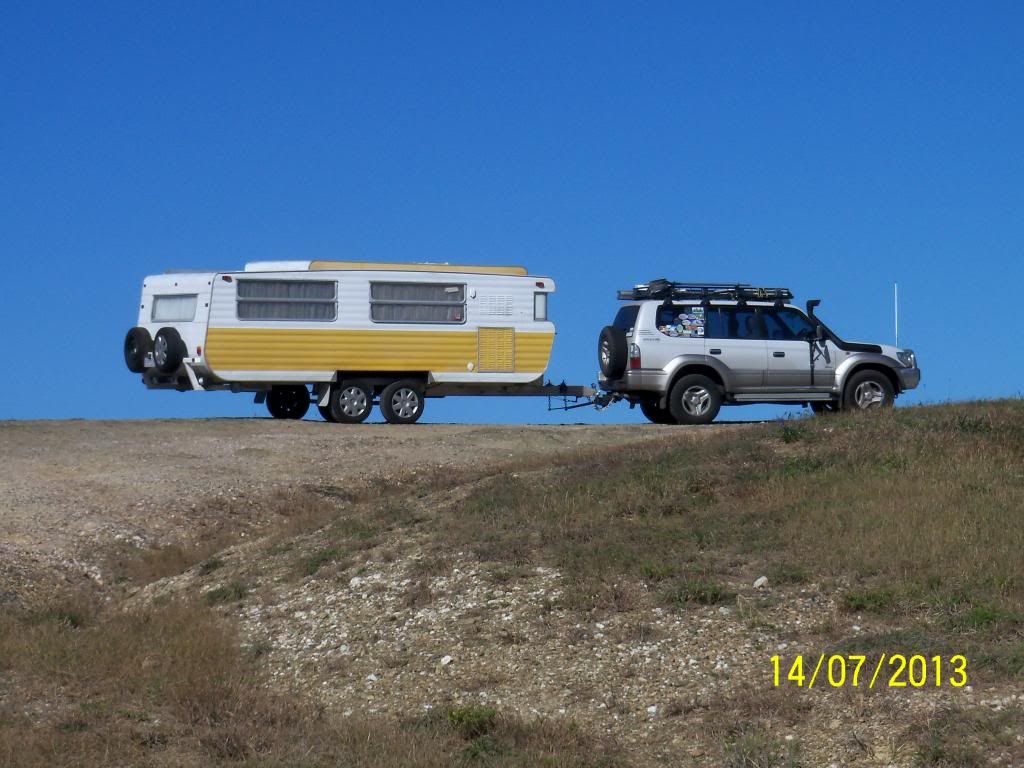
The tow rig is actually a Great Wall X240 (series 2). We've had it over 3.5yrs and it's punch well above it weight on and off road and towing. There's certainly nothing wrong with them. This one is the petrol variant, as I definitely wanted the low range gear box. It's also setup with everything you can poke a stick at and almost needs it's own thread.
Cheers
|
|
|
|
Post by camper2van on Jan 13, 2015 21:12:14 GMT 10
Looks like a nice clean example , apart from the draw bar . Be watching your posts , good luck with your project Cheers |
|
|
|
Post by atefooterz on Jan 16, 2015 10:08:13 GMT 10
HI mate I'm at the interior painting stage, and it failed due to the spray guns, paint, weather all didn't want me to have a go. So I'll do a quick sand and start again, no big deal, just painful. I am going to stick with the original light fittings, but retro fit them with leds inside. you can buy bulbs and what not, but I've got ways of making them a bit better. I've also got led strips planned, in such a way you won't notice them till they are on. I'll be fitting it with the 12V system as well, which it already has the wires there for the battery, but like our Cub, it'll have copious amounts of sockets for both 12v and 240v cause my girls like their gadgets and what not. Just makes it easier if it's there. I wouldn't mind getting hold of some mags for it, kind of like a hot rod style van. But I've also got to consider the travel too. Don't want anything breaking. The tow rig is actually a Great Wall X240 (series 2). We've had it over 3.5yrs and it's punch well above it weight on and off road and towing. There's certainly nothing wrong with them. This one is the petrol variant, as I definitely wanted the low range gear box. It's also setup with everything you can poke a stick at and almost needs it's own thread. Cheers Excellent progress & keeping the eye on the prize there Dan! Using & enjoying a few comforts V going the total rescue/restore route is good. The clever folks who set up this site even have a place for your Great Wall adventures, if you want to share, ditzygypsy.proboards.com/board/2/modern-miracles It is always easy for folks to knock stuff but first hand info is always better. A mate had a sponsorship that included a top of the range SsangYong Kyron 4wd, that was of course slagged off at by his mates, until after about a year & no issues plus all the naysayers going for joyrides discovering this thing is alright. A chippy mate is on his 3rd Great Wall now, since they started, & he just keeps them 18 months ish or 50,000klm, fleet style and loves it. |
|
Deleted
Deleted Member
Posts: 0
|
Post by Deleted on Jan 16, 2015 22:06:31 GMT 10
I've checked that area, looks like I might post in there too. While I may be working on the interior painting now, my minds ahead already planning the next stage. flashing up the outside. Something that's bending my melon, besides the possible year model, is what graphics to go for? I did the artwork for the green line on the outside... 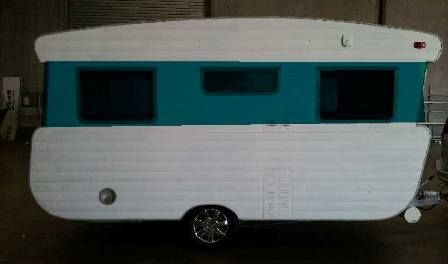 My wife likes this over the traditional graphics done on the side of the viscounts of the period. My 8yr old girl, who is a colour choosing genius(having picked the interior colours of our house and our xb)reckons go the traditional, but the stripe looks ok too. On such a small van, looking at all the HUGE 15 & 16ft vans, the traditional graphics might look too cramped, too rushed on such a small canvas. |
|
Carl
In Training
 
Posts: 44 
|
Post by Carl on Jan 18, 2015 12:05:21 GMT 10
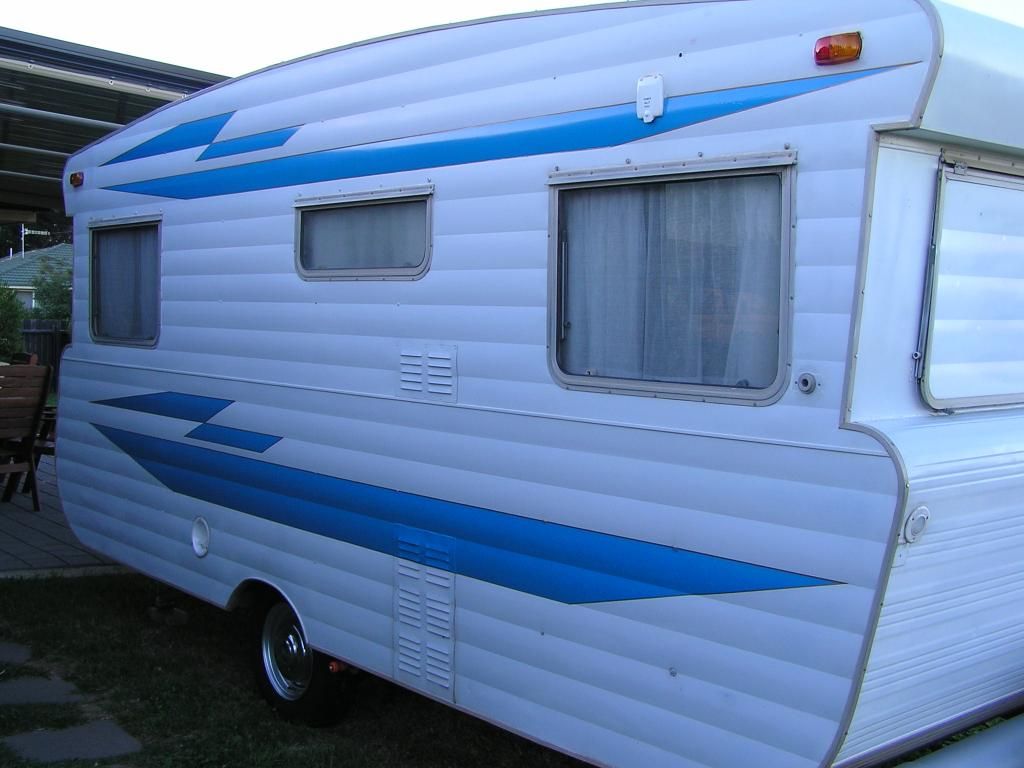
I don't mind that newer style side flash because it looks like the mid 70's vans, but still prefer the 1969-70 style "lightning" flashes. Your van was made 655 vans before mine so it would have been made originally with the lightning flashes, but it's your van, you do it the way you want.
Here's what my 15 ft Ambassador looks like with blue side flash and 3mm gold pinstripe around all the flash edges.
 |
|
Deleted
Deleted Member
Posts: 0
|
Post by Deleted on Jan 19, 2015 13:13:31 GMT 10
That's my problem carl, i don't know which to go with. I like the stripe, easy simple. But the lightning, especially yours, looks great too. I'd like to stay more traditional, but i wander if it'll cramp the 13ft canvas. In terms of layout, did you just guess, or is there a source for where the strips need to go?
I'm even thinking of re spraying the whole thing too. Nice fresh outside and in.
|
|
|
|
Post by awbeattie381 on Jan 19, 2015 16:28:00 GMT 10
geez the colour of that green stripe looks like my van!
I'll see if I can find some 13ft vans with the lightening design, i am sure i have seen some around here...
|
|
|
|
Post by awbeattie381 on Jan 19, 2015 16:34:36 GMT 10
here is a 10 footer (scroll down to the chocolate stripe van) ditzygypsy.proboards.com/thread/2450/more little ones... ditzygypsy.proboards.com/thread/2451/ Personally I would go with the flash, because its the right design for your van. It just wont be as easy as painting a stripe!!! Good luck with the decision! If you are anything like me I would agonise over something like that! And compare 50 vans with one style against 50 vans of the other style. |
|
Carl
In Training
 
Posts: 44 
|
Post by Carl on Jan 20, 2015 15:53:36 GMT 10
That's my problem carl, i don't know which to go with. I like the stripe, easy simple. But the lightning, especially yours, looks great too. I'd like to stay more traditional, but i wander if it'll cramp the 13ft canvas. In terms of layout, did you just guess, or is there a source for where the strips need to go? I'm even thinking of re spraying the whole thing too. Nice fresh outside and in. Hi, my stripes were already on the van, but they were the wrong colour so I only masked them and repainted them blue. You could easily figure out where they should go on yours by noting that the top and bottom large stripe is nearly as long as the van and the top large stripe is one strip of aluminium wide between the creases. The bottom long stripe is two creases wide. The smaller lightning stripe clusters are as long as you want and proportional to the dimensions of the van. Both top and bottom lightning stripe clusters are the same size.
Your side panelling is the same as mine, so you could easily use mine as a pattern and scale your lengths back. If you want actual dimensions, give me a yell.
|
|
Deleted
Deleted Member
Posts: 0
|
Post by Deleted on Jan 24, 2015 21:53:26 GMT 10
Thanks guys. I think i'll stop being a chicken and go for the flashes that it's spose to have. But while every thing was suppose to be going smoothly, Well as smooth as it can go after the trouble painting the inside of the van, a trip to spotlight to decide on cushion materials etc, changes everything. Sounds strange but I like to leave alot of colour choices to my 8yr old girl who is a genius at picking great colours. Having picked our house colours, and even picking the two tone colours I did for our Xb Falcon we built a few years ago. So once the wife and her got in spotlight, the door colours, well, they're changing. So the greens out and going to be done in a custom colour to match some of the material thats is going on the seats. The table is getting recovered. The splash back is going to get changed. The only thing I have been able to keep is my really glossy checkored flooring. Well, you win some.  Just some pics of it at this point. The doors are coming back off tommorrow and getting a new coat of paint. I'm also hoping to get the new roof hatch up there. So if anyone wants the old one, please put your hands up now. I've also got 8 of the old original, marble look, door handles which i won't be using.     |
|
Carl
In Training
 
Posts: 44 
|
Post by Carl on Jan 25, 2015 7:19:35 GMT 10
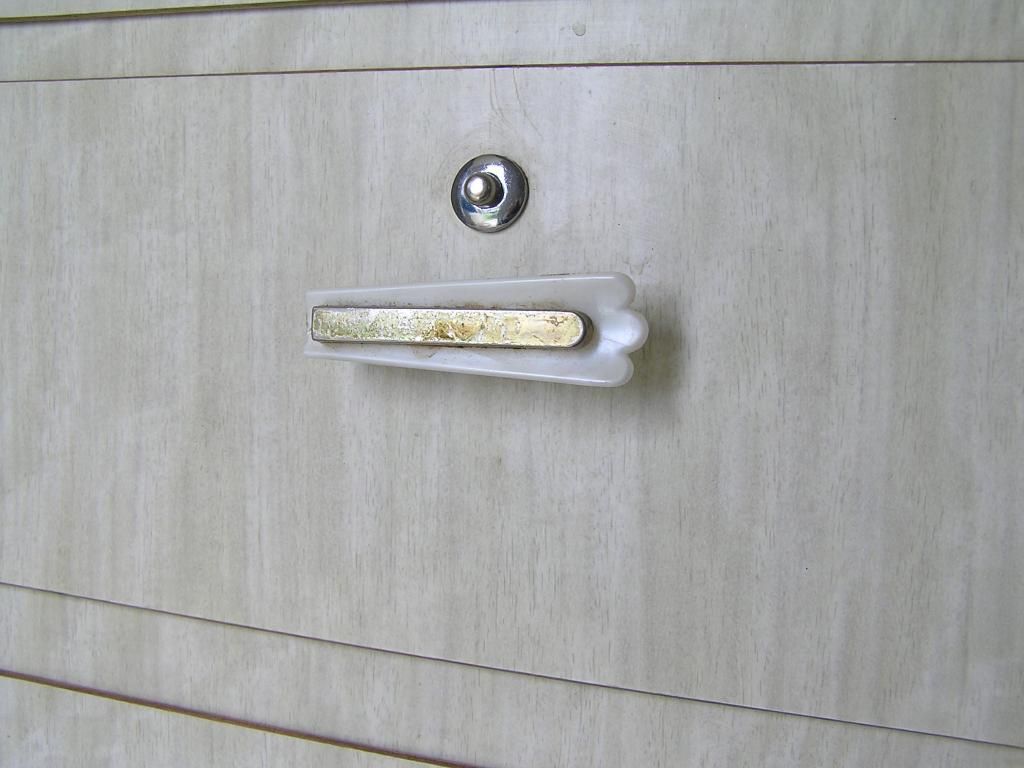
Pity about the changed interior colours, but great that you've decided to go with the original style flashes outside. And if those cupboard handles look like the photo below, I'll be very happy to buy them off you. Email me at csnelling@bigpond.com
|
|
Deleted
Deleted Member
Posts: 0
|
Post by Deleted on Jan 25, 2015 11:07:50 GMT 10
 Negative carl, they are the round ones. |
|
|
|
Post by awbeattie381 on Jan 25, 2015 20:32:06 GMT 10
I would buy the round ones off you but the wife has other ideas...total change of door knobs for my van! haha
My wife and I just spend the last 2 days doing two undercoats on the inside of our van. I feel your pain!
|
|
Carl
In Training
 
Posts: 44 
|
Post by Carl on Jan 26, 2015 8:11:12 GMT 10
|
|
Deleted
Deleted Member
Posts: 0
|
Post by Deleted on Feb 1, 2015 21:20:56 GMT 10
Update time: With the decision on the seat materials being made. The Green doors came back off and have been repainted. This time in a black, not to give too much away though, the final coat was done using a spray gun with glitter mixed in to give it a metallic finish. 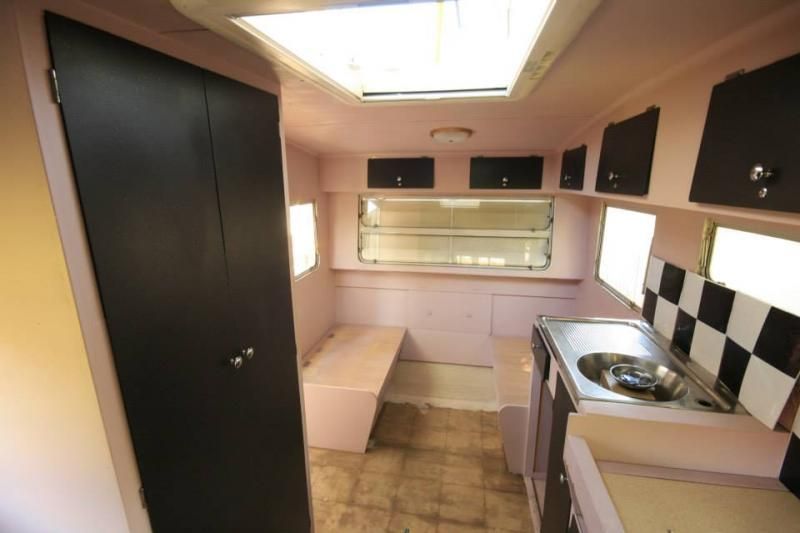 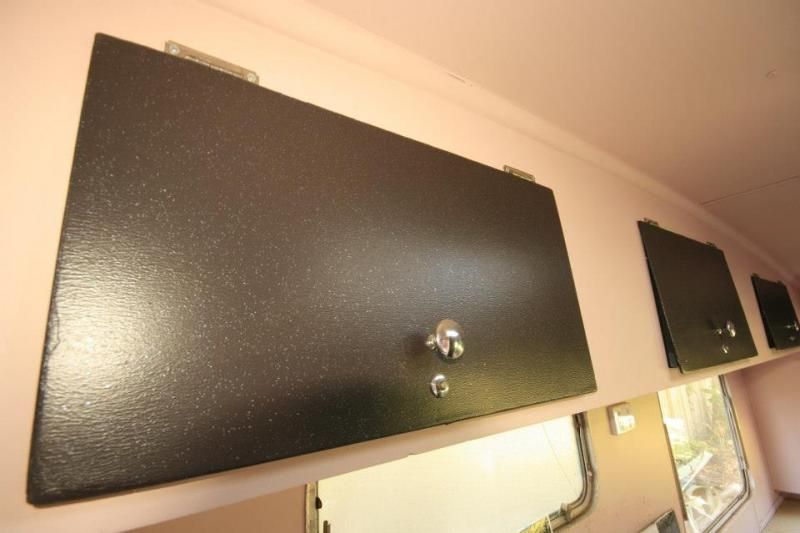 Note: the checkered tiles on the wall, are actually the floor tiles. just playing with the idea of the splash back being the same. 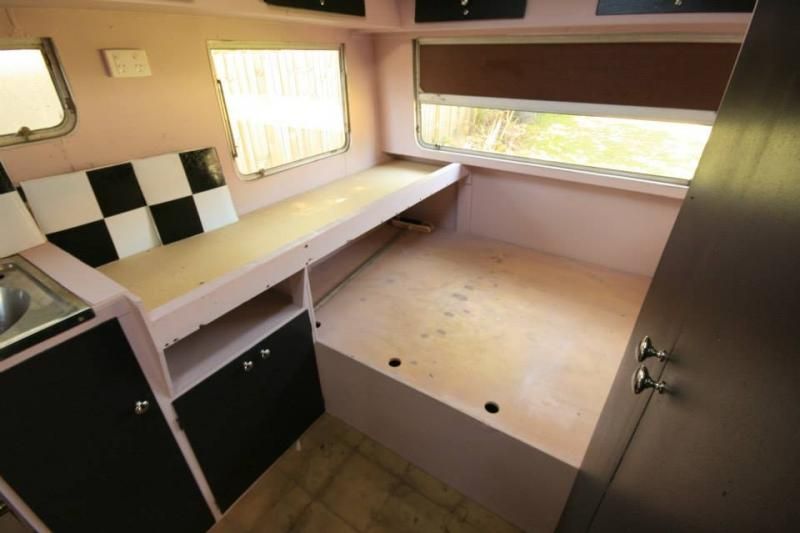 One of the big jobs I finally got out of the way was the roof hatch. Knowing the benefits of the new one from working on them, through work, I had to go from originality, least on this. The new hatch was 50mm bigger in each direction, meaning I had to notch and move the ribs in each direction. Man, nothings easy. 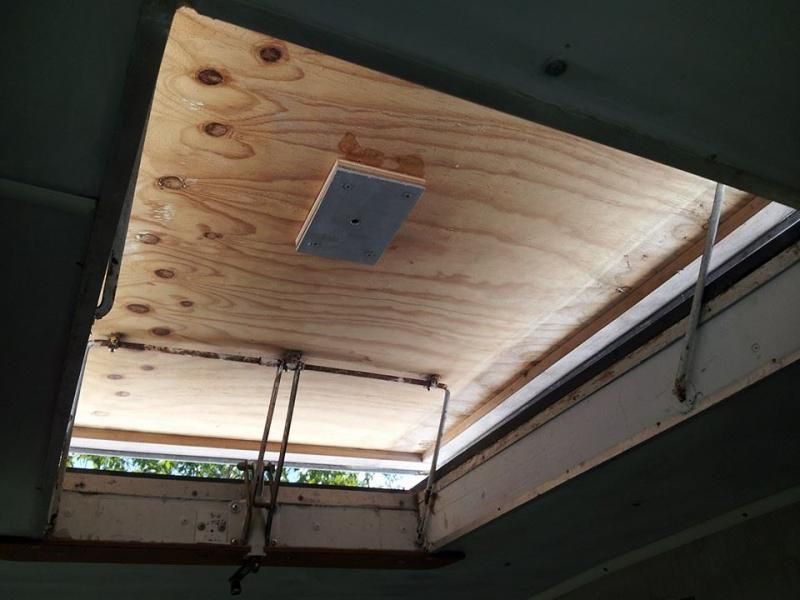 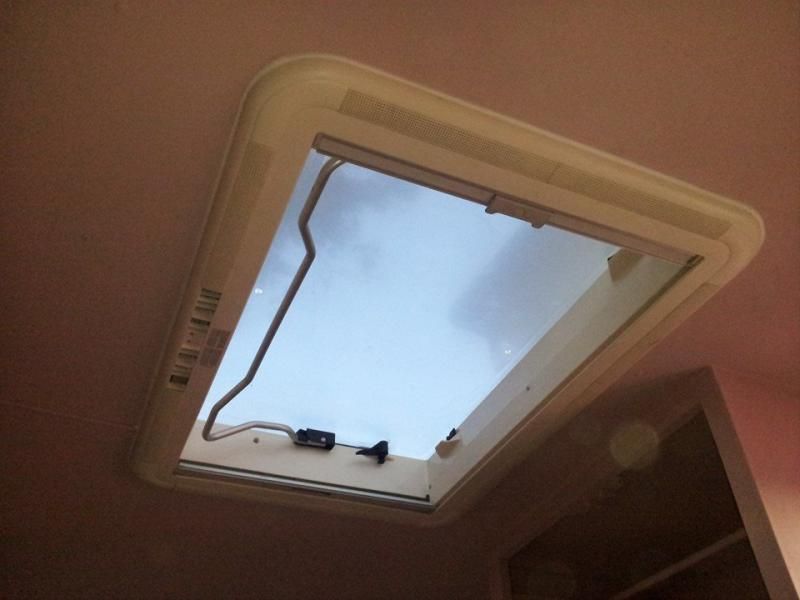 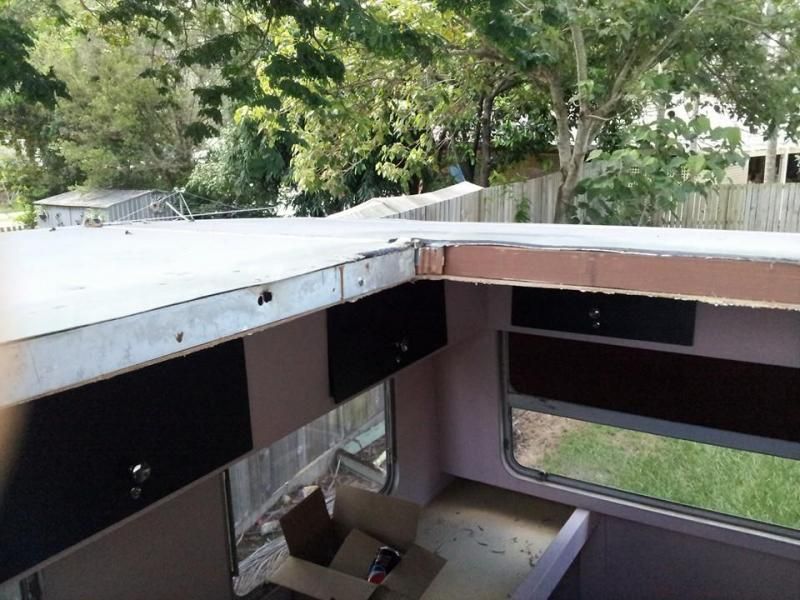 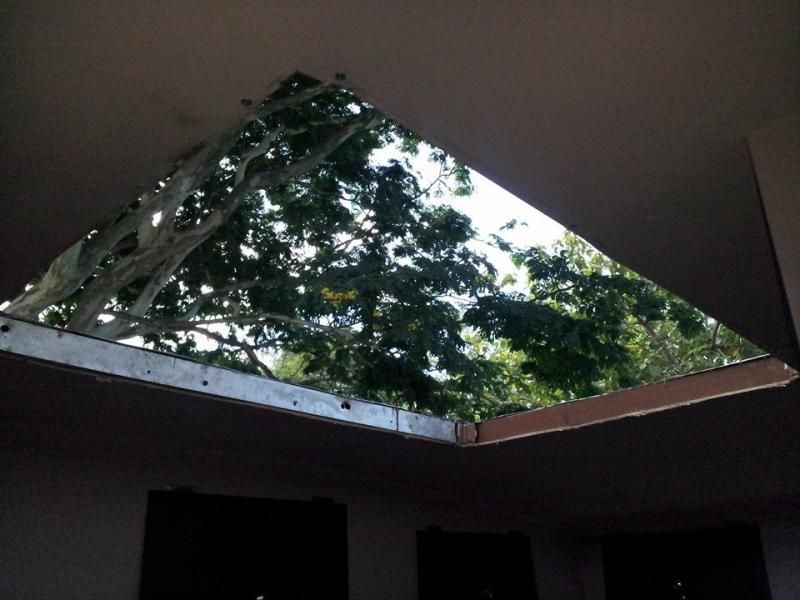 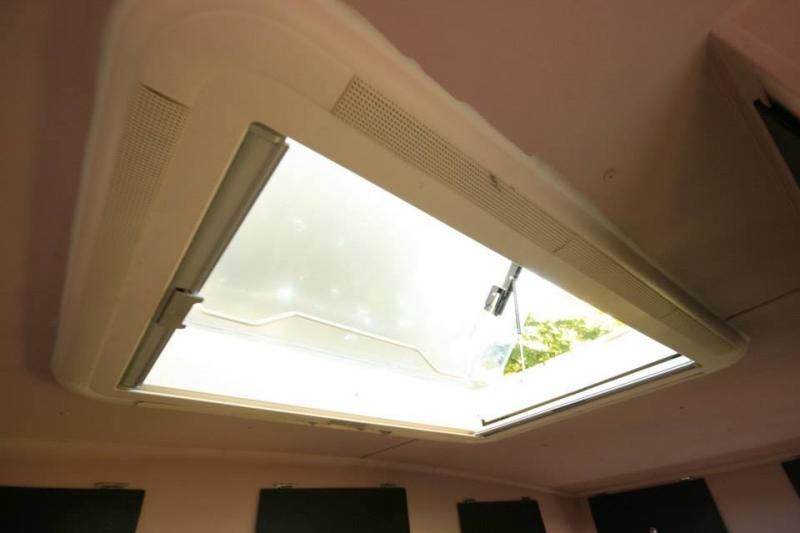 While we're at it. All of the switches are being replaced. The GPOs are being replaced, however the quad point which was high on the wall proved to be a double pole (so it should), so I serviced it and put it under the sink, as it will need to feed 4 devise anyway. But the main one was removing the old fuse, something I haven't seen for at least 20yrs or more. In went the rcdmcb. Then all tested. All sweet! 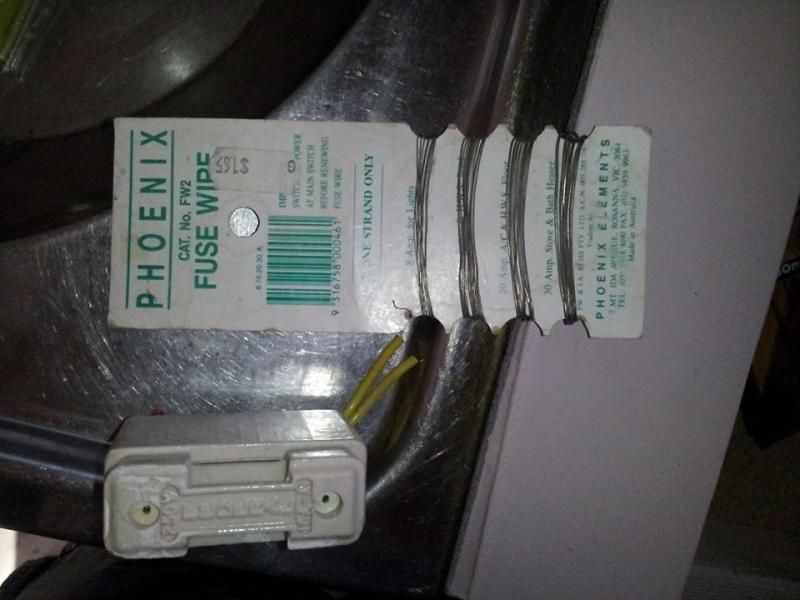 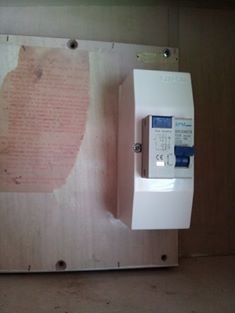 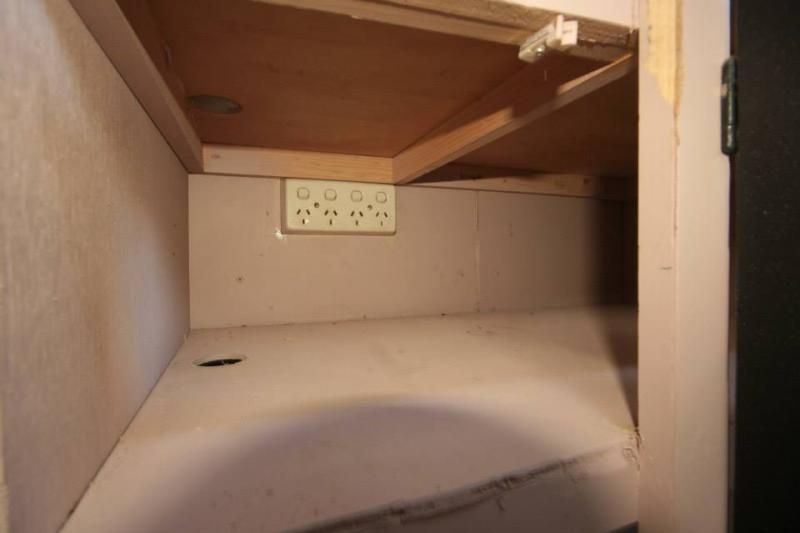 So it's starting to come together. 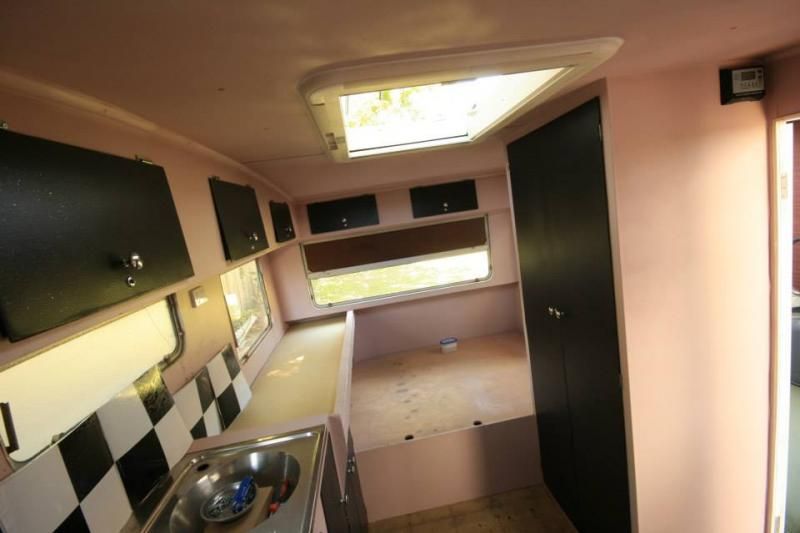 I was going to lay the floor, but i thought i'd leave that to very last so it doesn't get damaged while i do everything else. But i did have a quick look, by gosh it'll look sweet! Next week end, I will hopefully have all of the 12V sockets done, 12v power board, battery and the extra lighting. Next to these are extra 240V GPOs as well. Then the floor, then a thorough clean. Outside is then calling. From those who have done it, how much paint would it take to paint the outside, keeping mind i will spray it? Till next time.... |
|
|
|
Post by pisces51 on Feb 1, 2015 21:47:11 GMT 10
It's coming together very nicely, Dan.  The cupboard doors look great, and the roof hatch will be heaps better than the old one, hey?!  You should hang on to the old fuse for "Show and Tell" days. Can't understand why they didn't include a 2" nail in the spare fusewire pack - they mustn't have plugged a welder into the van in the old days...heh heh.  cheers, Al. |
|
|
|
Post by atefooterz on Feb 2, 2015 9:31:55 GMT 10
Looking fab Dan!
|
|
Deleted
Deleted Member
Posts: 0
|
Post by Deleted on Feb 3, 2015 18:49:21 GMT 10
Which brand skylight is that mate? Looks good
|
|
Deleted
Deleted Member
Posts: 0
|
Post by Deleted on Feb 5, 2015 18:07:54 GMT 10
Nice idea with that bunk over the main bed, might have to borrow that one!
|
|
|
|
Post by Sharky on Feb 5, 2015 19:14:00 GMT 10
Nice love your work Dan. Love that black/white finish
|
|
Deleted
Deleted Member
Posts: 0
|
Post by Deleted on Feb 9, 2015 22:19:57 GMT 10
Which brand skylight is that mate? Looks good I believe its a Dometic SEITZ Heki large roof hatch. I accidentally found out as it's the same as my work sells. I haven't done much, Started a new job with Jb Caravans at Caboolture, and having to knock a few other cashies on the head too. Basically piecing all my parts together for the next phase which is the extra 240v sockets. Along with the 12V sockets, battery and fuse board. Once I start, I could probably knock it all over in a day, but not if I have to chase parts. Also waiting on the led strips and led panels for the original lights. I've already got LED 240V bulbs in the original lights, big difference! Now when I get onto retro fitting the leds, that'll be an interesting view for all and sundry. My biggest pet peeve at the moment, the price and rarity of black multi gang 240v switches (black for 12V, white for 240V). The other is the big cost of window supports for them, you are looking at minimum $16, and that's off ebay. I would like to source out a wrecker or something to see if I can find some good second hand ones. Retro caravans, gold coast may be a help. Last but not least. What are peoples thoughts on wrapping the front with checker plate? Going shiny might detract from the classic look. Going powder coated black might look good, especially if I go the side flashes in black also to match the inside doors. I am considering painting the thing again as well. Seeing some of the others come up well with a fresh white. It'll also give me a chance to sort out a couple dints. But how much paint would it use? |
|
Deleted
Deleted Member
Posts: 0
|
Post by Deleted on Mar 21, 2015 19:37:35 GMT 10
Well i'm still alive. just dropped off the face of the earth for a while. But we've made steady progress. The battery and 12v system is in place. No pics of where the charger is, but the battery is under the main bed running to a fuse box mounted in the wardrobe. Neat cause all you see is the fuse block, and that's it. Under the bed, the wiring is in the bed frame, which will get covered by a panel as well. 240v and 12v sockets done. 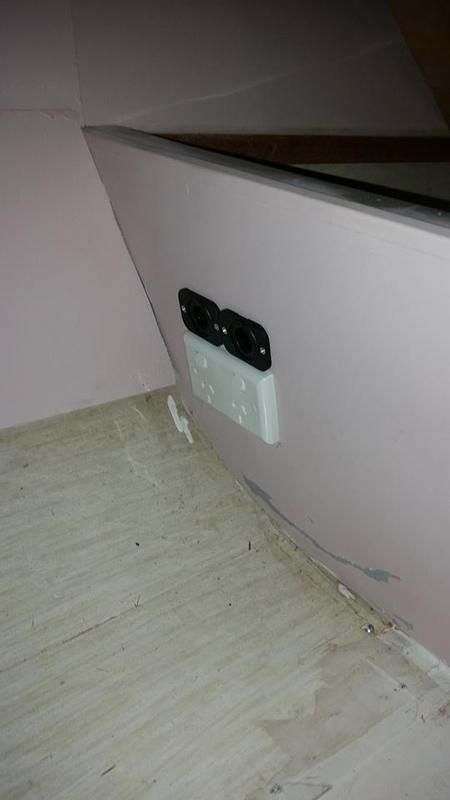 under both seats at the table... 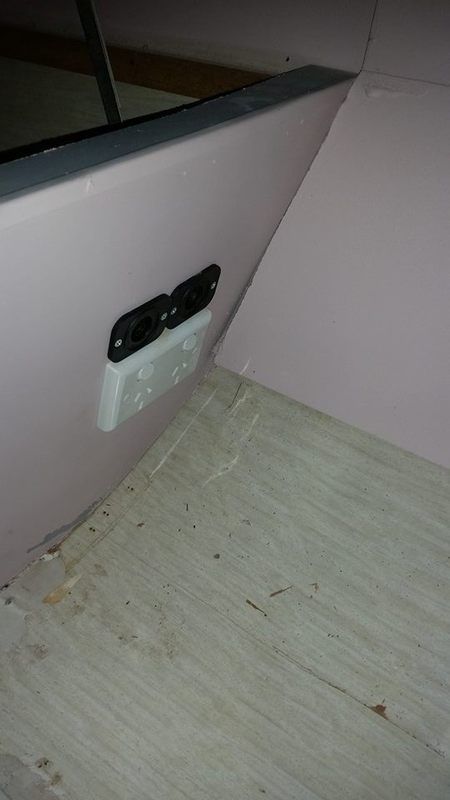 The led lights and switching. I really wanted to utilize the dimmer switches. so I mounted them on the switch. The same at the single switch at the door. 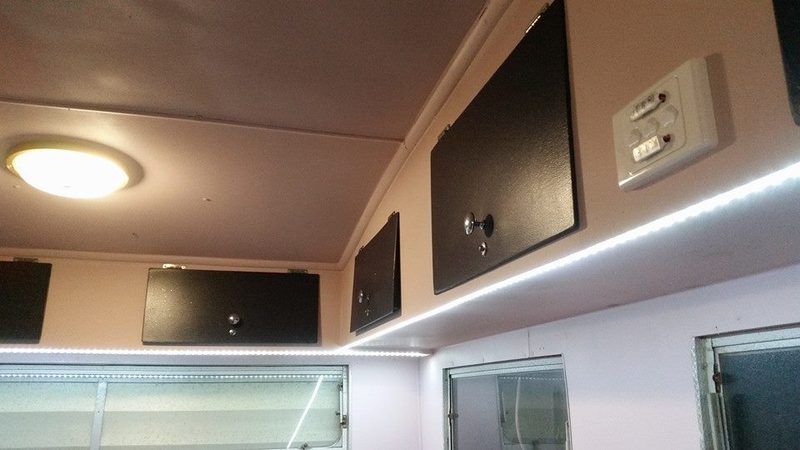 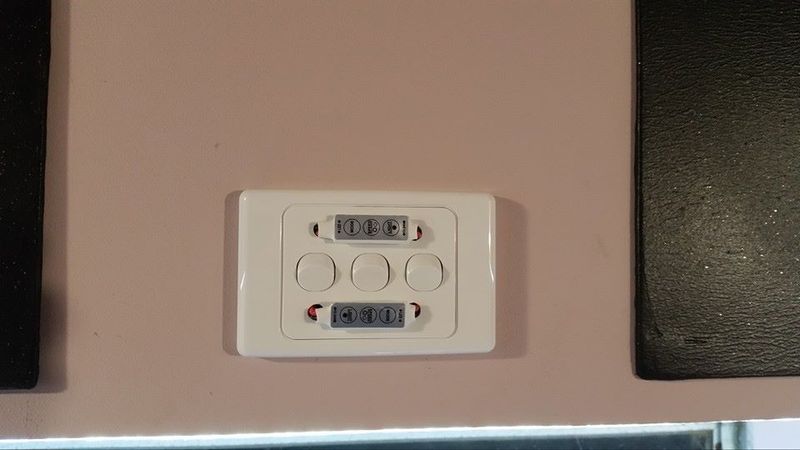 We can switch and dim each end, the middle over the kitchen, is simply on. 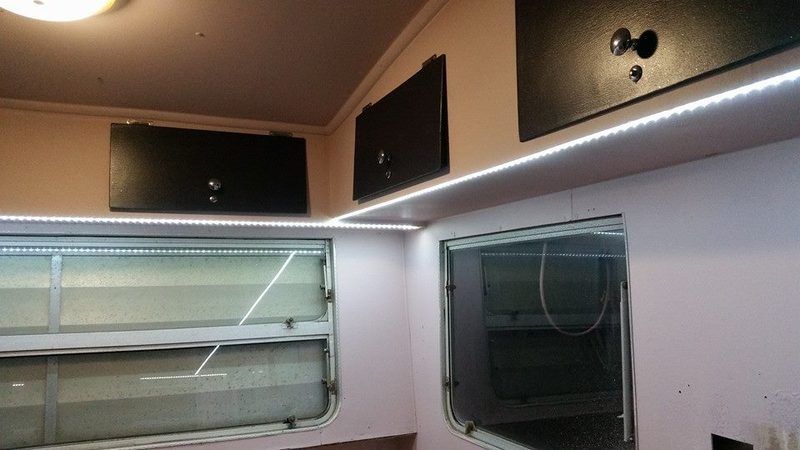 outside under the van, same situation. Dimmable, so I can dull it down while relaxing. 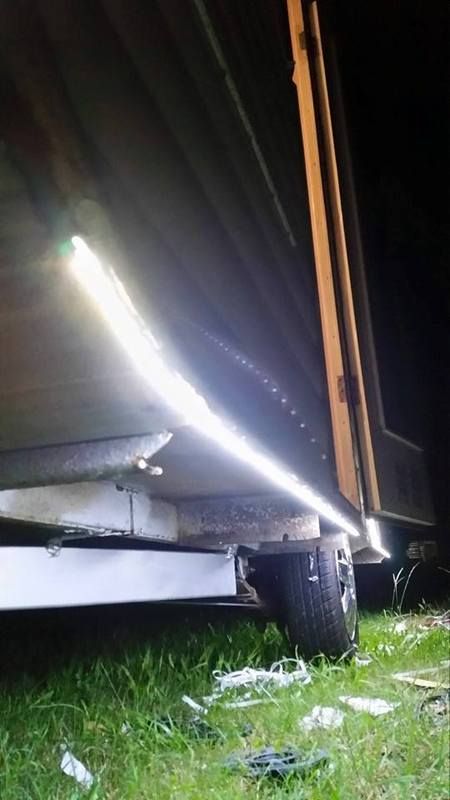 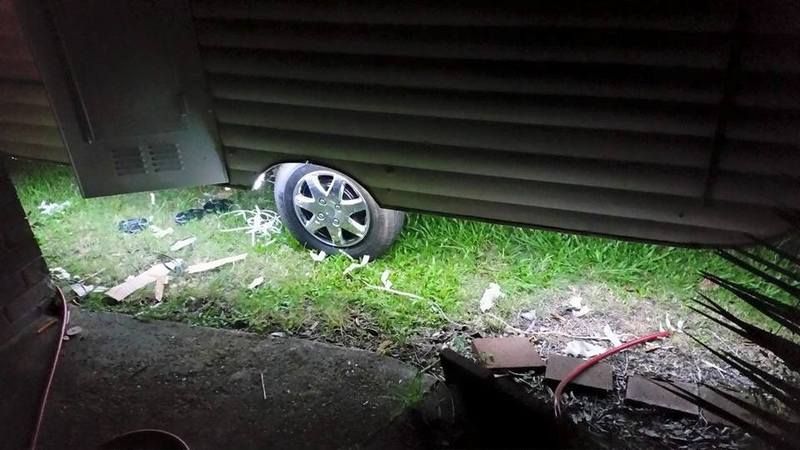 Meanwhile, back inside. The floor is finally done. 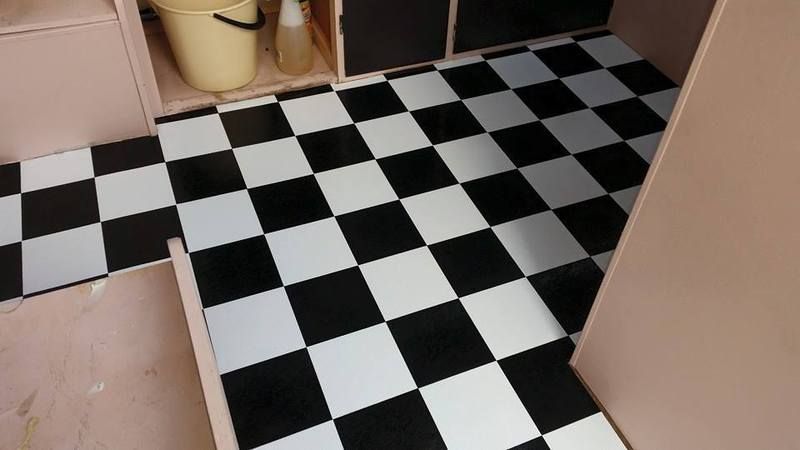 I even did the splash back in the same... 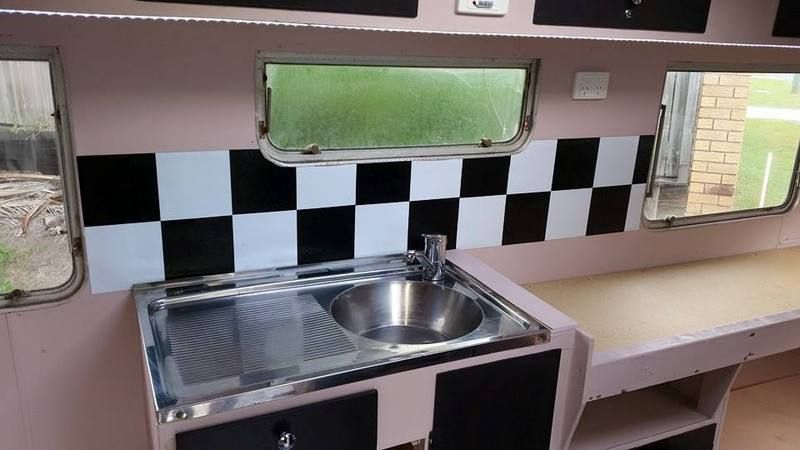 While I was at it, the fridge got covered in metallic vinyl, same finish (not color) as what the cushions are going. 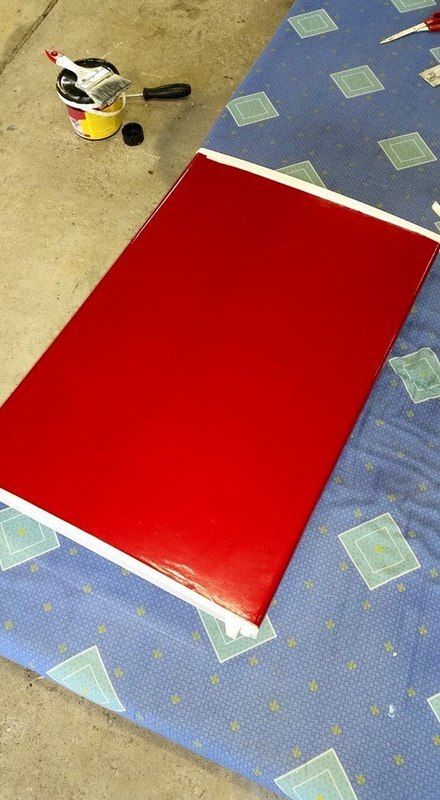 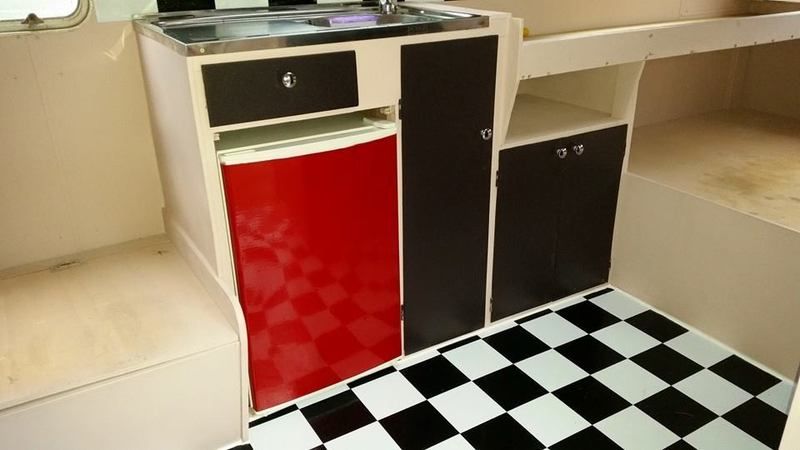 So I'm stoked at how it's going. I'll get the table sorted tomorrow, I've got 2 types to choose from, either are getting done in the red as well. then it'll be trim and seal everything up. Edging and what not around beds and steps etc. The plumbing is simple, just straight into the tap and also t off to the front tap on the draw bar, which found handy on the camper. |
|
Deleted
Deleted Member
Posts: 0
|
Post by Deleted on Mar 21, 2015 19:40:34 GMT 10
I'll do a complete shoot on everything once done. I still would like the air con under the seat trick.
I'm also keeping an eye out on a bigger van, which I'll retro fit, mirroring our new vans at work.
|
|
 . It has been in the back my mind don't you worry. But I think my aim will be, although modifying the van, keep everything that classic style. I've refrained from fitting extra bar work, led tail lights and later model gear. I've seen examples of air cons fitted without standing out or taking away from the classic lines and style. So I hope to stick with that plan some what, even though the layout inside has changed slightly. I do want to fit solar to it also, but I may negate the hard panel I've already got and fit a flexi panel which will go straight onto the roof, be low and hardly seen.


