JBJ
In Training
 
Posts: 12
|
Post by JBJ on Feb 16, 2013 19:40:26 GMT 10
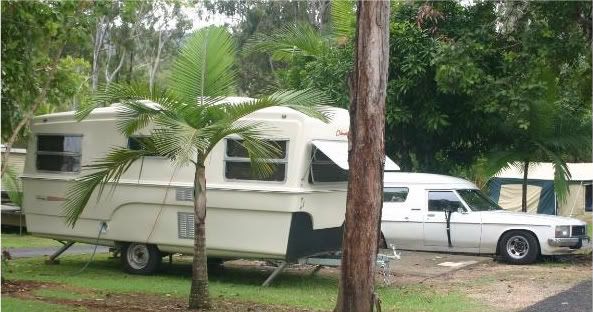
Hi, Just rejoined this forum, after a break. we bought an Olympic 11'6" at Canungra last year, to have a smaller lighter van as well as our 1956 Deejay Tandem. 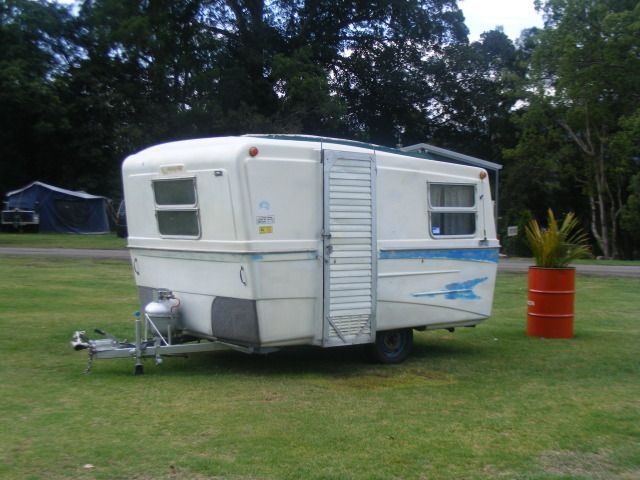 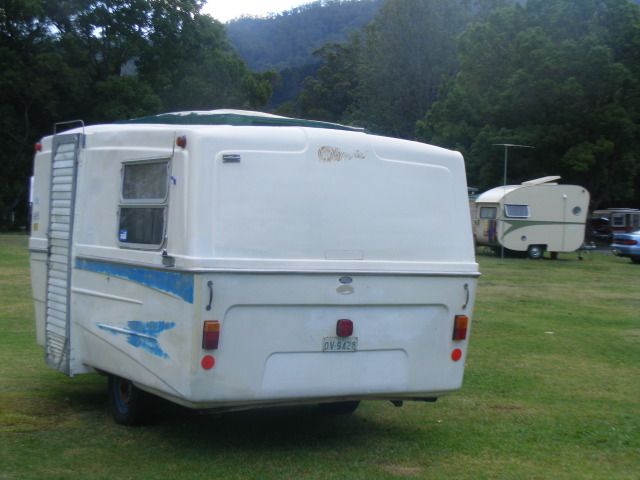 It was'nt near as good as we thought when we first looked at it & bought it, but it was small, had 2 single beds & a front kitchen as we wanted. So after getting it home, I got stuck into fixing what I thought was a reasonably simple tidy up' Firstly put a new jockey wheel on, then new chains. Decided to replace the carpet stone guards with aluminium. Then had a good look inside, & realised the kitchen & floor were stuffed. 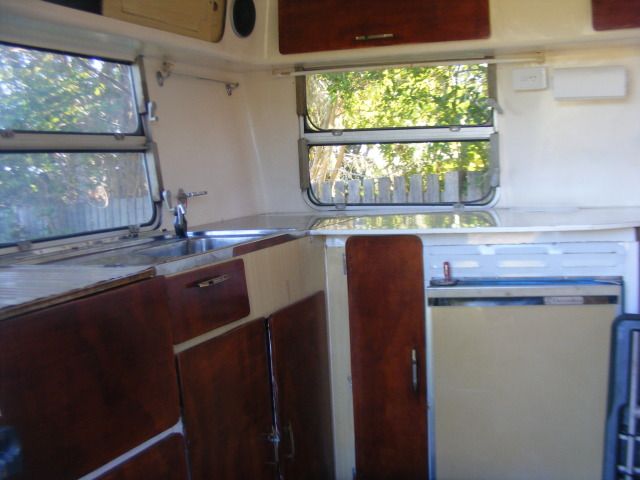 It appears ( after looking at it for a few months) that the outer walls of the van had all dropped in relation to the chassis, which is very minimal in this model. So I made a cross bar & welded it in over the drawbar, & used it to support the front lower edge of the van in a level state. Then made a spare wheel carrier, & rebuilt gas bottle supports. 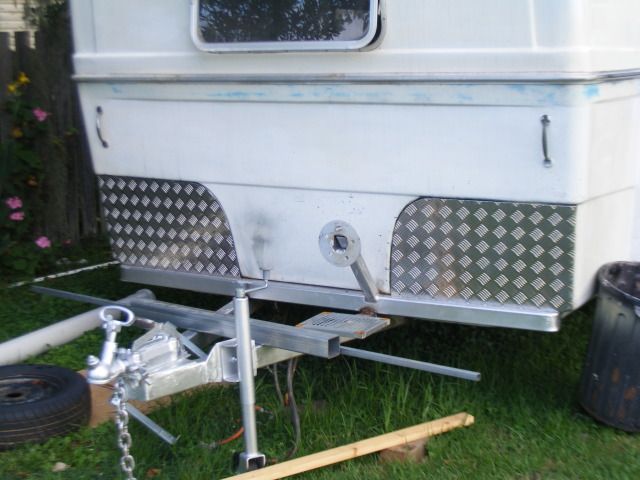 This meant the floor & kitchen had to be rebuilt. So I set a new panel of ply in the middle after removing the original rotted ply floor. This gave me a level base. I then projected this level forward & reconstructed the front floor. 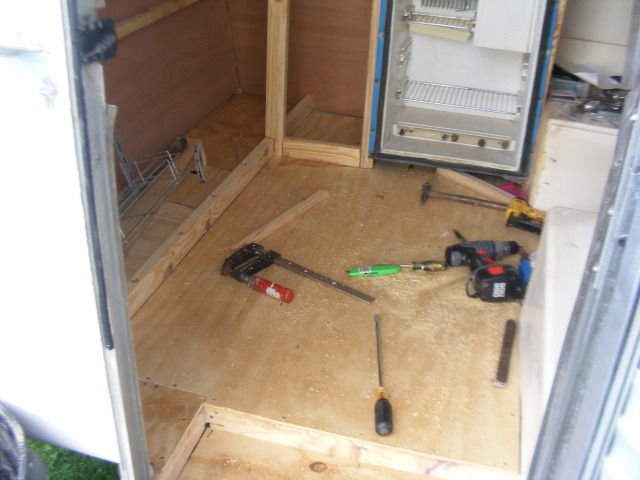 This caused a few problems around the door, but as the door & frame were broken, along with the wall next to the door, I figured it could be sorted out as I went. 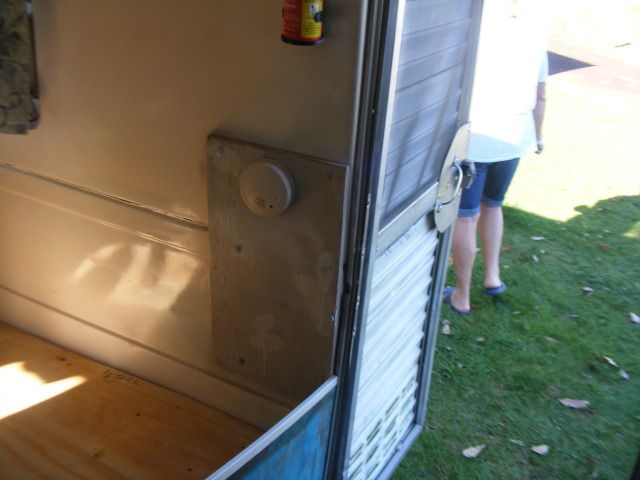 There is now a step down constructed at the door. Then started building a new kitchen, using the original fridge & bench top only. 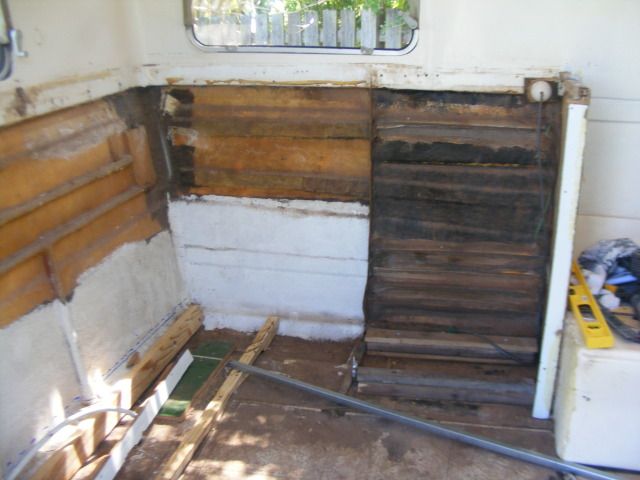 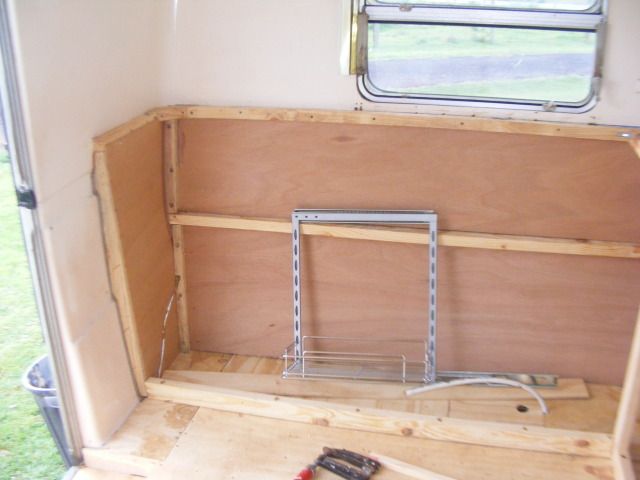 Made a cupboard for a porta potti, microvave, & my electrics. 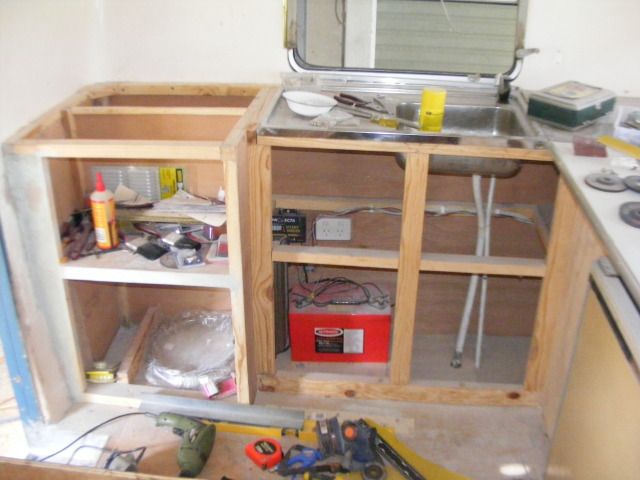 Installed a roll out pantry, & new drawer over fridge. Reused original sink & so far the plumbing. The original door was a disaster, with the wall of the van broken next to the door Then made a steel door frame, picked up a second hand door assembly, & glued & screwed the frame in place. New door is almost same size as original, & works well. Hinged from front now. 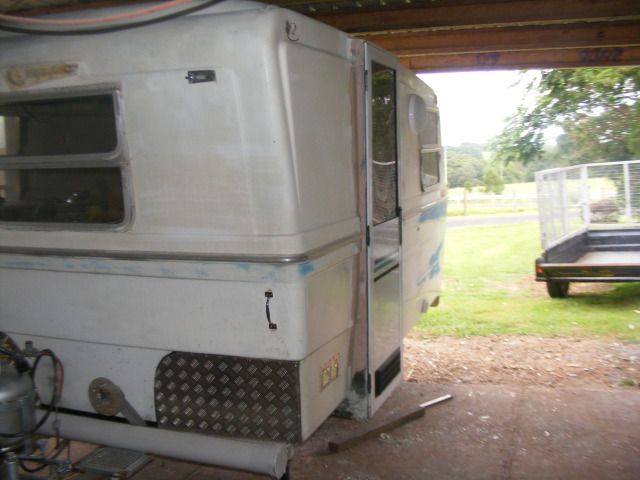 Then had to remake the beds, & when the outer body dropped the bed had 130mm fall from middle to side, & 150 front to rear. 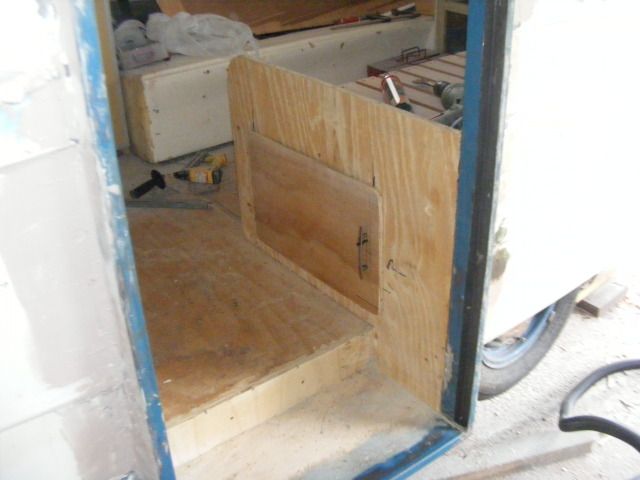 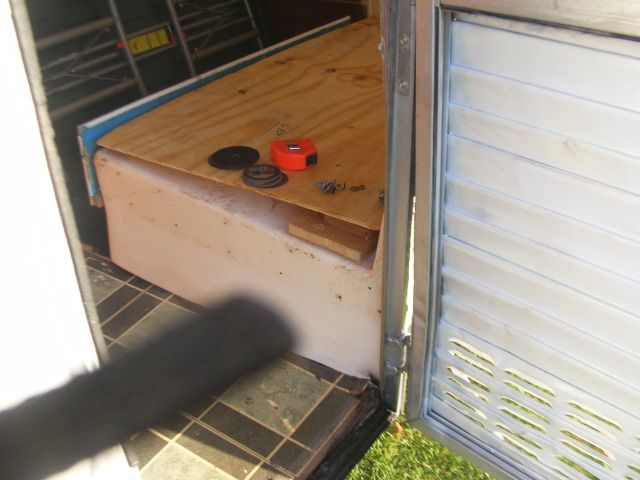 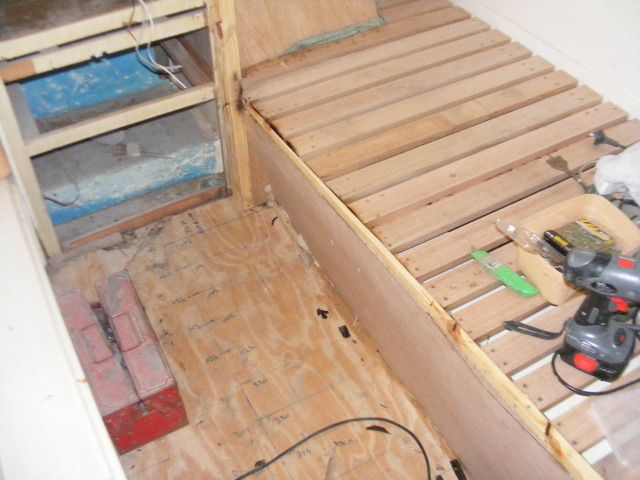 So I'm still working away madly when I can. The van will look original from outside, & have pretty well the original layout inside. . Hopefully we will be using it soon, as it had 12 months rego when we bought it |
|
|
|
Post by atouchofglass on Feb 16, 2013 21:14:38 GMT 10
Hey there JBJ
Lots of progress and more to come I bet ;D ;D
Keep the photos coming
Oh and Welcome back...
Cheers
Atog
|
|
|
|
Post by bobandjacqui on Feb 17, 2013 6:17:58 GMT 10
G'day Dennis, Looks like you have been very busy since Canungra  ;D  As usual you have put a lot of thought into your restoration. Looking forward to seeing it all come to-gether and on another outing. Cheers Bob and Jacqui  |
|
Deleted
Deleted Member
Posts: 0
|
Post by Deleted on Mar 3, 2013 20:01:35 GMT 10
Gidday Denis, looks like she will come up a treat.
Can't wait to see her in the flesh again to see the difference you have made.
Keep it coming.
Banno
|
|
JBJ
In Training
 
Posts: 12
|
Post by JBJ on Mar 19, 2013 19:59:37 GMT 10
Hi,
I'v been sanding the exterior back to gelcat, to remove god knows what was painted on it.
I'm finding lots of crazing in the gelcoat in spots that were obviously repaired.
I dont want to spend any more than neccessary on the exterior, & was thinking of just laying a good coat of 2 pack hifill on, then 2 pack final coat.
I have found this van very flimsy, & built about as light as possible. The thickness of the glass is minimal, & the hatch doesnt have external gel coat. The roof is very poor quality, & the walls arent much better.
However, its what I have to work with, & I will make it look OK( somehow)
Does anyone know of a flexible paint additive that can be painted over crazed gel coat, then a gloss coat laid over??
I hate the way these two forums split vans like the Olympics in the middle of their production, so I cant post about it on the vintage van forum where there are a lot more members.
I know I'm a whinging old fart, but why separate a van's production run into 2 groups because of a couple of years
JBJ
|
|
Deleted
Deleted Member
Posts: 0
|
Post by Deleted on Mar 20, 2013 6:18:47 GMT 10
Gidday Denis, the reason for the split is all in the people in control of the other forum.
They keep saying they are not a club, but they have more rules than a club.
If someone dares to speak out they are ostracised for it.
The powers to be can change their attitude any day they want to.
Too many inflexible people with inflexible attitudes make for a painful experience.
Don't forget you were one of them.
What goes around comes around.
Funny that.
Banno
|
|
JBJ
In Training
 
Posts: 12
|
Post by JBJ on Mar 20, 2013 14:48:59 GMT 10
Hi,
Thanks to those that replied positively by PM, especially Seeshell with her info about Norglass products.
I have found a local supplier, & phone the technical people at Norglass. After a discussion, I am confident their products should enable me to get a good finish.
Again thanks for those that responded positively.
JBJ
|
|
|
|
Post by bobt on Mar 20, 2013 19:25:25 GMT 10
gidday JBJ
Nice to hear from you on this side of the fence.
Take a look into atog's page, he painted his and it has stood the test of time.
In fact if the fibreglass wizz pops up I am sure he will be happy to share some of his experiences with his. It turned out good.
Tell me what are you going to tow this one with.
bobt
|
|
JBJ
In Training
 
Posts: 12
|
Post by JBJ on Mar 20, 2013 20:26:25 GMT 10
Hi Bobt, I have been told that this is to be towed by a car with windows & a heater, if I want Sue to travel with me.     So I guess our VS Statesman will be the initial tow car. If the van works out as good as we hope, who knows, we might get rid of Deejay & stick with the smaller one. Its all up in the air until I get it finished & use it a few times. Then I can go back to my Dodge rebuild, & finish it off before I get too old to work on it. ;D ;D ;D ;D Its good to have several choices. JBJ |
|
|
|
Post by bobt on Apr 2, 2013 16:06:59 GMT 10
Hey JBJ Man you need to contemplate retirement so you can have more time to spend on the projects. A VS.. OK personally I preferred that Val you had. The dodge has windows  But I do understand, it is a familiar cry in my household. I haven't seen or heard of the hot rod for awhile, I assume it is still motoring along nicely. Age... well me little mate around the corner might object to your statement, he is in his mid 70's and has just finished restoring a MG J2 now I need him to go fix his broken race cars so I can have a drive. Then there is my motor mechanic, I use him to fix broken beyond my capability things on my Austin 7. He is well booked up for work. He does the work so he can fund his racing and flying. He is 89.. Most competitive in the hill climbs. So let us know when your old..  Hope the weather is not holding you up Bobt |
|
JBJ
In Training
 
Posts: 12
|
Post by JBJ on Apr 3, 2013 20:58:18 GMT 10
Hi bob,
Things have been up & down for me for a while, with health & lack of work (read income), then hitting 65 & the pension while trying to work part time, & I guessI've let it beat me a bit. Time will resolve things I hope. But I'm not complaining, I'm still alive & pretty good
I still have the hotrod , & occassionly use it, mainly to tow Deejay with. We will be using it on the Canetoad run, but I need to finish a side curtain before then. Other than a bit of discomfort driving it, its a great tow vehicle. Plenty of grunt, 5 speeds, & a real strong diff & towbar setup. Shame about fuel economy, but its on par with most big 4 wd's as far as I know in consumption.
The old Valiant was OK, but it was geared badly, & with the 245 manual you had to change back to second a lot more often than I liked. But the young guy that bought it loves it.
My Statesman is so comfortable to use, it is so easy to leave my hotrod in its storage shed with Deejay.
Hopefully we will be getting out a bit more in the near future, going back to travelling, with a few trips down south & out west planned for later in the year
Hopefully catch up on the road again.
JBJ
|
|
|
|
Post by bobt on Apr 7, 2013 17:14:09 GMT 10
Hey JBJ Now pull ya socks up be greatful for the air you breath and that you can actually get out and about. 65 is a really good milestone. There is never enough Money to do all the things we want to do. But you could still chase down a bit of casual work, at least now you have some money coming in. And just think of all those discounts you get. Maybe ya need to chat to that kiwi fella for some tips. Go hook DeeJay on the back of that there Statesman slip out and go visit ya kids. More the Granddies nothing better then a dose of them to make ya feel good. We will be on the road again later in the year. I am sure we will come across you again in our travels. This time I will not get dragged away to set the TV up so SWMBO can watch 'days of our lives'  bobt |
|
|
|
Post by atouchofglass on Apr 7, 2013 19:24:04 GMT 10
Hey Dennis
Chin up ol' fella, all good things take time.
Your Olympic will come up just fine by the looks of your work on the Sunliner.
I used Two Pack on my Olympic and after five years? it still is in decent shape. The top is now matt finish but apart from that it is good.
Cheers and all the best with the build
Atog
|
|
JBJ
In Training
 
Posts: 12
|
Post by JBJ on Apr 20, 2013 20:18:43 GMT 10
Hi, Some progress shots & comments. I made a slatted timber base using KD tassie oak. 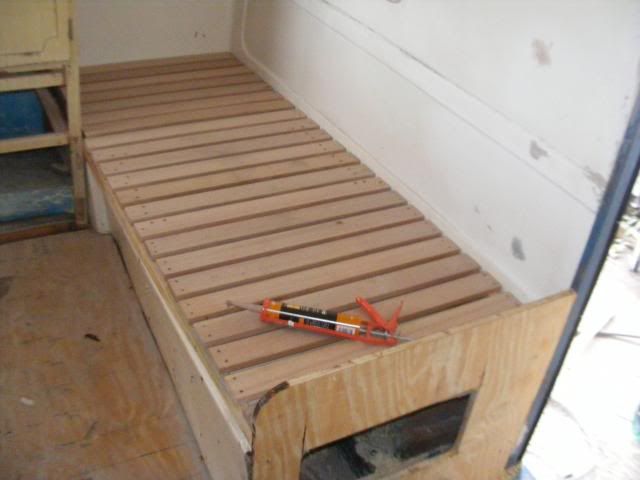 I then made a storage cupboard under the front of the bed, to hold the annex canopy & tools, accessible easily with door open. 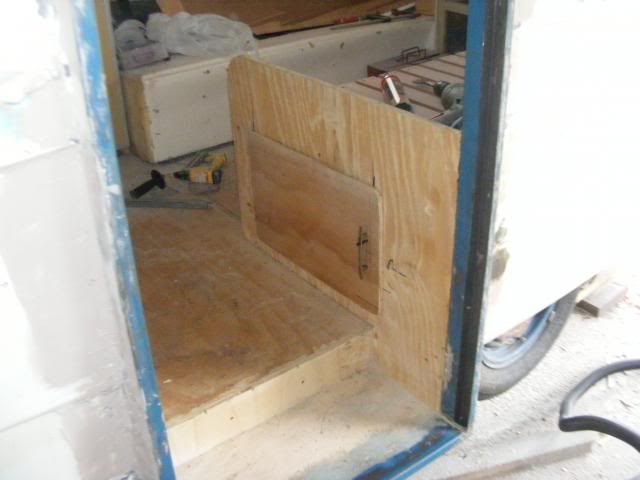 I made a cupboard next to the fridge, & fitted a roll out pantry from Camec. I modified it a bit to be taller with more storage. 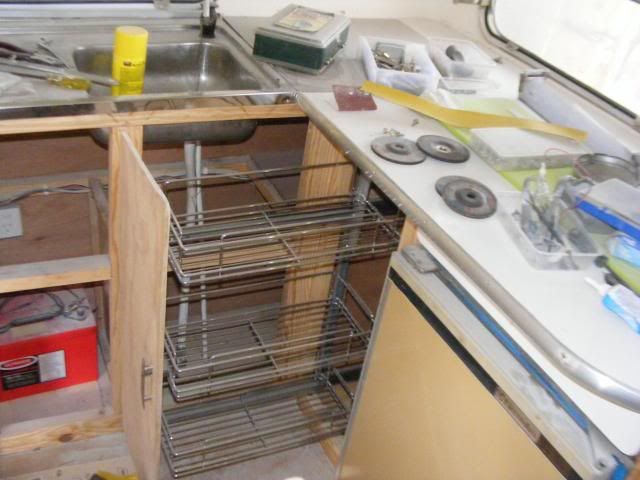 A view of the new door & frame, after it was glued & screwed into place. Its almost the same as original in size & construction, but just a lot better with security screen, decent locks , etc. I also made sure when I bought it on Ebay ( $300) that it hinged from the front, which is how I believe doors should hinge. That way if they come open the wind wont tear them off. 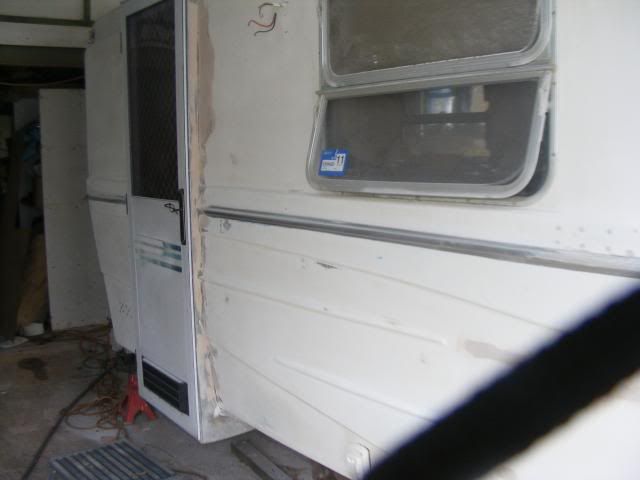 I changed the mongrelised hatch mechanisms that were fitted badly. Now it works much simpler. Up looks like this 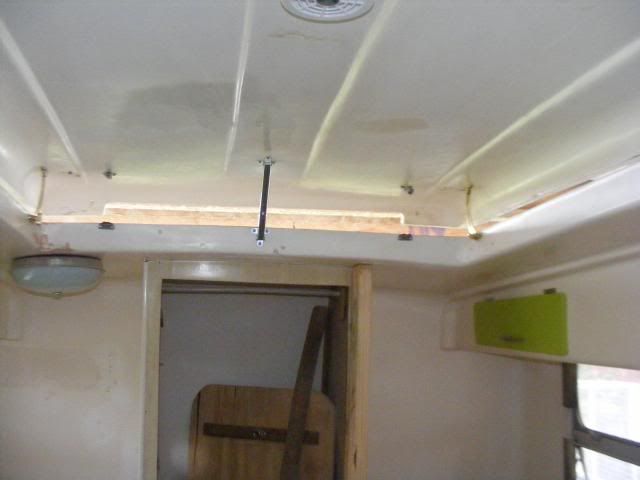 Down like this 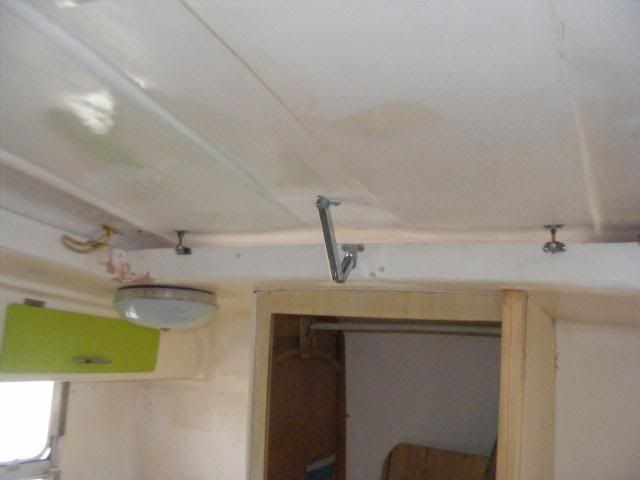 These little vans had an enormous hatch 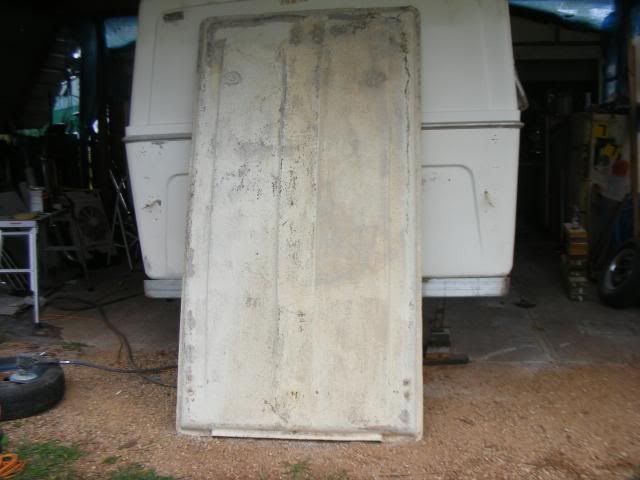 They had the gel coat on the inside, & raw fibreglass outside 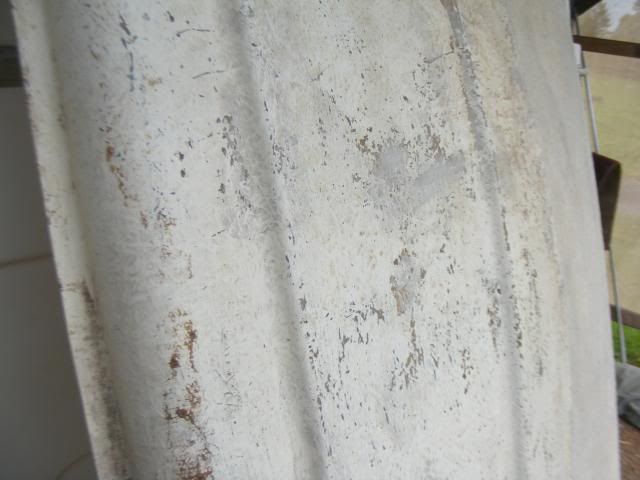 I decided to instal a solar fan in the centre of the hatch, & spray the outside with sound deadener in white, to cover the rough glass. 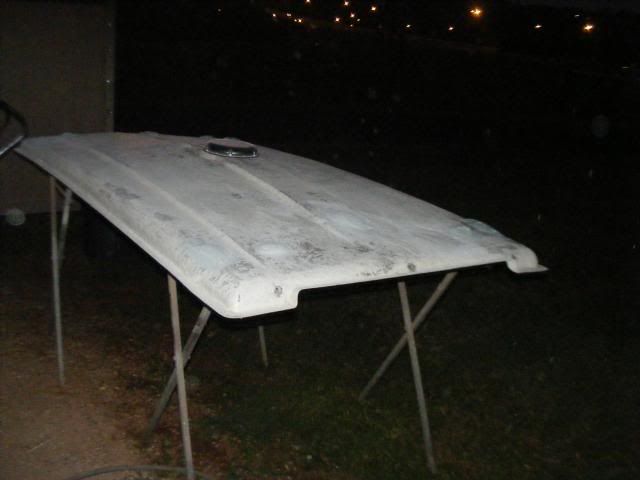 I've now almost finished sanding the crappy paint off the outside, & about 1/3 of the inside. I've bought Norglass primer, & I'm going to try it with a roller finish when I get back from the Toads & Roaches Vintage Van Tour that starts next week. II've started pulling the windows to rebuild them, but that also has to wait. But its coming along pretty well I reckon. JBJ |
|
|
|
Post by ForumMod on Apr 21, 2013 18:31:12 GMT 10
G'day JBJ, That is indeed quite an enormous hatch for such a little van. You must surely get some decent airflow during the hotter days, but how useful is the larger size when the winds are gusty or the rain is heavy? Would the larger size be a pain in those conditions, or is it no big deal? I like what you've done on the storage side of things. It's amazing how you can put every little nook and cranny into use in these vans, ay?! It sure is taking shape, and looking pretty neat so far!   cheers, Al. |
|
JBJ
In Training
 
Posts: 12
|
Post by JBJ on Apr 22, 2013 7:09:15 GMT 10
Hi Al,
We've never used the van yet, so no idea whether the hatch will be much different than a smaller one is. It will have flyscreen fitted all around between the hatch & the van roof, similar to what I have seen on other olympics, & maybe that may restrict the airflow a little??
One thing I know is tall people dont fit in it very well, but as I'm a shorter person it suits me. My friend who is well over 6 feet, can see out the top over the van with the hatch off, & can only stand where the hatch should be. Maybe thats why they built it so big??
JBJ
|
|
JBJ
In Training
 
Posts: 12
|
Post by JBJ on May 21, 2013 18:17:12 GMT 10
Hi All, Having difficulties achieving as much as I want to on this van. What with going on caravan trips, ocean cruises, & just relaxing as best I can, I find time to work on projects is becoming harder to find. Al, the van is not very high inside, so the big hatch works like a pop top. HOWEVER, I have been madly sanding the crappy paint forever it seems. I have never come across so many different types & shades of "white" paint as this van had. I have burned out 3 palm sanders so far on it. This is what I have had to remove. It has required 60 grit paper to remove, to get back to gel coat & rough up for new paint. The darker bits are the unsanded areas 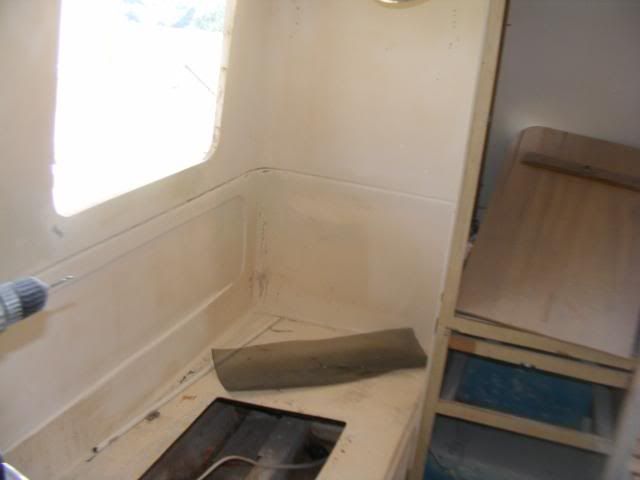 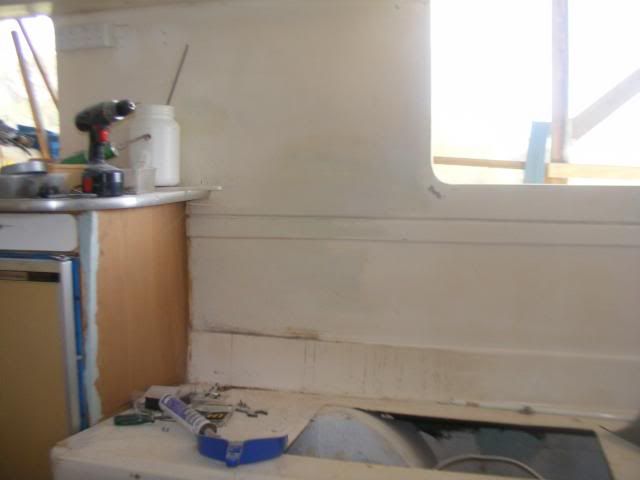 I have pretty well finished around the new door assembly & new kitchen cupboards, just waiting for primer 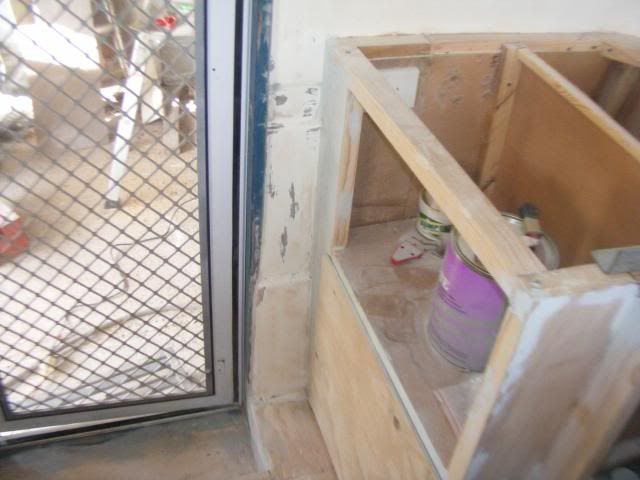 I sprayed the first undercoat under the hatch using Norglass, but (stupidly) didnt use their thinners. The paint didnt harden properly. So I have to recoat it. But I am impressed with the self levelling feature of their primer. It comes up a good looking semi gloss, & the Norglass Tech Guy told me that it will be OK to leave the primer as the final interior coat. No need to top coat. Hopefully I will get the interior finished & paint the whole van in the next month or so. I've sanded the aluminium strip on the van with 320 dry paper, then masked around it to prevent polish getting into sanded paint, then polished with Purple polish. The object of polishing at this stage is to prevent polishing compounds getting into paint before it is primed & painted. This is before polishing, after a sand back 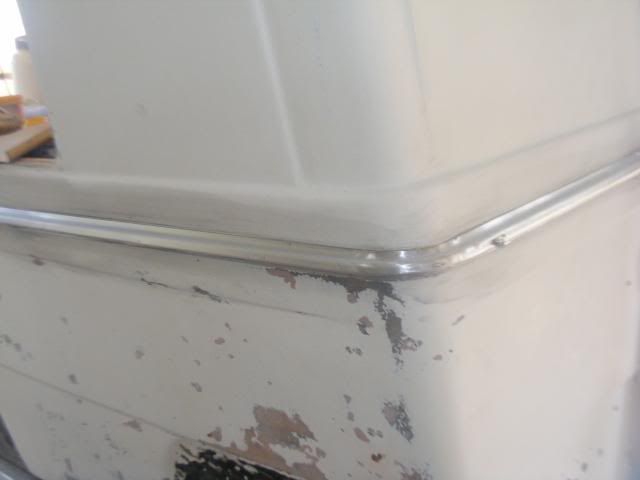 This is after polishing 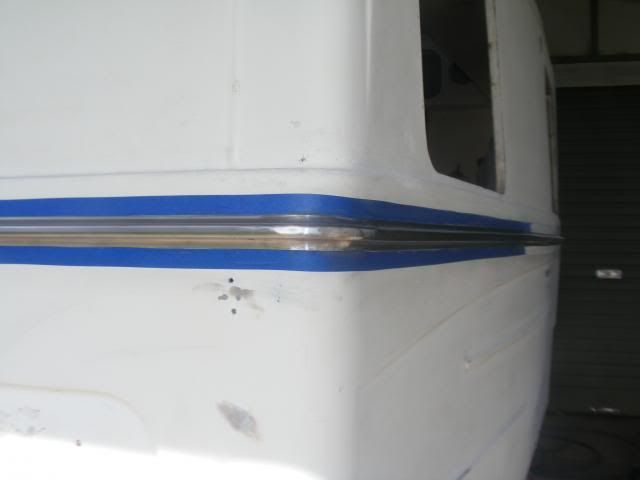 JBJ |
|
|
|
Post by bobt on May 21, 2013 21:40:34 GMT 10
Hey JBJ
It caint be all work without a little bit of play. It is looking good, keep us posted
bobt
|
|
JBJ
In Training
 
Posts: 12
|
Post by JBJ on Jun 8, 2013 19:07:37 GMT 10
Hi All, Well lots been happening, mostly slow methodical progress. I've got the interior rebuild pretty well finished ready for paint. Finished the bed on the RHS, & the cupboard at the rear. 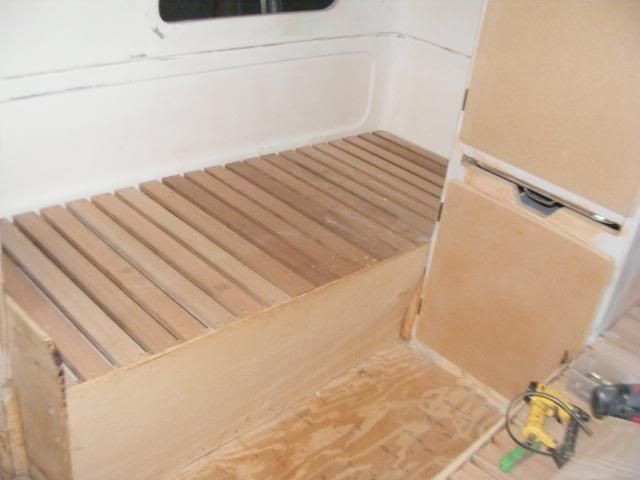 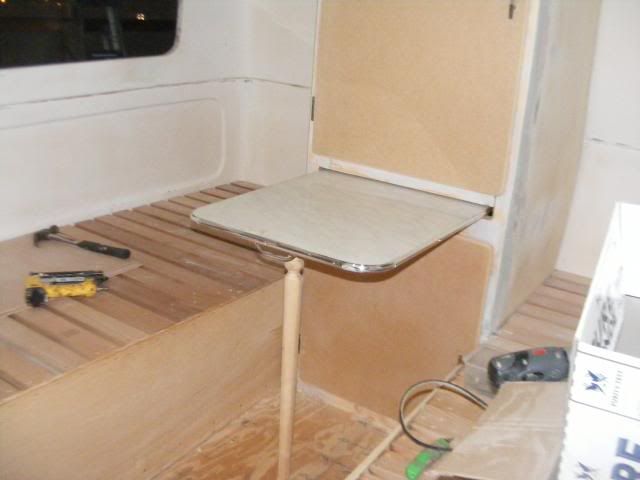 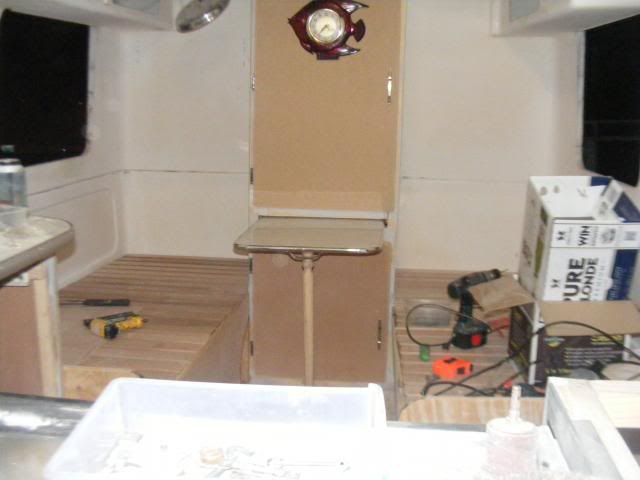 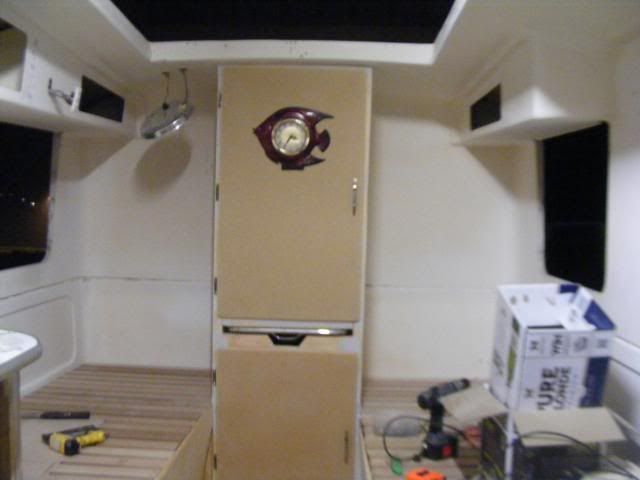 This van would appear to be pretty rare. Boblor mentioned that knows of 5 style leaders this size, & this is the only one with this internal layout. Plus its the only Olympic he knows of with 13" Falcon 4 stud wheels. So I guess its the only one left with the rear robe between the beds, with a slide out dining table. Like the rest of the van, these fittings were totaly past use by date, & had been poorly reworked in the past. So I remade it all. Decided to eliminate hanging space, as there isnt a lot of storage in this van.I went to Bunnings & found some slide out drawers in mesh, & a frame assembly. They fitted perfectly.It gave space to hang the table leg, with further storage for things like trays behind the leg. 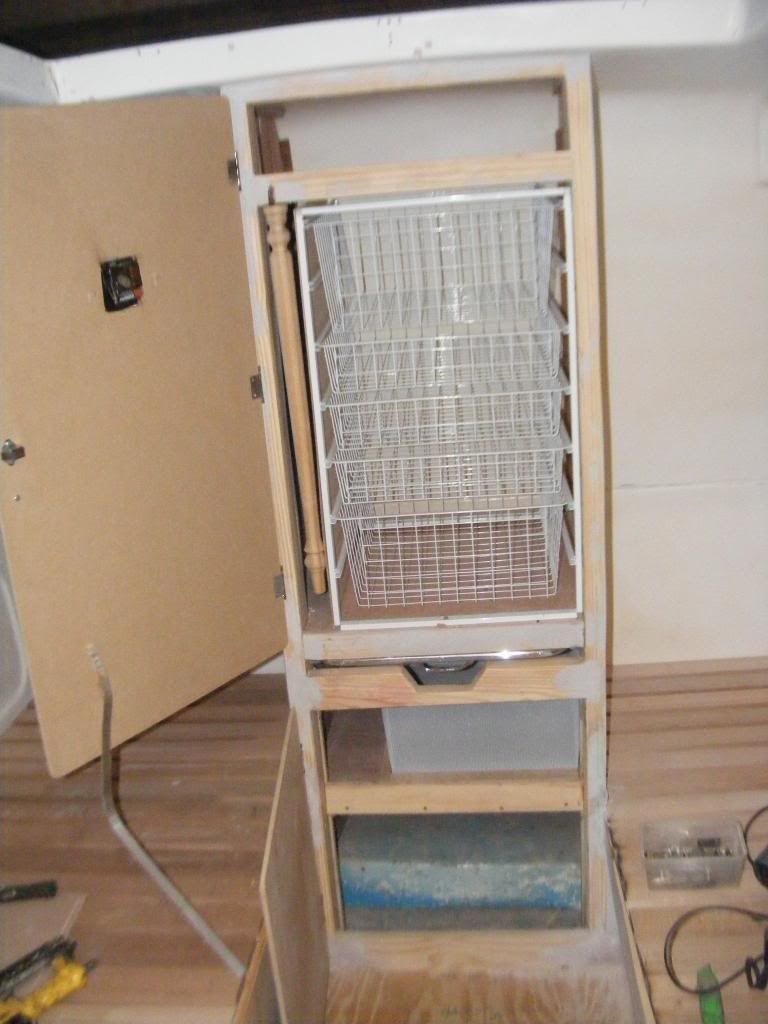 I had made a lot of the new cupboards doors using ply, but had found they warped over time after painting them. So I remade all the doors using 9mm MDF. 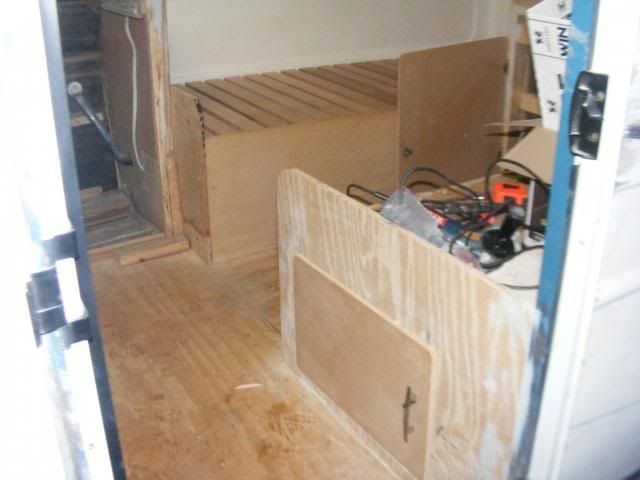 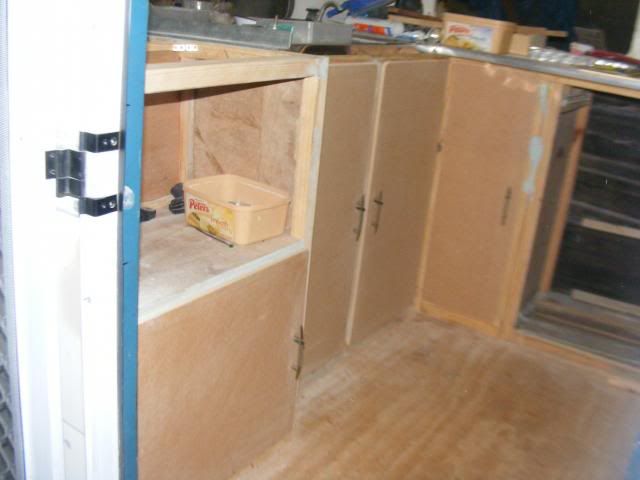 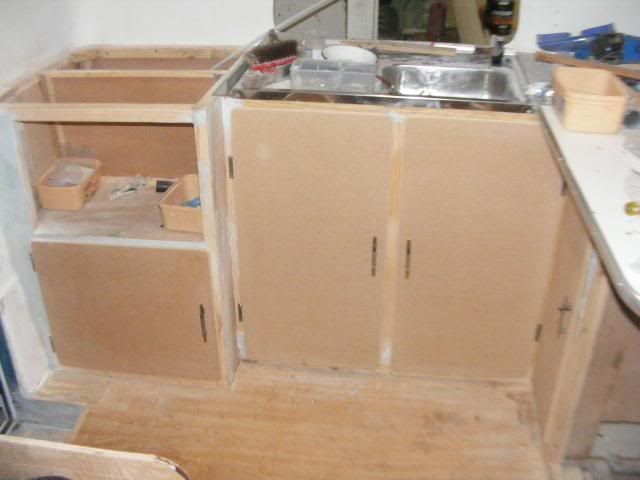 They are a lot better, & hopefully wont warp. I ended up with a spare hinge, & handle. So didnt need new ones after all. Recently on Vintage Van Forum, a clock was offered as give away. I was lucky enough to get it, & we love it. It is perfect in our eyes.Suits the age of the van. So now its still got a bit of puttying & sanding to go, then paint & re assemble. I am happy with it, even though its more a rebuild than a restoration. What the hell, as long its useable & looks OK, that will do us. JBJ |
|
|
|
Post by murray on Jun 9, 2013 10:04:16 GMT 10
Excellent rebuild.
You have certainly put a lot of thought into it.
Have re-looked through the whole thread
Cheers
|
|
|
|
Post by ForumMod on Jun 9, 2013 18:34:52 GMT 10
G'day JBJ, I agree with murray...it's quite a well-thought-out plan, with lots of storage space included. Interesting comment about the plywood warping. Do you think that's a result of the quality of the plywood available today, or is it due to some other factor?
Great idea with the pull-out table at the rear. Was that how it was originally, or is that an idea you came up with?
Overall the van is looking fantastic!
cheers,
Al.
|
|
JBJ
In Training
 
Posts: 12
|
Post by JBJ on Jun 9, 2013 19:20:42 GMT 10
Hi Al,
What I've rebuilt is pretty much in the same place as it was from the factory, albeit constructed using timber instead of the original very lightweight timber/ply/glass construction.The fibreglass was very out of shape in the bed areas, & the van had sagged over the (very) lightweight chassis. The front floor had dropped, & the cupboards were totally stuffed.
Everything is pretty much in the same locations.
With the ply bowing, I find the ply available varies very much in construction & type of timbers, at least out here in the country areas where I buy it. I have primed both sides as closely in time as I can, then painted in a similar manner. Within days it will warp. But I believe I was wrong trying to make doors from a single skin of ply. In my previous van rebuilds, I had a carpenter build a timber frame for the door, then sheeted the frame on the door. Thats more like the older kitchens were built. But my skills dont run to making door frames accurately, so I did what I could. Hence the change to MDF. Hopefully it will stay straight after painting.
The cupboard between the beds & the slide out table were in it when I bought it, but were pretty well stuffed by poor workmanship when things were altered /repaired during its life.
I used timber for the rebuild because I find it easier to work with in joinery work than trying to build in fibreglass. A bit wierd because if you asked me a few years ago, I would have told you I hate working with timber. But when I started rebuilding vintage vans I bought some basic woodworking tools, & found its not that much different than rebuilding a car, or building a hot rod.
I just want to get it finished so we can use it, & then I can get back onto finishing off my Dodge rebuild. I have to look sideways when I walk past it every day.
JBJ
|
|
|
|
Post by bobt on Jun 18, 2013 21:34:28 GMT 10
Gidday jbj
Your work looks good. I think the mdf will be fine for the cupboards doors, it will be interesting to see how it fairs over time. I am sure you will share. The slid Table is a neat idea, never seen one in anything but moderns. I often wonder about hanging space in caravans, in a lot of cases it is a waste of space, the wire baskets will give you a lot more storage.
Look forward to seeing the finished product.
bobt
|
|
|
|
Post by Julie McMillan on Aug 16, 2015 17:14:42 GMT 10
Hi jbj,
I've just looked through all of your posts because I have a 1978 Olympic style leader caravan that I bought about 5 years ago so was interested to see if there were any more around. Yours looks amazing. I have a three birth with the table and two chairs just inside the door where you kitchen is that can be made into a single bed. The double bed is at the end of the van where your two single beds are and I have a window at the back of the van. I've cleaned it up a bit and put new flooring, curtains and painted the cupboards but thats about it. I would love to do something like you have done with yours. Do you know of anyone in Victoria that does that sort of thing? It's interesting that you said that you bought yours from Canungra in Queensland because my Mum lives there. Do you live very near to Canungra? Your last post was in 2013 so I imagine that you have finished the project by now. Would you be able to post some more photos of the van now? I really enjoyed seeing the little van being brought back to life. Regards, Julie.
|
|




 ;D
;D 

