|
|
Post by ForumMod on Apr 17, 2013 20:53:52 GMT 10
G'day vomd, If you are not already aware of it, the CaravansPlus website has some really useful information about "Caravan Articles, FAQ & Guides" in one of their website sections. Click here to take you there, and scroll down the headings - about halfway down is the "Caravan Plumbing" section. It mightn't answer every question you've got, but it will hopefully give you some pointers. cheers, Al. |
|
|
|
Post by viscountofmydomain on Apr 17, 2013 22:25:02 GMT 10
Hi Al, I hadn't found that article and thank you for the link. it looks like there is loads of info in there, lots of food for thought.
Cheers
Stu
|
|
|
|
Post by viscountofmydomain on Jul 1, 2013 14:10:47 GMT 10
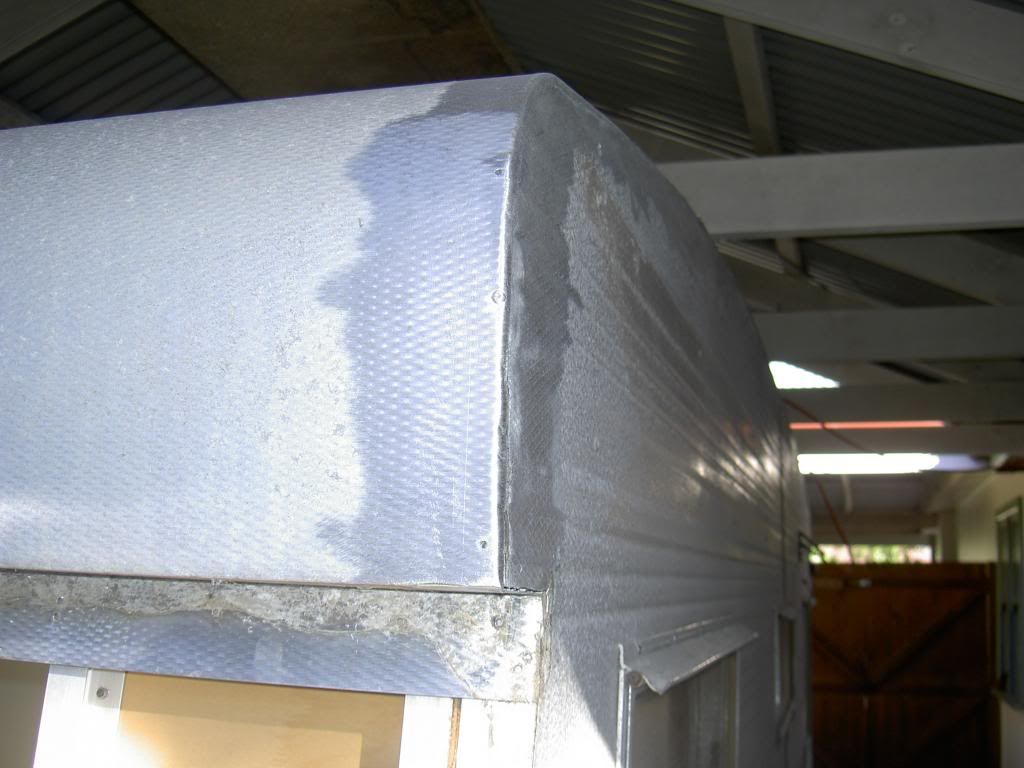
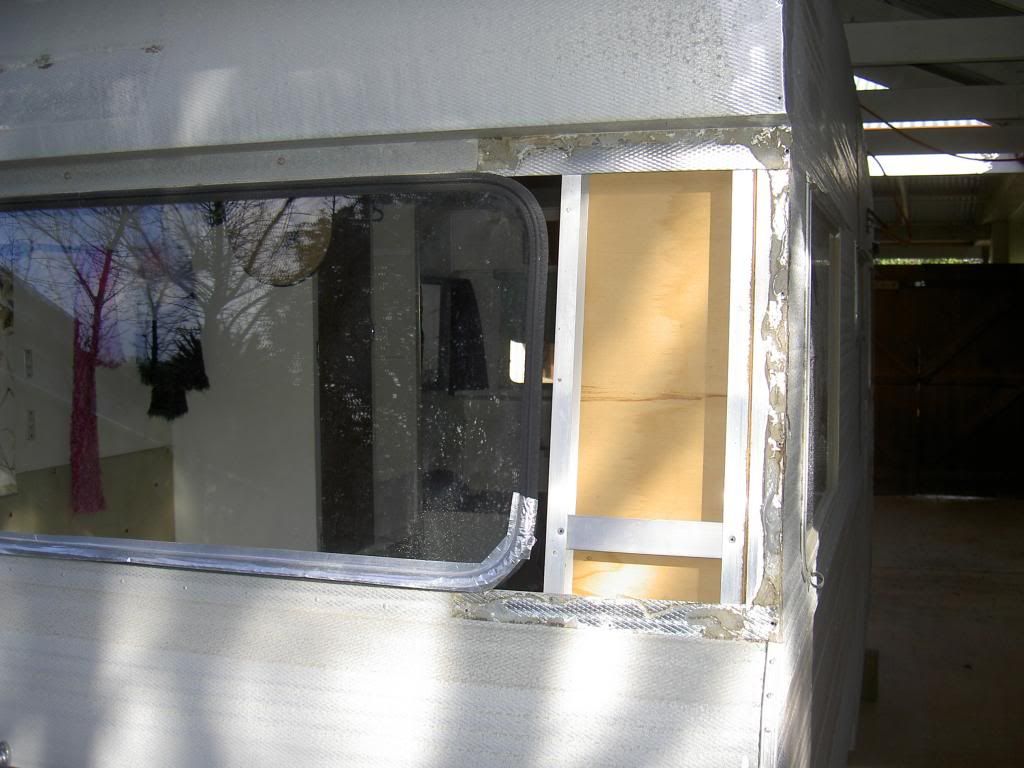
I have managed to negotiate some time to have the van off the road so I can repair the roof. I only have 1 month until I have to do some swift talking. My work area is our pagola on the side of our house, knowing that the roof aluminium is coming off and I want all the rivet hole to still line up when it goes back on I have taken the wheels off and dropped the van down onto some wooden beams. It also gives me some extra head room.  First job was to remove the side flashing strips and clean up all the external sealants. I used a scotch brite type disk on my drill, it did a great job of removing the sealant/paint and corrosion but they are a quick way of turning $18 into dust.  Getting the first panel off was a milestone  Then the rear window came out. I had been trying to find an example of the window seal before starting this job but I couldn't, so I now have only a few weeks. It looks like a straight forward H seal.  And very soon I have half a roof on the ground.  Its an interesting comparison to see the original shine on the parts of the panels that have been covered compared to the parts that have been exposed for 40 odd years. I could imagine it would have been a very smart van back in its hayday.  The insulation is very thin so I will replace it with a more modern insulation polystyrene product.  I still have a third of the roof to remove and loads of sealant removal. So far the joints have come apart way easier than i thought they would, a good indication that they had dried and gone hard. |
|
|
|
Post by glennv on Jul 1, 2013 16:55:57 GMT 10
Hi vomd ,
Can you put up some images of the scotch brite disk you used ?
I recently purchased a gritted nylon thread wheel for my drill which was great at gently removing old paint ... But was still a little too abrasive ...
Funnily enough ... It would touch silicone sealant ... I guess the silicone just flexed ...
Glenn.
|
|
|
|
Post by viscountofmydomain on Jul 1, 2013 20:38:11 GMT 10
Hi Glenn I hear what your saying, the wheel that I used is a little too abrasive as it leaves small swirls on the aluminium. As you have found any less and it takes too long to clear the old sealants away. I will go over the entire outside surface before putting the sheets back on the van In the picture below the red nylon wheel was too soft, the small wheel is the one I used (I've been through 3 of them so far) that one started nearly the same size as the larger wheel. the larger wheel was too soft to effectively remove the sealant but will hopefully do a good job cleaning away 40 years of corrosion without eating into the aluminium.  Tonight I came across the first hiccup, removing the short piece of trim beside the front window several screw heads broke off. It will be a careful job drilling them out. That's tomorrow nights job.  |
|
|
|
Post by viscountofmydomain on Jul 1, 2013 21:03:45 GMT 10
Here are some pics for anyone with a van like ours with a fixed rear window. The seal profile  ]  |
|
|
|
Post by viscountofmydomain on Sept 23, 2013 20:59:51 GMT 10
I'm now 2 1/2 months into a 1 month repair job. Serious explaining of myself has been done. And the van is about to go back together.
Here's where I'm up to:
The clean-up of the old sealants is finished, electrical cabling has been run across the roof space to supply a 240v outlet on the annex side and an internal power point on the rear wall of the wardrobe for a tv.
When I got the roof sheeting off I found there was a 35mm cavity with a thin 10mm layer of polystyrene for insulation. Wanting to upgrade the insulation I was lucky enough to come across free polystyrene sheeting to add to what was there, and I also used this Polyair insulation which is 2 layers of silver lining sandwiching a heavy duty bubble wrap. Insulation in place Insulation in place    Roof sheeting clamped back in place without sealant as a test run rear window in place with new window seal. Roof sheeting clamped back in place without sealant as a test run rear window in place with new window seal.  Now for a decision on the much debated topic of whether to use Mastic, polyurethane or silicon sealants Now for a decision on the much debated topic of whether to use Mastic, polyurethane or silicon sealants
more soon
|
|
|
|
Post by ForumMod on Sept 23, 2013 22:50:28 GMT 10
G'day vomd, Only 2 1/2 months?? You need to stop rushing the job!  It's not a fair dinkum restoration unless a 1 month job takes you at least 6 months to finish!! Where did you end up getting the new rubber for the rear window from? cheers, Al. |
|
|
|
Post by viscountofmydomain on Sept 24, 2013 8:36:54 GMT 10
Thanks Al, I probably can't class it as a fair dinkum resto because I didn't take the sides off, I would have love to have been able to insulate the sides also but it was too big a job for the time frame. I got the rubber seal from Spectrum Rubber, www.spectrumrubber.com.au/product-catalogue, they have a huge catalogue of seal profiles. You order it by the meter, cost somewhere around $70 and I got 1 meter more than I needed for safety. I'm pulling my hair out trying to decide on whether to seal the roof panels down with a polyurethane sealant which will definitely seal and stay sealed and be stucturally strong but I'll never be able to take a panel off for a repair etc. Or to use a butyl mastic type that was used originally and have the possibility that it may go hard in a few years and need redoing, provides no structural strength (held with rivets) but will allow for a repair to be carried out if needed. Do you have any thoughts Al? |
|
|
|
Post by ForumMod on Sept 24, 2013 19:55:14 GMT 10
In the Millard poptop I restored, there were two different sealants used originally: a cream coloured sealant used under the aluminium edge cover mouldings, and under some of the other fittings, and which had gone hard and brittle after 35 years... and a blue/grey coloured butyl mastic that was used around the door frame and the window frames, and which was still soft and pliable and easily removed after 35 years. All the damage in the poptop was from water that had leaked into the van through the brittle cream sealant, and no damage at all where the butyl mastic was used. From that experience, I've leaned towards using the mastic sealants for sealing caravans. There's no doubt that some of the polyurethane sealants these days are amazing, but the fact that they cure to a permanent bond worries me with a caravan that rocks and rolls around the highway and is likely at some stage to need repairs and replacement parts. The aluminium cladding on these vans is approximately 0.4mm thick, and you can fairly easily tear the sheeting by hand (it's a bit like holding a newspaper up with one hand and tearing it in half with the other). If you seal with a permanent bond, and have to try and remove the cladding later, I just have a feeling it would be torn to shreds in the process. Maybe I'm wrong, but it's a gut feel that I have. I guess one of the advantages of having the plain aluminium cladding on the van is that if you do have to try and grind a permanent sealant away in the future, it's not like you have to try and be careful of the paintwork on the van like you would with a white acrylic cladding. I've never worked on a van like yours, so it's difficult for me to say definitely what I would do to seal it. I've used the Selleys Butyl Mastic on our current 1992 Windsor van to seal up various areas, and it seems to be holding well after 12 months, but whether it is still holding well in another 12 years might be a different story. At $22 per cartridge, I would hope it does the job for quite a while. If you want to read an opinion from the professionals, have a read of the Hardings website info about resealing caravans. They've been doing this sort of thing for a good many years, so they must know what works and what doesn't. cheers, Al. |
|
|
|
Post by viscountofmydomain on Sept 24, 2013 23:13:46 GMT 10
Hi Al,
Thanks for your thoughts, they are along a similar line to mine. I have asked many questions of various caravan repair specialists and sealant reps regarding the appropriate sealant to use. I have been advised to use polyurethane sealants (Bostik Seal N Flex 1) by a leading van repair place and I believe it is probably one of the best products for ensuring the van will never leak again as it has a spec of 100% flexibility and sticks like the proverbial to a blanket. But I have this nagging feeling that I'm not comfortable with never being able to get the panels apart if repairs are needed in the future.
But when considering the use of Mastic what I am not happy about is the fact that even the sellys website only tout 5 years life for their mastic. I hope they like to undersell and over deliver when describing their products capability.
Thank you for the link, it appears they are using silicone sealants, which is another product that is recommended by many repairers.
I was looking at the Selleys Butyl Mastic just today in Bunnings and noticed it was as expensive as you mention. I will need to use this on the windows regardless of my decision for the roof panels. This will also include the rear roof panel as from what I can see I need to remove it when removing the rear fixed window pane.
I see that there are various types of Mastic my assumption is that I need a skin forming type that remains soft under the skin.
Cheers
Stu
|
|