|
|
Post by viscountofmydomain on Apr 12, 2012 21:09:59 GMT 10
Hi Cameron, great work, you'll end up with a fantastic van. I'm watching keenly to see how your sealing goes, its a job I will need to undertake on our van.
Stuart
|
|
Deleted
Deleted Member
Posts: 0
|
Post by Deleted on Apr 15, 2012 20:21:21 GMT 10
So now that the walls have been re riveted and sealed, I can get back to the windows. After removing the front window and stripping down to individual pieces you can see where the seal has failed and water penetration has occurred which just turns the chipboard to weetbix  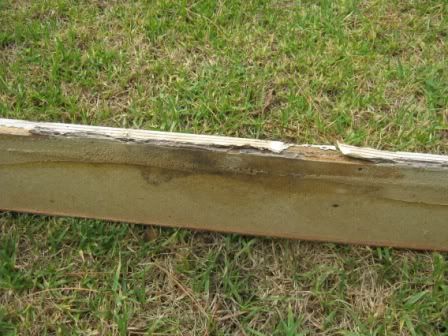 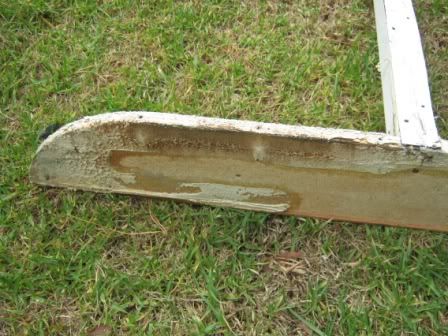  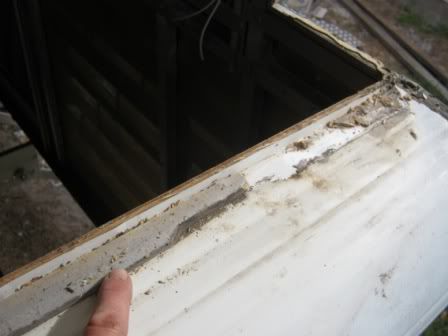 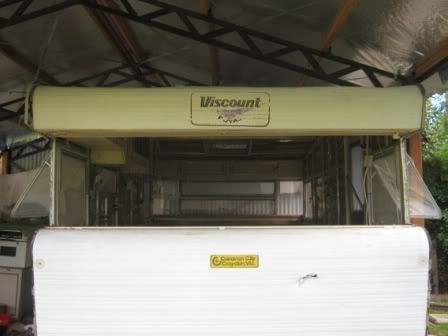 So I decided to rebuild the window in the same fashion but not use chipboard ! So using 12mm ply I cut out and shaped the top and bottom plates for the window, using the relavent curved corner windows for the curve template. The factory timber uprights (between the outside curved window and the middle window) were solid so I reused these. Again using sikaflex I screwed the three windows together via the wooden uprights and then screwed the top and bottom plates to all three windows. This way the top and bottom plates would inherently be in the correct position What I finished with was a really strong one piece window frame. I then “simply” lifted and positioned the window in place as one unit. The window really supports the lower front panel so really important to get a good seal at this point. I screwed through the ply into the top cupboard timber frame and also through the bottom plate to the timber work on the bottom ledge. Obviously Sikaflex went in everywhere (gotta love this stuff)  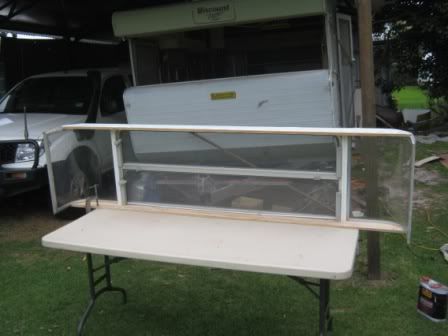 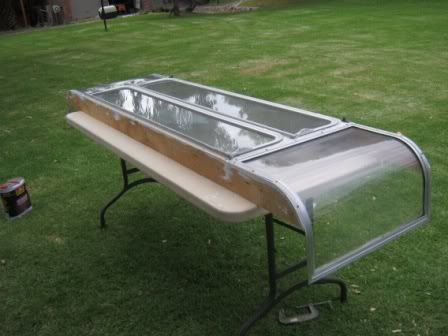 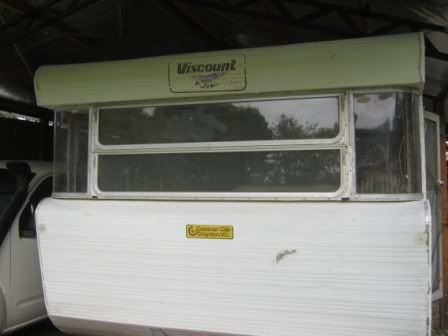 |
|
|
|
Post by millard1399 on Apr 15, 2012 21:14:40 GMT 10
G'day camich, Great job!!   There wouldn't be too many Viscounts out there that don't have the same sort of water damage, so your pictures will be a great help to other people down the track. ;D I like the way you are paying attention to all the important details relating to sealing. This van will be one of the most watertight vans around when it's finished. Good on you! ;D cheers, Al. |
|
Deleted
Deleted Member
Posts: 0
|
Post by Deleted on Apr 17, 2012 21:37:23 GMT 10
The back window was exactly the same but a previous owner had made up a shelf to hide the SUBSTANTIAL water damage that had occurred. 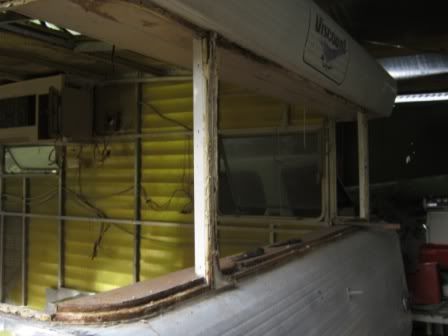   In fact the damage was so bad that the aluminum cladding under the bottom plate had corroded through just compounding the problem  So a little more work with the rear window was needed as I had to make a new aluminum tray, but in the end as per the front window, I again created a one piece window and “simply” lifted it into place, positioned sealed and screwed. Ah we're getting there slowly but shorly  |
|
Deleted
Deleted Member
Posts: 0
|
Post by Deleted on Apr 21, 2012 8:54:11 GMT 10
Also now have a floor and wheel arches. The floor is 12mm marine ply, screwed and sealed. Yes its a bit heavier than the original which looks about 8 or 10mm, but is nice and solid under foot . I painted underneath to seal the timber. I used Tech screws to screw the floor down just because it was easier , originally Viscount used Rivets Wheel arches are Galvanised premade jobs from Carac. I made up some inner Guards from some colourbond steel I had lying around, shaped and riveteted together and then riveted to the wall. The old plastic guards were broken and worn thin from road wear  So in summary, I have fully sealed the van, the front and back windows have been rebuilt and refitted, the floor is down, I have cleaned up the roof resealed and painted that and Drilled out every rivet in the body sealed and re revitted. mm Dosent seem that much has happened when you say it quickly !! Now its time for some panel beating and paint ;D ;D |
|
Deleted
Deleted Member
Posts: 0
|
Post by Deleted on Apr 21, 2012 10:40:02 GMT 10
may not seem much but you have done heaps, well done. Great to have it all sealed up.
Look forward to your next lot of photos.
|
|
Deleted
Deleted Member
Posts: 0
|
Post by Deleted on May 3, 2012 18:03:01 GMT 10
So with all the foundation work now completed its time for some paint I’ve painted a number of cars before and the norm is to strip the car right down and paint a shell. With this caravan however I have opted for a partial assembly, that is have all the windows installed and sealed properly first and then paint around them. Unlike a car the paint is a protective surface for the steel panels – ie to stop rust. With the caravan made from aluminum really the paint is purely cosmetic. Sikaflex is really messy stuff and its simply easier to have the windows in and sikaflexed wherever I need and then clean up mask up and paint over the top for a really neat finish. As long as you are careful with the masking, I use a Stanley knife to trim really neatly, the end result is nice and neat. So the paint I have used is ‘Agricultural Enamel’ with a bit of hardener in it. Enamel has excellent adhesion, ie it sticks to everything, requires only 10-15% thinning and so has really good thick coverage and will fill a lot of small scratches. Basically as the name suggests, it is enamel paint used to spray paint machinery. High gloss straight off the gun and with hardener added, it is tough as nails with excellent UV stability. Of course you could use acyclic but this requires cutting for gloss (a massive amount of work on a van) and clear coat, and also really needs a lot more preparation for a quality job – not worth the effort. So I dug out my panel beating dollies and smoothed out the bigger dents. I didn’t bother trying to get them all out. I filled a couple of dents with fiberglass but really didn’t go overboard. This van has been down plenty of dirt roads and the front is peppered with dents, (and lots of red dust underneath and in cavities) I may vinyl clad this later, but I intend to haul this van down just as many outback roads too so as I said I didn’t go overboard Using the orbital sander running off my compressor using 400 grit discs I gave the whole van surface a reasonable rub down, wiped the whole thing down with prepwash, masked it all up and sprayed the whole van. As I mentioned above enamel tends to stick wherever it lands on (as it stays wet for a lot longer than say acrylic) and so I wanted to paint the colour before white without yellow overspray on the white Also there was a lot less masking up if I masked the yellow for the white rather than the white for the yellow – if you get me. So I masked the stripe and painted yellow first, roughly matching the original colour. Then let this dry for a couple of days, masked the yellow totally up and sprayed the rest of the van in white. I sprayed two coats wet on wet (ie one straight after the other) for a good deep coverage and high gloss. It’s not perfect, it was never going to be, I just wanted to tidy the old girl up a bit. But I think the van came up looking pretty cool. 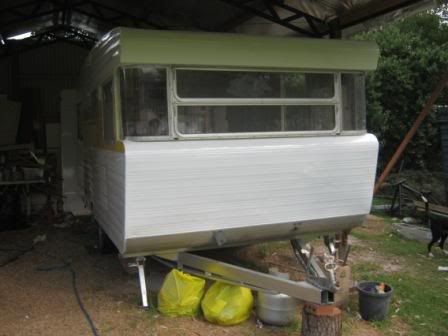  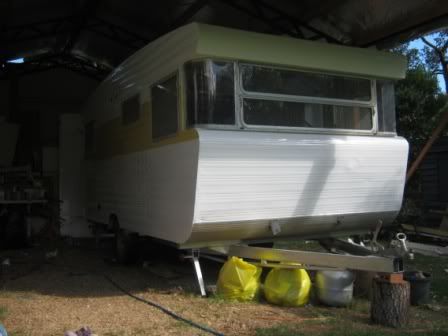 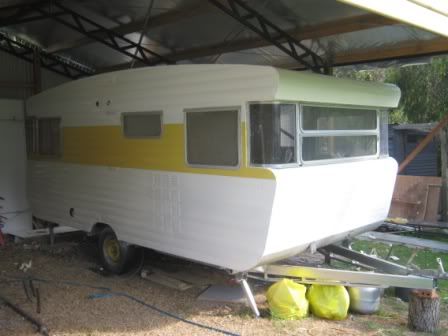   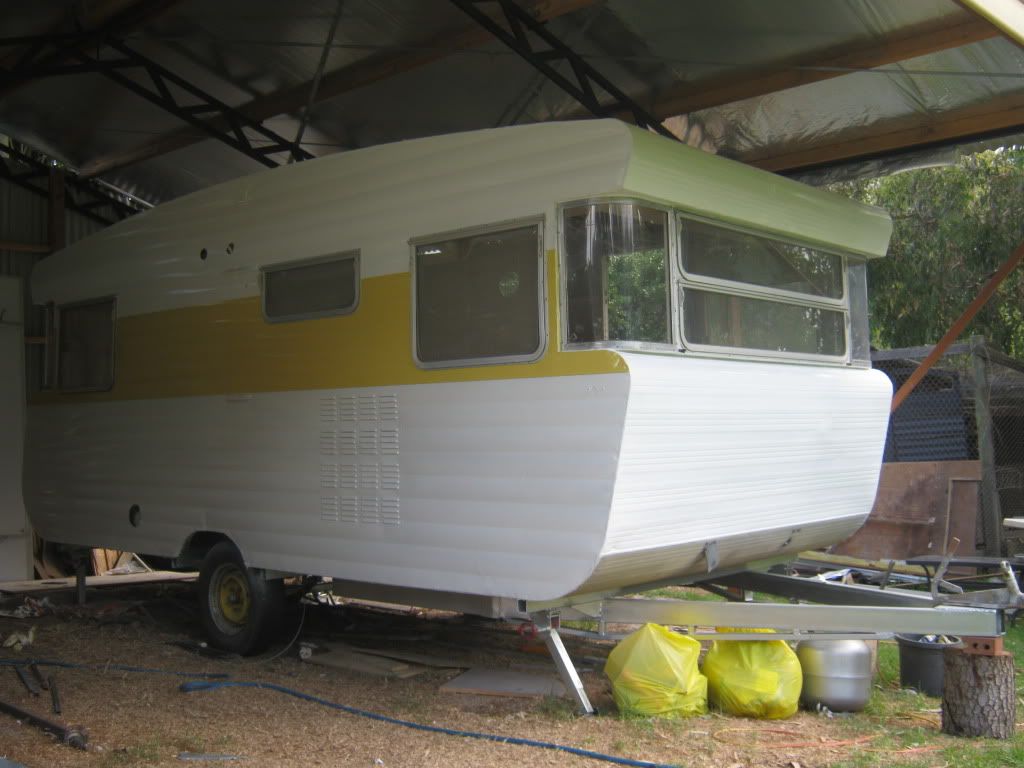 Next is assembly of all the aluminum trims top and bottom and then interior |
|
Deleted
Deleted Member
Posts: 0
|
Post by Deleted on May 3, 2012 22:06:32 GMT 10
Love it. Nothing like enamel for the 'shine'.
what is a good source for Ag enamel and hardener?
cheers
john k
|
|
Deleted
Deleted Member
Posts: 0
|
Post by Deleted on May 6, 2012 10:21:42 GMT 10
John
I bought the paint, hardener , reducer (thinners), and all the other extras like sanding discs, mixing cups etc etc from 'Paintmobile' in Dandenong Victoria, I would imagine any place that sells automotive paint can supply the paint.
Adding hardener to the enamel paint will aid to prevent the enamel from going chalky from the sun.
Importantly use a Isocyanate free hardener
cheers cameron
|
|
Deleted
Deleted Member
Posts: 0
|
Post by Deleted on May 6, 2012 20:55:37 GMT 10
Hi Camich,
Thanks.
Cheers
|
|
Deleted
Deleted Member
Posts: 0
|
Post by Deleted on May 17, 2012 11:08:27 GMT 10
Well done Camec, we are just one step behind you, we are about to fit the rear window this weekend. Same plan make it up and fit it in one. Front one looks a treat so can't wait to get the rear one in too.  Then for the door!  |
|
Deleted
Deleted Member
Posts: 0
|
Post by Deleted on May 18, 2012 22:21:39 GMT 10
its great to see someone else doing the same as us! The sense of achievement you get when you put these windows back in is amazing, I keep looking at ours and thinking......wow how good does that look! I am quite sure you will get the same feeling very soon.
|
|
Deleted
Deleted Member
Posts: 0
|
Post by Deleted on May 21, 2012 18:09:27 GMT 10
Yea great sense of achievement. Agree Good watching your progress too. one side of Australia to another !!
Cam
|
|
Deleted
Deleted Member
Posts: 0
|
Post by Deleted on May 21, 2012 18:19:48 GMT 10
|
|
Deleted
Deleted Member
Posts: 0
|
Post by Deleted on May 21, 2012 18:25:27 GMT 10
Gotta keep the warmth in and the heat out too I used foilboard for insulation, cheap light and very effective. It wont retain any moisture at all. Cut it up with a Stanley knife and liquid nails it to the walls. I used all the scraps and filled every crevice. Now its nice and toasty working in the van at night, the nites are fairly chilly at the moment   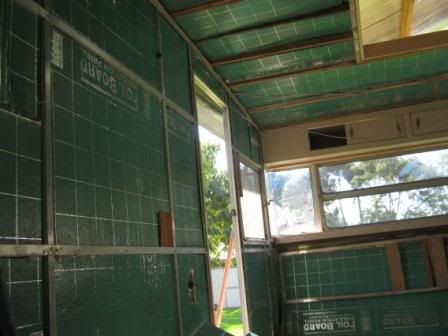 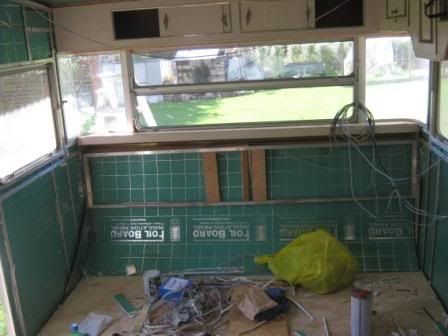 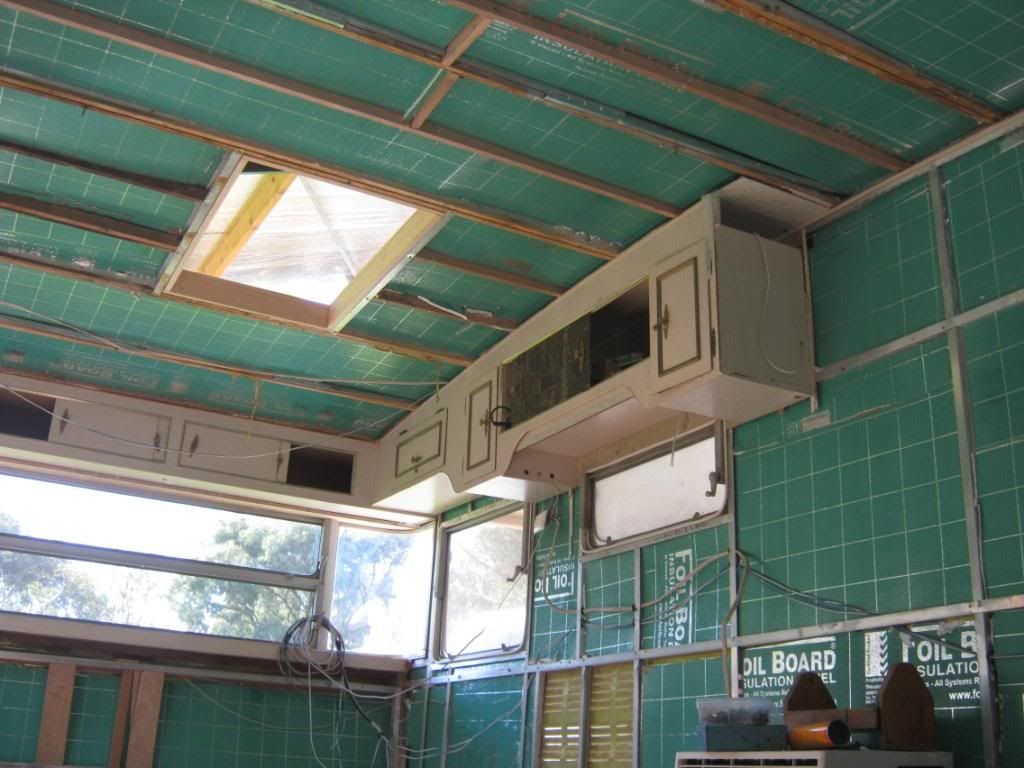 Next job is wiring |
|
|
|
Post by millard1399 on May 21, 2012 22:39:40 GMT 10
G'day camich, I'd never heard of Foilboard before, so I looked it up on the internet. It's quite an interesting product, and nice and light for using in a caravan, ay?!  How much does a sheet of this stuff normally cost? Nice work on the hatch too! I reckon you're on the right track with saving money on timber. I personally think the best money is spent on sealing the van properly, so any savings on other things can be put towards buying decent sealer for a van. You've certainly come a long way with the van, and it's looking great. Well done!  cheers, Al. |
|
Deleted
Deleted Member
Posts: 0
|
Post by Deleted on May 22, 2012 16:48:44 GMT 10
Al, I paid $18 a sheet and used 9 sheets. Maybe you can buy it cheaper somewhere I dont know. I bought it from the local building supplies (but not the big Green one)
The sheet thickness is 10mm so it is perfect for the van walls and roof cavities, as it allows a bit of room for wiring also.
Regards Cam
|
|
Deleted
Deleted Member
Posts: 0
|
Post by Deleted on May 22, 2012 17:47:46 GMT 10
.... The sheet thickness is 10mm so it is perfect for the van walls and roof cavities, as it allows a bit of room for wiring also.
Regards Cam[/size] Thanks Cam, it looks like the perfect product for caravan insulation. It appears to be available in 10, 15 and 20mm thickness with a corresponding improvement in R rating. Ideally, to best prevent thermal bridging, it would be fixed to the internal lining or spaced off the external cladding. But any insulation is better than none and I guess it is a pretty good sound insulation as well. |
|
Deleted
Deleted Member
Posts: 0
|
Post by Deleted on May 28, 2012 19:41:33 GMT 10
Great resto thread, and pretty much the blueprint for my upcomming adventure.
Just a quick question on the insulation. Is there much of a difference fixing it to the cladding, or the internal wall?
Also which type of sikaflex did ou use?
|
|
Deleted
Deleted Member
Posts: 0
|
Post by Deleted on May 28, 2012 20:57:56 GMT 10
Thanks for you comments.
I used Sikaflex-11FC, fantastic product, sticks to everything, strong, and paintable. Its not cheap though and I used quite a number of cartridges, but like I have previously said, I dont want it leaking and as important I dont want dust, in fact the dust is probably harder to keep out
For critical areas I was very careful to have a really clean surface, ie use a sanding disc on the grinder and then use the primer.
Yea sure stick the insulation to the internal wall, obviously working from the outside with the cladding off.
Cheers Cam
|
|
Deleted
Deleted Member
Posts: 0
|
Post by Deleted on May 30, 2012 19:00:46 GMT 10
insulation looks fantastic, I too had never heard of Foilboard, we had planned using polystyrene but might have to check that stuff out first. Great job.
regards
Jean
|
|
Deleted
Deleted Member
Posts: 0
|
Post by Deleted on Jun 3, 2012 17:20:03 GMT 10
Yeah thanks Jean, Already the van is noticably warmer inside,
So Ive started recladding the walls today, I bought all the ply off ebay very cheap, brand new cherry colour.
Ive worked out that the best way to cut the ply with absolutely NO splintering is to NOT use a jigsaw or any saw at all but use a thin metal cutting disc and my 4" grinder. Super neat cuts.
I'll post some photos soon
Cam
|
|
|
|
Post by jacko14 on Jun 3, 2012 21:08:37 GMT 10
If you are cutting 3mm ply, for straight cuts, a straightedge and a sharp Stanley knife do a good job.
Bob
|
|
Deleted
Deleted Member
Posts: 0
|
Post by Deleted on Jun 7, 2012 18:04:32 GMT 10
So Im just thinking about registration, I can obviously get a Tare weight as I simply just get the van weighed, but does anybody know what is or how I determine the legal ATM ?
|
|
|
|
Post by kylarama on Jun 9, 2012 9:21:10 GMT 10
Hi Camich,
excellent resto work so far!
In Victoria any caravan/trailer older than 1989 does not need a weigh bridge certificate, so long as it still has the original chassis no.
When I registered our Millard which hadn't been registered for over 25 years, I was asked "what do you think the tare and ATM is?"
I said 850kg for tare, as I though that was a pretty close guess.
ATM I based on the capacities of the axle, bearing, brakes, tyres, springs and picked the smallest. The 45mm axle capacity is 1450kg so I had ATM listed at 1400kg.
When registering a van or trailer in Vic, the Vicroads inspectors are supposed to check operation of lights and brakes, condition of tyres, chains, chassis, measure width, Length, height and an overall general condition check.
The Vic roads lady measured mine (the van ;D) and asked why I had a Rego sticker from 1987 still on it... that was it!
|
|