|
|
Post by gavo on Apr 22, 2012 12:03:44 GMT 10
Thanks for the nice comments. It's good to see something happen after a while as it kind of gets depressing just sanding and prepping for paint. Flash two pack paint eh Al? Well kind of, Solarguard plus water to thin it to get it through the gun. That make to pack,yeah? The Gloss probably is about the same level as the original vinyl paint would have been. Got the striping done yesterday including the black pinstripe. I was removing the tape in the dark. Used Scotch edge-lock tape for the stripes at $12 per roll and still managed to get some bleed through, still looks good though. Here are the pic's, Looks nice and fresh. Just don't look at the dents.  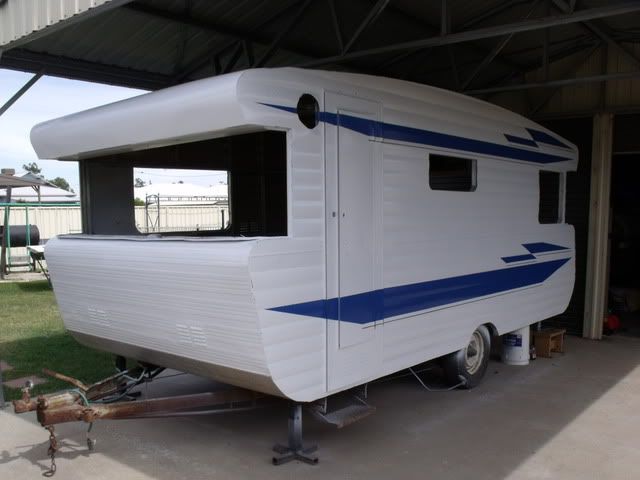 Next on the agenda is to get the external trims and the windows cleaned up, repaired and re-fitted. Cheers Gav |
|
|
|
Post by greedy53 on Apr 22, 2012 15:45:18 GMT 10
dents are like war wounds proof of life
|
|
Deleted
Deleted Member
Posts: 0
|
Post by Deleted on Apr 24, 2012 16:20:58 GMT 10
Looking Good, I like the blue flash,
I agree with Greedy, I wouldnt be at all concerned with a few dents, adds to the character, It will look good going down the road.
Now for the assembly ...
|
|
|
|
Post by gavo on Apr 24, 2012 17:32:59 GMT 10
Yeah I reckon dents are like a story of the vans adventure. Now for the assembly hey; it should be as simple as that hey, just pop the windows in put a few sheets of ply together. Well there may be some adventures along the way. Now to add to the jobs at hand I have just purchased ten metres of blue and cream striped canvas. The wife and I just decided we may as well become annex makers to add to our many varied trades  . This weekend I plan to keep myself off the streets by re-fitting the roof hatches and starting to re-build the timber work around the front and rear windows. Cheers Gav |
|
Deleted
Deleted Member
Posts: 0
|
Post by Deleted on Apr 24, 2012 18:14:02 GMT 10
Hi Gav, ....Now to add to the jobs at hand I have just purchased ten metres of blue and cream striped canvas. The wife and I just decided we may as well become annex makers to add to our many varied trades  . ..... Cheers Gav Seems to have that effect on folk. ----- Following this re-build with great interest. Acrylic gloss does give a pretty good finish 'off the gun'. I wonder what the factory finish was for the panels on these classic vans. Was it a powder coat style finish or something else? |
|
|
|
Post by millard1399 on Apr 24, 2012 20:02:56 GMT 10
G'day wahroonga, No, I think it would have been rubber roller painted, same as how the paint coating is applied to Colorbond steel today. The aluminium strip would be passed through sets of rubber rolls, and paint is poured onto the top of one roll. The paint is spread out over the surface as it passes through the rolls. Then the strip passes through an oven where the paint is baked onto the surface. If you rub the white paint surface with metho, it will be removed and reveal a greenish undercoat layer underneath. Both layers would be applied by the same process. (I'm speaking as an ex-steelworker familiar with coating metal strip  ) When the white cladding was first introduced in the late 1960s, advertisements sprouted loudly about the "baked acrylic cladding", and since it can be removed with metho, I'm assuming it was an acrylic 'enamel' paint. cheers, Al. |
|
Deleted
Deleted Member
Posts: 0
|
Post by Deleted on Apr 24, 2012 20:20:45 GMT 10
Hi Al, Thanks for the great info. I hadn't realised it was an acrylic finish So I'm guessing a modern acrylic gloss enamel, over an etch primer base is just perfect.  Cheers John k |
|
|
|
Post by gavo on Apr 24, 2012 21:37:54 GMT 10
So I'm guessing a modern acrylic gloss enamel, over an etch primer base is just perfect.  Interesting how paint changes. I have had the experience of painting a few cars and buses/interstate coaches in my time. Cars as an interest, coaches as a part of my past trade life. I used to paint cars with acrylic lacquer; lacquer comes off with thinners no matter how old it is. I then moved to two-pack as this is what we used when painting coaches. Two pack give a great gloss off the gun and is not affected by solvents. I had considered using two pack for the van as I happen to have a little sitting around at the moment, but.... Two pack automotive paint gives such a gloss that it would not only let you see the dents but it would make every one stand out like dogs.... It also dries hard, does not flex so well and is difficult to touch up. Household acrylic flexes well, is easy to touch up, seals well, and almost mimics the original gloss level, which is similar to new colourbond. I had a discussion about paints with my brother in law; he is a sign writer and used to be in the paint industry for a short while; and we both concluded that a good quality water based acrylic exterior paint holds good properties when used on old caravans. Anyway the stuff is made to be able to be used even on the roof of a house and put up with the treatment our Aussie sun gives it so that is good enough for me. Cheers Gav. |
|
|
|
Post by millard1399 on Apr 24, 2012 22:20:04 GMT 10
G'day gavo, Yep, I've heard that said before. I don't know whether you've read through the thread about former member keelz' Viscount Supreme, but when he decided to repaint the front stone shield/guard, that's what he used as well [see Reply #11 and 13 in that thread]. cheers, Al. |
|
Deleted
Deleted Member
Posts: 0
|
Post by Deleted on Jun 2, 2012 23:03:46 GMT 10
That paint job looks great Gav, any updates, all finished? What did you end up doing for the roof, full repaint as well? Regards Ray  |
|
Deleted
Deleted Member
Posts: 0
|
Post by Deleted on Jun 7, 2012 13:54:12 GMT 10
hi gavo. all the best to u mate great work. if mine turns out half as good i will be happy!!  i am lucky i only have to paint the roof. the rest is very good for the age. but the same as u i have tape everywhere with possiable lay outs to suit! i keep asking the boss . are we having fun yetttt  cheers gav |
|
Deleted
Deleted Member
Posts: 0
|
Post by Deleted on Jun 7, 2012 17:24:17 GMT 10
Hi Gav, What a great looking van  ! Just read your post front to back - very impressive and can't wait to see it to completion. Thanks for the tips on the paint job - I need to do the top half of the 'Duck' soon and you've convinced me that Solarguard is the way to go. It's powdering and back to metal in some areas. I used Penatrol paint conditioner on the bottom half of the 'Duck' as the woodgrain finish would have been too hard to match / it was powdering as well - that was last November and it's still holding gloss - they use it on ships so it must be OK. I'm due to check the hubs on Saturday - hope I don't get the same surprises you got. Regards Bobbie |
|
|
|
Post by gavo on Sept 2, 2012 17:57:19 GMT 10
Thanks for all the kind words all. We have had a bit of a rough winter this year so have been off line for a while. I have just started to get back into a few tasks on the Viscount. I have now completed the full paint job on the Van including the roof hatches.
Funny thing, I was wondering why Viscount never painted the galvanized roof hatches thinking they would have gotten mighty hot in the sun, however when I pulled the old bolts out I found paint under the washers. So it would seem that every last bit of paint had totally broken down and washed away. Anyway they are bright and white now. Speaking of roof hatches I now have them fitted. I was able to buy the plastic brackets and I manufactured new barrels and spindles. They now raise up and down like a charm.
We went to the big smoke (Toowoomba) a couple of weeks back and went to the big green shed and came out $450 lighter and about 150kg heavier with plywood sheeting. So this weekend I have spent my time being a clairvoyant running power cables to where I think I will need them before commencing re-sheeting the interior.
I have also managed to get half of the exterior trims cleaned and re-fitted using sikaflex to reseal them (now try and leak). Most of the windows are back in, but still require window rubbers and new panes in them.
Will try and post some pics again soon.
Edit: Went to the caravan and camping show in Brisvagas and looked at all the shiny vans; only thing that came close to the size and inclusions we would like started at 34K and still had no toilet and shower cubicle. I think we will keep the oldie.
Cheers
Gavin
|
|
|
|
Post by gavo on Sept 29, 2012 19:32:02 GMT 10
Time for an update. Finally got out of the re-build doldrums for a while and now starting to put stuff back onto the Viscount, Hooray. I was able to get hold of the plastic hatch winder housings a while ago and re-manufactured the spindles and barrels. I repainted all of the parts with silver paint before assembling. I also relined the hatches with 3mm ply that was painted with the gloss weathershield paint, I had some roof sarking which I also put between the ply and the metal hatch to add a little insulation. Roof hatch parts,  One of the roof hatches fitted, 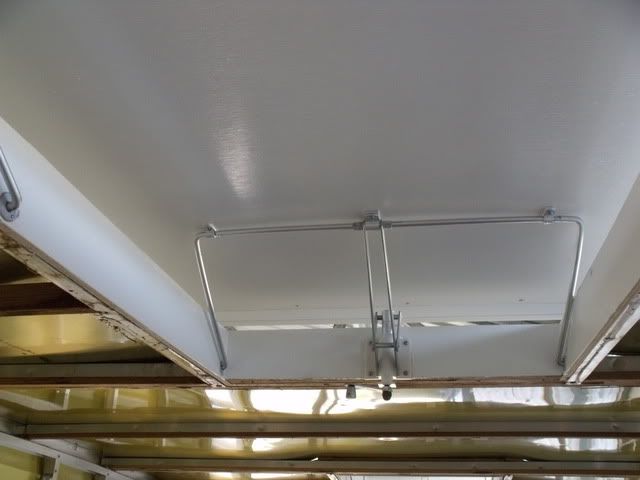 I the past week I have got the whip out and lined the roof and the walls, both of which are insulated with pink batts. The batts are R 3.3 and a bit thick so I split them down the middle so they are now R 1.65 (around there abouts) But still much better that the original R 0.0 ;D. The roof and wall still have a lot of screws that will need removal and rivets fitted instead each panel is also glued to the frame using construction adhesive which has made the walls and roof a lot stronger than original. Roof lined, 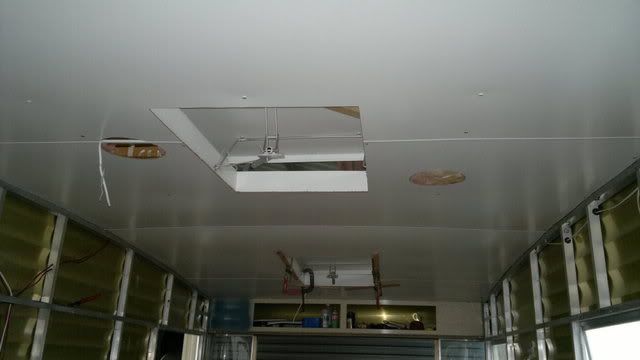 Walls lined, 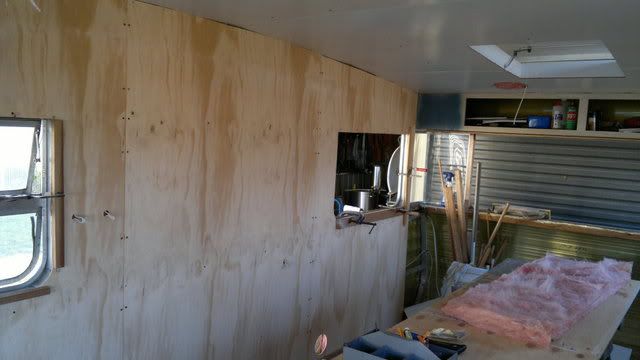 I was wondering how to fit the curved panels and getting strength on the edges while controlling the curve; and then I came up with this idea,  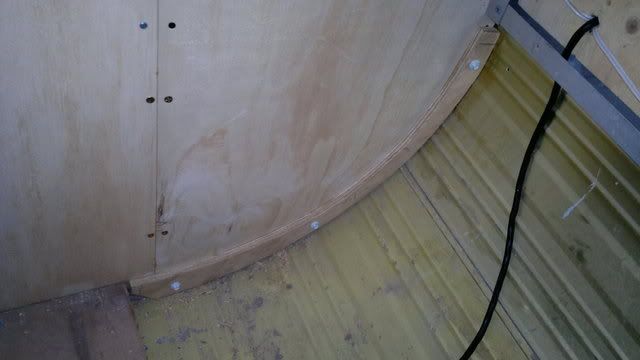 I was looking at the floor today and not liking the lino covering not wanting to come up, and also not liking the fact that the backing is blue in colour and fibrous and therefore thinking asbestos ... even if it isn’t the dreaded A it will still be a PITA to sand the floor flat so now the next job is to remove and replace the floor sheets, oh well just another job to add to the list.  Cheers, Gav. |
|
|
|
Post by millard1399 on Sept 30, 2012 20:28:25 GMT 10
G'day gav, Struth! you're a bit of a master craftsman, eh what?!   Great job on the hatch hardware. I can see a little niche business opportunity for you there.   All up, the van is looking great! ;D cheers, Al. |
|
|
|
Post by gavo on Oct 2, 2012 19:51:08 GMT 10
Master craftsman eh Al, reckon if you saw it all up close you might say something else like rough &@$!@#*. I am very happy with the results of the hatch winders, as you would recall I was looking at replacing the hatches. I'm certainly glad I've kept them as they allow a lot of air flow. Well the last couple of days have been busy, which is good as work will slow down again now. I decided it would be a good idea to replace the floor, so up the old floor came. I then sanded the top of the chassis frames with the sanding disk on the angle grinder and painted them with some kill rust I had around. While I had the floor up I remembered how other guys here had such fun undoing their water tank bolts with and angle grinder while lying under the van, so I decided to forgo that excitement and undo them from above  . The new floor feels a lot more solid than the old, the old floor was 10mm thick and the new is 12mm thick and glued with sikaflex and screwed into place. The floor of and prepped for the new timber  With the floor done I then installed the front and rear lining panels after insulating the cavities. Rear view 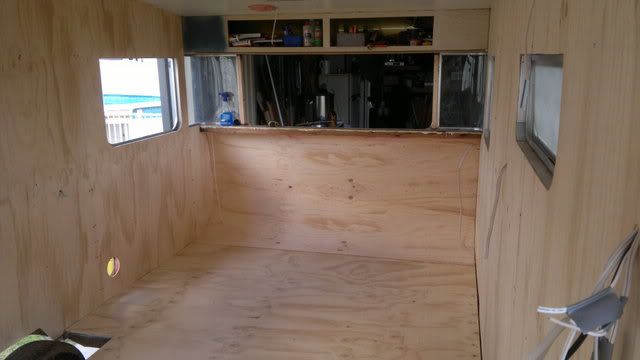 Front view 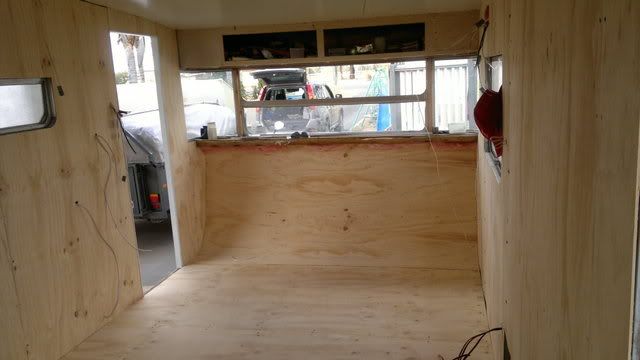 I also installed the front lounge today, apparently it already requires upgrading. I did say I would screw the lounges down but apparently that still isn't good enough ;D 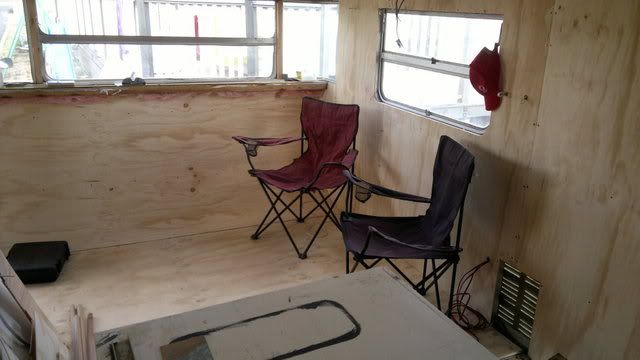 Next step is to make and install new wheel arches and then start on the O/S robe and overhead cupboards. Cheers, Gav. |
|
Deleted
Deleted Member
Posts: 0
|
Post by Deleted on Oct 13, 2012 0:09:50 GMT 10
Great Job
I wish I had the time to do what your doin.
Hows your hand made Anexe coming along ?
|
|
|
|
Post by gavo on Oct 13, 2012 7:05:58 GMT 10
Time you say??? Isn't that the illusive thing we would all like more of? Now it's water ski season and I am still re-manufacturing a pair of trick ski's, luckily the van makes a good workshop for that type of thing also.
The annex still looks like a couple of rolls of canvass lying on the floor ATM. We were looking at new ones at the Brisbane show to try and work out how to stitch one together, but looking at your new/old annex found under the bunk of his van has given me a few ideas of how to handle the task.
Gav.
|
|
Deleted
Deleted Member
Posts: 0
|
Post by Deleted on Oct 13, 2012 7:20:27 GMT 10
hi gavo. do you have a dead line like me. tick tock. the boss has already lent our camper trailer to Friends for x-mas holidays   good girl!!! cheers gav |
|
|
|
Post by gavo on Oct 13, 2012 19:01:15 GMT 10
Hi Gav, no real time line, although I would like to be taking it for a trip to the snow next September so some sort of time line oh and we may need to live in it if we decide to sell our house and build a new one in 2014. According to the minister of war and finance I have to keep our camper trailer as well as the caravan... go figure  . The family does also like camping though and the camper is probably easier to tow although it is pushing the 1000Kg mark. Anyway I was able to put some time into the van today and did some building of the O/S overhead cupboards. I decided to build them in the original manner as in frame overlaid with 3mm ply as this keeps the weight down. I did glue and screw them though rather than staple them. Rear O/S cupboard 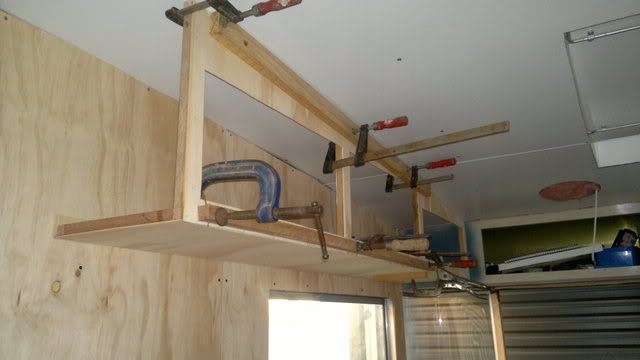 Front O/S cupboard in frame stage 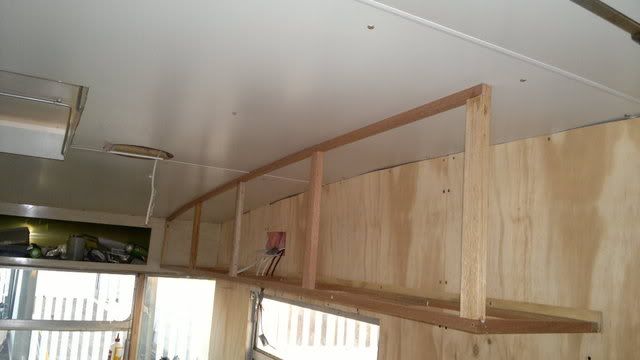 I will be taking the cupboards down to fit a bottom lining panel and then gluing and screwing them back in place. Cheers Gav. |
|
Deleted
Deleted Member
Posts: 0
|
Post by Deleted on Mar 10, 2013 7:42:45 GMT 10
Hi Gav
You have done a great job to the van and I am in awe and envious.
Unfortunately I do not have the skills to even contemplate starting at this stage.
I need to replace the glass in the windows, they are all cracked in some way or other and some are so badly broken I dare not touch them to try opening them up.
The metal struts(?) which should keep them open are broken or parts are missing.....so I have to try and get some replacements and see if someone can help me replace them.
|
|
|
|
Post by gavo on Apr 28, 2013 15:20:40 GMT 10
Wow, October last year when I posted last and did some serious work on the Viscount. Have not done much to the van since my last post apart from putting one exterior molding back on, stained the two overhead cabinets I have made and were featured in my previous post in this thread. I have just got back into it and just painted the wall linings and bulkheads yesterday. I haven't done much for a couple of reasons i.e. doing a lot of work on the house freshening it up for sale, hopefully put on the market mid this year then when sold set out to build another.
The other reason for my lack of work on the van comes with a warning, that is if you are thinking of buying the 3mm white ply for around $14 per sheet from Bunnings for wall lining then don't!!! I used it and lined the walls in nice dry weather and it all looked good, however a few days later and some humid weather it looks like waves in the ocean. At this point I stopped working on the van in discussed and contemplated many ways of solving the problem including chucking it in and purchasing a newer van.
I have now, however, decided to get back on the project and paint the walls a flat colour rather than glossy stain and varnish. a lot of the wall lining will be covered by overhead cabinets, cupboards, benches, bunks and lounge. I have decided to also go with the idea of getting it to be a solid and functional van rather than worrying with getting it to be the high end showroom finish that I may have originally had in mind.
So here's to getting back into the job and getting a van that can be used to see this great country of ours.
Cheers,
Gavo.
|
|
|
|
Post by gavo on Apr 28, 2013 15:31:34 GMT 10
Kiviscount,
Thanks for the kind words, some times those skills one acquires to contemplate a job like this are also the cause of disappointment when it doesn't work the way planned. Alas time to move on and work with the problem - see above post about the wall lining.
I have some broken glass and will be replacing with perspex, about a quarter of the weight and economically viable option. I won't be worrying about getting original rubber to seal the glass, rather I will tape out and seal with black sikaflex. The sikaflex will hold the glass in and seal forever, the trick is to not spread it everywhere and keep it neat. If the window needs replacing in the future though it will be a bit of a painstaking process cutting the old sikaflex out, a process and risk I am willing to take.
The broken struts? Try caravansplus, if not try finding some old widows and cannibalizing parts.
Cheers,
Gavo.
|
|
Deleted
Deleted Member
Posts: 0
|
Post by Deleted on May 3, 2013 8:10:09 GMT 10
Hi Gavo, I am new to the forum; have recently purchased a 78 valiant/viscount- very excited- and daunted by the job ahead. I also had The plan of covering the interior laminex with ply- so glad I saw your post regarding its change in humid weather- would that apply to all ply? Marine ply? Is there some type of sealer I could use that would prevent it happening (I don't want 'shiny' surfaces) . Regards Fionna
|
|
|
|
Post by gavo on May 3, 2013 16:29:18 GMT 10
Hi Fionna,
I used random groove plywood in the 22' Viscount I had years ago and never had a problem with it, you would probably have no problem with the paper faced or vinyl faced ply products.
Cheers,
Gav.
|
|